Centos7下yum安装部署Mysql
基础环境
系统:centos7 内存:4G
网络类型:NAT模式 硬盘大小:80G
最小化安装 语言:英语
IP:192.168.180.131
能够访问外网
前置准备
删除Centos7下自带的Mariadb
# 查找系统自带的Mariadb
rpm -qa|grep mariadb
[root@localhost ~]# rpm -qa|grep mariadb
mariadb-libs-5.5.68-1.el7.x86_64

# 删除查找出来的软件
rpm -e --nodeps 软件名

[root@localhost ~]# rpm -e --nodeps mariadb-libs-5.5.68-1.el7.x86_64

# 查看本机是否安装了mysql,有则删除
rpm -qa | grep mysql
yum安装
下载官方的mysql安装包
wget https://dev.mysql.com/get/mysql57-community-release-el7-8.noarch.rpm
如果wget命令没有安装的,需要提前安装
curl -o /etc/yum.repos.d/CentOS-Base.repo http://mirrors.aliyun.com/repo/Centos-7.repo
yum -y install wget
安装mysql
[root@localhost ~]# rpm -ivh mysql57-community-release-el7-8.noarch.rpm
warning: mysql57-community-release-el7-8.noarch.rpm: Header V3 DSA/SHA1 Signature, key ID 5072e1f5                             : NOKEY
Preparing...                          ################################# [100%]
Updating / installing...
   1:mysql57-community-release-el7-8  ################################# [100%]
安装完后,/etc/yum.repos.d/目录下会多两个mysql文件

yum安装
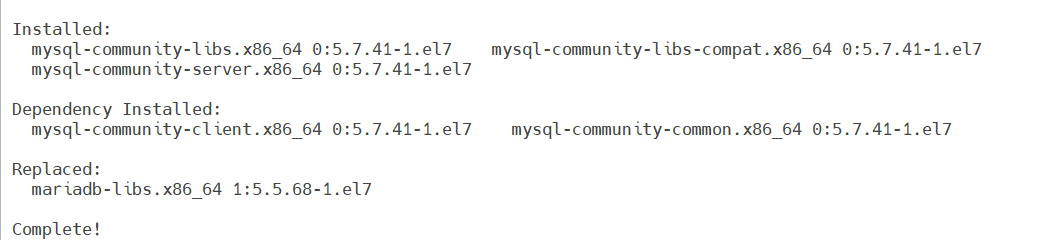
yum -y install mysql-server
[root@localhost yum.repos.d]# yum -y install mysql-server
Downloading packages:
warning: /var/cache/yum/x86_64/7/mysql57-community/packages/mysql-community-libs-compat-5.7.37-1.el7.x86_64.rpm: Header V4 RSA/SHA256 Signature, key ID 3a79bd29: NOKEY
Retrieving key from file:///etc/pki/rpm-gpg/RPM-GPG-KEY-mysql


The GPG keys listed for the "MySQL 5.7 Community Server" repository are already installed but they are not correct for this package.
Check that the correct key URLs are configured for this repository.


 Failing package is: mysql-community-libs-compat-5.7.37-1.el7.x86_64
 GPG Keys are configured as: file:///etc/pki/rpm-gpg/RPM-GPG-KEY-mysql
直接安装的话会报一个错,大概是密钥已经过期了,需要更新密钥
更新密钥
rpm --import https://repo.mysql.com/RPM-GPG-KEY-mysql-2022
再次安装即可成功
yum -y install mysql-server
启动mysql服务
systemctl start mysqld
获取临时密码
grep 'temporary password' /var/log/mysqld.log

使用临时密码登录
mysql -uroot -p
# 使用刚刚生成的临时密码登录
[root@localhost ~]# mysql -uroot -p
Enter password:
Welcome to the MySQL monitor.  Commands end with ; or \g.
Your MySQL connection id is 2
Server version: 5.7.41

Copyright (c) 2000, 2023, Oracle and/or its affiliates.

Oracle is a registered trademark of Oracle Corporation and/or its
affiliates. Other names may be trademarks of their respective
owners.

Type 'help;' or '\h' for help. Type '\c' to clear the current input statement.

mysql>
修改mysql密码策略
把MySQL的密码校验强度改为低风险
set global validate_password_policy=LOW;
修改MySQL的密码长度为6位
set global validate_password_length=6;
修改MySQL密码为123456
ALTER USER ‘root’@‘localhost’ IDENTIFIED BY ‘123456’;
mysql> set global validate_password_policy=LOW;
Query OK, 0 rows affected (0.00 sec)

mysql> set global validate_password_length=6;
Query OK, 0 rows affected (0.00 sec)

mysql> ALTER USER 'root'@'localhost' IDENTIFIED BY '123456';
Query OK, 0 rows affected (0.00 sec)

mysql>
远程连接测试
查看防火墙状态,如果开启则把防火墙给关闭
systemctl status firewalld
systemctl stop firewalld
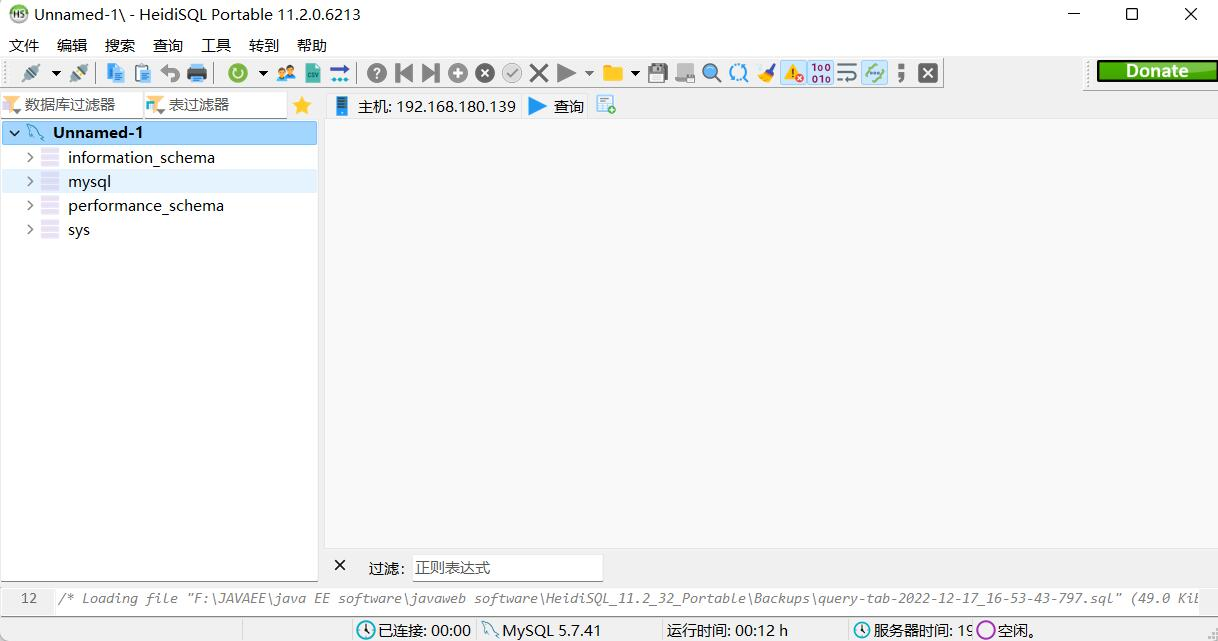
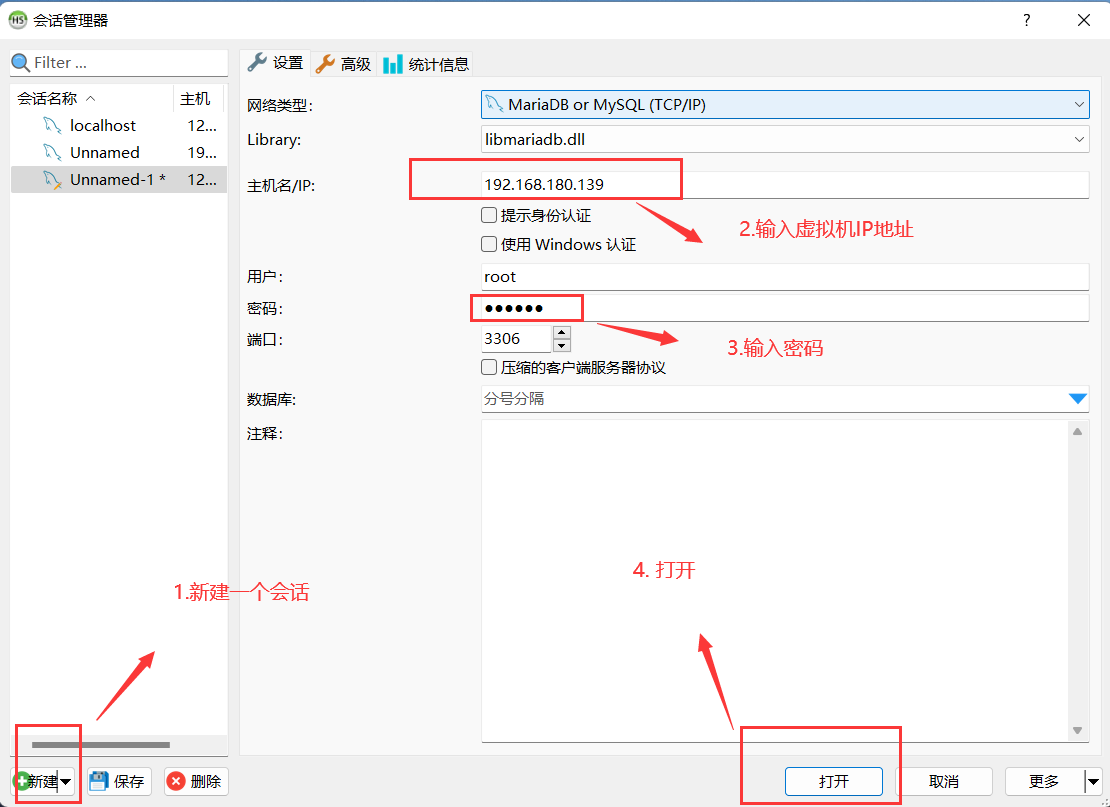
在Windows主机上打开 heidisql 或其他软件
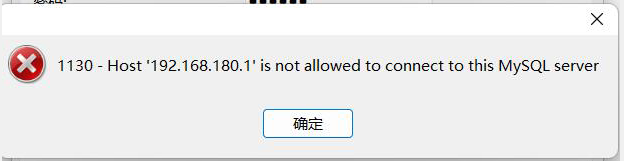
这里发现报了一个错,是没有开启远程连接数据库的权限,需要在MySQL里面打开
# 连接数据库
mysql -uroot -p

# 切换到mysql表
use mysql;

# 查看root的host权限
select host from user where user='root';

# 修改登录权限
update user set host = '%' where user ='root';

# 刷新
flush privileges;

# 再次查看权限
select host from user where user='root';
[root@localhost ~]# mysql -uroot -p
Enter password:
Welcome to the MySQL monitor.  Commands end with ; or \g.
Your MySQL connection id is 5
Server version: 5.7.41 MySQL Community Server (GPL)

Copyright (c) 2000, 2023, Oracle and/or its affiliates.

Oracle is a registered trademark of Oracle Corporation and/or its
affiliates. Other names may be trademarks of their respective
owners.

Type 'help;' or '\h' for help. Type '\c' to clear the current input statement.

mysql> use mysql;
Reading table information for completion of table and column names
You can turn off this feature to get a quicker startup with -A

Database changed
mysql> select host from user where user='root';
+-----------+
| host      |
+-----------+
| localhost |
+-----------+
1 row in set (0.00 sec)

mysql> update user set host = '%' where user ='root';
Query OK, 1 row affected (0.00 sec)
Rows matched: 1  Changed: 1  Warnings: 0

mysql> flush privileges;
Query OK, 0 rows affected (0.01 sec)

mysql> select host from user where user='root';
+------+
| host |
+------+
| %    |
+------+
1 row in set (0.00 sec)
此时就可以在物理机上远程连接数据库了