目录
一、什么是依赖注入
依赖注入(Dependency Injection,简称DI),它是Spring控制反转思想的具体实现。
控制反转将对象的创建交给了Spring,但是对象中可能会依赖其他对象。比如service类中要有dao类的属性,我们称service依赖于dao。之前需要手动注入属性值,代码如下:
public interface StudentDao {
Student findById(int id);
}
public class StudentDaoImpl implements StudentDao{
@Override
public Student findById(int id) {
// 模拟根据id查询学生
return new Student(1,"程序员","北京");
}
}
public class StudentService {// service依赖dao,手动注入属性值,即手动维护依赖关系
private StudentDao studentDao = new StudentDaoImpl();
public Student findStudentById(int id){
return studentDao.findById(id);
}
}
此时,当StudentService的想要使用StudentDao的另一个实现类如StudentDaoImpl2时,则需要修改Java源码,造成代码的可维护性降低。
而使用Spring框架后,Spring管理Service对象与Dao对象,此时它能够为Service对象注入依赖的Dao属性值。这就是Spring的依赖注入。简单来说,控制反转是创建对象,依赖注入是为对象的属性赋值
二、依赖注入方式
1. Setter注入
被注入类编写属性的setter方法
    public void setStudentDao(StudentDao studentDao){
        this.studentDao = studentDao;
    }
配置文件中,给需要注入属性值的 <bean> 中设置 <property>
<bean id="studentDao" class="com.itbaizhan.dao.StudentDaoImpl"> </bean>
<bean id="studentService" class="com.itbaizhan.service.StudentService">
  <!--依赖注入-->
  <!--name:对象的属性名 ref:容器中对象的id值-->
  <property name="studentDao" ref="studentDao"></property>
</bean>
测试
新增测试方法
    // 测试依赖注入
    @Test
    public void t6(){
        ApplicationContext ac = new ClassPathXmlApplicationContext("bean.xml");
        StudentService service = (StudentService) ac.getBean("studentService");
        System.out.println(service.findStudentById(8));
    }
运行结果
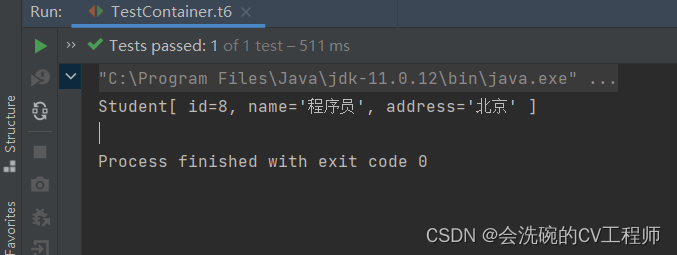
OK,确实成功测试到了
2. 构造方法注入
被注入类编写有参的构造方法
    public StudentService(StudentDao studentDao){
        this.studentDao = studentDao;
    }
给需要注入属性值的 <bean> 中设置 <constructor-arg>
<bean id="studentDao" class="com.itbaizhan.dao.StudentDaoImpl"></bean>
<bean id="studentService" class="com.itbaizhan.service.StudentService">
  <!-- 依赖注入 -->
  <!-- name:对象的属性名 ref:配置文件中注入对象的id值 -->
  <constructor-arg name="studentDao" ref="studentDao"></constructor-arg>
</bean>
测试结果:

OK,确实也是可以使用的
3. 自动注入
自动注入不需要在 <bean> 标签中添加其他标签注入属性值,而是自动从容器中找到相应的bean对象设置为属性值。
自动注入有两种配置方式:
- 全局配置:在 <beans> 中设置 default-autowire 属性可以定义所有bean对象的自动注入策略。
- 局部配置:在 <bean> 中设置 autowire 属性可以定义当前bean对象的自动注入策略。
autowire的取值如下:
- no:不会进行自动注入。
- default:全局配置default相当于no,局部配置default表示使用全局配置
- byName:在Spring容器中查找id与属性名相同的bean,并进行注入。需要提供set方法。
- byType:在Spring容器中查找类型与属性类型相同的bean,并进行注入。需要提供set方法。
- constructor:在Spring容器中查找id与属性名相同的bean,并进行注入。需要提供构造方法。
三、依赖注入类型

DI支持注入bean类型、基本数据类型和字符串、List集合、Set集合、Map集合、Properties对象类型等,他们的写法如下:
准备注入属性的类
package com.example.service;

import com.example.dao.StudentDao;
import com.example.pojo.Student;

import java.util.List;
import java.util.Map;
import java.util.Properties;
import java.util.Set;

public class StudentService {
    // service依赖dao,手动注入属性值,即手动维护依赖关系
    //private StudentDao studentDao;

    // bean属性
    private StudentDao studentDao;
    // 字符串类型
    private String name;
    // 基本数据类型
    private int count;
    // 字符串List集合
    private List<String> students1;
    // 对象类型List集合
    private List<Student> nameList;
    // 字符串类型Set集合
    private Set<String> students2;
    // 字符串类型Map集合
    private Map<String, String> students3;
    // 对象类型map集合
    private Map<String,Student> studentMap;
    // Properties类型
    private Properties properties;

    public StudentService(){}

    public StudentService(StudentDao studentDao){
        this.studentDao = studentDao;
    }

    public Student findStudentById(int id){
        return studentDao.findById(id);
    }

    public void setStudentDao(StudentDao studentDao){
        this.studentDao = studentDao;
    }

    public StudentDao getStudentDao() {
        return studentDao;
    }

    public String getName() {
        return name;
    }

    public void setName(String name) {
        this.name = name;
    }

    public int getCount() {
        return count;
    }

    public void setCount(int count) {
        this.count = count;
    }

    public List<String> getStudents1() {
        return students1;
    }

    public void setStudents1(List<String> students1) {
        this.students1 = students1;
    }

    public Set<String> getStudents2() {
        return students2;
    }

    public void setStudents2(Set<String> students2) {
        this.students2 = students2;
    }

    public Map<String, String> getNames2() {
        return students3;
    }

    public void setNames2(Map<String, Student> names2) {
        this.studentMap = names2;
    }

    public Map<String, String> getStudents3() {
        return students3;
    }

    public void setStudents3(Map<String, String> students3) {
        this.students3 = students3;
    }

    public Properties getProperties() {
        return properties;
    }

    public void setProperties(Properties properties) {
        this.properties = properties;
    }

    public List<Student> getNameList() {
        return nameList;
    }

    public void setNameList(List<Student> nameList) {
        this.nameList = nameList;
    }

    @Override
    public String toString() {
        return "StudentService[ " +
                "studentDao=" + studentDao +
                ", name='" + name + '\'' +
                ", count=" + count +
                ", students1=" + students1 +
                ", nameList=" + nameList +
                ", students2=" + students2 +
                ", students3=" + students3 +
                ", studentMap=" + studentMap +
                ", properties=" + properties +
                " ]";
    }
}
准备测试方法
    // 测试注入类型
    @Test
    public void t7(){
        ApplicationContext ac = new ClassPathXmlApplicationContext("bean.xml");
        StudentService service = (StudentService) ac.getBean("studentService");
        System.out.println(service);
    }
1. 注入bean类型
    <!-- 注入bean类型 -->
    <bean id="studentDao" class="com.example.dao.StudentDaoImpl1"/>
    <!-- 写法1 -->
    <bean id="studentService" class="com.example.service.StudentService">
        <property name="studentDao" ref="studentDao"/>
    </bean>
    <!-- 写法2 -->
    <!--<bean id="studentService" class="com.example.service.StudentService">
        <property name="studentDao">
            <ref bean="studentDao"/>
        </property>
    </bean>-->
2. 注入基本数据类型
        <!-- 注入基本数据类型 -->
        <!-- 写法一 name:属性名 value:属性值 -->
        <property name="name" value="程序员"/>
        <!-- 写法二 name:属性名 value:属性值-->
        <property name="count">
            <value>10</value>
        </property>
3. 注入List集合
    <!-- 注入List集合 -->
        <!-- 简单的数据类型List集合 name:属性名 -->
        <property name="students1" >
            <list>
                <value>上海</value>
                <value>广州</value>
            </list>
        </property>
        <!-- 对象类型的List集合 name:属性名 -->
        <property name="nameList">
            <list>
                <bean class="com.example.pojo.Student">
                    <property name="id" value="1"/>
                    <property name="name" value="几何心凉"/>
                    <property name="address" value="北京"/>
                </bean>
                <bean class="com.example.pojo.Student">
                    <property name="id" value="2"/>
                    <property name="name" value="哈士奇"/>
                    <property name="address" value="上海"/>
                </bean>
            </list>
        </property>
4. 注入Set集合
        <!-- 注入Set集合 -->
        <property name="students2">
            <set>
                <value>深圳</value>
                <value>北京</value>
            </set>
        </property>
5. 注入Map集合
        <!-- 注入Map集合 -->
        <property name="students3">
            <map>
                <entry key="哈士奇" value="上海"/>
                <entry key="几何心凉" value="北京"/>
            </map>
        </property>
        <!-- 注入对象类型map类型 -->
        <property name="names2">
            <map>
                <entry key="student1" value-ref="s1"/>
                <entry key="student2" value-ref="s2"/>
            </map>
        </property>
<bean id="s1" class="com.example.pojo.Student">
<property name="id" value="1"/>
<property name="name" value="几何心凉"/>
<property name="address" value="北京"/>
</bean>
<bean id="s2" class="com.example.pojo.Student">
<property name="id" value="2"/>
<property name="name" value="哈士奇"/>
<property name="address" value="上海"/>
</bean>上面是用到的bean对象
6. 注入Properties对象
        <!-- 注入properties -->
        <property name="properties">
            <props>
                <prop key="配置1">值1</prop>
                <prop key="配置2">值2</prop>
            </props>
        </property>
运行测试方法测试一下

OK ,可以看到都是插入的了。
往期专栏&文章相关导读
大家如果对于本期内容有什么不了解的话也可以去看看往期的内容,下面列出了博主往期精心制作的Maven,Mybatis等专栏系列文章,走过路过不要错过哎!如果对您有所帮助的话就点点赞,收藏一下啪。其中Spring专栏有些正在更,所以无法查看,但是当博主全部更完之后就可以看啦。
1. Maven系列专栏文章
| Maven系列专栏 | Maven工程开发 |
| Maven聚合开发【实例详解---5555字】 |