实训目标
掌握Flink的部署
读取文件、数据转换、分组聚合以及连接操作等
通过idea开发环境和scala编程语言实现热门商品的统计
一、实训数据
某平台销售数据,格式为csv。
UserBehavior.csv
包含如下内容
用户ID
商品ID
类别
浏览类型
时间戳
部分数据显示如下

二、实训步骤
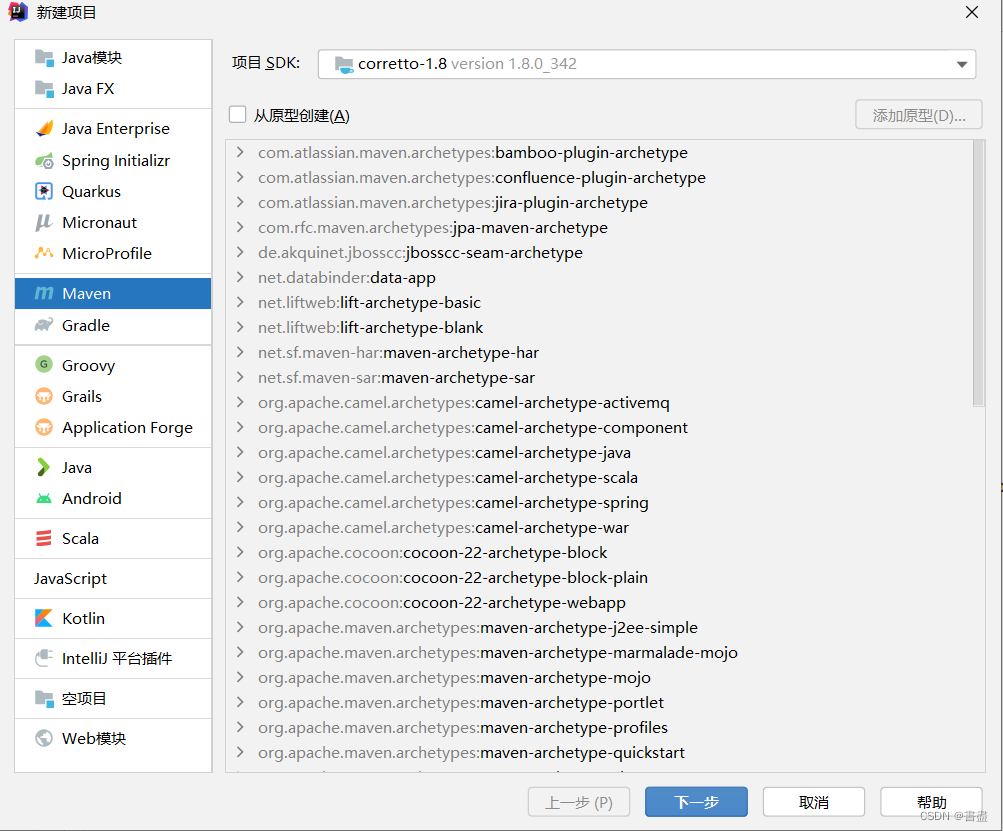
- 准备IDEA环境(使用maven)
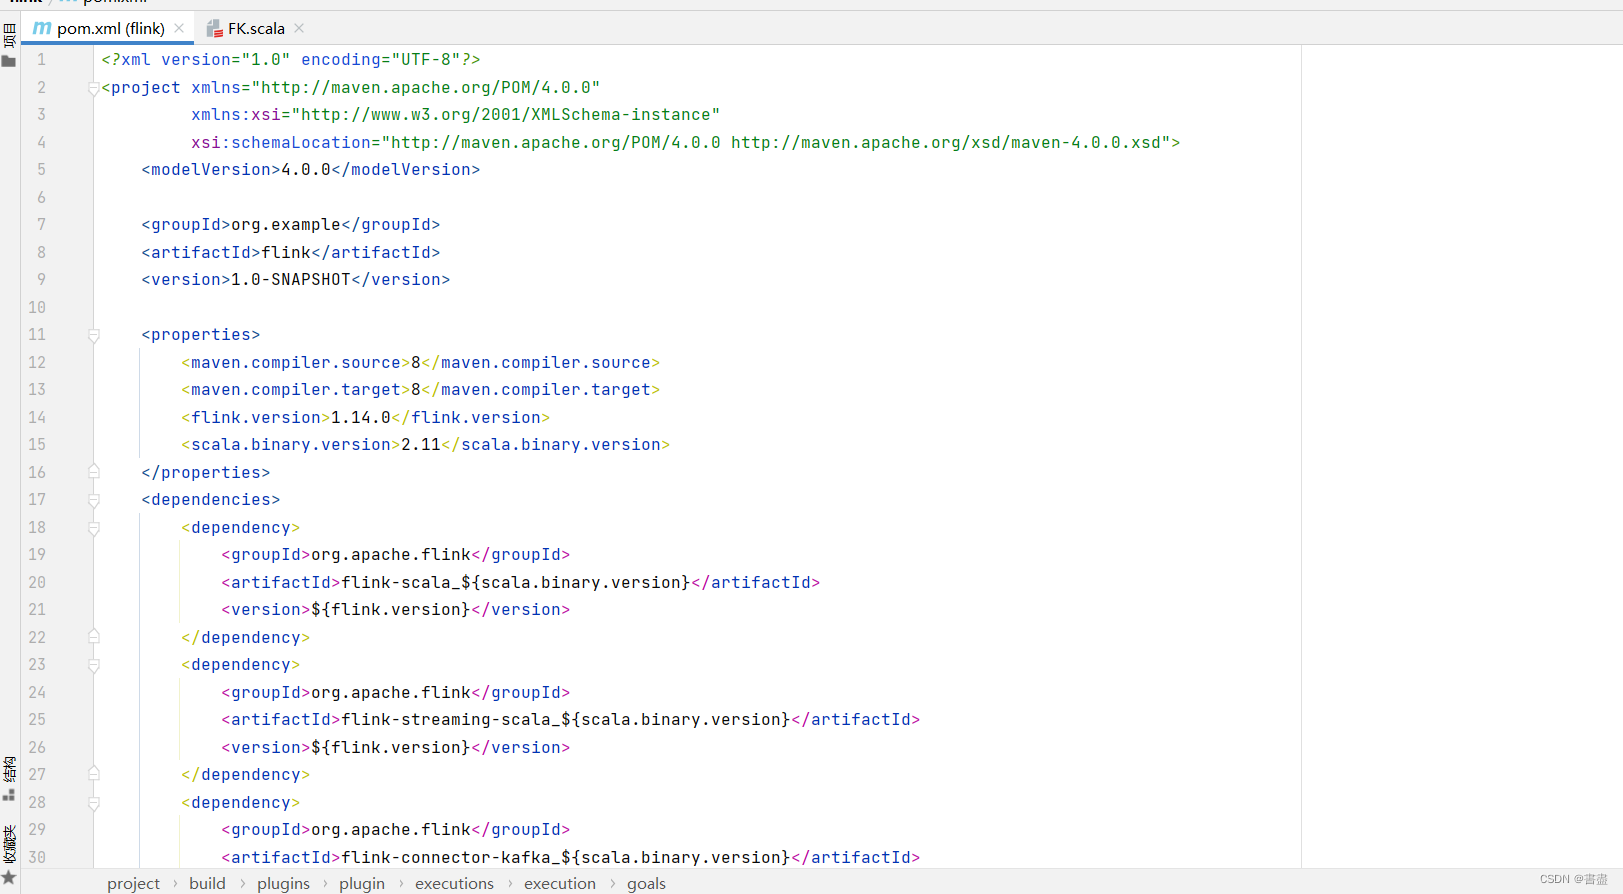
- 添加依赖(配置pom.xml)
<?xml version="1.0" encoding="UTF-8"?>
<project xmlns="http://maven.apache.org/POM/4.0.0"
         xmlns:xsi="http://www.w3.org/2001/XMLSchema-instance"
         xsi:schemaLocation="http://maven.apache.org/POM/4.0.0 http://maven.apache.org/xsd/maven-4.0.0.xsd">
    <modelVersion>4.0.0</modelVersion>

    <groupId>org.example</groupId>
    <artifactId>flink</artifactId>
    <version>1.0-SNAPSHOT</version>

    <properties>
        <maven.compiler.source>8</maven.compiler.source>
        <maven.compiler.target>8</maven.compiler.target>
        <flink.version>1.14.0</flink.version>
        <scala.binary.version>2.11</scala.binary.version>
    </properties>
    <dependencies>
        <dependency>
            <groupId>org.apache.flink</groupId>
            <artifactId>flink-scala_${scala.binary.version}</artifactId>
            <version>${flink.version}</version>
        </dependency>
        <dependency>
            <groupId>org.apache.flink</groupId>
            <artifactId>flink-streaming-scala_${scala.binary.version}</artifactId>
            <version>${flink.version}</version>
        </dependency>
        <dependency>
            <groupId>org.apache.flink</groupId>
            <artifactId>flink-connector-kafka_${scala.binary.version}</artifactId>
            <version>${flink.version}</version>
        </dependency>
    </dependencies>
    <build>
        <plugins>
            <!-- 该插件用于将Scala代码编译成class文件 -->
            <plugin>
                <groupId>net.alchim31.maven</groupId>
                <artifactId>scala-maven-plugin</artifactId>
                <version>3.4.6</version>
                <executions>
                    <execution>
                        <!-- 声明绑定到maven的compile阶段 -->
                        <goals>
                            <goal>testCompile</goal>
                        </goals>
                    </execution>
                </executions>
            </plugin>

            <plugin>
                <groupId>org.apache.maven.plugins</groupId>
                <artifactId>maven-assembly-plugin</artifactId>
                <version>3.0.0</version>
                <configuration>
                    <descriptorRefs>
                        <descriptorRef>
                            jar-with-dependencies
                        </descriptorRef>
                    </descriptorRefs>
                </configuration>
                <executions>
                    <execution>
                        <id>make-assembly</id>
                        <phase>package</phase>
                        <goals>
                            <goal>single</goal>
                        </goals>
                    </execution>
                </executions>
            </plugin>
        </plugins>
    </build>
</project>
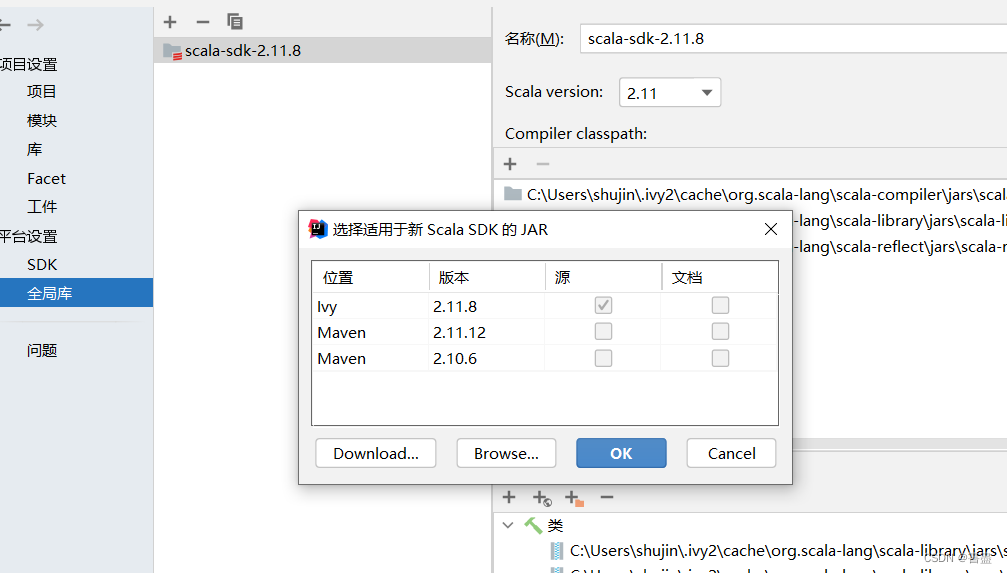
添加scala SDK
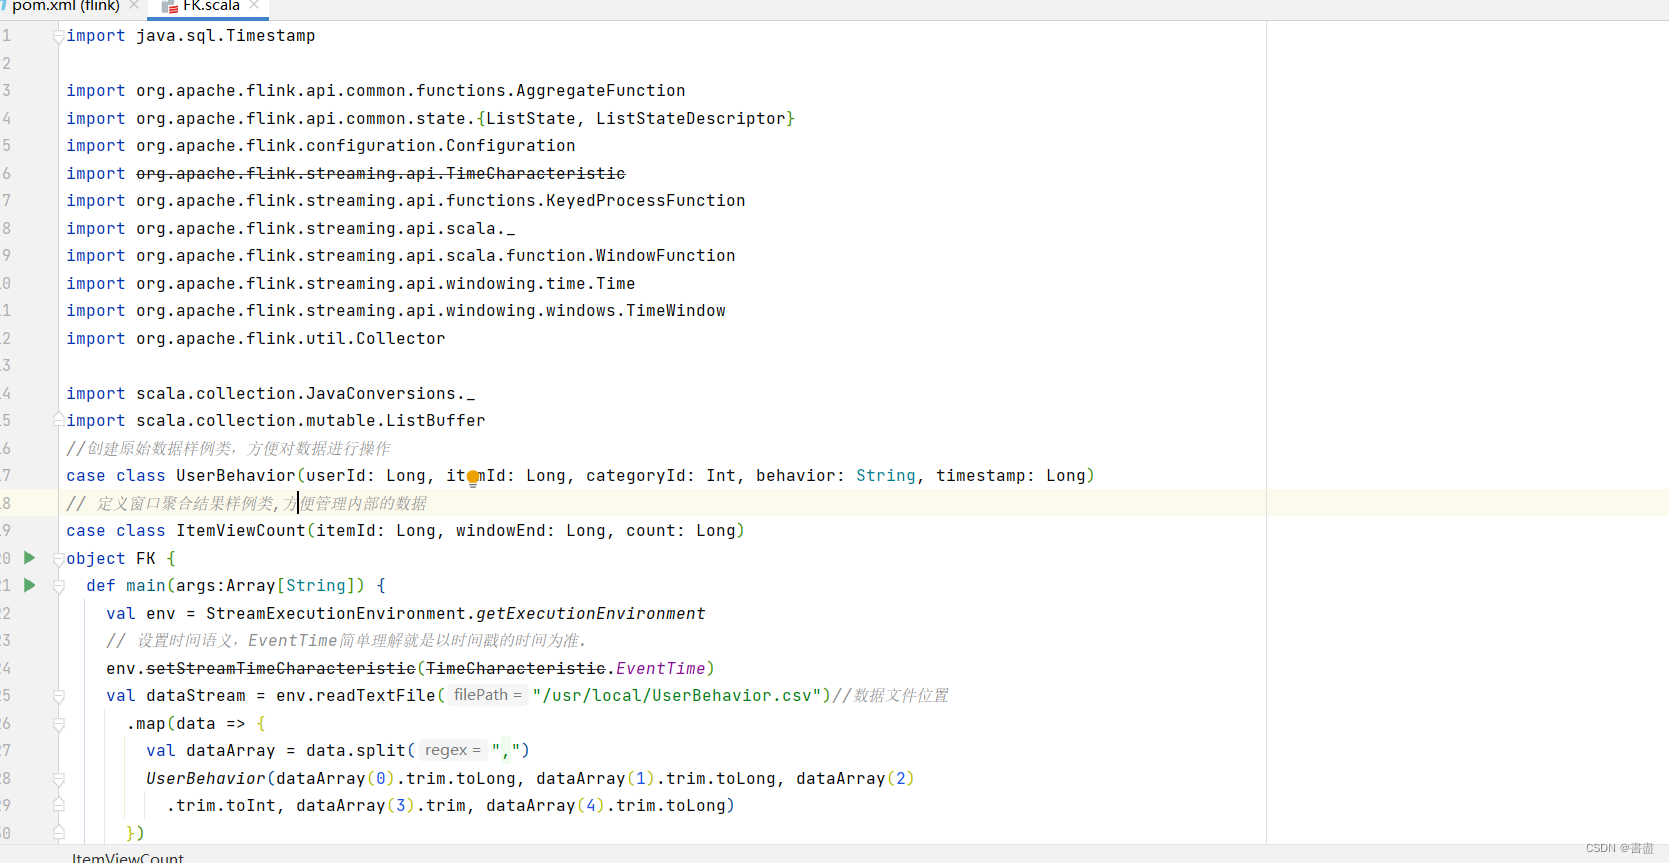
项目完整代码
import java.sql.Timestamp

import org.apache.flink.api.common.functions.AggregateFunction
import org.apache.flink.api.common.state.{ListState, ListStateDescriptor}
import org.apache.flink.configuration.Configuration
import org.apache.flink.streaming.api.TimeCharacteristic
import org.apache.flink.streaming.api.functions.KeyedProcessFunction
import org.apache.flink.streaming.api.scala._
import org.apache.flink.streaming.api.scala.function.WindowFunction
import org.apache.flink.streaming.api.windowing.time.Time
import org.apache.flink.streaming.api.windowing.windows.TimeWindow
import org.apache.flink.util.Collector

import scala.collection.JavaConversions._
import scala.collection.mutable.ListBuffer
//创建原始数据样例类,方便对数据进行操作
case class UserBehavior(userId: Long, itemId: Long, categoryId: Int, behavior: String, timestamp: Long)
// 定义窗口聚合结果样例类,方便管理内部的数据
case class ItemViewCount(itemId: Long, windowEnd: Long, count: Long)
object FK {
  def main(args:Array[String]) {
    val env = StreamExecutionEnvironment.getExecutionEnvironment
    // 设置时间语义,EventTime简单理解就是以时间戳的时间为准.
    env.setStreamTimeCharacteristic(TimeCharacteristic.EventTime)
    val dataStream = env.readTextFile("/usr/local/UserBehavior.csv")//数据文件位置
      .map(data => {
        val dataArray = data.split(",")
        UserBehavior(dataArray(0).trim.toLong, dataArray(1).trim.toLong, dataArray(2)
          .trim.toInt, dataArray(3).trim, dataArray(4).trim.toLong)
      })
      // 因为源数据时间戳为升序,所以直接用下边这个API,乘1000转单位为秒
      .assignAscendingTimestamps(_.timestamp * 1000)
      .filter(_.behavior == "pv") // 筛出pv数据
      .keyBy(_.itemId) // 用itemId划出keyedStream,简单理解就是变成多个流了
      .timeWindow(Time.hours(1), Time.minutes(5)) //对流进行窗口操作,前参为窗口大小,后为步长
      .aggregate(new CountAgg(), new WindowResult()) // 窗口聚合,前为预聚合,可以提高效率,不至于把数据全摞到一起计算
    val processedStream = dataStream
      .keyBy(_.windowEnd) // 因前边逻辑已经划好了1小时内的窗口,所以这里直接按窗口进行分组统计
      .process(new TopNHotItems(3)) // 自定义ProcessFunction
    // Sink直接输出
    processedStream.print("process")
    // 执行
    env.execute("HotItems job")
  }
}
// 自定义预聚合是,减少State压力,效率更高
class CountAgg() extends AggregateFunction[UserBehavior, Long, Long] {
  override def createAccumulator(): Long = 0L // 初始值
  override def merge(acc: Long, acc1: Long): Long = acc + acc1
  override def getResult(acc: Long): Long = acc // 输出终值
  override def add(in: UserBehavior, acc: Long): Long = acc + 1
}
//窗口函数
class WindowResult() extends WindowFunction[Long, ItemViewCount, Long, TimeWindow] {
  override def apply(key: Long, w: TimeWindow, iterable: Iterable[Long],
                     collector: Collector[ItemViewCount]): Unit = {
    collector.collect(ItemViewCount(key, w.getEnd, iterable.iterator.next))
  }
}
class TopNHotItems(topSize: Int) extends KeyedProcessFunction[Long, ItemViewCount, String] {
  // 定义列表状态,就是用来保存数据流的数据结构,共有四种,初始化在open中完成,后续案例有简化写法
  private var itemState: ListState[ItemViewCount] = _
  // 初始化,定义列表状态中内容
  override def open(parameters: Configuration): Unit = {
    itemState = getRuntimeContext
      .getListState(new ListStateDescriptor[ItemViewCount]("item-state", classOf[ItemViewCount]))
  }
  override def processElement(i: ItemViewCount, context: KeyedProcessFunction[Long, ItemViewCount, String]#Context,
                              collector: Collector[String]): Unit = {
    itemState.add(i)
    // 注册一个定时器,+ 100表示延迟100毫秒触发,触发指启动onTimer方法
    context.timerService().registerEventTimeTimer(i.windowEnd + 100)
  }
  // 定时器触发时,对所有数据排序,并输出结果
  override def onTimer(timestamp: Long, ctx: KeyedProcessFunction[Long, ItemViewCount, String]#OnTimerContext,
                       out: Collector[String]): Unit = {
    // 将所有State中数据取出放到一个List Buffer中
    val allItems: ListBuffer[ItemViewCount] = new ListBuffer()
    // 注意遍历ListState需要引入下边这个包

    for (item <- itemState.get()) {
      allItems += item
    }
    // 按照count大小排序,并取前N个
    val sortedItems = allItems.sortBy(_.count)(Ordering.Long.reverse).take(topSize)
    out.collect(itemState.toString())
    // 清空状态
    itemState.clear()
    // 将排名结果格式化输出
    val result: StringBuilder = new StringBuilder()
    // 此处的- 100与定时器呼应,结果会保持0;Timestamp是格式化用的
    result.append("时间:").append(new Timestamp(timestamp - 100)).append("\n")
    // 输出每一个商品的信息
    for (i <- sortedItems.indices) {
      val currentItem = sortedItems(i)
      result.append("No").append(i + 1).append(":")
        .append(" 商品ID=").append(currentItem.itemId)
        .append(" 浏览量=").append(currentItem.count)
        .append("\n")
    }
    result.append("================================")
    // 控制输出频率
    Thread.sleep(1000)
    out.collect(result.toString())
  }
}
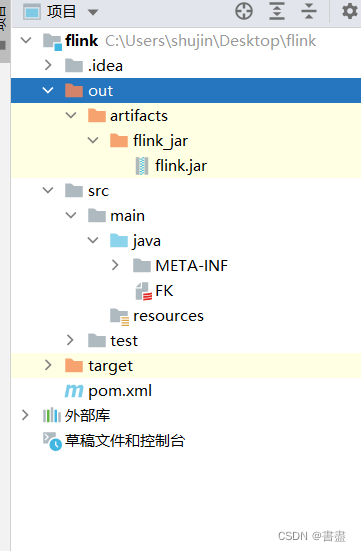
打包上传到ubuntu
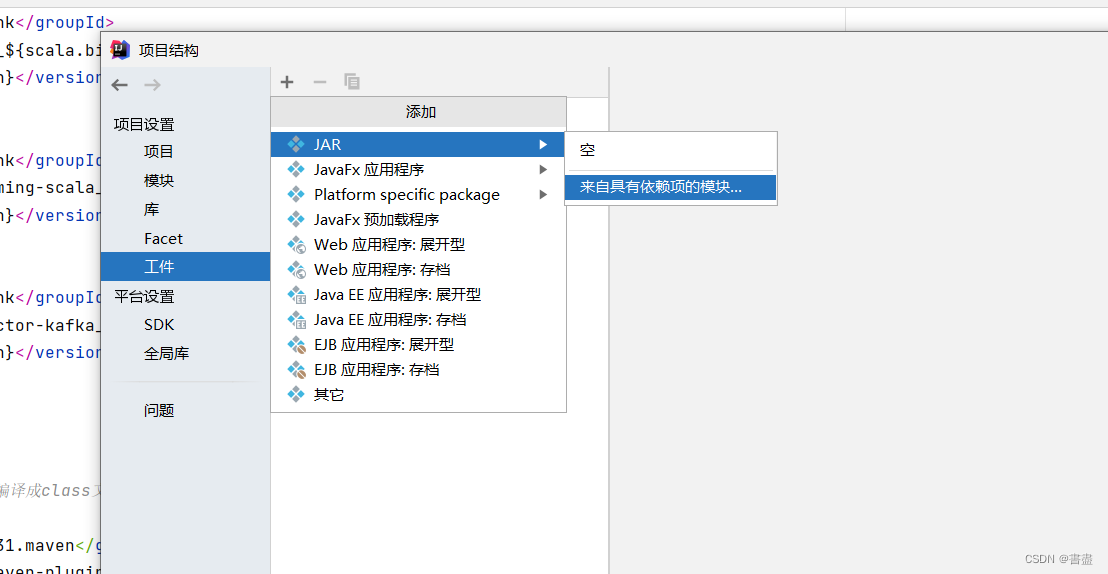
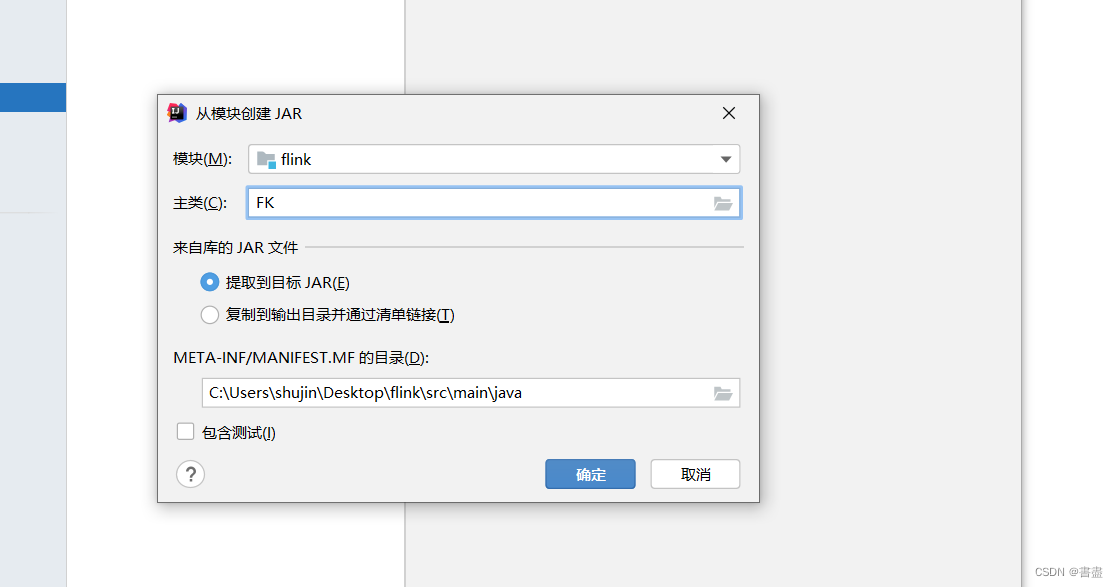
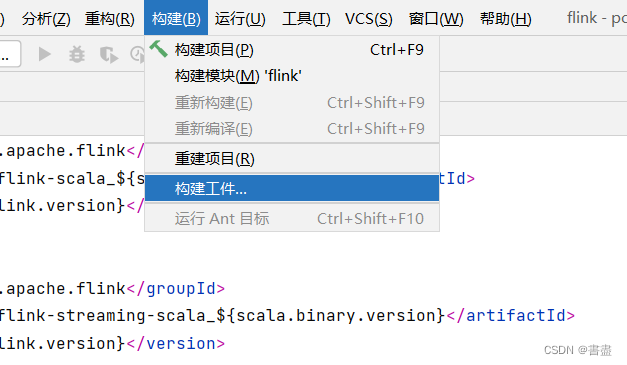

- 生成一个flink.jar
将jar包上传到/home/hadoop目录下,数据集上传到/usr/local目录下,然后运行

- 启动flink

- bin/flink run --class FK /home/hadoop/hotproducts.jar
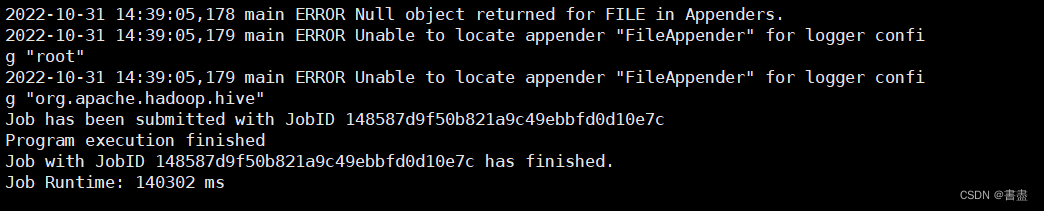
- 查看数据分析结果。结果在/flink/log目录中,使用cat命令查看
- cat flink-root-taskexecutor-0-dblab-VirtualBox.out


三、实训总结
- 项目所用的依赖,需要根据安装框架的版本来导入,否则会运行失败
- 代码中使用的文件需要提前导入(UserBehavior.csv)