目录
1.概述
Spring Security是一个基于Spring框架的安全性框架,它提供了一系列的API和扩展点,可以帮助开发人员在应用程序中轻松地实现安全认证和授权控制。
我们可以理解为Spring Security维护了一组我们可以自定义的访问规则,每次访问都会去进行规则比对,满足规则的才放行。
这些规则可以有很多维度,本文会以最基础的基于角色的控制入手逐步扩展详细介绍Spring Security。
基于角色的控制,我们可以理解为Spring Security为我们维护了一张“白名单”,而登录就是去白名单里进行比对。
2.登录
2.1.默认用户
依赖:
<dependency>
<groupId>org.springframework.boot</groupId>
<artifactId>spring-boot-starter-security</artifactId>
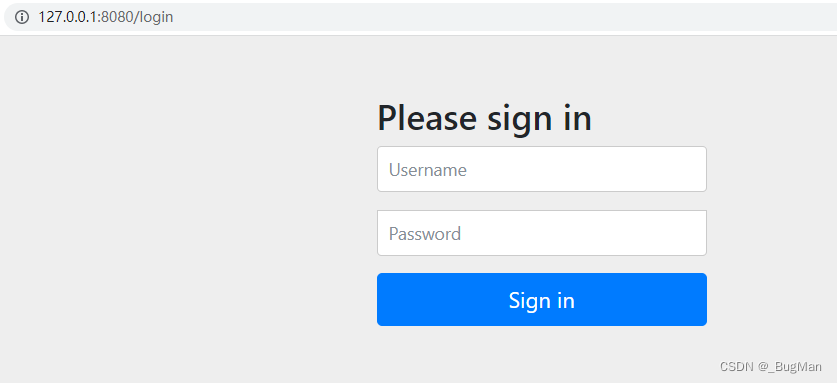
</dependency>依赖引入后其实spring security就已经生效了,此时访问我们的接口会自动转跳spring security内置的登录页,验证通过后才会转跳到后端接口:
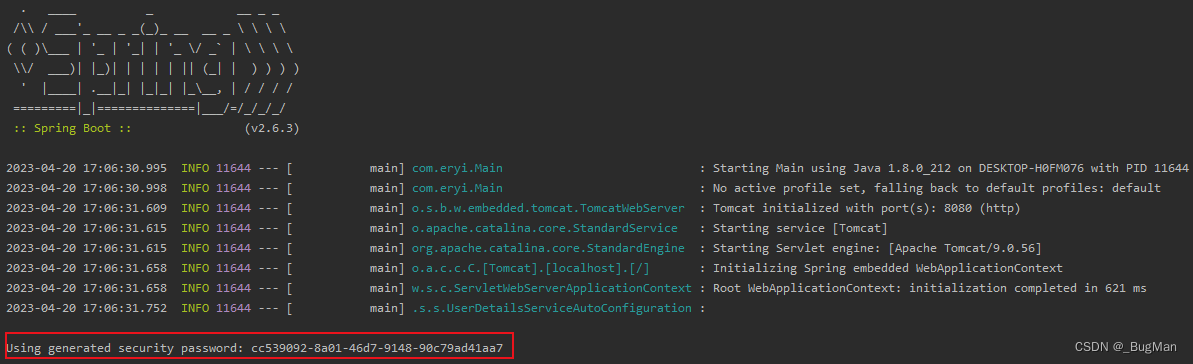
默认用户名:user
默认密码:会在日志中输出
2.2.自定义用户
spring security给我们提供了接口来配置security,其中就包括自定义用户和角色:
import org.springframework.context.annotation.Configuration;
import org.springframework.security.config.annotation.authentication.builders.AuthenticationManagerBuilder;
import org.springframework.security.config.annotation.web.builders.HttpSecurity;
import org.springframework.security.config.annotation.web.configuration.EnableWebSecurity;
import org.springframework.security.config.annotation.web.configuration.WebSecurityConfigurerAdapter;

@Configuration
@EnableWebSecurity
public class MySecurityConfig extends WebSecurityConfigurerAdapter {
    @Override
    protected void configure(HttpSecurity http) throws Exception {
        http.authorizeHttpRequests().
                //所有用户都可以访问/all
                        antMatchers("/all").permitAll().
                //admin可以访问/admin
                        antMatchers("/admin").hasRole("admin");
        //如果验证未通过,转跳spring security自带的登录页面进行登录
        //如果不配置此处的步骤,验证未通过则会直接返回403访问被拒绝。
        http.formLogin();
    }

    @Override
    protected void configure(AuthenticationManagerBuilder auth) throws Exception {
        //自定义两个用户user、admin,user对应user角色,admin对应admin角色
        auth.inMemoryAuthentication()
                .withUser("user").password("123").roles("user")
                .and()
                .withUser("admin").password("456").roles("user", "admin");
    }
}
2.3.加密
完成上面的配置这时候我们再访问我们的接口,转跳登录页后输入我们定义的有对应访问用户名密码,比如admin 456,似乎就应该能正常访问到我们的接口了。但是实际上会报错:
java.lang.IllegalArgumentException: There is no PasswordEncoder mapped for the id "null"
这是因为我们在定义用户的时候密码没有加密,自spring security 5.0开始就要求必须对密码进行加密,否则,在进行密码比较时,就会出现无法解析密码加密算法的异常。我们当前用的主流版本一定是5.0以上,所以加密是必须的。
spring security提供了一个PasswordEncoder接口给我们自定器,在加密器里可以通过方法重写来自定义加密过程。但是实际使用上不用费力去自己写一个加密算法,security给我们准备了多种加密器、多种加密方法,而且自己写的也肯定没有开源的稳定和好用。
spring security提供的加密器如下:
-
BCryptPasswordEncoder:这是最常用的加密算法之一,它使用哈希和随机盐来加密密码。
-
Pbkdf2PasswordEncoder:这也是一种密码加密算法,它使用基于密码的密钥导出函数(PBKDF2)来加密密码。
-
SCryptPasswordEncoder:这是一种基于内存的密码哈希算法,它使用大量的内存来防止散列碰撞攻击。
-
NoOpPasswordEncoder:这是一种不安全的加密算法,它仅仅是将明文密码作为加密后的密码。不建议在生产环境中使用。
我们就挑选BCryptPasswordEncoder来对密码进行加密,修改一下,在定义用户名密码的时候用BCryptPasswordEncoder来进行加密:
 @Override
    protected void configure(AuthenticationManagerBuilder auth) throws Exception {
        //自定义两个用户user、admin,user对应user角色,admin对应admin角色
        auth.inMemoryAuthentication().passwordEncoder(new BCryptPasswordEncoder())
                .withUser("user").password("123").roles("user")
                .and()
                .withUser("admin").password("456").roles("user", "admin");
    }
加密之后我们再在登陆页面进行登录的时候就不能用明文的admin 456来进行登录了,需要将456使用同样的加密算法加密后的密文密码来登录。
2.4.绕过加密
在实际生产环境种使用密文密码当然是无可厚非的,但是在开发、测试阶段会很麻烦,有没有绕过的办法喃?有的,{noop}","no operation"的缩写,表示不执行任何操作。如果密码的前缀是"{noop}",则Spring Security会将其识别为明文密码,不进行加密,直接存储到数据库或内存中。可以将上面的代码改成:
@Override
    protected void configure(AuthenticationManagerBuilder auth) throws Exception {
        //自定义两个用户user、admin,user对应user角色,admin对应admin角色
        auth.inMemoryAuthentication()
                .withUser("user").password("{noop}123").roles("user")
                .and()
                .withUser("admin").password("{noop}456").roles("user", "admin");
    }
2.5.怎么传递用户信息
由于我们的请求我们都是在登陆界面输入用户名密码,实际使用中不可能每次都这样去做,怎么把用户名、密码携带在请求里传给security喃?这却决于配置为哪种,支持两种方式:
-
表单
-
放在请求头中
表单:
后端配置:
@Override
    protected void configure(HttpSecurity http) throws Exception {
        http
                .authorizeRequests()
                .antMatchers("/", "/home").permitAll()
                .anyRequest().authenticated()
                .and()
                //指定用表单的方式登录
                .formLogin()
                //登录地址,不配置的话会有默认值,默认是login,可以用这个配置来设置新的请求页
                .loginPage("/login")
                //配置用户名的参数名,不配置的话会有默认值,默认是username
                .usernameParameter("username")
                //配置密码的参数名,不配置的话会有默认值,默认是password
                .passwordParameter("password")
                .permitAll()
    }
前端表单:
<form action="/login" method="post">
  <label for="username">Username:</label>
  <input type="text" id="username" name="username"><br><br>
  <label for="password">Password:</label>
  <input type="password" id="password" name="password"><br><br>
  <input type="submit" value="Submit">
</form>
当用户提交表单后,会向后端发送一个POST请求,请求的URL为/login,请求参数包含用户名和密码。
放在表头中:
在请求头中添加Authorization字段,将用户名和密码进行Base64编码后传递给后端进行验证。后端配置示例:
@Override
protected void configure(HttpSecurity http) throws Exception {
    http
        .authorizeRequests()
        .antMatchers("/", "/home").permitAll()
        .anyRequest().authenticated()
        .and()
        .httpBasic()
        .permitAll();
}
2.6.记住我
security支持“记住我”这个功能,是基于token来实现得,开启记住我后,登陆成功后会返给客户端一个cookie,用这个cookie来实现记住我的效果,配置示例如下:
@Override
    protected void configure(HttpSecurity http) throws Exception {
        http.authorizeHttpRequests().
                antMatchers("/all").permitAll().
                antMatchers("/admin").hasRole("admin").and()
                .formLogin().and()
                //开启记住我功能
                .rememberMe()
                //设置返回的cookie的键名
                .rememberMeParameter("remember-me")
                //设置过期时间
                .tokenValiditySeconds(7*24*60*60);
    }
3.登出
讲完登陆后再看登出就很好明白:
@Override
protected void configure(HttpSecurity http) throws Exception {
    http
        // 其他配置
        .logout()
            .logoutUrl("/logout") // 配置登出的URL
            .logoutSuccessUrl("/login") // 配置登出成功后的跳转URL
            .deleteCookies("remember-me") // 删除Cookie
            .permitAll(); // 允许所有用户访问登出URL
}
4.使用数据库
上文中我们都是用auth.inMemoryAuthentication()将定义的用户和角色信息放在内存中,在实际业务场景中有时候我们是需要将这些信息放在数据库中进行持久化的。spring security中有两种常用方式来将信息放在数据库中:
-
auth.jdbcAuthentication()
-
auth.userDetailsService()
4.1.jdbcAuthentication
使用这种方式时,严格规定了表结构,具体的建表语句在这里:
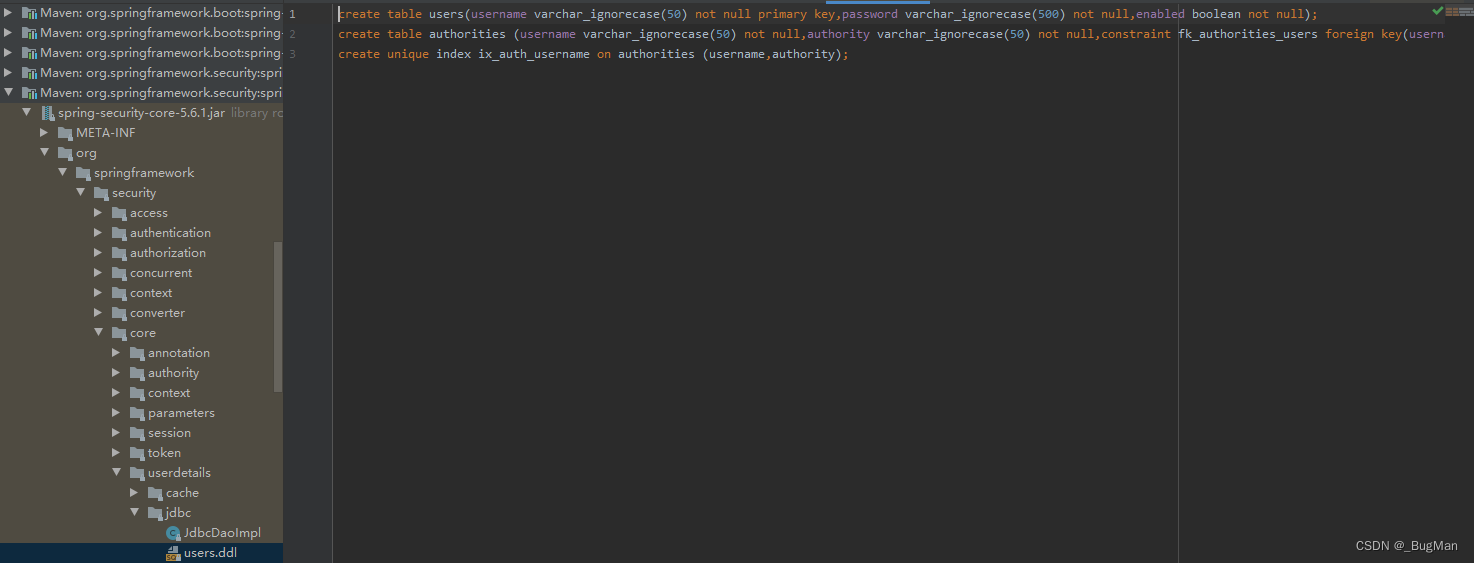
建出来后会有两个表:
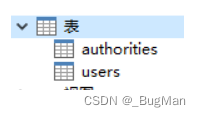
这里要注意几点:
-
权限前缀要加ROLE_,不然不会生效,enabled属性是用户是否生效1是0否
-
密码一定要使用加密,不加密识别不了

接下来就是使用:
@Configuration
@EnableWebSecurity
public class SecurityConfig extends WebSecurityConfigurerAdapter {

    @Autowired
    private DataSource dataSource;

    @Override
    protected void configure(AuthenticationManagerBuilder auth) throws Exception {
        auth.jdbcAuthentication().dataSource(dataSource)
            .usersByUsernameQuery("select username, password, enabled from users where username=?")
            .authoritiesByUsernameQuery("select username, authority from authorities where username=?")
            .passwordEncoder(new BCryptPasswordEncoder());
    }

    @Override
    protected void configure(HttpSecurity http) throws Exception {
        // ...
    }
}
4.2.userDetailsService
jdbcAuthentication这种方式中对表结构有严格要求,如果觉得太死,需要灵活一点,security还提供了userDetailsService这种方式灵活的来让我们灵活的使用。
我们可以自己实现UserDetailsService,重新loadUserByUsername方法,在方法中灵活的去将系统用户转为security的用户。
@Service
public class UserServiceImpl implements UserDetailsService {

    @Autowired
    UserDao userDao;

    @Override
    public UserDetails loadUserByUsername(String username) throws UsernameNotFoundException {
        //从存储中获取系统用户
        SystemUser systemUser = userDao.getUser();
        //将系统用户的用户名密码来创建security的用户
        User.UserBuilder builder = User.builder();
        UserDetails user = builder.username(systemUser.getUserName()).password(systemUser.getPassword()).roles("admin").build();
        return user;
    }
}
5.自定义处理器
在Spring Security中,默认认证成功了就能访问到接口,但是如果我想认证成功后不直接访问接口而是做其他事情喃?spring security也提供了我们自定义操作完成后的处理过程的能力,我们可以使用自定义的处理器(Handler)来处理认证、授权、注销等操作。自定义处理器可以通过实现相应的接口或继承相应的类来完成。
以下是几个常用的自定义处理器的接口/类及其作用:
-
AuthenticationSuccessHandler:用于认证成功后的处理,比如记录日志、跳转到指定页面等。 -
AuthenticationFailureHandler:用于认证失败后的处理,比如记录日志、显示错误信息等。 -
AccessDeniedHandler:用于处理访问被拒绝的情况,比如跳转到错误页面、记录日志等。 -
LogoutSuccessHandler:用于注销成功后的处理,比如跳转到登录页面、删除Cookie等。 -
InvalidSessionStrategy:用于处理无效的Session,比如跳转到登录页面、记录日志等。
在Spring Security中,我们可以通过配置来使用自定义的处理器。例如:
public class MyAuthenticationSuccessHandler implements AuthenticationSuccessHandler {

    @Override
    public void onAuthenticationSuccess(HttpServletRequest request, HttpServletResponse response, Authentication authentication) throws IOException, ServletException {
        // 处理认证成功的逻辑,比如记录日志、跳转页面等
        response.sendRedirect("/index");
    }
}
public class MyAuthenticationFailureHandler implements AuthenticationFailureHandler {
@Override
public void onAuthenticationFailure(HttpServletRequest request, HttpServletResponse response, AuthenticationException exception) throws IOException, ServletException {
// 处理认证失败的逻辑,比如记录日志、跳转页面等
response.sendRedirect("/login?error=true");
}
}public class MyAccessDeniedHandler implements AccessDeniedHandler {
@Override
public void handle(HttpServletRequest request, HttpServletResponse response, AccessDeniedException accessDeniedException) throws IOException, ServletException {
// 处理访问拒绝的逻辑,比如记录日志、跳转页面等
response.sendRedirect("/accessDenied");
}
}public class MyLogoutHandler implements LogoutHandler {
@Override
public void logout(HttpServletRequest request, HttpServletResponse response, Authentication authentication) {
// 处理注销的逻辑,比如记录日志、清除缓存等
}
}public class MyLogoutSuccessHandler implements LogoutSuccessHandler {
@Override
public void onLogoutSuccess(HttpServletRequest request, HttpServletResponse response, Authentication authentication) throws IOException, ServletException {
// 处理注销成功的逻辑,比如记录日志、跳转页面等
response.sendRedirect("/logoutSuccess");
}
}定义完后直接使用即可:
@Configuration
@EnableWebSecurity
public class SecurityConfig extends WebSecurityConfigurerAdapter {

    //省略其他配置...

    @Autowired
    private CustomAuthenticationSuccessHandler customAuthenticationSuccessHandler;

    @Autowired
    private CustomAuthenticationFailureHandler customAuthenticationFailureHandler;

    @Autowired
    private CustomAccessDeniedHandler customAccessDeniedHandler;

    @Autowired
    private CustomLogoutSuccessHandler customLogoutSuccessHandler;

    @Autowired
    private CustomInvalidSessionStrategy customInvalidSessionStrategy;

    @Override
    protected void configure(HttpSecurity http) throws Exception {
        http.authorizeRequests()
            .antMatchers("/admin/**").hasRole("ADMIN")
            .antMatchers("/user/**").hasAnyRole("USER", "ADMIN")
            .anyRequest().authenticated()
            .and()
            .formLogin()
            .successHandler(customAuthenticationSuccessHandler)
            .failureHandler(customAuthenticationFailureHandler)
            .and()
            .exceptionHandling()
            .accessDeniedHandler(customAccessDeniedHandler)
            .and()
            .logout()
            .logoutSuccessHandler(customLogoutSuccessHandler)
            .and()
            .sessionManagement()
            .invalidSessionStrategy(customInvalidSessionStrategy);
    }

}
6.更多细粒度的控制
前文我们都是基于角色来进行访问控制的,稍加思考就会想到,光是靠角色来控制实际应用中可能不够,有时候还要基于HTTP METHOD、IP、权限等等,spring security当然给我们提供了这些更加细粒度的访问控制方法:
@Configuration
@EnableWebSecurity
public class SecurityConfig extends WebSecurityConfigurerAdapter {

    // 配置安全规则
    @Override
    protected void configure(HttpSecurity http) throws Exception {
        http.authorizeRequests()

            // 基于角色控制访问
            .antMatchers("/admin/**").hasRole("ADMIN")
            .antMatchers("/user/**").hasRole("USER")

            // 基于权限控制访问
            .antMatchers("/article/**").hasAuthority("ARTICLE_VIEW")

            // 基于IP地址控制访问
            .antMatchers("/profile/**").hasIpAddress("192.168.1.0/24")

            // 基于方法表达式控制访问
            .antMatchers(HttpMethod.DELETE, "/article/**").access("hasRole('ADMIN') or hasAuthority('ARTICLE_DELETE')")
            .antMatchers(HttpMethod.PUT, "/article/**").access("hasRole('ADMIN') or hasAuthority('ARTICLE_EDIT')")

            // 其他请求需要进行身份认证
            .anyRequest().authenticated()

            .and()
            .formLogin()

            .and()
            .httpBasic();
    }

    // 配置用户信息
    @Autowired
    public void configureGlobal(AuthenticationManagerBuilder auth) throws Exception {
        auth.inMemoryAuthentication()

            // 配置用户角色和权限
            .withUser("user").password("{noop}password").roles("USER").authorities("ARTICLE_VIEW")
            .and()
            .withUser("admin").password("{noop}password").roles("ADMIN").authorities("ARTICLE_VIEW", "ARTICLE_EDIT", "ARTICLE_DELETE");
    }
}
当然除了代码里可以配置,也提供了注解版本:
// 基于角色的访问控制注解
    @Secured("ROLE_ADMIN")
    public void adminOnlyMethod() {
        // 只有 ADMIN 角色的用户可以调用这个方法
    }

    // 基于角色的访问控制注解
    @RolesAllowed("ROLE_USER")
    public void userOnlyMethod() {
        // 只有 USER 角色的用户可以调用这个方法
    }

    // 基于方法调用之后的返回值进行访问控制
    @PostAuthorize("returnObject.owner == authentication.name")
    public Resource getResourceById(String id) {
        // 获取资源
        return resource;
    }

    // 在方法调用前进行集合过滤
    @PreFilter("filterObject.owner == authentication.name")
    public List<Resource> getResources(List<String> ids) {
        // 获取指定 ID 的资源列表
        return resources;
    }

    // 在方法调用后进行集合过滤
    @PostFilter("filterObject.owner == authentication.name")
    public List<Resource> getAllResources() {
        // 获取所有资源列表
        return resources;
    }

    // 基于SpEL表达式的访问控制注解,控制HTTP方法
    @PreAuthorize("hasRole('ADMIN') and #httpMethod == 'GET'")
    @GetMapping("/adminOnly")
    public ResponseEntity<String> adminOnlyEndpoint(HttpServletRequest request) {
        return ResponseEntity.ok("Only accessible to admins");
    }
7.原理简述

看上图,Spring Security的实现原理一目了然,其实它就是通过一个Servlet过滤器来挂载到应用程序的请求流程中。当一个请求到达应用程序时,它首先会被Spring Security的过滤器拦截,进行安全控制处理,然后将请求继续传递给应用程序的其他组件进行处理。
这里面的投票器不用深究,它的作用其实就是用于决定一个用户是否有访问特定资源的权限。投票器通过对安全上下文(SecurityContext)中的身份验证信息、访问控制列表(ACL)和其他因素进行评估,决定是否允许用户访问资源。