【原文链接】openQA----基于openSUSE部署openQA
(1)下载 openqa-bootstrap 脚本并执行
cd /opt/
curl -s https://raw.githubusercontent.com/os-autoinst/openQA/master/script/openqa-bootstrap | bash -x
(2)配置apache proxy,正常如下配置都已经配置了,这里再执行一次,确保正确
a2enmod headers
a2enmod proxy
a2enmod proxy_http
a2enmod proxy_wstunnel
a2enmod rewrite
(3)修改配置文件名
cp /etc/apache2/vhosts.d/openqa.conf.template /etc/apache2/vhosts.d/openqa.conf
(4)这里先按照不启用https的配置,修改 /etc/openqa/openqa.ini 文件,如下位置设置为0
[openid]
httpsonly = 0
(5)编辑 /etc/openqa/database.ini 文件,因为这里使用的本地的PostgreSQL,因此production字段按照如下配置设置。
[production]
dsn = dbi:Pg:dbname=openqa
(6)openQA支持三种认证方式,OpenID, OAuth2 and Fake,默认为OpenID,OAuth2需要github认证回调,因此这里设置使用Fake方式,编辑 /etc/openqa/openqa.ini 文件,其中auth字段设置Fake模式,如下所示
[auth]
method = Fake
(7)启动WEB UI,并设置开机自启动
systemctl enable --now postgresql
systemctl enable --now openqa-webui
systemctl enable --now openqa-scheduler
systemctl restart apache2
(8)关闭防火墙设置
systemctl stop firewalld
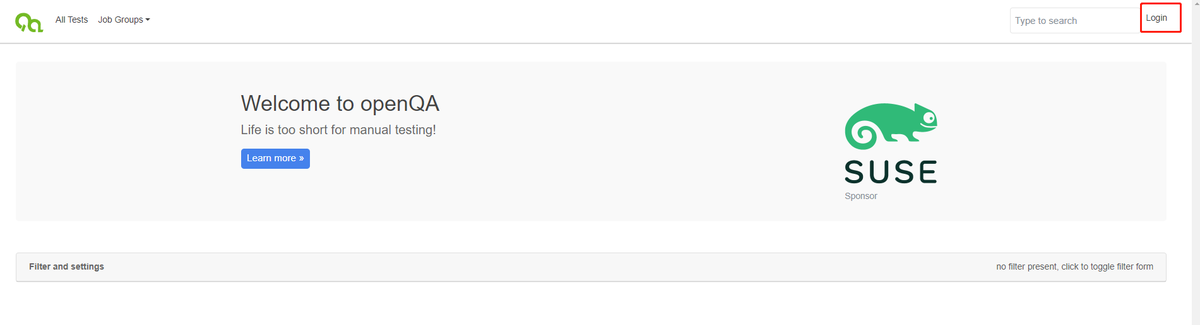
(9)然后在浏览器通过服务器的ip地址和80端口即可访问,如下图所示

(10)安装openQA-worker

zypper in openQA-worker
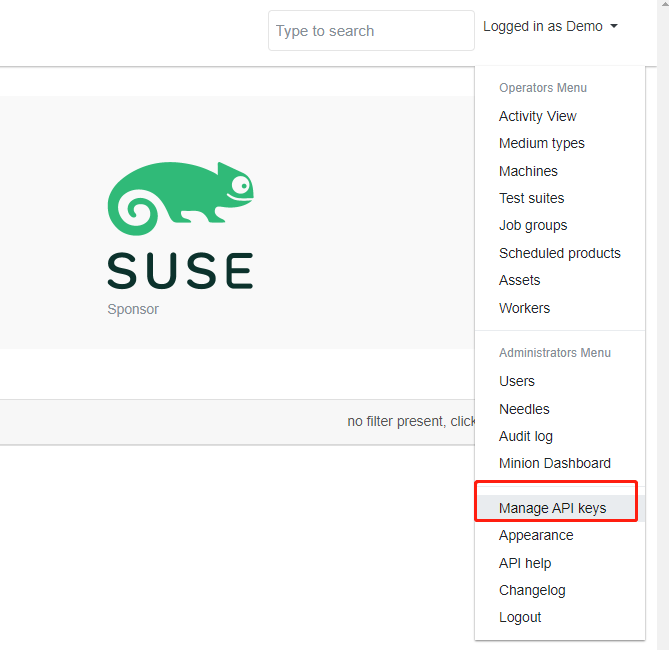
(11)登录openQA的WEB页面,如下图,点击“Login”
(12)然后点击“Manager API Keys”
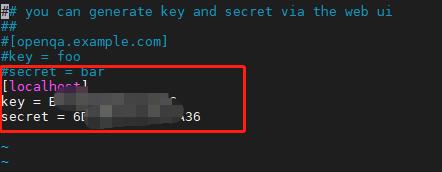
(13)去勾选过期时间设置,然后点击“Create”,然后就会在下面生成新的key和Secret

(14)拷贝新建的key和Secret,然后在安装openQA的服务器上编辑/etc/openqa/client.conf 文件,在如下位置填入key和Secret
(15)启动openQA-worker
systemctl start openqa-worker@1
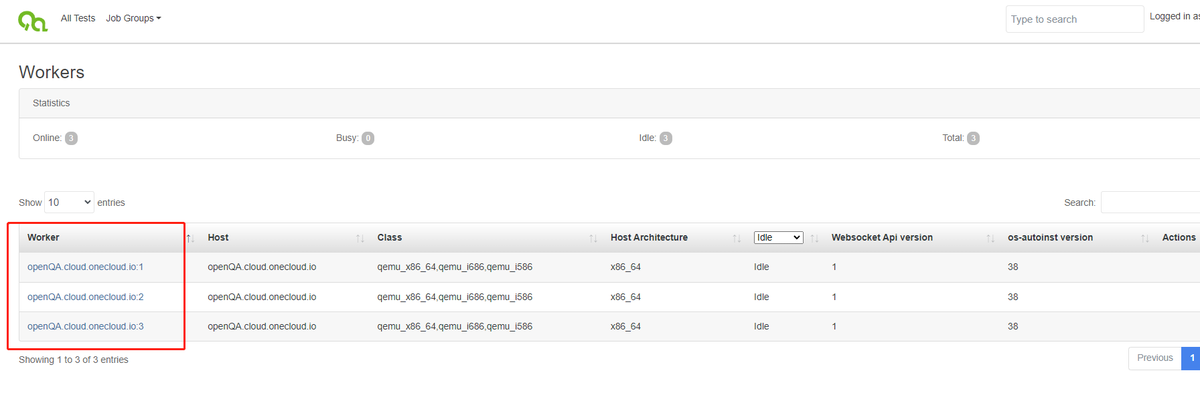
(16)查看workers

(17)如下图所示,已经存在一个worker了

(18)此时可以再增加几个worker,执行如下命令即可,只需要改变@符号后的数字
systemctl start openqa-worker@2
systemctl start openqa-worker@3
(19)再次查看worker,可以发现此时已经存在3个worker了
至此基于openSUSE系统openQA已经部署完成了