001- JavaConfig
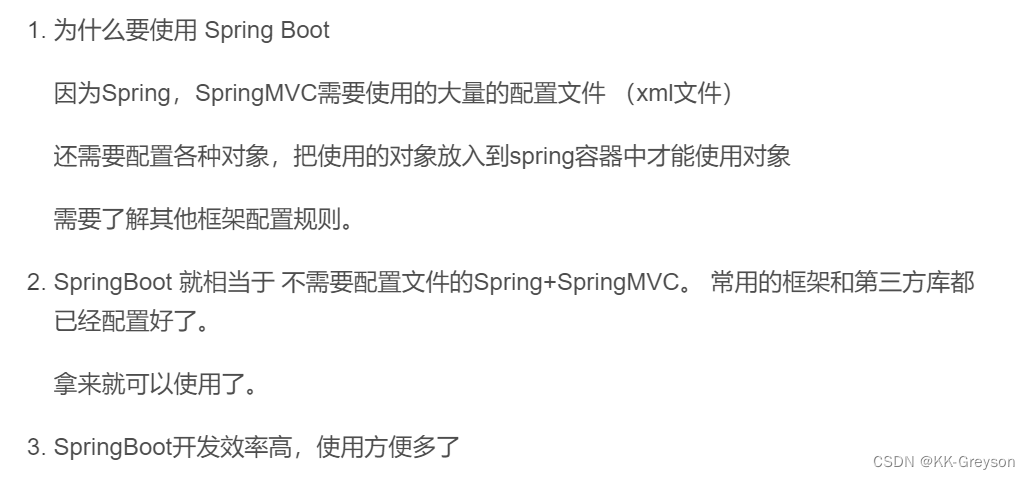
1.1 为什么使用springboot
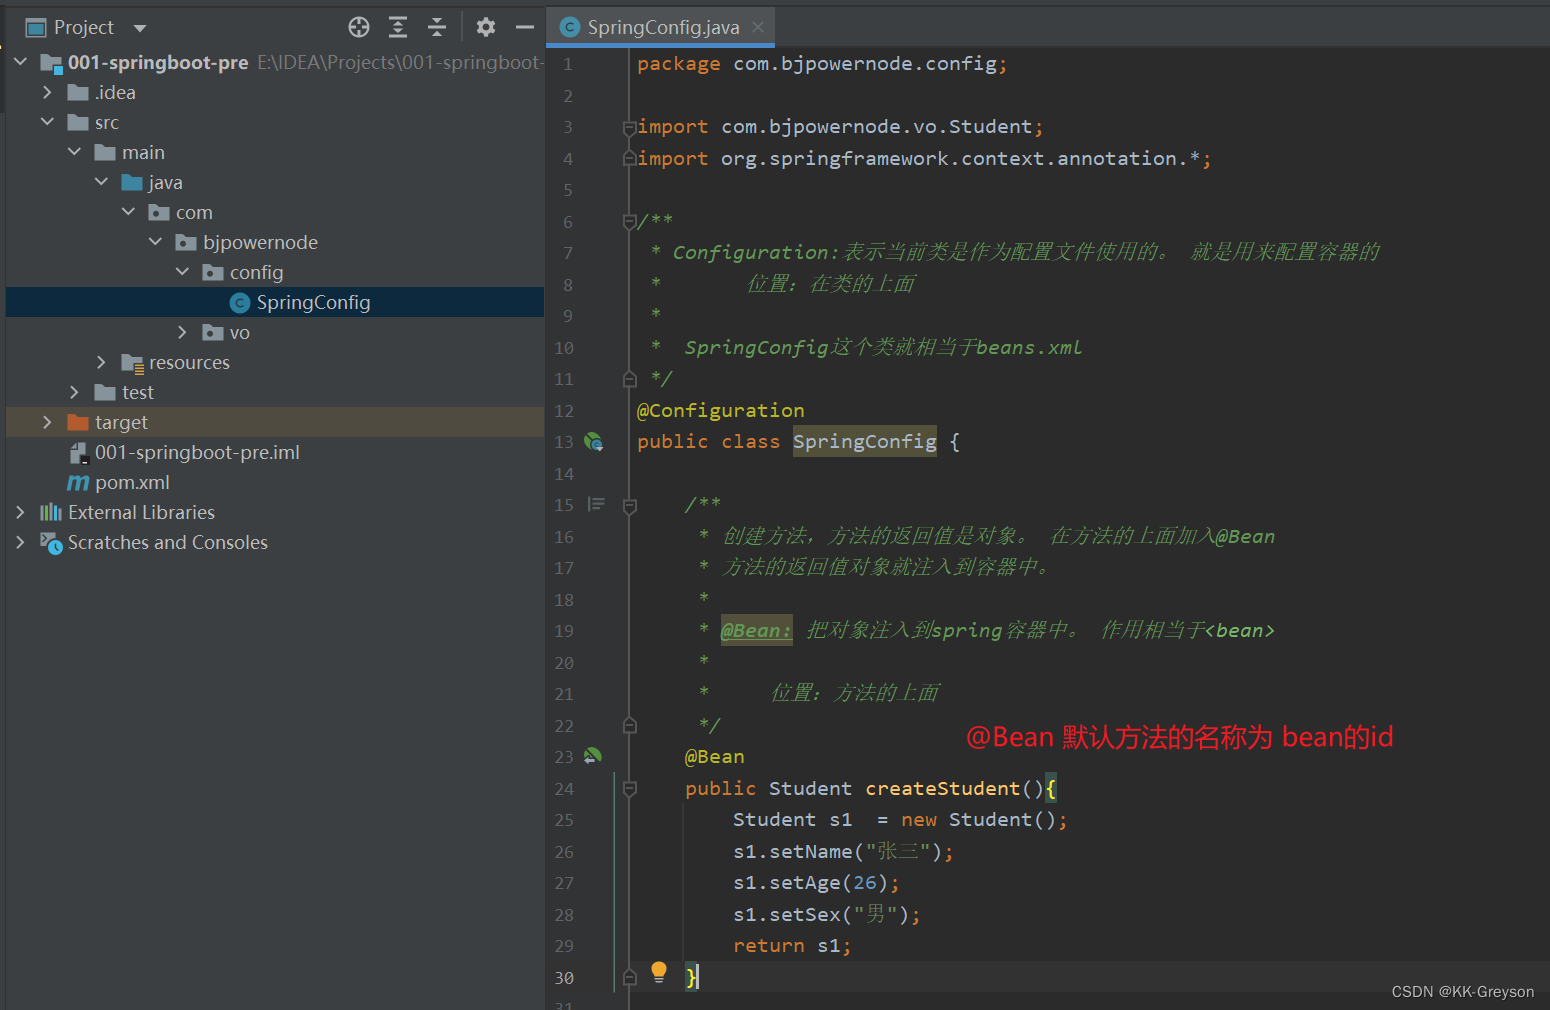
1.2 JavaConfig
JavaConfig: 使用java类作为xml配置文件的替代, 是配置spring容器的纯java的方式。
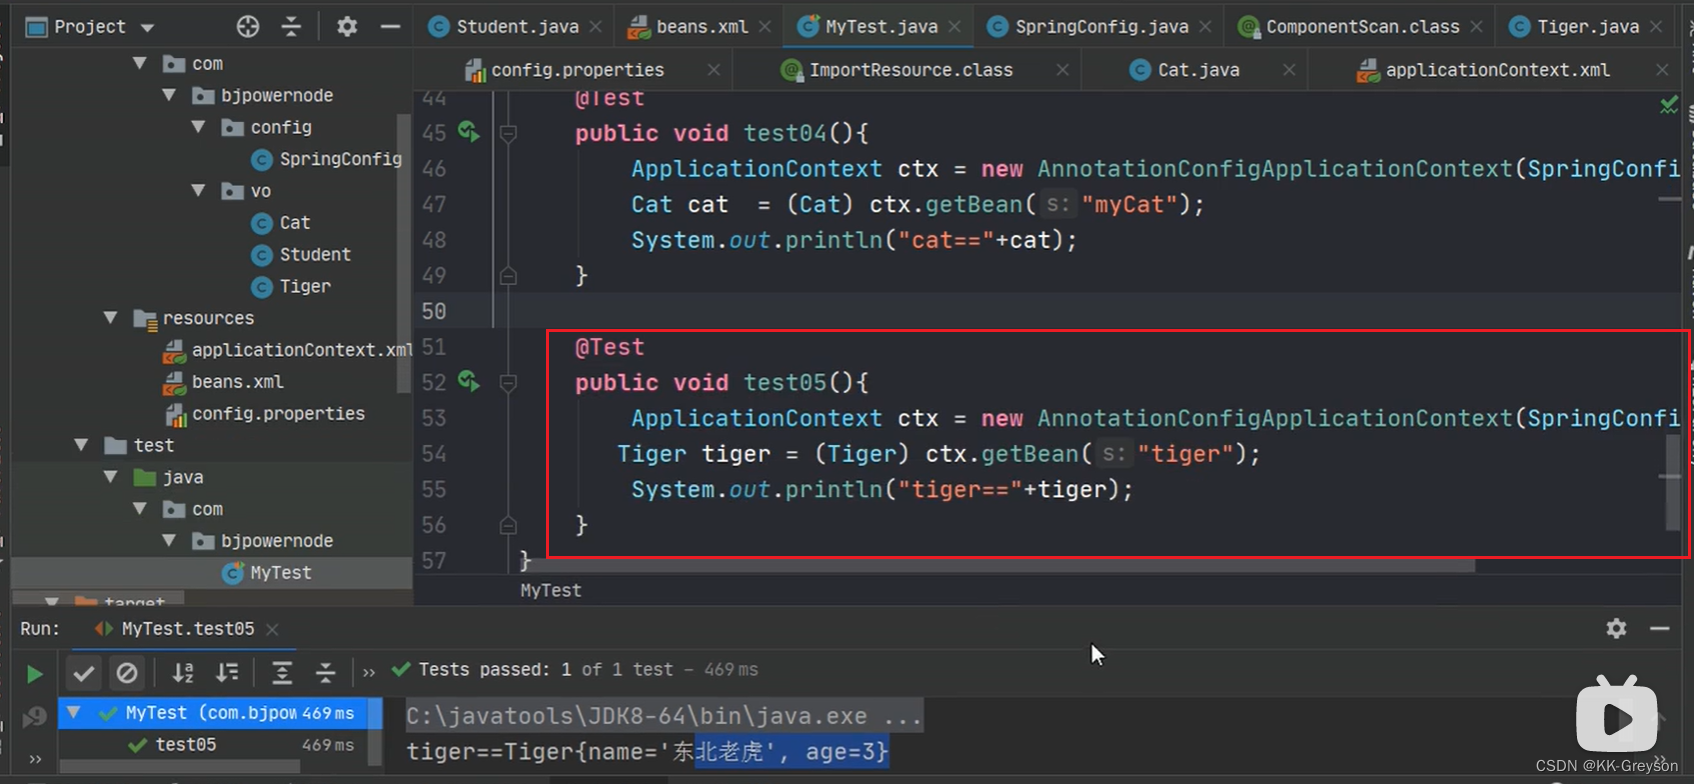
在这个java类就可以创建java对象,把对象放入spring容器中(注入到容器)
使用两个注解:
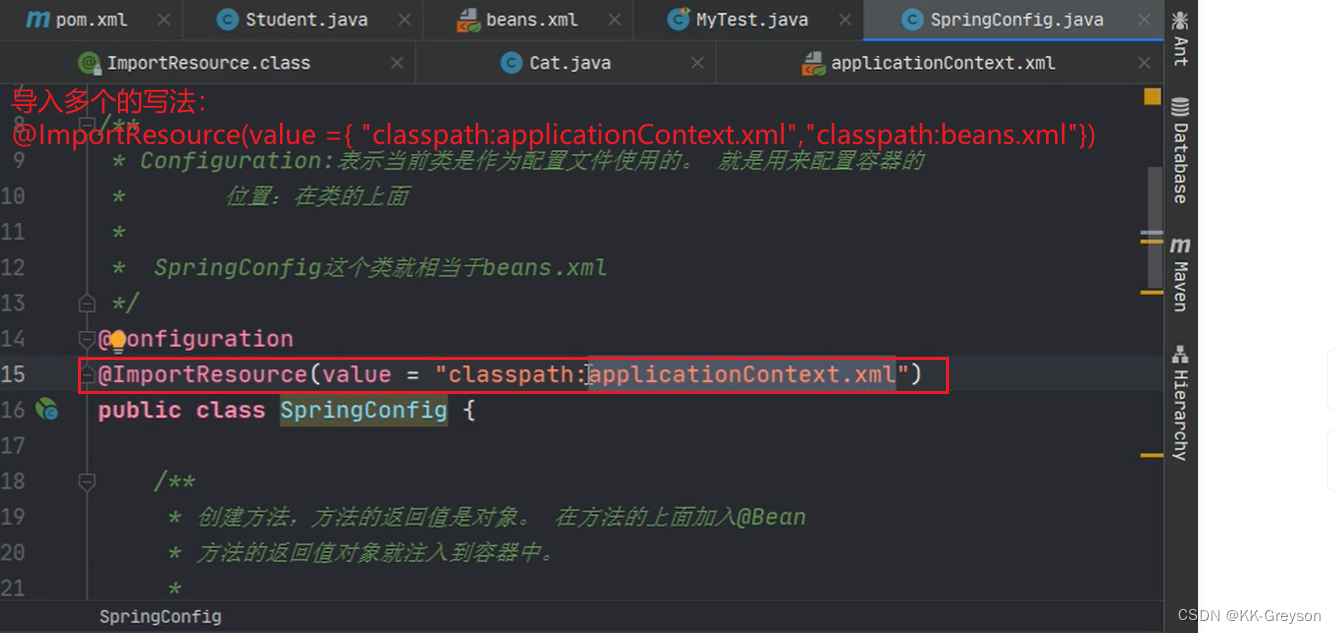
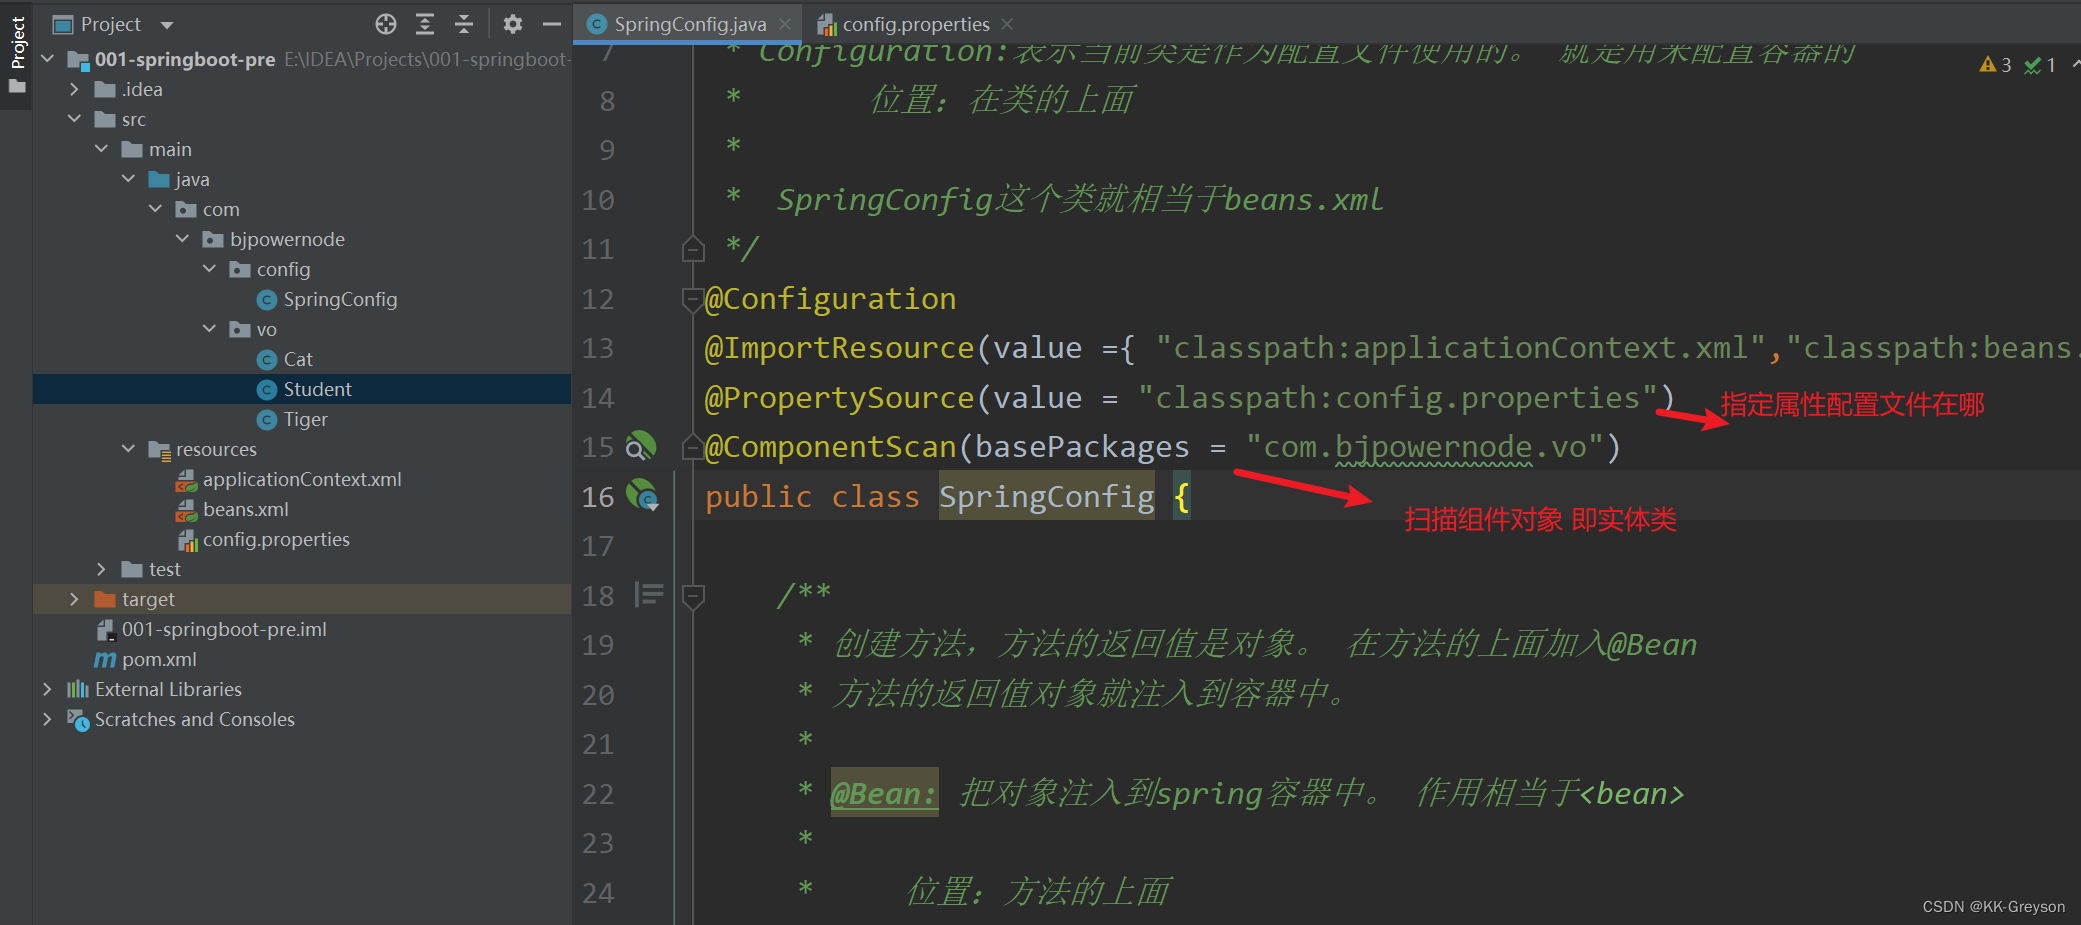
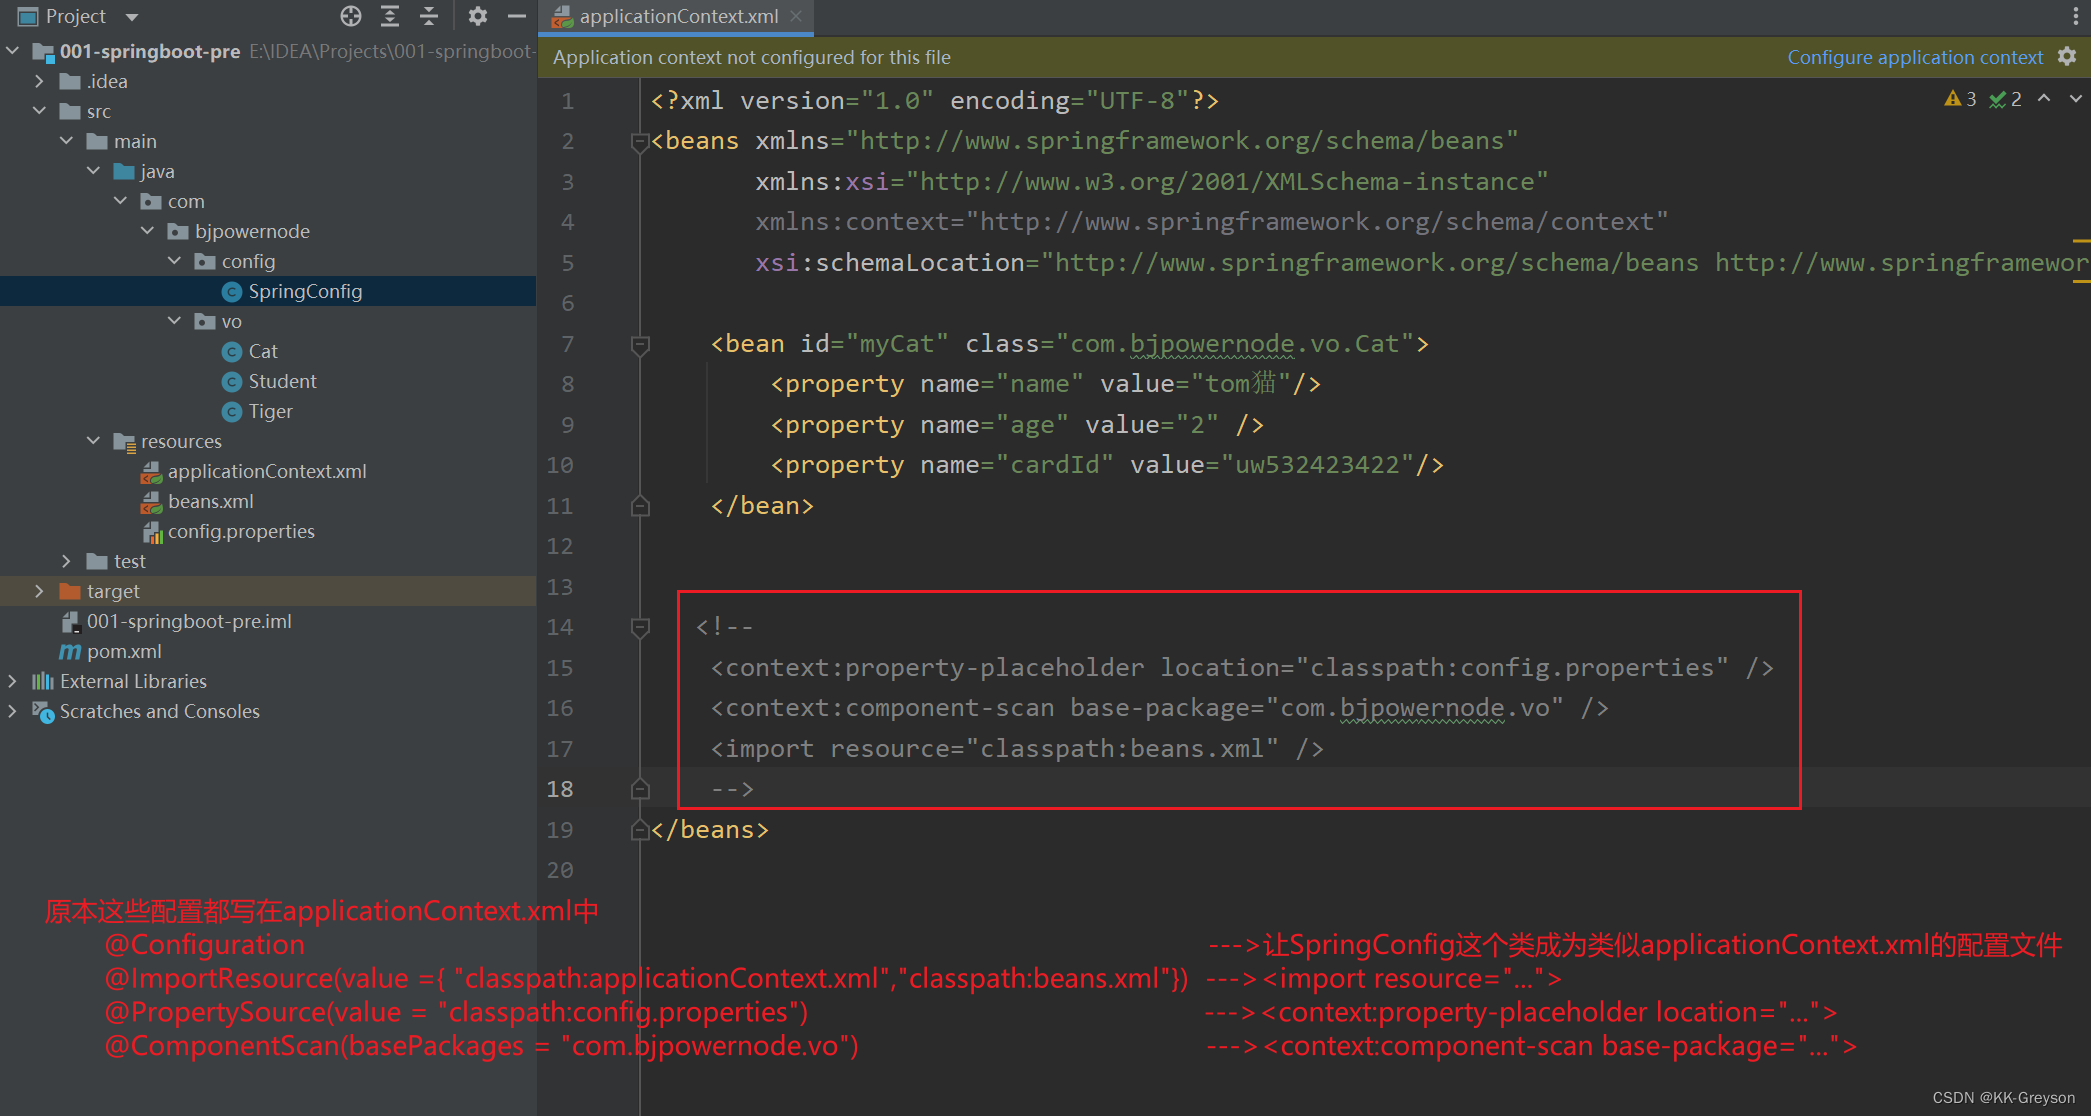
1)@Configuration: 放在一个类的上面,表示这个类是作为配置文件使用的。
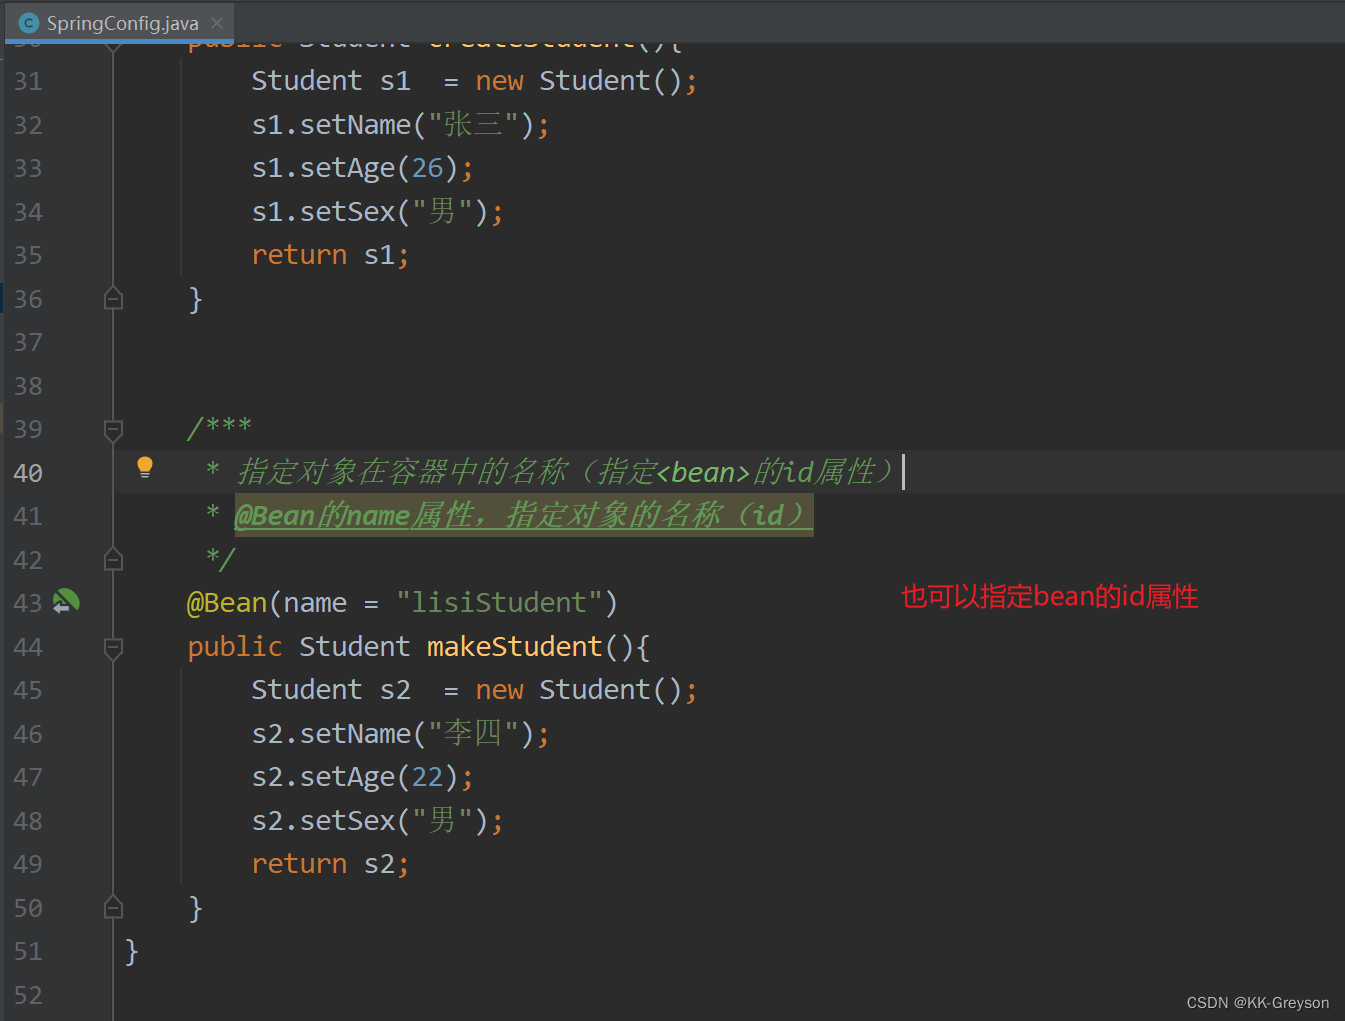
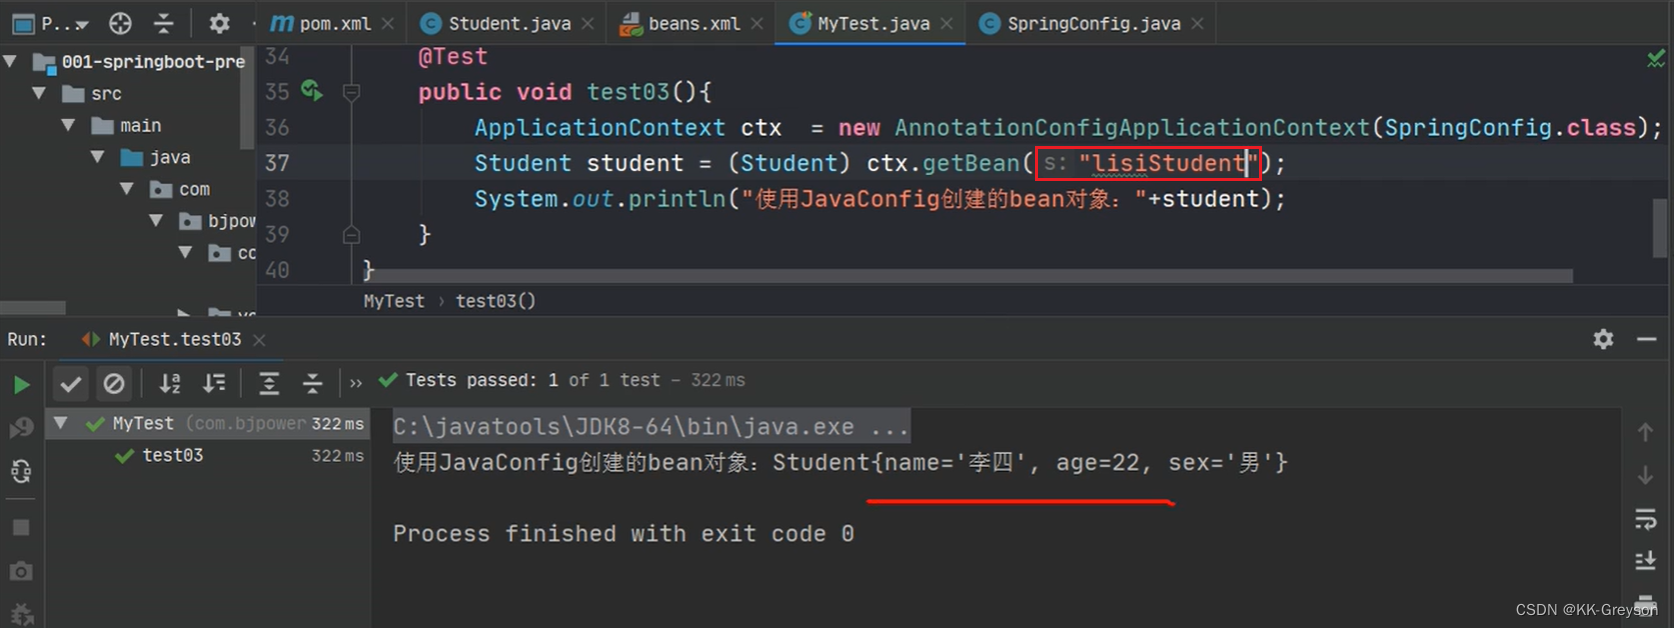
2)@Bean:声明对象,把对象注入到容器中。
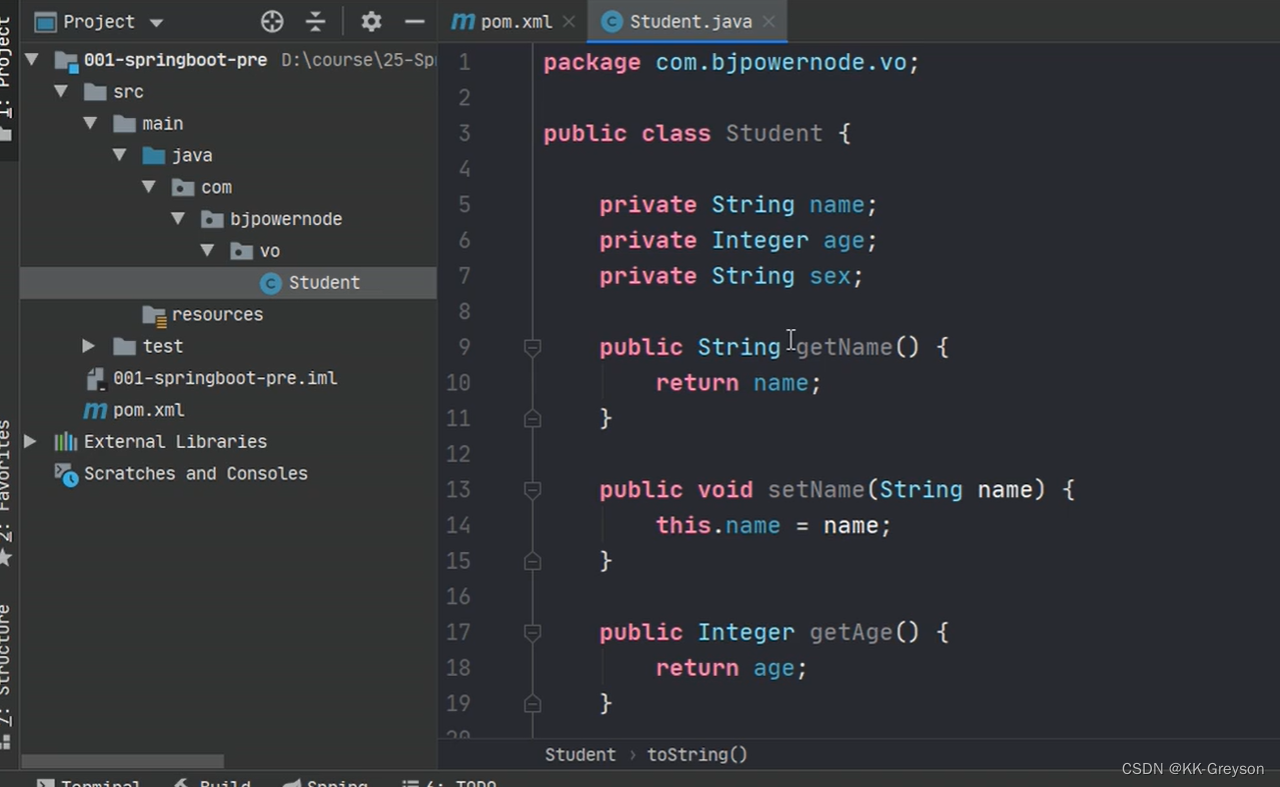
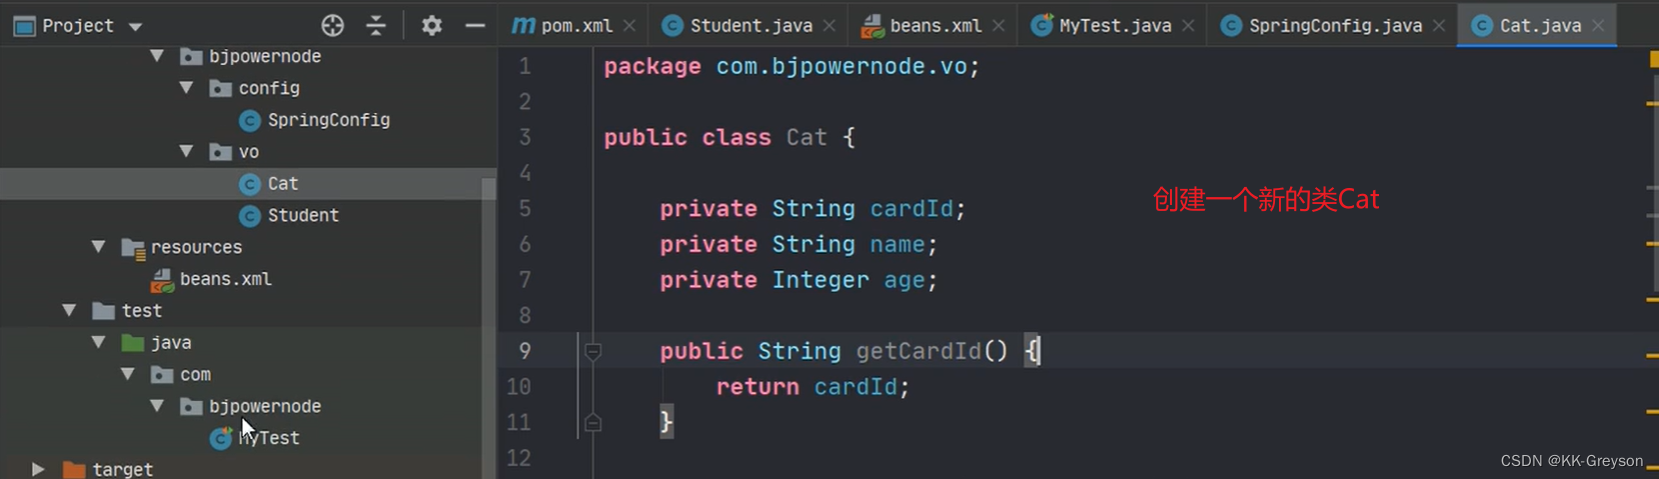
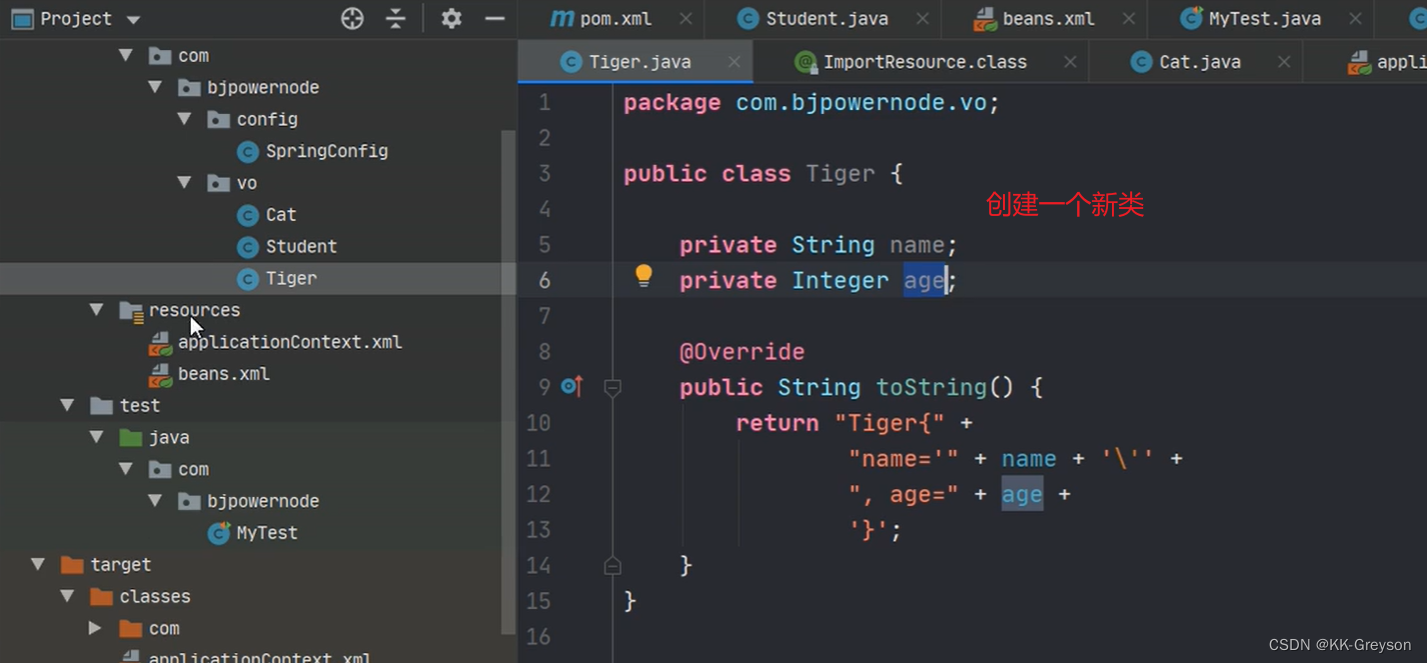
创建一个空项目 再创建一个maven java 模块进行演示
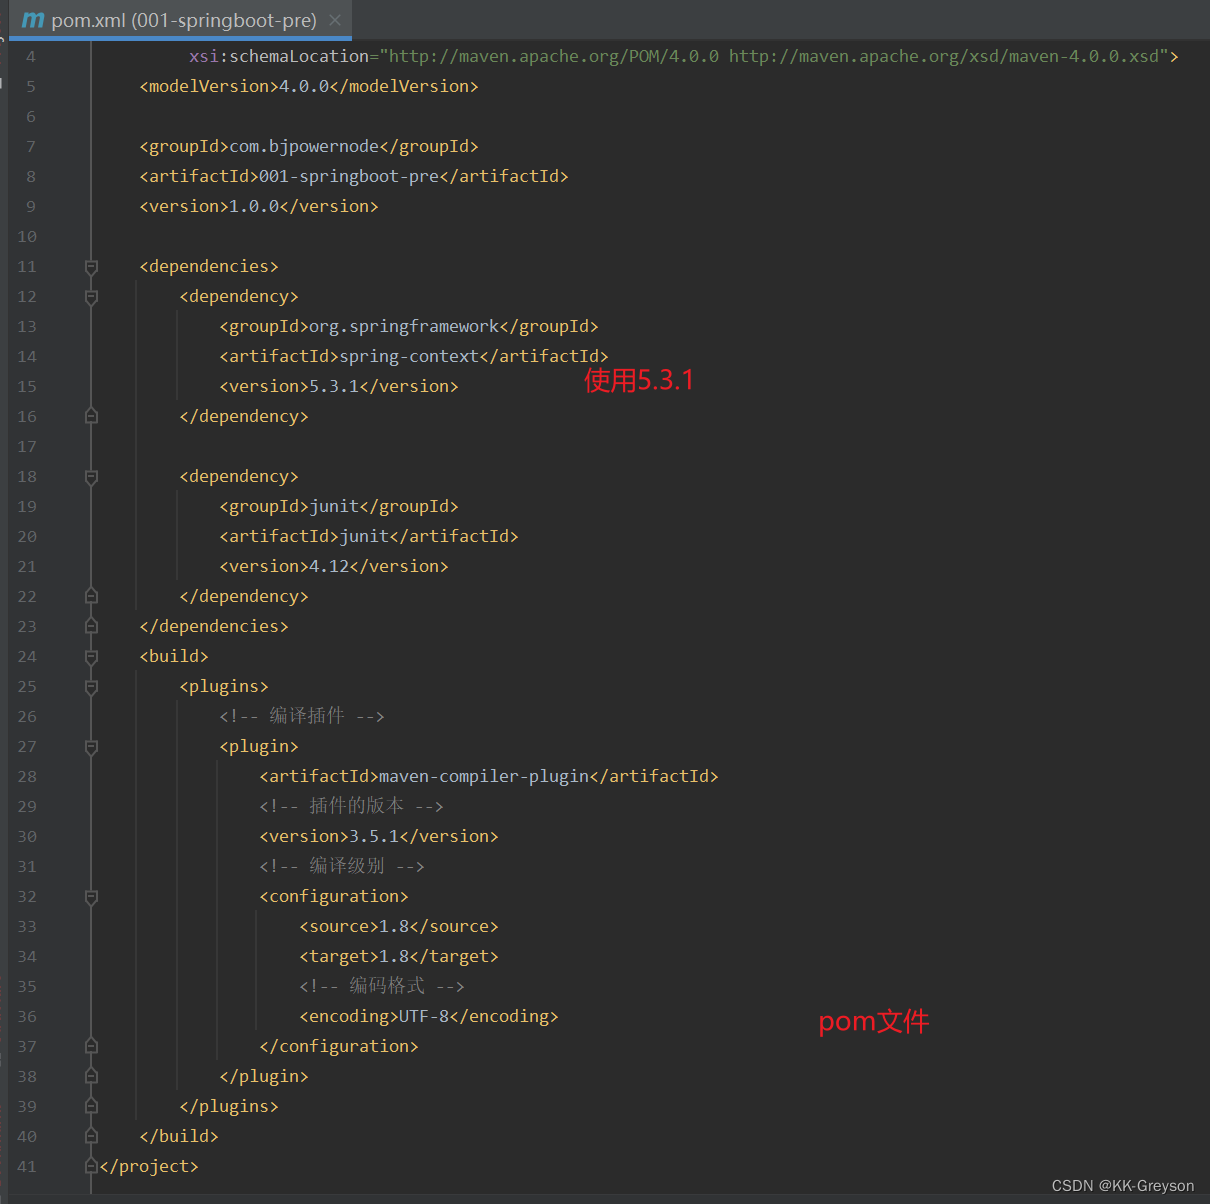
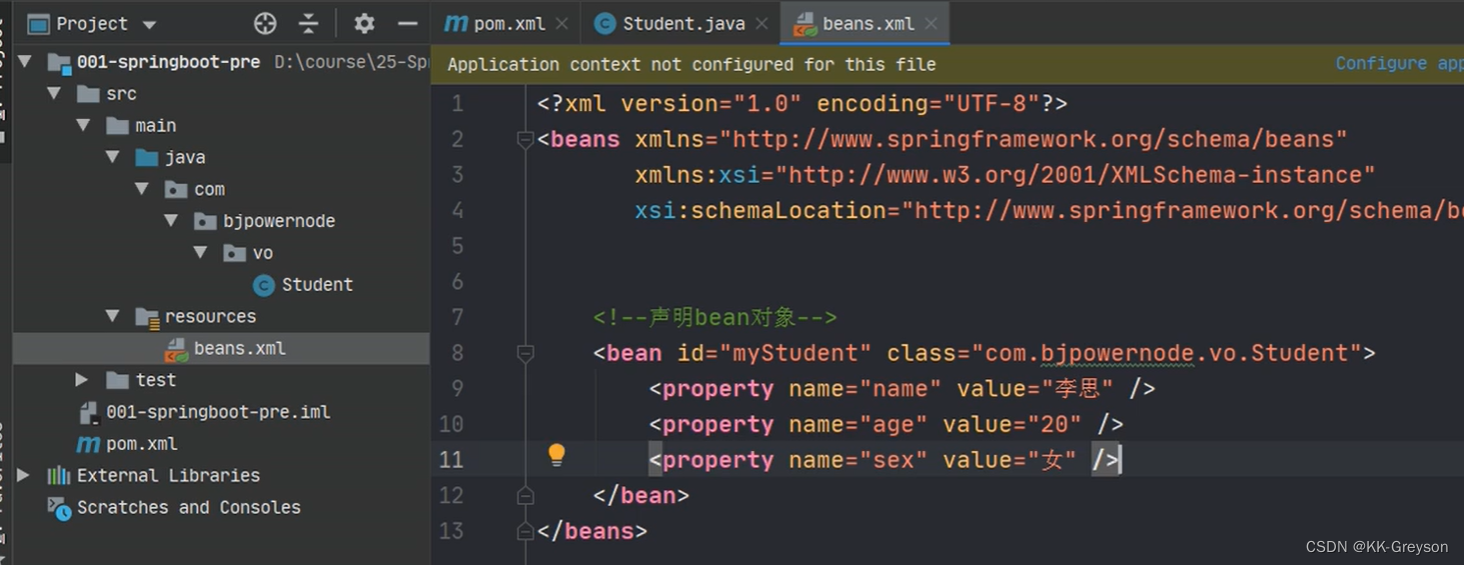
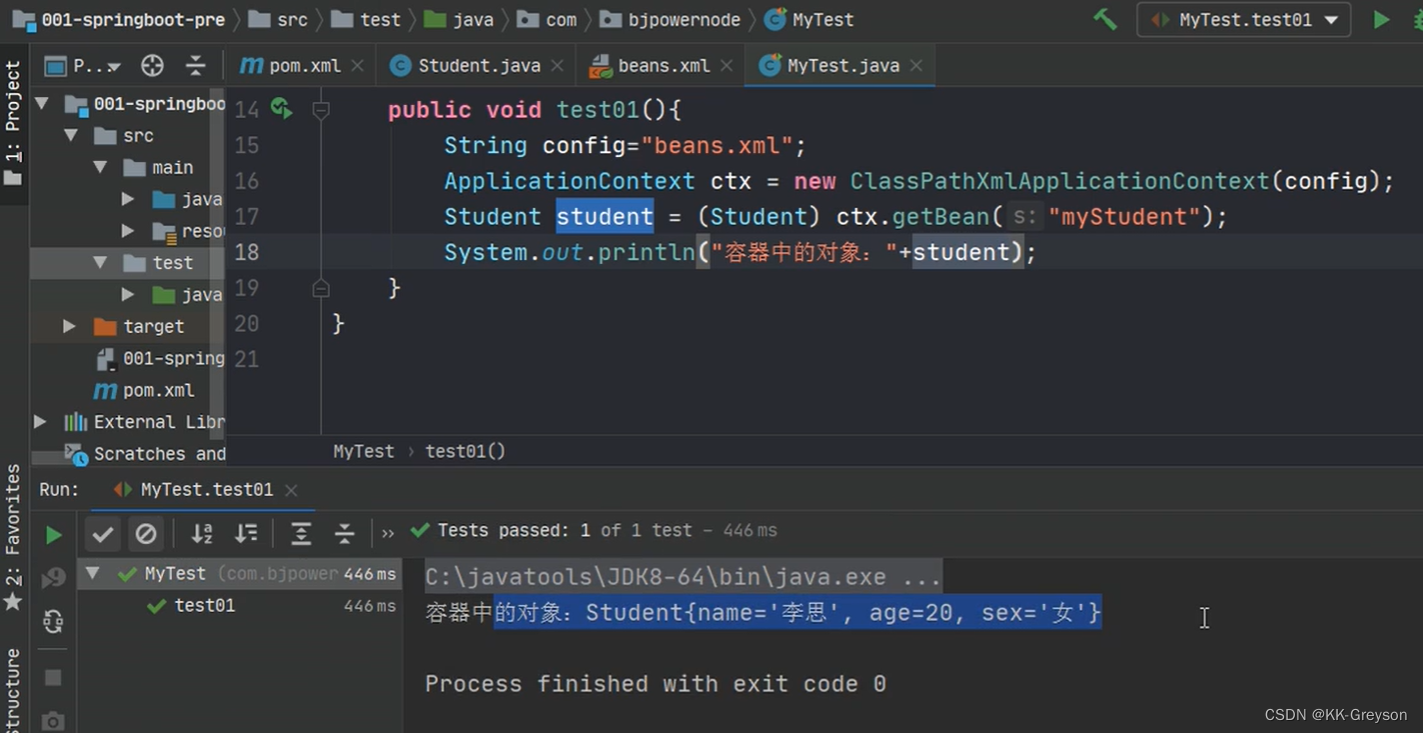
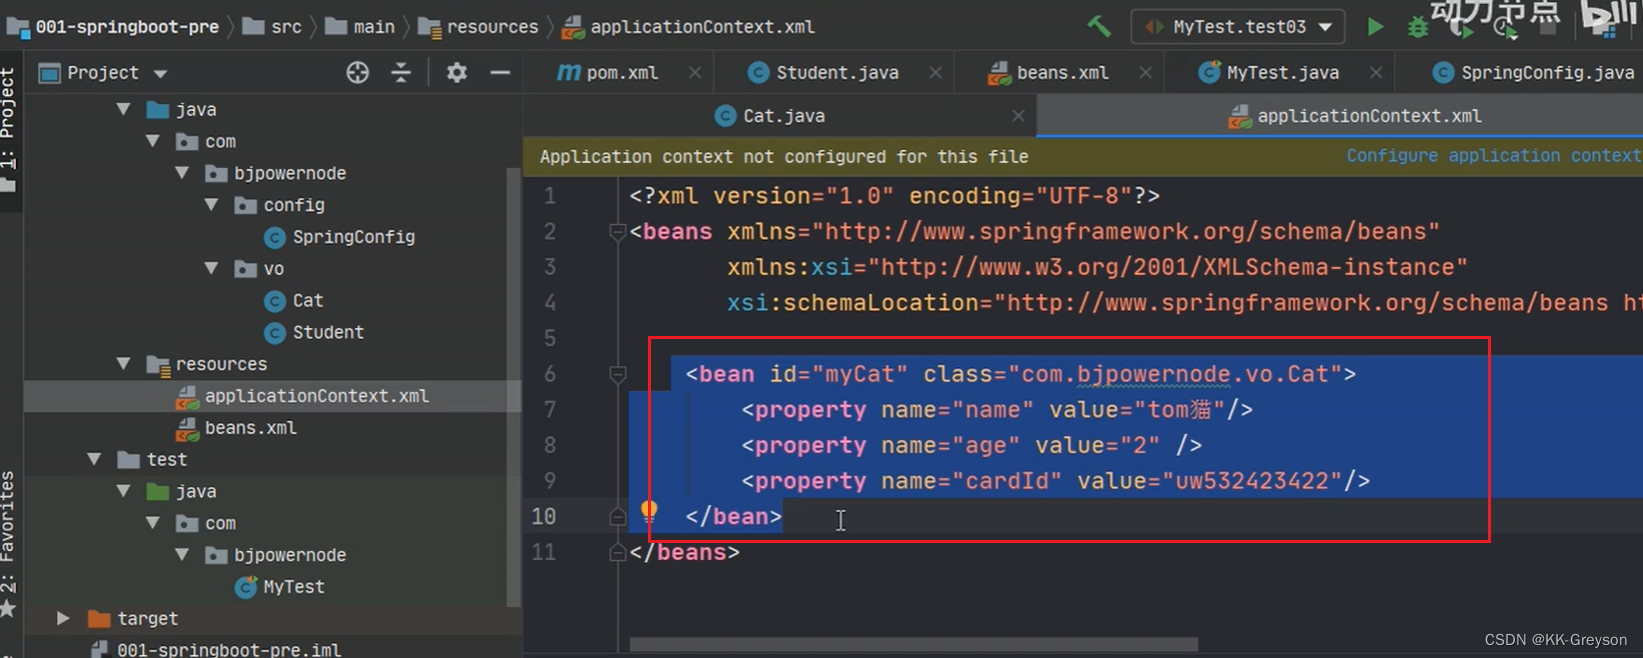
使用原本的方法 xml配置文件
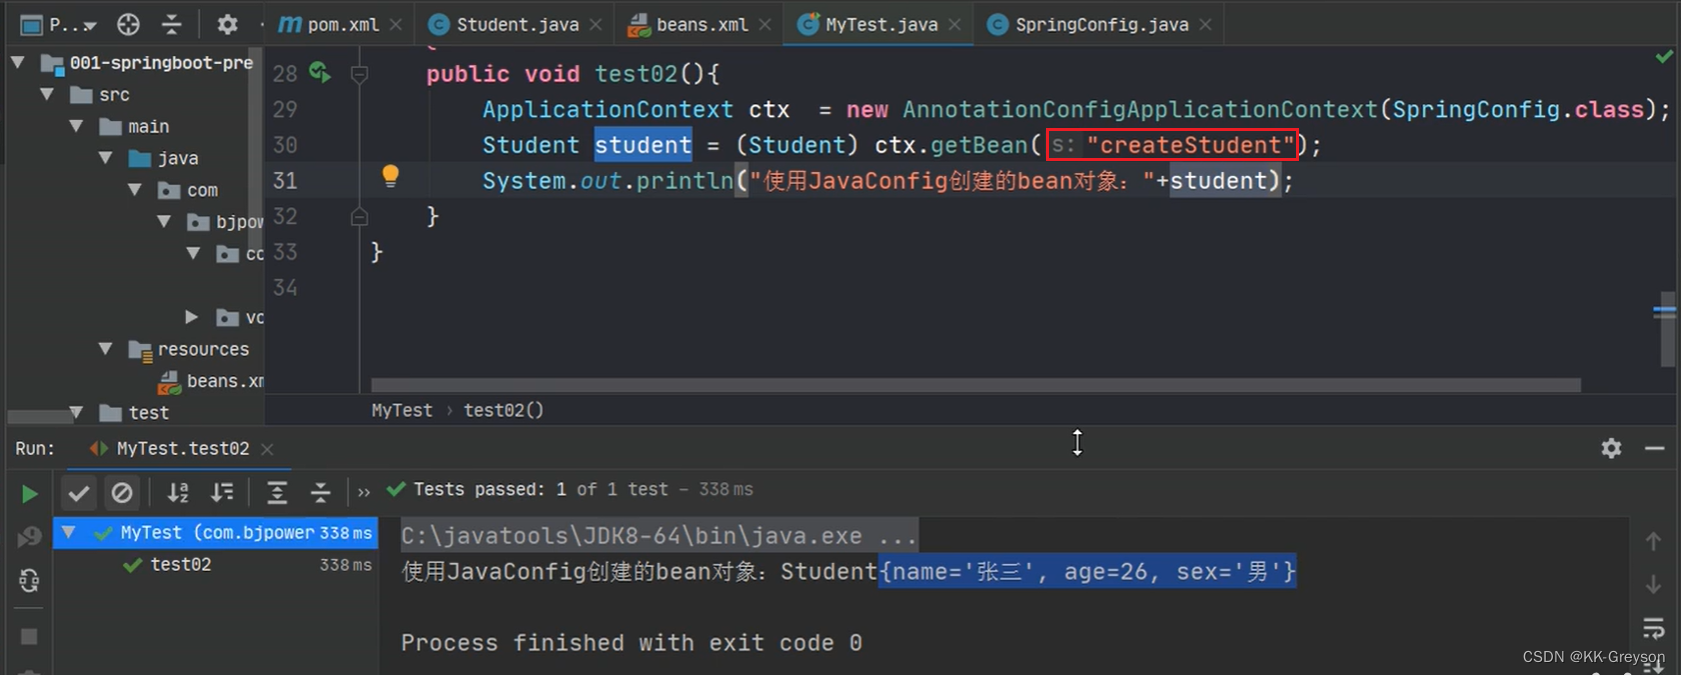
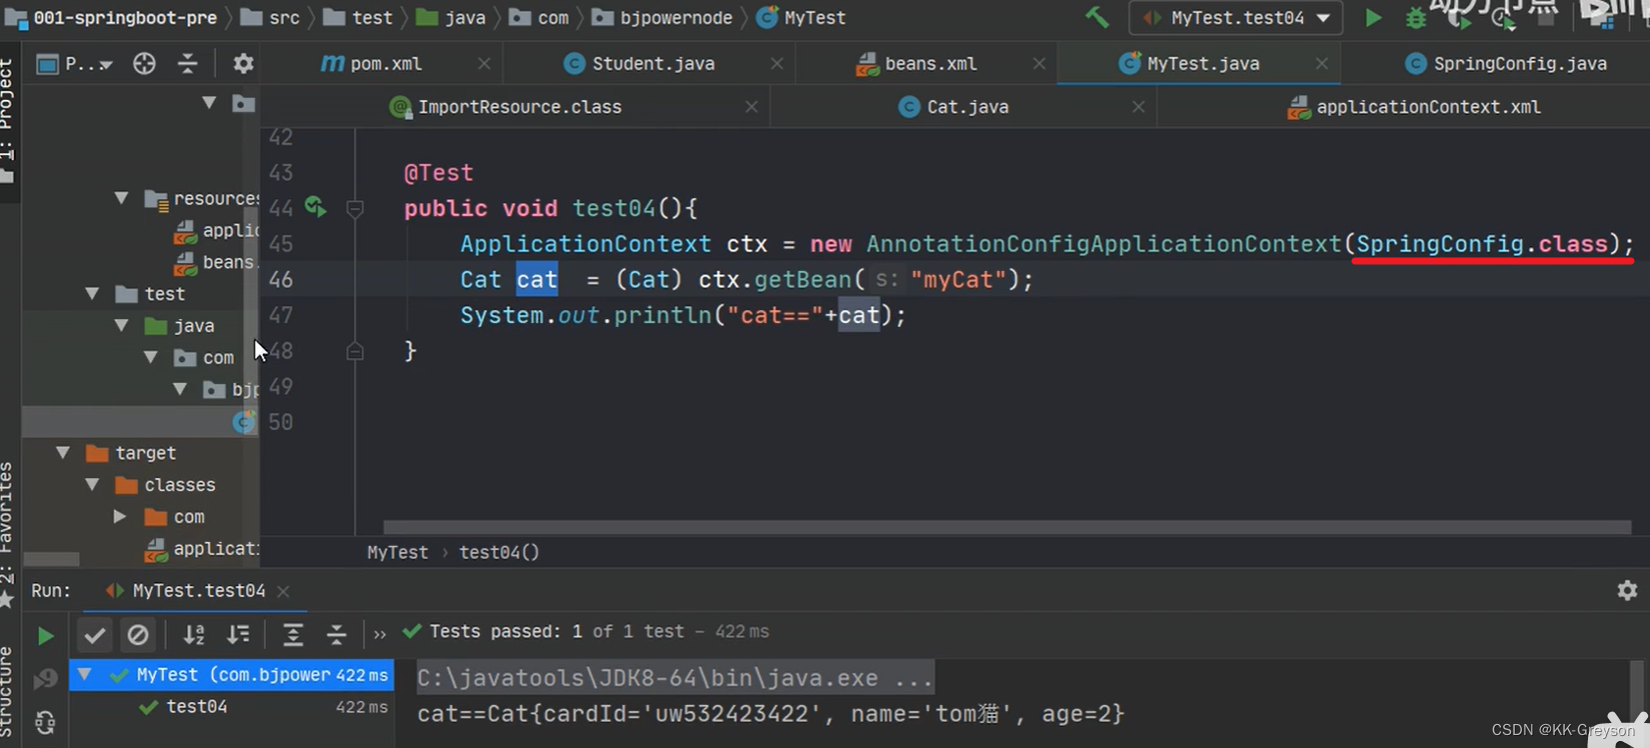
使用javaconfig
1.3 @ImporResource
作用:导入其他的xml配置文件,等于在xml中的
<import resources="其他配置文件"/>
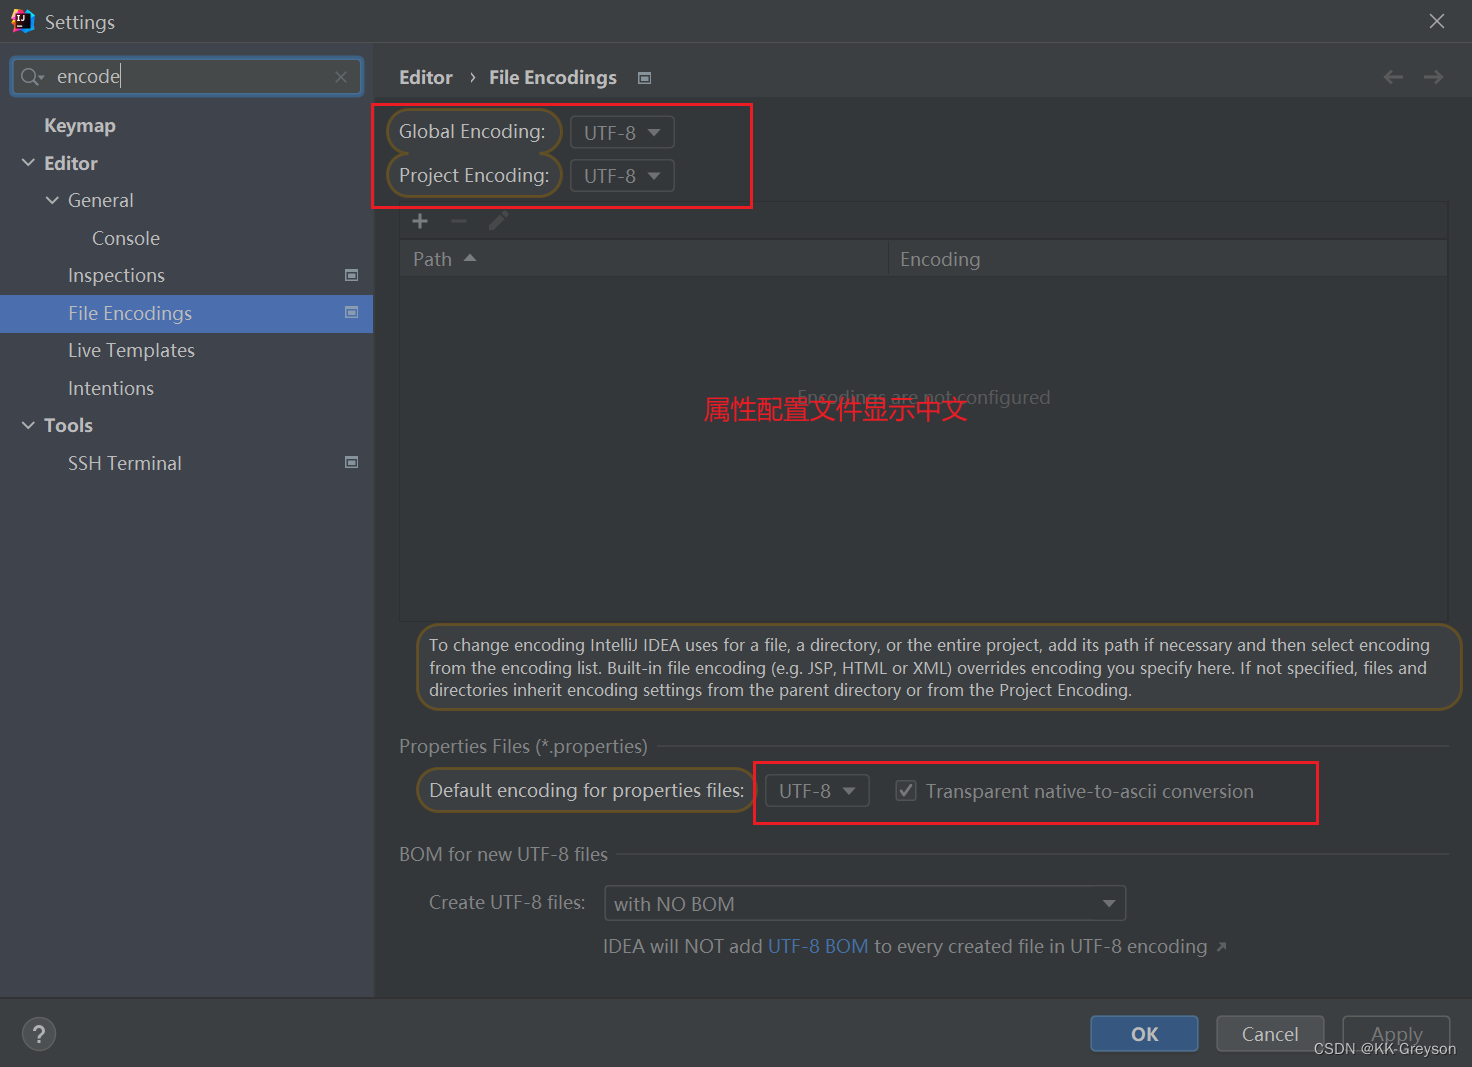
1.4 @PropertyResource
@PropertyResource:
读取properties属性配置文件。
使用属性配置文件可以实现外部化配置,在程序代码之外提供数据。
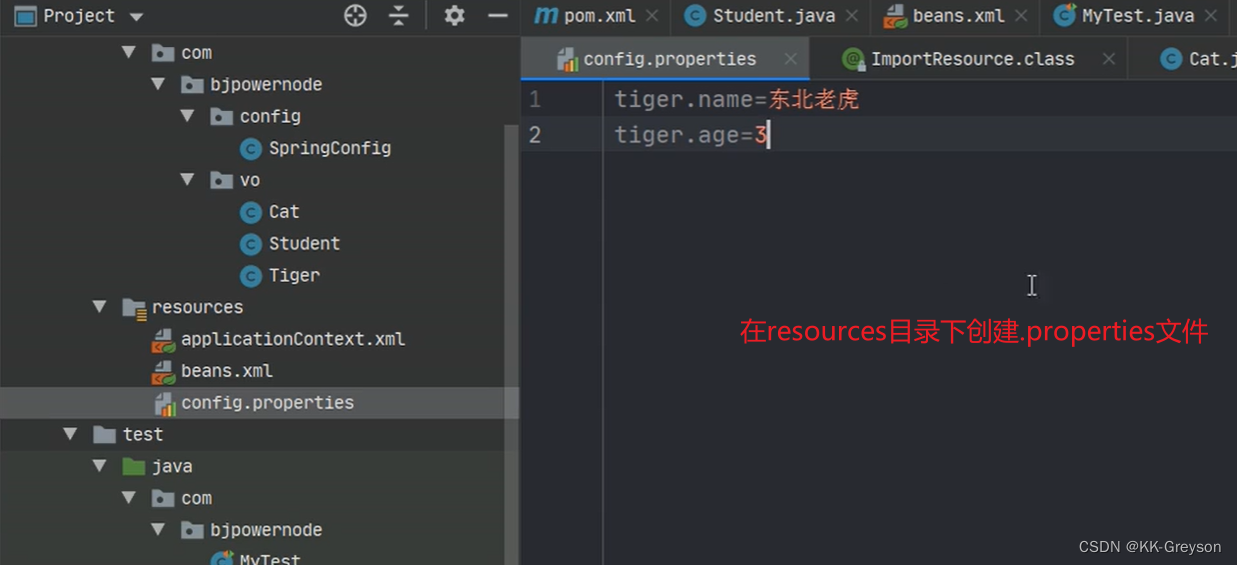
步骤:
在resources目录下,创建properties文件, 使用k=v的格式提供数据
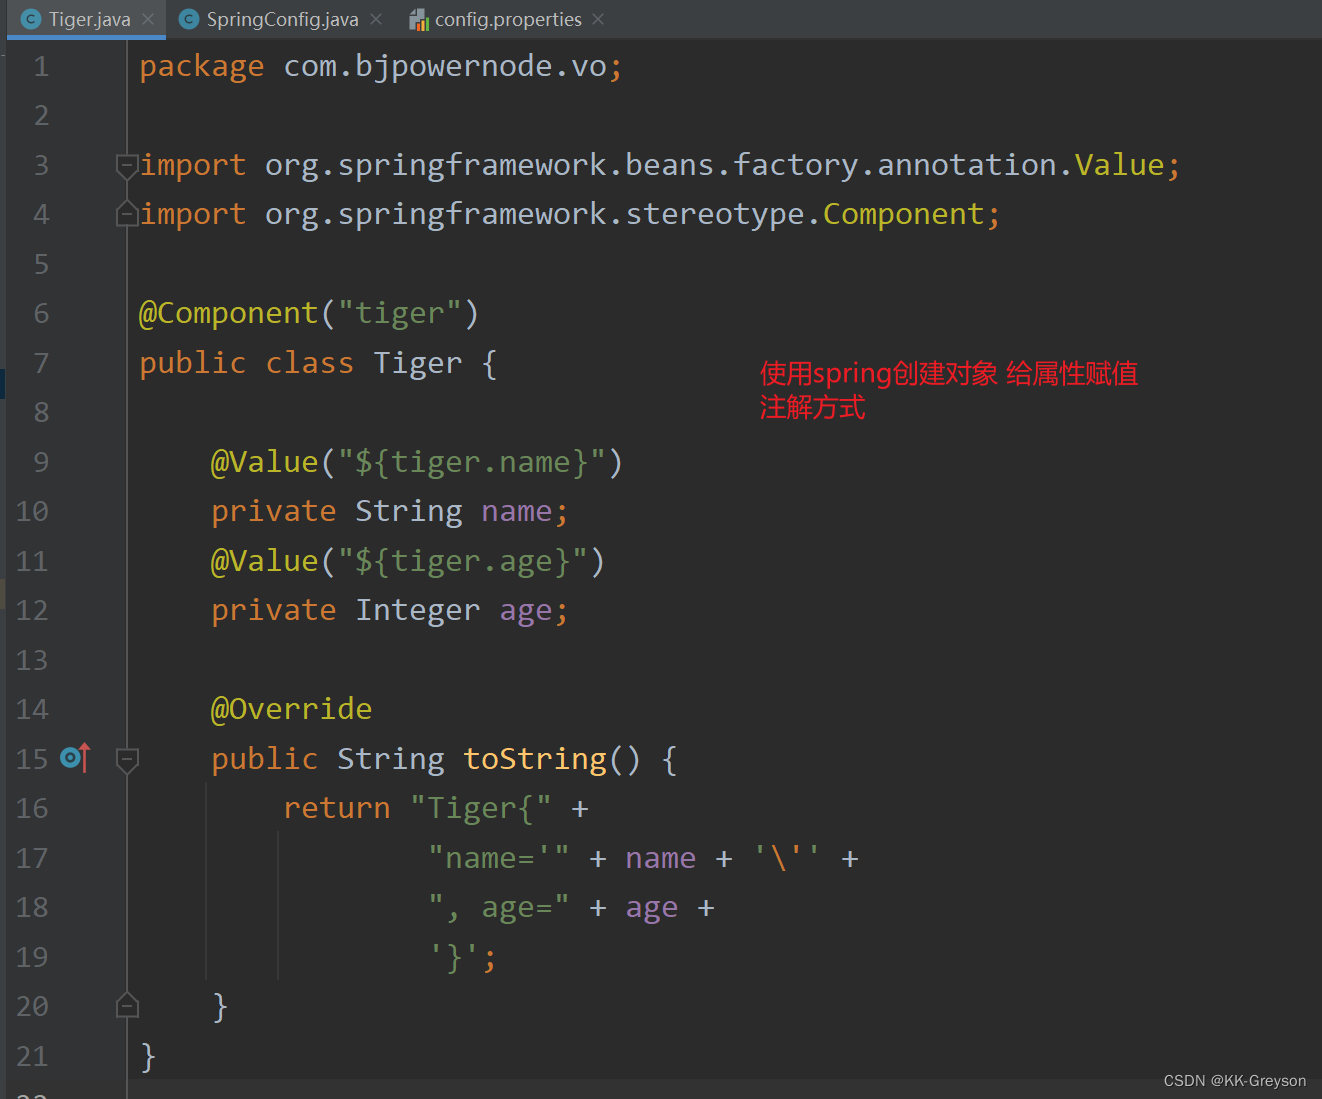
在@PropertyResource 指定properties文件的位置
使用@Value(value=“${key}”)
002- springboot 入门
2.1 介绍
SpringBoot是Spring中的一个成员,可以简化Spring,SpringMVC的使用。
他的核心还是IOC容器。
特点:
-
Create stand-alone Spring applications
创建spring应用
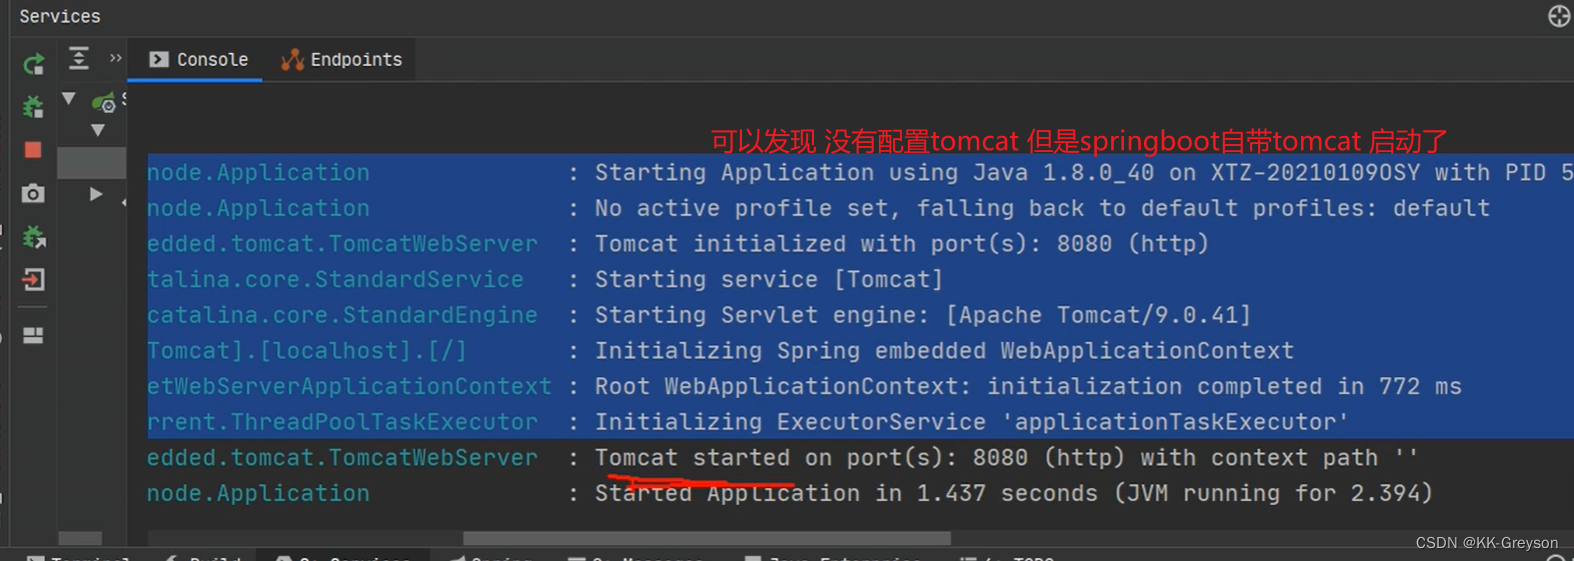
-
Embed Tomcat, Jetty or Undertow directly (no need to deploy WAR files)
内嵌的tomcat,jetty,Undertow
-
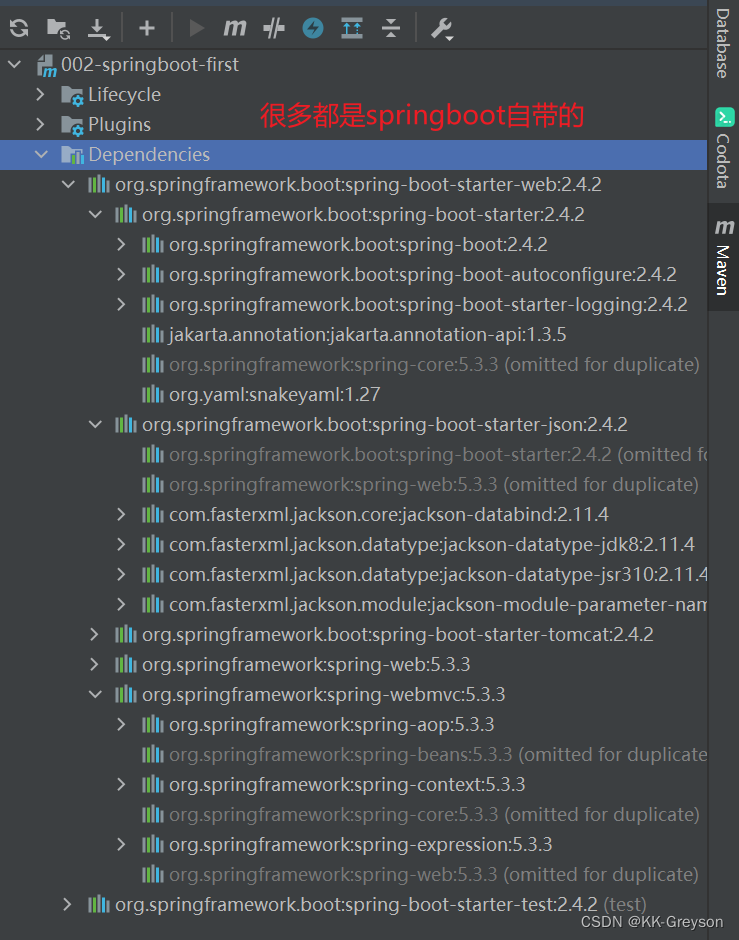
Provide opinionated ‘starter’ dependencies to simplify your build configuration
提供了starter起步依赖,简化应用的配置。
比如使用MyBatis框架,需要在Spring项目中配置MyBatis的对象 SqlSessionFactory,
Dao的代理对象。在SpringBoot项目中,在pom.xml里面,加入一个 mybatis-spring-boot-starter 依赖,
上述对象的配置就已经配好了,可以直接使用。 -
Automatically configure Spring and 3rd party libraries whenever possible
尽可能去配置spring和第三方库。
叫做自动配置(就是把spring中的,第三方库中的对象都创建好,放到容器中,开发人员可以直接使用) -
Provide production-ready features such as metrics, health checks, and externalized configuration
提供了健康检查, 统计,外部化配置
-
Absolutely no code generation and no requirement for XML configuration
不用生成代码, 不使用xml做配置。
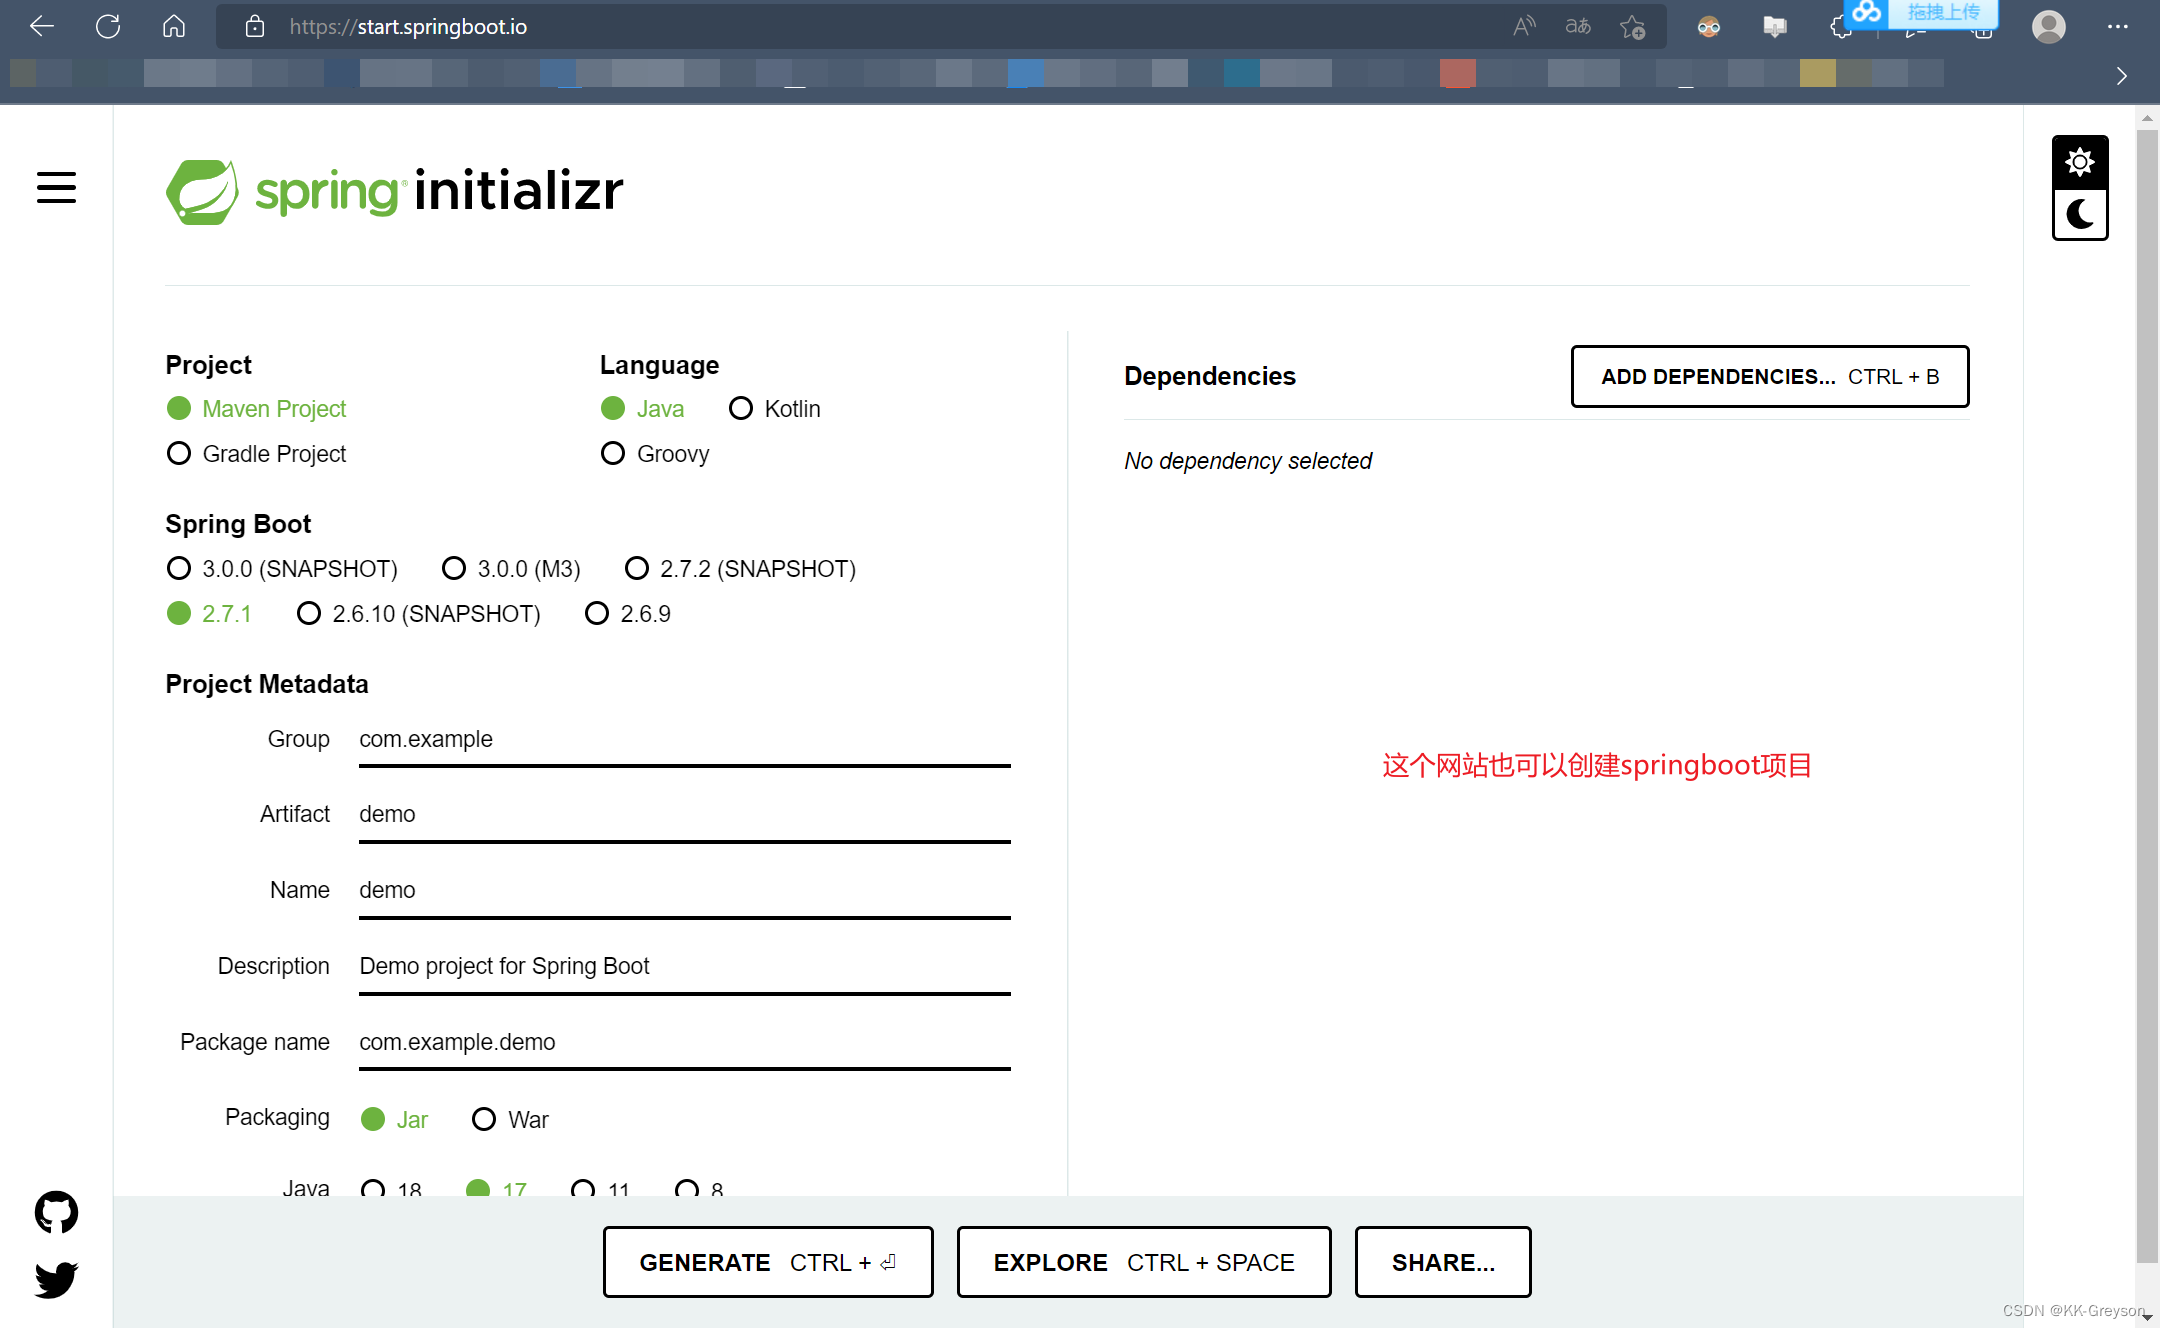
2.2 创建springboot项目
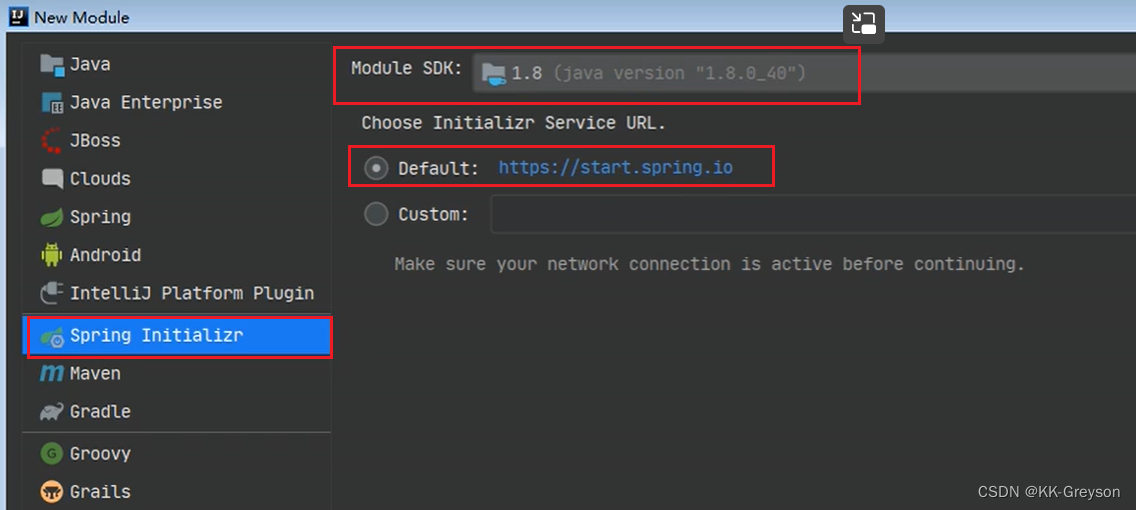
使用Spring提供的初始化器,就是向导,创建SpringBoot应用

默认使用的地址:Default:https://start.spring.io
国内地址:Custom:https://start.springboot.io
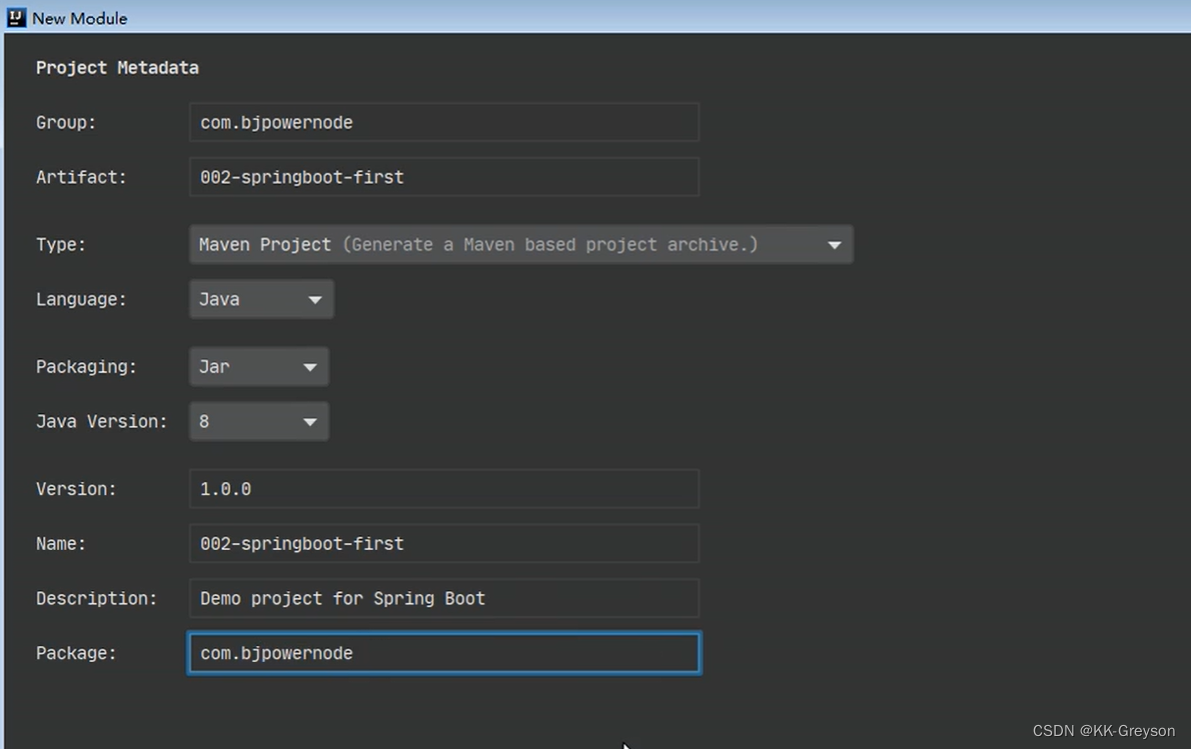
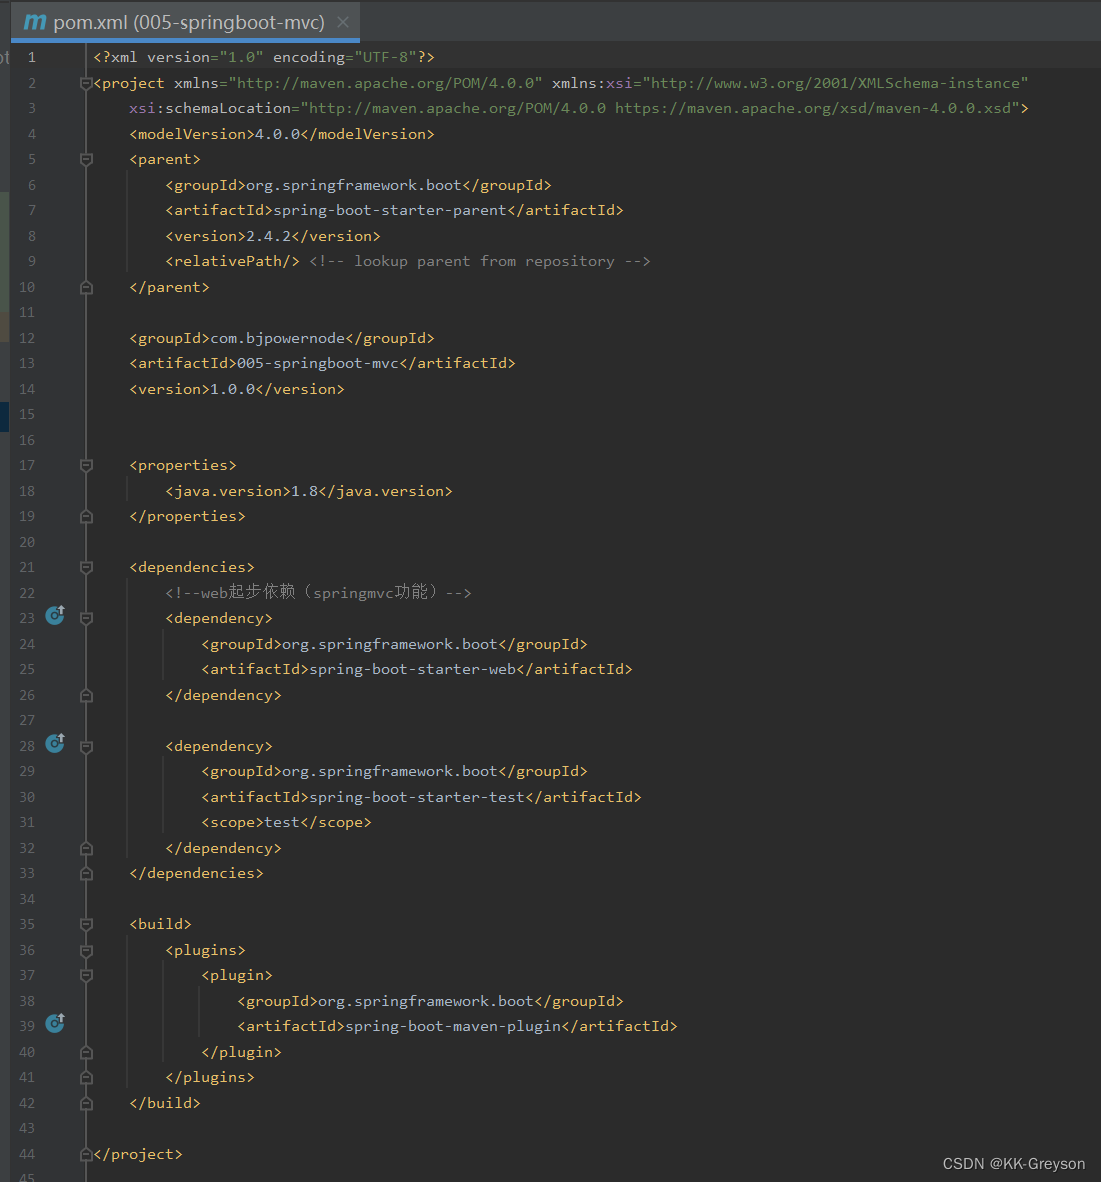
pom.xml文件:
<?xml version="1.0" encoding="UTF-8"?>
<project xmlns="http://maven.apache.org/POM/4.0.0" xmlns:xsi="http://www.w3.org/2001/XMLSchema-instance"
	xsi:schemaLocation="http://maven.apache.org/POM/4.0.0 https://maven.apache.org/xsd/maven-4.0.0.xsd">
	<modelVersion>4.0.0</modelVersion>

	<!--SpringBoot的父项目-->
	<parent>
		<groupId>org.springframework.boot</groupId>
		<artifactId>spring-boot-starter-parent</artifactId>
		<version>2.4.2</version>
		<relativePath/>
	</parent>

	<!--当前项目的gav-->
	<groupId>com.bjpowernode</groupId>
	<artifactId>002-springboot-first</artifactId>
	<version>1.0.0</version>


	<properties>
		<java.version>1.8</java.version>
	</properties>

	<dependencies>
		<dependency>
			<groupId>org.springframework.boot</groupId>
			<artifactId>spring-boot-starter-web</artifactId>
		</dependency>

		<dependency>
			<groupId>org.springframework.boot</groupId>
			<artifactId>spring-boot-starter-test</artifactId>
			<scope>test</scope>
		</dependency>
	</dependencies>

	<build>
		<plugins>
			<plugin>
				<groupId>org.springframework.boot</groupId>
				<artifactId>spring-boot-maven-plugin</artifactId>
			</plugin>
		</plugins>
	</build>

</project>
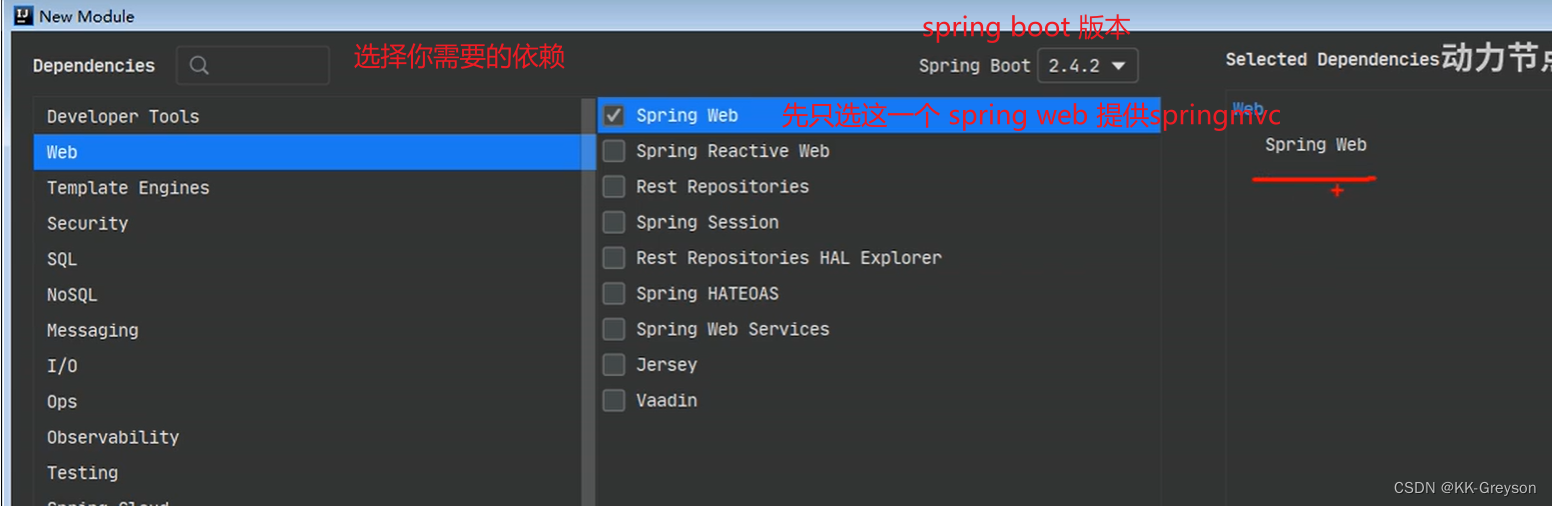
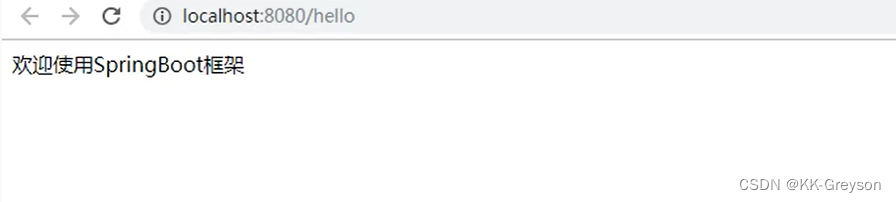
2.3 入门项目
使用springboot实现简单的控制层操作

和上面一样 使用maven创建一个模块 spring initializr
只选spring web 依赖

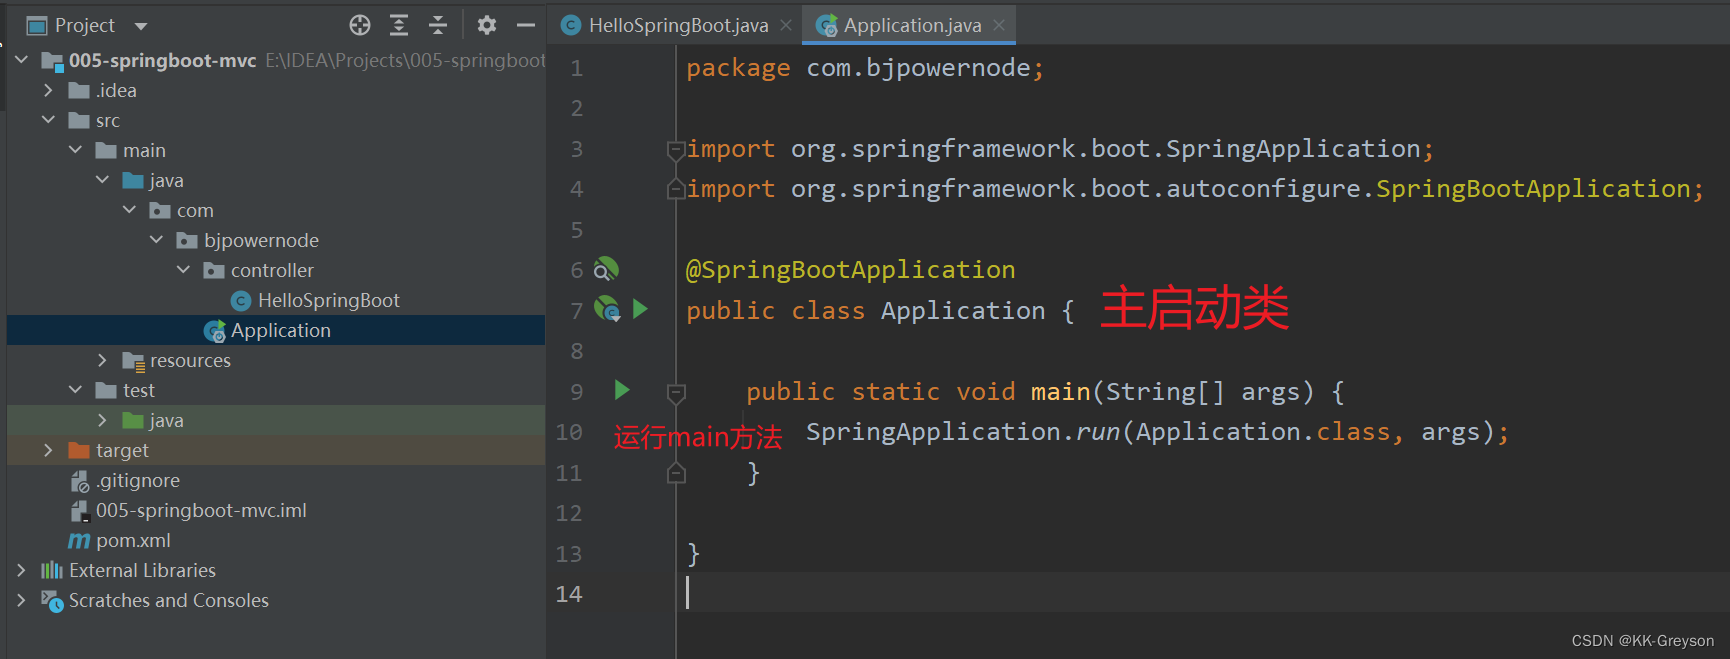
2.4 @SpringBootApplication
@SpringBootApplication:
是一个复合注解,主要由以下三个组成
@SpringBootConfiguration
@EnableAutoConfiguration
@ComponentScan
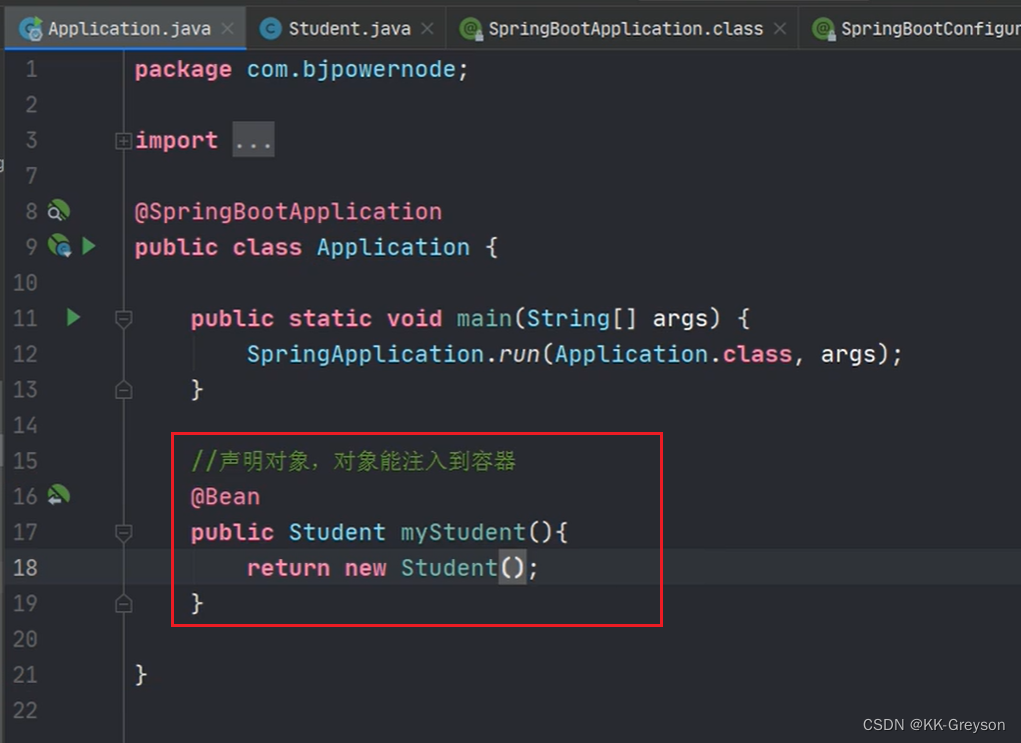
1.@SpringBootConfiguration
@Configuration
public @interface SpringBootConfiguration {
@AliasFor(
annotation = Configuration.class
)
boolean proxyBeanMethods() default true;
}
说明:使用了@SpringBootConfiguration注解标注的类,可以作为配置文件使用,
可以使用@Bean声明对象,注入到容器,如下:
2.@EnableAutoConfiguration

启用自动配置,把java对象配置好,注入到spring容器中。
例如可以把mybatis的对象创建好,放入到容器中

3.@ComponentScan

@ComponentScan 扫描器,找到注解,根据注解的功能创建对象,给属性赋值等等。
默认扫描的包:有@ComponentScan注解的类所在的包和子包。
所以其他代码一定得和Application文件平级或小于
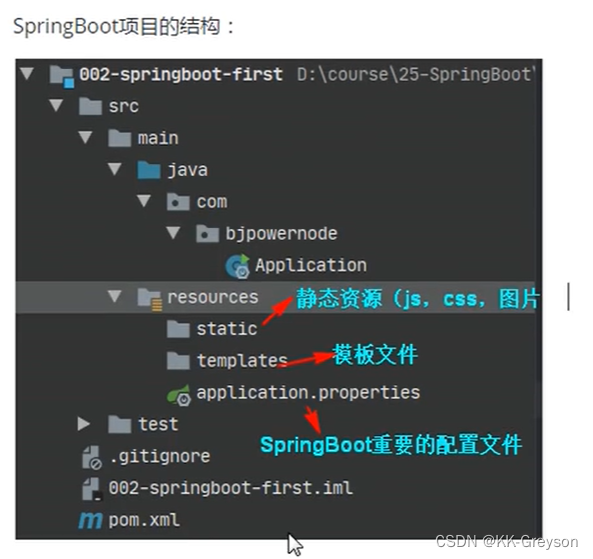
2.5 springboot重要配置文件
即application.properties
springboot的配置文件有两种格式 .properties 和.yml

配置文件名称:application

扩展名有:
	properties	(k=v)
	yml 		(k: v) (k:空格v)

使用application.properties,application.yml
.yml更轻量 主推这个
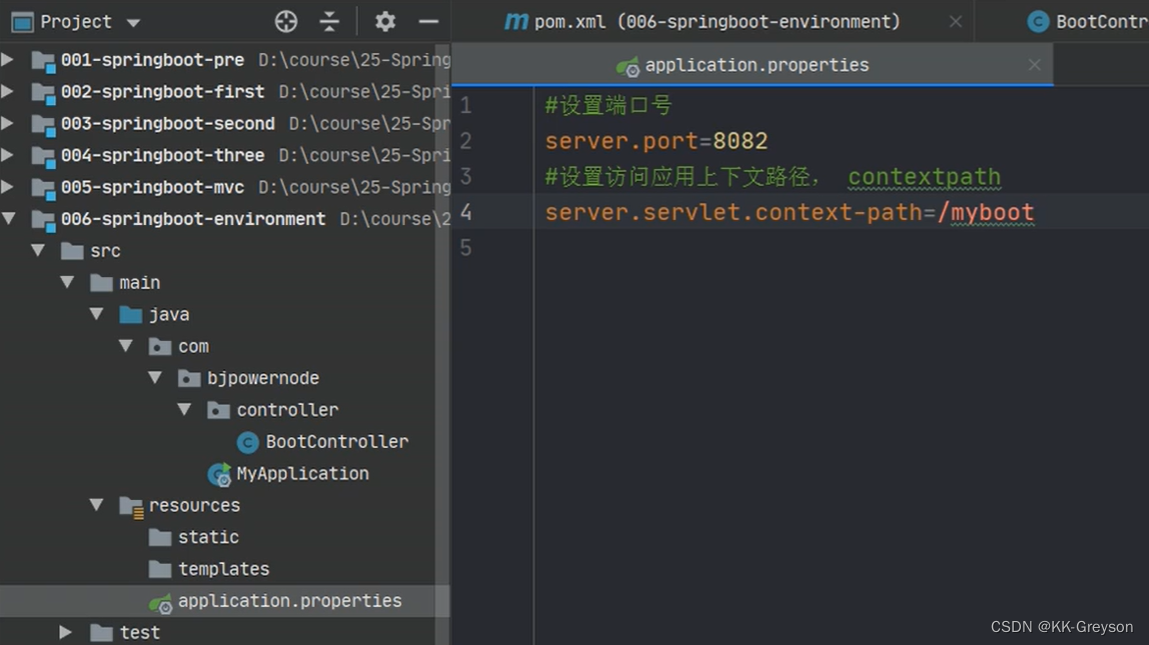
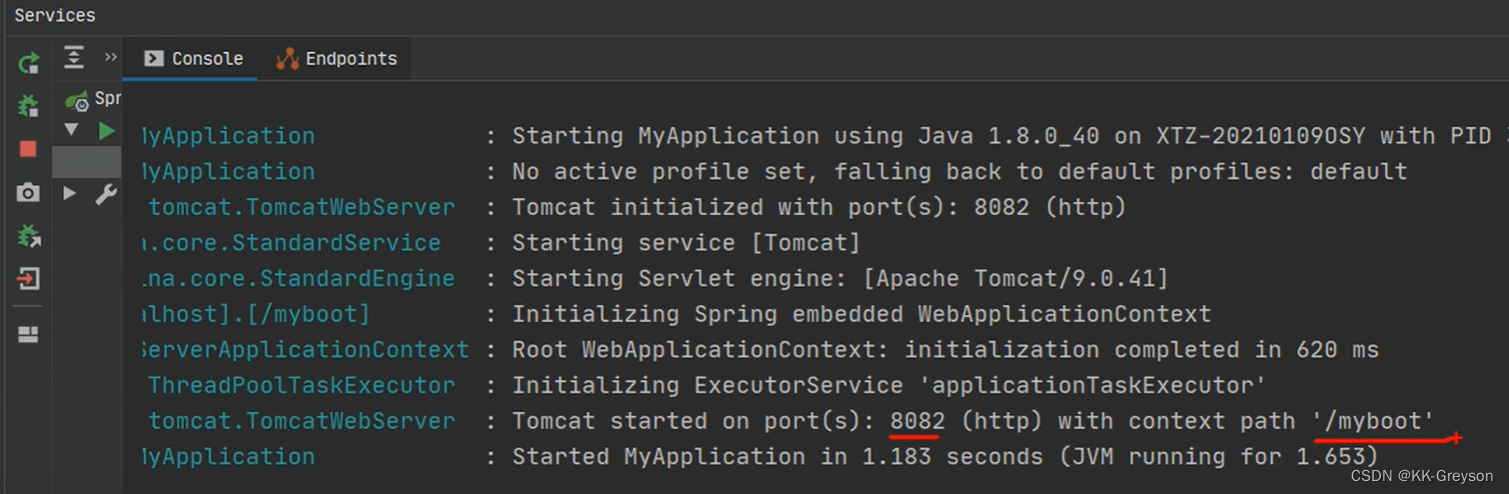
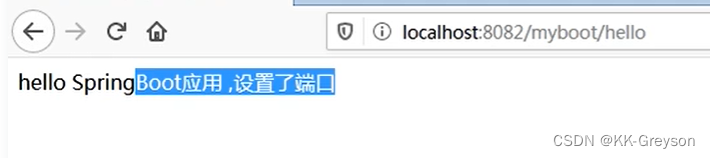
例1:application.properties设置 端口和上下文
#设置端口号
server.port=8082

#设置访问应用上下文路径,contextpath
server.servlet.context-path=/myboot
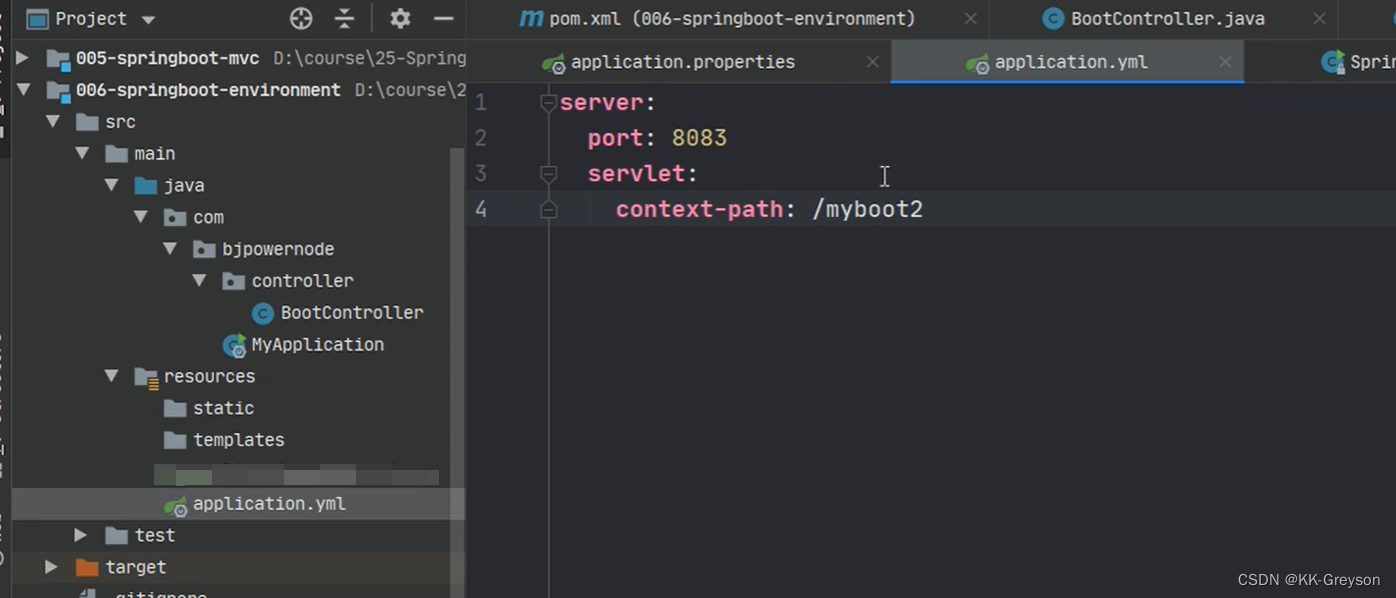
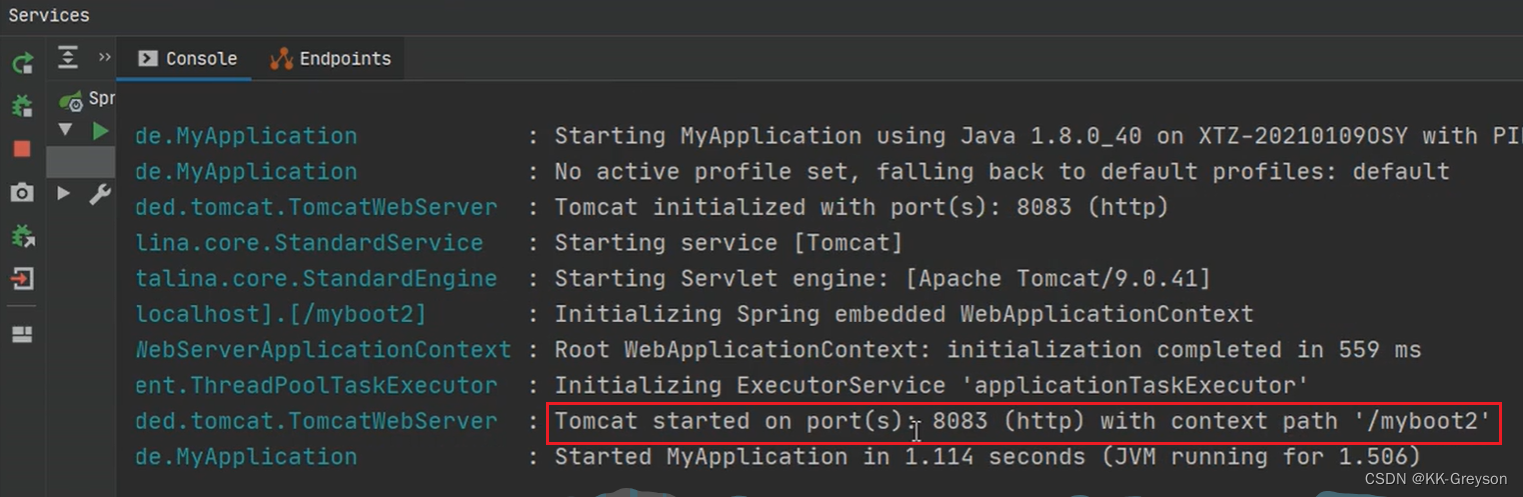
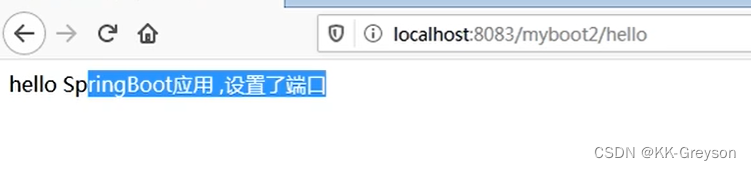
例2: application.yml
server:
  port: 8083
  servlet:
    context-path: /myboot2
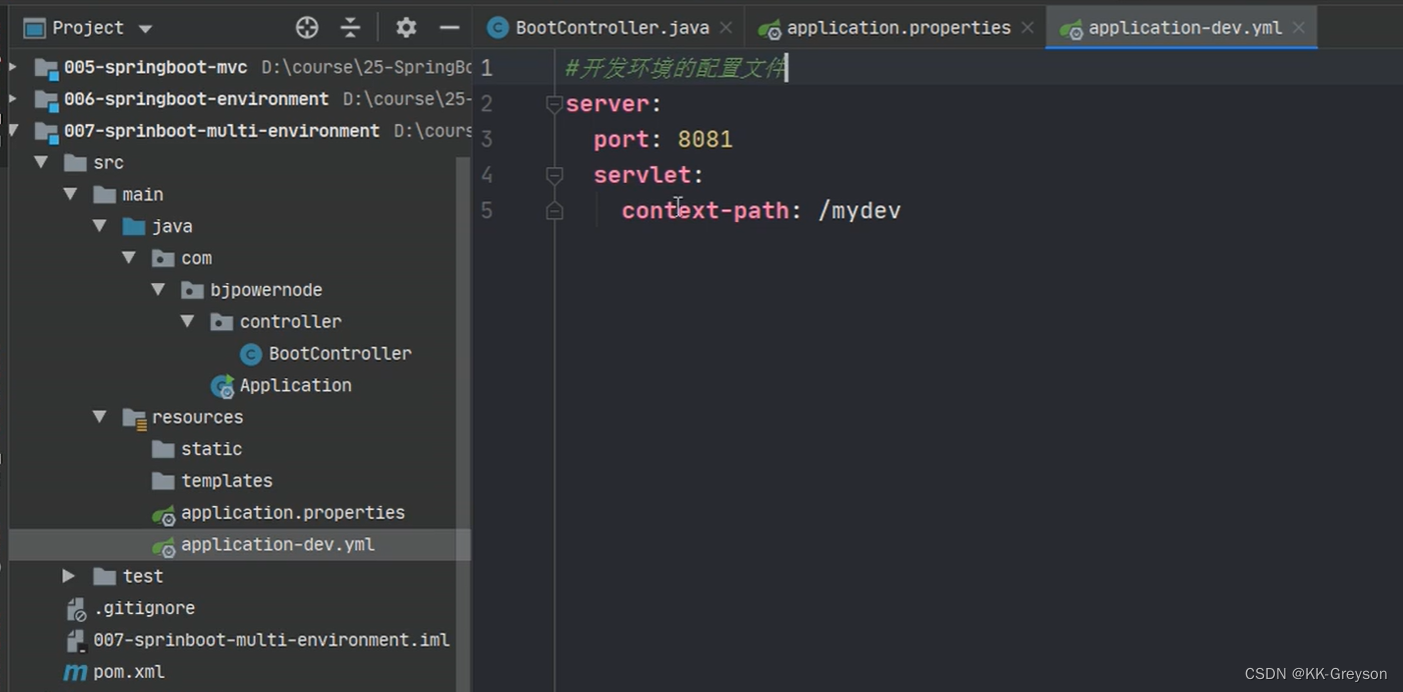
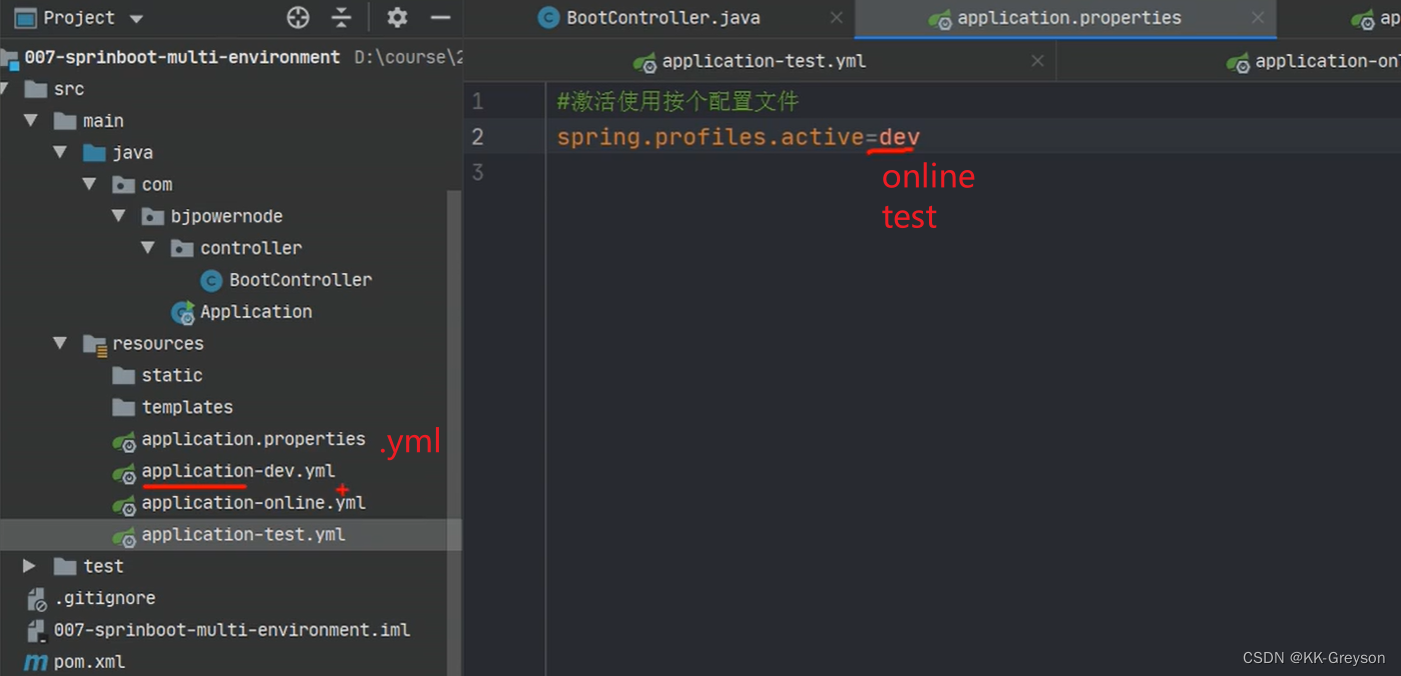
2.6 多环境配置
有开发环境, 测试环境, 上线的环境。
每个环境有不同的配置信息, 例如端口, 上下文件, 数据库url,用户名,密码等等
使用多环境配置文件,可以方便的切换不同的配置。
使用方式: 创建多个配置文件, 名称规则: application-环境名称.properties(yml)
创建开发环境的配置文件: application-dev.properties( application-dev.yml )
创建测试者使用的配置: application-test.properties


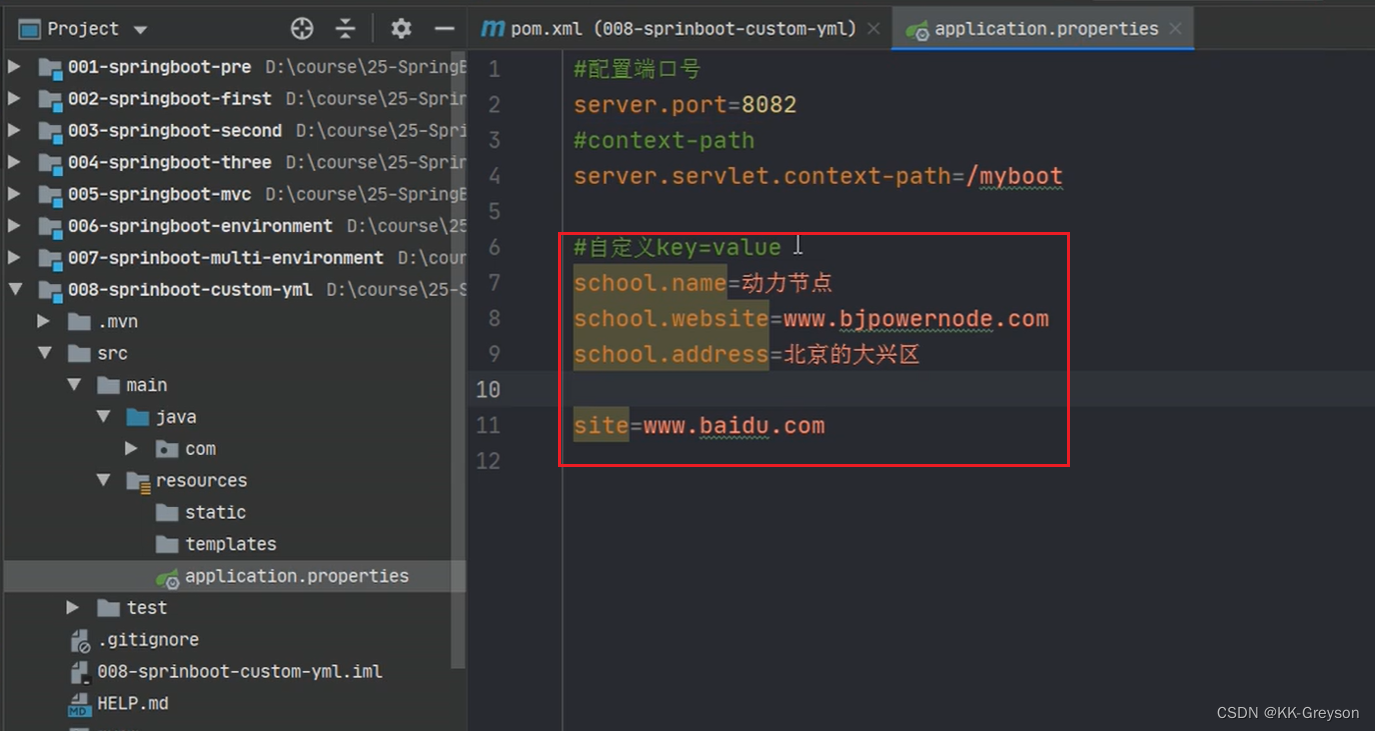
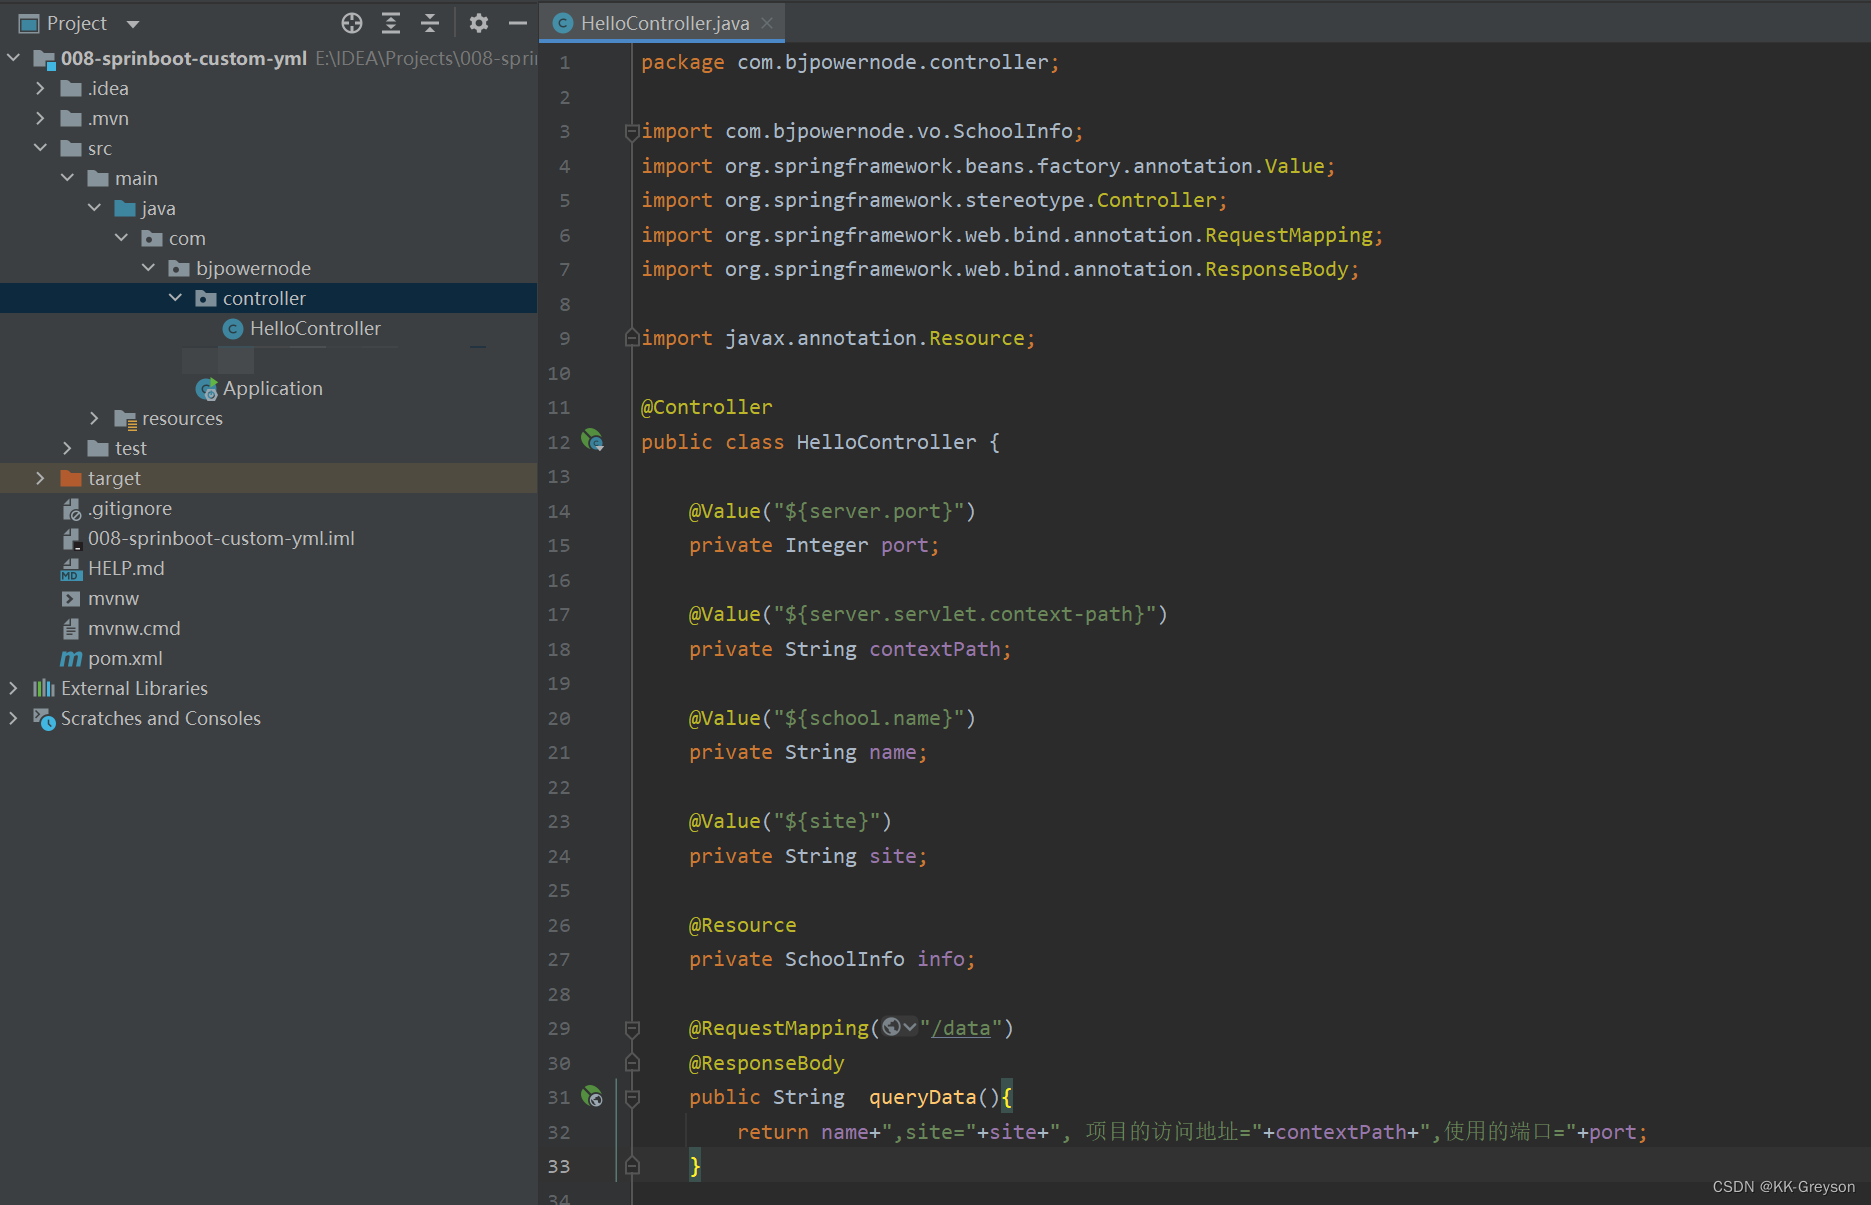
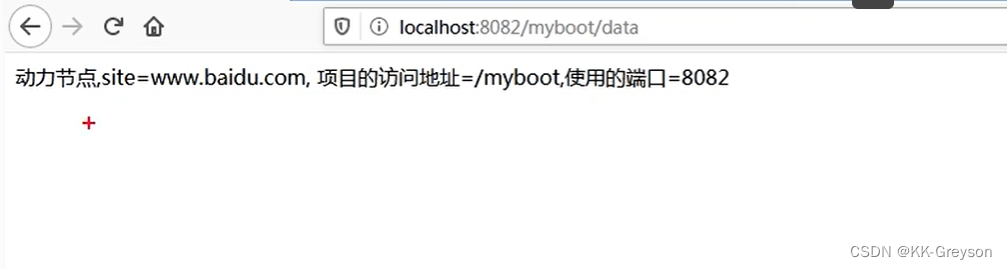
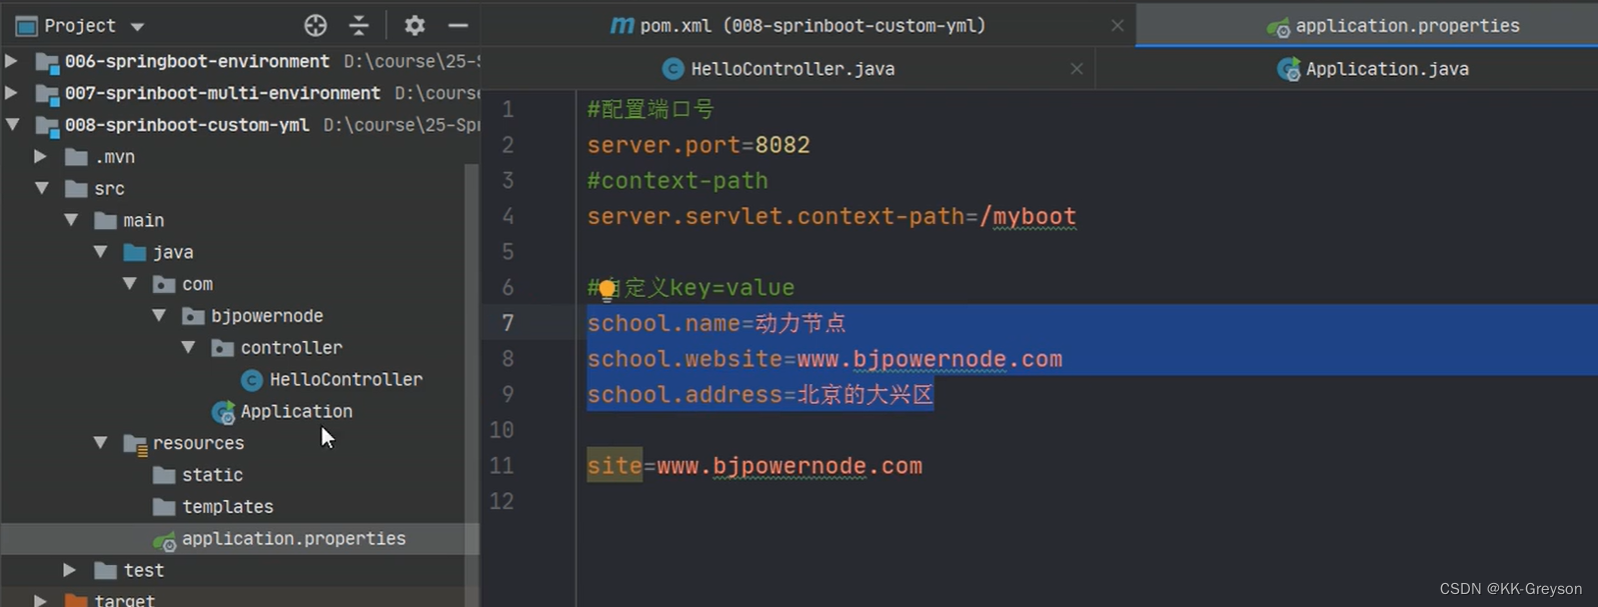
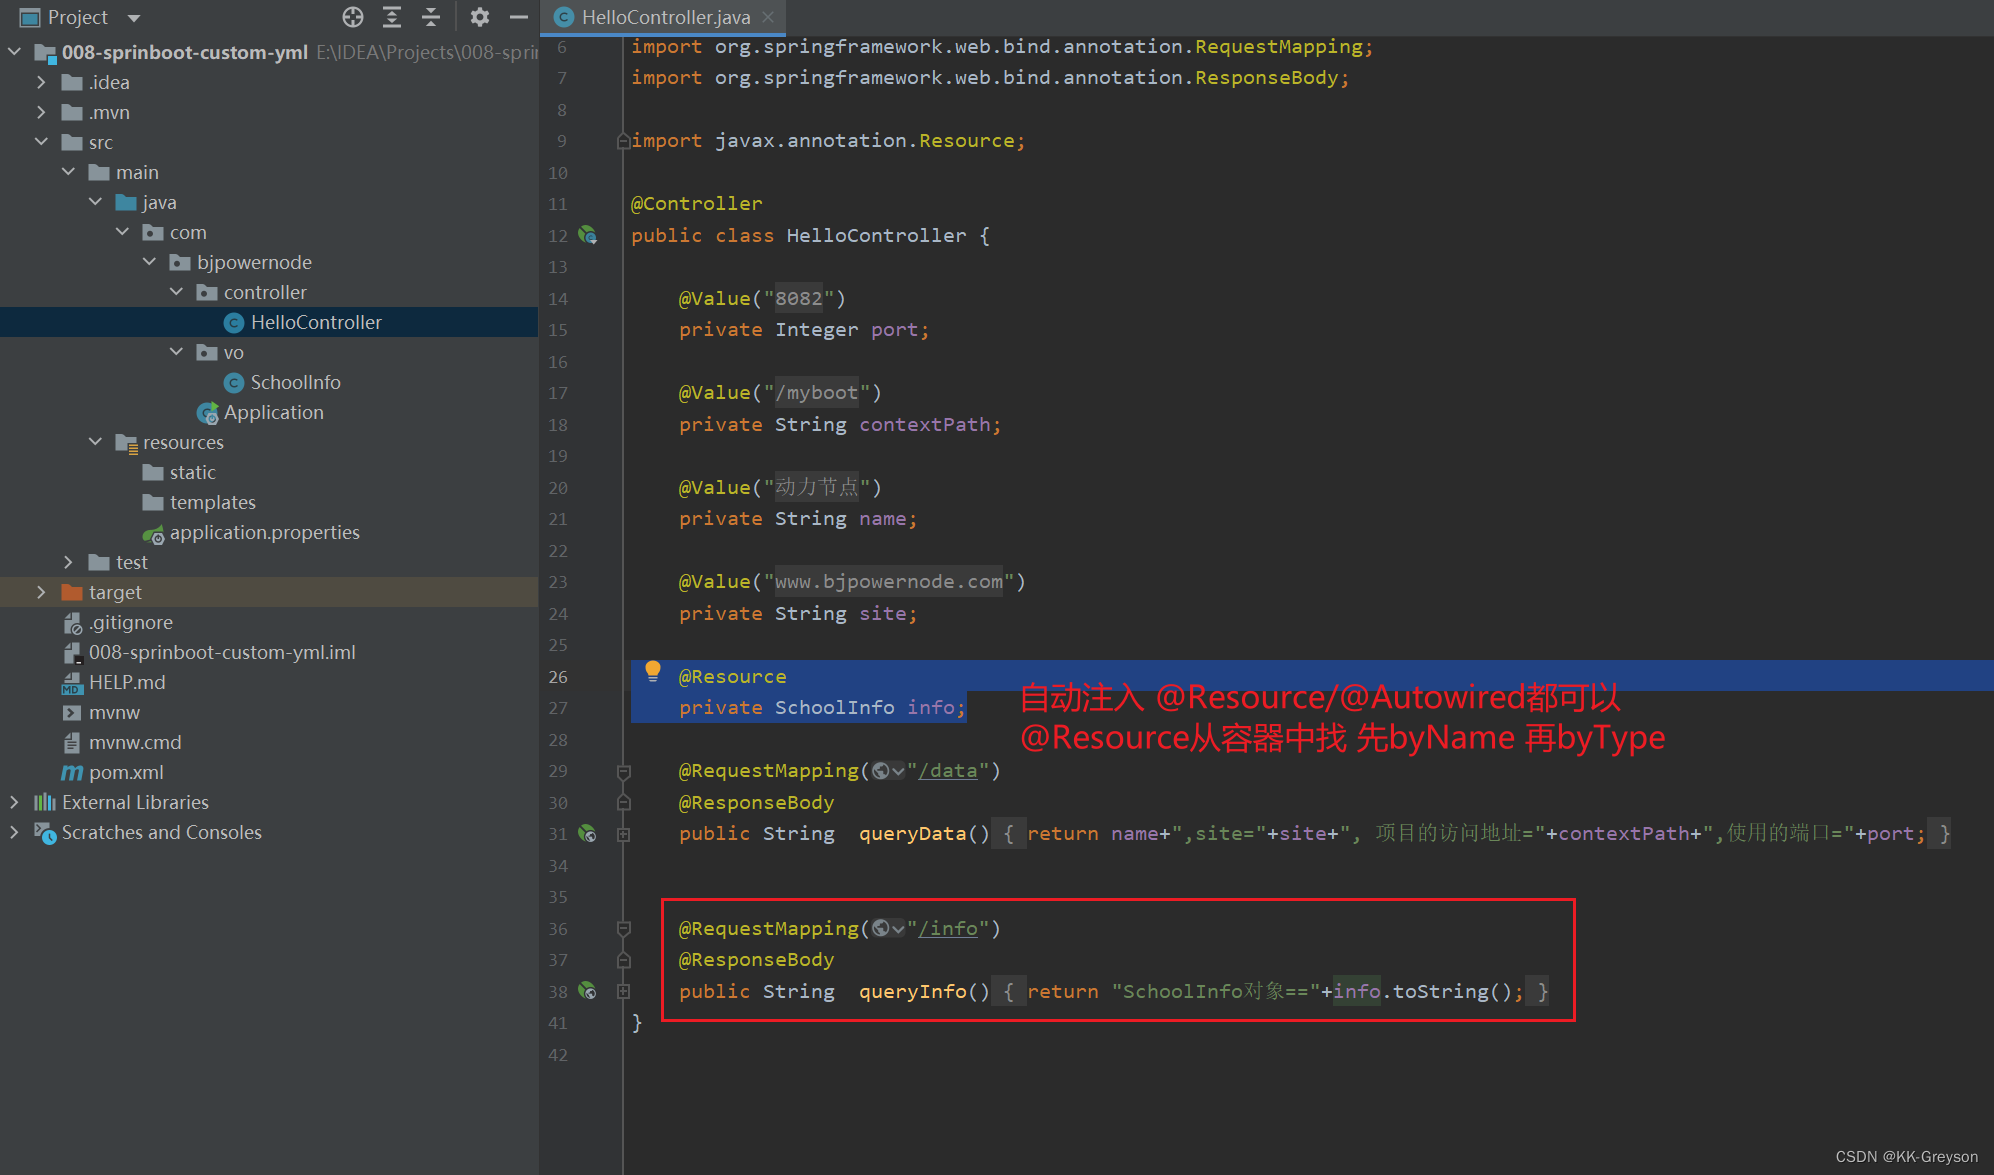
2.7 springboot自定义配置
(1)@Value
SpringBoot 的核心配置文件中,除了使用内置的配置项之外,我们还可以在自定义配置,
然后采用如下注解去读取配置的属性值
	@Value("${key}") , key 来自 application.properties(yml)
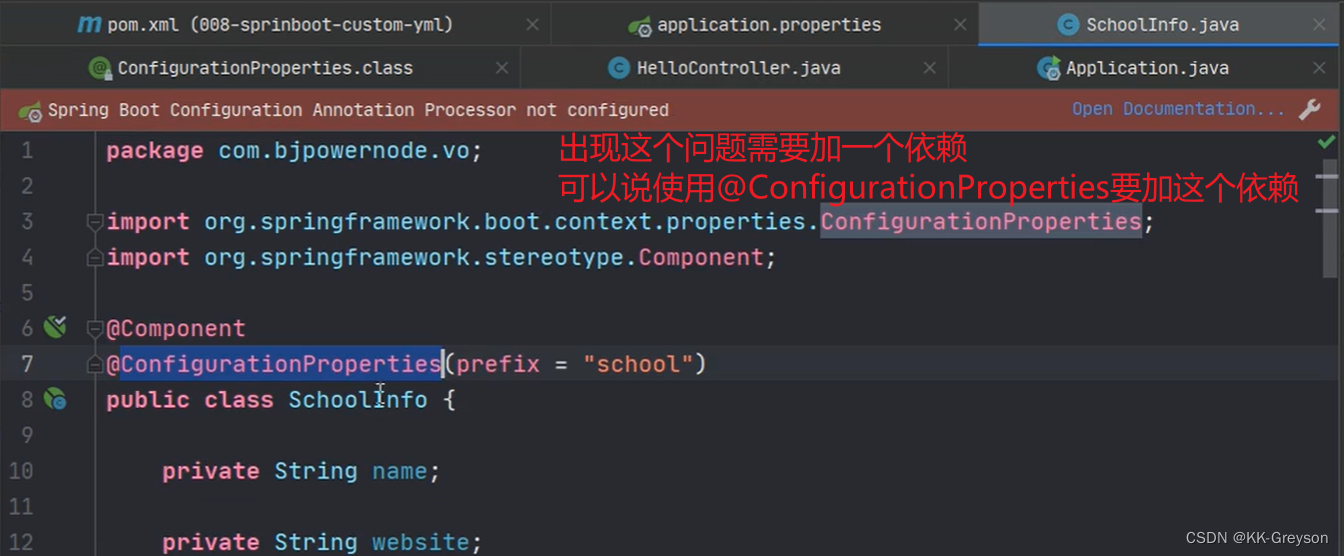
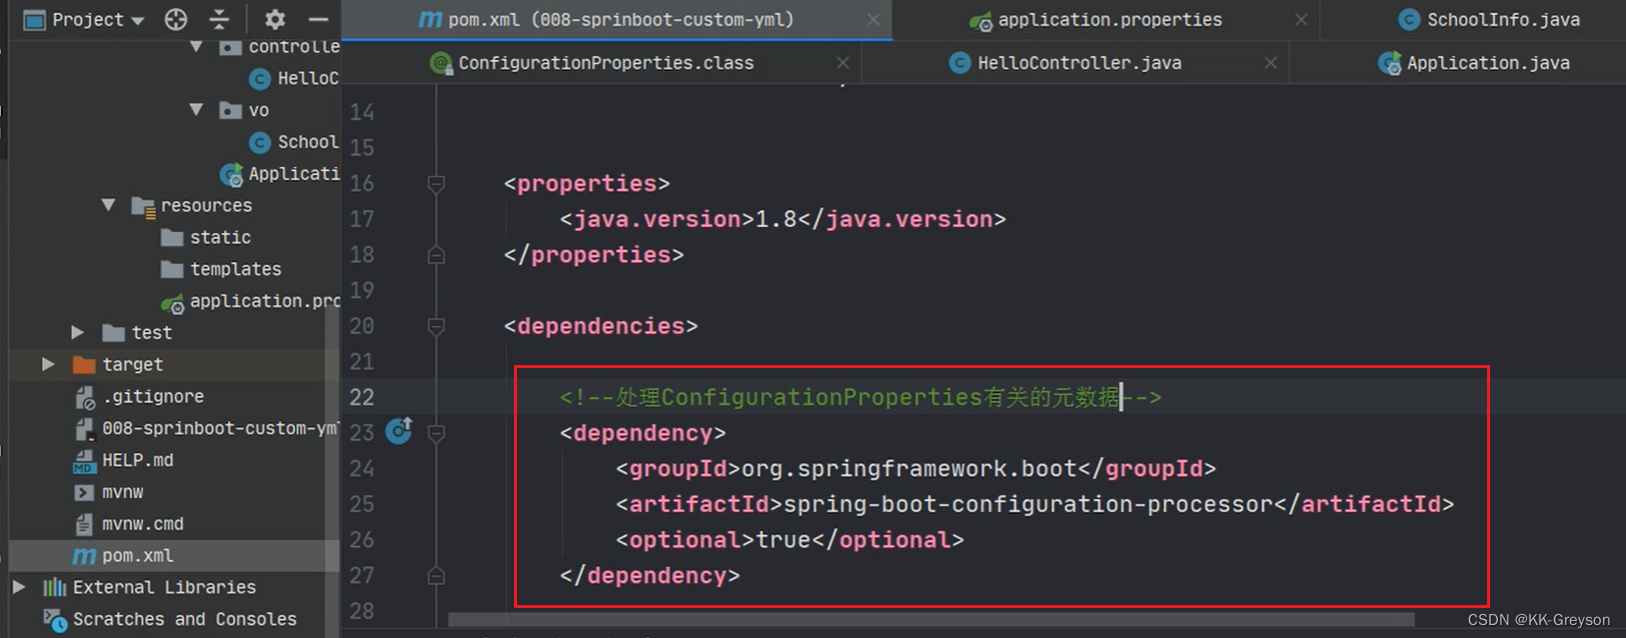
(2)@ConfigurationProperties
将整个文件映射成一个对象,用于自定义配置项比较多的情况

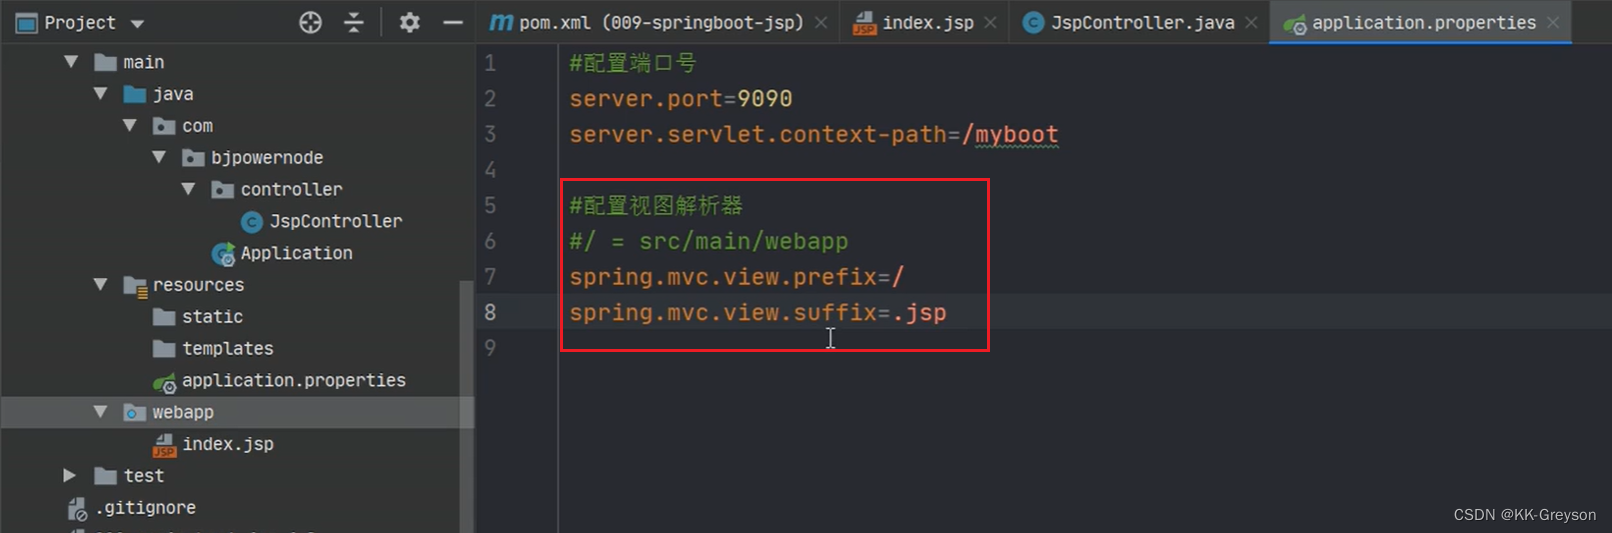
2.8 springboot使用 jsp
不推荐在spingboot使用jsp
springboot也不提供使用jsp 需要进行配置才能使用
在springboot中使用jsp逐渐会被淘汰

会使用模板来完成视图层的操作
使用jsp需要配置:
- 加入一个处理jsp的依赖。 负责编译jsp文件
<dependency>
    <groupId>org.apache.tomcat.embed</groupId>
    <artifactId>tomcat-embed-jasper</artifactId>
</dependency>
- 如果需要使用servlet, jsp,jstl的功能
<dependency>
	<groupId>javax.servlet</groupId>
	<artifactId>jstl</artifactId>
</dependency>

<dependency>
	<groupId>javax.servlet</groupId>
	<artifactId>javax.servlet-api</artifactId>
</dependency>

<dependency>
<groupId>javax.servlet.jsp</groupId>
	<artifactId>javax.servlet.jsp-api</artifactId>
	<version>2.3.1</version>
</dependency>
-
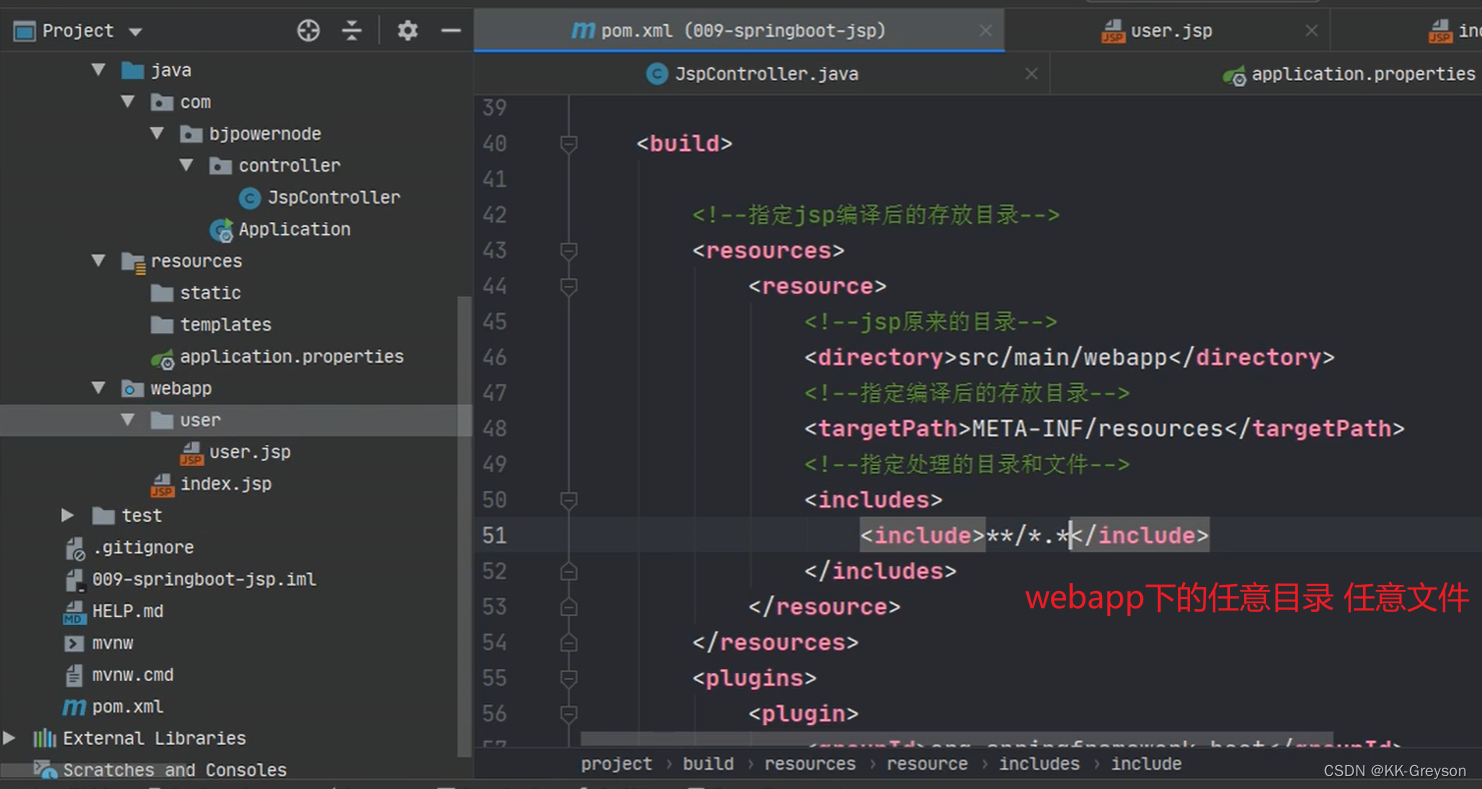
创建一个存放jsp的目录,一般叫做webapp
index.jsp
-
需要在pom.xml指定jsp文件编译后的存放目录。
META-INF/resources
-
创建Controller, 访问jsp
-
在application.propertis文件中配置视图解析器
具体操作见视频
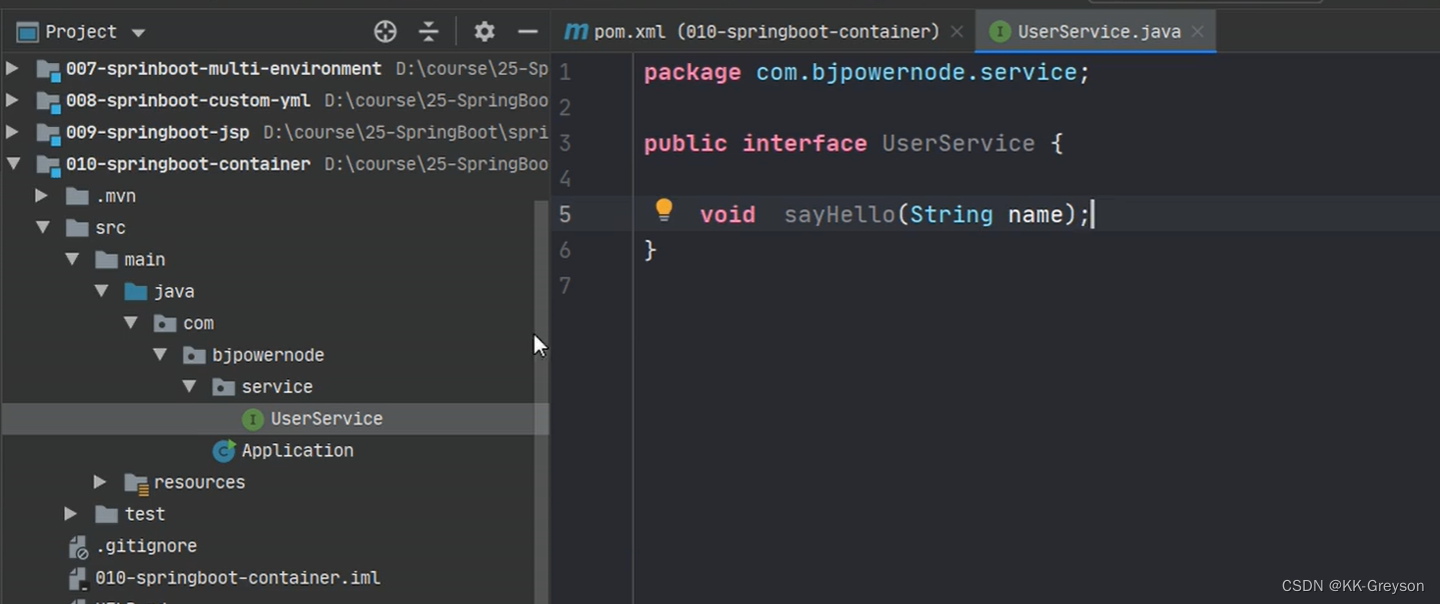
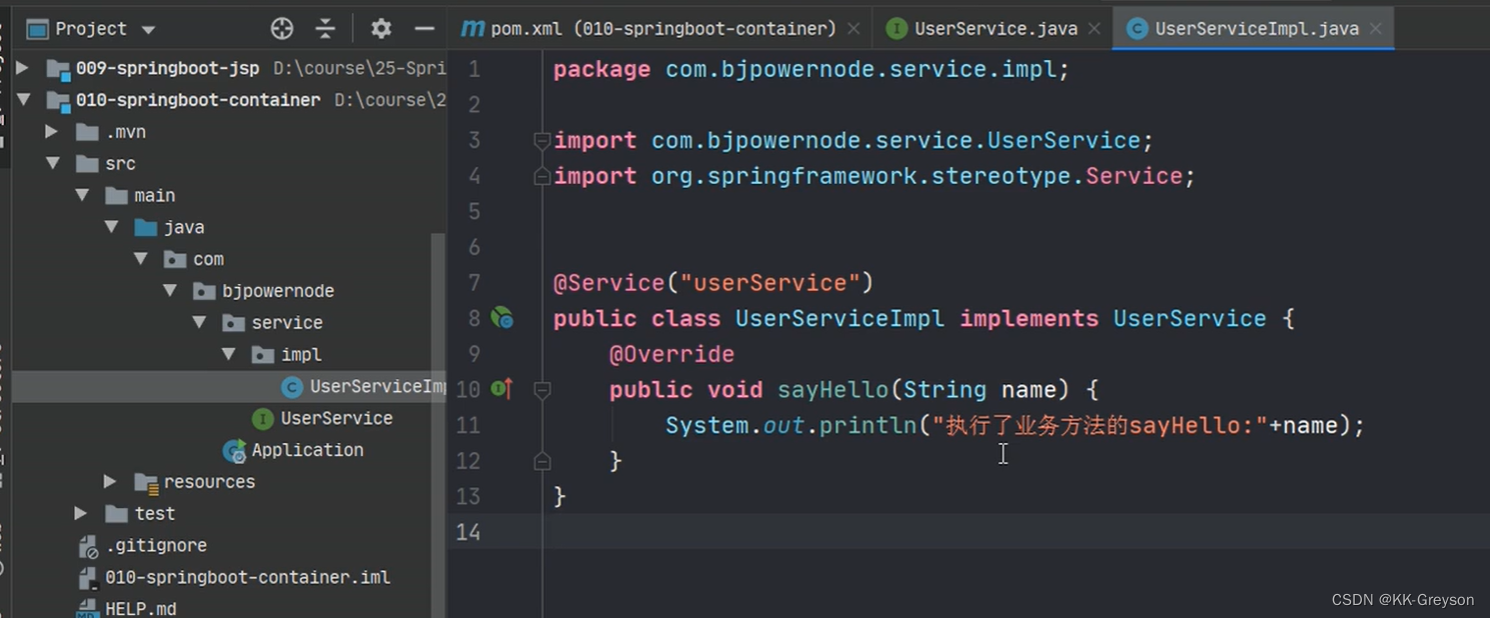
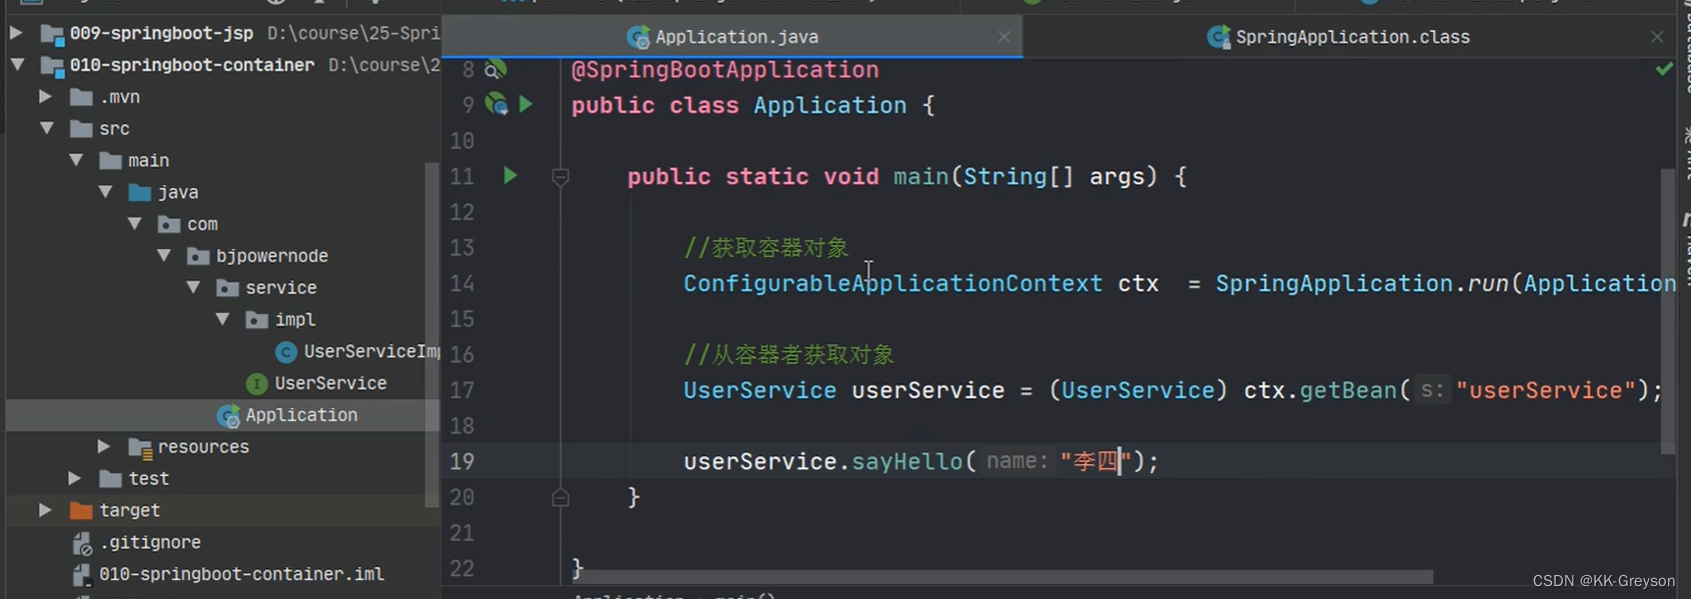
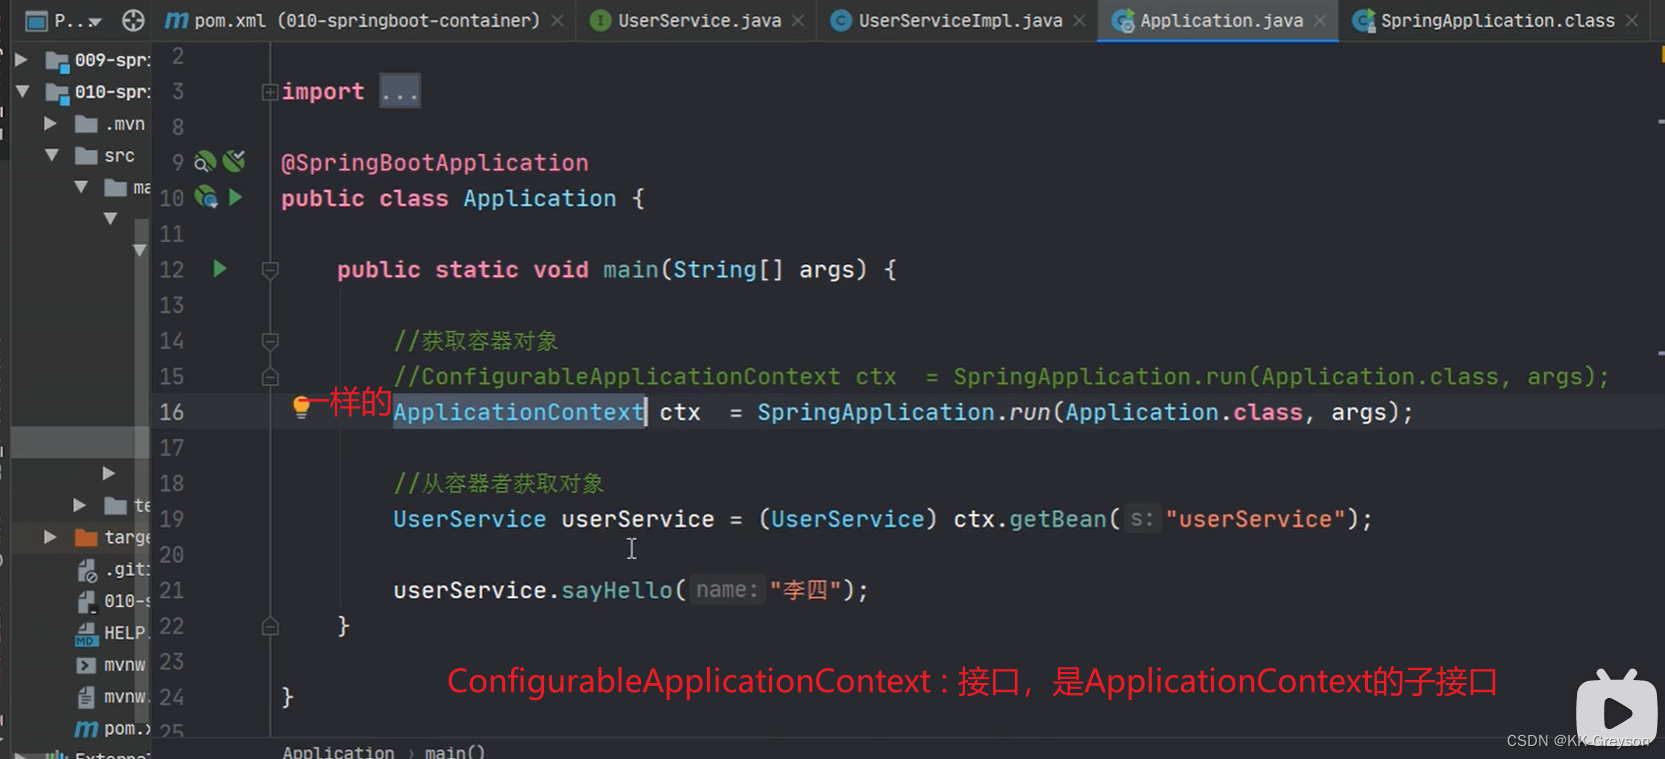
2.9 springboot中使用ApplicationContext容器
如果你想通过代码,从容器中获取对象。
SpringApplication.run(Application.class, args)的返回值就是ApplicationContext容器。
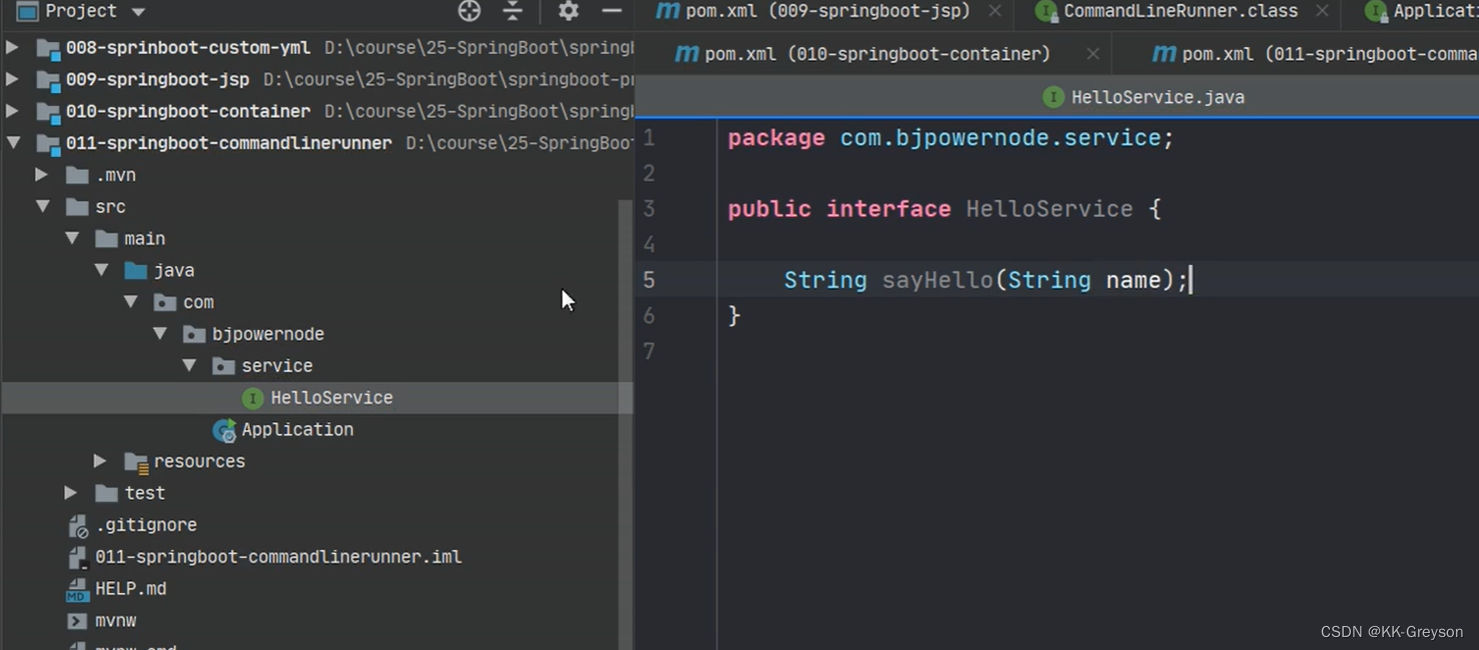
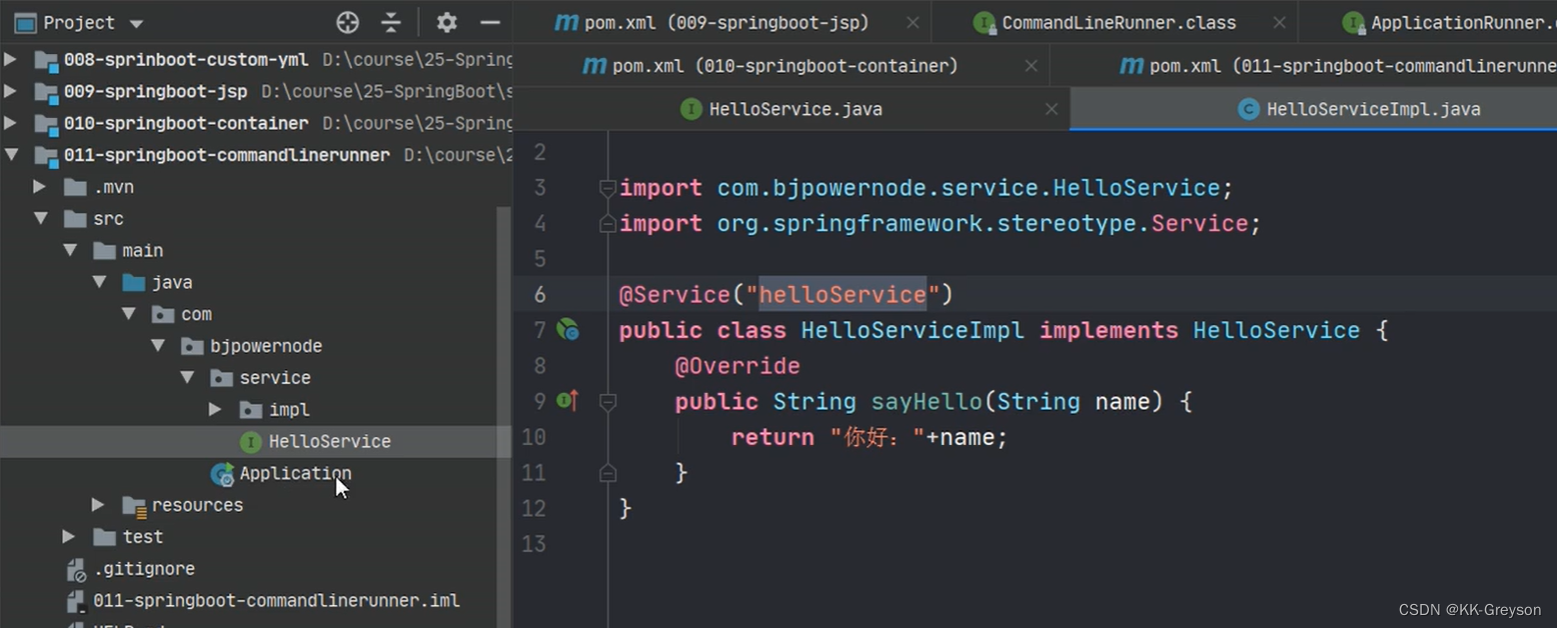
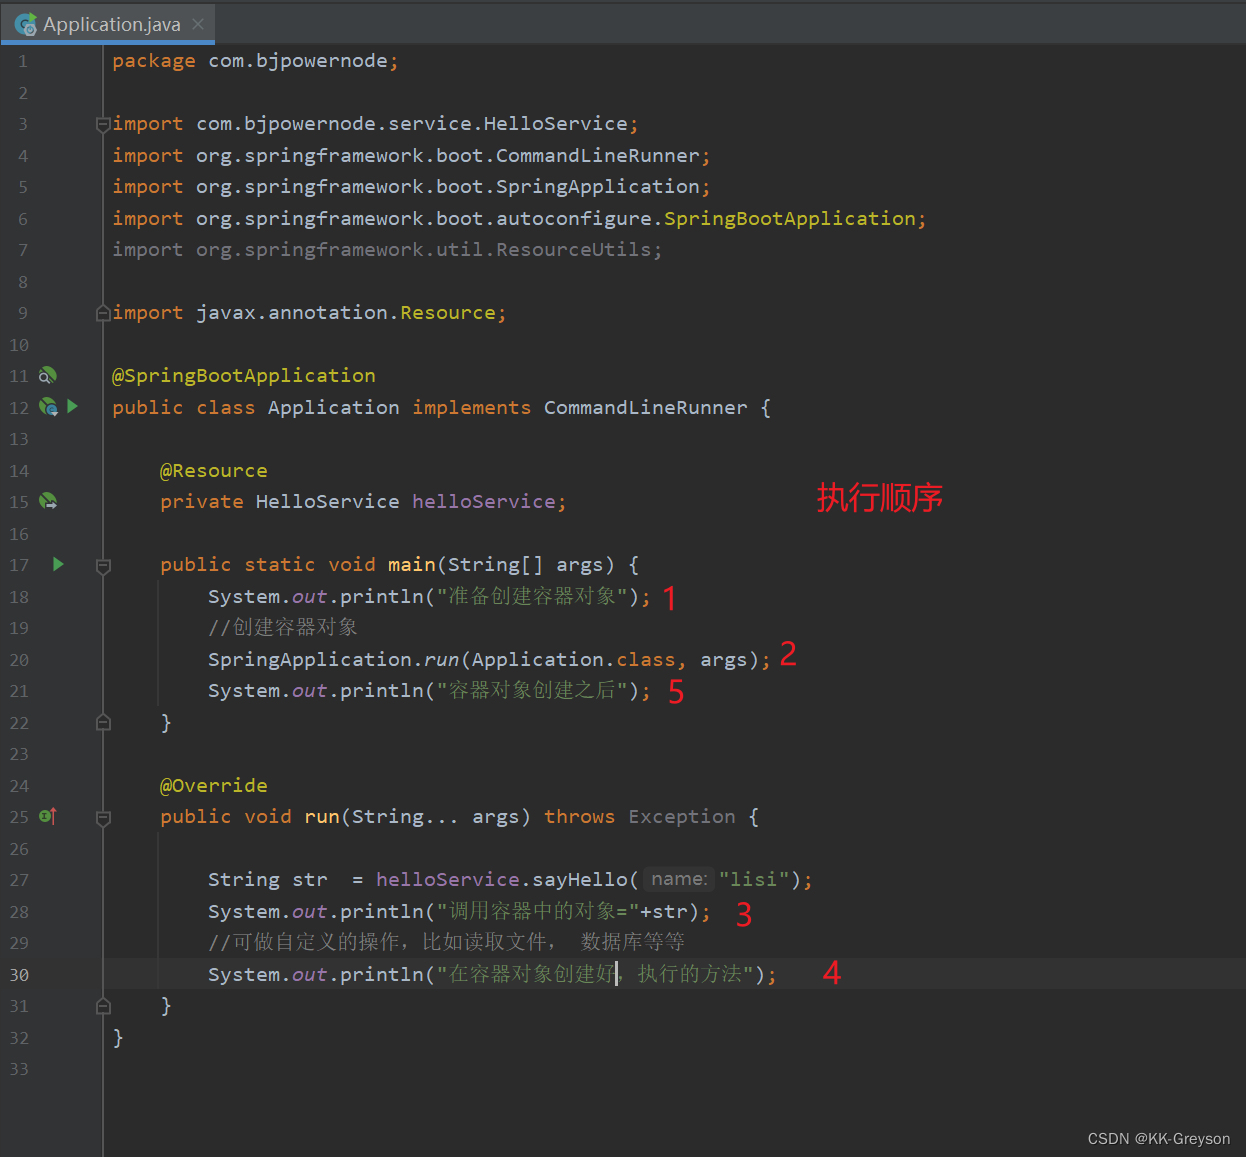
2.10 ComnandLineRunner 接口 ApplcationRunner 接口
开发中可能会有这样的情景。需要在容器启动后执行一些内容。
比如读取配置文件,数据库连接之类的。
SpringBoot 给我们提供了两个接口来帮助我们实现这种需求。
这两个接口分别为 CommandLineRunner 和 ApplicationRunner。
他们的执行时机为容器启动完成的时候。

这两个接口都有一个 run 方法,我们只需要实现这个方法即可。
这两个接口的不同之处在于:
	ApplicationRunner 中 run 方法的参数为 ApplicationArguments
	而CommandLineRunner接口中 run 方法的参数为 String 数组
@FunctionalInterface
public interface CommandLineRunner {


    void run(String... args) throws Exception;
}

@FunctionalInterface
public interface ApplicationRunner {


    void run(ApplicationArguments args) throws Exception;
}