什么是跨域请求?
出于对客户的访问安全的考虑,浏览器中的网页只能向本源网站发送请求,也就是说,浏览器会阻止网页向其他网站发送请求,此限制就称为相同源策略。相同源策略可以防止恶意网站站点读取另一个站点中的敏感数据,但在实际的开发过程中,有时需要读取其他网站中的数据,可能需要允许其他站点对开发者的应用进行跨域请求。
那么我们就来做个小案例吧
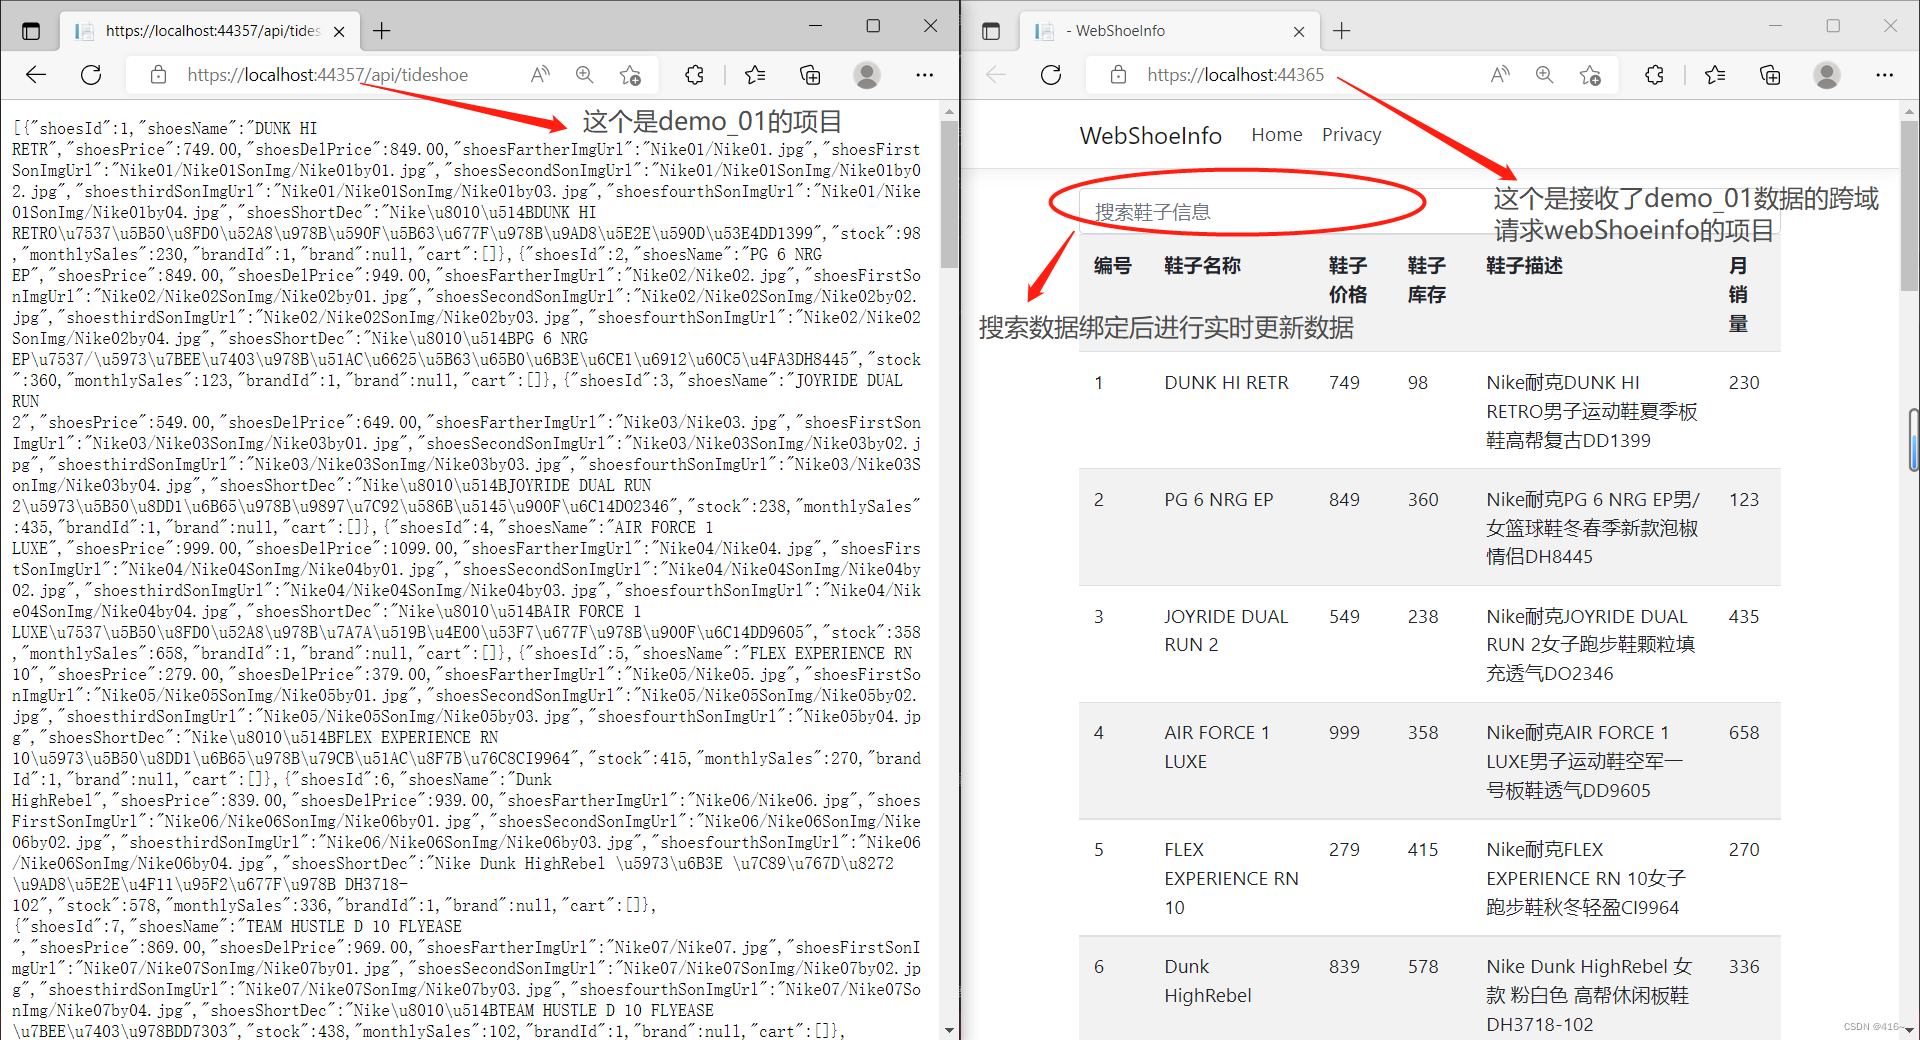
实验内容:先把数据库数据迁移到项目中后,得到一组数据表的数组数据,并且把数组数据json格式返回到你的视图页,使用Vue+axios跨域请求,将数据给到另一个服务器,并显示出来实现双向绑定输入内容实时更新表格数据
1.首先先创建好你的.net core项目,选择ASP.NET Core Web应用(模型-视图-控制器)
2.进入程序后创建两个新建项目,因为是跨域,所以需要两个不同的服务器进行访问
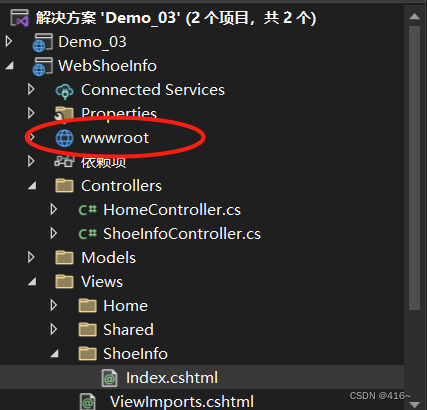
创建完后如下图。Demo_03作为你的api接口 将里面的数据跨域请求给WebShoeInfo
注:需要先迁移好数据库,能够得到数据表的数据才可进行下一步(也可以自己写类,进行实验)
如果有不太懂的可以点击这里先进行学习搭建配置。搞完这些后就可以进行实验了

先到Demo_03(Demo_03作为你的api接口)的Controllers中创建一个新的控制器,具体代码如下:
using Demo_03.Models;
using Microsoft.AspNetCore.Mvc;
using System.Collections.Generic;
using System.Linq;

namespace Demo_03.Controllers
{
    [Route("api/[controller]")]
    [ApiController]
    public class TideShoeController : Controller
    {
        FreshLiveDBContext context;

        public TideShoeController(FreshLiveDBContext freshLiveDBContext)
        {
            context = freshLiveDBContext;
        }

        public IActionResult Get()
        {
            List<ShoesInfo> Shoes=context.ShoesInfo.ToList();

            return Json(Shoes);//这个就作为你要返回给另一个服务器的json数组对象
        }

        //public IActionResult Index()
        //{
        //    return View();
        //}
    }
}
Demo_03下的appsettings.json内容如下:
{
  "ConnectionStrings": {
//数据库配置连接字符串
    "TideShoeDB": "Data Source=.;Initial Catalog=TideshoeDB ;Integrated Security=True"
  },
  "Logging": {
    "LogLevel": {
      "Default": "Information",
      "Microsoft": "Warning",
      "Microsoft.Hosting.Lifetime": "Information"
    }
  },
  "AllowedHosts": "*"
}
Demo_03下的Startup.cs内容如下:
//声明跨域策略名称
readonly string MyCorsPolicy = "CorsPolicy";
//在ConfigureServices内容中复制粘贴以下内容:
services.AddCors(options =>
{
options.AddPolicy(MyCorsPolicy, builder =>
{
//声明跨域策略:允许所有域,任何请求标头和全部HTTP方法
builder.AllowAnyOrigin().AllowAnyHeader().AllowAnyMethod();
});
});
//在Configure中复制以下内容
//使用允许跨域请求
app.UseCors();
app.UseEndpoints(endpoints =>
{
//所有请求都应用跨域请求策略
endpoints.MapControllers().RequireCors(MyCorsPolicy);
});
我的Startup.cs完整代码如下:
using Demo_03.Models;
using Microsoft.AspNetCore.Builder;
using Microsoft.AspNetCore.Hosting;
using Microsoft.AspNetCore.HttpsPolicy;
using Microsoft.EntityFrameworkCore;
using Microsoft.Extensions.Configuration;
using Microsoft.Extensions.DependencyInjection;
using Microsoft.Extensions.Hosting;
using System;
using System.Collections.Generic;
using System.Linq;
using System.Threading.Tasks;

namespace Demo_03
{
    public class Startup
    {
        public Startup(IConfiguration configuration)
        {
            Configuration = configuration;
        }
        //声明跨域策略名称
        readonly string MyCorsPolicy = "CorsPolicy";
        public IConfiguration Configuration { get; }

        // This method gets called by the runtime. Use this method to add services to the container.
        public void ConfigureServices(IServiceCollection services)
        {
            services.AddCors(options =>
            {
                options.AddPolicy(MyCorsPolicy, builder =>
                {
                    //声明跨域策略:允许所有域,任何请求标头和全部HTTP方法
                    builder.AllowAnyOrigin().AllowAnyHeader().AllowAnyMethod();
                });
            });
            services.AddDbContext<FreshLiveDBContext>(
                    options =>
        {
                    options.UseSqlServer(Configuration.GetConnectionString
                    ("TideShoeDB")); //“FreshLiveDB”要与“appsettings.json”配置的一致
        });


            services.AddControllers();

            services.AddControllersWithViews();
        }

        // This method gets called by the runtime. Use this method to configure the HTTP request pipeline.
        public void Configure(IApplicationBuilder app, IWebHostEnvironment env)
        {
            if (env.IsDevelopment())
            {
                app.UseDeveloperExceptionPage();
            }
            else
            {
                app.UseExceptionHandler("/Home/Error");
                // The default HSTS value is 30 days. You may want to change this for production scenarios, see https://aka.ms/aspnetcore-hsts.
                app.UseHsts();
            }
            app.UseHttpsRedirection();
            app.UseStaticFiles();

            app.UseRouting();

            app.UseAuthorization();
            //使用允许跨域请求
            app.UseCors();
            app.UseEndpoints(endpoints =>
            {
                //所有请求都应用跨域请求策略
                endpoints.MapControllers().RequireCors(MyCorsPolicy);
            });
            //app.UseEndpoints(endpoints =>
            //{
            //    endpoints.MapControllerRoute(
            //        name: "default",
            //        pattern: "{controller=Home}/{action=Index}/{id?}");
            //});
        }
    }
}
好了 关于Demo_03的相关配置都已经完成。接下来进入WebShoeInfo内进行访问Demo_03的api,也就是一个小小的跨域访问
在WebShoeInfo中只需要新建控制器,添加index视图页即可
然后转到视图页面,注:首先要先下载VUE和axios的js包 并且放入视图页中
不需要到网上找,而是直接下载就好 过程如下
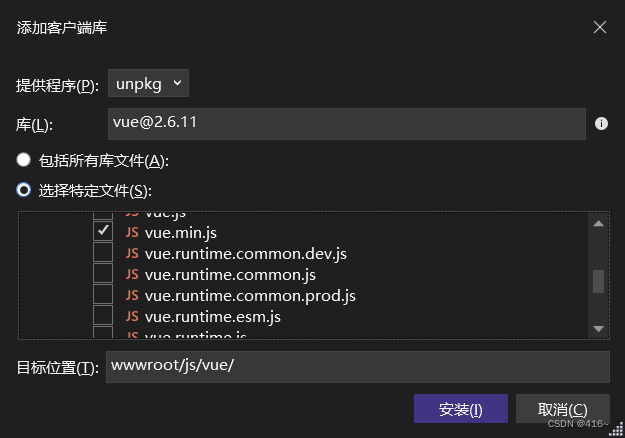
1.找到wwwroot 打开后点击js文件夹右键添加选择客户端库
找到Vue.min.js进行下载,同理,axios也是一样的操作
我的视图页整体代码如下:
@*
    For more information on enabling MVC for empty projects, visit https://go.microsoft.com/fwlink/?LinkID=397860
*@
@{
}
<body>
    <div id="app">
        <input type="text" v-model="key" class="form-control" placeholder="搜索鞋子信息"/>
        <table class="table table-striped table-hover">
            <tr>
                <th>编号</th>
                <th>鞋子名称</th>
                <th>鞋子价格</th>
                <th>鞋子库存</th>
                <th>鞋子描述</th>
                <th>月销量</th>
            </tr>
            <tr v-for="item in ShoeInfolist" :key="item.shoesId">
                <td>{

   {item.shoesId}}</td>
                <td>{

   {item.shoesName}}</td>
                <td>{

   {item.shoesPrice}}</td>
                <td>{

   {item.stock}}</td>
                <td>{

   {item.shoesShortDec}}</td>
                <td>{

   {item.monthlySales}}</td>
            </tr>
        </table>
    </div>
</body>
<script src="~/js/vue/vue.min.js"></script>
<script src="~/js/axios/axios.min.js"></script>
<script>
    var vm = new Vue({
        el: "#app",
        data: {
            key: "",
            Shoes: []
        },
        created: function () {
            var self = this;
            axios.get("https://localhost:44357/api/tideshoe").then(function (res) {
                var result = res.data;
                self.Shoes = result;
            }).catch(function (err) {
                console.log(err)
            })
        },
        computed: {
            ShoeInfolist: function () {
                var self = this;
                return this.Shoes.filter(function (item) {
                    var abcc=JSON.stringify(item);
                    abcc = JSON.parse(abcc);
                    return abcc.shoesShortDec.indexOf(self.key) != -1;
                })
            }
        }
    })
</script>
最后找到解决方案的属性设置多个应用程序启动即可

最终效果如下:

博主知识浅薄,初学没多久, 写的不是很精辟很详细,我只做个记录,方便日后学习。如有不懂,可私信我一起讨论探究。