近期由于项目需要,本来集成的TRTC切换成MRTC
现在就MRTC集成做个简单整理,这里主要介绍web和H5的集成
1、MRTC简介
官网介绍
音视频通话组件( Mobile Real-Time Communication,简称 MRTC)是 mPaaS 提供的音频、视频通话组件。该组件功能丰富,提供纯语音通话和视频通话功能,支持 PC、移动端、IoT 设备等多终端接入。音视频通话可实现一对一通话及多人会议,通话过程中支持屏幕录制、屏幕共享、截图等功能,同时支持即时文字消息和文件传输。此外,支持实时语音识别,能够识别对端的语音确认,辅助本端判断对端的意向;点播功能可实现在视频通话过程中,播放视频、PPT 等多种提示画面。
多种参与模式:支持一对一视频通话及多人视频通话。
多平台:支持 iOS、Android、PC Web、H5 以及小程序。
多端互通:支持手机、PC、IoT 设备之间互联互通。
会话保持:网络短暂异常、网络切换时,业务流程不中断,保持会话的持续性。
自定义视频规格、自适应视频规格:支持自定义宽、高、最大帧率、最大码率,并能在上限范围内根据网络状况自适应调整视频规格。
2、MRTC的集成
在官网的集成上在详细介绍下,做个二次封装,相关接口可查看官方文档
官方流程图
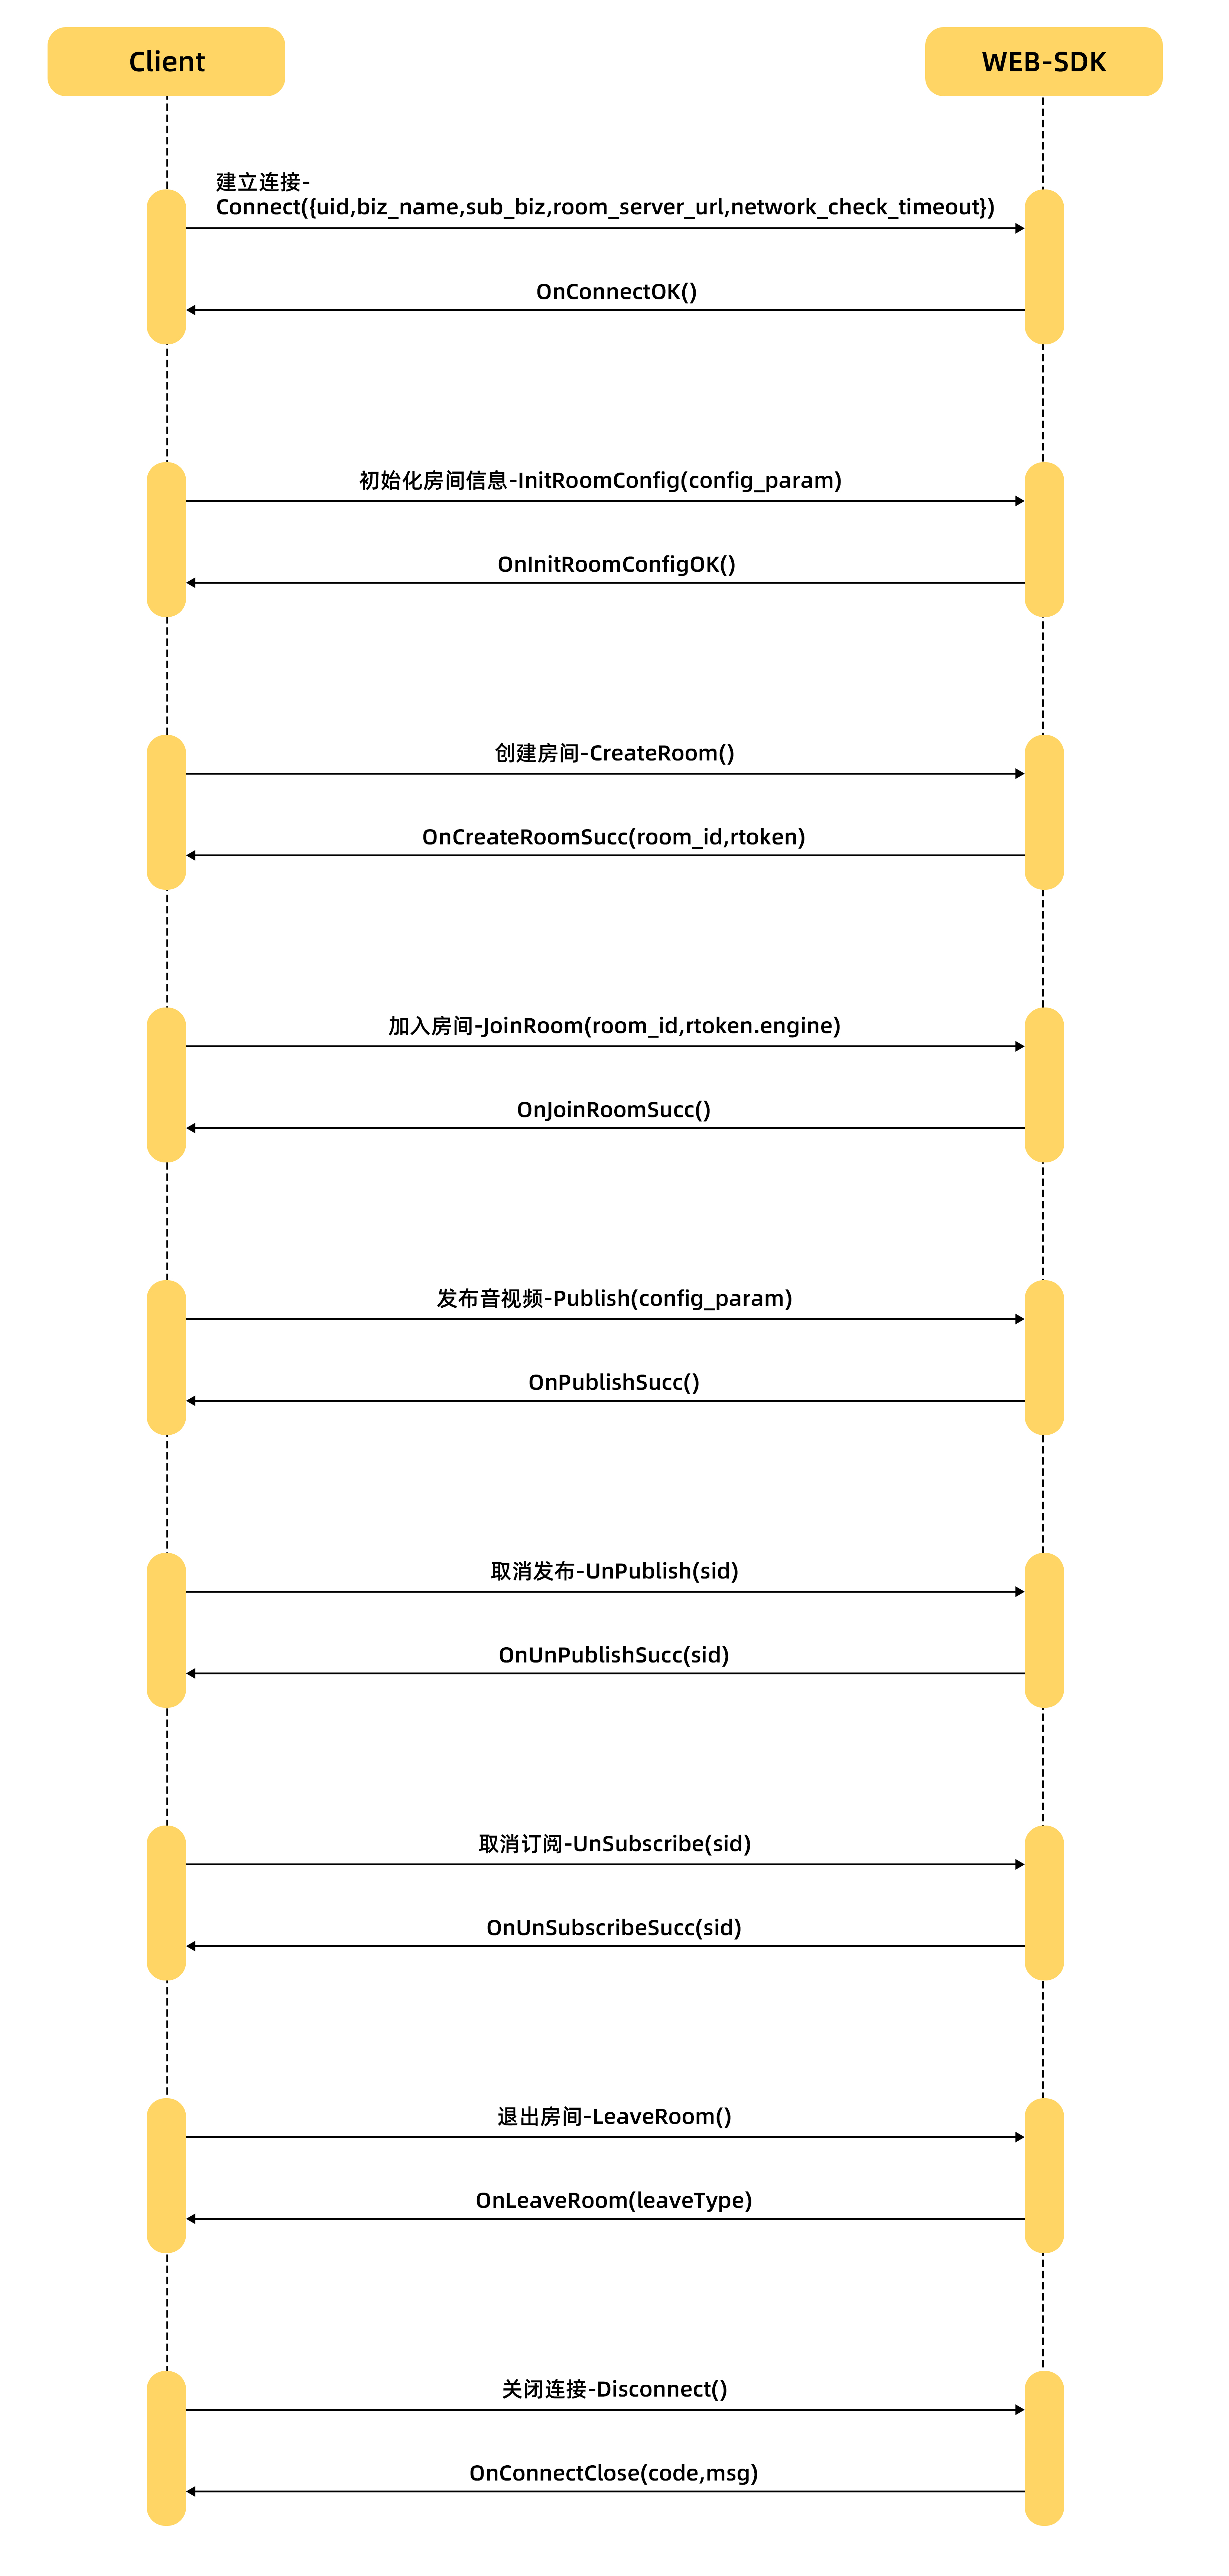
思路:
1、封装集成JS方法 (可使用mixins方式)
2、封装UI组件(呼叫组件,视频通话组件,接听组件)
3、在业务的基础上封装相关业务音视频SDK
3、具体实现(vue版)
1、下载SDK,引入项目
下载 artvc-web-sdk,把lib文件引入到项目中
项目按需引入对应的js(在index.html里面)
  <script src="./lib/adapter.js"></script>
  <script src="./lib/meeting_api.js"></script>
  <script src="./lib/mcu.js"></script>
  <script src="./lib/meeting_camera_stream.js"></script>
  <script src="./lib/meeting_invite.js"></script>
2、实例化 SDK
 const test_controller = new McuController() // 实例化 SDK
    this.test_controller = test_controller
3、建立连接
init() {
      const test_controller = this.test_controller
      const config_param = {}

      config_param.uid = '6189'
      config_param.biz_name = 'demo'
      config_param.sub_biz = 'default'
      config_param.workspaceId = 'default'
      config_param.room_server_url = 'wss://服务地址'
      config_param.sign = this. getSign()
      // 允许最大断网时间 (超过未重连, 直接关闭)
      config_param.network_check_timeout = 120 * 1000
      test_controller.Connect(config_param)
    }

// 注意:签名应该是后台返回的,这是demo可写死
 // 签名(通道建连/创建房间/加入房间需要)
    getSign(uid, isRecord = false) {
      const test_controller = this.test_controller
      test_controller.trace(`GetSign uid=${uid}`)
      return 'signature'
    },
4、初始化回调方法
所有的回调方法都在这里监听
initCallback() {
      const test_controller = this.test_controller
      // 建立连接成功回调
      test_controller.OnConnectOK = () => {
        // this.initRoom()
        console.log('建立连接成功')
      }
      // 建立连接失败回调
      test_controller.OnConnectFailed = function(code, msg) {
        console.log(code, msg)
        console.log('建立连接失败, 请尝试https修复')
      }
      // 房间初始化成功
      test_controller.OnInitRoomConfigOK = () => {
        console.log('房间初始化成功')
        if (this.role === 'created') {
          this.createRoom()
        } else if (this.role === 'join') {
          this.joinRoom()
        }
      }
      // 房间初始化失败
      test_controller.OnInitRoomConfigFail = function(err_code, err_msg) {
        console.log(err_code, err_msg)
        console.log('房间初始化失败')
      }
      // 创建房间成功回调
      test_controller.OnCreateRoomSucc = (room_id, rtoken) => {
        console.log( room_id, rtoken)

        this.isHiddenVideo = false
        this.typeState = '0'
        this.messageSend({
          toUserId: '9232131735',
          userId: '123',
          type: '1',
          roomNumber: room_id,
          passWord: rtoken
        })
        // test_controller.JoinRoom(room_id, rtoken, this.getSign())

        console.log('创建房间成功')
      }
      // 创建房间失败回调
      test_controller.OnCreateRoomFailed = function(err_code, err_msg) {
        console.log(err_code, err_msg)
        console.log('创建房间失败')
      }
      // 加入房间成功
      test_controller.OnJoinRoomSucc = () => {
        console.log('加入房间成功')
        this.isHiddenVideo = false
        this.typeState = '0'
      }
      // 加入房间失败
      test_controller.OnJoinRoomFailed = function(err_code, err_msg) {
        console.log(err_code, err_msg)
        console.log('加入房间失败')
      }
      test_controller.OnPublishSucc = (sid) => {
        this.timeStart()
        console.log('发布订阅')
      }
      // 订阅成功回调
      test_controller.OnSubscribeSucc = function(feedId, sid) {
        test_controller.trace(`~~~~~~~~~~~~~ OnSubscribeSuccess  Response  , sid=${sid},feedId=${feedId}`)
        console.log('订阅成功回调')
      }
      // 邀请成功
      test_controller.OnInviteOK = function() {
        console.log('邀请成功回调')
      }

      // 邀请失败
      test_controller.OnInviteFail = function(code, msg) {
        console.log('邀请失败回调')
      }
      test_controller.OnReplyInviteOK = () => {
        console.log('回复邀请回调')
      }
      // 退出房间回调
      test_controller.OnLeaveRoom = (leaveType) => {
        test_controller.warning(`~~~~~~~~~~~~~ leave room! leaveType = ${leaveType}`)
        console.log('退出房间成功')
        this.onTimeReset()
        this.isHiddenVideo = true
      }
      // 退出房间回调
      test_controller.OnParticipantLeaveRoom = (participant, exitType) => {
        test_controller.warning(`~~~~~~~~~~~~~ leave room! leaveType = ${participant}${exitType}`)
        console.log('对方退出房间成功')
        this.onQuit()
      }
    }
5、初始化房间
initRoom(type) {
    // type 是区分是加入房间还是创建房间
      if (type) {
        this.role = type
      }
      const test_controller = this.test_controller
      const config_param = {
        auto_publish_subscribe: 3,
        media_type: 1,
        publish_device: 1,
        initSubscribe: [
          {
            subscribe_video_id: 'video0',
            subscribe_audio_id: 'audio0',
            subscribe_streamId_id: 'subscribe_streamId0',
            feedId_id: 'feedId0'
          }, {
            subscribe_video_id: 'video4',
            subscribe_audio_id: 'audio4'
          }],
        initPublish: [
          {
            publish_video_id: 'publish_video1',
            publish_streamId_id: 'publish_streamId1',
            publish_tag: 'VIDEO_SOURCE_CAMERA_1'
          }
        ]
      }
      test_controller.InitRoomConfig(config_param)
    }
6、创建房间
createRoom() {
      const test_controller = this.test_controller
      test_controller.CreateRoom(this.getSign())
    },
7、发布订阅
注意:如果初始化的时候是自动发布订阅,则创建房间之后不需要手动发布订阅,否则需要手动发布订阅
onPublish() {
      const test_controller = this.test_controller
      const config_param = {
        'media_type': 1,
        'need_volume_analyser': true,
        'publish_video_id': 'publish_video1',
        'publish_streamId_id': 'publish_streamId1',
        'aspectRatioStrongDepend': false,
        'aspectRatio': '0',
        'video_profile_type': '2',
        'publish_tag': 'VIDEO_SOURCE_CAMERA',
        'enableVideo': true,
        'enableAudio': true,
        'publish_device': 1,
        'transport_': 'all',
        'defaultTurnServer': '',
        'degradationType': 1,
        'scalabilityMode': 'NONE'
      }
      test_controller.Publish(config_param)
    }
8、退出房间
 onLeaveRoom() {
      const test_controller = this.test_controller
      test_controller.LeaveRoom()
    },
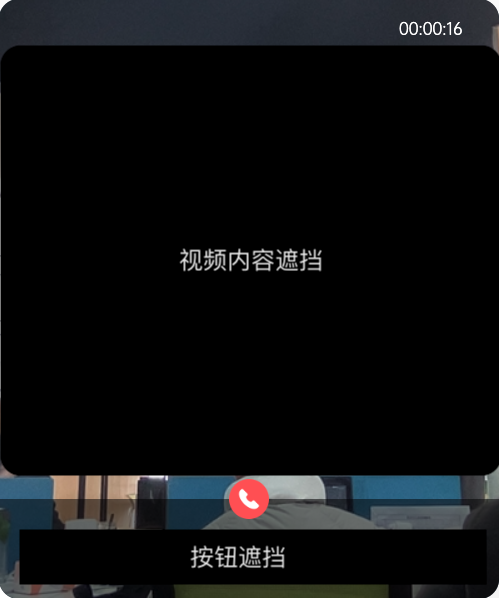
9、视频UI组件
<template>
<div id="videos" v-drag class="video-div" :class="isHiddenVideo?'display-none':'display-block'">
<div class="publishVideo">
<video
id="publish_video1"
autoplay
muted="true"
webkit-playsinline="true"
playsinline="true"
width="100%"
height="100%"
style="object-fit: cover;"
/>
<div class="time">{
{ time }}</div>
<div class="video-tool">
<img class="img-gd" src="@/assets/images/jj.png" alt="" @click="onQuit">
</div>
<div class="subscribeVideo">
<video
id="video0"
autoplay
muted
width="100%"
height="100%"
webkit-playsinline="true"
playsinline="true"
style="object-fit: cover;"
>
video
</video>
<audio id="audio0" autoplay>音频</audio>
<video id="video99" autoplay muted="true" width="100%" height="480" hidden>
video
</video>
<audio id="audio99" autoplay hidden>音频</audio>
<br>
<label id="subscribe_feedId_text0" type="text" class="hiddenForMobile" hidden> feedId:</label>
<label id="feedId0" class="css-text-color hiddenForMobile" type="text" />
<br>
<label id="subscribe_streamId_text0" type="text" hidden class="hiddenForMobile"> streamId:</label>
<label id="subscribe_streamId0" class="css-text-color hiddenForMobile" type="text" />
</div>
</div>
</template>
<script>
export default {
name: 'Index',
// 自定义指令
directives: {
drag: {
// 指令的定义
bind: function(el) {
const oDiv = el // 获取当前元素
oDiv.onmousedown = (e) => {
console.log('onmousedown')
// 算出鼠标相对元素的位置
const disX = e.clientX - oDiv.offsetLeft
const disY = e.clientY - oDiv.offsetTop
document.onmousemove = (e) => {
// 用鼠标的位置减去鼠标相对元素的位置,得到元素的位置
const left = e.clientX - disX
const top = e.clientY - disY
oDiv.style.left = left + 'px'
oDiv.style.top = top + 'px'
}
document.onmouseup = (e) => {
document.onmousemove = null
document.onmouseup = null
}
}
}
}
},
props: {
isHiddenVideo: {
type: Boolean,
default: true
},
time: {
type: String,
default: '00:00:00'
}
},
methods: {
onQuit() {
this.$emit('onQuit')
},
onInappropriate() {
this.$emit('onInappropriate')
},
onLooks() {
this.$emit('onLooks')
},
onOffer() {
this.$emit('onOffer')
}
}
}
</script>
<style lang="scss" scoped>
.display-none {
display: none;
}
.display-block {
display: block;
}
.video-div {
position: absolute;
top: 40px;
right: 10px;
width: 500px;
height: 600px;
overflow: hidden;
background: #001528;
border-radius: 20px;
.publishVideo {
width: 100%;
height: 100%;
.time {
position: absolute;
top: 10px;
right: 0;
width: 100px;
height: 40px;
line-height: 40px;
color: white;
}
.video-tool {
position: absolute;
bottom: 0;
left: 0;
width: 100%;
height: 100px;
background-color: rgba(0,0,0,.5);
.img-gd {
position: absolute;
top: -20px;
right: calc(50% - 20px);
z-index: 99;
width: 40px;
}
.btn-class {
position: relative;
width: 320px;
height: 100px;
margin: 0 auto;
//background: red;
}
.looks {
position: absolute;
left: 120px;
}
.offer {
position: absolute;
left: 220px;
}
.inappropriate {
position: absolute;
left: 20px;
}
.btn-base {
bottom: 25px;
width: 90px;
height: 40px;
font-size: 12px;
line-height: 40px;
color: white;
text-align: center;
background: #000;
border-radius: 20px;
}
}
}
.subscribeVideo {
position: absolute;
top: 50px;
right: 10px;
width: 200px;
height: 200px;
overflow: hidden;
//background-color: #409eff;
border-radius: 10px;
}
}
</style>
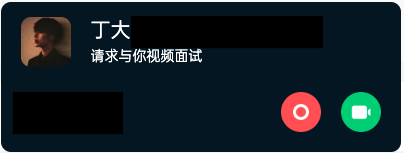
10、接听UI组件
<template>
  <div class="invite-video">
    <div class="user-info">
      <img class="img-head" :src="callUserInfo.avatar?callUserInfo.avatar:'/company/static/images/system/user_avatar_default.png'" alt="">
      <div class="info-name"><span class="name">{

   { callUserInfo.name }}</span><span> {

   {callUserInfo.attrs}} </span></div>
      <div class="info-text"><span>请求与你视频面试</span></div>
    </div>
    <img class="img-jj" src="../../assets/image/jj.png" alt="" @click="onAction('1')">
    <img class="img-splj" src="../../assets/image/splj.png" alt="" @click="onAction('2')">

  </div>
</template>

<script>
export default {
  name: 'Index',
  props:{
    callUserInfo:{
      type:Object,
      default:()=>{
        return {
          avatar:null,
          name:null,
          attrs:null
        }
      }
    }
  },
  methods: {
    onAction(type) {
      this.$emit('onAction', type)
    }
  }
}
</script>
<style lang="scss" scoped>
.invite-video {
  position: absolute;
  top: 20px;
  right: calc(50% - 200px);
  width: 400px;
  height: 150px;
  overflow: hidden;
  background: #001528;
  border-radius: 10px;

  .user-info {
    position: absolute;
    top: 0;
    right: 0;
    width: 400px;
    height: 80px;
    //background: red;
    overflow: hidden;

    .info-name {
      position: absolute;
      top: 15px;
      left: 90px;
      width: 300px;
      height: 20px;
      font-size: 14px;
      color: #666;

      .name {
        font-size: 20px;
        color: white
      }
    }

    .info-text {
      position: absolute;
      bottom: 15px;
      left: 90px;
      width: 300px;
      height: 20px;
      font-size: 14px;
      color: white;
    }

    .img-head {
      position: absolute;
      bottom: 15px;
      left: 20px;
      width: 50px;
      border-radius: 10px;
    }
  }

  .ckjl-btn {
    position: absolute;
    left: 110px;
  }

  .kshf-btn {
    position: absolute;
    left: 20px;
  }

  .btn-base {
    bottom: 25px;
    width: 80px;
    height: 30px;
    font-size: 12px;
    line-height: 30px;
    color: white;
    text-align: center;
    background: #000;
    border-radius: 17px;
  }

  .img-jj {
    position: absolute;
    right: 80px;
    bottom: 20px;
    width: 40px;
  }

  .img-splj {
    position: absolute;
    right: 20px;
    bottom: 20px;
    width: 40px;
  }
}
</style>
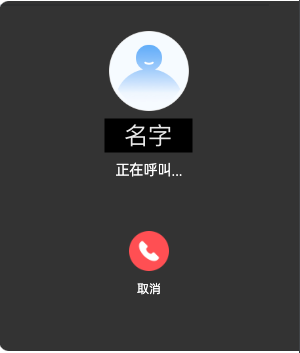
11、呼叫UI组件
<template>
<div class="call-class">
  <img class="img-user" :src="userInfo.avatar?userInfo.avatar:'/company/static/images/system/user_avatar_default.png'" alt="">
  <div class="name">{

   { userInfo.userName }}</div>
  <div class="name-call">正在呼叫...</div>
  <img class="img-cancel" src="../../assets/image/cancel.png" alt="" @click="onCancel">
  <div class="name-cancel" @click="onCancel">取消</div>

</div>
</template>

<script>
export default {
  name: "index",
  props:{
    userInfo:{
      type:Object,
      default:()=>{
        return {
          avatar:null,
          userName:null
        }
      }
    }
  },
  methods:{
    onCancel(){
      this.$emit('onCancel')
    }

  }

}
</script>

<style scoped lang="scss">
.call-class{
  position: absolute;
  top: 100px;
  right: 0;
  width: 300px;
  height: 350px;
  background: rgba(0,0,0,0.8);
  color: white;
  border-radius: 10px 0 0 10px;
  z-index: 99999;
  .name{
    text-align: center;
    position: absolute;
    top: 120px;
    font-size: 20px;
    font-weight: bold;
    width: 100%;
  }
  .img-cancel{
    position: absolute;
    top: 230px;
    right: calc(50% - 20px);
    width: 40px;
    z-index: 99;
  }
  .name-cancel{
    text-align: center;
    position: absolute;
    top: 280px;
    font-size: 12px;
    width: 100%;
  }
  .name-call{
    text-align: center;
    position: absolute;
    top: 160px;
    font-size: 14px;
    width: 100%;
  }
}
.img-user{
  position: absolute;
  top: 30px;
  right: calc(50% - 40px);
  width: 80px;
  z-index: 99;
}

</style>
12、app.vue 集成
<Video :is-hidden-video="isHiddenVideo" :time="timeStr" @onQuit="onQuit" />
    <InviteVideo v-if="typeState === '0'" @onAction="onAction" />
    <CallVideo v-if="isCallShow" @onCancel="onCancel"></CallVideo>


import InviteVideo from './components/InviteVideo'
import Video from './components/Video'
import mrtc from '@/mixins/mrtc'

components: {
    InviteVideo,
    Video
  },
  mixins: [mrtc, webSocket],
到这里基本上MRTC音视频集成完成了。
4、WebSocket 使用
由于需求场景是pc和小程序互通,但由于小程序的局限性,无法邀请好友加入房间,也无法监听加入房间事件。因此需要业务自行实现消息发送。
websocket封装,网上也有相应的教程
export default {
  components: { },
  data() {
    return {
      websock: '',
      lockReconnect: false, // 是否真正建立连接
      timeout: 58 * 1000, // 58秒一次心跳
      timeoutObj: null, // 心跳倒计时
      serverTimeoutObj: null, // 心跳倒计时
      timeoutnum: null, // 断开 重连倒计时
      typeState: '0',
      roomID: '6693563501',
      roomKey: '123',
      userID: ''
    }
  },
  created() {
  },
  destroyed() {
    this.websock.close() // 离开路由之后断开websocket连接
  },
  methods: {
    messageSend({ toUserId, userId, type, roomNumber, passWord }) {
      const actions = {
        toUserId: '9232131735487',
        userId: '123',
        type: type,
        roomNumber: roomNumber,
        passWord: passWord
      }
      this.websocketsend(JSON.stringify(actions))
    },
    currentTime() {
      setInterval(this.formatDate, 500)
    },
    initWebSocket() {
      // 初始化weosocket
      const wsuri = 'ws://域名'
      this.websock = new WebSocket(wsuri)
      // 客户端接收服务端数据时触发
      this.websock.onmessage = this.websocketonmessage
      // 连接建立时触发
      this.websock.onopen = this.websocketonopen
      // 通信发生错误时触发
      this.websock.onerror = this.websocketonerror
      // 连接关闭时触发
      this.websock.onclose = this.websocketclose
    },
    // 连接建立时触发
    websocketonopen() {
      // 开启心跳
      this.start()
      // 连接建立之后执行send方法发送数据

      // this.websocketsend(actions)
    },
    // 通信发生错误时触发
    websocketonerror() {
      console.log('出现错误')
      this.reconnect()
    },
    // 客户端接收服务端数据时触发
    websocketonmessage(e) {
      console.log(e.data)
      // 收到服务器信息,心跳重置
      //("1","呼叫"),
      //  ("2","被拒接"),
      //  ("3","不在线"),
      //  ("4","占线中"),
      //  ("999","心跳检测");
  // 业务逻辑自行处理
      const data = JSON.parse(e.data)
      this.typeState = data.type
      switch (data.type) {
        case '1':
          this.roomID = data.roomNumber
          this.roomKey = data.passWord
          this.userID = data.userId
          break
      }

      this.reset()
    },
    websocketsend(Data) {
      // 数据发送
      this.websock.send(Data)
    },
    // 连接关闭时触发
    websocketclose(e) {
      // 关闭
      console.log('断开连接', e)
      // 重连
      this.reconnect()
    },
    reconnect() {
      // 重新连接
      var that = this
      if (that.lockReconnect) {
        return
      }
      that.lockReconnect = true
      // 没连接上会一直重连,设置延迟避免请求过多
      that.timeoutnum && clearTimeout(that.timeoutnum)
      that.timeoutnum = setTimeout(function() {
        // 新连接
        that.initWebSocket()
        that.lockReconnect = false
      }, 5000)
    },
    reset() {
      // 重置心跳
      var that = this
      // 清除时间
      clearTimeout(that.timeoutObj)
      clearTimeout(that.serverTimeoutObj)
      // 重启心跳
      that.start()
    },
    start() {
      // 开启心跳
      console.log('开启心跳')
      var self = this
      self.timeoutObj && clearTimeout(self.timeoutObj)
      self.serverTimeoutObj && clearTimeout(self.serverTimeoutObj)
      self.timeoutObj = setTimeout(function() {
        // 这里发送一个心跳,后端收到后,返回一个心跳消息,
        if (self.websock.readyState && Number(self.websock.readyState) === 1) {
          // 如果连接正常
          const actions = {
            toUserId: '1592321317',
            userId: '123',
            type: '999',
            roomNumber: '123456',
            passWord: '123456'
          }
          self.websocketsend(JSON.stringify(actions)) // 这里可以自己跟后端约定
        } else {
          // 否则重连
          self.reconnect()
        }
        self.serverTimeoutObj = setTimeout(function() {
          // 超时关闭
          self.websock.close()
        }, self.timeout)
      }, self.timeout)
    }
  },
  mounted() {
    this.currentTime()
  },
  // 销毁定时器
  beforeDestroy() {
    if (this.formatDate) {
      clearInterval(this.formatDate) // 在Vue实例销毁前,清除时间定时器
    }
  }
}
到这MRTC就集成完成了,通信需要配置WebSocket实现。
附带简单集成demo,不带业务逻辑