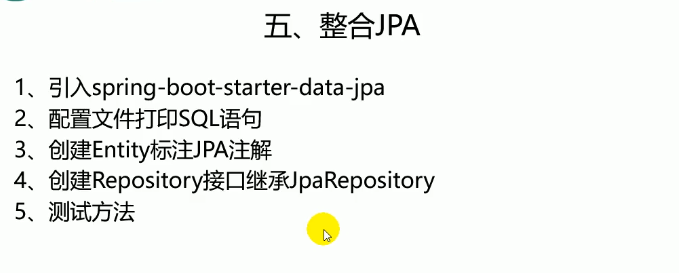
整合JPA
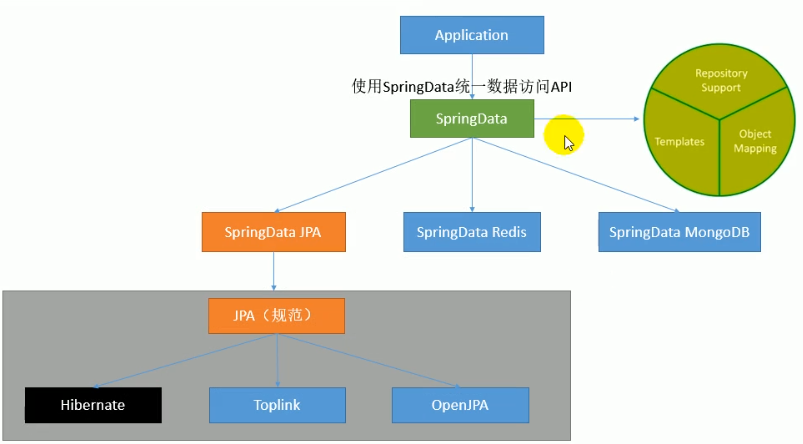
SpringData 程序数据交互结构图 (springdata jpa 默认使用 hibernate 进行封装)
使用之后就关注于 SpringData 不用再花多经历关注具体各个交互框架实现
JPA:ORM 关系型数据
1.新建项目 使用springboot 快速构建工具 模块选择 web, sql模块 选择 jdbc, mysql, jpa
创建项目pom文件为:
    <dependencies>
        <dependency>
            <groupId>org.springframework.boot</groupId>
            <artifactId>spring-boot-starter-data-jpa</artifactId>
        </dependency>
        <dependency>
            <groupId>org.springframework.boot</groupId>
            <artifactId>spring-boot-starter-jdbc</artifactId>
        </dependency>
        <dependency>
            <groupId>org.springframework.boot</groupId>
            <artifactId>spring-boot-starter-web</artifactId>
        </dependency>

        <dependency>
            <groupId>mysql</groupId>
            <artifactId>mysql-connector-java</artifactId>
            <scope>runtime</scope>
        </dependency>
        <dependency>
            <groupId>org.springframework.boot</groupId>
            <artifactId>spring-boot-starter-test</artifactId>
            <scope>test</scope>
        </dependency>
    </dependencies>
2)编写一个实体类(bean) 和数据表进行映射 并且配置好映射的关系
package com.lixuchun.springboot.entity;

import javax.persistence.*;

// 使用jpa注解配置映射关系
@Entity // 告诉jpa这是一个实体类 数据库和表的映射
@Table(name = "tbl_user") // table来指定和那个表对应 如果省略就是 user表
public class User {

    @Id // 主键
    @GeneratedValue(strategy = GenerationType.IDENTITY) // 自增主键
    private Integer id;

    @Column(name = "last_name", length = 50) // 数据表对应的一个列
    private String lastName;

    @Column // 省略默认列名就是属性名称
    private String email;

   get set ......
3)编写一个Dao接口来操作试题对应的数据表,对yml文件进行jpa配置(参照JpaProperties 配置类进行配置)
package com.lixuchun.springboot.repository;

import com.lixuchun.springboot.entity.User;
import org.springframework.data.jpa.repository.JpaRepository;
import org.springframework.stereotype.Repository;

// 集成 jpaRepository 来完成数据库的操作
@Repository
public interface UserRepository extends JpaRepository<User, Integer> {
}
spring:
  datasource:
    url: jdbc:mysql://192.168.10.129/jpa
    username: root
    password: 101022li
    driver-class-name: com.mysql.jdbc.Driver
  jpa:
    hibernate:
      # 更新或者创建数据表
      ddl-auto: update
    show-sql: true
4)编写一个 测试 Controller
package com.lixuchun.springboot.controller;

import com.lixuchun.springboot.entity.User;
import com.lixuchun.springboot.repository.UserRepository;
import org.springframework.beans.factory.annotation.Autowired;
import org.springframework.web.bind.annotation.GetMapping;
import org.springframework.web.bind.annotation.PathVariable;
import org.springframework.web.bind.annotation.RestController;

@RestController
public class UserController {

    @Autowired
    UserRepository userRepository;

    @GetMapping("/user/{id}")
    public User getUserById(@PathVariable("id") Integer id) {
        User user = userRepository.findOne(id);
        return user;
    }

    @GetMapping("/user")
    public User insertUser(User user) {
        User save = userRepository.save(user);
        return save;
    }

}
浏览器进行测试:
localhost:8080/user?lastName=jack&email=aa 进行数据插入
localhost:8080/user/1 进行id查询
