第一种下载方法
使用阿里云的源安装 Zabbix-agent
[root@agent-41 ~]
第二种下载方法
添加zabbix官方源(第一种方法安装时提示缺依赖时可以这样)
[root@agent-41 ~]
[zabbix]
name=Zabbix Official Repository
baseurl=http://repo.zabbix.com/zabbix/6.0/rhel/7/x86_64/
enabled=1
gpgcheck=0
gpgkey=file:///etc/pki/rpm-gpg/RPM-GPG-KEY-ZABBIX-A14FE591
[root@agent-41 ~]
[root@agent-41 ~]
[root@agent-41 ~]
zabbix-agent下载好后修改配置文件
[root@agent-41 ~]
[root@agent-41 ~]
13:PidFile=/run/zabbix/zabbix_agentd.pid
32:LogFile=/var/log/zabbix/zabbix_agentd.log
43:LogFileSize=0
117:Server=192.168.10.40
171:ServerActive=127.0.0.1
182:Hostname=Zabbix server
323:Include=/etc/zabbix/zabbix_agentd.d/*.conf
启动 Zabbix-agent 服务
[root@agent-41 ~]
[root@agent-41 ~]
[root@agent-41 ~]
虚拟机无法安装zabbix-agent依赖解决方法(配置阿里云的源)
[root@agent-41 ~]
[aliyun-os]
name=aliyun-os
baseurl=https://mirrors.aliyun.com/centos/7/os/x86_64/
enabled=1
gpgcheck=1
gpgkey=https://mirrors.aliyun.com/centos/7/os/x86_64/RPM-GPG-KEY-CentOS-7
[aliyun-extra]
name=aliyun-extra
baseurl=https://mirrors.aliyun.com/centos/7/extras/x86_64/
enabled=1
gpgcheck=0
[aliyun-epel]
name=aliyun-epel
baseurl=https://mirrors.aliyun.com/epel/7Server/x86_64/
enabled=1
gpgcheck=0
[root@agent-41 ~]
[root@agent-41 ~]
配置好阿里云的源再重新走上面的下载安装配置流程即可
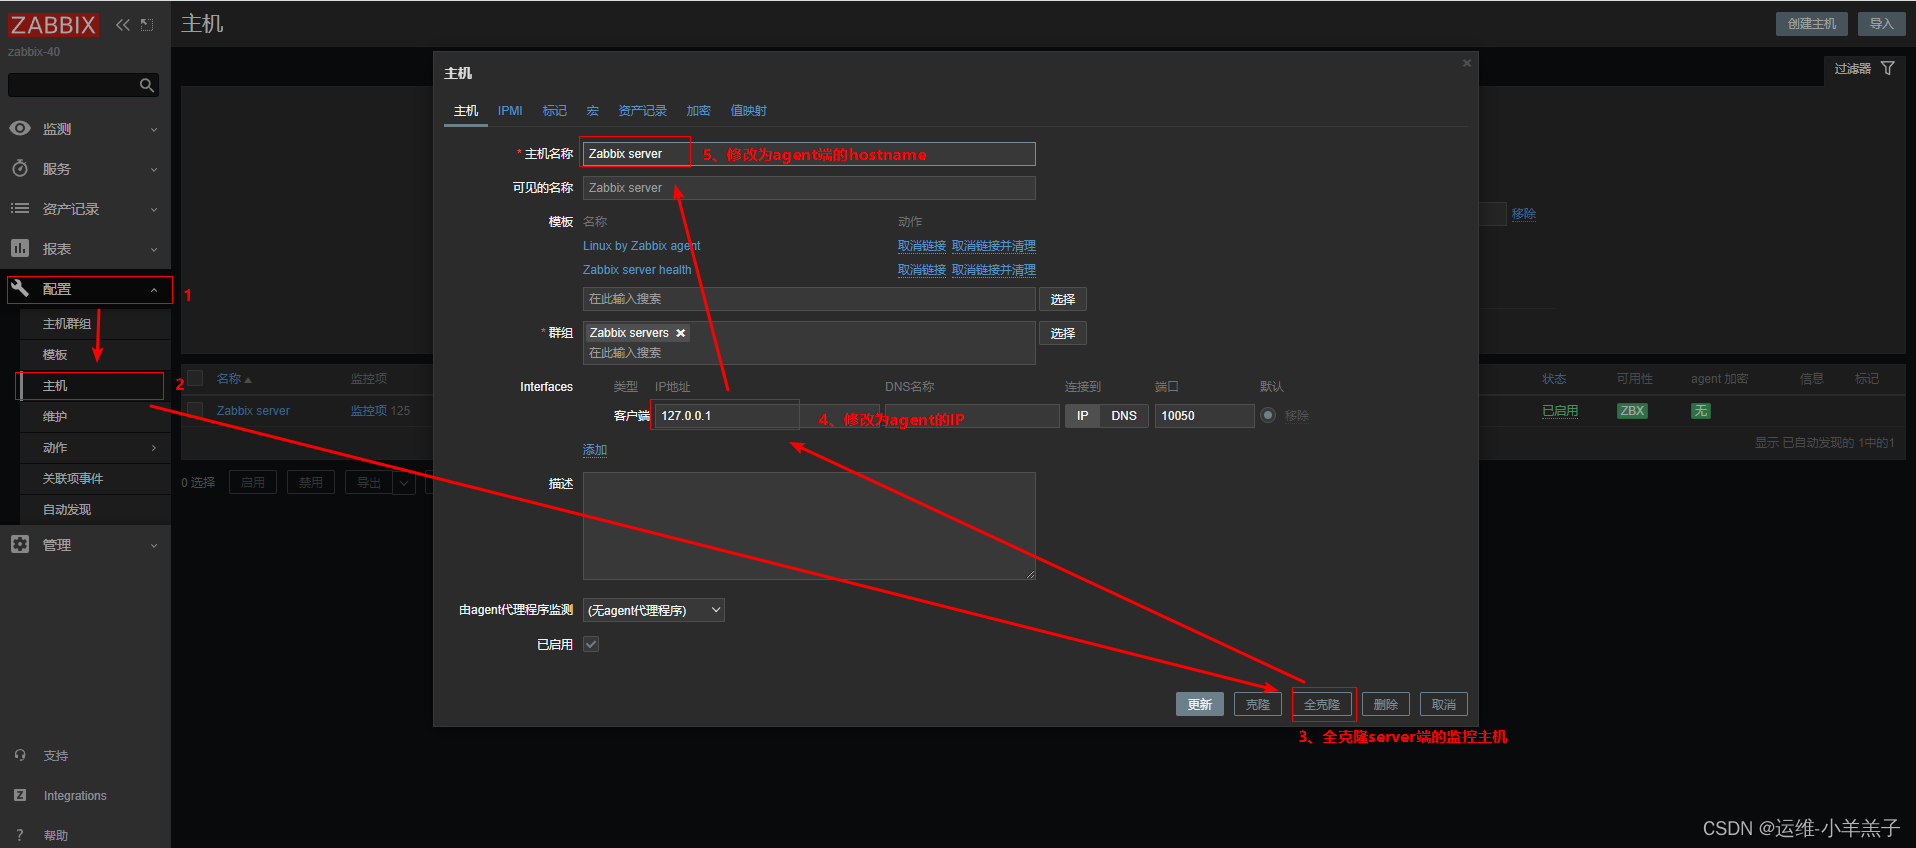
Web端添加监控主机

