完整资源位置:https://download.csdn.net/download/dmw412724/10361959
1.构建父级项目

这里有个问题,maven默认的java是1.5的,它的子模块什么的都是1.5,以后updateProject也会还原成1.5,很恶心,所以要在父级模块里添加1.8
<project xmlns="http://maven.apache.org/POM/4.0.0" xmlns:xsi="http://www.w3.org/2001/XMLSchema-instance" xsi:schemaLocation="http://maven.apache.org/POM/4.0.0 http://maven.apache.org/xsd/maven-4.0.0.xsd">
  <modelVersion>4.0.0</modelVersion>
  <groupId>community</groupId>
  <artifactId>community-parent</artifactId>
  <version>0.0.1-SNAPSHOT</version>
  <packaging>pom</packaging>
  <build>
    <plugins>
        <plugin>
            <groupId>org.apache.maven.plugins</groupId>
            <artifactId>maven-compiler-plugin</artifactId>
            <version>3.1</version>
            <configuration>
                <source>1.8</source>
                <target>1.8</target>
            </configuration>
        </plugin>
    </plugins>
   </build>
</project>
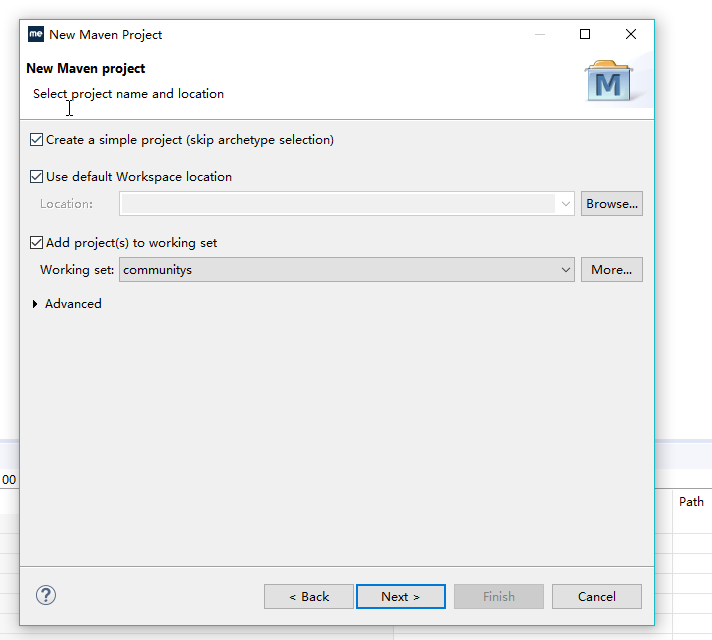
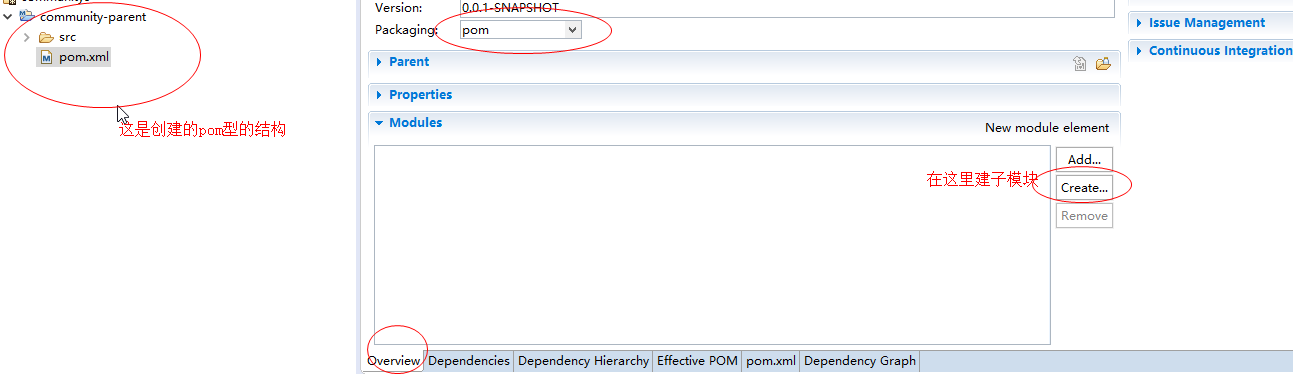
2.创建子级项目

一路next即可.然后结果是
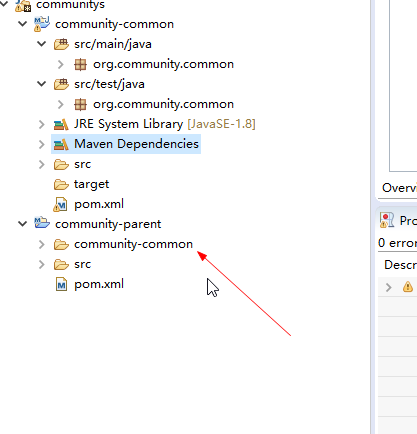
可以看到父级模块下多了一个子级模块 community-common
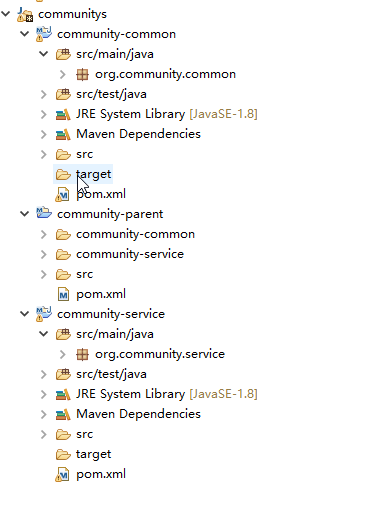
我们再创建一个子级模块 叫 community-service
现在 整个项目长这样
3.现在让community-service里面可以访问community-common里面的资源
community-common里新建个类
package org.community.common;

/**
 * Hello world!
 *
 */
public class CommonUtil
{
    public static void SayHello()
    {
        System.out.println( "Hello World!" );
    }
}
那么现在在community-service里面是无法调用的.
需要在community-service里的pom文件里添加以下依赖
<dependencies>
    <dependency>
      <groupId>maventest-common</groupId>
	  <artifactId>maventest-common</artifactId>
	  <version>0.0.1-SNAPSHOT</version>
    </dependency>
  </dependencies>
这时候,我们在community-service里面调用上面的那个CommonUtil就可以直接使用的.
但这个功能不局限于此.而是把community-comon的pom.xml里的jar包也都引入了过来.
我们修改下community-comon的pom.xml,加入ssm的一些包
       <properties>
		<project.build.sourceEncoding>UTF-8</project.build.sourceEncoding>
		<spring.version>4.0.5.RELEASE</spring.version>
		<!-- mybatis版本号 -->
		<mybatis.version>3.2.6</mybatis.version>
		<!-- log4j日志文件管理包版本 -->
		<slf4j.version>1.7.7</slf4j.version>
		<log4j.version>1.2.17</log4j.version>
	</properties>
	<dependencies>
		<dependency>
			<groupId>junit</groupId>
			<artifactId>junit</artifactId>
			<version>4.12</version>
			<scope>test</scope>
		</dependency>
		<!-- spring核心包 -->
		<dependency>
			<groupId>org.springframework</groupId>
			<artifactId>spring-core</artifactId>
			<version>${spring.version}</version>
		</dependency>

		<dependency>
			<groupId>org.springframework</groupId>
			<artifactId>spring-web</artifactId>
			<version>${spring.version}</version>
		</dependency>
		<dependency>
			<groupId>org.springframework</groupId>
			<artifactId>spring-oxm</artifactId>
			<version>${spring.version}</version>
		</dependency>
		<dependency>
			<groupId>org.springframework</groupId>
			<artifactId>spring-tx</artifactId>
			<version>${spring.version}</version>
		</dependency>


		<dependency>
			<groupId>org.springframework</groupId>
			<artifactId>spring-jdbc</artifactId>
			<version>${spring.version}</version>
		</dependency>


		<dependency>
			<groupId>org.springframework</groupId>
			<artifactId>spring-webmvc</artifactId>
			<version>${spring.version}</version>
		</dependency>
		<dependency>
			<groupId>org.springframework</groupId>
			<artifactId>spring-aop</artifactId>
			<version>${spring.version}</version>
		</dependency>


		<dependency>
			<groupId>org.springframework</groupId>
			<artifactId>spring-context-support</artifactId>
			<version>${spring.version}</version>
		</dependency>


		<dependency>
			<groupId>org.springframework</groupId>
			<artifactId>spring-test</artifactId>
			<version>${spring.version}</version>
		</dependency>


		<!-- json数据 -->
		<dependency>
			<groupId>org.codehaus.jackson</groupId>
			<artifactId>jackson-core-asl</artifactId>
			<version>1.9.13</version>
		</dependency>
		<dependency>
			<groupId>org.codehaus.jackson</groupId>
			<artifactId>jackson-mapper-asl</artifactId>
			<version>1.9.13</version>
		</dependency>

		<!-- 日志文件管理包 -->
		<!-- log start -->
		<dependency>
			<groupId>log4j</groupId>
			<artifactId>log4j</artifactId>
			<version>${log4j.version}</version>
		</dependency>
		<dependency>
			<groupId>org.slf4j</groupId>
			<artifactId>slf4j-api</artifactId>
			<version>${slf4j.version}</version>
		</dependency>
		<dependency>
			<groupId>org.slf4j</groupId>
			<artifactId>slf4j-log4j12</artifactId>
			<version>${slf4j.version}</version>
		</dependency>
		<!-- log end -->
	</dependencies>
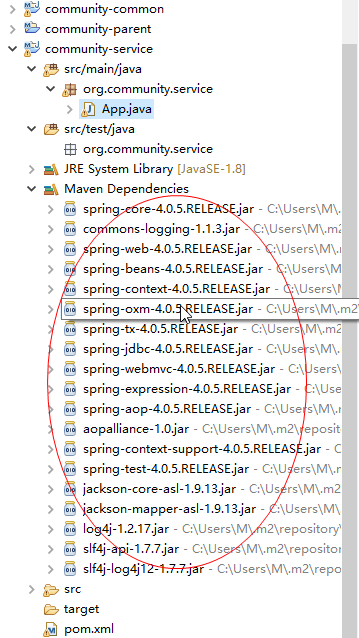
等待依赖包下载好,我们再去community-service里面去调用spring的方法,发现是可以的,也引入了这些资源
4.创建一个具有web功能的子模块
先建一个community-web-back 就是网站后台的这个模块,点开pom.xml,把jar改成war

然后再右键该模块-peroperties-projectFacts
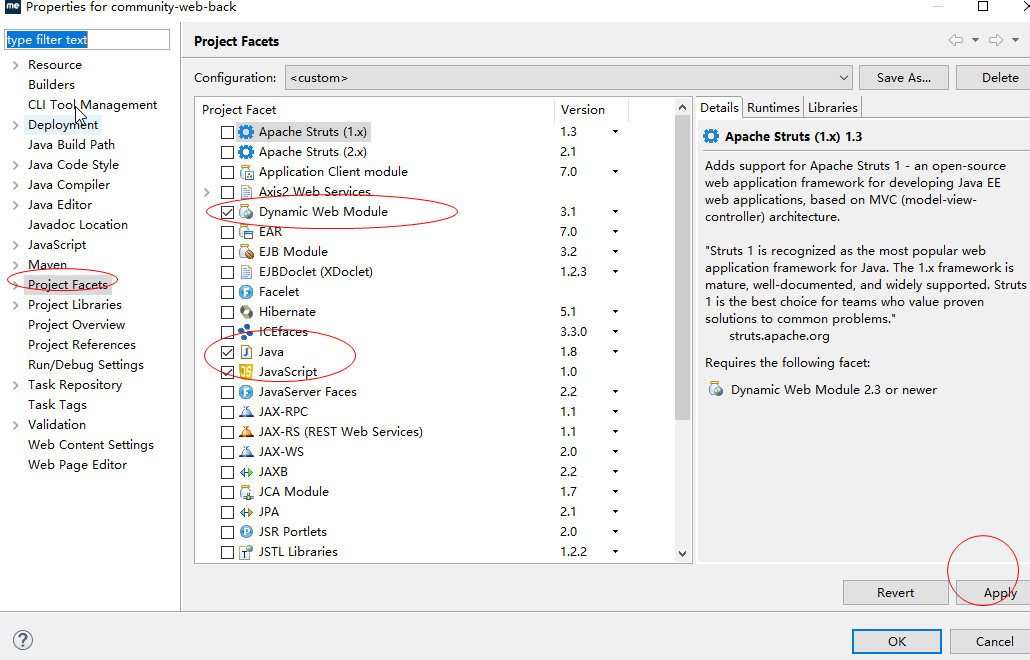
这时候我们就会发现项目已经变成了web项目.

这时候的错误是因为WebRoot里面的那个jsp需要javaEE的servlet包,而我们现在没有.加入即可
但是webRoot这个文件夹不符合maven的约定.所以,我们把webroot里面的文件复制到src/main下新建文件夹webapp,然后复制一个web.xml到里面
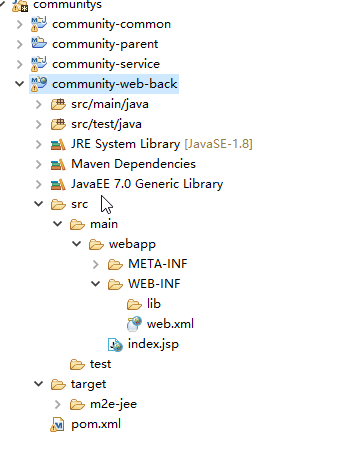
如果pom.xml会报错,多半是因为少了web.xml或者在properties标签里添加这个webVersion
<properties>
    <project.build.sourceEncoding>UTF-8</project.build.sourceEncoding>
    <webVersion>3.1</webVersion>
  </properties>
接着引入那个community-common的依赖.
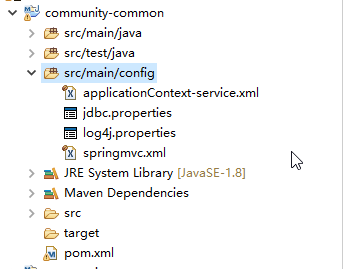
5.applictionContext-spring.xml等配置文件的依赖
那么关于web启动的一些配置文件呢?我们也放到community-common里面
新建个/src/main/config
把一些资源塞进去
然后在community-web-back子模块里的Pom.xml里引入
<build>
  	<resources>
  		<resource>
  				<directory>../community-common/src/main/config</directory>
				<includes>
					<include>*</include>
				</includes>
				<targetPath>.</targetPath>
  		</resource>
  	</resources>
  </build>
这个时候就ok了.配置好你的xml.然后在community-web-back里写个testController.我们接着启动项目
6.启动web项目
按正常Tomcat把这个community-web-back放进去就行了.就启动成功了可以访问.但是如果不注意,会有几个个常见错误.
一个是:
Failed to start component .这个建议重新下载jar包,有的jar包可能错误,或者版本冲突一个是:
org.springframework.core.io.Resource 这个是根本没有载入进去. 右键-properties-builder path把资源添加去