一、交叉编译LAME库
LAME是一种非常优秀的MP3编码引擎,在业界,转码成MP3格式的音频文件时,最常用的编码器就是LAME库。
1. 下载LAME库源码
https://sourceforge.net/projects/lame/files/lame/
进入LAME官网下载LAME源码,我选择最新版本:3.100
2. 配置交叉编译环境
在编译LAME之前,我们需要先配置交叉编译环境。
Android NDK附带了交叉工具链,具体参考这篇文章:https://developer.android.com/ndk/guides/other_build_systems?hl=zh-cn
我的NDK路径为:/home/lorien/Android/Sdk/ndk/22.1.7171670/toolchains/llvm/prebuilt/linux-x86_64/bin
3. 配置、编译、安装LAME
首先我们需要编译使用的一些环境变量:
#!/bin/bash

export TOOLCHAIN=/home/lorien/Android/Sdk/ndk/22.1.7171670/toolchains/llvm/prebuilt/linux-x86_64
export TARGET=aarch64-linux-android
export API=21
export AR=$TOOLCHAIN/bin/llvm-ar
export CC=$TOOLCHAIN/bin/$TARGET$API-clang
export AS=$CC
export CXX=$TOOLCHAIN/bin/$TARGET$API-clang++
export LD=$TOOLCHAIN/bin/ld
export RANLIB=$TOOLCHAIN/bin/llvm-ranlib
export STRIP=$TOOLCHAIN/bin/llvm-strip

export CFLAGS="-fPIC"
接下来解压的LAME源码:lame-3.100.tar.gz,解压后进入源码根目录:/lame-3.100
配置:
./configure --host=arm-linux --disable-shared --disable-frontend --enable-static --prefix=/Users/zhanghao43/Desktop/lame/arm64-v8a
编译:
make clean
make -j4
安装:
make install
安装完成后,生成的头文件和库文件,就会在prefix指定的路径下面,即:/Users/zhanghao43/Desktop/lame/arm64-v8a
在生成的文件中,接下来需要使用的文件是:
- 头文件:/Users/zhanghao43/Desktop/lame/arm64-v8a/include/lame/lame.h
- 库文件:/Users/zhanghao43/Desktop/lame/arm64-v8a/lib/lame/libmp3lame.a
至此,LAME库交叉编译完成。
二、创建Android Native项目使用LAME库
下面我们使用LAME库创建一个Android Demo项目,完成PCM音频的录制以及PCM文件转MP3的功能
我们需要创建Android Natvie项目。
1. 配置工程
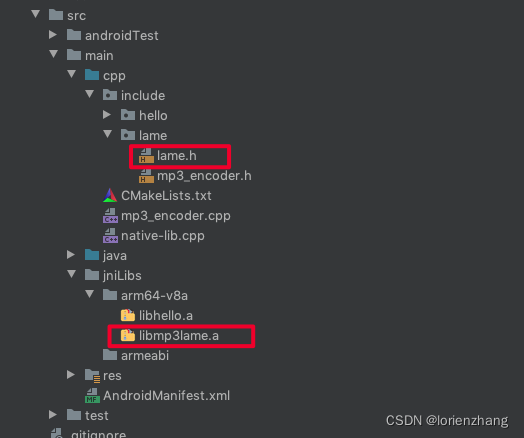
我们先把编译LAME库生成的头文件和库文件放到项目中,路径如下图:
然后,我们修改下CMakeLists.txt,让CMake在编译、链接时,找到LAME头文件和库文件。CMakeLists.txt文件内容如下:
cmake_minimum_required(VERSION 3.10.2)

# Declares and names the project.

project("lame")

include_directories(
        ${CMAKE_SOURCE_DIR}/include/lame)

add_library( # Sets the name of the library.
             native-lib

             # Sets the library as a shared library.
             SHARED

             # Provides a relative path to your source file(s).
             native-lib.cpp mp3_encoder.cpp)

add_library(mp3lame STATIC IMPORTED)
set_target_properties(mp3lame PROPERTIES IMPORTED_LOCATION
        ${CMAKE_SOURCE_DIR}/../jniLibs/${ANDROID_ABI}/libmp3lame.a)

find_library( # Sets the name of the path variable.
              log-lib

              # Specifies the name of the NDK library that
              # you want CMake to locate.
              log )

target_link_libraries(native-lib
        mp3lame)
2. C++代码
接下来,可以写代码了。首先看一下mp3_encoder.h, mp3_encoder.cpp
#ifndef LAME_MP3ENCODER_H
#define LAME_MP3ENCODER_H
#include <stdio.h>
#include "lame.h"

class Mp3Encoder {


private:
    FILE* pcmFile;
    FILE* mp3File;
    lame_t lameClient;

public:
    Mp3Encoder();
    ~Mp3Encoder();
    int Init(const char* pcmFilePath, const char* mp3FilePath, int sampleRate, int channels, int bitRate);
    void Encode();

    void Destroy();
};

#endif //LAME_MP3ENCODER_H
#include "mp3_encoder.h"
#include "lame.h"

Mp3Encoder::Mp3Encoder() {


}

int Mp3Encoder::Init(const char* pcmFilePath, const char* mp3FilePath, int sampleRate, int channels, int bitRate) {


    int ret = -1;
    pcmFile = fopen(pcmFilePath, "rb");
    if (pcmFile) {


        mp3File = fopen(mp3FilePath, "wb");
        if (mp3File) {


            lameClient = lame_init();
            // in 采样率
            lame_set_in_samplerate(lameClient, sampleRate);
            // out 采样率
            lame_set_out_samplerate(lameClient, sampleRate);
            lame_set_num_channels(lameClient, channels);
            lame_set_brate(lameClient, bitRate / 1000);
            lame_init_params(lameClient);
            ret = 0;
        }
    }
    return ret;
}

void Mp3Encoder::Encode() {


    int bufferSize = 1024 * 256;
    short *buffer = new short[bufferSize / 2];
    short *leftBuffer = new short[bufferSize / 4];
    short *rightBuffer = new short[bufferSize / 4];
    unsigned char* mp3_buffer = new unsigned char[bufferSize];
    size_t readBufferSize = 0;
    while ((readBufferSize = fread(buffer, 2, bufferSize / 2, pcmFile)) > 0) {


        for (int i = 0; i < readBufferSize; i++) {


            if (i % 2 == 0) {


                leftBuffer[i / 2] = buffer[i];
            } else {


                rightBuffer[i / 2] = buffer[i];
            }
        }
        size_t wroteSize = lame_encode_buffer(lameClient, (short int *) leftBuffer, (short int *) rightBuffer, (int)(readBufferSize / 2), mp3_buffer, bufferSize);
        fwrite(mp3_buffer, 1, wroteSize, mp3File);
    }

    delete [] buffer;
    delete [] leftBuffer;
    delete [] rightBuffer;
    delete [] mp3_buffer;
}

void Mp3Encoder::Destroy() {


    if (pcmFile) {


        fclose(pcmFile);
    }
    if (mp3File) {


        fclose(mp3File);
        lame_close(lameClient);
    }
}
然后我们看一下native-lib.cpp中的JNI方法:
Mp3Encoder *encoder;

extern "C" JNIEXPORT jint JNICALL
Java_com_baidu_lame_MainActivity_pcmToMp3JNI(
        JNIEnv *env,
        jobject,
        jstring pcm_path,
        jstring mp3_path,
        jint sample_rate,
        jint channel,
        jint bit_rate) {


    const char *pcmPath = env->GetStringUTFChars(pcm_path, NULL);
    const char *mp3Path = env->GetStringUTFChars(mp3_path, NULL);

    encoder = new Mp3Encoder();
    encoder->Init(pcmPath, mp3Path, sample_rate, channel, bit_rate);
    encoder->Encode();

    env->ReleaseStringUTFChars(pcm_path, pcmPath);
    env->ReleaseStringUTFChars(mp3_path, mp3Path);
    return 0;
}
3. Java代码
先贴一下MainAcgtivity的XML文件
<LinearLayout xmlns:android="http://schemas.android.com/apk/res/android"
    xmlns:tools="http://schemas.android.com/tools"
    android:layout_width="match_parent"
    android:layout_height="match_parent"
    android:orientation="vertical"
    tools:context=".MainActivity">

    <Button
        android:layout_width="match_parent"
        android:layout_height="wrap_content"
        android:text="开始录制pcm"
        android:onClick="startRecordPcm"
        />

    <Button
        android:layout_width="match_parent"
        android:layout_height="wrap_content"
        android:text="停止录制pcm"
        android:onClick="stopRecordPcm"
        />

    <Button
        android:layout_width="match_parent"
        android:layout_height="wrap_content"
        android:text="pcm转mp3"
        android:onClick="pcm2mp3"
        />

</LinearLayout>
MainActivity.kt
class MainActivity : AppCompatActivity() {


    override fun onCreate(savedInstanceState: Bundle?) {


        super.onCreate(savedInstanceState)
        setContentView(R.layout.activity_main)
    }

    external fun stringFromJNI(): String
    external fun pcmToMp3JNI(pcmPath: String, mp3Path: String,
                             sampleRate: Int, channel: Int, bitRate: Int): Int

    companion object {


        init {


            System.loadLibrary("native-lib")
        }
    }

    private lateinit var audioRecord: AudioRecord
    private var pcmFilePath: String = ""
    private var buffersize = 1024
    private var isRecord = false

    /**
     * 调用Native代码完成PCM文件转成MP3
     */
    fun pcm2mp3(view: View) {


        val pcmPath = getPCMFile().absolutePath
        val mp3Path = getMP3File().absolutePath
        val sampleRate = 44100
        val channel = 2
        val bitRate = 64000
        val ret = pcmToMp3JNI(pcmPath, mp3Path, sampleRate, channel, bitRate)
        Toast.makeText(this, "$ret", Toast.LENGTH_SHORT).show()
    }

    /**
     * 开始录制PCM音频文件
     */
    @SuppressLint("MissingPermission")
    fun startRecordPcm(view: View) {


        val frequency = 44100
        val channelConfig = AudioFormat.CHANNEL_IN_STEREO
        val audioEncoding = AudioFormat.ENCODING_PCM_16BIT
        buffersize = AudioRecord.getMinBufferSize(frequency, channelConfig, audioEncoding)
        audioRecord = AudioRecord(
            MediaRecorder.AudioSource.MIC,
            frequency,
            channelConfig,
            audioEncoding,
            buffersize)
        pcmFilePath = getPCMFile().absolutePath
        isRecord = true
        RecordThread().start()
    }

    /**
     * 结束录制PCM音频文件
     */
    fun stopRecordPcm(view: View) {


        isRecord = false
    }

    private fun getPCMFile(): File {


        val root = getExternalFilesDir(null)
        val csvDir = File(root, "/audio/")
        if (!csvDir.exists()) {


            // 创建csv 目录
            csvDir.mkdir()
        }
        return File(csvDir, "sing.pcm")
    }

    private fun getMP3File(): File {


        val root = getExternalFilesDir(null)
        val csvDir = File(root, "/audio/")
        if (!csvDir.exists()) {


            // 创建csv 目录
            csvDir.mkdir()
        }
        return File(csvDir, "sing.mp3")
    }

    /**
     * 录制PCM音频线程
     */
    inner class RecordThread : Thread() {


        override fun run() {


            audioRecord.startRecording()
            var fos: FileOutputStream? = null
            try {


                Log.d(TAG, "pcm文件:$pcmFilePath")
                fos = FileOutputStream(pcmFilePath)
                val bytes = ByteArray(buffersize)
                while (isRecord) {


                    audioRecord.read(bytes, 0, bytes.size)
                    fos.write(bytes, 0, bytes.size)
                    fos.flush()
                }
                Log.d(TAG, "停止录制")
                audioRecord.stop()
                fos.flush()
            } catch (e: Exception) {


                Log.d(TAG, "exception: $e")
            } finally {


                if (fos != null) {


                    try {


                        fos.close()
                    } catch (e: Exception) {


                    }
                }
            }
        }
    }
}
最后,权限:
<!--录音-->
<uses-permission android:name="android.permission.RECORD_AUDIO" />
<!--读取SD卡-->
<uses-permission android:name="android.permission.WRITE_EXTERNAL_STORAGE" />
代码中,没有动态申请权限,APP装上后,需要再到设置页面给APP开下对应权限才能录制音频。
OK,本文到这就结束了,感谢大家阅读。