源码留在底部
引子
现在ChatGPT很火,但是注册账号还得有国外的手机号,这难倒了不少人。
于是很多人自己封装了一下ChatGPT的API,做了一个简单的转发,把要问的问题通过调用ChatGPT API的方式获取答案。
不过好像通过API获取的答案没有直接用网页获取的详细,其中的原因就不知道了。
现在这样的应用、网站到处都是,但是作为一个有追求的程序员,怎么能不自己实现一下呢?
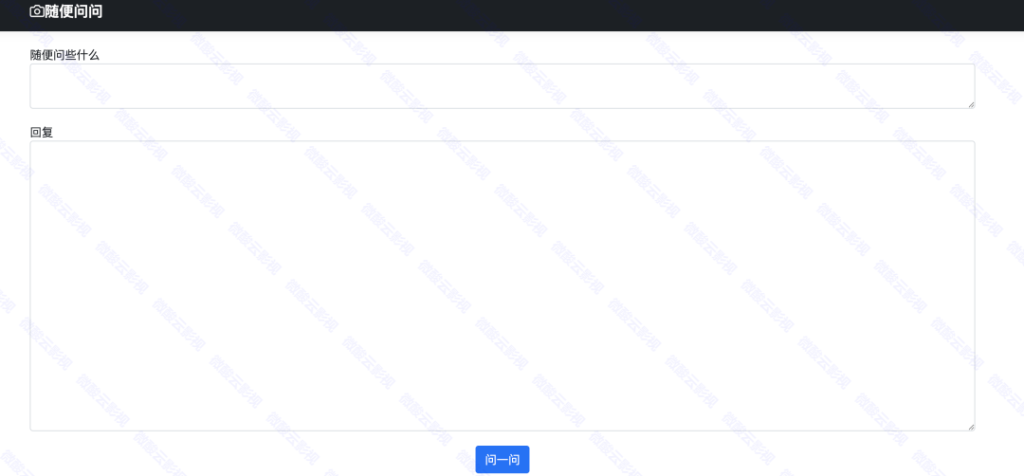
下面我们来做个最简单的页面,只实现一问一答的功能:
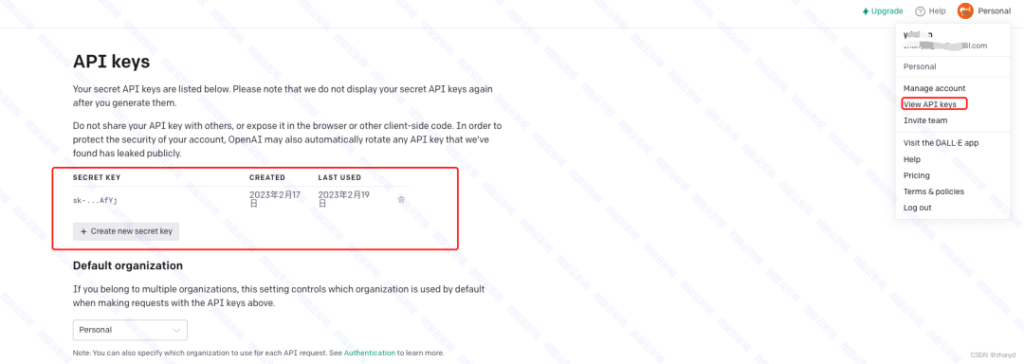
账号和秘钥
好,我们这就开始。
首先我们要有一个ChatGPT的账号,注册账号的方法网上很多,你可以自己去找,也可以直接去买一个现成的。
注册好了之后,点击右上角的View API keys,然后生成一个秘钥就行了,这个是调用API的私钥,一定要保管好,不要泄露给别人。
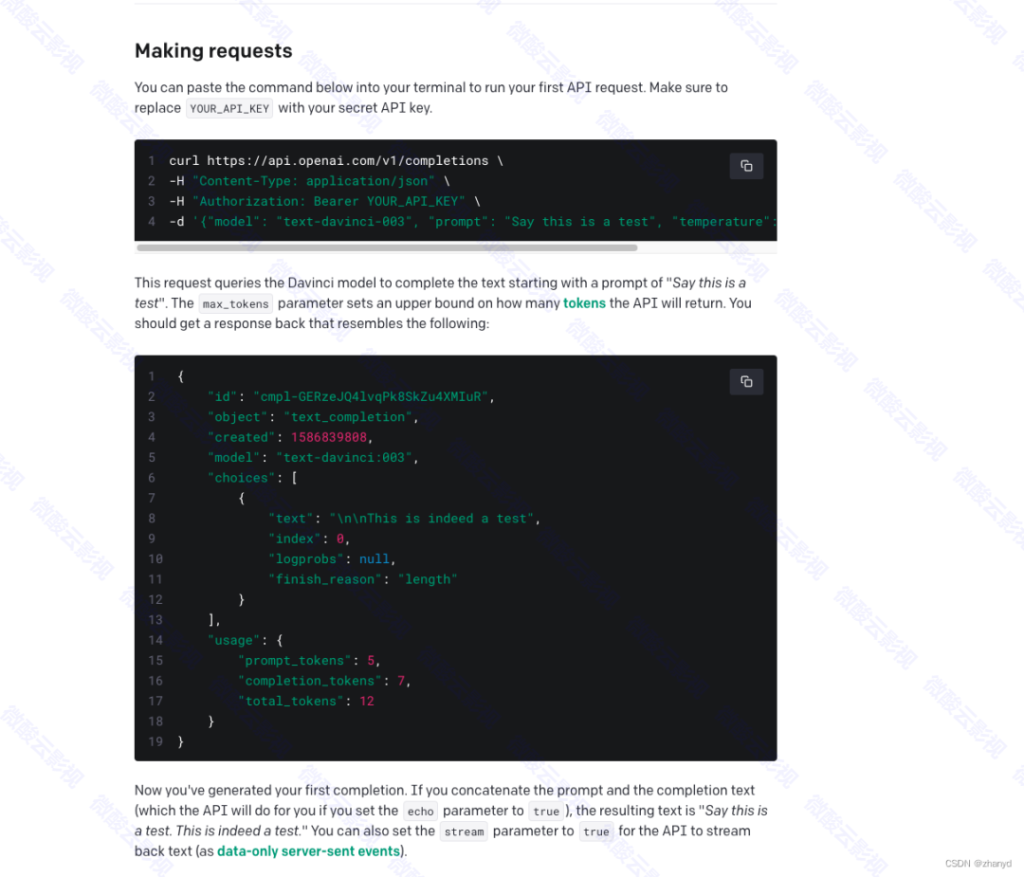
看一下文档,里面有API请求和返回的数据格式:
后端
我们开始写代码,无非就是调用一个API接口,用什么语言都行,这里我就用Java了。
主要就是下面这段代码,其他代码就是对这段代码的调用,值得注意的是,只能用post方式调用,不能用get方式。
    /**
  * 调用ChatGPTAPI
  * @param question
  * @return
  */
 public static String postChatGPT(String question) {

  StringBuffer receive = new StringBuffer();
  BufferedWriter dos = null;
  BufferedReader rd = null;
  HttpURLConnection URLConn = null;

  try {

   // API的地址
   URL url = new URL("https://api.openai.com/v1/completions");
   URLConn = (HttpURLConnection) url.openConnection();
   URLConn.setReadTimeout(readTimeout);
   URLConn.setConnectTimeout(connectTimeout);
   URLConn.setDoOutput(true);
   URLConn.setDoInput(true);
   URLConn.setRequestMethod("POST");
   URLConn.setUseCaches(false);
   URLConn.setAllowUserInteraction(true);
   URLConn.setInstanceFollowRedirects(true);

   URLConn.setRequestProperty("Content-Type", "application/json");
   // 这里填秘钥,最前面得加"Bearer "
   URLConn.setRequestProperty("Authorization", "Bearer sk********");

   JSONObject sendParam = new JSONObject();
   // 语言模型
   sendParam.put("model", "text-davinci-003");
   // 要问的问题
   sendParam.put("prompt", question);
   // 温度,即随机性,0表示随机性最低,2表示随机性最高
   sendParam.put("temperature", 0.8);
   // 返回最大的字数
   sendParam.put("max_tokens", 2048);

   URLConn.setRequestProperty("Content-Length", String.valueOf(sendParam.toString().getBytes().length));
   dos = new BufferedWriter(new OutputStreamWriter(URLConn.getOutputStream(), "UTF-8"));
   dos.write(sendParam.toString());
   dos.flush();

   rd = new BufferedReader(new InputStreamReader(URLConn.getInputStream(), "UTF-8"));
   String line;
   while ((line = rd.readLine()) != null) {
    receive.append(line);
   }

  } catch (IOException e) {
   receive.append("访问产生了异常-->").append(e.getMessage());
   e.printStackTrace();
  } finally {
   if (dos != null) {
    try {
     dos.close();
    } catch (IOException ex) {
     ex.printStackTrace();
    }
   }

   if (rd != null) {
    try {
     rd.close();
    } catch (IOException ex) {
     ex.printStackTrace();
    }
   }

   URLConn.disconnect();
  }

  String content = receive.toString();
  LOGGER.info("content = "+content);
  return content;
 }
Controller
@RestController@EnableAutoConfiguration@RequestMapping("/api/ask")@ApiIgnorepublic class AskController { @Autowired AskService askService; /** * 获取chatGPT返回的数据 * @param question * @return */ @PostMapping("/chatGPT") public ApiResult<String> chatGPT(String question) { ApiResult<String> apiResult = new ApiResult<String>(); String result = askService.getResultFromChatGPT(question); return apiResult.success(result); }}Service
@Servicepublic class AskService { private static final Logger LOGGER = LoggerFactory.getLogger(AskService.class); /** * 获取chatGPT返回的数据 * @param question * @return */ public String getResultFromChatGPT(String question) { // 调用API接口 String returnContent = HttpService.postChatGPT(question); LOGGER.info("returnContent = " + returnContent); // 解析返回的数据 JSONObject returnContentObject = JSONObject.parseObject(returnContent); JSONArray choicesArray = returnContentObject.getJSONArray("choices"); if(choicesArray != null && !choicesArray.isEmpty()) { JSONObject choicesObject = choicesArray.getJSONObject(0); if(choicesObject != null) { return choicesObject.getString("text"); } } return ""; }}好了,后端代码就这些了。
前端
前端的页面很简单,就直接用HTML和jQuery好了,为了美观一点再加个bootstrap5吧。
<!DOCTYPE html>
<html lang="zh-CN">

    <head><meta http-equiv="Content-Type" content="text/html; charset=UTF-8">

    <meta name="viewport" content="width=device-width, initial-scale=1, shrink-to-fit=no">
    <meta name="keywords" content="chatGPT,你问我答">
    <meta name="description" content="随便问点什么">
    <meta name="author" content="[email protected]">
    <link rel="icon" href="https://getbootstrap.com/docs/4.0/assets/img/favicons/favicon.ico">

    <title>你问我答</title>

    <link rel="canonical" href="https://getbootstrap.com/docs/4.0/examples/album/">

    <link href="/assets/bootstrap-5.1.3-dist/css/bootstrap.css" rel="stylesheet">

    <!-- jQuery 和 Bootstrap 集成包(集成了 Popper) -->
    <script src="/assets/js/jquery-3.6.0.js"></script>
    <!-- JavaScript Bundle with Popper -->
    <script src="/assets/bootstrap-5.1.3-dist/js/bootstrap.bundle.js"></script>

    <script src="/assets/js/index/index.js?2"></script>

    <!-- Custom styles for this template -->
    <link href="/assets/css/index/index.css" rel="stylesheet">
</head>

<body>

<header>
    <div class="navbar navbar-dark bg-dark box-shadow">
        <div class="container d-flex justify-content-between">
            <a class="navbar-brand d-flex align-items-center">
                <svg xmlns="http://www.w3.org/2000/svg" width="20" height="20" viewBox="0 0 24 24" fill="none" stroke="currentColor" stroke-width="2" stroke-linecap="round" stroke-linejoin="round" class="mr-2"><path d="M23 19a2 2 0 0 1-2 2H3a2 2 0 0 1-2-2V8a2 2 0 0 1 2-2h4l2-3h6l2 3h4a2 2 0 0 1 2 2z"></path><circle cx="12" cy="13" r="4"></circle></svg>
                <strong>随便问问</strong>
            </a>
        </div>
    </div>
</header>

<main role="main">

    <div class="container">
        <div class="form-group" style="margin-top: 20px;">
            <label for="question">随便问些什么</label>
            <textarea class="form-control" name="question" id="question" rows="2"></textarea>
        </div>
        <div class="form-group" style="margin-top: 20px;">
            <label for="answer">回复</label>
            <textarea class="form-control" name="answer" id="answer" rows="16"></textarea>
        </div>
        <div class="form-group" style="margin-top: 20px;display: flex;justify-content: center;">
            <button class="btn btn-primary loading-btn" type="button" disabled style="display: none">
                <span class="spinner-border spinner-border-sm" role="status" aria-hidden="true"></span>
                请耐心等待...
            </button>
            <button class="btn btn-primary submit-btn">问一问</button>
        </div>
    </div>
</main>

<footer class="text-muted">
    <div class="container">
        <p>有问题请百度微酸云,关注微酸云影视公众号</p>
    </div>
</footer>

</body>

</html>
js代码
$(function(){ // 微信内置浏览器不支持onclick事件,在这里绑定 $(".submit-btn").attr('onclick','getResultFromChatGPT()')})// 新增用户访问数据function getResultFromChatGPT() { if($("#question").val() === '') { alert('问题不能为空') return } $(".loading-btn").show() $(".submit-btn").hide() $("#answer").text('') //获取商机状态列表 $.ajax({ type:"post", url:"/api/ask/chatGPT", data:{ question: $("#question").val() }, success:function(result){ console.log(result) $("#answer").text(result.data) $(".loading-btn").hide() $(".submit-btn").show() } })}有一个坑就是,如果在微信中直接打开这个网页,微信自带的浏览器是无法识别html的onclick方法的,点击事件只能在js里绑定。
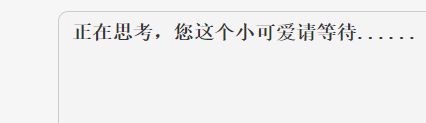
$(".submit-btn").attr('onclick','getResultFromChatGPT()')还有,调用API的时间可能需要很久,一定要做个请耐心等待的提示,不然用户会以为系统没反应了。
运行
好了,代码写完了,我们运行下程序,看看效果:
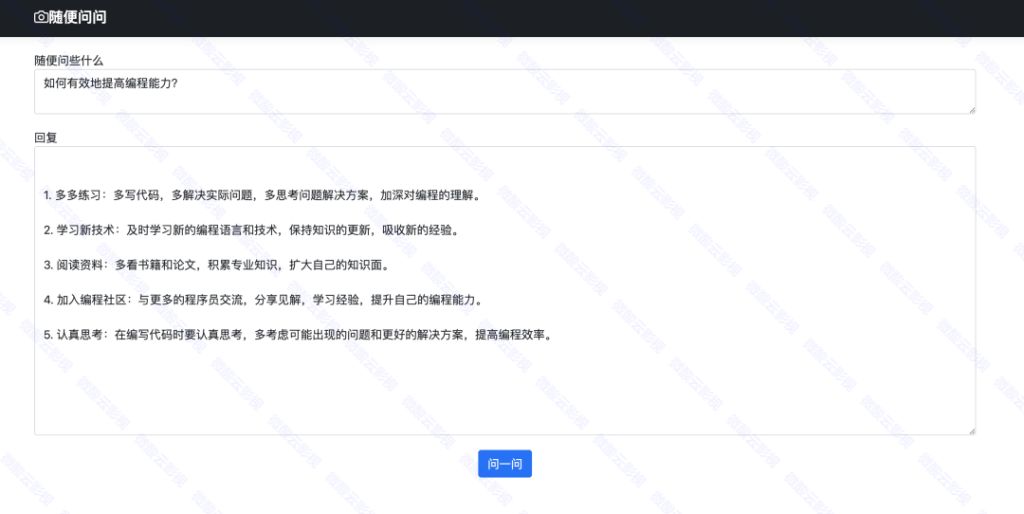
嗯,这个建议不错。
如果开以的话请关注”微酸云影视“公众号
下载一个本人运营的app,纯净无广告(聚合影视漫画小说,chatgpt,以及其他各类工具):
https://wwxm.lanzouo.com/i83vG0qje00f
密码:3062