在上面对axios有了一定的了解后,感兴趣可以看看源码部分,下面贴出地址和部分分析的结果
github:https://github.com/axios/axios/tree/6b4fd93e6886c281ef1a51fca556616ce17f8fba
axios的创建过程
入口文件
我们在axios包的入口文件index.js中可以看到,只有这些代码
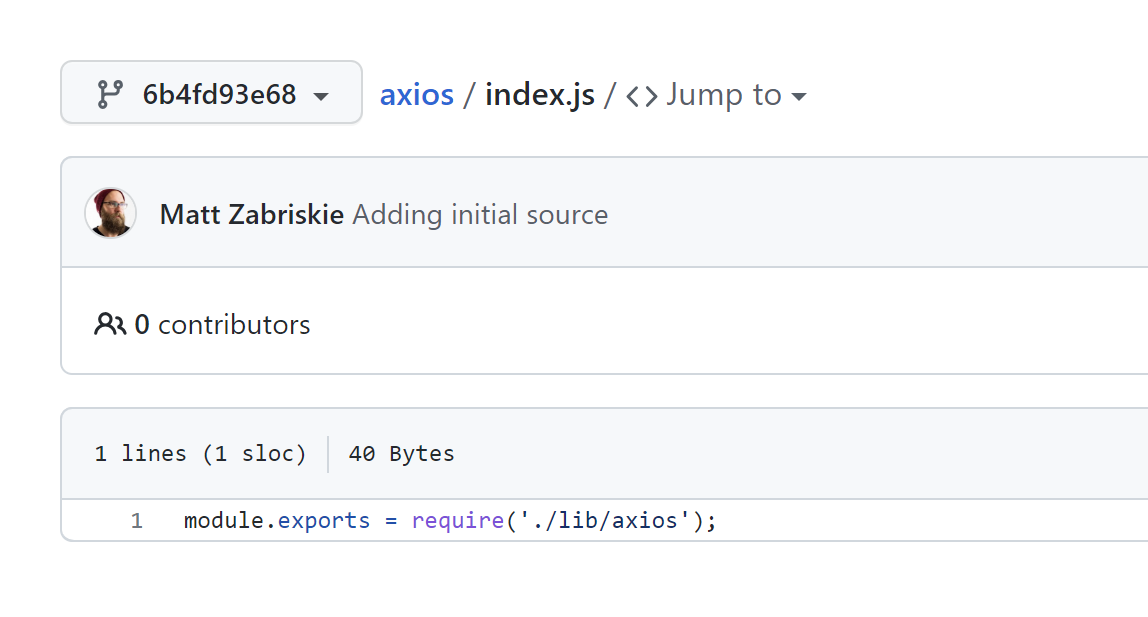
可以知道这里的入口其实是axios.js文件,其中lib文件夹是主要的文件夹
axios.js
在axios.js中:
'use strict';

// 外部依赖的导入
var utils = require('./utils');
var bind = require('./helpers/bind');
var Axios = require('./core/Axios');
var mergeConfig = require('./core/mergeConfig');
var defaults = require('./defaults');

/**
 * Create an instance of Axios
 *
 * @param {Object} defaultConfig The default config for the instance
 * @return {Axios} A new instance of Axios
 */


function createInstance(defaultConfig) {
  var context = new Axios(defaultConfig);
  var instance = bind(Axios.prototype.request, context);

  // Copy axios.prototype to instance
  utils.extend(instance, Axios.prototype, context);

  // Copy context to instance
  utils.extend(instance, context);

  // Factory for creating new instances
  instance.create = function create(instanceConfig) {
    return createInstance(mergeConfig(defaultConfig, instanceConfig));
  };

  return instance;
}


// Create the default instance to be exported
var axios = createInstance(defaults);

// Expose Axios class to allow class inheritance
axios.Axios = Axios;


// Expose Cancel & CancelToken
axios.Cancel = require('./cancel/Cancel');
axios.CancelToken = require('./cancel/CancelToken');
axios.isCancel = require('./cancel/isCancel');
axios.VERSION = require('./env/data').version;

// Expose all/spread
axios.all = function all(promises) {
  return Promise.all(promises);
};
axios.spread = require('./helpers/spread');

// Expose isAxiosError
axios.isAxiosError = require('./helpers/isAxiosError');

module.exports = axios;

// Allow use of default import syntax in TypeScript
module.exports.default = axios;
其中主要的代码片段是:
function createInstance(defaultConfig) {
  var context = new Axios(defaultConfig);
  var instance = bind(Axios.prototype.request, context);

  // Copy axios.prototype to instance
  utils.extend(instance, Axios.prototype, context);

  // Copy context to instance
  utils.extend(instance, context);

  // Factory for creating new instances
  instance.create = function create(instanceConfig) {
    return createInstance(mergeConfig(defaultConfig, instanceConfig));
  };

  return instance;
}
// Create the default instance to be exported
var axios = createInstance(defaults);
可以看出axios其实就是函数createInstance的返回值赋值,下面分析下函数createInstance
Axios函数线索
函数 createInstance接受一个参数,这个参数就是文件头上的一个导入,注意的是context这个构造对象:
var context = new Axios(defaultConfig);
context是 new Axios得到的,这里的 Axios就是下一步的线索,在github上的代码直接点击,选择这个就可以看到
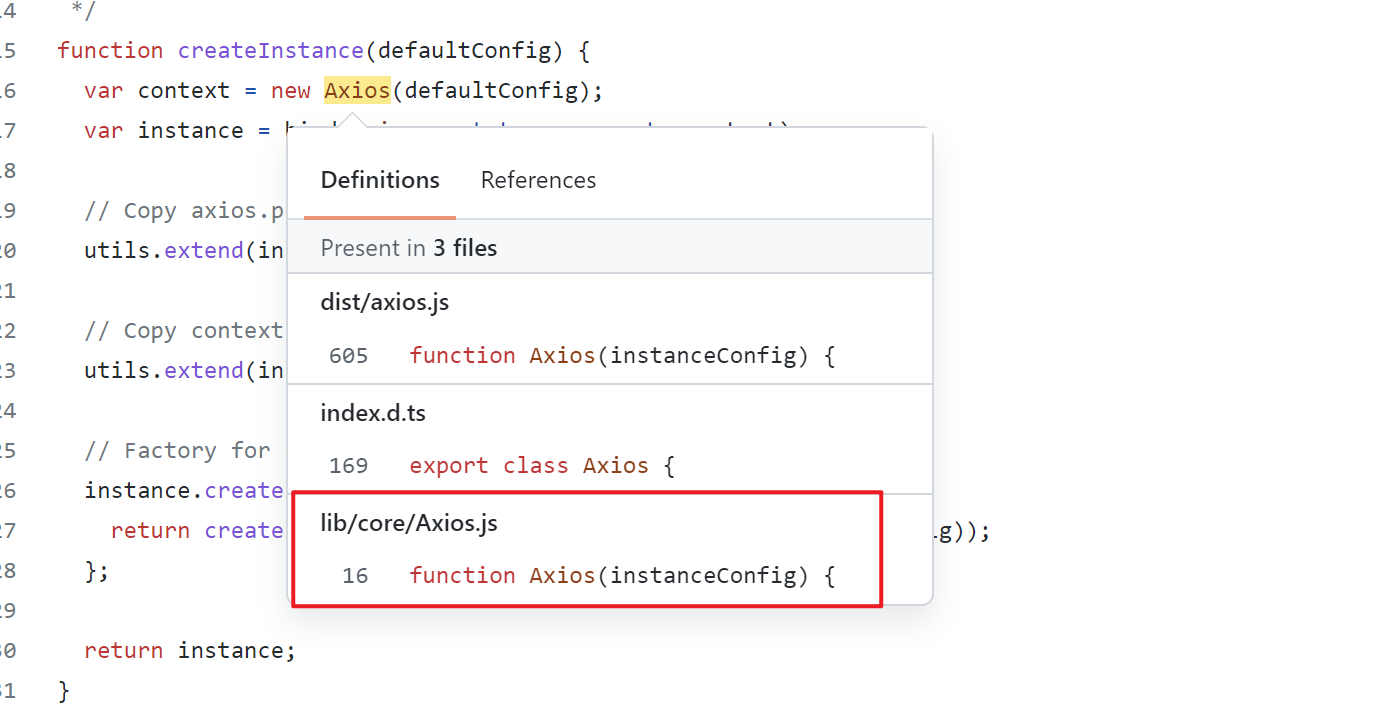
我们找到对应路径下的文件,可以看到
'use strict';

var utils = require('./../utils');
var buildURL = require('../helpers/buildURL');
var InterceptorManager = require('./InterceptorManager');
var dispatchRequest = require('./dispatchRequest');
var mergeConfig = require('./mergeConfig');
var validator = require('../helpers/validator');

var validators = validator.validators;
/**
 * Create a new instance of Axios
 *
 * @param {Object} instanceConfig The default config for the instance
 */
function Axios(instanceConfig) {
  this.defaults = instanceConfig;
  this.interceptors = {
    request: new InterceptorManager(),
    response: new InterceptorManager()
  };
}

/**
 * Dispatch a request
 *
 * @param {Object} config The config specific for this request (merged with this.defaults)
 */
Axios.prototype.request = function request(config) {
  /*eslint no-param-reassign:0*/
  // Allow for axios('example/url'[, config]) a la fetch API
  if (typeof config === 'string') {
    config = arguments[1] || {};
    config.url = arguments[0];
  } else {
    config = config || {};
  }

  config = mergeConfig(this.defaults, config);

  // Set config.method
  if (config.method) {
    config.method = config.method.toLowerCase();
  } else if (this.defaults.method) {
    config.method = this.defaults.method.toLowerCase();
  } else {
    config.method = 'get';
  }

  var transitional = config.transitional;

  if (transitional !== undefined) {
    validator.assertOptions(transitional, {
      silentJSONParsing: validators.transitional(validators.boolean),
      forcedJSONParsing: validators.transitional(validators.boolean),
      clarifyTimeoutError: validators.transitional(validators.boolean)
    }, false);
  }

  // filter out skipped interceptors
  var requestInterceptorChain = [];
  var synchronousRequestInterceptors = true;
  this.interceptors.request.forEach(function unshiftRequestInterceptors(interceptor) {
    if (typeof interceptor.runWhen === 'function' && interceptor.runWhen(config) === false) {
      return;
    }

    synchronousRequestInterceptors = synchronousRequestInterceptors && interceptor.synchronous;

    requestInterceptorChain.unshift(interceptor.fulfilled, interceptor.rejected);
  });

  var responseInterceptorChain = [];
  this.interceptors.response.forEach(function pushResponseInterceptors(interceptor) {
    responseInterceptorChain.push(interceptor.fulfilled, interceptor.rejected);
  });

  var promise;

  if (!synchronousRequestInterceptors) {
    var chain = [dispatchRequest, undefined];

    Array.prototype.unshift.apply(chain, requestInterceptorChain);
    chain = chain.concat(responseInterceptorChain);

    promise = Promise.resolve(config);
    while (chain.length) {
      promise = promise.then(chain.shift(), chain.shift());
    }

    return promise;
  }


  var newConfig = config;
  while (requestInterceptorChain.length) {
    var onFulfilled = requestInterceptorChain.shift();
    var onRejected = requestInterceptorChain.shift();
    try {
      newConfig = onFulfilled(newConfig);
    } catch (error) {
      onRejected(error);
      break;
    }
  }

  try {
    promise = dispatchRequest(newConfig);
  } catch (error) {
    return Promise.reject(error);
  }

  while (responseInterceptorChain.length) {
    promise = promise.then(responseInterceptorChain.shift(), responseInterceptorChain.shift());
  }

  return promise;
};

Axios.prototype.getUri = function getUri(config) {
  config = mergeConfig(this.defaults, config);
  return buildURL(config.url, config.params, config.paramsSerializer).replace(/^\?/, '');
};

// Provide aliases for supported request methods
utils.forEach(['delete', 'get', 'head', 'options'], function forEachMethodNoData(method) {
  /*eslint func-names:0*/
  Axios.prototype[method] = function(url, config) {
    return this.request(mergeConfig(config || {}, {
      method: method,
      url: url,
      data: (config || {}).data
    }));
  };
});

utils.forEach(['post', 'put', 'patch'], function forEachMethodWithData(method) {
  /*eslint func-names:0*/
  Axios.prototype[method] = function(url, data, config) {
    return this.request(mergeConfig(config || {}, {
      method: method,
      url: url,
      data: data
    }));
  };
});

module.exports = Axios;
首先按照线索我们对函数Axios进行分析,也就是如下代码
function Axios(instanceConfig) {
  this.defaults = instanceConfig;
  this.interceptors = {
    request: new InterceptorManager(),
    response: new InterceptorManager()
  };
}
是不是感觉很熟悉? defaults、interceports
是的,在Axios函数中定义了我们直接使用的axios.defaults、axios.interceprots,当然interceports包括了请求拦截与响应拦截,关于这两个的new这里不做过多的分析。
所以Axios函数中写了默认值、拦截器的方法
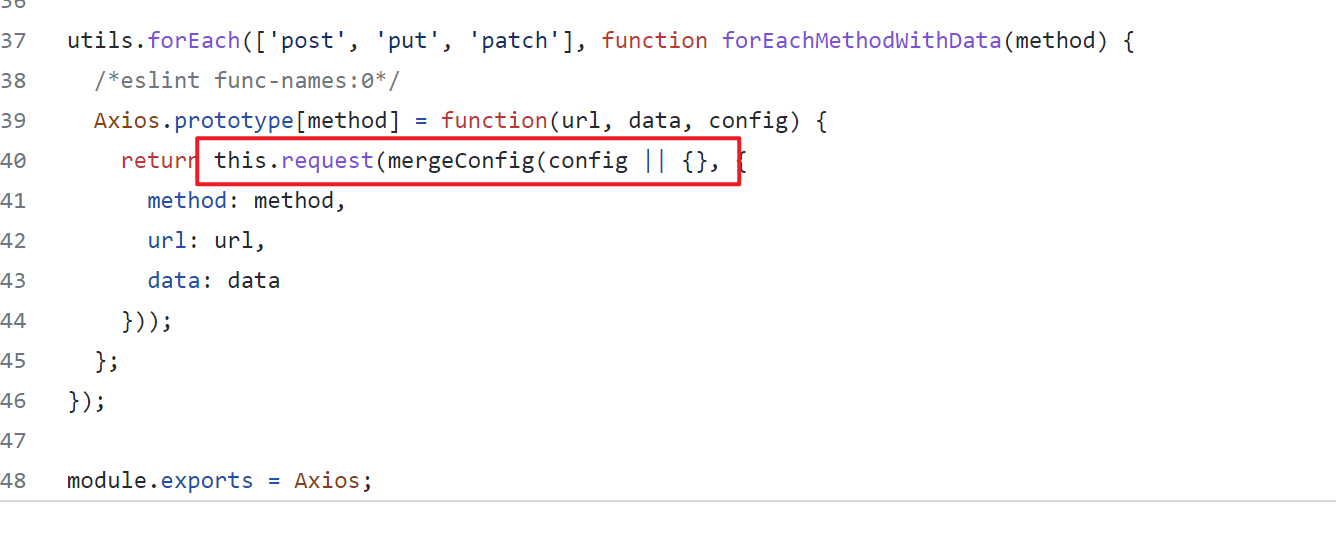
而在Axios.js这个文件中我们可以看到在Axios的原型上添加了delete、put、post、get等方法,同时也添加了getUri、request等方法,在调用axios.get的时候也会执行axios.request这个方法,因为在源代码中已被调用:
所以关于var context = new Axios(defaultConfig),我们就可以知道context中带有什么,回归下一行代码
instance
var instance = bind(Axios.prototype.request, context);
bind:用来改变this指向的问题,同时返回的也就是一个函数,这行代码的意思是,将Axios原型上的request的this指向指向到构造对象context,并赋值给instance,这样instance就是函数并且带有request这个方法
Axios.prototype.request:是用来发送请求的
 // Copy axios.prototype to instance
  utils.extend(instance, Axios.prototype, context);

  // Copy context to instance
  utils.extend(instance, context);
extend: 可以把对象的方法复制
在第一行的 utils.extend中我们可以看出把Axios.prototype原型复制给instance函数上,这样instance就会携带在文件Axios.js上定义在原型上的方法,比如get、post等
第二行的 utils.extend中把构造对象context复制给了Instance,同上instance就带有defautls、intercepors方法
最后 createInstance函数返回的是instance,再由
var axios = createInstance(defaults);
可以看出axios是这样创建的
最后再导出
module.exports = axios;

// Allow use of default import syntax in TypeScript
module.exports.default = axios;
以上就是axios的创建的源码解析
aixos对象创建过程的模拟实现
理论加上实践等于更好的理解
    <script>
      //函数Axios实现
      function Axios(conifg) {
        //默认值
        this.defaults = conifg;
        //拦截器
        this.intercepors = {
          request: {},
          response: {},
        };
      }

      //Axios原型方法添加
      Axios.prototype.request = function (config) {
        console.log("发送的AJAX请求为:" + config.method);
      };
      Axios.prototype.get = function (config) {
        return this.request({ method: "GET" });
      };
      Axios.prototype.post = function (config) {
        return this.request({ method: "POST" });
      };
      Axios.prototype.put = function (config) {
        return this.request({ method: "PUT" });
      };
      Axios.prototype.delete = function (config) {
        return this.request({ method: "delete" });
      };

      //上面对Axios函数部分功能添加完成

      //创建createInstance函数
      function createInstance(config) {
        var context = new Axios(conifg);
        console.log(111);
        var instance = Axios.prototype.request.bind(context);
        //下面把Axios原型上方法都赋值给instance
        Object.key(Axios.prototype).forEach((item) => {
          instance[item] = Axios.prototype[item].bind(context);
        });
        //这是对Aixos函数中的defaluts、intercepors方法赋值给instance
        Object.key(context).forEach((item) => {
          instance[item] = context[item];
        });

        return instance;
      }

      //最后调用createInstance方法创建axios
      let axios = createInstance();

      //当函数用
      axios({
        method: "GET",
      });

      // 当对象用
      axios.get({ method: "GET" });
    </script>
在axios创建的过程中大概发生的就是这些
axios发送请求的过程
上面介绍了创建axios的过程,可以知道实际上就是Axios.js文件中的内容。
在我们使用axios去发送请求的时候不管是axios的函数调用还是对象调用都是用的一套逻辑
//函数形式发送
axios({
 method: '',
 data: {},
 ....
})

//对象形式发送
axios.get('url', {请求体})
这样我们就可以实现了请求的发送,但是这中间核心发生了什么?为什么说axios和promise、ajax有关系?aixos是和ajax一样的发送方式吗?下面是对对源码的阅读与记录
Axios.js文件
在创建axios对象的过程中,执行了这样一行代码
var instance = bind(Axios.prototype.request, context);
这在axios创建过程中也有介绍,这是通过bind函数把Axios.prototype.request的this指向绑定在context中,然后返回新函数赋值给instance
这里就是axios发送请求的入口----Axios.prototype.request
接下来我们去Axios.js文件去查看对应的方法,下面的片段代码做了相关的注释,并且后续会对核心代码分析
     Axios.prototype.request = function request(config) {
        /*eslint no-param-reassign:0*/
        // Allow for axios('example/url'[, config]) a la fetch API

        // 这里就是对传入的配置对象做处理
        if (typeof config === "string") {
          config = arguments[1] || {};
          config.url = arguments[0];
        } else {
          config = config || {};
        }

         // 把默认的配置对象和传入的配置对象进行合并
        config = mergeConfig(this.defaults, config);

        // Set config.method

        // 这里是拿到传入的配置对象中的方法,其中toLowerCase(),是把传入的转换为小写,可以看出我们在写axios请求方式的时候,大小写不管、不写方式也会默认
        执行get方式
        if (config.method) {
          config.method = config.method.toLowerCase();
        } else if (this.defaults.method) {
          config.method = this.defaults.method.toLowerCase();
        } else {
          config.method = "get";
        }


        var transitional = config.transitional;

        if (transitional !== undefined) {
          validator.assertOptions(
            transitional,
            {
              silentJSONParsing: validators.transitional(validators.boolean),
              forcedJSONParsing: validators.transitional(validators.boolean),
              clarifyTimeoutError: validators.transitional(validators.boolean),
            },
            false
          );
        }

        // filter out skipped interceptors

        //这里是请求拦截
        var requestInterceptorChain = [];
        var synchronousRequestInterceptors = true;
        this.interceptors.request.forEach(function unshiftRequestInterceptors(
          interceptor
        ) {
          if (
            typeof interceptor.runWhen === "function" &&
            interceptor.runWhen(config) === false
          ) {
            return;
          }

          synchronousRequestInterceptors =
            synchronousRequestInterceptors && interceptor.synchronous;

          requestInterceptorChain.unshift(
            interceptor.fulfilled,
            interceptor.rejected
          );
        });
        //这里是响应拦截
        var responseInterceptorChain = [];
        this.interceptors.response.forEach(function pushResponseInterceptors(
          interceptor
        ) {
          responseInterceptorChain.push(
            interceptor.fulfilled,
            interceptor.rejected
          );
        });

        var promise;

       //这个if内就是核心代码
        if (!synchronousRequestInterceptors) {
          var chain = [dispatchRequest, undefined];

          Array.prototype.unshift.apply(chain, requestInterceptorChain);
          chain = chain.concat(responseInterceptorChain);

          promise = Promise.resolve(config);
          while (chain.length) {
            promise = promise.then(chain.shift(), chain.shift());
          }

          return promise;
        }

        var newConfig = config;
        while (requestInterceptorChain.length) {
          var onFulfilled = requestInterceptorChain.shift();
          var onRejected = requestInterceptorChain.shift();
          try {
            newConfig = onFulfilled(newConfig);
          } catch (error) {
            onRejected(error);
            break;
          }
        }

        try {
          promise = dispatchRequest(newConfig);
        } catch (error) {
          return Promise.reject(error);
        }

        while (responseInterceptorChain.length) {
          promise = promise.then(
            responseInterceptorChain.shift(),
            responseInterceptorChain.shift()
          );
        }

        return promise;
      };
核心片段分析
 if (!synchronousRequestInterceptors) {
          // dispatchRequest是文件中的一个导出的函数
          var chain = [dispatchRequest, undefined];  //undefined在这里就是一个占位符

          Array.prototype.unshift.apply(chain, requestInterceptorChain);
          chain = chain.concat(responseInterceptorChain);
          // promise在这里的状态是根据传入的config决定的,在Promise的知识点中我们可以知道如果config为非promise都对象则返回成功的promise,如果是promise对象,则根据传入的promise对象决定。下面用非promise对象分析
          promise = Promise.resolve(config);
          while (chain.length) {
          //  因为promise为成功的状态,所以执行第一个参数,也就是dispatchRequest,dispatchRequest就是我们的下一个线索
            promise = promise.then(chain.shift(), chain.shift());
          }

          return promise;
        }
dispatchRequest.js文件
找到对应的文件
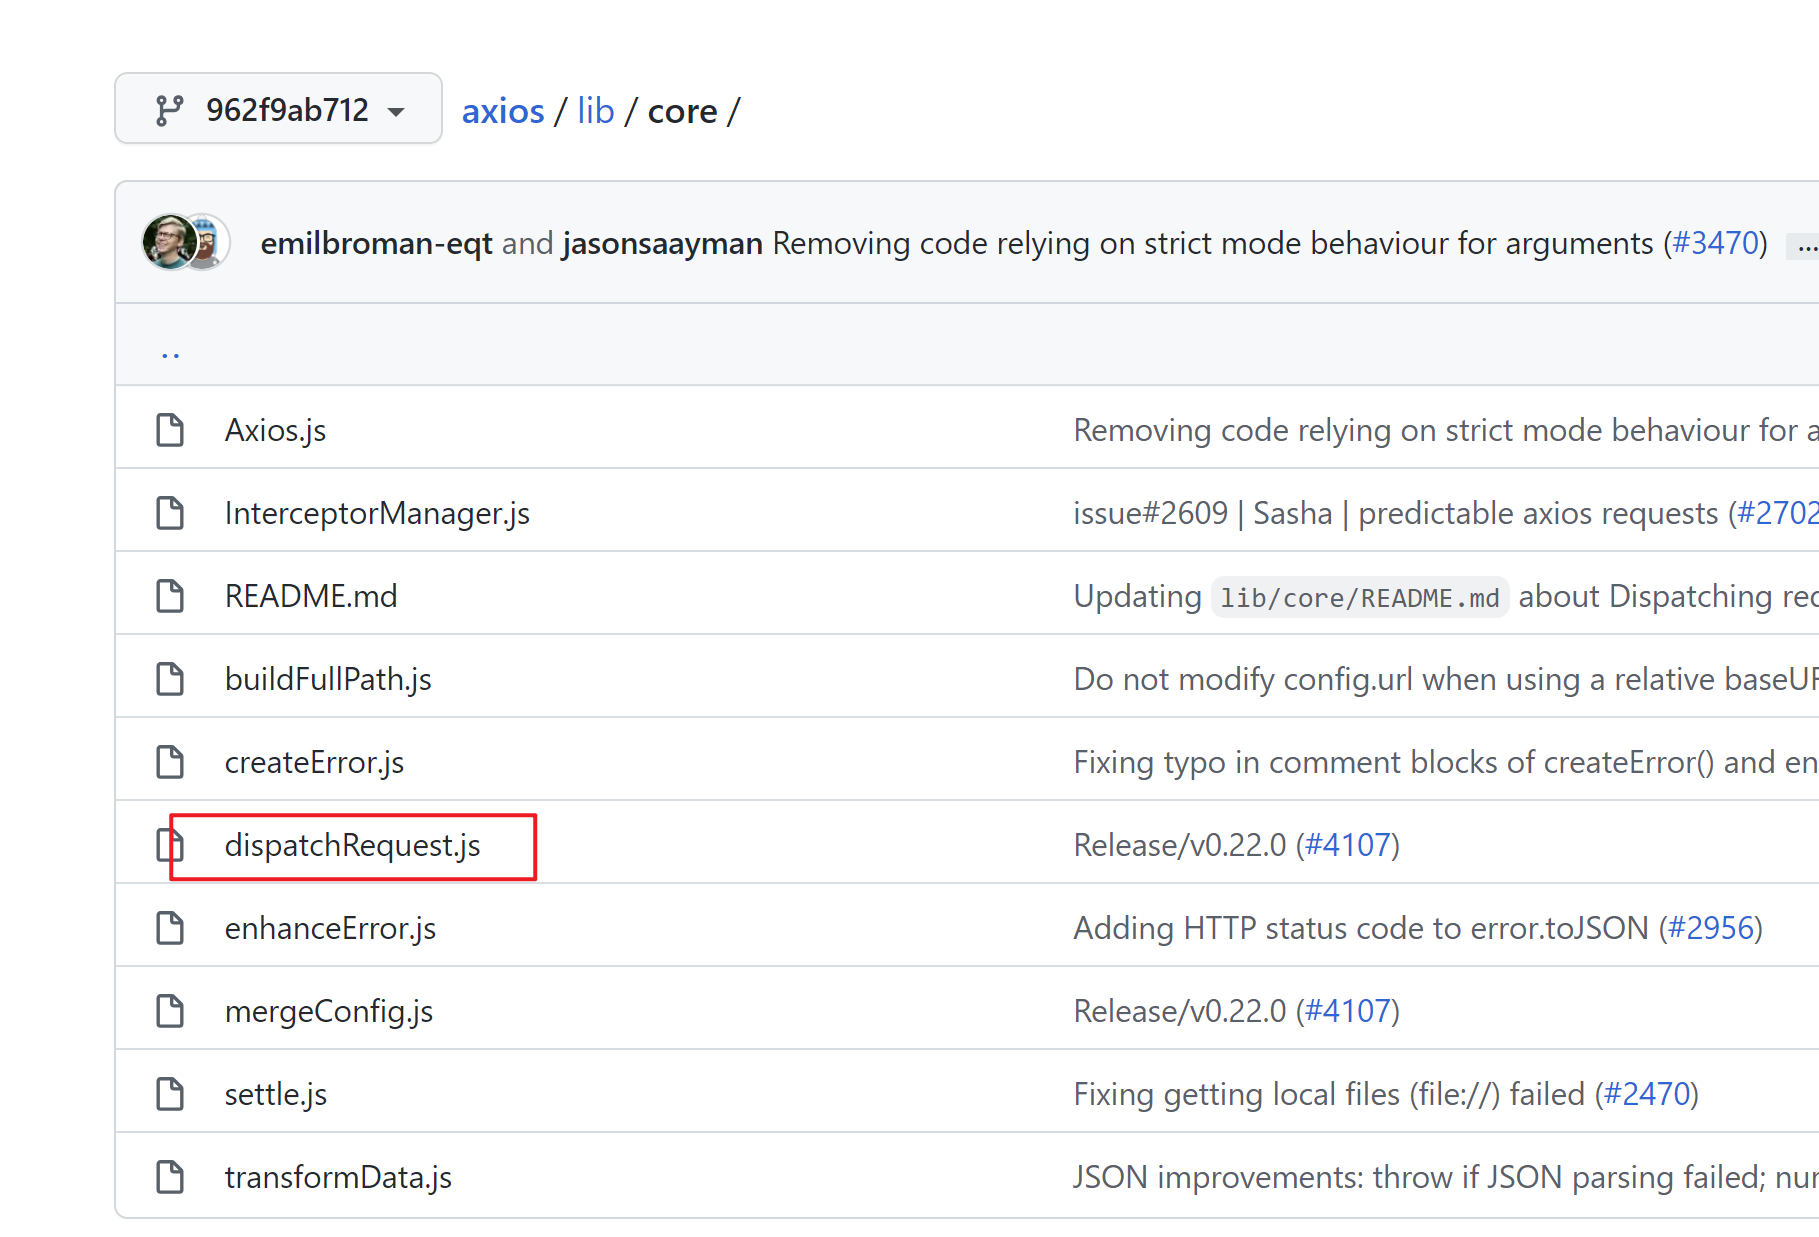
这个文件中我们只分析导出的 dispatchRequest方法,下面也做出一些中文注释
  module.exports = function dispatchRequest(config) {
       // 这里都是做出一些数据转换,config就是传入的配置对象
        throwIfCancellationRequested(config);

        // Ensure headers exist
        config.headers = config.headers || {};

        // Transform request data
        config.data = transformData.call(
          config,
          config.data,
          config.headers,
          config.transformRequest
        );

        // Flatten headers
        config.headers = utils.merge(
          config.headers.common || {},
          config.headers[config.method] || {},
          config.headers
        );

        utils.forEach(
          ["delete", "get", "head", "post", "put", "patch", "common"],
          function cleanHeaderConfig(method) {
            delete config.headers[method];
          }
        );

        var adapter = config.adapter || defaults.adapter;
         // 这里的返回的就是重点,返回的是adapter(config)的结果,通过then方法可以知道返回的是一个promise对象,这里的adapter(config)就是下一个线索
        return adapter(config).then(
          function onAdapterResolution(response) {
            throwIfCancellationRequested(config);

            // Transform response data
            response.data = transformData.call(
              config,
              response.data,
              response.headers,
              config.transformResponse
            );

            return response;
          },
          function onAdapterRejection(reason) {
            if (!isCancel(reason)) {
              throwIfCancellationRequested(config);

              // Transform response data
              if (reason && reason.response) {
                reason.response.data = transformData.call(
                  config,
                  reason.response.data,
                  reason.response.headers,
                  config.transformResponse
                );
              }
            }

            return Promise.reject(reason);
          }
        );
      };
adapter(config)线索
我们直接点击adapter可以找到对应的方法,下面贴出片段
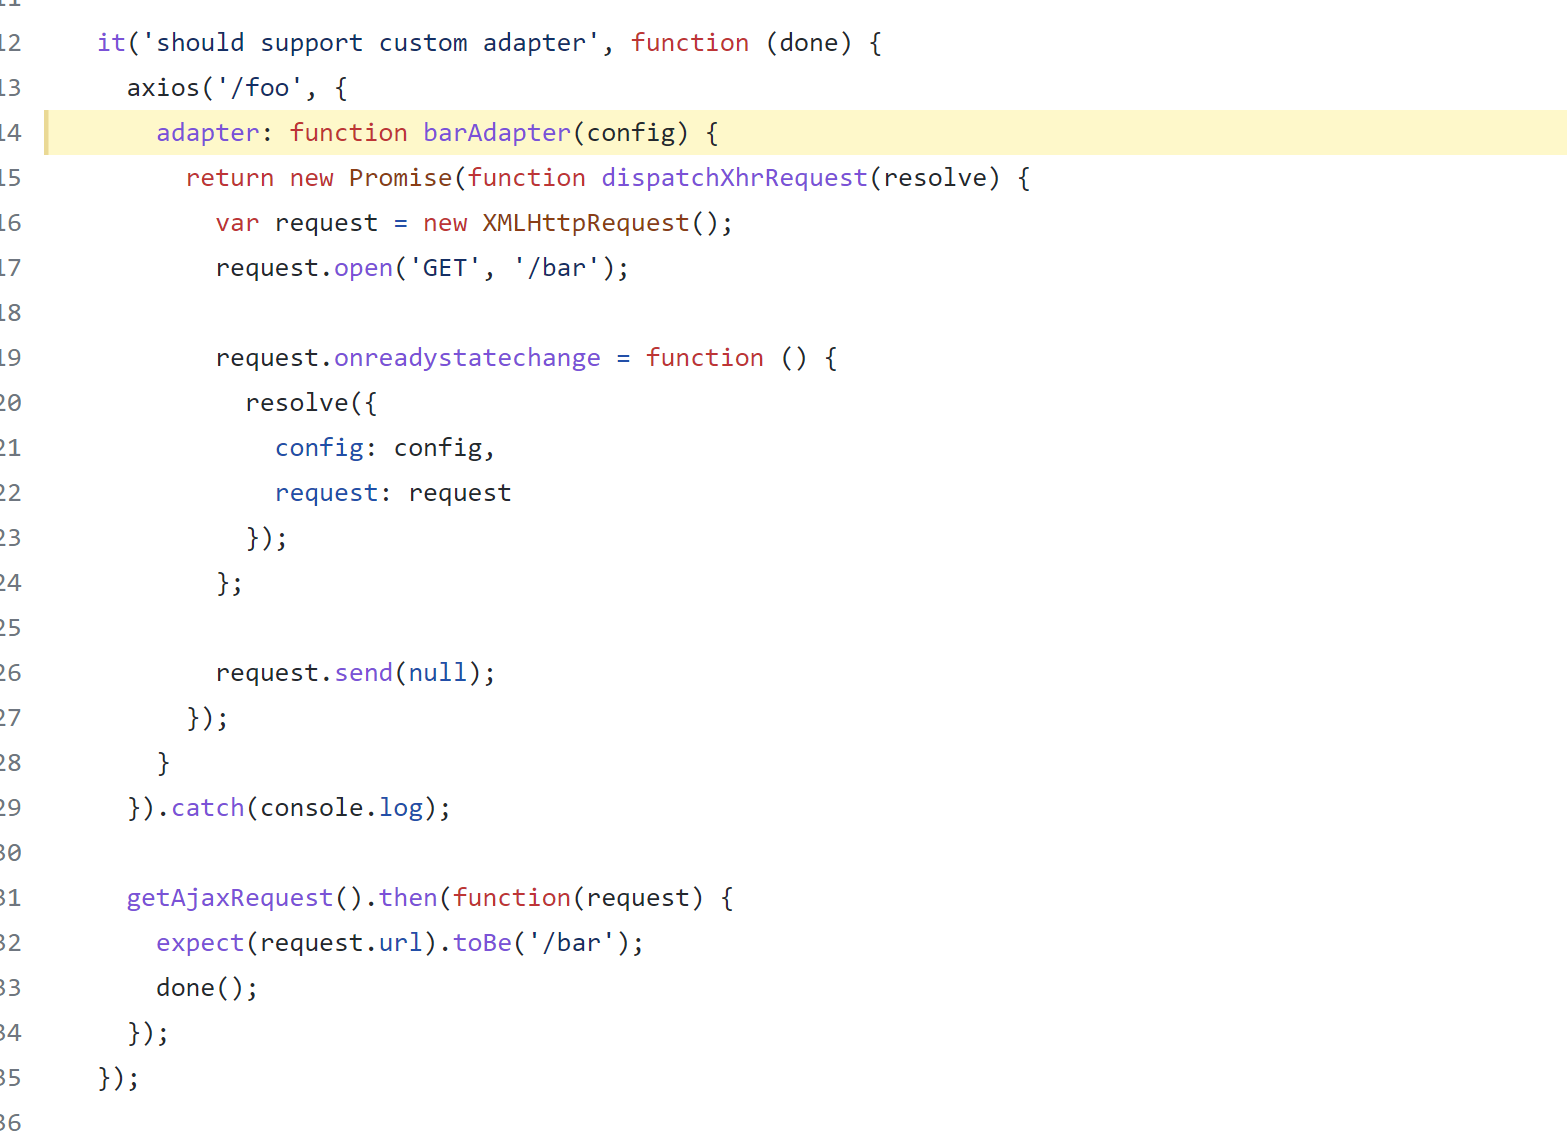
可以看到,adapter返回的是一个promise对象,并且在里面发送了xhr的一个请求,所以这里才是axios真正发送请求的地方,沿用上个列子,这里返回的是成功的promise则在dispatchRequest方法返回的方法中,就会执行第一个参数
 var adapter = config.adapter || defaults.adapter;
         // 这里的返回的就是重点,返回的是adapter(config)的结果,通过then方法可以知道返回的是一个promise对象,这里的adapter(config)就是下一个线索
        return adapter(config).then(
          function onAdapterResolution(response) {
            throwIfCancellationRequested(config);

            // Transform response data
            response.data = transformData.call(
              config,
              response.data,
              response.headers,
              config.transformResponse
            );

            return response;
          },
可以看出,这里还对请求成功响应的参数做出了处理
总结
aixos发送请求的过程可以简单的分为
axios.propotype.request ====> dispatchRequest ====> adapter
其中成功的返回值再一层一层的返回。也就是利用了promise中的then方法,发送方式也和ajax类似
axios发送过程的模拟实现
 <script>
      function Axios(config) {
        this.config = config;
      }
      Axios.prototype.request = function (config) {
        let promise = Promise.resolve(config);
        let chain = [dispatchRequest, undefined];
        let result = promise.then(chain[0], chain[1]);
        return result;
      };

      function dispatchRequest(config) {
        return xhradapter(config).then(
          (v) => {
            // 这里成功了可以对数据进行处理
            console.log(v);
          },
          (err) => {
            console.log(err);
          }
        );
      }

      function xhradapter(config) {
        return new Promise((resolve, reject) => {
          let xhr = new XMLHttpRequest();
          xhr.open(config.method, config.url);
          xhr.send();
          xhr.onreadystatechange = function () {
            if (xhr.readyState === 4) {
              if (xhr.status >= 200 && xhr.status < 300) {
                resolve();
              } else {
                reject();
              }
            }
          };
        });
      }
    </script>
发送的解析就是
axios.propotype.request ====> dispatchRequest ====> adapter
返回的结果就根据adapter的值去判断
axios拦截器原理
axios.interceports.request.use((函数),(函数))
上面的就是一个请求拦截器的使用,在源码中又是哪里体现的?
在axios的创建的源码分析中,我们有这样的代码分析:
function Axios(instanceConfig) {
  this.defaults = instanceConfig;
  this.interceptors = {
    request: new InterceptorManager(),
    response: new InterceptorManager()
  };
}
可以看到,interceptors中被定义了request、response,而InterceptorManager就是线索,我们看看InterceptorManager中怎么定义的?
function InterceptorManager() {
  this.handlers = [];
}
发现在InterceptorManager中定义了一个数组handlers,这样我们可以知道其实axios.interceports.request其实就是调用的这个数组,那后面的use是什么呢? 同样的还是去看源码
InterceptorManager.prototype.use = function use(fulfilled, rejected, options) {
  this.handlers.push({
    fulfilled: fulfilled,
    rejected: rejected,
    synchronous: options ? options.synchronous : false,
    runWhen: options ? options.runWhen : null
  });
  return this.handlers.length - 1;
};
发现在定义use的方法上,其实就是对handlers数组进行push操作,push的值也就是拦截器中传过来的参数,这样不管是请求拦截器还是响应拦截器都是把携带的参数添加在对应的handlers中。
上后面是对Axios.js中的interceports代码分析,但是拦截器肯定是伴随着请求的,则又回到了axios发送请求的源码分析,下面贴出核心的源码分析:
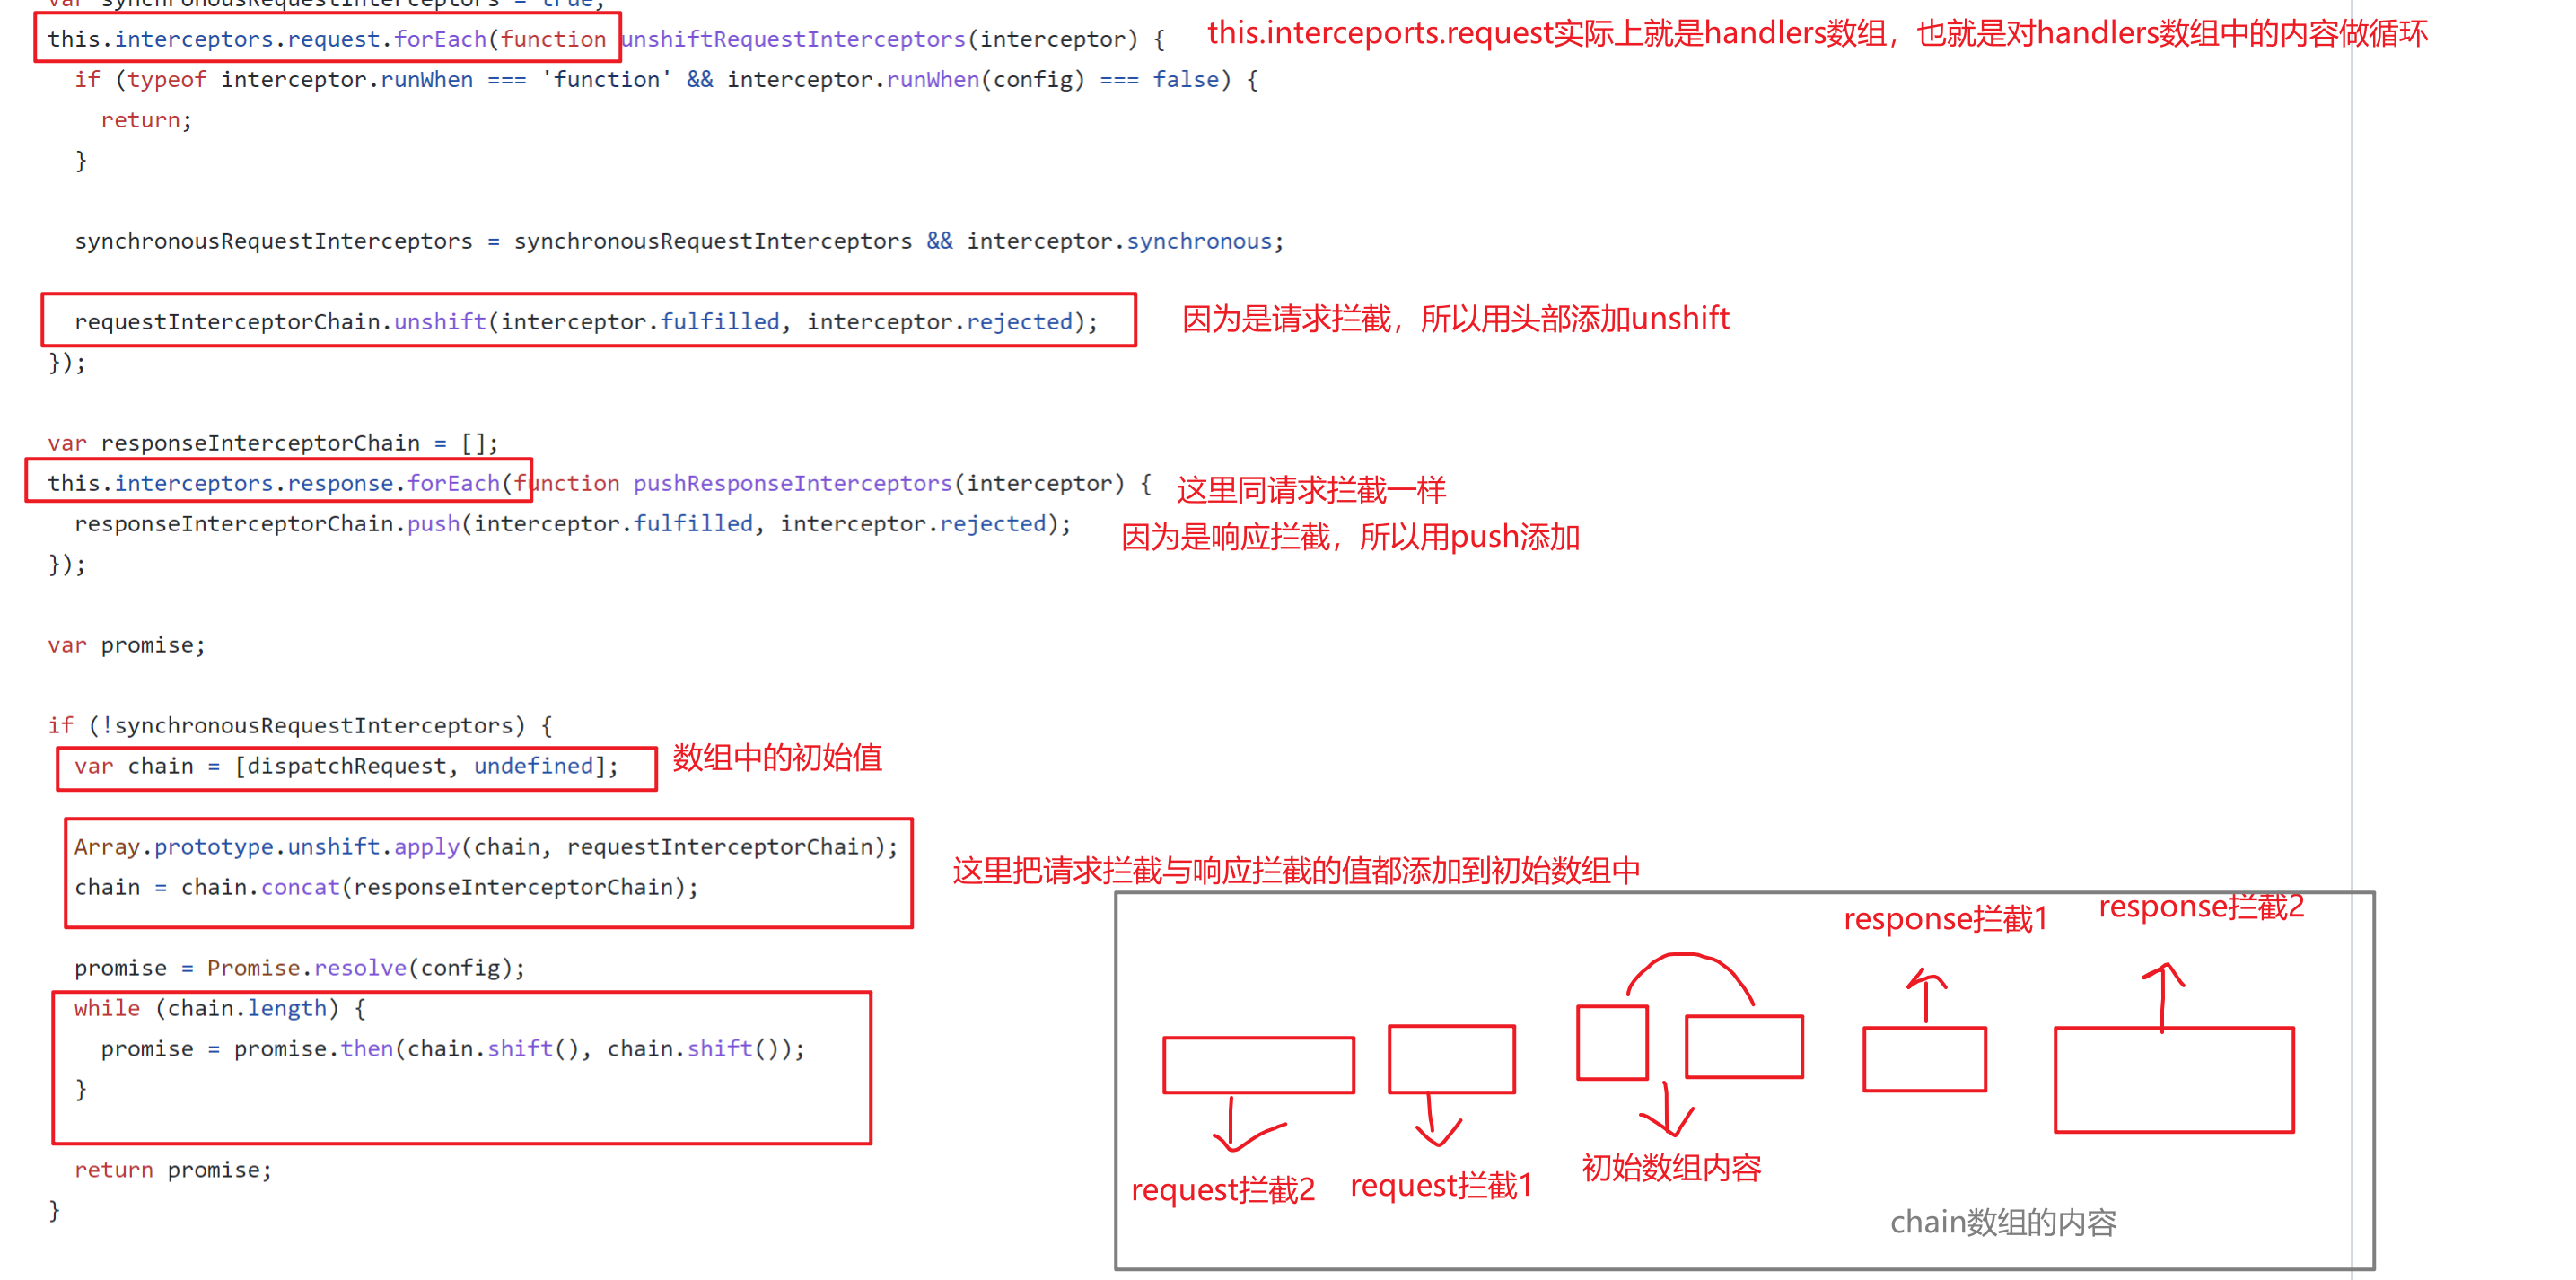
可以看出请求拦截和响应拦截的添加方式是不一样的,则下面代码输出的顺序则是
axios.interceports.request.use((response)=>{
  console.log(1)
},(err)=>{
  console.log(err)
})
axios.interceports.request.use((response)=>{
  console.log(2)
},(err)=>{
  console.log(err)
})
axios.interceports.response.use((response)=>{
  console.log(3)
},(err)=>{
  console.log(err)
})
axios.interceports.response.use((response)=>{
  console.log(4)
},(err)=>{
  console.log(err)
})
这里的代码按照上面的解释会输出: 2、1、3、4
axios取消请求——CancelToken
CancelToken作为axios取消请求的属性,同样的添加在配置对象中,我们可能经常使用,下面举出使用的列子与一些源码分析
使用列子:
<!DOCTYPE html>
<html lang="en">
  <head>
    <meta charset="UTF-8" />
    <meta http-equiv="X-UA-Compatible" content="IE=edge" />
    <script src="https://cdn.bootcdn.net/ajax/libs/axios/0.21.1/axios.min.js"></script>
    <meta name="viewport" content="width='device-width', initial-scale=1.0" />
    <title>Document</title>

    <style>
      ul {
        display: flex;
      }
      li {
        width: 200px;
        height: 50px;
        margin: 0 20px;
        list-style: none;
        border-radius: 10px;
        text-align: center;
        line-height: 50px;
        cursor: pointer;
      }

      .a {
        background-color: yellow;
      }
      .b {
        background-color: red;
      }
    </style>
  </head>
  <body>
    <ul>
      <li onclick="hand1('GET')" class="a">发起请求</li>
      <li onclick="hand2()" class="b">取消请求</li>
    </ul>

    <script>
      axios.defaults.baseURL = "http://localhost:3000/";
      let cancel = null;
      function hand1(e) {
        if (cancel !== null) {
          cancel();
        }
        axios({
          method: e,
          URL: "/profile",
          cancelToken: new axios.CancelToken((v) => { // v的值肯定是一个函数
            console.log(typeof v);
            cancel = v; //v赋值给cancel
          }),
        }).then((v) => {
          console.log(v);
          cancel = null;
        });
      }

      function hand2() {
        cancel();
      }
    </script>
  </body>
</html>
可以看到cancelToken,后面接的是axios.CancelToken的一个构造对象,关于cancelToken的源码分析如下:
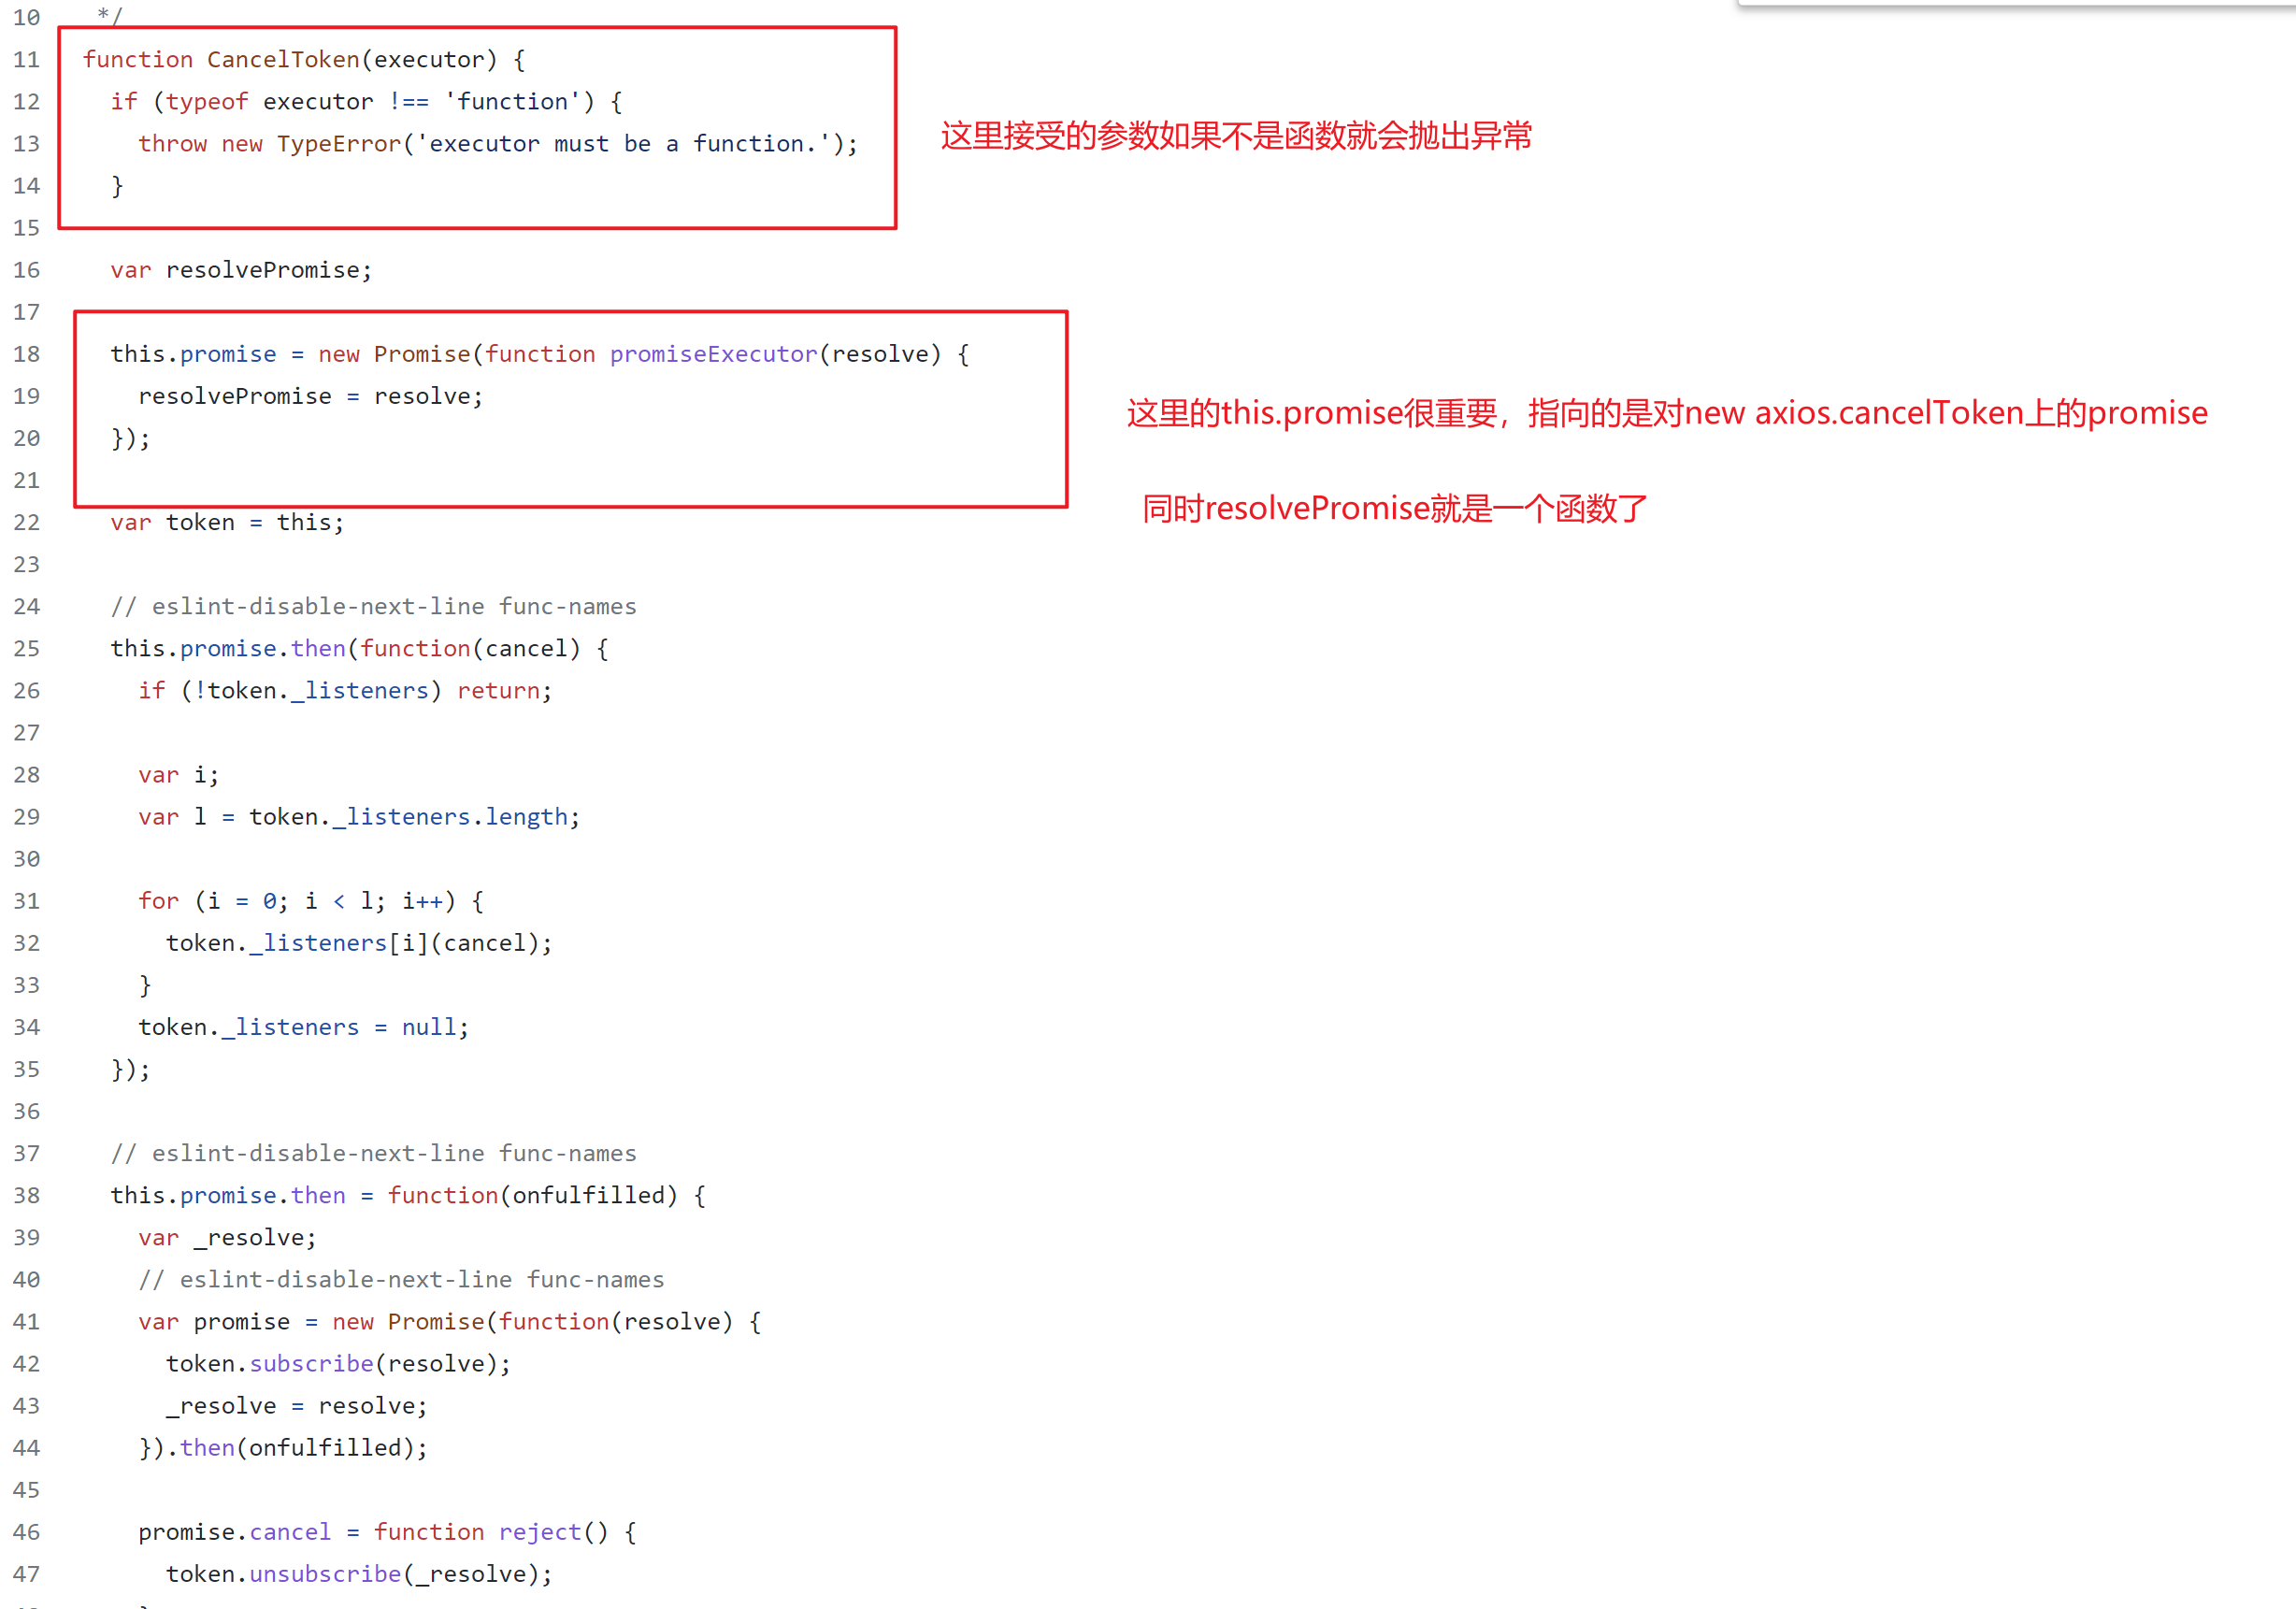
关于取消请求时adapter文件中的,abort()实现的,
原理就是在xhr.js相关方法中暴露了一个promise的状态给使用人员,然后通过resplvePromise去影响,如果改变了状态,则xhr.js中的方法就为成功,执行abort()去中断。