在本章节主要会讲到JDBC的概念,使用细节,以及连接池和JDBC的进阶使用,主要知识点包括
- JDBC的使用步骤
- 数据库的查询方法
- 数据库写入方法
- SQL注入攻击的应对
- 连接池的使用
- Apache Commons DBUtils
JDBC快速入门
什么是JDBC?
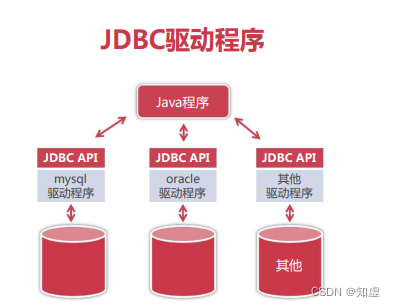
JDBC 全称为Java Database Connectivity,他可以使java通过程序操作关系型数据库,JDBC基于驱动程序实现与数据库的连接与操作
什么是驱动程序?

类似电脑的USB接口,可以链接鼠标,键盘,打印机,摄像头等不同的设备,只需要通过驱动来识别判断使用属于哪一种设备,JDBC驱动程序也可以通过驱动来使得Java程序使用数据库。
JDBC的优点
- 统一的API,提供一致的开发过程
- 易于学习,容易上手,代码结构稳定
- 功能强大,执行效率高,可处理海量数据
快速上手JDBC
JDBC开发分为5个步骤:
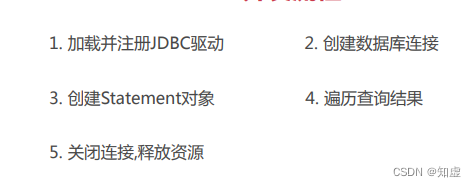
给出一个示例,来展示如何通过JDBC连接数据库查询数据的。
package com.jdbc.sample;

import java.sql.*;
import java.util.List;

/**
 * 标准JDBC操作五步骤
 *
 * @author wangwei
 * @version 1.0.0
 * @since 2022-10-08
 */
public class StandardJDBCSample {
    public static void main(String[] args) {
        Connection conn =null;
        try {
            // 1.加载并注册JDBC驱动
            Class.forName("com.mysql.cj.jdbc.Driver");
            // 2.创建数据库连接
           conn = DriverManager.getConnection("jdbc:mysql://localhost:3306/imooc?useSSL=false&useUnicode" +
                    "=true" +
                    "&characterEncoding" +
                    "=UTF8&serverTimezone=Asia/Shanghai", "root", "123456");

            // 3.创建Statement对象
            Statement stmt = conn.createStatement();
            ResultSet rs = stmt.executeQuery("SELECT * FROM employee WHERE dname ='研发部'");
            // 4.遍历查询结果
            while (rs.next()) {
                Integer eno = rs.getInt(1);//eno
                String ename = rs.getString("ename");
                Float salary = rs.getFloat("salary");
                String dname = rs.getString("dname");
                System.out.println(dname + "-" + eno + "-" + ename + "-" + salary);
            }
        }catch (Exception e){
            e.printStackTrace();
        }finally {
            try {
                if (conn !=null&&conn.isClosed() ==false) {
                    conn.close();
                }
            } catch (SQLException e) {
                e.printStackTrace();
            }
        }
        // 5.关闭连接,释放资源

    }
}
接下来,我们就详细的介绍一下JDBC的使用流程。
JDBC驱动的秘密
如何获取JDBC驱动Jar
我们可以在各大数据库的官网获取JDBC驱动jar包,例如:
MYSQL的JDBC驱动jar包地址为:https://dev.mysql.com/downloads/connector/j/
创建数据库连接代码:
String dbDriver = "com.mysql.cj.jdbc.Driver"; //JDBC驱动类
String dbURL = "jdbc:mysql://localhost:3306/imooc" ; //连接字符串
String dbUsername = "root"; //数据库用户名
String dbPassword = "123456"; //数据库密码
//1.加载并初始化JDBC驱动
Class.forName(dbDriver);
//2.创建数据库连接
Connection connection = DriverManager.getConnection(dbURL, dbUsername, dbPassword);
Class.forName作用
- Class.forName()是用于加载指定的JDBC驱动类
- Class.forName本质是通知JDBC注册这个驱动类
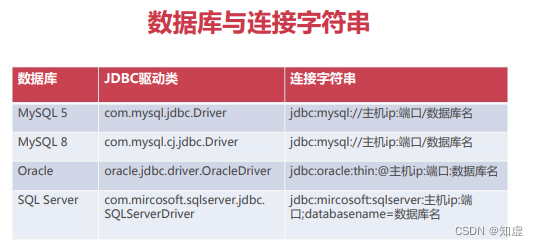
- JDBC因为是由不同的数据库厂商提供jar,所以对应的连接串也不同。
DriverManager 设备管理器
- DriverManager 用于注册/管理JDBC驱动程序
- DriverManager.getConnection(连接字符串,用户名,密码);
- 返回值Connection对象,对应数据库的物理网络连接
Connection对象
- Connection对象用于JDBC与数据库的网络通信对象
- java.sql.Connection是一个接口,具体由驱动厂商实现
- 所有数据库的操作都是建立在Connection上的
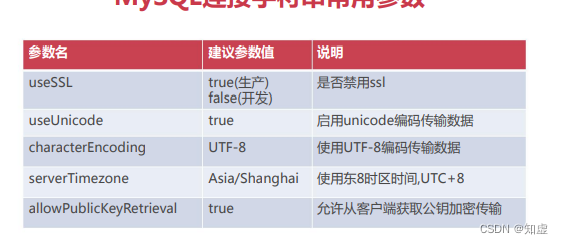
Mysql连接数据串
- 格式:jdbc:mysql://主机IP:端口号/数据库名?参数列表
- 主机IP与端口是可选设置,默认值是127.0.0.1与3306
- 参数列表采用URL编码,格式:参数1=值1&参数2=值2&…
- 常用的数据库参数如下:
下面示例演示如何创建连接串:
package com.jdbc.sample;

import java.sql.Connection;
import java.sql.DriverManager;
import java.sql.SQLException;

/**
 * todo {类简要说明}
 *
 * @author wangwei
 * @version 1.0.0
 * @since 2022-10-09
 */
public class ConnectionSample {
    public static void main(String[] args) {
        // 1.获取驱动
        Connection conn = null;
        try {
            Class.forName("com.mysql.cj.jdbc.Driver");
            String url = "jdbc:mysql://localhost:3306/imooc?useSSL=false&useUnicode=true&haracterEncoding=UTF-8" +
                    "&serverTimezone=Asia/Shanghai&allowPublicKeyRetrieval=true";
            String username="root";
            String password ="123456";
            // 2.获取数据库连接
            conn = DriverManager.getConnection(url,username,password);
        } catch (ClassNotFoundException e) {
          e.printStackTrace();
        } catch (SQLException e) {
            e.printStackTrace();
        }
        System.out.println(conn);
    }
}
有几个常见错误需要注意一下:
-
未添加驱动包或者驱动包不对时,提示 java.lang.ClassNotFoundException: com.mysql.cj.jdbc.Driver

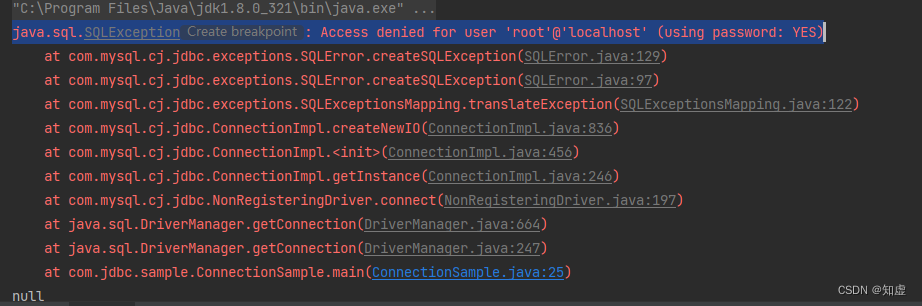
-
写错用户名/密码,提示 java.sql.SQLException: Access denied for user ‘root’@‘localhost’ (using password: YES)
-
IP或者端口号写错了,提示 com.mysql.cj.jdbc.exceptions.CommunicationsException: Communications link failure

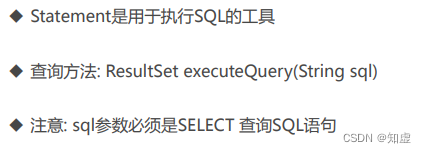
Statement对象
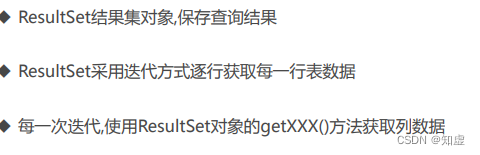
ResultSet对象
从部门表中筛选数据
package com.jdbc.hrapp.command;

import java.sql.*;
import java.util.Scanner;

/**
 * todo {类简要说明}
 *
 * @author wangwei
 * @version 1.0.0
 * @since 2022-10-09
 */
public class QueryCommand implements Command{
    @Override
    public void excute() {
        Connection connection = null ;
        Statement stmt = null;
        ResultSet rs =null;
        System.out.println("请输入部门名称");
        Scanner in =new Scanner(System.in);
        String pdname = in.next();
        try {
            // 1.加载并注册JDBC驱动
            Class.forName("com.mysql.cj.jdbc.Driver");
            // 2.创建数据库连接
             connection =  DriverManager.getConnection("jdbc:mysql://localhost:3306/imooc?useSSL=false&useUnicode" +
                     "=true" +
                     "&characterEncoding" +
                     "=UTF8&serverTimezone=Asia/Shanghai", "root", "123456");
            // 3.创建Statement对象
             stmt = connection.createStatement();
            // 结果集
             rs = stmt.executeQuery("SELECT * FROM employee WHERE dname ='"+pdname+"'");
            // 4.遍历结果
            while (rs.next()){
                Integer eno = rs.getInt(1);//eno
                String ename = rs.getString("ename");
                Float salary = rs.getFloat("salary");
                String dname = rs.getString("dname");
                System.out.println(dname + "-" + eno + "-" + ename + "-" + salary);
            }

        } catch (Exception e){
            e.printStackTrace();
        }finally {
            try {
                if (rs != null){
                    rs.close();
                }
                if (stmt != null){
                    stmt.close();
                }
                if (connection != null &&!connection.isClosed()){
                    connection.close();
                }
            } catch (SQLException e) {
                e.printStackTrace();
            }


        }
    }
}
显然上面一段代码具有sql注入的风险,为了解决这个问题,我们引入PreparedStatement ,它会将sql语句进行预处理。
package com.jdbc.hrapp.command;

import java.sql.*;
import java.util.Scanner;

/**
 * todo {类简要说明}
 *
 * @author wangwei
 * @version 1.0.0
 * @since 2022-10-09
 */
public class QueryCommand implements Command{
    @Override
    public void excute() {
        Connection connection = null ;
        PreparedStatement stmt = null;
        ResultSet rs =null;
        System.out.println("请输入部门名称");
        Scanner in =new Scanner(System.in);
        String pdname = in.next();
        try {
            // 1.加载并注册JDBC驱动
            Class.forName("com.mysql.cj.jdbc.Driver");
            // 2.创建数据库连接
             connection =  DriverManager.getConnection("jdbc:mysql://localhost:3306/imooc?useSSL=false&useUnicode" +
                     "=true" +
                     "&characterEncoding" +
                     "=UTF8&serverTimezone=Asia/Shanghai", "root", "123456");
            // 3.创建Statement对象
             stmt = connection.prepareStatement("SELECT * FROM employee WHERE dname =?");
             stmt.setString(1,pdname);
            // 结果集
             rs = stmt.executeQuery();
            // 4.遍历结果
            while (rs.next()){
                Integer eno = rs.getInt(1);//eno
                String ename = rs.getString("ename");
                Float salary = rs.getFloat("salary");
                String dname = rs.getString("dname");
                System.out.println(dname + "-" + eno + "-" + ename + "-" + salary);
            }

        } catch (Exception e){
            e.printStackTrace();
        }finally {
            try {
                if (rs != null){
                    rs.close();
                }
                if (stmt != null){
                    stmt.close();
                }
                if (connection != null &&!connection.isClosed()){
                    connection.close();
                }
            } catch (SQLException e) {
                e.printStackTrace();
            }


        }
    }
}
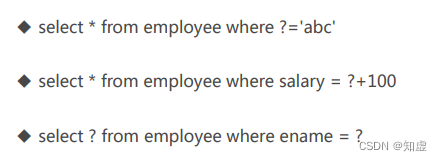
PreparedStatemen
- PreparedStatement 预编译Statement是Statement的子接口
- PreparedStatement对SQL进行参数化,预防SQL注入攻击
- PreparedStatement比Statement执行效率更高
错误的使用方式
封装DbUtils
因为每次使用JDBC都需要创建连接,使用完毕后都需要释放资源等,很麻烦,所以应运而生产生DbUtils类,帮助我们创建/关闭连接。
工具类如下:
package com.jdbc.common;

import java.sql.*;

/**
 * todo {类简要说明}
 *
 * @author wangwei
 * @version 1.0.0
 * @since 2022-10-11
 */
public class DbUtils {
    /**
     * 创建新的数据库连接
     *
     * @return
     * @throws SQLException
     * @throws ClassNotFoundException
     */
    public static Connection getConnection() throws SQLException, ClassNotFoundException {
        Class.forName("com.mysql.cj.jdbc.Driver");
        //2.获取连接
        Connection conn = DriverManager.getConnection("jdbc:mysql://localhost:3306/imooc?useSSL=false&useUnicode" +
                "=true" +
                "&characterEncoding" +
                "=UTF8&serverTimezone=Asia/Shanghai", "root", "123456");
        return conn;
    }

    /**
     * 关闭连接,释放资源
     *
     * @param rs
     * @param statement
     * @param connection
     */
    public static void closeConnection(ResultSet rs, Statement statement,Connection connection){
        try {
            if (rs != null){
                rs.close();
            }
            if (statement != null){
                statement.close();
            }
            if (connection != null &&!connection.isClosed()){
                connection.close();
            }
        } catch (SQLException e) {
            e.printStackTrace();
        }
    }
}
JDBC实现写数据
下面给出代码示例:
增加:
package com.jdbc.hrapp.command;

import com.jdbc.common.DbUtils;

import java.sql.Connection;
import java.sql.PreparedStatement;
import java.sql.SQLException;
import java.util.Scanner;

/**
 * todo {类简要说明}
 *
 * @author wangwei
 * @version 1.0.0
 * @since 2022-10-11
 */
public class InsertCommand implements Command{
    @Override
    public void excute() {
        Connection connection = null;
        PreparedStatement preparedStatement = null;
        Scanner sc = new Scanner(System.in);
        System.out.println("请输入员工编号");
        int eno = sc.nextInt();
        System.out.println("请输入员工姓名");
        String ename =sc.next();
        System.out.println("请输入员工薪资");
        Float salary =sc.nextFloat();
        System.out.println("请输入员工隶属部门");
        String dname =sc.next();
        try {
            connection  = DbUtils.getConnection();
            String sql = "INSERT INTO employee(eno,ename,salary,dname) VALUES(?,?,?,?)";
            preparedStatement = connection.prepareStatement(sql);
            preparedStatement.setInt(1,eno);
            preparedStatement.setString(2,ename);
            preparedStatement.setFloat(3,salary);
            preparedStatement.setString(4,dname);
            int cnt =preparedStatement.executeUpdate();
            System.out.println("cnt:"+cnt);
            System.out.println("员工入职手续已经办理完成!");
        } catch (SQLException e) {
            throw new RuntimeException(e);
        } catch (ClassNotFoundException e) {
            throw new RuntimeException(e);
        }finally {
            DbUtils.closeConnection(null,preparedStatement,connection);
        }

    }
}
删除
package com.jdbc.hrapp.command;

import com.jdbc.common.DbUtils;

import java.sql.Connection;
import java.sql.PreparedStatement;
import java.sql.SQLException;
import java.util.Scanner;

/**
 * todo {类简要说明}
 *
 * @author wangwei
 * @version 1.0.0
 * @since 2022-10-11
 */
public class DeleteCommand implements Command{
    @Override
    public void excute() {

        Connection connection = null;
        PreparedStatement preparedStatement = null;
        Scanner sc = new Scanner(System.in);
        System.out.println("请输入员工编号");
        int eno = sc.nextInt();

        try {
            connection  = DbUtils.getConnection();
            String sql = "DELETE FROM  employee WHERE eno =?";
            preparedStatement = connection.prepareStatement(sql);
            preparedStatement.setFloat(1,eno);
            int cnt =preparedStatement.executeUpdate();
            if (cnt==1) {
                System.out.println("员工离职完成");
            }else {
                System.out.println("未找到"+eno+"员工数据");
            }
        } catch (SQLException e) {
            throw new RuntimeException(e);
        } catch (ClassNotFoundException e) {
            throw new RuntimeException(e);
        }finally {
            DbUtils.closeConnection(null,preparedStatement,connection);
        }

    }
}
修改:
package com.jdbc.hrapp.command;

import com.jdbc.common.DbUtils;

import java.sql.Connection;
import java.sql.PreparedStatement;
import java.sql.SQLException;
import java.util.Scanner;

/**
 * todo {类简要说明}
 *
 * @author wangwei
 * @version 1.0.0
 * @since 2022-10-11
 */
public class UpdateCommand implements Command{
    @Override
    public void excute() {

        Connection connection = null;
        PreparedStatement preparedStatement = null;
        Scanner sc = new Scanner(System.in);
        System.out.println("请输入员工编号");
        int eno = sc.nextInt();

        System.out.println("请输入员工新的薪资");
        Float salary =sc.nextFloat();

        try {
            connection  = DbUtils.getConnection();
            String sql = "UPDATE employee SET salary = ? WHERE eno =?";
            preparedStatement = connection.prepareStatement(sql);
            preparedStatement.setInt(2,eno);
            preparedStatement.setFloat(1,salary);
            int cnt =preparedStatement.executeUpdate();
            if (cnt==1) {
                System.out.println("员工调薪完成");
            }else {
                System.out.println("未找到"+eno+"员工数据");
            }
        } catch (SQLException e) {
            throw new RuntimeException(e);
        } catch (ClassNotFoundException e) {
            throw new RuntimeException(e);
        }finally {
            DbUtils.closeConnection(null,preparedStatement,connection);
        }

    }
}
JDBC中的事务管理
我们身边的例子:
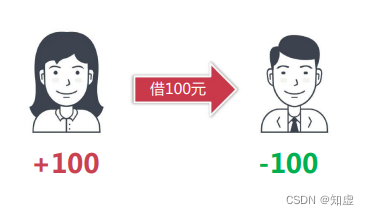
小张想交话费,100元,但是发现自己没钱了,怎么办呢,她就找小王借了100元,在现实生活中很正常,就是小王的钱减少100,小张的钱增加100,那么在数据库中是怎么管理的呢?就是小张的账户增加100,小王的账户减少100,这两个动作要么同时发生,要么都不发生,不允许说是存在一个中间态。这个时候就需要把两个动作放在一个事务中管理。
什么是事务
- 事务是以一种可靠的、一致的方式,访问和操作数据库的程序单元
- 说人话:要么把事情做完,要么什么都不做,不要做一半
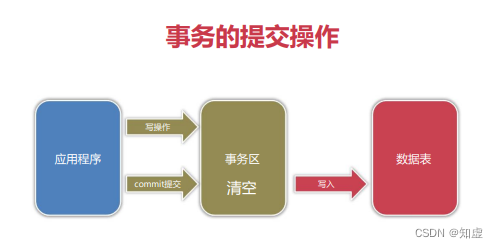
- 事务依赖于数据库实现,MySQL通过事务区作为数据缓冲地带
JDBC的事务模式
JDBC有两种事务模式:自动提交的事务模式 和手动提交的事务模式
自动提交事务模式
- 自动提交模式是指每执行一次写操作SQL,自动提交事务
- 自动提交开启方法: conn.setAutoCommit(true)
- 自动事务是JDBC默认行为,此模式无法保证多数据一致性
手动提交事务模式
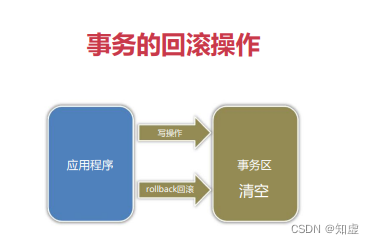
- 手动提交模式是指显式调用commit()与rollback()方法管理事务
- 手动提交开启方法: conn.setAutoCommit(false)
- 手动提交事务可保证多数据一致性,但必须手动调用提交/回滚方法
下面我们通过实例来来看一下这两种模式怎么使用。
自动提交时
package com.jdbc.sample;
import com.jdbc.common.DbUtils;
import java.sql.Connection;
import java.sql.PreparedStatement;
import java.sql.SQLException;
/**
* 事务控制
*
* @author wangwei
* @version 1.0.0
* @since 2022-10-12
*/
public class TransactionSample {
public static void main(String[] args) {
Connection connection = null;
PreparedStatement preparedStatement = null;
try {
connection = DbUtils.getConnection();
//connection.setAutoCommit(false);
String sql = "INSERT INTO employee(eno,ename,salary,dname) VALUES(?,?,?,?)";
for (int i = 1000; i < 2000; i++) {
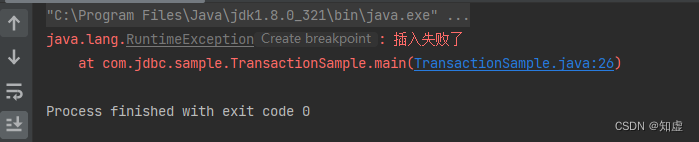
if (i == 1005) {
throw new RuntimeException("插入失败了");
}
preparedStatement = connection.prepareStatement(sql);
preparedStatement.setInt(1, i);
preparedStatement.setString(2, "员工" + i);
preparedStatement.setFloat(3, 4000f);
preparedStatement.setString(4, "市场部");
preparedStatement.executeUpdate();
}
//connection.commit();
} catch (SQLException e) {
throw new RuntimeException(e);
} catch (ClassNotFoundException e) {
throw new RuntimeException(e);
} catch (Exception e) {
e.printStackTrace();
try {
if (connection != null && !connection.isClosed()) {
// connection.rollback();
}
} catch (SQLException ex) {
throw new RuntimeException(ex);
}
} finally {
DbUtils.closeConnection(null, preparedStatement, connection);
}
}
}
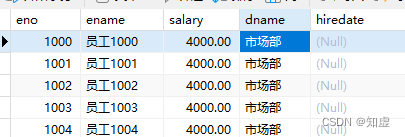
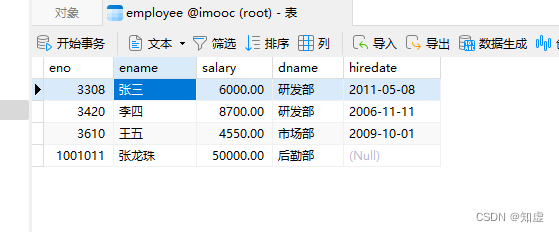
结果在i=1005时提示报错,数据库中有1000——1004的数据,是因为每次执行INSERT都自动提交了事务。
而当我使用connection.setAutoCommit(false); 设置为手动提交事务后,结果就不同了。
手动提交事务
package com.jdbc.sample;

import com.jdbc.common.DbUtils;

import java.sql.Connection;
import java.sql.PreparedStatement;
import java.sql.SQLException;

/**
 * 事务控制
 *
 * @author wangwei
 * @version 1.0.0
 * @since 2022-10-12
 */
public class TransactionSample {
    public static void main(String[] args) {
        Connection connection = null;
        PreparedStatement preparedStatement = null;
        try {
            connection = DbUtils.getConnection();
            connection.setAutoCommit(false);
            String sql = "INSERT INTO employee(eno,ename,salary,dname) VALUES(?,?,?,?)";
            for (int i = 1000; i < 2000; i++) {
                if (i == 1005) {
                    throw new RuntimeException("插入失败了");
                }
                preparedStatement = connection.prepareStatement(sql);
                preparedStatement.setInt(1, i);
                preparedStatement.setString(2, "员工" + i);
                preparedStatement.setFloat(3, 4000f);
                preparedStatement.setString(4, "市场部");
                preparedStatement.executeUpdate();
            }
            connection.commit();
        } catch (SQLException e) {
            throw new RuntimeException(e);
        } catch (ClassNotFoundException e) {
            throw new RuntimeException(e);
        } catch (Exception e) {
            e.printStackTrace();
            try {
                if (connection != null && !connection.isClosed()) {
                    connection.rollback();
                }
            } catch (SQLException ex) {
                throw new RuntimeException(ex);
            }

        } finally {
            DbUtils.closeConnection(null, preparedStatement, connection);
        }
    }
}
结果在i=1005时抛出异常提示插入失败,数据回滚,所以没有任何数据插入。
基于实体类实现分页数据封装
给出示例代码:
package com.jdbc.hrapp.command;

import com.jdbc.common.DbUtils;
import com.jdbc.hrapp.entity.Employee;

import java.sql.Connection;
import java.sql.PreparedStatement;
import java.sql.ResultSet;
import java.sql.SQLException;
import java.util.ArrayList;
import java.util.List;
import java.util.Scanner;

/**
 * todo {类简要说明}
 *
 * @author wangwei
 * @version 1.0.0
 * @since 2022-10-12
 */
public class PaginationCommand implements Command {
    @Override
    public void excute() {
        Scanner scanner = new Scanner(System.in);
        System.out.println("请输入页号");
        int page = scanner.nextInt();
        Connection connection = null;
        PreparedStatement preparedStatement = null;
        ResultSet rs = null;
        List<Employee> list = new ArrayList();
        try {
            connection = DbUtils.getConnection();
            String sql = "SELECT * FROM employee LIMIT ?,10";
            preparedStatement = connection.prepareStatement(sql);
            preparedStatement.setInt(1, (page - 1) * 10);
            rs = preparedStatement.executeQuery();
            while (rs.next()) {
                Employee employee = new Employee();
                employee.setEno(rs.getInt("eno"));
                employee.setEname(rs.getString("ename"));
                employee.setSalary(rs.getFloat("salary"));
                employee.setDname(rs.getString("dname"));
                list.add(employee);
            }
            System.out.println(list.size());
        } catch (SQLException e) {
            throw new RuntimeException(e);
        } catch (ClassNotFoundException e) {
            throw new RuntimeException(e);
        } finally {
            DbUtils.closeConnection(rs,preparedStatement,connection);
        }
    }
}
JDBC中Date日期对象的处理
在JDBC中我们一般使用java.util.date存储查询的date数据,但是在数据库中是用java.sql.date,所以需要针对这个做处理。
在查询时候,因为sql.date 继承自 util.date 所以查询出的数据可以直接赋值使用,但是在录入时,我们输入的String类型最终需要处理成sql.date才能使用。处理过程如下:
 Date udHiredate =null;
 // 声明字符串类型日期
String strhiredate = "1970-01-01";
// 声明时间格式
SimpleDateFormat simpleDateFormat =new SimpleDateFormat("yyyy-MM-dd");

// 字符串转换为util.date
udHiredate =  simpleDateFormat.parse(strhiredate);

// 2.java.util.date 转java.sql.date
// util.date转为数值毫秒数
 Long time = udHiredate.getTime(); //获取从1970年到现在的毫秒数
 // 毫秒数转sql.date
java.sql.Date sqlDate = new java.sql.Date(time);
*这里注意声明格式时候,“YYYY-MM-DD"和"yyyy-MM-dd” 不同,我们采用后面的方式。
JDBC批处理
JDBC的批处理也很简单,使用addBatch()和excuteBatch()方法即可,下面我们看一下和之前标准方法插入数据的区别,代码如下
package com.jdbc.sample;

import com.jdbc.common.DbUtils;

import java.sql.Connection;
import java.sql.PreparedStatement;
import java.sql.SQLException;
import java.util.Date;

/**
 * 事务控制
 *
 * @author wangwei
 * @version 1.0.0
 * @since 2022-10-12
 */
public class BatchSample {

    //标准方法插入若干数据
    public static void tc1(){
        Connection connection = null;
        PreparedStatement preparedStatement = null;
        try {
            long startTime = new Date().getTime();
            connection = DbUtils.getConnection();
            connection.setAutoCommit(false);
            String sql = "INSERT INTO employee(eno,ename,salary,dname) VALUES(?,?,?,?)";
            for (int i = 100000; i < 200000; i++) {
                preparedStatement = connection.prepareStatement(sql);
                preparedStatement.setInt(1, i);
                preparedStatement.setString(2, "员工" + i);
                preparedStatement.setFloat(3, 4000f);
                preparedStatement.setString(4, "市场部");
                preparedStatement.executeUpdate();
            }
            connection.commit();
            long endTime =new Date().getTime();
            System.out.println("tc1执行总时长" + (startTime-endTime));
        } catch (SQLException e) {
            throw new RuntimeException(e);
        } catch (ClassNotFoundException e) {
            throw new RuntimeException(e);
        } catch (Exception e) {
            e.printStackTrace();
            try {
                if (connection != null && !connection.isClosed()) {
                    connection.rollback();
                }
            } catch (SQLException ex) {
                throw new RuntimeException(ex);
            }

        } finally {
            DbUtils.closeConnection(null, preparedStatement, connection);
        }
    }

    // 使用批处理插入数据
    public static void tc2(){
        Connection connection = null;
        PreparedStatement preparedStatement = null;
        try {
            long startTime = new Date().getTime();
            connection = DbUtils.getConnection();
            connection.setAutoCommit(false);
            String sql = "INSERT INTO employee(eno,ename,salary,dname) VALUES(?,?,?,?)";
            preparedStatement = connection.prepareStatement(sql);
            for (int i = 200000; i < 300000; i++) {

                preparedStatement.setInt(1, i);
                preparedStatement.setString(2, "员工" + i);
                preparedStatement.setFloat(3, 4000f);
                preparedStatement.setString(4, "市场部");
                preparedStatement.addBatch();
            }
            preparedStatement.executeBatch();
            connection.commit();
            long endTime =new Date().getTime();
            System.out.println("tc2执行总时长" + (startTime-endTime));
        } catch (SQLException e) {
            throw new RuntimeException(e);
        } catch (ClassNotFoundException e) {
            throw new RuntimeException(e);
        } catch (Exception e) {
            e.printStackTrace();
            try {
                if (connection != null && !connection.isClosed()) {
                    connection.rollback();
                }
            } catch (SQLException ex) {
                throw new RuntimeException(ex);
            }

        } finally {
            DbUtils.closeConnection(null, preparedStatement, connection);
        }
    }
    public static void main(String[] args) {
        tc1();
        tc2();
    }
}
执行后效果如下,可以看出批处理比之前快了10s左右,那么为什么会这样呢?是因为批处理省去了重复的sql解析工作。

连接池和JDBC进阶使用
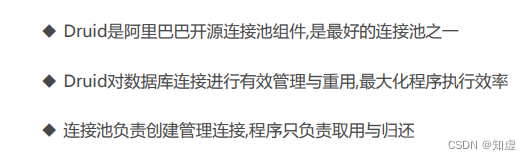
阿里巴巴Druid连接池
给出示例代码及配置:
配置项-druid-config.properties
# Druid??????
driverClassName=com.mysql.cj.jdbc.Driver
url=jdbc:mysql://localhost:3306/imooc?useSSL=false&useUnicode=true&characterEncoding=UTF8&serverTimezone=Asia/Shanghai
username=root
password=123456
initialSize=10
maxActive=20
代码:
package com.jdbc.sample;

import com.alibaba.druid.pool.DruidDataSourceFactory;
import com.jdbc.common.DbUtils;

import javax.sql.DataSource;
import java.io.FileInputStream;
import java.io.FileNotFoundException;
import java.io.IOException;
import java.io.UnsupportedEncodingException;
import java.net.URLDecoder;
import java.sql.Connection;
import java.sql.PreparedStatement;
import java.sql.ResultSet;
import java.util.Properties;

/**
 * Druid连接池
 *
 * @author wangwei
 * @version 1.0.0
 * @since 2022-10-14
 */
public class DruidSample {


    public static void main(String[] args) {


        // 1.加载属性文件
        Properties properties = new Properties();
        String propertyFile  = DruidSample.class.getResource("/druid-config.properties").getPath();
        Connection connection =null;
        PreparedStatement preparedStatement =null;
        ResultSet rs = null;
        // URLDecoder().decode多次使用了,请记住使用
        try {


            propertyFile = new URLDecoder().decode(propertyFile,"UTF-8");
            properties.load(new FileInputStream(propertyFile));
        } catch (UnsupportedEncodingException e) {


            throw new RuntimeException(e);
        } catch (FileNotFoundException e) {


            throw new RuntimeException(e);
        } catch (IOException e) {


            throw new RuntimeException(e);
        }

        // 2.获取datasource数据源对象
        try {


            DataSource dataSource = DruidDataSourceFactory.createDataSource(properties);
            // 3.创建数据库链接
            for (int i = 0; i < 21; i++) {


                connection = dataSource.getConnection();


          preparedStatement =  connection.prepareStatement("SELECT * FROM employee limit 1");
          rs = preparedStatement.executeQuery();
          while(rs.next()){


              Integer eno = rs.getInt(1);//eno
              String ename = rs.getString("ename");
              Float salary = rs.getFloat("salary");
              String dname = rs.getString("dname");
              System.out.println(dname + "-" + eno + "-" + ename + "-" + salary);
          }
            }
        } catch (Exception e) {


            e.printStackTrace();
        }finally {


            DbUtils.closeConnection(rs,preparedStatement,connection);
        }


    }
}
C3P0使用
配置文件:c3p0-config.xml
<?xml version="1.0" encoding="UTF-8"?>
<c3p0-config>
<default-config>
<property name="driverClass">com.mysql.cj.jdbc.Driver</property>
<property name="jdbcUrl">jdbc:mysql://localhost:3306/imooc?useSSL=false&useUnicode=true&characterEncoding=UTF-8&serverTimezone=Asia/Shanghai&allowPublicKeyRetrieval=true</property>
<property name="user">root</property>
<property name="password">123456</property>
<!-- 连接池初始连接数量 -->
<property name="initialPoolSize">10</property>
<!--最大连接数量-->
<property name="maxPoolSize">20</property>
</default-config>
</c3p0-config>
代码;
package com.jdbc.sample;

import com.jdbc.common.DbUtils;
import com.mchange.v2.c3p0.ComboPooledDataSource;

import javax.sql.DataSource;
import java.sql.Connection;
import java.sql.PreparedStatement;
import java.sql.ResultSet;
import java.sql.SQLException;

/**
 * C3P0连接池
 *
 * @author wangwei
 * @version 1.0.0
 * @since 2022-10-17
 */
public class C3P0Sample {
    public static void main(String[] args) {
        Connection connection =null;
        PreparedStatement preparedStatement =null;
        ResultSet resultSet =null;
        DataSource dataSource = new ComboPooledDataSource();
        try {
            connection =dataSource.getConnection();
            String sql ="SELECT * FROM employee limit 10";
            preparedStatement = connection.prepareStatement(sql);
            resultSet =preparedStatement.executeQuery();
            while (resultSet.next()){
                Integer eno = resultSet.getInt(1);//eno
                String ename = resultSet.getString("ename");
                Float salary = resultSet.getFloat("salary");
                String dname = resultSet.getString("dname");
                System.out.println(dname + "-" + eno + "-" + ename + "-" + salary);
            }
        } catch (Exception e) {
            throw new RuntimeException(e);
        } finally {
            DbUtils.closeConnection(resultSet,preparedStatement,connection);
        }
    }
}
Common DbUtils使用
代码如下:
package com.jdbc.sample;

import com.alibaba.druid.pool.DruidDataSourceFactory;
import com.jdbc.hrapp.entity.Employee;
import org.apache.commons.dbutils.QueryRunner;
import org.apache.commons.dbutils.handlers.BeanListHandler;

import javax.sql.DataSource;
import java.io.FileInputStream;
import java.io.IOException;
import java.net.URLDecoder;
import java.sql.Connection;
import java.sql.SQLException;
import java.util.List;
import java.util.Properties;

/**
 * todo {类简要说明}
 *
 * @author wangwei
 * @version 1.0.0
 * @since 2022-10-17
 */
public class CommonDbUtilSample {
    private static void query(){
        Properties properties =new Properties();
        String propertyFile  = DruidSample.class.getResource("/druid-config.properties").getPath();

        try {
            propertyFile = new URLDecoder().decode(propertyFile,"UTF-8");
            properties.load(new FileInputStream(propertyFile));
            DataSource dataSource = DruidDataSourceFactory.createDataSource(properties);
            QueryRunner queryRunner =new QueryRunner(dataSource);
            List<Employee> list = queryRunner.query("SELECT * FROM employee LIMIT ?,10",
                    new BeanListHandler<>(Employee.class),
                    new Object[]{1});
            for (Employee employee:list) {
                System.out.println(employee.toString());
            }
        } catch (Exception e) {
            throw new RuntimeException(e);
        }
    }

    private static void update(){
        Properties properties =new Properties();
        String propertyFile  = DruidSample.class.getResource("/druid-config.properties").getPath();
        Connection connection =null;
        try {
            propertyFile = new URLDecoder().decode(propertyFile,"UTF-8");
            properties.load(new FileInputStream(propertyFile));
            DataSource dataSource = DruidDataSourceFactory.createDataSource(properties);
           connection = dataSource.getConnection();
           connection.setAutoCommit(false);
           String sql1 ="update employee set salary =salary+1000 where eno =?";
            String sql2 ="update employee set salary =salary-500 where eno =?";
            QueryRunner queryRunner =new QueryRunner();
            queryRunner.update(connection,sql1,new Object[]{1000});
            queryRunner.update(connection,sql2,new Object[]{1000});
            connection.commit();
        } catch (Exception e) {
            try {
          if (connection!=null&&!connection.isClosed()){

                  connection.rollback();
              } }catch (SQLException ex) {
                  throw new RuntimeException(ex);

          }
        }
    }
    public static void main(String[] args) {
        query();
        update();
    }
}