Linux安装MySQL5.7
一、设置yum源并安装
1.1 配置rpm仓库
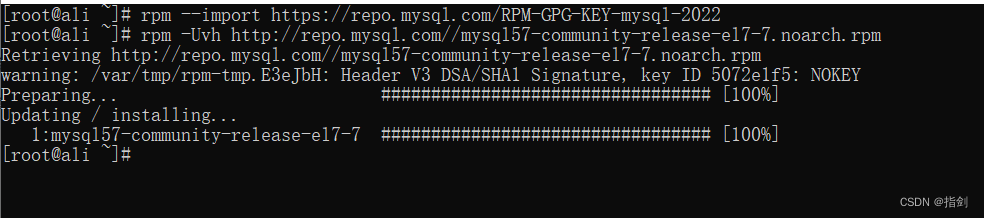
1.1.1 更新密钥
rpm --import https://repo.mysql.com/RPM-GPG-KEY-mysql-2022
1.1.2 安装mysql yum库
rpm -Uvh http://repo.mysql.com/mysql57-community-release-el7-7.noarch.rpm
1.2 使用yum进行安装
yum -y install mysql-community-server
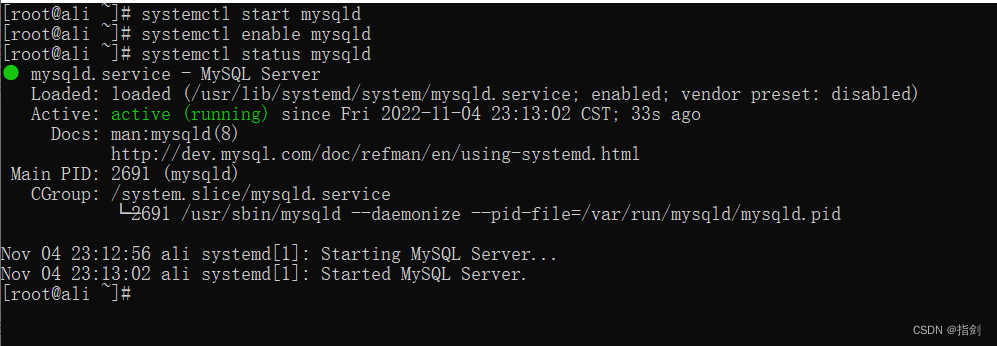
1.3 启动并配置开机启动
# 启动mysql
systemctl start mysqld
# 设置开机启动
systemctl enable mysqld
# 查看mysql状态
systemctl status mysqld
二、配置MySQL
2.1 获取初始密码
使用命令
grep "temporary password" /var/log/mysqld.log

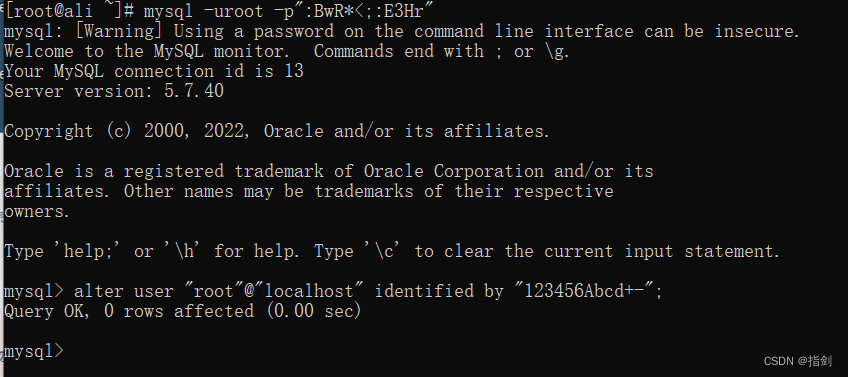
2.2 登录MySQL
mysql -u用户名 -p密码
# 因为有特殊符号,所以加了引号

2.3 修改root密码
2.3.1 设置复杂密码(默认)
alter user "root"@"localhost" identified by "123456Abcd+-";
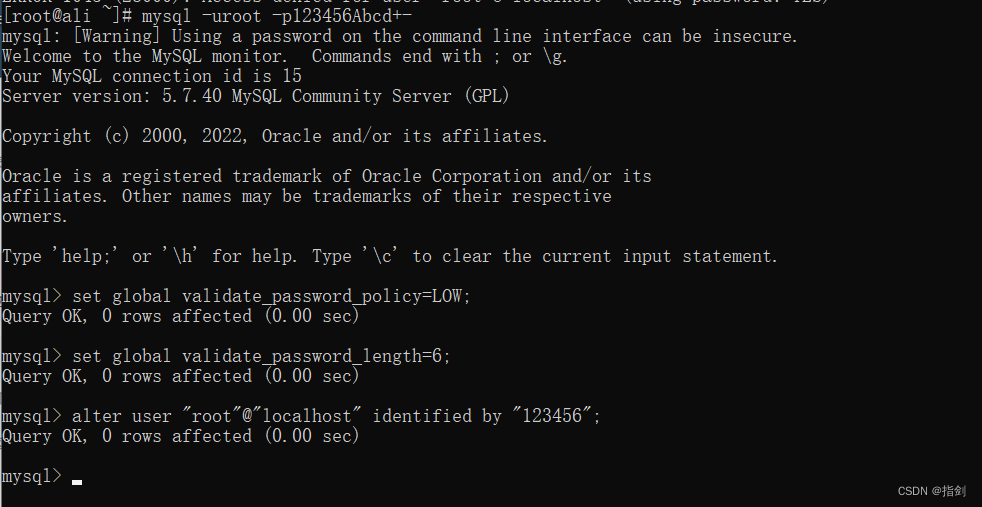
2.3.2 设置简单的用户密码
# 设置密码等级
mysql> set global validate_password_policy=LOW;
Query OK, 0 rows affected (0.00 sec)
# 设置密码长度
mysql> set global validate_password_length=6;
Query OK, 0 rows affected (0.00 sec)
# 修改用户密码
mysql> alter user "root"@"localhost" identified by "123456";
Query OK, 0 rows affected (0.00 sec)
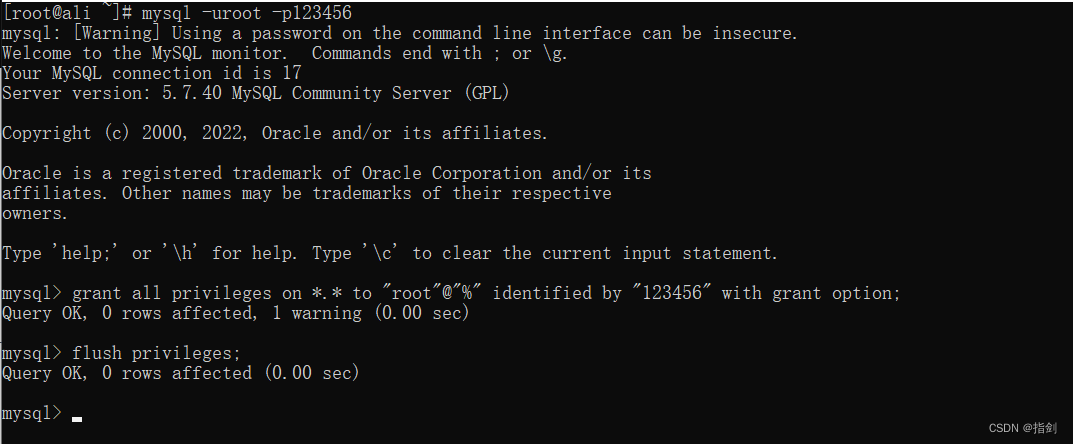
2.4 授权root用户远程登陆权限
# % 表示任意远程地址
# 这里的 % 可以指定为某一个地址 例如 192.168.1.1
mysql> grant all privileges on *.* to "root"@"%" identified by "123456" with grant option;
Query OK, 0 rows affected, 1 warning (0.00 sec)

# 刷新权限
mysql> flush privileges;
Query OK, 0 rows affected (0.00 sec)
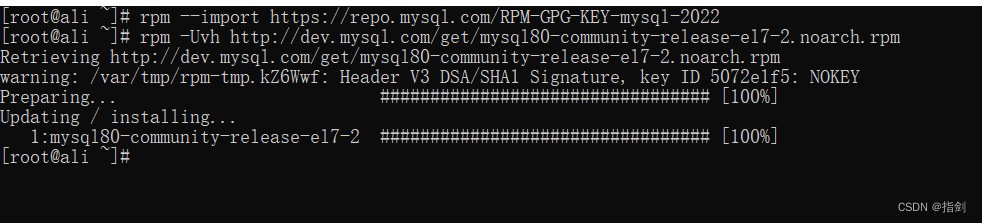
三、设置yum源并安装(MySQL8.0)
3.1 配置rpm仓库
3.1.1 更新密钥
rpm --import https://repo.mysql.com/RPM-GPG-KEY-mysql-2022
3.1.2 安装mysql yum库
rpm -Uvh http://dev.mysql.com/get/mysql80-community-release-el7-2.noarch.rpm
3.2 使用yum进行安装
yum -y install mysql-community-server
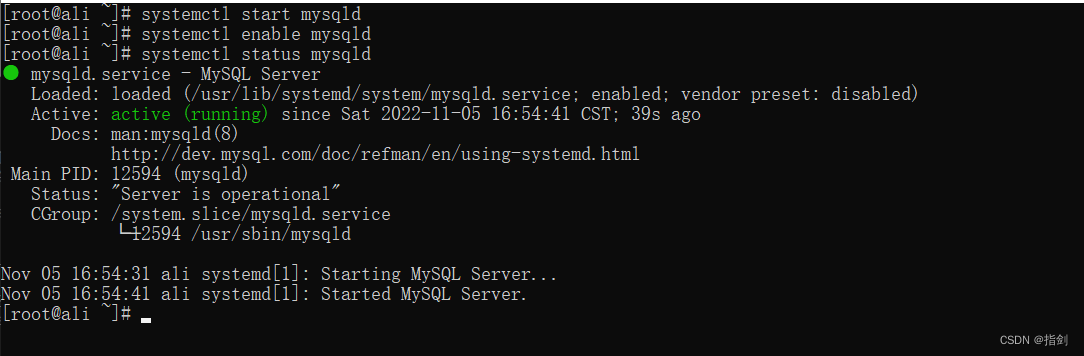
3.3 启动并配置开机启动
# 启动mysql
systemctl start mysqld
# 设置开机启动
systemctl enable mysqld
# 查看mysql状态
systemctl status mysqld
四、配置MySQL
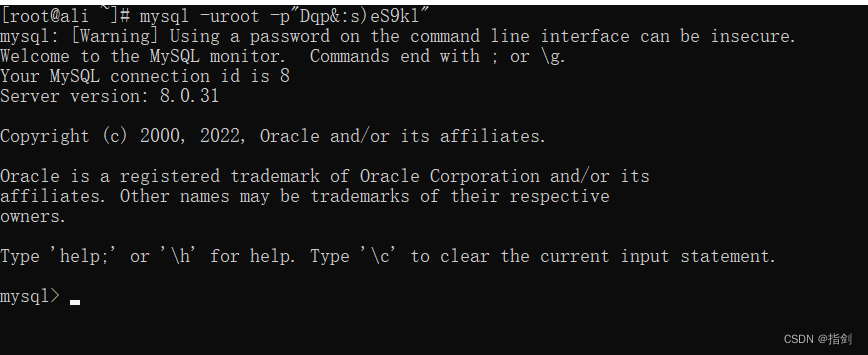
4.1 获取初始密码
使用命令
grep "temporary password" /var/log/mysqld.log

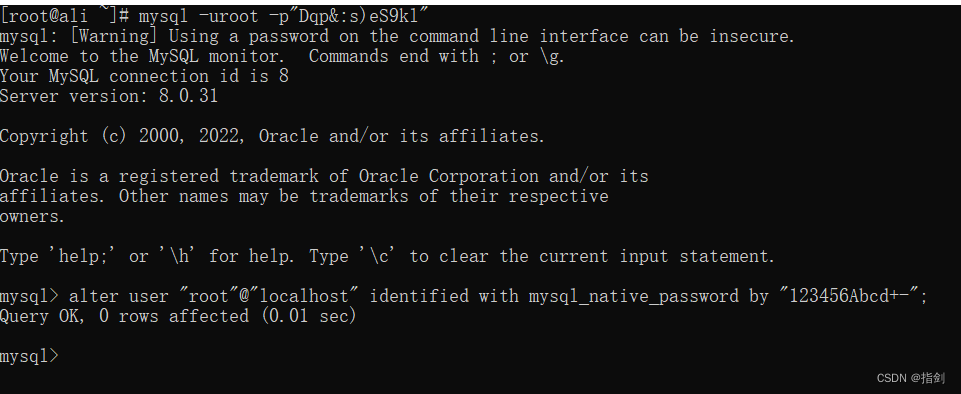
4.2 登录MySQL
mysql -u用户名 -p密码
# 因为有特殊符号,所以加了引号
4.3 修改root密码
4.3.1 设置复杂密码(默认)
alter user "root"@"localhost" identified with mysql_native_password by "123456Abcd+-";
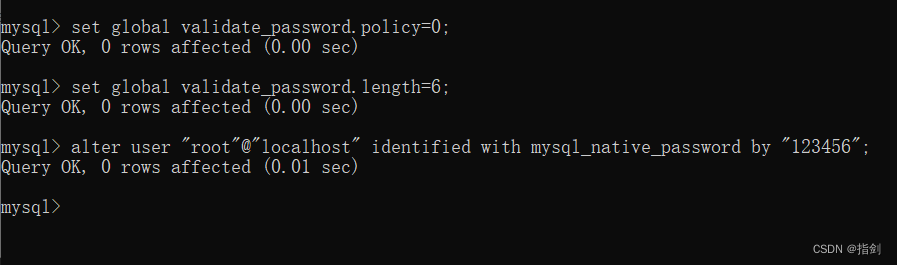
4.3.2 设置简单的用户密码
mysql> set global validate_password.policy=0;
Query OK, 0 rows affected (0.00 sec)

mysql> set global validate_password.length=6;
Query OK, 0 rows affected (0.00 sec)

mysql> alter user "root"@"localhost" identified with mysql_native_password by "123456";
Query OK, 0 rows affected (0.01 sec)
4.4 授权root用户远程登陆权限
# % 表示任意远程地址
# 这里的 % 可以指定为某一个地址 例如 192.168.1.1
create user "root"@"%" identified with mysql_native_password by "123456";