
目录
前言:
平常工作中,你应该遇到过这种代码:
public void setParam(ExamPaperVo vo){
ExamPaper examPaper=new ExamPaper();
//试卷主键
examPaper.setExaminationPaperId(vo.getExaminationPaperId());
//剩余时间
curForm.setLeavTime(examPaper.getLeavTime());
//单位主键
curForm.setOrganizationId(examPaper.getOrganizationId());
//考试主键
curForm.setId(examPaper.getId());
//考场主键
curForm.setExamroomId(examPaper.getExamroomId());
//用户主键
curForm.setUserId(examPaper.getUserId());
//专业
curForm.setSpecialtyCode(examPaper.getSpecialtyCode());
//岗位
curForm.setPostionCode(examPaper.getPostionCode());
//等级
curForm.setGradeCode(examPaper.getGradeCode());
//考试开始时间
curForm.setExamStartTime(examPaper.getExamStartTime());
//考试结束时间
curForm.setExamEndTime(examPaper.getExamEndTime());
//单选题重要数量curForm.setSingleSelectionImpCount(examPaper.getSingleSelectionImpCount());
//多选题重要数量curForm.setMultiSelectionImpCount(examPaper.getMultiSelectionImpCount());
//判断题重要数量
curForm.setJudgementImpCount(examPaper.getJudgementImpCount());
//考试时间
curForm.setExamTime(examPaper.getExamTime());
//总分
curForm.setFullScore(examPaper.getFullScore());
//及格分
curForm.setPassScore(examPaper.getPassScore());
//学员姓名
curForm.setUserName(examPaper.getUserName());
//分数
curForm.setScore(examPaper.getScore());
//是否及格
curForm.setResult(examPaper.getResult());
curForm.setIsPassed(examPaper.getIsPassed());
//单选答对数量
curForm.setSingleOkCount(examPaper.getSingleOkCount());
//多选答对数量
curForm.setMultiOkCount(examPaper.getMultiOkCount());
//判断答对数量
curForm.setJudgementOkCount(examPaper.getJudgementOkCount());
//提交试卷
service.submit(examPaper);
}
代码是不是看起来非常整洁,命名也非常规范,注释也很全面,大家觉得这个代码优雅么?我认为这个代码纯属体力劳动,那么我们接下来用原型模式来解决这个问题。
原型模式使用场景介绍
- 类初始化消耗资源较多
- new产生一个对香需要非常繁琐的过程(数据准备、访问权限等)
- 构造函数比较复杂
- 循环体中产生大量对象时
简单克隆
一个标准的原型模式代码,应该是这样设计的。先创建原型Prototype接口:
public interface Prototype {

    Prototype clone();

}
创建具体需要克隆的对象ConcretePrototype
public class ConcretePrototype implements Prototype{

    private int age;
    private String name;
    private List hobbies;


    public int getAge() {
        return age;
    }

    public void setAge(int age) {
        this.age = age;
    }

    public String getName() {
        return name;
    }

    public void setName(String name) {
        this.name = name;
    }

    public List getHobbies() {
        return hobbies;
    }

    public void setHobbies(List hobbies) {
        this.hobbies = hobbies;
    }

    @Override
    public Prototype clone() {
        ConcretePrototype concretePrototype=new ConcretePrototype();
        concretePrototype.setAge(this.age);
        concretePrototype.setHobbies(this.hobbies);
        concretePrototype.setHobbies(this.hobbies);
        return concretePrototype;
    }
}
创建Client对象:
public class Client {

    private Prototype mPrototype;


    public Client(Prototype prototype) {
        mPrototype = prototype;
    }


    Prototype startClone(Prototype concretePrototype){
        return concretePrototype.clone();
    }
}
测试代码:
public class PrototypeTest {

    public static void main(String[] args) {

        ConcretePrototype concretePrototype = new ConcretePrototype();
        //测试属性
        concretePrototype.setAge(18);
        concretePrototype.setName("阿力");
        List hobbies = new ArrayList<String>();
        concretePrototype.setHobbies(hobbies);
        System.out.println(concretePrototype);


        //准备开克隆
        Client client = new Client(concretePrototype);
        ConcretePrototype concretePrototypeClone = (ConcretePrototype)
                client.startClone(concretePrototype);


        System.out.println("克隆对象中的引用类型地址值:" + concretePrototypeClone.getHobbies());
        System.out.println("原对象中的引用类型地址值:" + concretePrototype.getHobbies());
        System.out.println("对象地址比较:" +
                (concretePrototypeClone.getHobbies() == concretePrototype.getHobbies()));
    }
}
运行结果
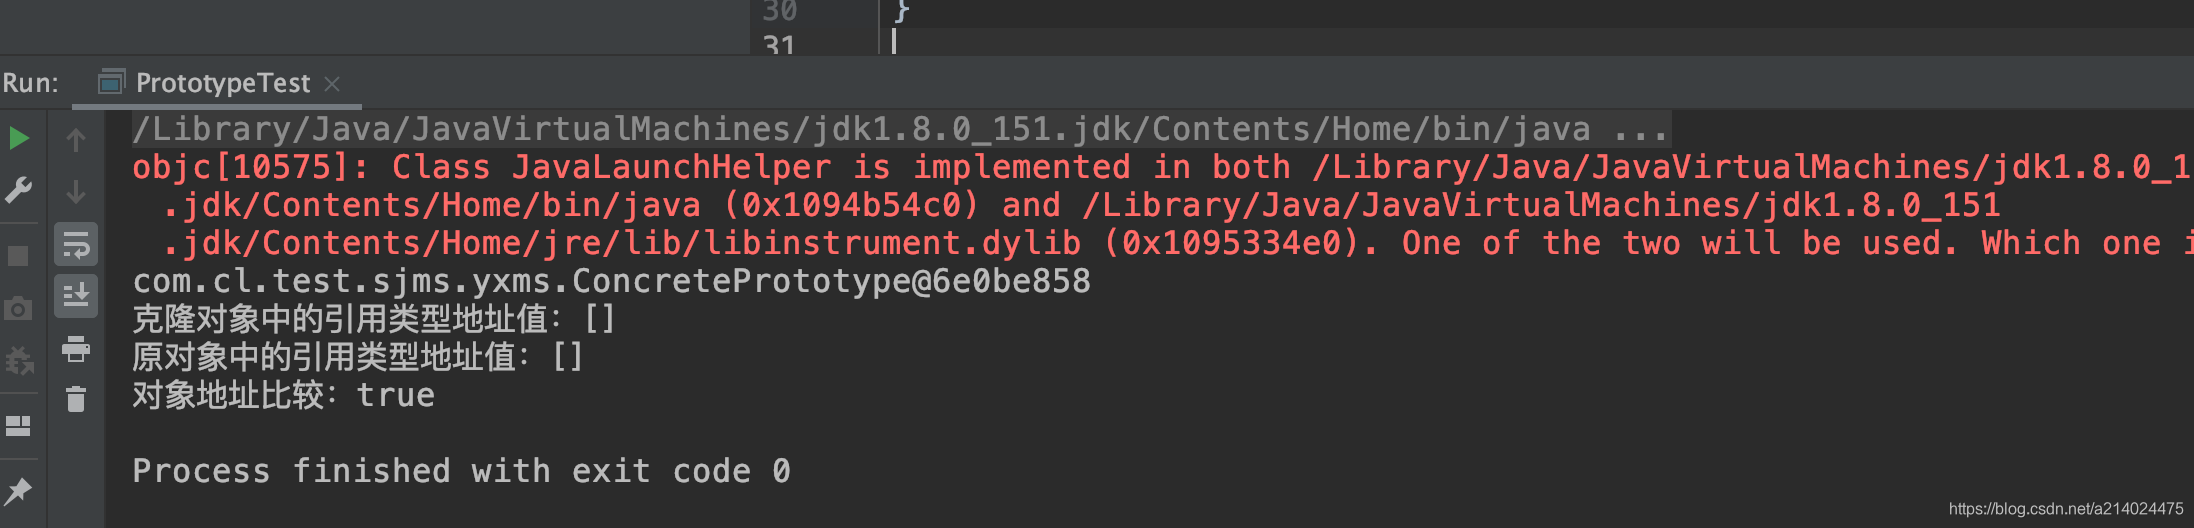
从测试结果看出hobbies的引用地址是相同的,意味着复制的不是值,而是引用的地址。这样的话,如果我们修改任意一个对象中的属性值,concretePrototype和concretePrototypeCone的hobbies值都会改变。这就是我们常说的浅克隆。只是完整复制了值类型数据,没有赋值引用对象。换言之,所有的引用对象仍然指向原来的对象,显然不是我们想要的结果。下面我们来看深度克隆继续改造。
深度克隆
我们换一个场景,大家都知道齐天大圣。首先它是一只猴子,有七十二般变化,把一根毫毛就可以吹出千万个泼猴,手里还拿着金箍棒,金箍棒可以变大变小。这就是我们耳熟能详的原型模式的经典体现。
创建原型猴子Monkey类: