1.下载FFmpeg(3.3.9)
ffmpeg官网:Index of /releases
ffmpeg-3.3.9下载链接: http://www.ffmpeg.org/releases/ffmpeg-3.3.9.tar.gz
2.下载NDK
不受支持的 NDK 下载 | Android NDK | Android Developers
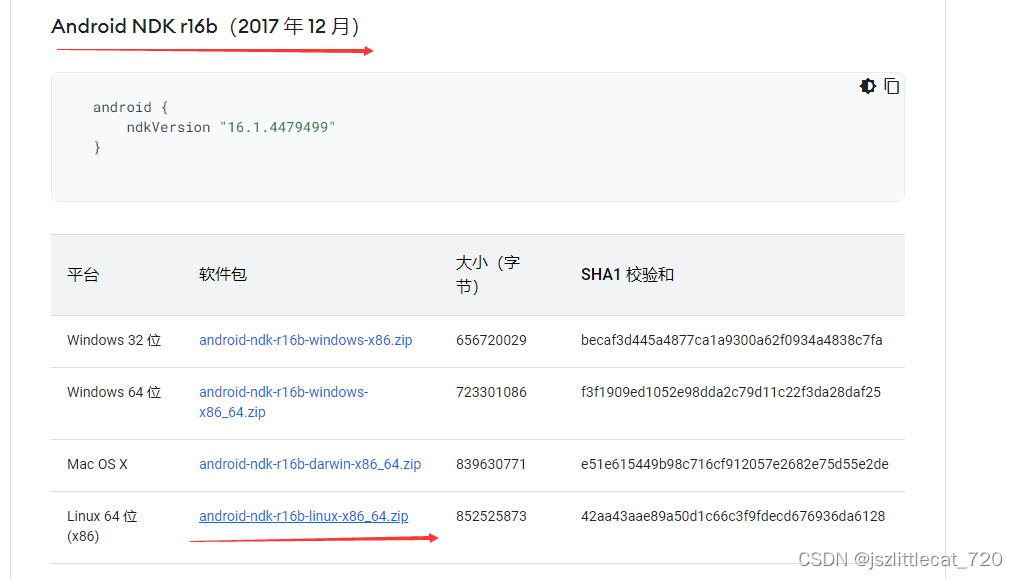
ndk-r16下载链接:https://dl.google.com/android/repository/android-ndk-r16b-linux-x86_64.zip?hl=zh-cn
3.下载VMware Workstation Pro (自行某度)
下载 VMware Workstation Pro | CN
4.安装VMware Workstation Pro (自行某度)
5.下载ubuntu镜像 (自行某度)
Ubuntu 14.04.6 LTS (Trusty Tahr)

6.在VMware Workstation中加载ubuntu镜像 (自行某度)
7.配置ndk环境变量
将下载的android-ndk-r16b-linux-x86_64.zip压缩文件复制到ubuntu指定的文件夹中(自行某度)
将下载的ffmpeg-3.3.9.tar.gz压缩文件复制到ubuntu指定的文件夹中(自行某度)
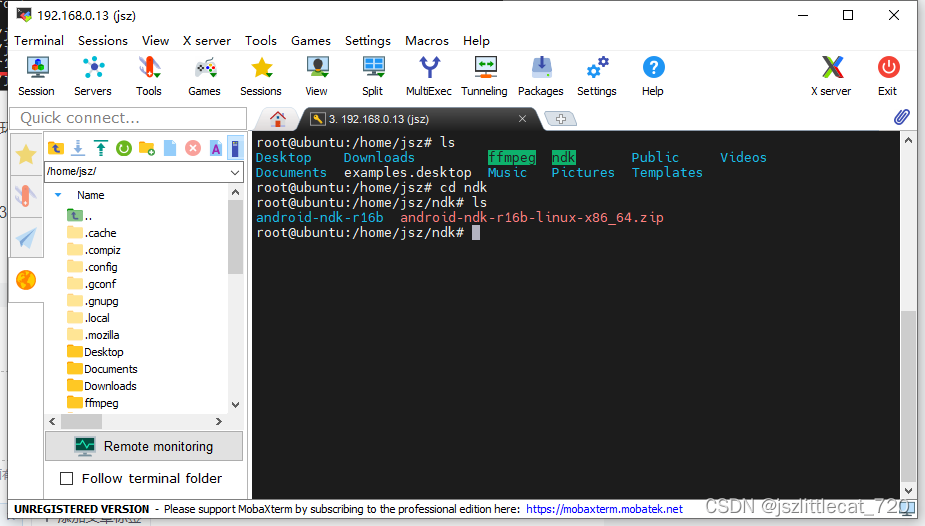
这里是在ubuntu终端下创建ndk和ffmpeg文件夹,并把压缩文件分别放置对应的目录中
在终端进入ndk目录,输入命令:unzip android-ndk-r16b-linux-x86_64.zip 解压此文件
ndk目录如下图所示:
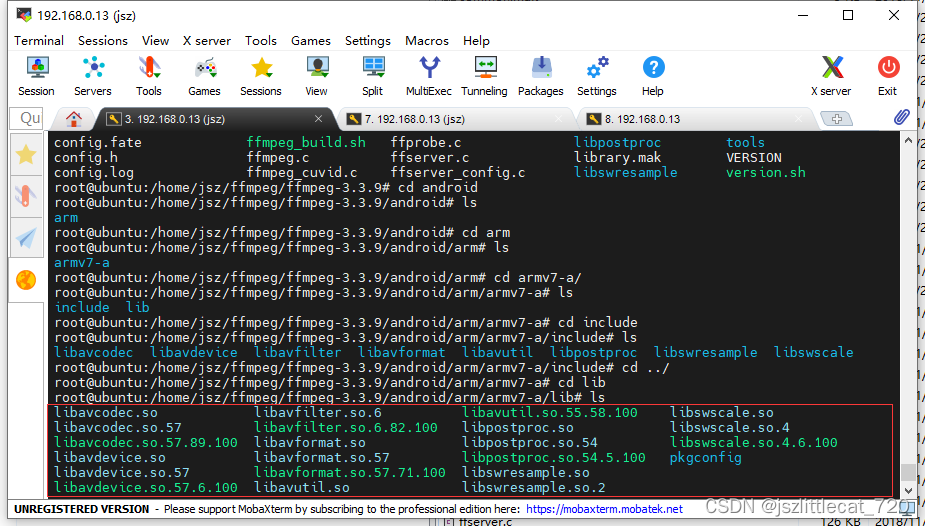
在终端进入ffmpeg目录,输入命令:tar -zxvf ffmpeg-3.3.9.tar.gz 解压此文件
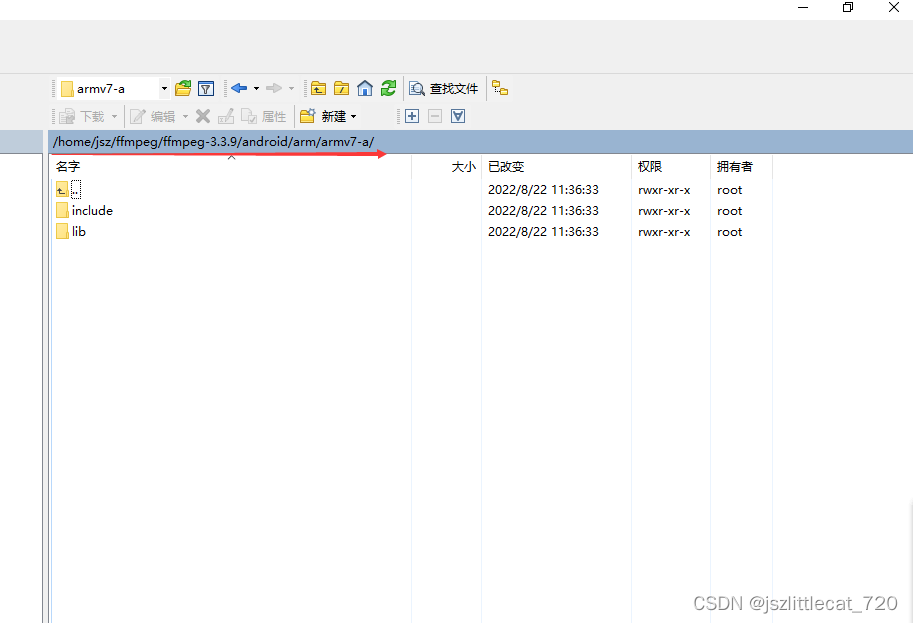
ffmpeg目录如下图所示:

在终端输入命令:vim /etc/profile 打开此文件
键盘按i键进入编辑模式 ,在文件的最后添加:
# 配置NDK路径
export NDK_PATH=/ndk/android-ndk-r16b
export PATH=$NDK_PATH:$PATH
键盘按Esc退出编辑模式进入命令行模式 输入:wq!保存此文件
在终端输入命令: source /etc/profile
在终端输入命令:echo $NDK_PATH

出现如上图所示表示环境变量设置成功。
8.生成android版本的交叉编译链
ndk-r16以上的版本需要我们自己去生成android版本的交叉编译链
在终端输入命令:cd ndk/android-ndk-r16b/进入android-ndk-r16b目录
在终端输入命令:ls查看此目录下的文件
在终端输入命令:cd build/tools 进入tools目录
在终端输入命令:ls 查看tools目录下的文件
在终端输入命令:./make_standalone_toolchain.py --arch arm --api 19 --install-dir /home/jsz/ndk/android-ndk-r16b/android-toolchains/android-19/arch-arm
在终端输入命令:cd ../../返回android-ndk-r16b目录

在终端输入命令:ls查看android-ndk-r16b目录
在终端输入命令:cd android-toolchains/android-19/arch-arm/ 进入arch-arm目录
在终端输入命令:ls查看脚本是否运行成功

9.编写shell脚本
在终端进入ffmpeg-3.3.9 目录,执行命令:vim ffmpeg_build.sh创建并打开ffmpeg_build.sh

键盘按i键进入编辑模式
添加内容如下:
#用于编译android平台的脚本
#!/bin/bash
. /etc/profile
function build()
{

	#执行.configure文件
	./configure --prefix=$PREFIX \
        --enable-gpl \
        --disable-static \
        --enable-shared \
        --enable-small \
        --disable-programs \
	--enable-avresample \
        --disable-ffmpeg \
        --disable-ffplay \
        --disable-ffprobe \
        --disable-ffserver \
        --disable-doc \
        --arch=$ARCH \
        --cpu=$CPU \
        --cross-prefix=$CROSS_PREFIX \
        --enable-cross-compile \
        --sysroot=$SYSROOT \
        --target-os=linux \
        --extra-cflags="-fpic"
	#makefile清除 就是执行了makefile文件里面的clean 命令
	make clean
	#运行Makefile
	make
	#安装到指定prefix目录下
	make install

}
#定义变量
ARCH=arm
CPU=armv7-a
PREFIX=$(pwd)/android/$ARCH/$CPU
echo "NDK_PATH=$NDK_PATH"
ANDROID_TOOLCHAINS_PATH=$NDK_PATH/android-toolchains/android-19/arch-arm
CROSS_PREFIX=$ANDROID_TOOLCHAINS_PATH/bin/arm-linux-androideabi-
SYSROOT=$ANDROID_TOOLCHAINS_PATH/sysroot
#执行build函数
build
#下面需要编译其他的
#重新给变量赋值即可
#CPU=x86_64
#build
键盘按Esc退出编辑模式进入命令模式,输入:wq!保存 退出此文件
输入命令:./ffmpeg_build.sh执行脚本

如果遇到Permission denied问题,输入命令:chmod u+x ffmpeg_build.sh赋予可执行权限
等待脚本执行,需要一段时间。

出现android文件夹说明执行成功。
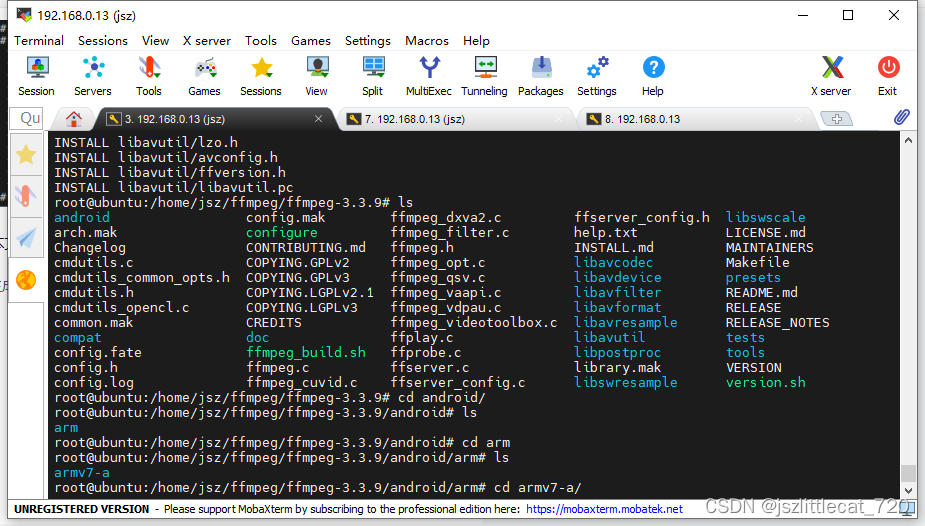
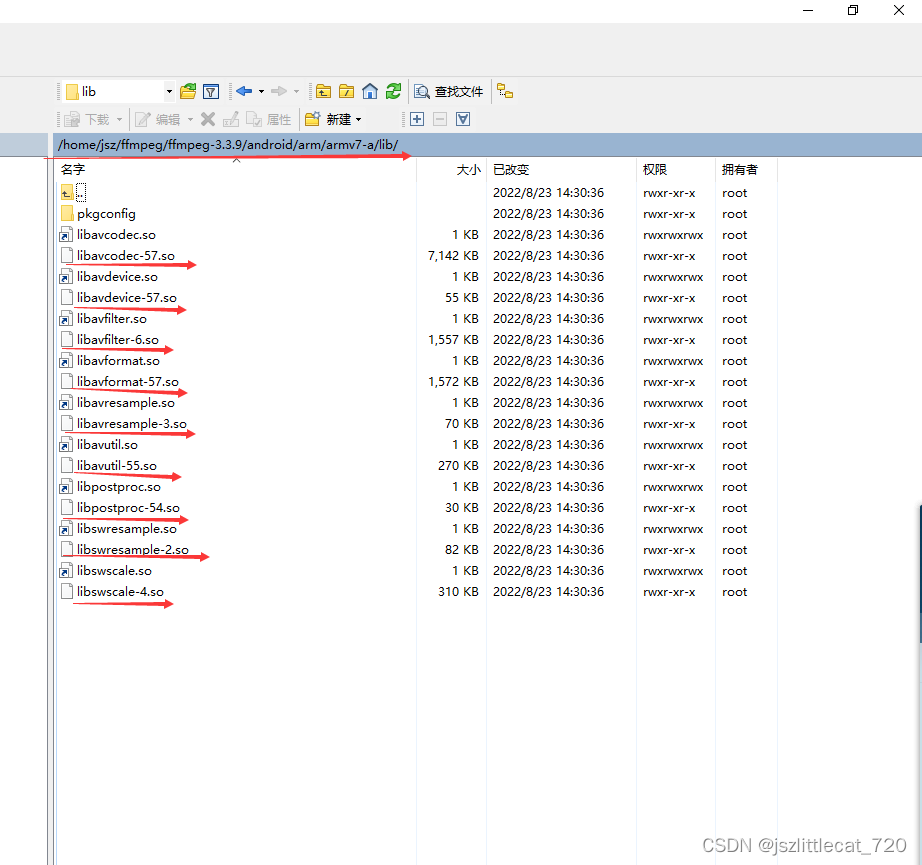
进入lib目录查看生成的库文件
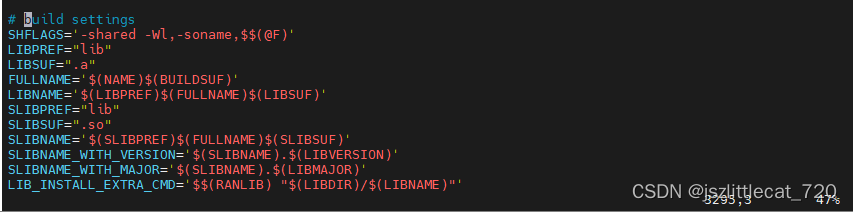
10.修改configure文件修改生成文件名的格式
返回ffmpeg-3.3.9目录,执行命令:vim configure打开configure文件
![]()
输入:/build settings查找需要修改的位置
键盘按i键进入编辑模式
修改内容如下:

键盘按Esc键退出编辑模式进入命令模式
输入命令:wq!保存文件并退出。
移除android文件夹,重新执行脚本文件,重新生成so库
输入命令: rm -rf android 删除android文件夹
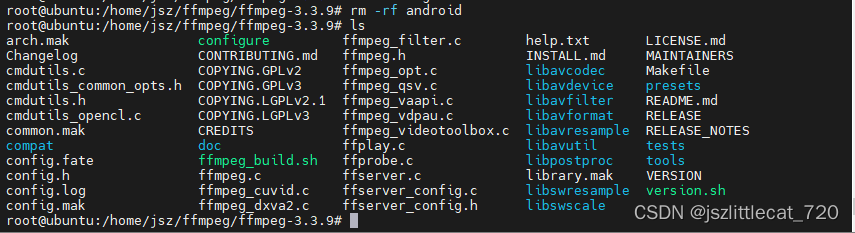
输入命令:./ffmpeg_build.sh 执行脚本文件
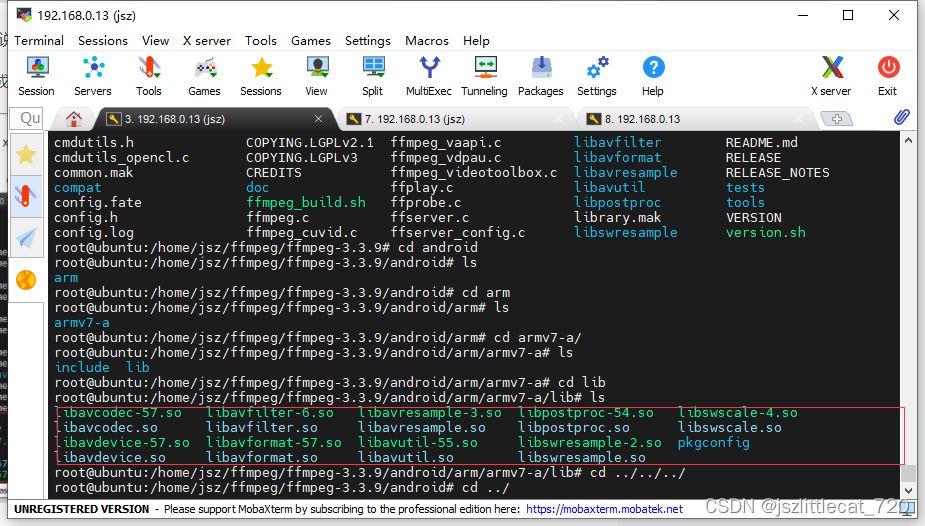
等待脚本执行完毕,进入lib目录查看生成的库文件
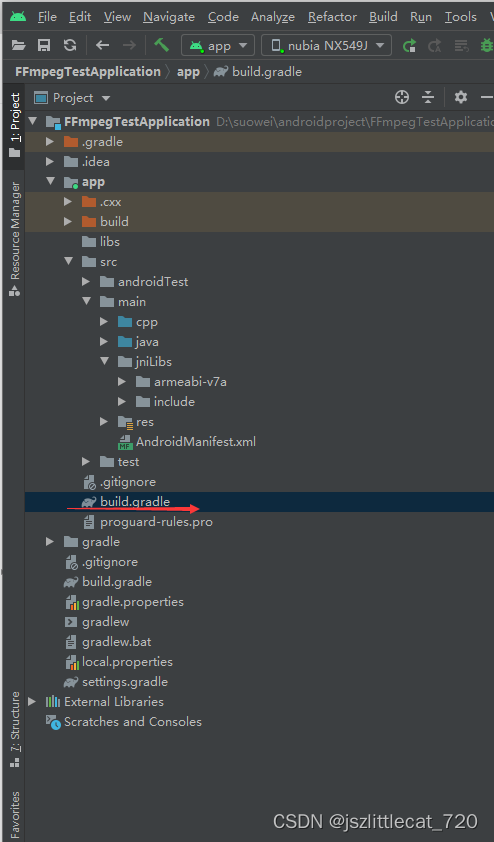
11.生成的文件拷贝至android studio项目中
将include文件夹拷贝至android studio项目中
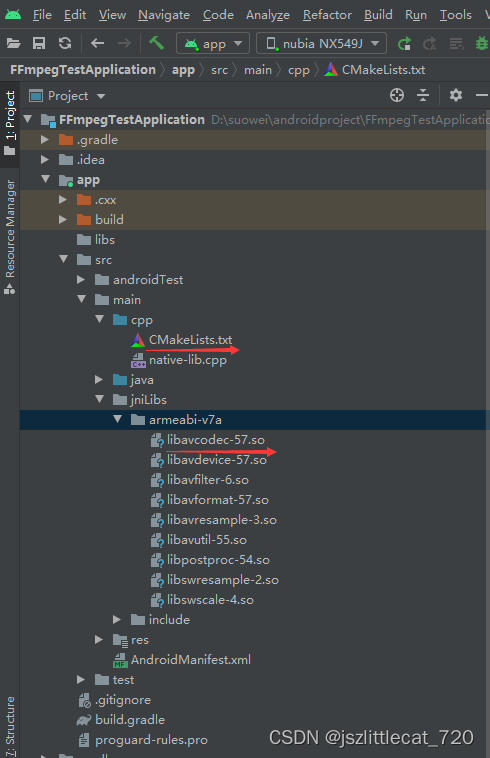
将lib下的9个so文件拷贝至android studio 项目中
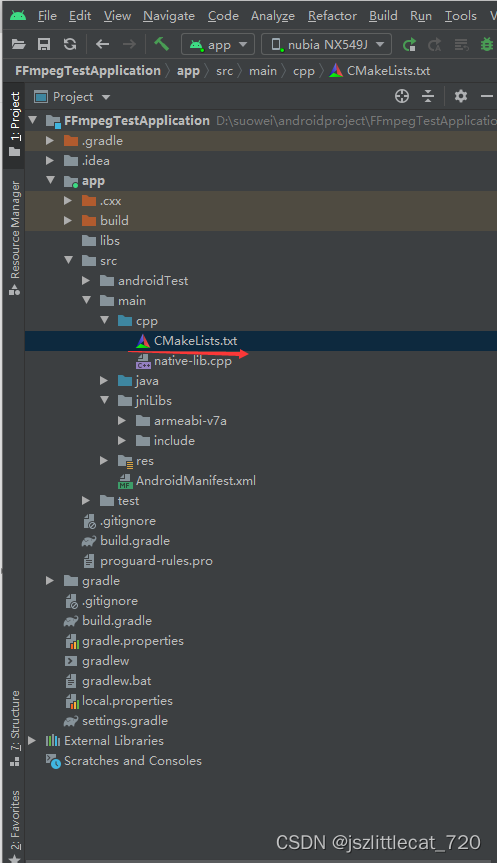
12.android studio创建c++项目
创建项目时选择c++

c++标准选择c++11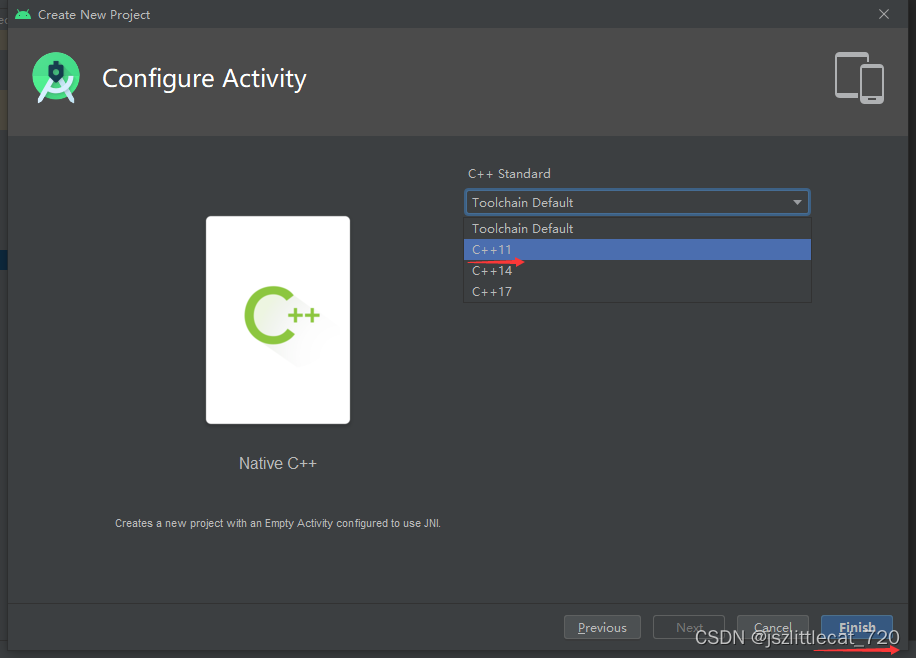
在main目录下创建jniLibs文件夹,把include文件夹复制到此文件夹中
在jniLibs文件夹下创建armeabi-v7a文件夹,把9个so文件复制到此文件夹中


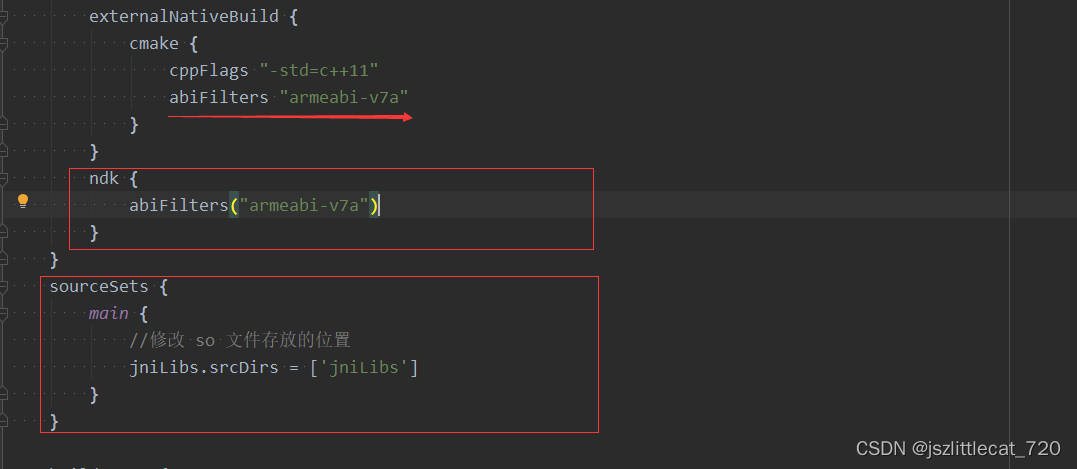
修改app下的build.gradle文件
plugins {
    id 'com.android.application'
}

android {
    compileSdkVersion 32
    buildToolsVersion "32.0.0"

    defaultConfig {
        applicationId "com.suoer.ndk.ffmpegtestapplication"
        minSdkVersion 16
        targetSdkVersion 32
        versionCode 1
        versionName "1.0"

        testInstrumentationRunner "androidx.test.runner.AndroidJUnitRunner"
        externalNativeBuild {
            cmake {
                cppFlags "-std=c++11"
                abiFilters "armeabi-v7a"
            }
        }
        ndk {
            abiFilters("armeabi-v7a")
        }
    }
    sourceSets {
        main {
            //修改 so 文件存放的位置
            jniLibs.srcDirs = ['jniLibs']
        }
    }

    buildTypes {
        release {
            minifyEnabled false
            proguardFiles getDefaultProguardFile('proguard-android-optimize.txt'), 'proguard-rules.pro'
        }
    }
    externalNativeBuild {
        cmake {
            path "src/main/cpp/CMakeLists.txt"
            version "3.10.2"
        }
    }
    compileOptions {
        sourceCompatibility JavaVersion.VERSION_1_8
        targetCompatibility JavaVersion.VERSION_1_8
    }
}

dependencies {

    implementation 'androidx.appcompat:appcompat:1.1.0'
    implementation 'com.google.android.material:material:1.1.0'
    implementation 'androidx.constraintlayout:constraintlayout:1.1.3'
    testImplementation 'junit:junit:4.+'
    androidTestImplementation 'androidx.test.ext:junit:1.1.1'
    androidTestImplementation 'androidx.test.espresso:espresso-core:3.2.0'
}
13.修改CMakeLists.txt文件
# For more information about using CMake with Android Studio, read the
# documentation: https://d.android.com/studio/projects/add-native-code.html

# Sets the minimum version of CMake required to build the native library.

cmake_minimum_required(VERSION 3.10.2)

# Declares and names the project.

project("ffmpegtestapplication")

#判断编译器类型,如果是gcc编译器,则在编译选项中加入c++11支持
if(CMAKE_COMPILER_IS_GNUCXX)

    set(CMAKE_CXX_FLAGS "-std=c++11 ${CMAKE_CXX_FLAGS}")
    message(STATUS "optional:-std=c++11")
endif(CMAKE_COMPILER_IS_GNUCXX)


#需要引入我们头文件,以这个配置的目录为基准

include_directories(${CMAKE_SOURCE_DIR}/../jniLibs/include)

# Creates and names a library, sets it as either STATIC
# or SHARED, and provides the relative paths to its source code.
# You can define multiple libraries, and CMake builds them for you.
# Gradle automatically packages shared libraries with your APK.

add_library( # Sets the name of the library.
             native-lib

             # Sets the library as a shared library.
             SHARED

             # Provides a relative path to your source file(s).
             native-lib.cpp )
# 编解码(最重要的库)
add_library(
        avcodec
        SHARED
        IMPORTED)
set_target_properties(
        avcodec
        PROPERTIES IMPORTED_LOCATION
        ${CMAKE_SOURCE_DIR}/../jniLibs/armeabi-v7a/libavcodec-57.so)

# 设备信息
add_library(
        avdevice
        SHARED
        IMPORTED)
set_target_properties(
        avdevice
        PROPERTIES IMPORTED_LOCATION
        ${CMAKE_SOURCE_DIR}/../jniLibs/armeabi-v7a/libavdevice-57.so)

# 滤镜特效处理库
add_library(
        avfilter
        SHARED
        IMPORTED)
set_target_properties(
        avfilter
        PROPERTIES IMPORTED_LOCATION
        ${CMAKE_SOURCE_DIR}/../jniLibs/armeabi-v7a/libavfilter-6.so)

# 封装格式处理库
add_library(
        avformat
        SHARED
        IMPORTED)
set_target_properties(
        avformat
        PROPERTIES IMPORTED_LOCATION
        ${CMAKE_SOURCE_DIR}/../jniLibs/armeabi-v7a/libavformat-57.so)
# 重采样处理库
add_library(
        avresample
        SHARED
        IMPORTED)
set_target_properties(
        avresample
        PROPERTIES IMPORTED_LOCATION
        ${CMAKE_SOURCE_DIR}/../jniLibs/armeabi-v7a/libavresample-3.so)
# 工具库(大部分库都需要这个库的支持)
add_library(
        avutil
        SHARED
        IMPORTED)
set_target_properties(
        avutil
        PROPERTIES IMPORTED_LOCATION
        ${CMAKE_SOURCE_DIR}/../jniLibs/armeabi-v7a/libavutil-55.so)

# 后期处理
add_library(
        postproc
        SHARED
        IMPORTED)
set_target_properties(
        postproc
        PROPERTIES IMPORTED_LOCATION
        ${CMAKE_SOURCE_DIR}/../jniLibs/armeabi-v7a/libpostproc-54.so)

# 音频采样数据格式转换库
add_library(
        swresample
        SHARED
        IMPORTED)
set_target_properties(
        swresample
        PROPERTIES IMPORTED_LOCATION
        ${CMAKE_SOURCE_DIR}/../jniLibs/armeabi-v7a/libswresample-2.so)

# 视频像素数据格式转换
add_library(
        swscale
        SHARED
        IMPORTED)
set_target_properties(
        swscale
        PROPERTIES IMPORTED_LOCATION
        ${CMAKE_SOURCE_DIR}/../jniLibs/armeabi-v7a/libswscale-4.so)

# Searches for a specified prebuilt library and stores the path as a
# variable. Because CMake includes system libraries in the search path by
# default, you only need to specify the name of the public NDK library
# you want to add. CMake verifies that the library exists before
# completing its build.

find_library( # Sets the name of the path variable.
              log-lib

              # Specifies the name of the NDK library that
              # you want CMake to locate.
              log )

# Specifies libraries CMake should link to your target library. You
# can link multiple libraries, such as libraries you define in this
# build script, prebuilt third-party libraries, or system libraries.

target_link_libraries( # Specifies the target library.
                       native-lib avcodec avdevice avfilter avformat avresample avutil postproc swresample swscale

                       # Links the target library to the log library
                       # included in the NDK.
                       ${log-lib} )
需要注意的问题添加本地库文件时,注意库所在的路径,是相对于CMakeLists.txt所在路径的相对路径。

${CMAKE_SOURCE_DIR}为CMakeLists.txt所在的路径即app下的build.gradle文件中对CMakeLists.txt的路径配置与项目所处的位置保持一致。

我们需要配置添加的库的路径例如:libavcodec-57.so的路径
libavcodec-57.so是在jniLibs/armeabi-v7a下面
路径应该配置为:${CMAKE_SOURCE_DIR}/../jniLibs/armeabi-v7a/libavcodec-57.so
${CMAKE_SOURCE_DIR}为cpp目录 ../为main目录
libavcodec-57.so为main目录下的jniLibs目录下的armeabi-v7a目录下的libavcodec-57.so
build项目等待项目build成功
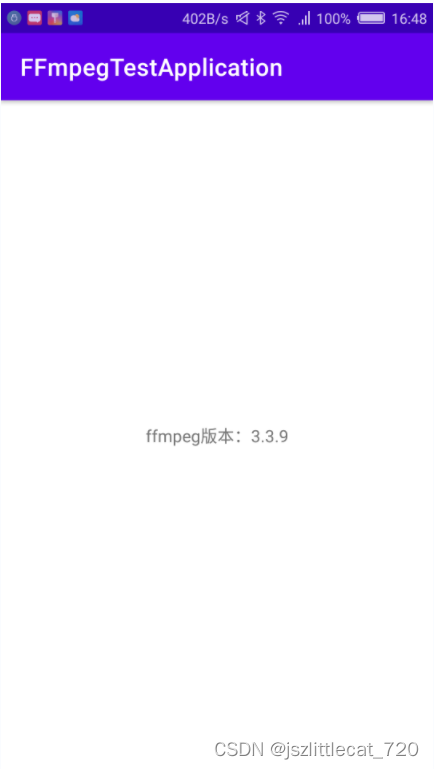
14.app中显示ffmpeg的版本号
native-lib.cpp修改如下内容:

native-lib.cpp
#include <jni.h>
#include <string>
extern "C" {
#include "libavutil/avutil.h"
}
extern "C" JNIEXPORT jstring JNICALL
Java_com_suoer_ndk_ffmpegtestapplication_MainActivity_stringFromJNI(
        JNIEnv* env,
        jobject /* this */) {
    //std::string hello = "Hello from C++";
    return env->NewStringUTF(av_version_info());
}
MainActivity修改如下内容:
MainActivity.java
package com.suoer.ndk.ffmpegtestapplication;
import android.os.Bundle;
import android.widget.TextView;
import androidx.appcompat.app.AppCompatActivity;
public class MainActivity extends AppCompatActivity {
// Used to load the 'native-lib' library on application startup.
static {
System.loadLibrary("native-lib");
}
@Override
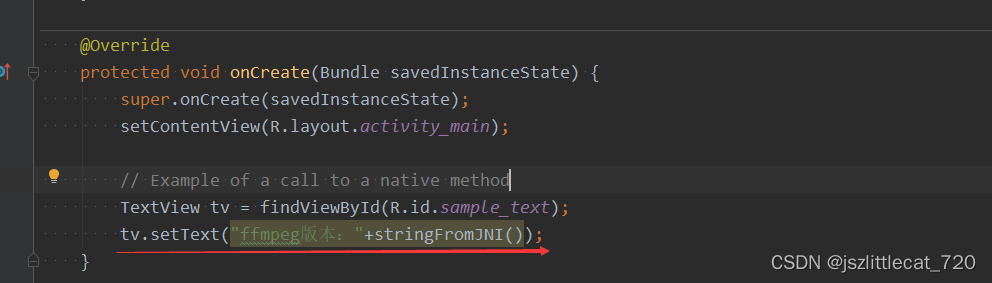
protected void onCreate(Bundle savedInstanceState) {
super.onCreate(savedInstanceState);
setContentView(R.layout.activity_main);
// Example of a call to a native method
TextView tv = findViewById(R.id.sample_text);
tv.setText("ffmpeg版本:"+stringFromJNI());
}
/**
* A native method that is implemented by the 'native-lib' native library,
* which is packaged with this application.
*/
public native String stringFromJNI();
}app运行结果如下图所示: