因为工作中用到了锚点设置,滚动定位到列表的某一行,常用的总是出问题,后来扒拉出了这个属性,详细研究了下方便 日 后使用
一、介绍scrollIntoView()的详细属性
1、简介
该scrollIntoView()方法将调用它的元素滚动到浏览器窗口的可见区域。
- 根据其他元素的布局,元素可能无法完全滚动到顶部或底部。
- 页面(容器)可滚动时才有用!
2、语法
element.scrollIntoView(); // 等同于element.scrollIntoView(true)
element.scrollIntoView(alignToTop); //布尔参数
element.scrollIntoView(scrollIntoViewOptions); //对象参数
3、语法参数
| align To Top | [可选],目前之前这个参数得到了良好的支持 |
|---|---|
| true | 元素的顶部将对齐到可滚动祖先的可见区域的顶部。对应于scrollIntoViewOptions: {block: “start”, inline: “nearest”}。这是默认值 |
| false | 元素的底部将与可滚动祖先的可见区域的底部对齐。对应于scrollIntoViewOptions: {block: “end”, inline: “nearest”}。 |
| scrollIntoViewOptions | [可选],目前这个参数浏览器对它的支持并不好,可以查看下文兼容性详情 |
|---|---|
| behavior | [可选]定义过渡动画。“auto”,“instant"或"smooth”。默认为"auto"。 |
| block | [可选] “start”,“center”,“end"或"nearest”。默认为"center"。 |
| inline | [可选] “start”,“center”,“end"或"nearest”。默认为"nearest"。 |
4、示例
var element = document.getElementById("box");

element.scrollIntoView();
element.scrollIntoView(false);
element.scrollIntoView({

    block: "end"});
element.scrollIntoView({

    behavior: "instant", block: "end", inline: "nearest"});
5、应用场景
URL中hash标记的进化
-
聊天窗口滚动显示最新的消息
-
往一个列表添加item后滚动显示最新的添加的item
-
回到顶部(#)
-
滚动到指定位置(#xxx)
6、浏览器兼容性

二、实际运用
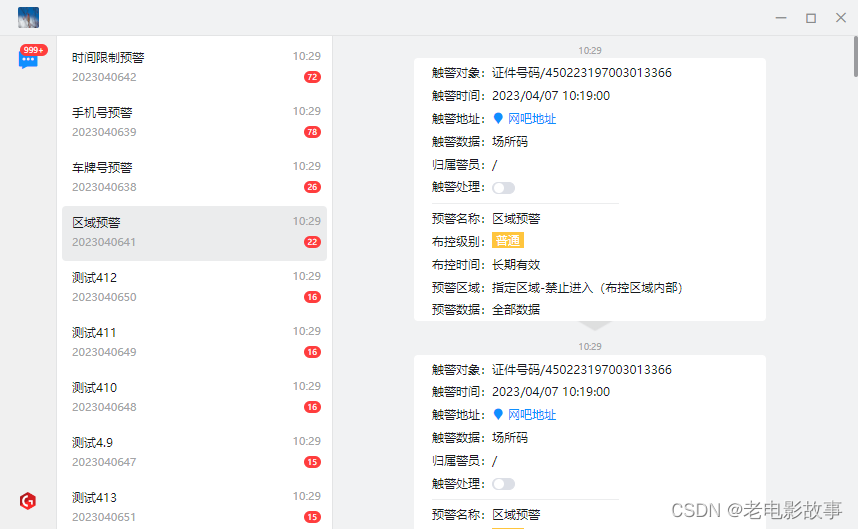
如图所示一个类似微信一样的electron项目,这个是消息列表,然后有消息过来的时候,就是右下角托盘消息提醒的时候,点击消息提示中的某一项,然后就打开这个页面,定位到选中的某一个,再右边显示详细信息
先说下具体思路:
在Vue 3中,可以使用v-for指令的ref属性来绑定每个列表项的引用。然后,使用computed属性来获取要滚动到的元素,并使用scrollIntoView方法将其滚动到可见区域。
以下是在Vue 3中使用v-for和computed实现根据列表的索引定位到某一行的示例:
<template>
  <div>
    <div v-for="(item, index) in list" :key="index" :ref="'listItem-' + index">{

    {

     item }}</div>
  </div>
</template>

<script>
import {

     computed, ref } from 'vue';

export default {


  setup() {


    const list = ref(['Item 1', 'Item 2', 'Item 3', 'Item 4', 'Item 5']);
    const activeIndex = ref(null);

    // 计算要滚动到的元素
    const activeElement = computed(() => {


      if (activeIndex.value !== null) {


        return document.querySelector(`[ref="listItem-${

      activeIndex.value}"]`);
      }
      return null;
    });

    // 滚动到指定的列表项
    const scrollToIndex = (index) => {


      activeIndex.value = index;
      if (activeElement.value) {


        activeElement.value.scrollIntoView();
      }
    };

    return {


      list,
      scrollToIndex
    };
  }
};
</script>
在上面的代码中,使用v-for指令循环遍历列表,并将每个列表项的引用绑定到ref属性上。然后,使用computed属性来计算要滚动到的元素。在scrollToIndex方法中,使用activeIndex来存储要滚动到的元素的索引,并使用activeElement计算出要滚动到的元素。最后,使用scrollIntoView方法将该元素滚动到可见区域。
在组件中触发scrollToIndex方法,可以在需要滚动到指定列表项时调用该方法。例如,可以在按钮的点击事件处理程序中调用scrollToIndex方法:
<button @click="scrollToIndex(3)">Scroll to Index 3</button>
在上面的代码中,单击按钮将调用scrollToIndex方法,并将3作为参数传递给该方法,以滚动到索引为3的列表项。
再看下我具体写的:

watch(clickId, async() => {


  // console.log('clickId changed from', oldValue, 'to', newValue)
  // eslint-disable-next-line
  const data = await window.app.windowGetData(store.userBaseInfo.username + '.data.warn')
  let code = 0
  const index = data.findIndex((item:any) => (
    item.configId === clickId.value
  ))
  data.forEach((item:any) => {


    if (item.configId === clickId.value) {


      code = Number(item.code)
    }
  })
  if (index !== -1) {


    itemClick(index, code)
    scrollToIndex() // 点击托盘消息的时候触发这里
  }
})
// 计算要滚动到的元素
const activeElement = computed(() => {


  if (activeIndex.value) {


    return document.getElementById(`listItem-${

       activeIndex.value }`)
  }
  return null
})
// 滚动到指定的列表项
const scrollToIndex = () => {


  if (activeElement.value) {


    activeElement.value.scrollIntoView(false)
  }
}
完事!