0.概述
记录一下mac系统安装git环境
首先我们看一下自己的mac系统是否有git ,
打开终端输入git --version
2.我们进入git官网
git官网下载界面https://git-scm.com/download/mac
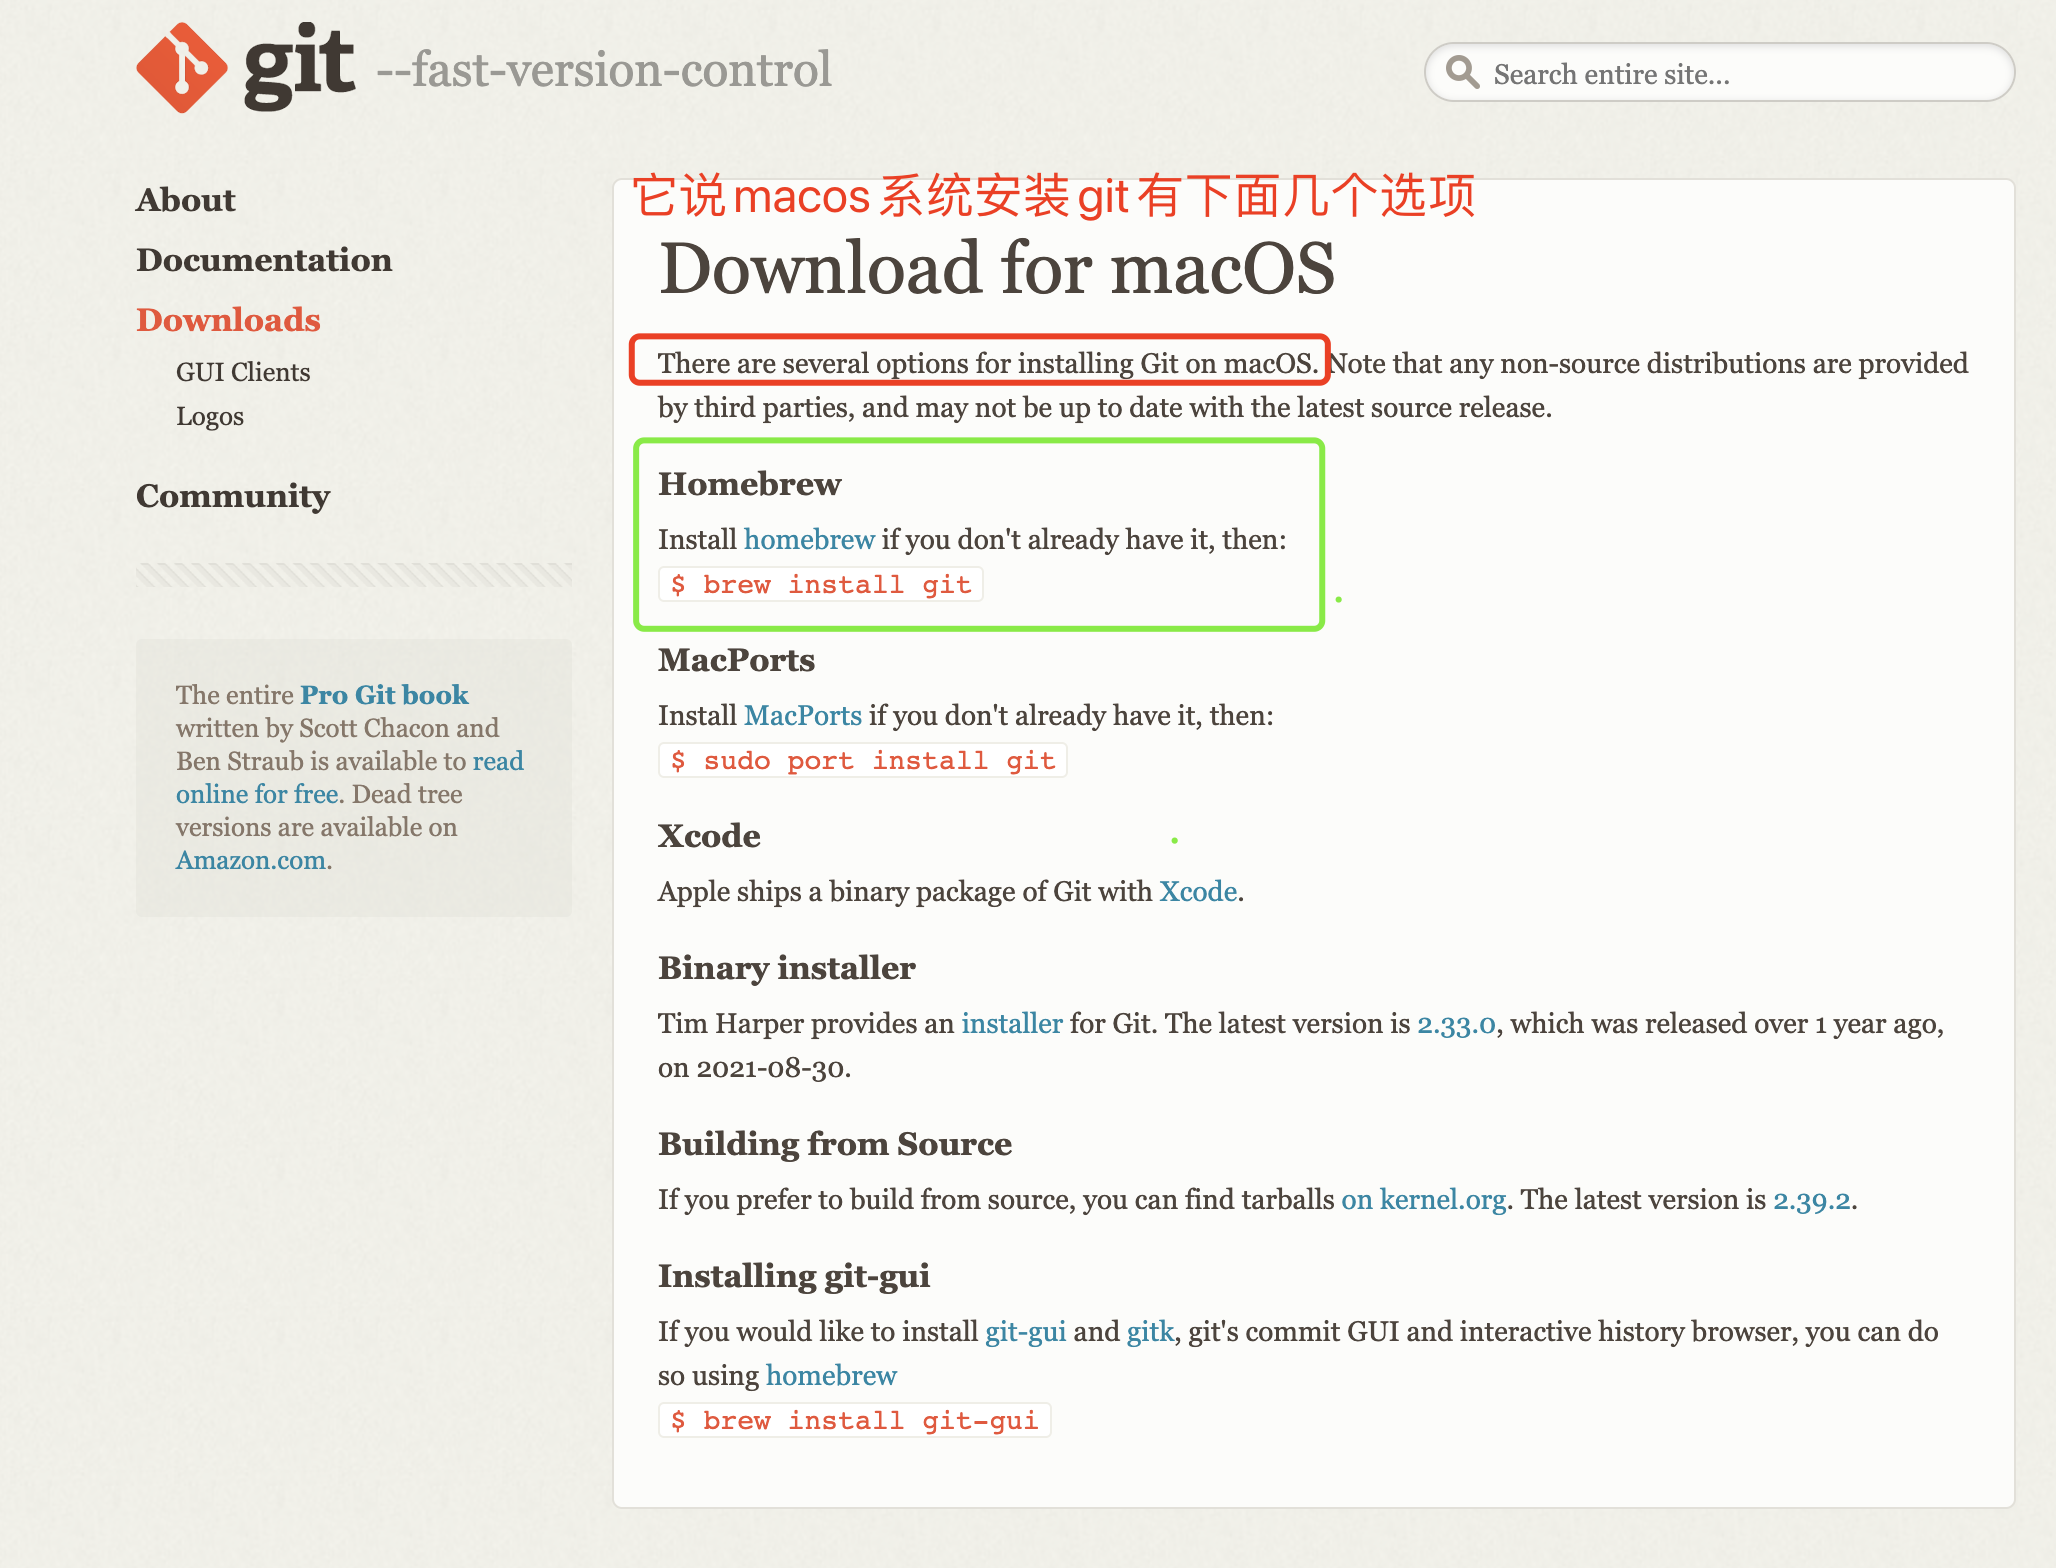
通过官网介绍我们得知安装git有下面几种方式,我们下面会通过Homebrew的方式进行安装
3.安装Homebrew
可参考本人写的第一篇http://t.csdn.cn/XlZ1M mac m1芯片安装Homebrew,里面有详细介绍

4.通过Homebrew安装git
#通过brew 中的search 可以查询git
brew search git

#通过brew 安装git
brew install git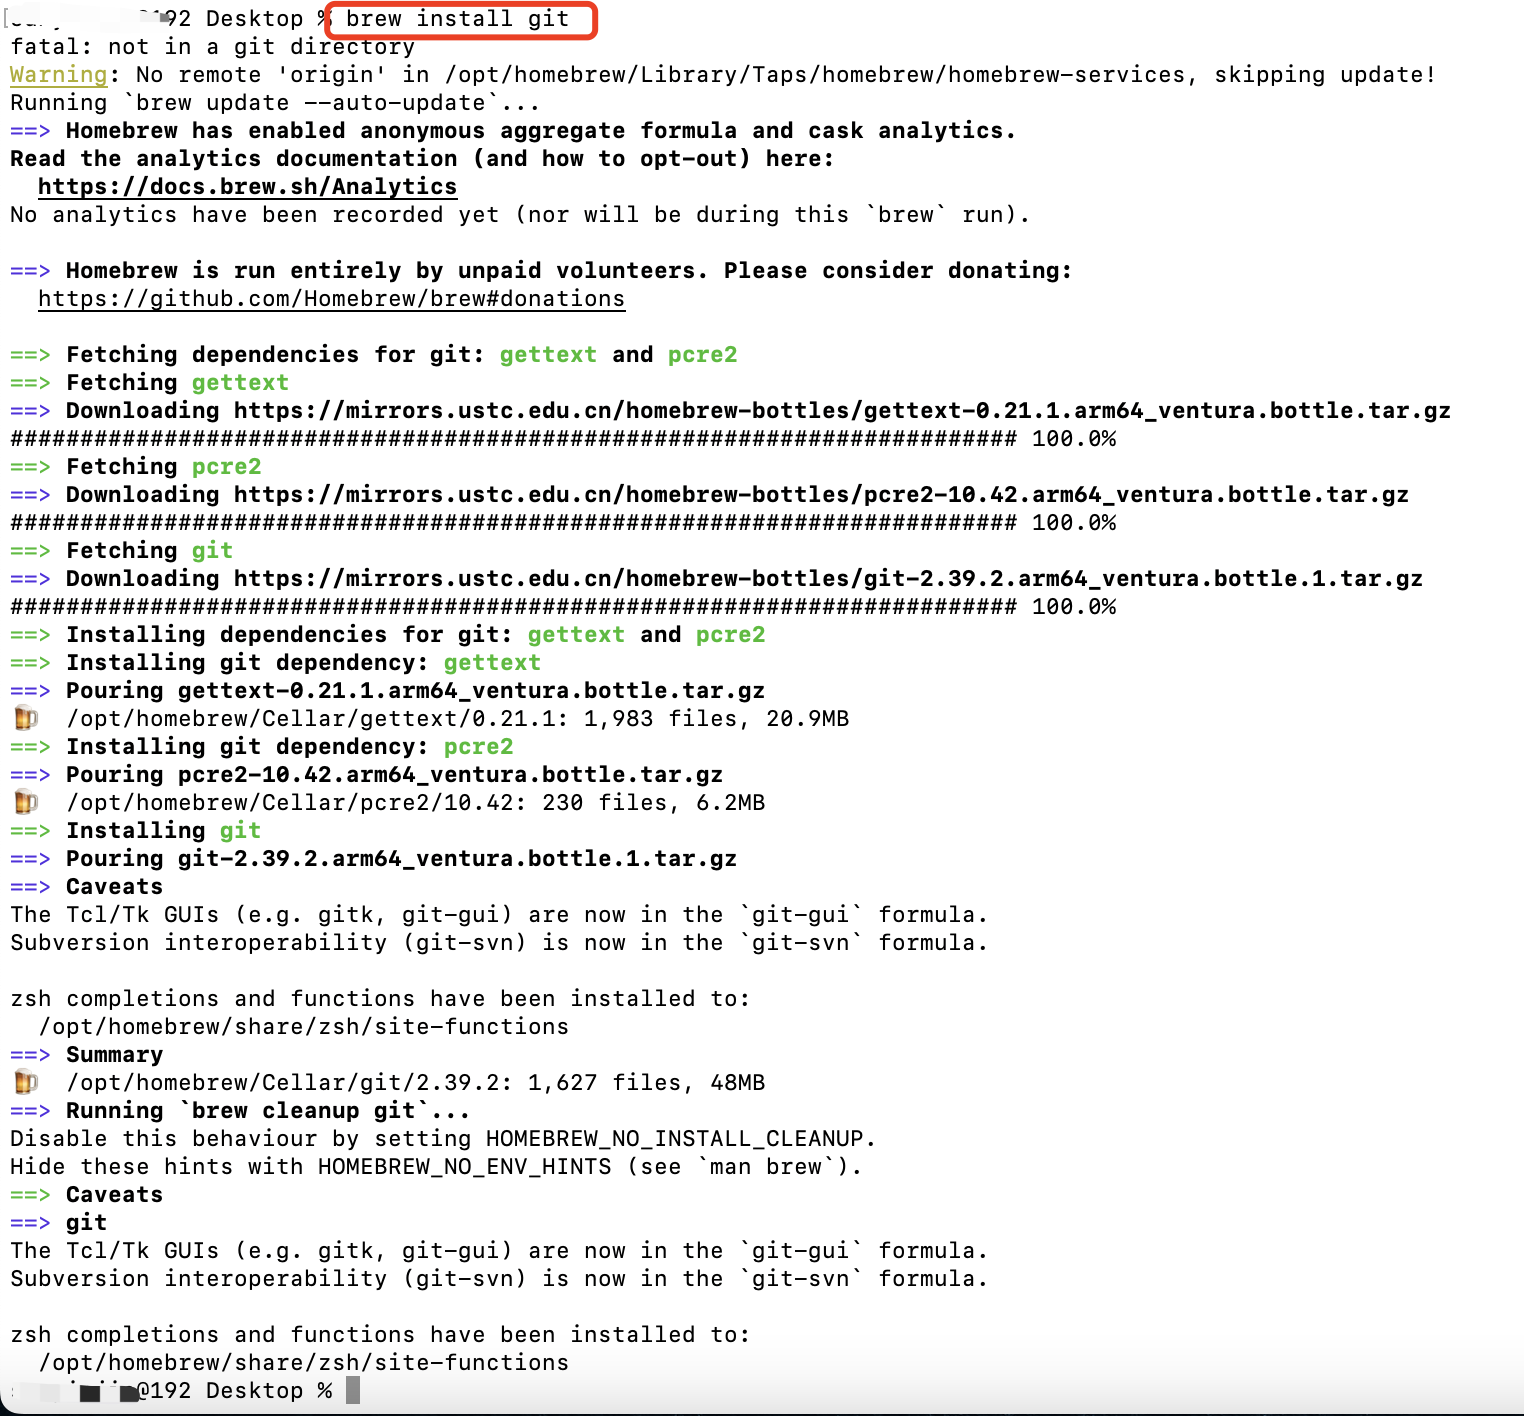
#通过brew 更新git
brew upgrade git
M1芯片ARM版Homebrew会把程序安装到/opt/homebrew/Cellar路径下
5.接下来我们去配置git环境
 vim ~/.zshrc
#输入i进入编辑模式
#添加下面这句话,版本需要进入/opt/homebrew/Cellar/git/目录下查看
export GIT=/opt/homebrew/Cellar/git/2.39.2
#然后按esc,在输入:wq退出编辑模式并保存
#通过source命令更新~/.zshrc文件
source ~/.zshrc
#现在就可以通过git --version查看一下安装的版本了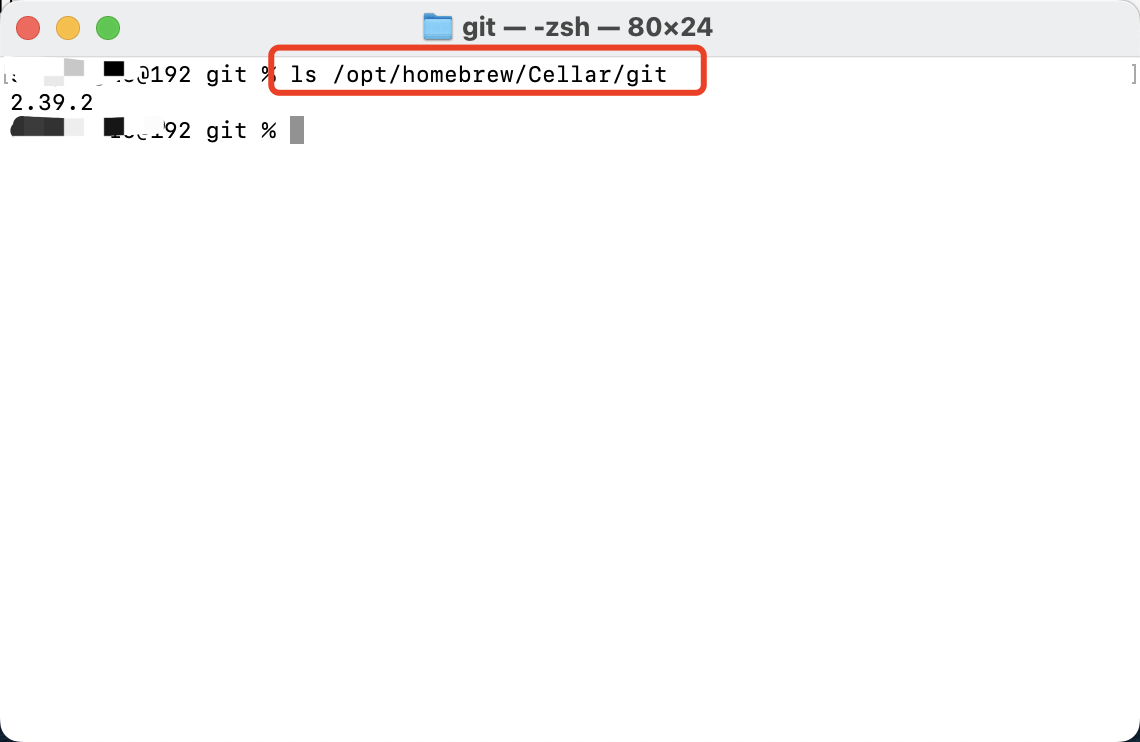

6.设置git信息
git config --global user.name "git账号"
git config --global user.email "git邮箱"
#通过git config --list来查看配置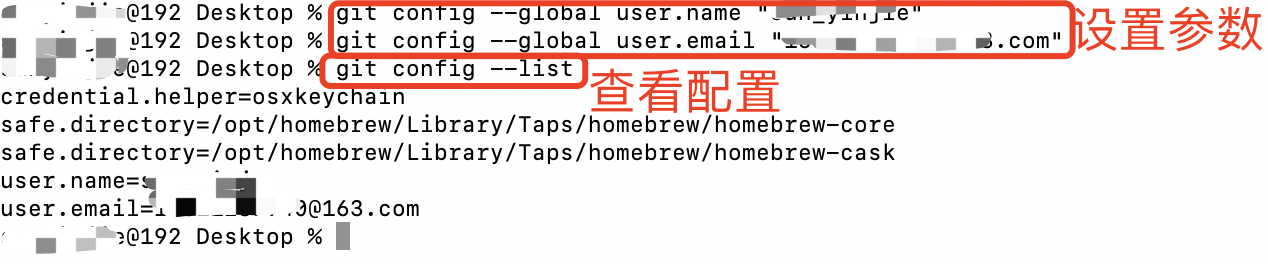
到这里我们的git安装就结束啦!仅供大家参考