背景
在上一篇的博客JavaFX爱好者看过来,这款工具值得拥有中,简单介绍了一款JavaFx开发框架xJavaFxTool。本次将采用debug的方式对xJavaFxTool进行调试,深度讲解重点模块的代码设计实现。希望通过本文的讲解,能够让您对xJavaFxTool有更深入的了解和认识。
一、项目主体结构
在这里再次重复一遍工程项目的主体结构,遵循MVC三层架构,在JavaFx中也是有相应的应用的,视图层采用Fxml来进行展示,控制层有对应的Contoller,每个视图层对象都会对应一个Controller,模型层对象这里采用了多个JavaBean和业务实体来组成,共同完成相应的逻辑功能封装。
xJavaFxTool
├─ images	项目截图
├─ pom.xml	maven配置文件
├─ README.md	说明文件
├─ src
│  ├─ main
│  │  ├─ java
│  │  │  └─ com
│  │  │   └─ xwintop
│  │  │    └─ xJavaFxTool
│  │  │     ├─ common	第三方工具类
│  │  │     ├─ controller	javafx控制层
│  │  │     │  └─ index	首页控制层
│  │  │     ├─ model	基础bean类层
│  │  │     ├─ services	工具服务层
│  │  │     │  └─ index	首页工具服务层
│  │  │     ├─ utils	系统工具类
│  │  │     └─ view	javafx视图层
│  │  │        └─ index	首页工具视图层
│  │  └─ resources
│  │   ├─ com
│  │   │  └─ xwintop
│  │   │   └─ xJavaFxTool
│  │   │    └─ fxmlView     .fxml文件
│  │   ├─ config	配置文件
│  │   │  └─ toolFxmlLoaderConfiguration.xml	系统菜单加载配置文件
│  │   ├─ css	样式资源
│  │   ├─ images	图片资源
│  │   ├─ locale	国际化
│  │   ├─ banner.txt	启动banner图片
│  │   └─ logback.xml	logback日志配置文件
│  └─ test  测试类
│   ├─ java
│   └─ resources
二、Main.java 程序入口
public static void main(String[] args) {
XJavaFxSystemUtil.initSystemLocal();//初始化本地语言
XJavaFxSystemUtil.addJarByLibs();//添加外部jar包
SplashScreen splashScreen = new SplashScreen() {
@Override
public String getImagePath() {
return "/images/javafx.png";
}
};
launch(Main.class, IndexView.class, splashScreen, args);
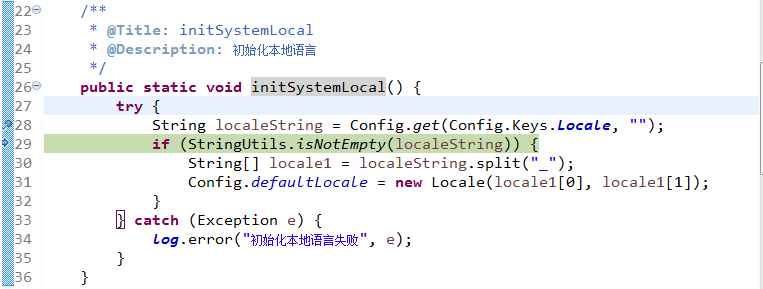
}1、本地语言设置
下面通过Debug来看看在这短短的几行代码中会包含那些操作。第一步需要进行本地语言设置,通过调用InitSystemLocal方法来实现。
2、加载外置的插件jar包
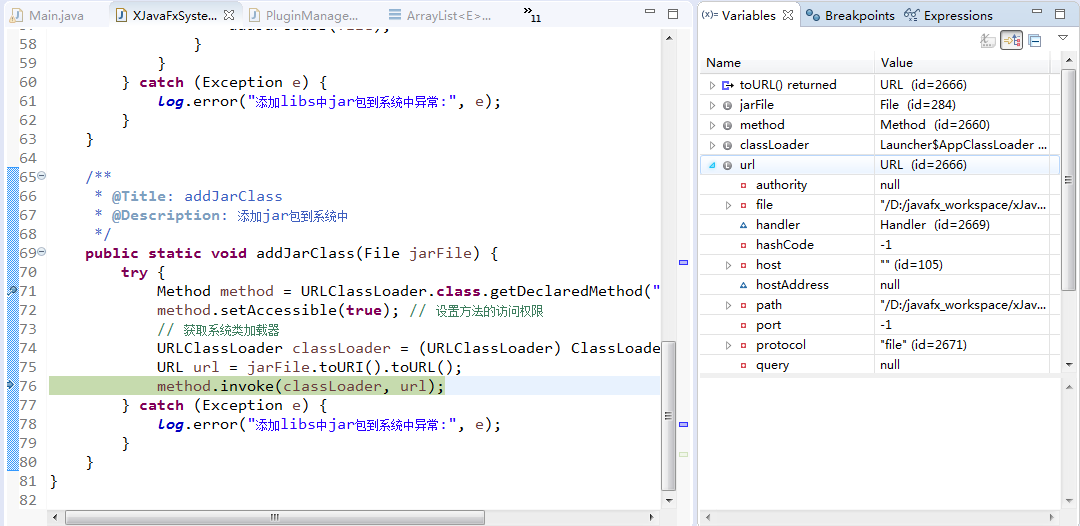
 /**
     * @Title: addJarByLibs
     * @Description: 添加libs中jar包到系统中
     */
    public static void addJarByLibs() {
        PluginManager.getInstance().loadLocalPlugins();
        try {
            // 系统类库路径
            File libPath = new File("libs/");
            // 获取所有的.jar和.zip文件
            File[] jarFiles = libPath.listFiles(
                    (dir, name) -> name.endsWith(".jar")
            );
            if (jarFiles != null) {
                for (File file : jarFiles) {
                    if (!PluginManageService.isPluginEnabled(file.getName())) {
                        continue;
                    }
                    addJarClass(file);
                }
            }
        } catch (Exception e) {
            log.error("添加libs中jar包到系统中异常:", e);
        }
    }
这里需要注意的是,为了方便集中统一管理jar包,将外置的可运行的jar都放在libs目录下面,应用程序启动后在固定目录下读取指定jar,通过反射即可完成插件的调用。这也是该框架的一个亮点,在开发时大大减少了工作量,也降低了代码的复杂度。
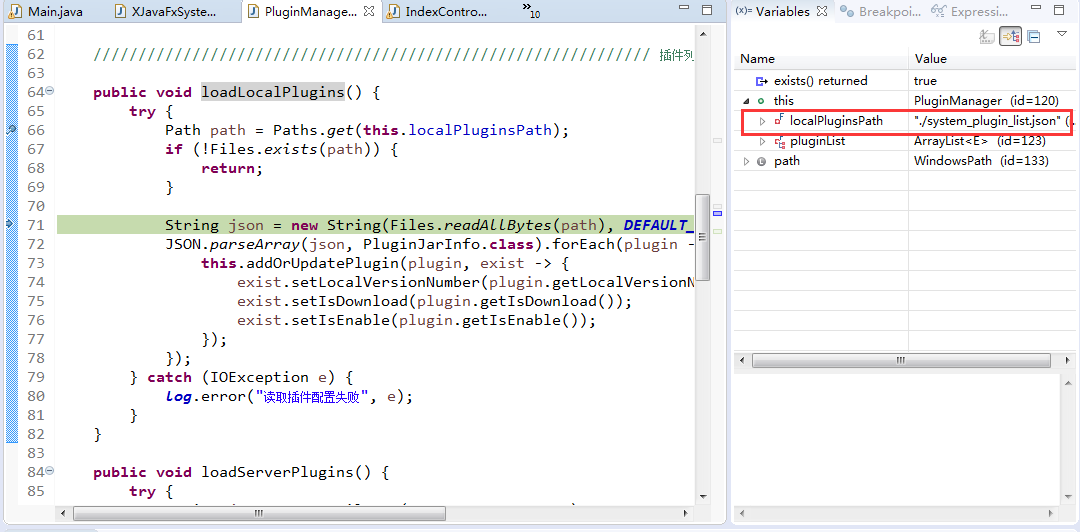
通过上述代码可以看到,通过配置的插件json配置,插件读取器会自动将数据解析并绑定到相应的数据集合中。下图是解析出来的插件json文件。

 private void addOrUpdatePlugin(PluginJarInfo pluginJarInfo,  Consumer<PluginJarInfo> ifExists) {
        PluginJarInfo exists = getPlugin(pluginJarInfo.getJarName());
        if (exists == null) {
            this.pluginList.add(pluginJarInfo);
        } else {
            ifExists.accept(exists);
        }
    }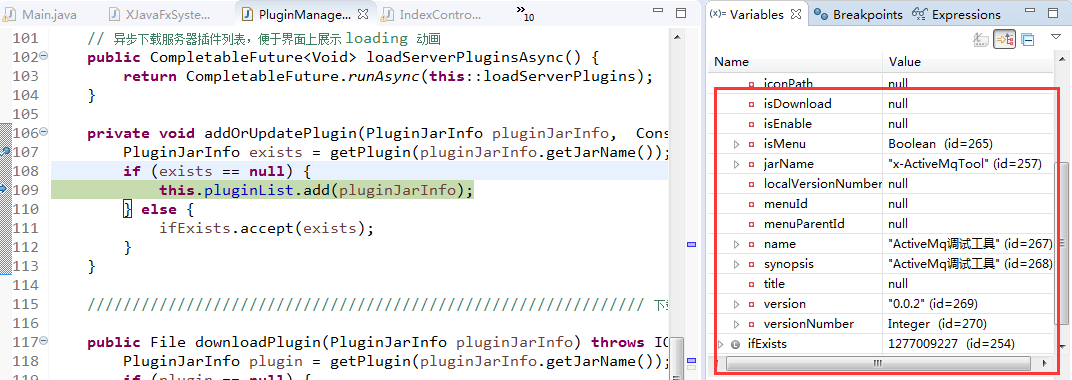
加载已下载插件,并通过反射机制进行调用,核心代码如下:
至此主程序的驱动入口函数调试完成,最后两行代码是指定程序的启动窗口。关键代码如下:
launch(Main.class, IndexView.class, splashScreen, args);IndexView是应用程序的入口窗口。splashScreen定义了启动页面,同时在启动页面中嵌入了一张本地图片。
三、IndexView解析
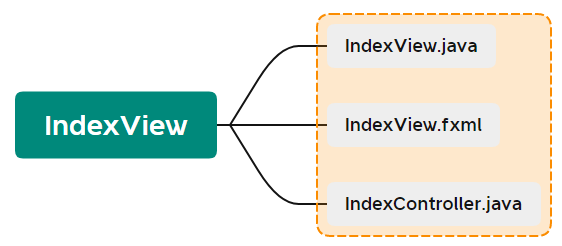
通常来说,一个IndexView包含了三个文件,一个是IndexView.java,在这个文件中绑定了相对应的页面配置fxml,controller是页面视图对象上所有操作逻辑的处理对象。核心的功能也是放在Controller对象中。
@Scope("prototype")
@FXMLView(value = "/com/xwintop/xJavaFxTool/fxmlView/Index.fxml", bundle = "locale.Menu")
public class IndexView extends AbstractFxmlView {
public IndexView() throws Exception {
//反射修改默认语言
ResourceBundle bundle = ResourceBundle.getBundle(this.getResourceBundle().get().getBaseBundleName(), Config.defaultLocale);
FieldUtils.writeField(this,"bundle",Optional.ofNullable(bundle),true);
GUIState.getStage().setTitle(bundle.getString("Title"));//修改标题国际化
}
@Override
public Parent getView() {
JFXDecorator decorator = JavaFxViewUtil.getJFXDecorator(GUIState.getStage(),GUIState.getStage().getTitle() + Config.xJavaFxToolVersions,"/images/icon.jpg",super.getView());
decorator.setOnCloseButtonAction(() -> {
if (AlertUtil.showConfirmAlert("确定要退出吗?")) {
System.exit(0);
}
});
return decorator;
}
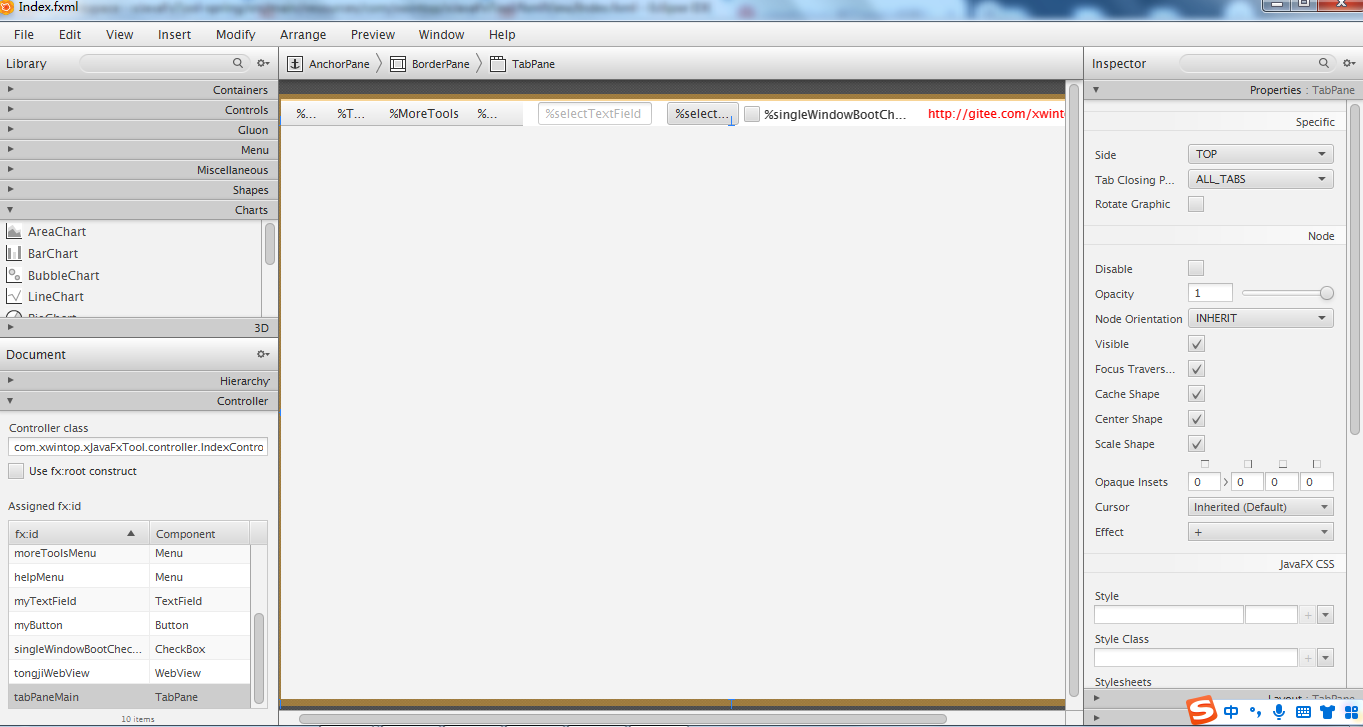
}下面是通过场景编辑器打开Index.Fxml页面对象,可以看到这里的布局选择器采用的是:AnchorPane、BorderPane,中间采用的是TabPane,通过Tab页来切换功能。
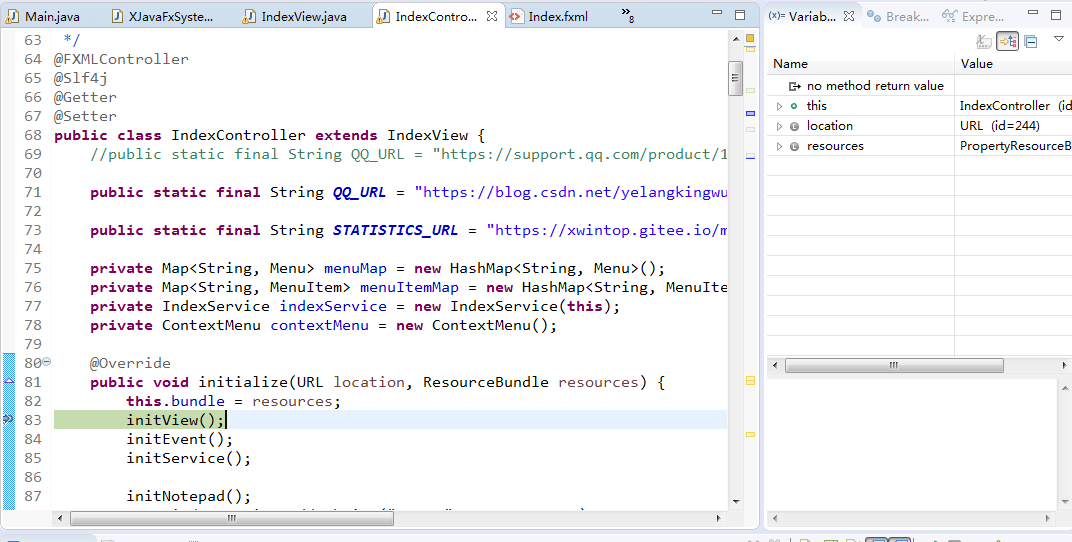
在这里主要完成页面上相关菜单的加载和展示。
private void initView() {
        menuMap.put("toolsMenu", toolsMenu);
        menuMap.put("moreToolsMenu", moreToolsMenu);
        File libPath = new File("libs/");
        // 获取所有的.jar和.zip文件
        File[] jarFiles = libPath.listFiles((dir, name) -> name.endsWith(".jar"));
        if (jarFiles != null) {
            for (File jarFile : jarFiles) {
                if (!PluginManageService.isPluginEnabled(jarFile.getName())) {
                    continue;
                }
                try {
                    this.addToolMenu(jarFile);
                } catch (Exception e) {
                    log.error("加载工具出错:", e);
                }
            }
        }
    }
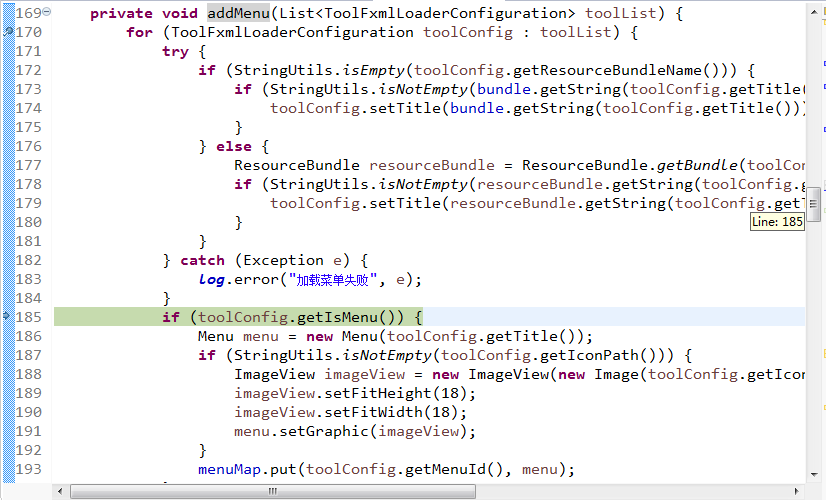
通过以上的方法可以生成相应的菜单列表供调用。在默认的tab页面,前面可以看到有一个默认的记事本的页面。
public void addNodepadAction(ActionEvent event) {
        TextArea notepad = new TextArea();
        notepad.setFocusTraversable(true);
        if (indexController.getSingleWindowBootCheckBox().isSelected()) {
            JavaFxViewUtil.getNewStage(indexController.getBundle().getString("addNodepad"), null, notepad);
        } else {
            Tab tab = new Tab(indexController.getBundle().getString("addNodepad"));
            tab.setContent(notepad);
            indexController.getTabPaneMain().getTabs().add(tab);
            if (event != null) {
                indexController.getTabPaneMain().getSelectionModel().select(tab);
            }
        }
    }
窗口的默认设置方法和参数可以参考以下的配置。
/**
* 获取新窗口
**/
public static Stage getNewStage(String title, String iconUrl, Parent root) {
  double[] screenSize = JavaFxSystemUtil.getScreenSizeByScale(0.74, 0.8);
  Stage newStage = getNewStageNull(title, iconUrl, root, screenSize[0], screenSize[1], true, true, true);
  newStage.initModality(Modality.NONE);
//newStage.setMaximized(false);
  newStage.show();
  return newStage;
 }
四、总结
以上就是本文的主要内容,本文主要通过对代码进行debug的方式进行深入调试,详细讲解了在启动过程中,各业务逻辑模块是怎么工作的,插件的读取到菜单的生成,最重要的核心技术应该是用过JAVA的反射技术来实现动态注册及调用。心动不如行动,喜欢的朋友可以学习起来,给自己充电加油。