上一篇讲到nginx 1.7.11.3 Gryphon版本无法支持http2,于是心生一计:自己编译源码构建一个自己的版本。
1、需要工具
perl:ActivePerl_v5.28.1.0000.exe
msys2:msys2-x86_64-20180531.exe
nginx源码:nginx-861f076eab72.zip
rtmp插件:nginx-rtmp-module-1.2.2.tar.gz
openssl:openssl-1.0.2u.tar.gz
pcre:pcre-8.42.tar.gz
zlib:zlib-1.2.11.tar.gz
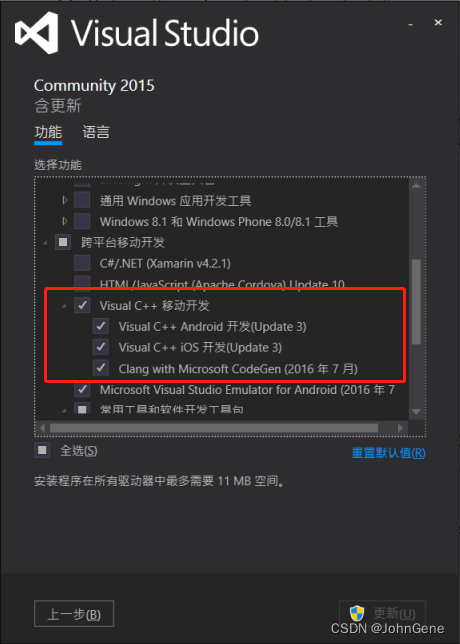
VisualStudio2015:vs2015.2.com_chs-VS2015.iso(选择功能的时候记得多勾选VisualC++移动开发选项(为了使用nmake命令工具:VS2015 x64 本机工具命令提示符),其他都默认即可)
Win64OpenSSL-3_0_3.exe【可选】该程序在这里只用作配合生成SSL证书。
一键下载: https://pan.baidu.com/s/1JwPbpiDv3FwofPP9HD72VQ 提取码: gw5h 也可以根据文件名字去搜官网但是里面有很多坑。
2、VusualStudio2015安装
注意选中Visucal C++移动开发,这样才会在win菜单中多出nmake工具[ VS2015 x64 本机工具命令提示符 ]

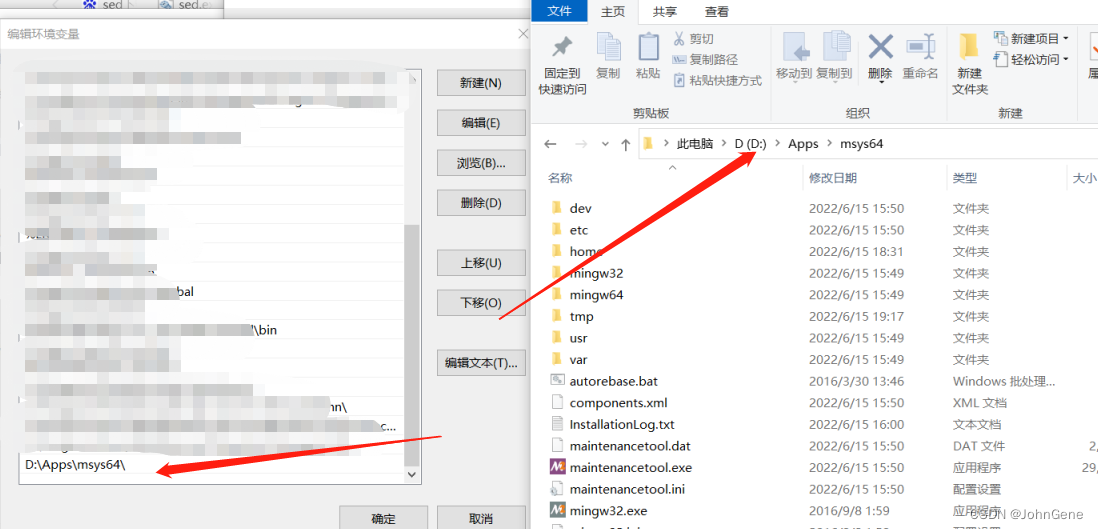
3、msys2安装
直接下一步下一步即可,安装完成记得配置环境变量
4、Nginx源码解压
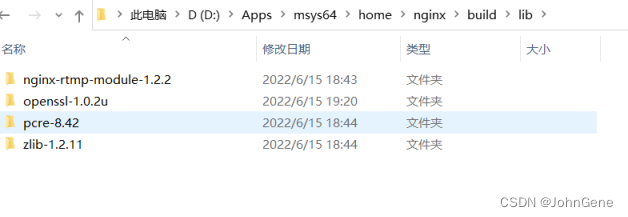
Nginx源码解压到msys2文件目录的home目录中,并在nginx文件夹中新建文件夹build/lib
里面存放nginx依赖的其他模块源码(解压后的):nginx-rtmp-module-1.2.2、openssl-1.0.2u、pcre-8.42、zlib-1.2.11
目录结构如下图:
4.1、修改32位nginx源码为64位(可选)
编辑nginx\auto\lib\openssl\makefile.msvc文件
“VC-WIN32”替换为“VC-WIN64A”
“if exist ms\do_ms.bat”替换为“if exist ms\do_win64a.bat”
“ms\do_ms”替换为“ms\do_win64a”
4.2、使用msys2工具编译
msys2工具不懂的教你一招:直接cd / 然后ls命令看看熟不熟悉,是不是和linux系统长得差不多
进入到/home目录查看文件ls,可以看到刚解压放进去的nginx文件,cd nginx
再然后执行命令:
auto/configure --with-cc=cl --builddir=objs \
--with-debug --prefix= --conf-path=conf/nginx.conf \
--pid-path=logs/nginx.pid --http-log-path=logs/access.log \
--error-log-path=logs/error.log --sbin-path=nginx.exe \
--http-client-body-temp-path=temp/client_body_temp \
--http-proxy-temp-path=temp/proxy_temp \
--http-fastcgi-temp-path=temp/fastcgi_temp \
--http-scgi-temp-path=temp/scgi_temp \
--http-uwsgi-temp-path=temp/uwsgi_temp \
--with-cc-opt=-DFD_SETSIZE=1024 \
--with-select_module \
--with-http_v2_module \
--with-http_realip_module \
--with-http_addition_module \
--with-http_sub_module \
--with-http_dav_module \
--with-http_stub_status_module \
--with-http_flv_module \
--with-http_mp4_module \
--with-http_gunzip_module \
--with-http_gzip_static_module \
--with-http_auth_request_module \
--with-http_random_index_module \
--with-http_secure_link_module \
--with-http_slice_module \
--with-mail \
--with-stream \
--with-openssl-opt=no-asm \
--with-http_ssl_module \
--with-mail_ssl_module \
--with-stream_ssl_module \
--with-openssl=./build/lib/openssl-1.0.2u \
--with-pcre=./build/lib/pcre-8.42 \
--with-zlib=./build/lib/zlib-1.2.11 \
--add-module=./build/lib/nginx-rtmp-module-1.2.2/
4.3、使用nmake工具生成可执行文件
因为引入了nginx-rtmp-module模块,nmake生成exe过程会报错,各种上网查,最后发现需要修改objs\Makefile文件
报错信息:
修改生成的文件nginx\objs\Makefile,找到第3行:CFLAGS =...... 去掉 -WX 即可,去掉后需要重新执行nmake命令编译。

使用nmake工具生成nginx.exe文件(nmake工具在win菜单里面找到VisualStudio文件夹下的VS2015 x64 本机工具命令提示符)cd到nginx所在目录后执行:nmake -f objs/Makefile

最后可能会报一些不影响大雅的错误,反正nginx.exe生成了就能用了,也没仔细去研究怎么优化,有时间再搞。
本篇文章目的已达到,包含多个功能模块的nginx.exe生成。
=============================分隔=================================
5、Nginx配置SSL。
5.1、生成SSL证书
安装Win64OpenSSL-3_0_3.exe工具,配置环境变量

验证:cmd中执行openssl help命令即可
使用CMD命令行生成证书步骤
客户端:(生成的CA-certificate.crt需要导入到证书管理里面的受信任的根证书颁发机构)
1、生成ca证书【CA-certificate.crt】和ca私钥【CA-private.key】
openssl req -x509 -nodes -days 3650 -newkey rsa:2048 -subj "/C=CN/ST=MyProvince/L=MyCity/O=BearOS" -out CA-certificate.crt -keyout CA-private.key -reqexts v3_req -extensions v3_ca
服务端:(生成的private.key和private.crt需要放到nginx里面)
2、生成私钥【private.key】
openssl genrsa -out private.key 2048
3、生成证书请求文件【private.csr】
(-subj是附加企业信息:BeiJing、Beijing、企业名BearOS、请求颁发的目标网址kuaishou.bearos.com)
openssl req -new -key private.key -subj "/C=CN/ST=BeiJing/L=BeiJing/O=BearOS/CN=a.b.com" -sha256 -out private.csr
4、新建文本文件private.ext
文件内容:
[ req ]
default_bits        = 1024
distinguished_name  = req_distinguished_name
req_extensions      = san
extensions          = san
[ req_distinguished_name ]
countryName         = CN
stateOrProvinceName = Definesys
localityName        = Definesys
organizationName    = Definesys
[SAN]
authorityKeyIdentifier=keyid,issuer
basicConstraints=CA:FALSE
keyUsage = digitalSignature, nonRepudiation, keyEncipherment, dataEncipherment
#subjectAltName = IP:127.0.0.1
subjectAltName = @alt_names
[ alt_names ]
IP.1 = 127.0.0.1
DNS.1 = a.b.com
DNS.2 = localhost
DNS.3 = 127.0.0.1
5、生成自签名证书【private.crt】
根据根证书私钥【CA-private.key】,根证书【CA-certificate.crt】,自签名证书申请文件【private.csr】,自签名证书扩展文件【private.ext】,生成自签名证书【private.crt】
(参数 -days是有效天数,经网上查得知最多24年左右)
openssl x509 -req -days 3650 -in private.csr -CA CA-certificate.crt -CAkey CA-private.key -CAcreateserial -sha256 -out private.crt -extfile private.ext -extensions SAN
最后生成两个可以用在nginx里面的文件:server.crt、server.key
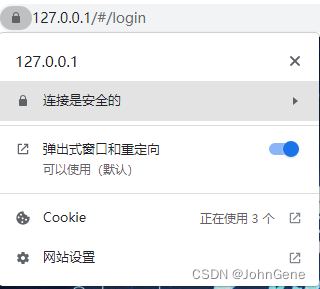
6、将CA-certificate.crt证书导入到电脑上受信任的根证书颁发机构里面。
可以从浏览器进入证书管理窗口,也可以win+R输入certmgr.msc进入。

将private.cat、private.key两个文件放到nginx/conf/ssl目录下,并配置nginx.conf
5.2、nginx.conf配置
server{
		#https监听443端口
		listen 443 ssl http2;
		#对应的域名
		server_name xxx.xxx.xxx.xxx;

		#SSL-START SSL相关配置
		#HTTP_TO_HTTPS_START
		#强制使用https
		if ($server_port !~ 443){
			rewrite ^(/.*)$ https://$host$1 permanent;
		}
		#HTTP_TO_HTTPS_END
		#注释掉ssl on; 是为了让此server同时处理http和https
		#ssl on;
		#获取到的第一个文件的全路径
		ssl_certificate ssl/private.crt;
		#获取到的第二个文件的全路径
		ssl_certificate_key ssl/private.key;
		ssl_session_timeout 5m;
		ssl_protocols TLSv1 TLSv1.1 TLSv1.2;
		ssl_ciphers ECDHE-RSA-AES128-GCM-SHA256:HIGH:!aNULL:!MD5:!RC4:!DHE;
		ssl_prefer_server_ciphers on;
		#SSL-END
		location / {
			alias  D:\\Apps\\nginx-server\\kuaishou-manager-web\\;
			index  index.html index.htm;
		}
		#hls直播地址
		location /hls {
			types {
				application/vnd.apple.mpegurl m3u8;
				#或 application/x-mpegURL
				video/mp2t ts;
			}
			alias D:/videos/vod/;  #点播视频文件(.ts;.m3u8)存放位置
			expires -1;
			add_header Cache-Control no-cache; #跨域支持,不然网页播放不了
			add_header Access-Control-Allow-Origin *;
			add_header Access-Control-Allow-Headers "Origin, X-Requested-With, Content-Type, Accept";
			add_header Access-Control-Allow-Methods "GET, POST, OPTIONS";
		}

	}
5.3、最终结果