安装wireshark
sudo add-apt-repository ppa:wireshark-dev/stable
sudo apt update
sudo apt install wireshark
安装时,系统将询问你是否允许非超级用户捕获数据包。选择“Yes”允许,选择“No”限制非超级用户捕获数据包,最后完成安装。
安装aircrack-ng
sudo apt-get install aircrack-ng开始抓包
这里是默认配置,只是如何开启抓包。针对设备后面会说。
首先查看接口,使用ifconfig,如,小米笔记本
yg@yg:~$ ifconfig
lo: flags=73<UP,LOOPBACK,RUNNING>  mtu 65536
        inet 127.0.0.1  netmask 255.0.0.0
        inet6 ::1  prefixlen 128  scopeid 0x10<host>
        loop  txqueuelen 1000  (Local Loopback)
        RX packets 1928  bytes 133638 (133.6 KB)
        RX errors 0  dropped 0  overruns 0  frame 0
        TX packets 1928  bytes 133638 (133.6 KB)
        TX errors 0  dropped 0 overruns 0  carrier 0  collisions 0

wlp0s20f3: flags=4163<UP,BROADCAST,RUNNING,MULTICAST>  mtu 1500
        inet 192.168.31.167  netmask 255.255.255.0  broadcast 192.168.31.255
        inet6 fe80::3c98:3e90:feaf:4418  prefixlen 64  scopeid 0x20<link>
        ether 64:79:f0:d2:d6:d3  txqueuelen 1000  (Ethernet)
        RX packets 39938  bytes 53962096 (53.9 MB)
        RX errors 0  dropped 0  overruns 0  frame 0
        TX packets 18144  bytes 2136016 (2.1 MB)
        TX errors 0  dropped 0 overruns 0  carrier 0  collisions 0
注意网口是wlp0s20f3,而非wlan0。
开启monitor模式
首先说明开启monitor模式后,是不能上网。
yg@yg:~$ sudo airmon-ng start wlp0s20f3

Found 4 processes that could cause trouble.
Kill them using 'airmon-ng check kill' before putting
the card in monitor mode, they will interfere by changing channels
and sometimes putting the interface back in managed mode

    PID Name
    593 avahi-daemon
    600 NetworkManager
    633 wpa_supplicant
    645 avahi-daemon

PHY        Interface        Driver                Chipset

phy0        wlp0s20f3        iwlwifi                Intel Corporation Device a0f0 (rev 20)

                (mac80211 monitor mode vif enabled for [phy0]wlp0s20f3 on [phy0]wlp0s20f3mon)
                (mac80211 station mode vif disabled for [phy0]wlp0s20f3)
这时候再ifconfig查看,就没有wlp0s20f3了,而是wlp0s20f3mon。
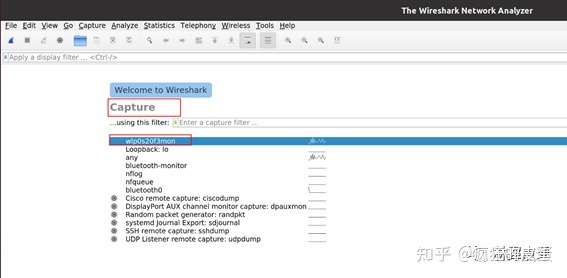
打开wireshark
sudo wireshark选择wlp0s20f3mon开始即可。
设置channel和bw
上面都是默认的channel和bw,其实每次都需要设置channel和bw。
连上WiFi之后,使用iw wlan0 link,会有如下打印,一般是会显示freq和bw的,这个没有显示。也可以通过WiFi魔盒查看。
sh-5.1# iw wlan0 link
Connected to 8c:53:c3:14:22:49 (on wlan0)
SSID: AX1800_TEST
freq: 2462
RX: 4002830 bytes (8769 packets)
TX: 598410 bytes (990 packets)
signal: -25 dBm
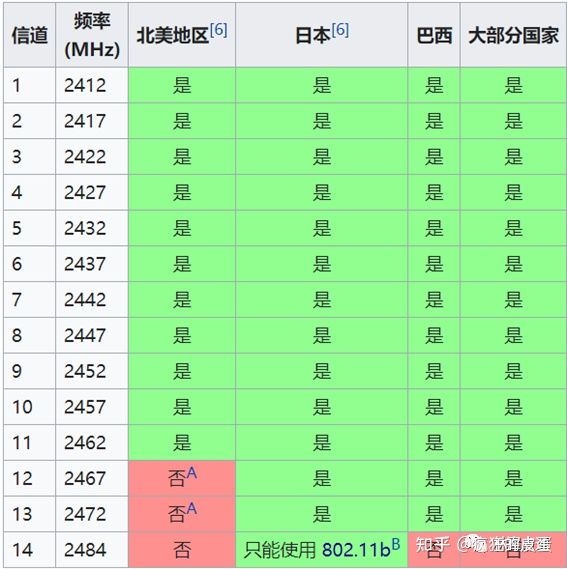
tx bitrate: 130.0 MBit/s这里SSID就是连接AP的名字,freq就是中心频点,也就是channel,根据这个channel去查表,例如2462就是11信道,如图所示,5G信道太多就不列举了,查询链接
知道了channel和bw,现在就需要设置了。比如在100信道上抓20M的包
// Start the capture on channel 100
sudo airmon-ng start wlp0s20f3 100
在100信道上抓40M的包
// Start the capture on channel 100
sudo airmon-ng start wlp0s20f3 100

// Set the channel width to 40MHz
sudo iw dev wlp0s20f3mon set freq 5500 HT40+
在100信道上抓80M的包
// Start the capture on channel 100
sudo airmon-ng start wlp0s20f3 100

// Set the channel width to 40MHz
sudo iw dev wlp0s20f3mon set freq 5500 80MHz
最后关闭monitor模式
// Stop the capture and put the wlan0 interface back in station mode
sudo airmon-ng stop wlp0s20f3mon