申明: 未经许可,禁止以任何形式转载,若要引用,请标注链接地址。 全文共计3077字,阅读大概需要3分钟
更多学习内容, 欢迎关注我的个人公众号:不懂开发的程序猿
友情链接:
基于SpringBoot的外卖项目(详细开发过程)
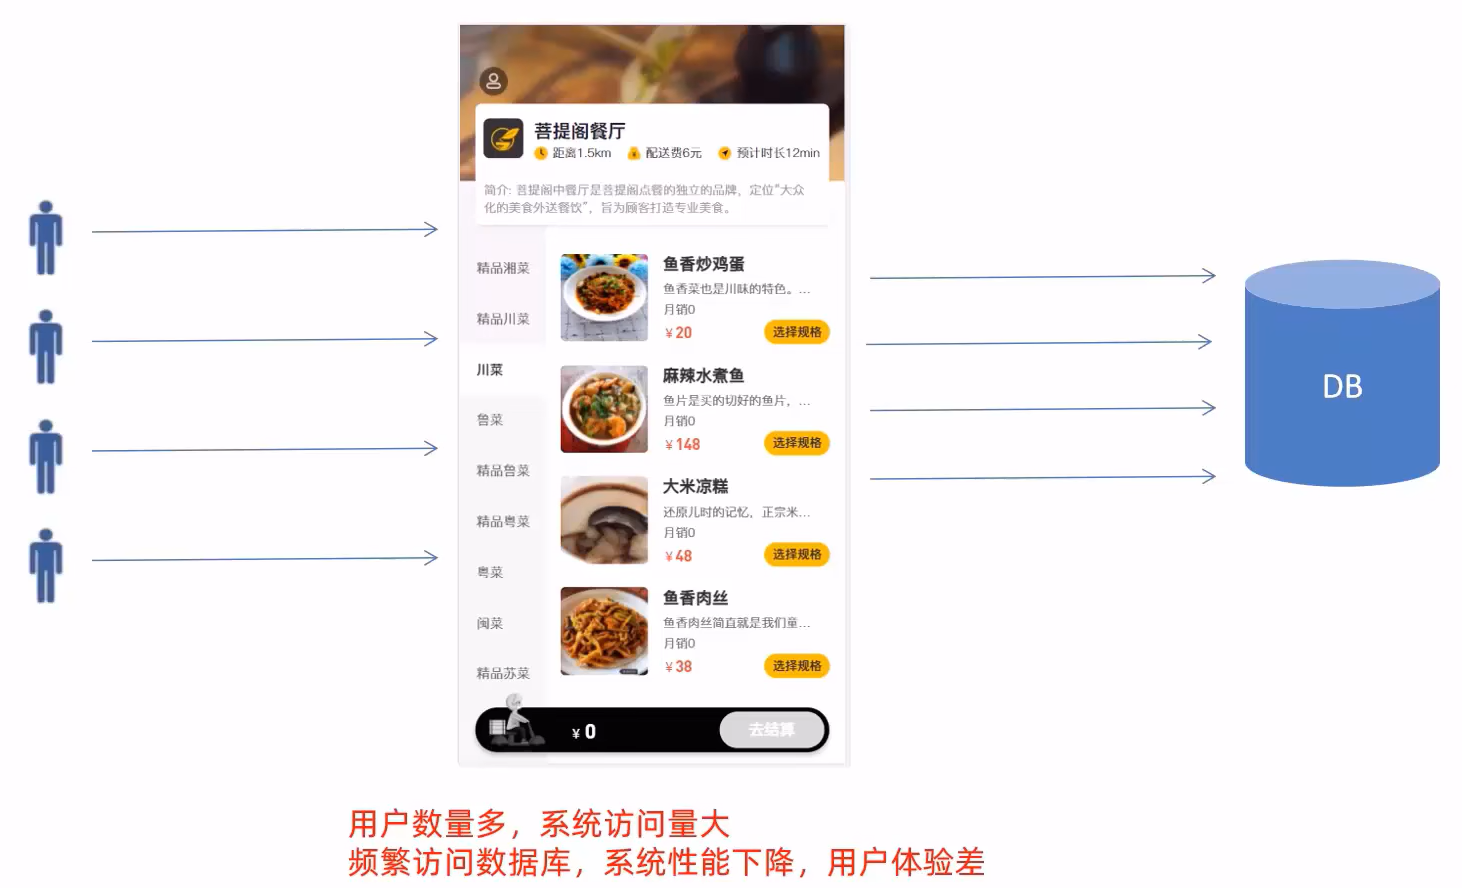
1、缓存优化
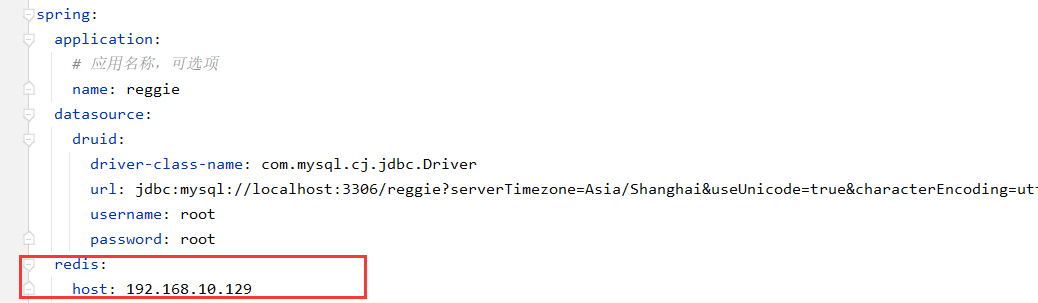
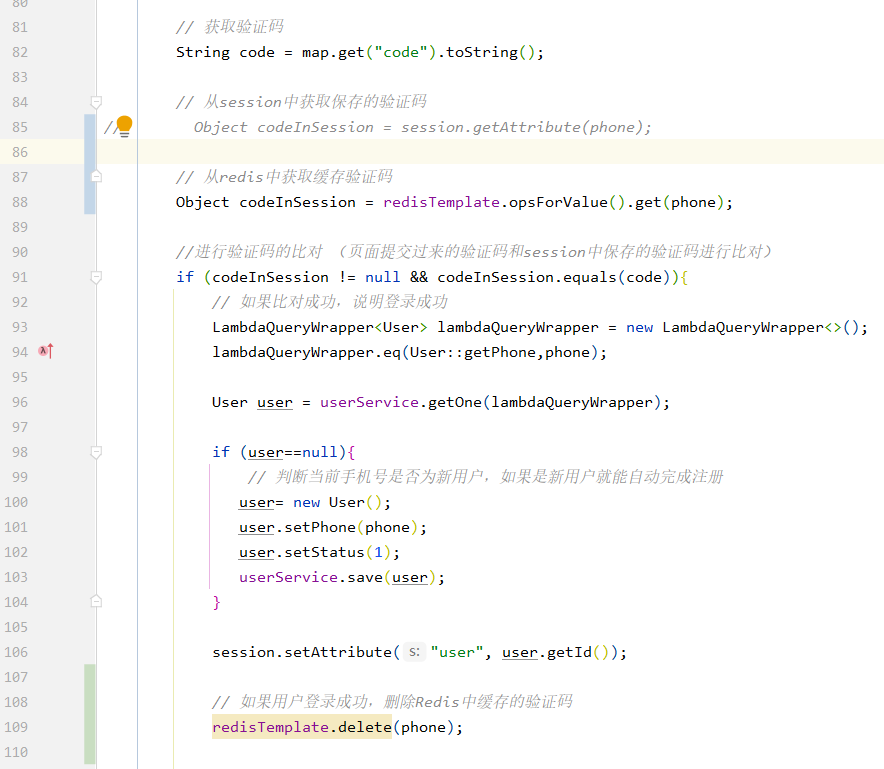
1.1、缓存短信验证码
问题分析
代码改造
pom.xml
<!--开启 redis 缓存-->
<dependency>
  <groupId>org.springframework.boot</groupId>
  <artifactId>spring-boot-starter-data-redis</artifactId>
</dependency>
application.yml


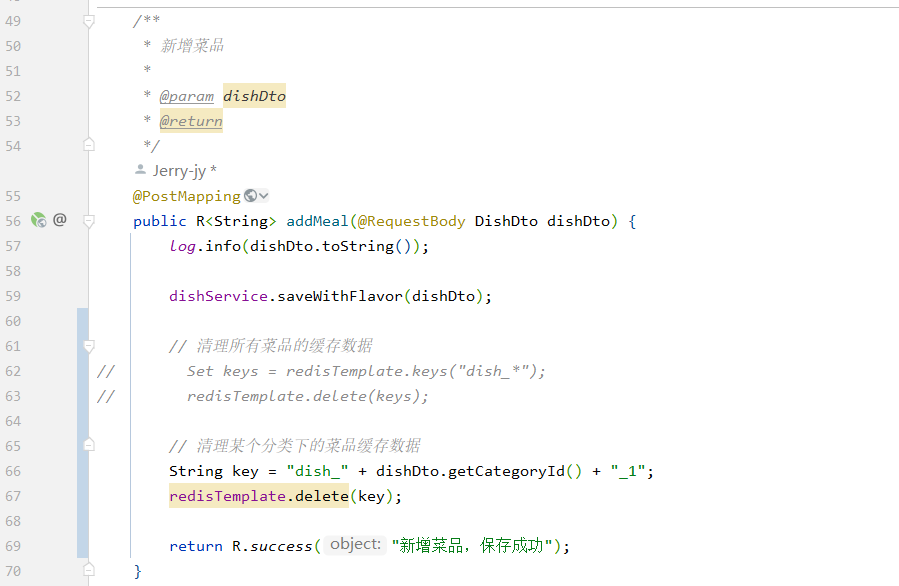
1.2、缓存菜品数据
实现思路

把所有的菜品数据缓存到redis中
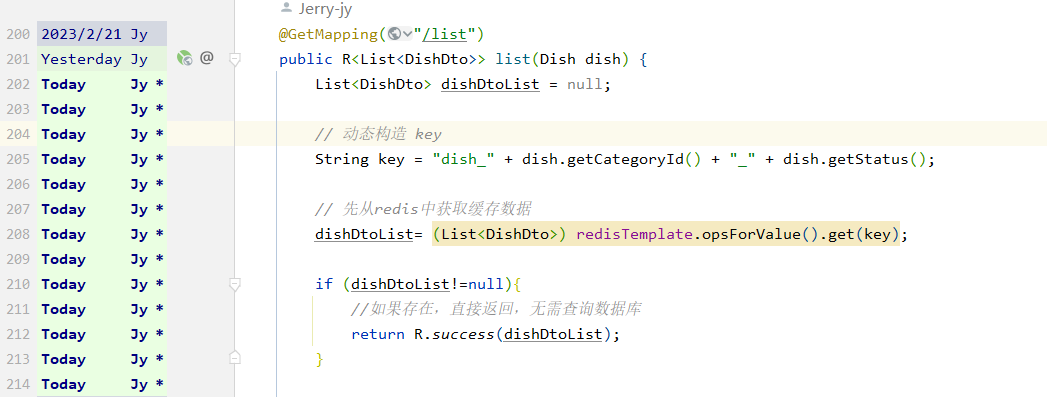

如果菜品数据发生了更新和添加操作,就需要清理下redis缓存

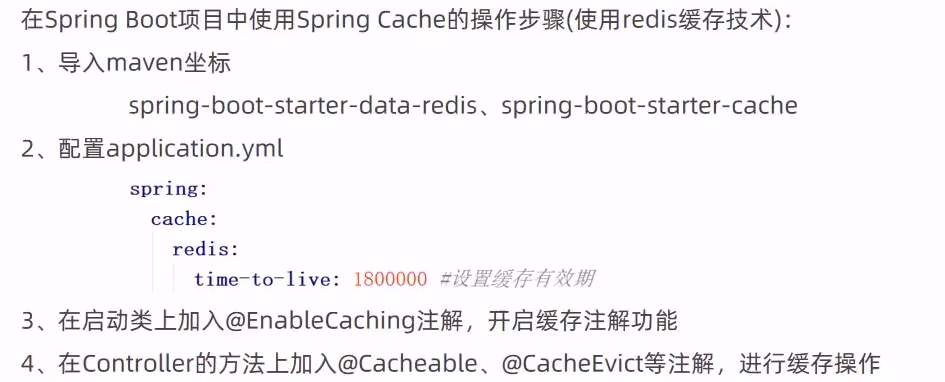
1.3、Spring Cache
介绍

常用注解
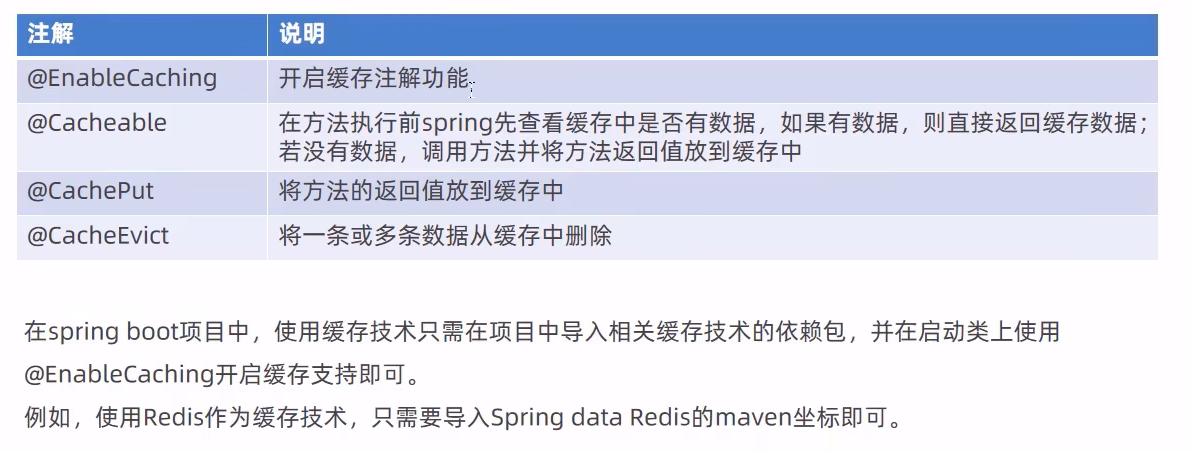
默认的缓存技术底层是基于map来缓存数据,因此服务停止后,缓存数据就消失了
但是如果采用RedisCache作为缓存,就不会存在这个问题
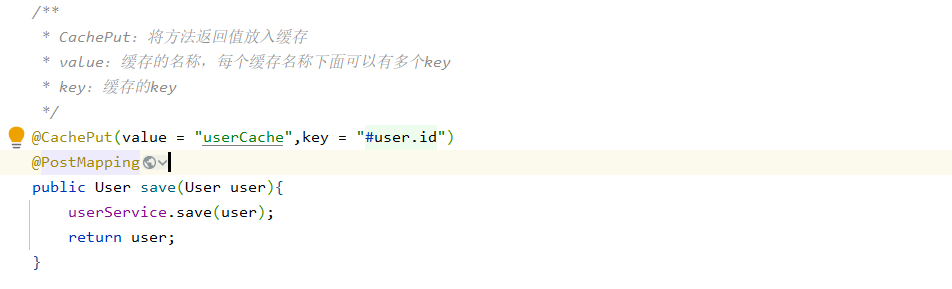
@CachePut
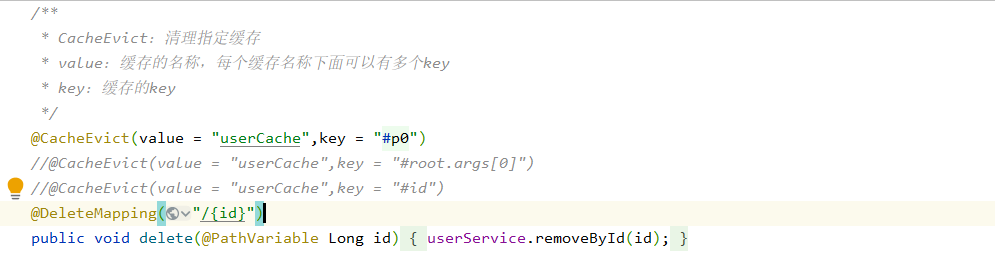
@CacheEvict
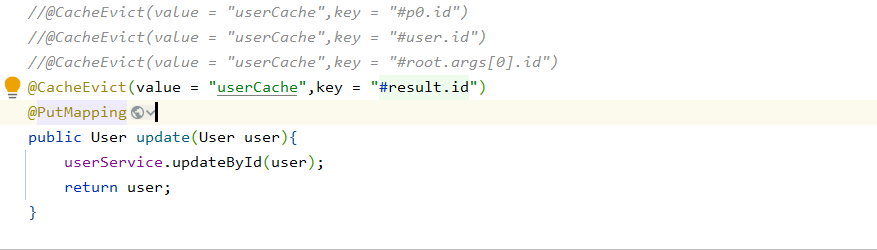
@Cacheable

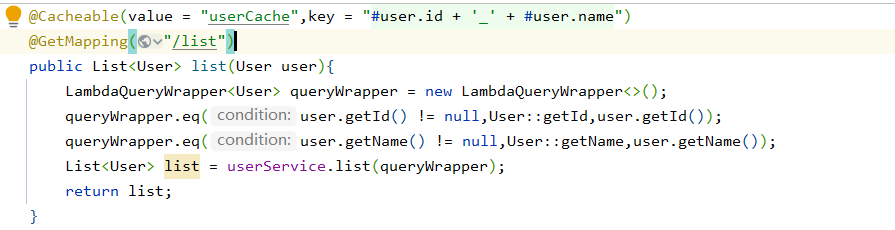
使用方式
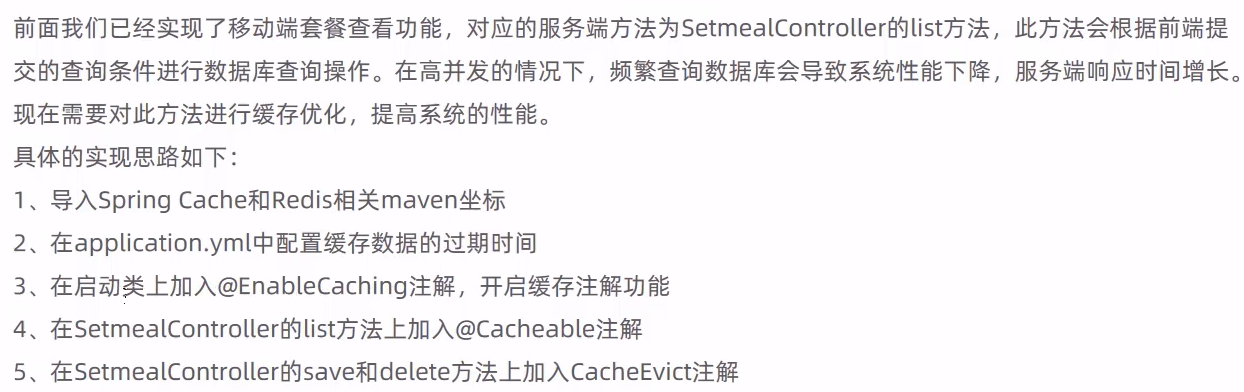
1.4、缓存套餐数据
实现思路
代码改造
pom.xml
<!--开启 cache 缓存-->
<dependency>
  <groupId>org.springframework.boot</groupId>
  <artifactId>spring-boot-starter-cache</artifactId>
</dependency>
application.yml

在启动类上开启缓存注解@EnableCaching

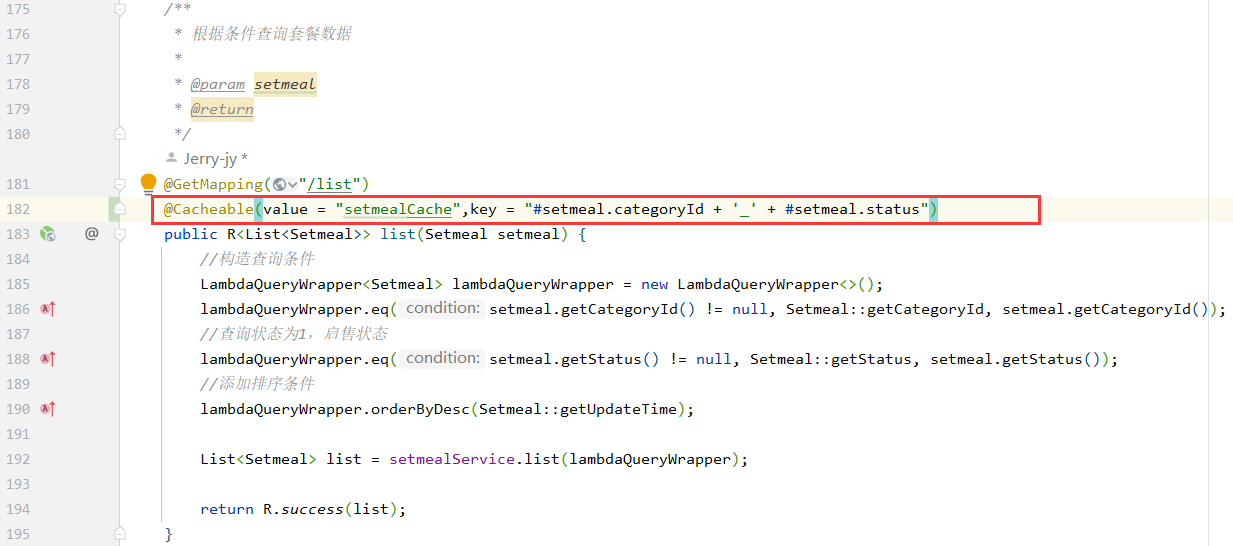
在SetmealController的list方法上加入@Cacheable注解:
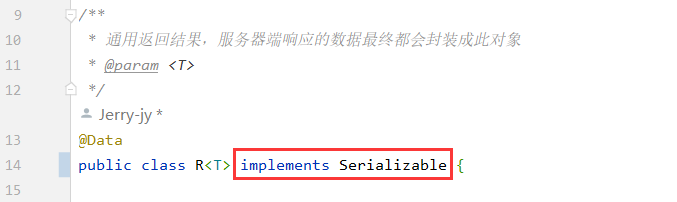
通用返回类R需要实现Serializable序列化接口
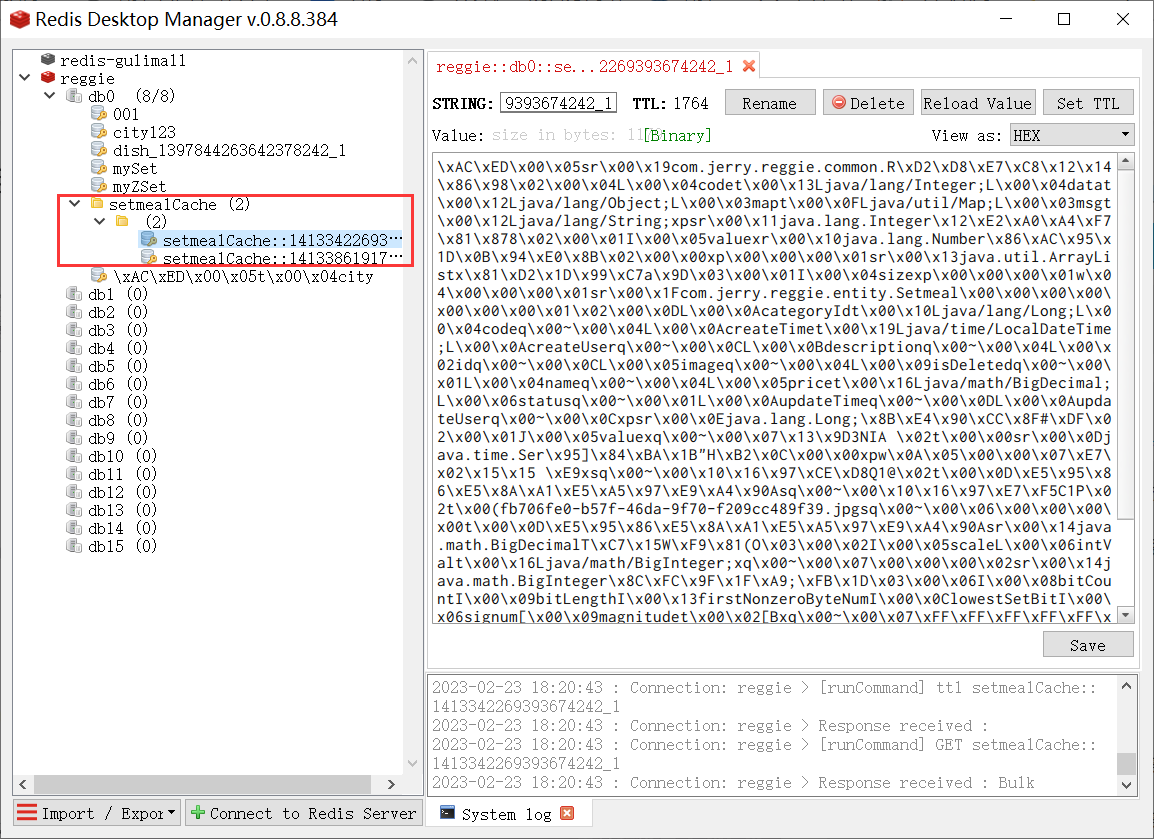
用Redis图形化桌面工具也可以看到缓存中有套餐数据
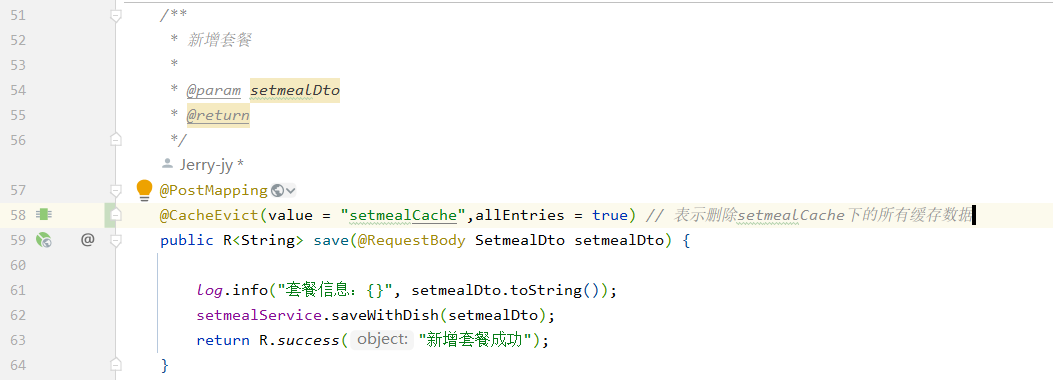
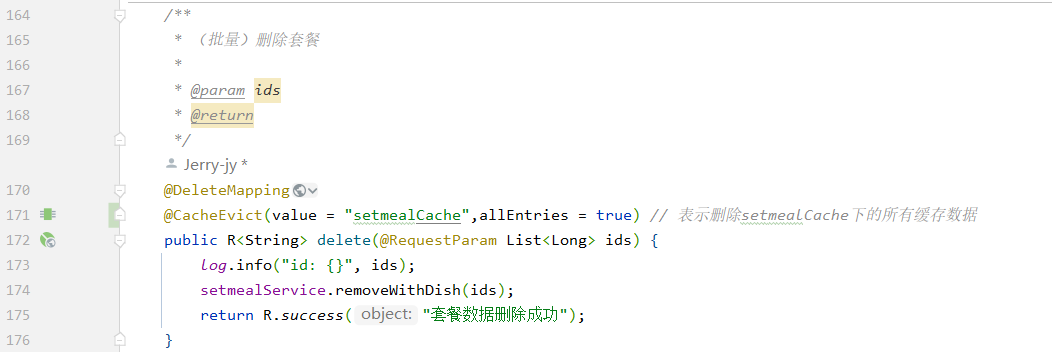
新增套餐和删除套餐也类似都需要加入@CacheEvict注解
2、读写分离
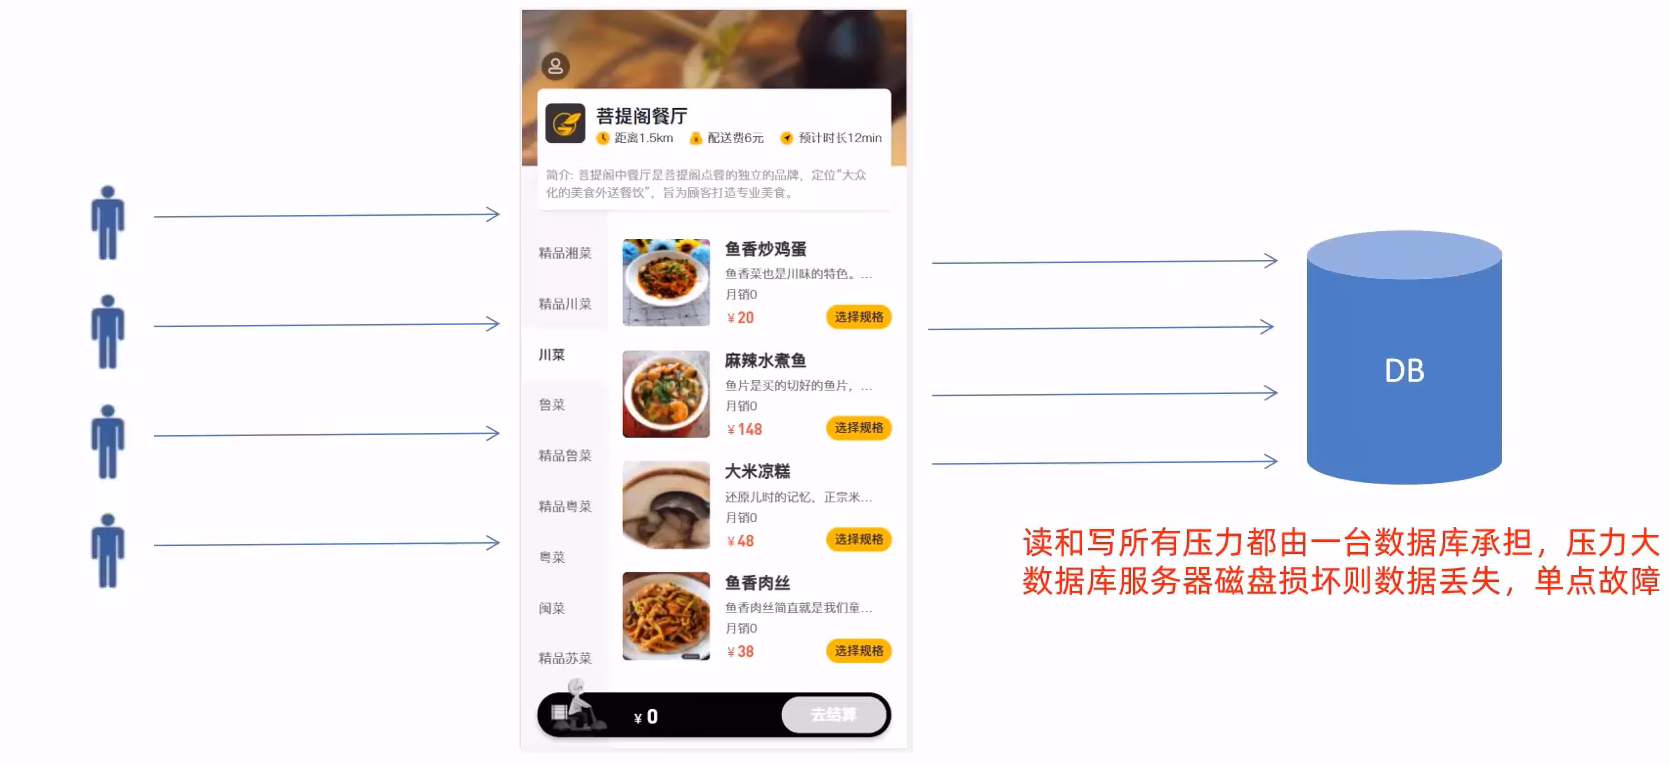
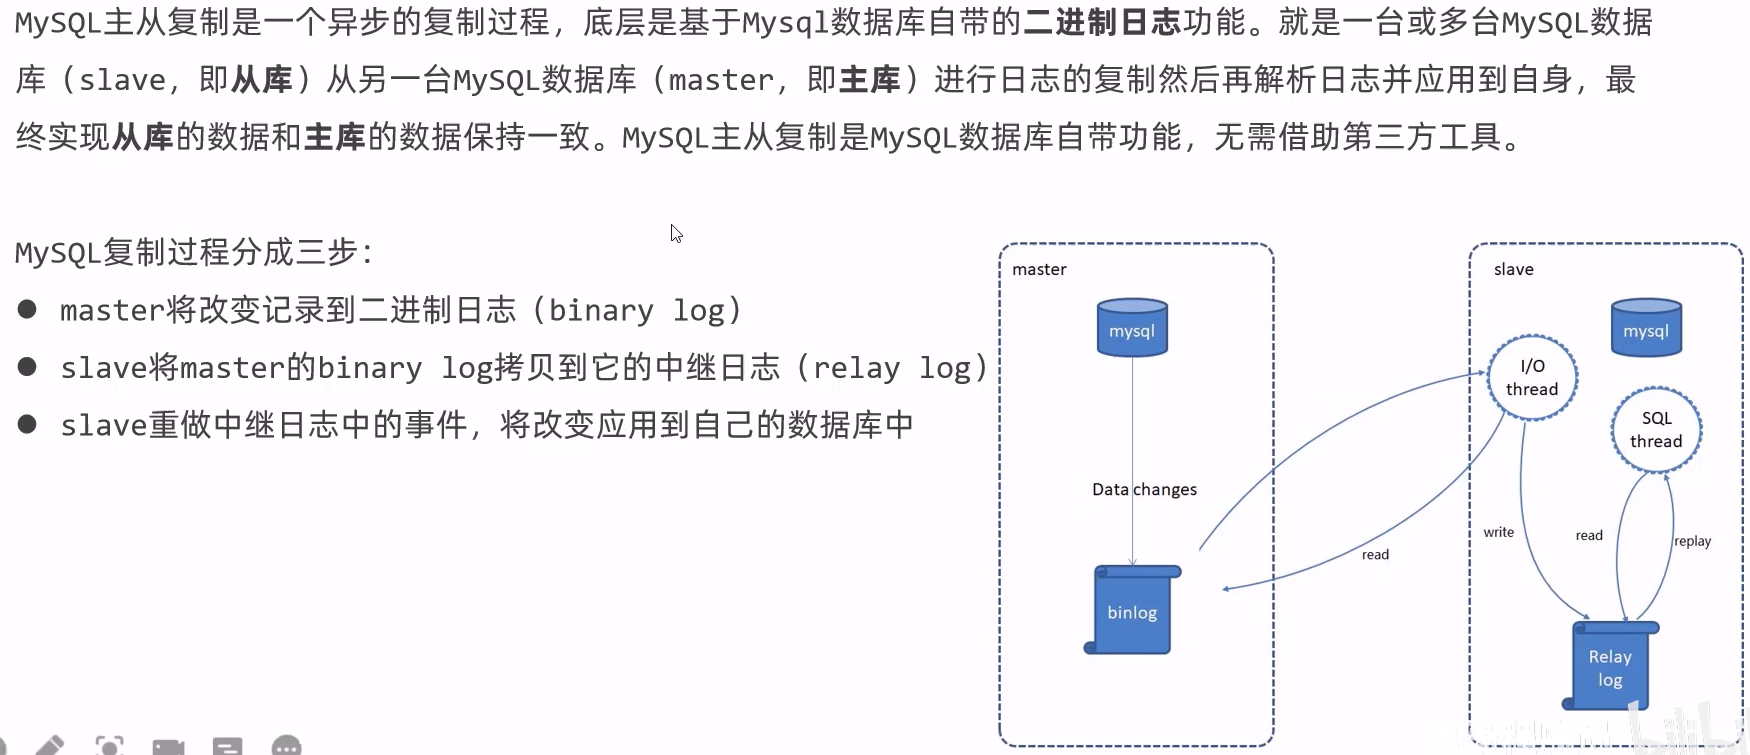
2.1、主从复制
存在的问题
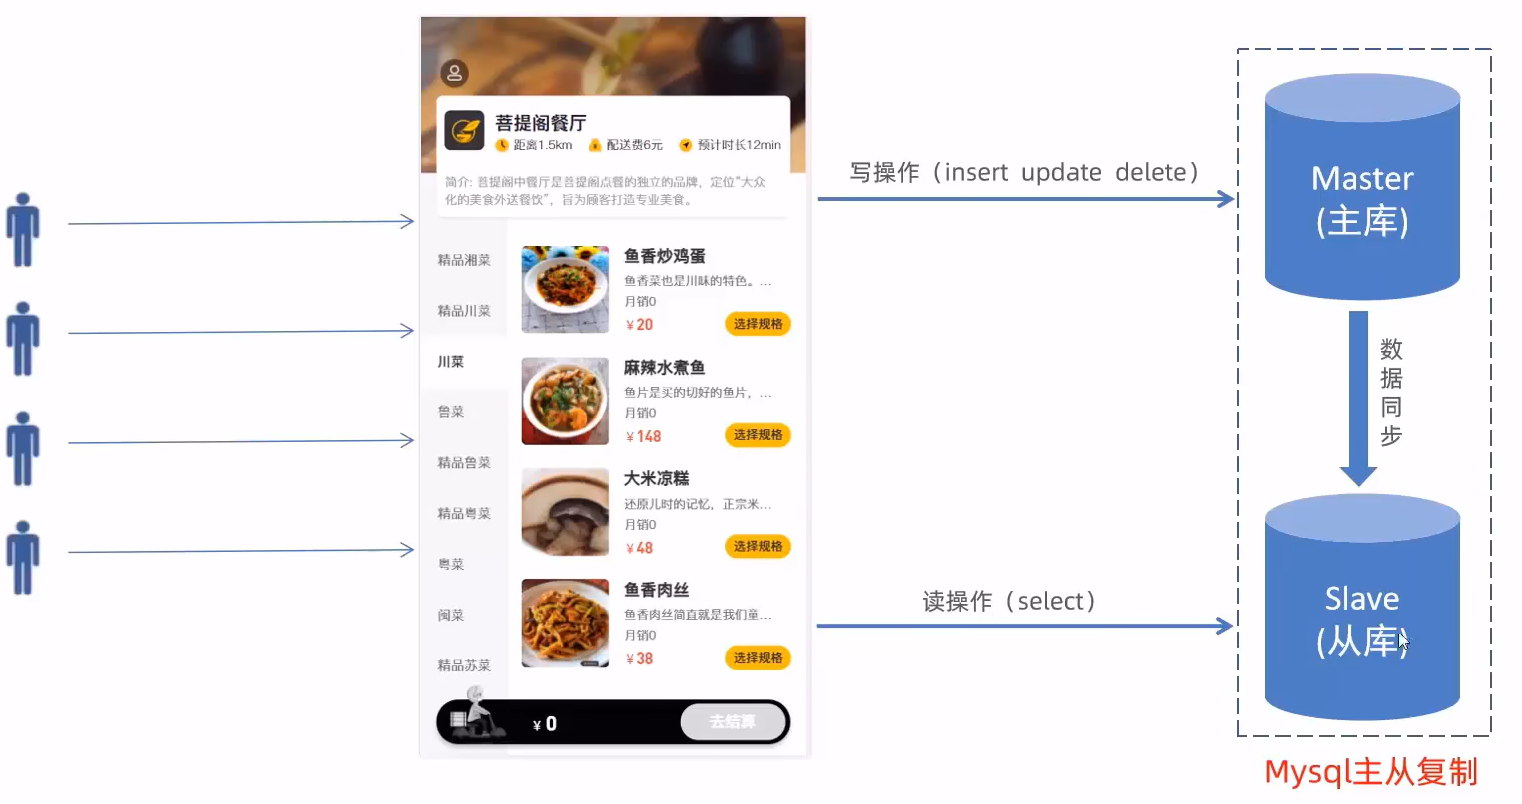
介绍
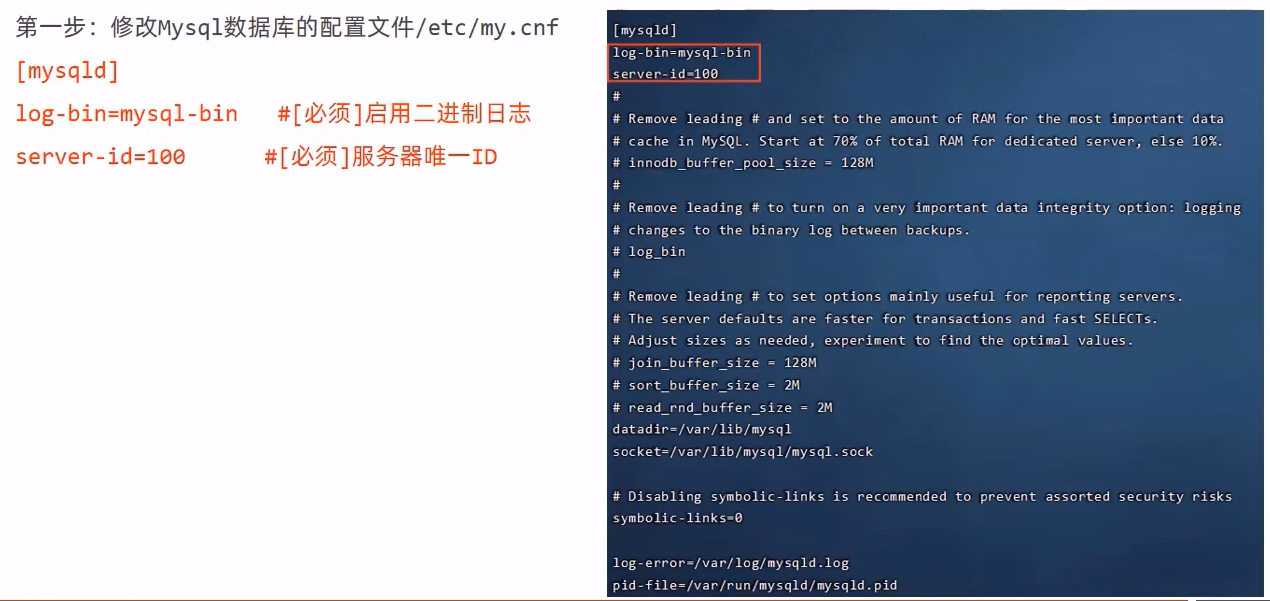
配置

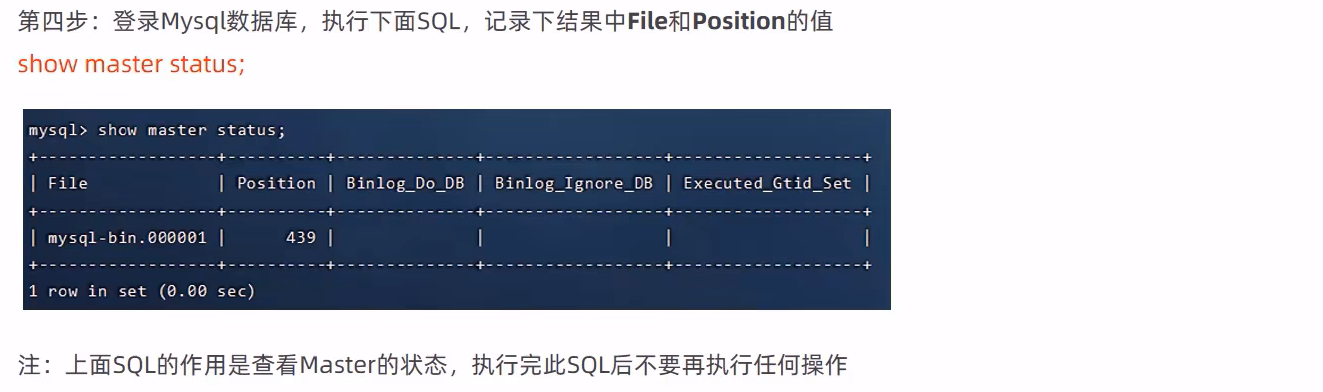
配置主库–master


配置从库–slave


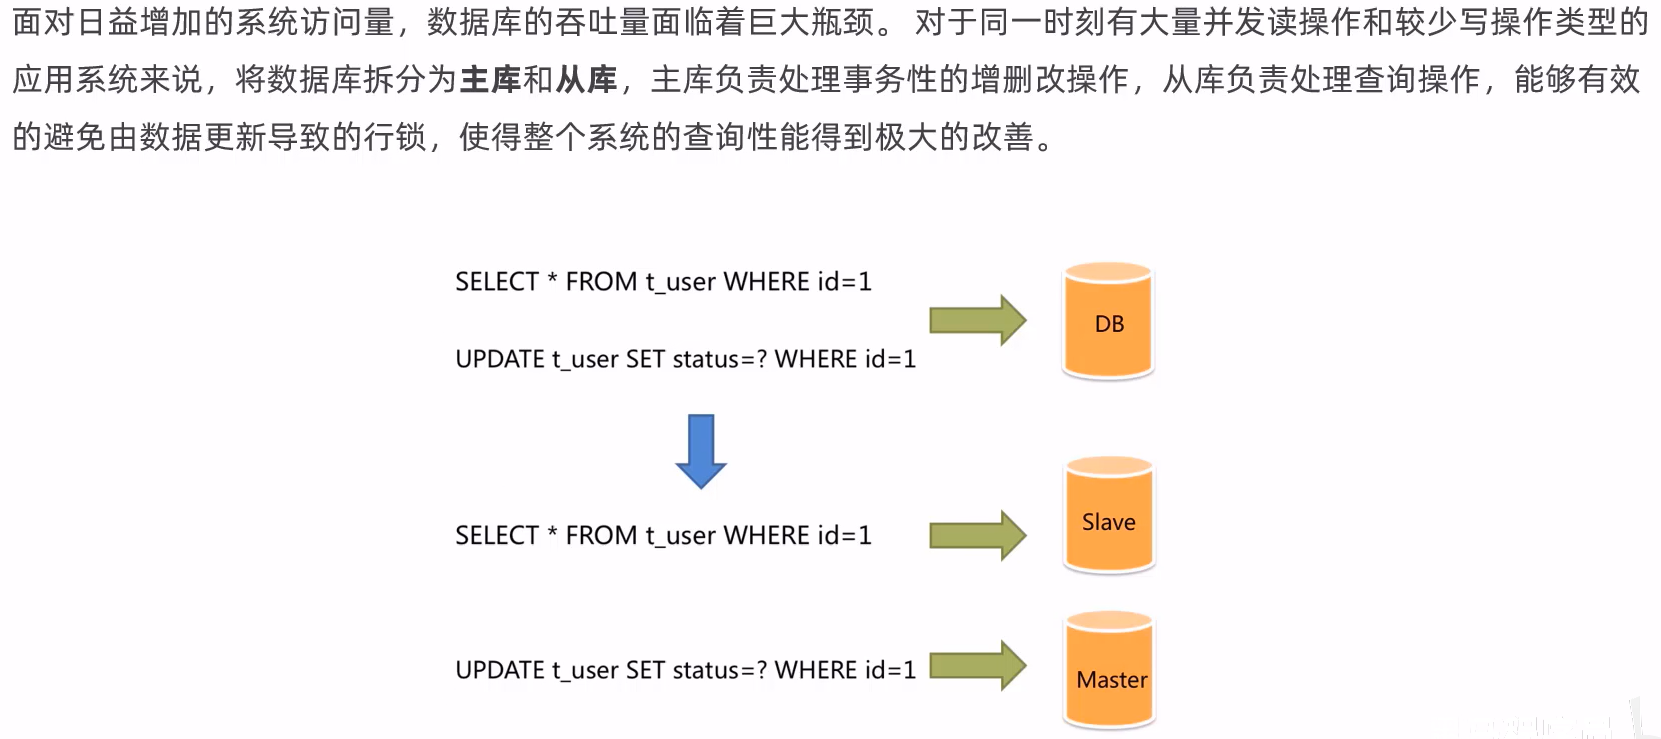
2.2、读写分离
背景
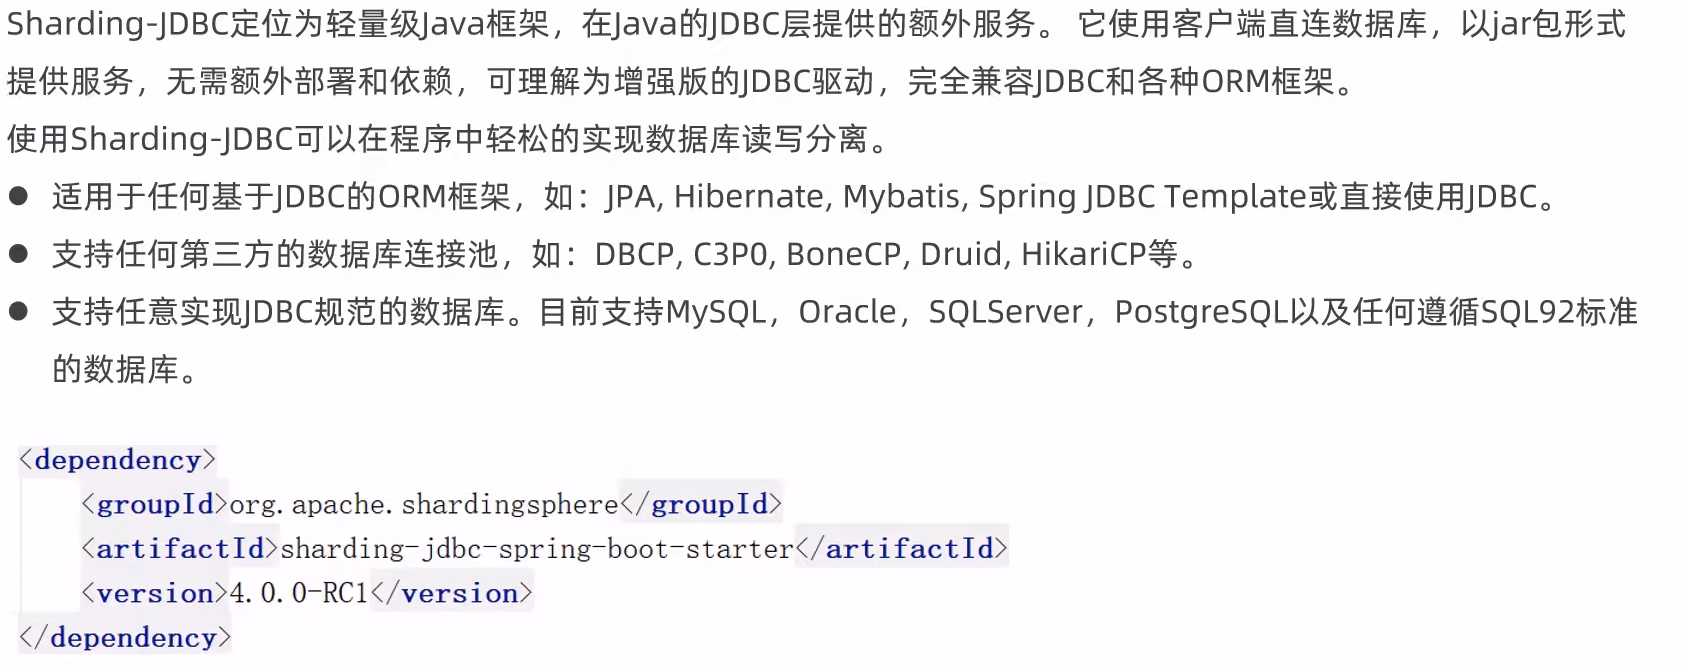
Sharding-JDBC介绍
案例

pom
<dependency>
    <groupId>org.apache.shardingsphere</groupId>
    <artifactId>sharding-jdbc-spring-boot-starter</artifactId>
    <version>4.0.0-RC1</version>
</dependency>
配置数据源
server:
  port: 8080
mybatis-plus:
  configuration:
    #在映射实体或者属性时,将数据库中表名和字段名中的下划线去掉,按照驼峰命名法映射
    map-underscore-to-camel-case: true
    log-impl: org.apache.ibatis.logging.stdout.StdOutImpl
  global-config:
    db-config:
      id-type: ASSIGN_ID
spring:
  shardingsphere:
    datasource:
      names:
        master,slave
      # 主数据源
      master:
        type: com.alibaba.druid.pool.DruidDataSource
        driver-class-name: com.mysql.cj.jdbc.Driver
        url: jdbc:mysql://192.168.138.100:3306/rw?characterEncoding=utf-8
        username: root
        password: root
      # 从数据源
      slave:
        type: com.alibaba.druid.pool.DruidDataSource
        driver-class-name: com.mysql.cj.jdbc.Driver
        url: jdbc:mysql://192.168.138.101:3306/rw?characterEncoding=utf-8
        username: root
        password: root
    masterslave:
      # 读写分离配置
      load-balance-algorithm-type: round_robin #轮询
      # 最终的数据源名称
      name: dataSource
      # 主库数据源名称
      master-data-source-name: master
      # 从库数据源名称列表,多个逗号分隔
      slave-data-source-names: slave
    props:
      sql:
        show: true #开启SQL显示,默认false
  main:
    allow-bean-definition-overriding: true
2.3、项目中实现读写分离
数据库环境准备


跟上面的案例一样,准备好主从两个数据库、导pom、修改配置文件
3、Nginx
3.1、概述
介绍
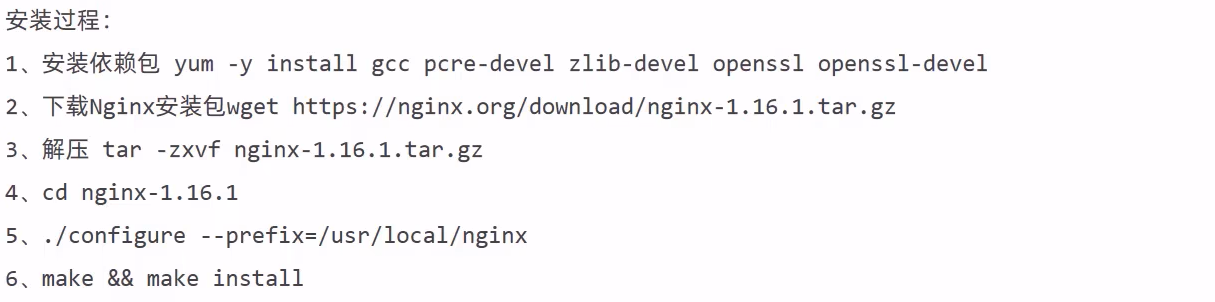
下载和安装

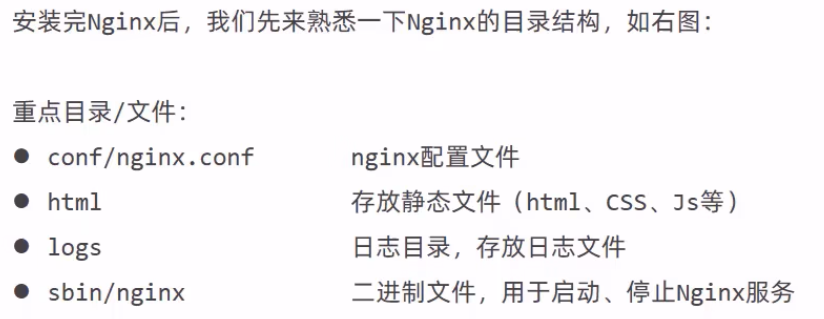
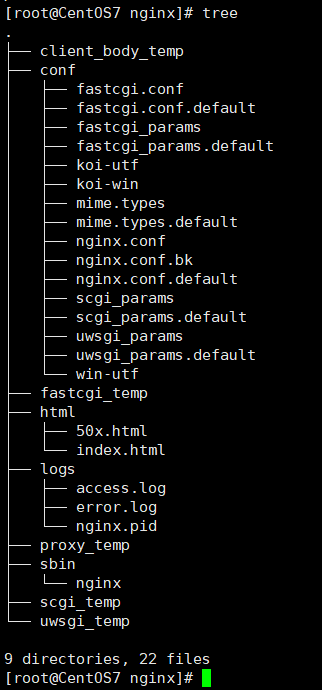
目录结构
3.2、命令
查看版本
cd /usr/local/nginx/sbin
./nginx -v

检查配置文件的正确性
cd /usr/local/nginx/sbin
./nginx -t

启动和停止
简单启动:
cd /usr/local/nginx/sbin
./nginx
复杂启动:
cd /usr/local/nginx/sbin
./nginx -c /usr/local/nginx/conf/nginx.conf
查看进程:
ps -ef | grep nginx
停止:
cd /usr/local/nginx/sbin
./nginx -s quit
或
cd /usr/local/nginx/sbin
./nginx -s stop
重新加载配置文件
cd /usr/local/nginx/sbin
./nginx -s reload
systemctl status nginx
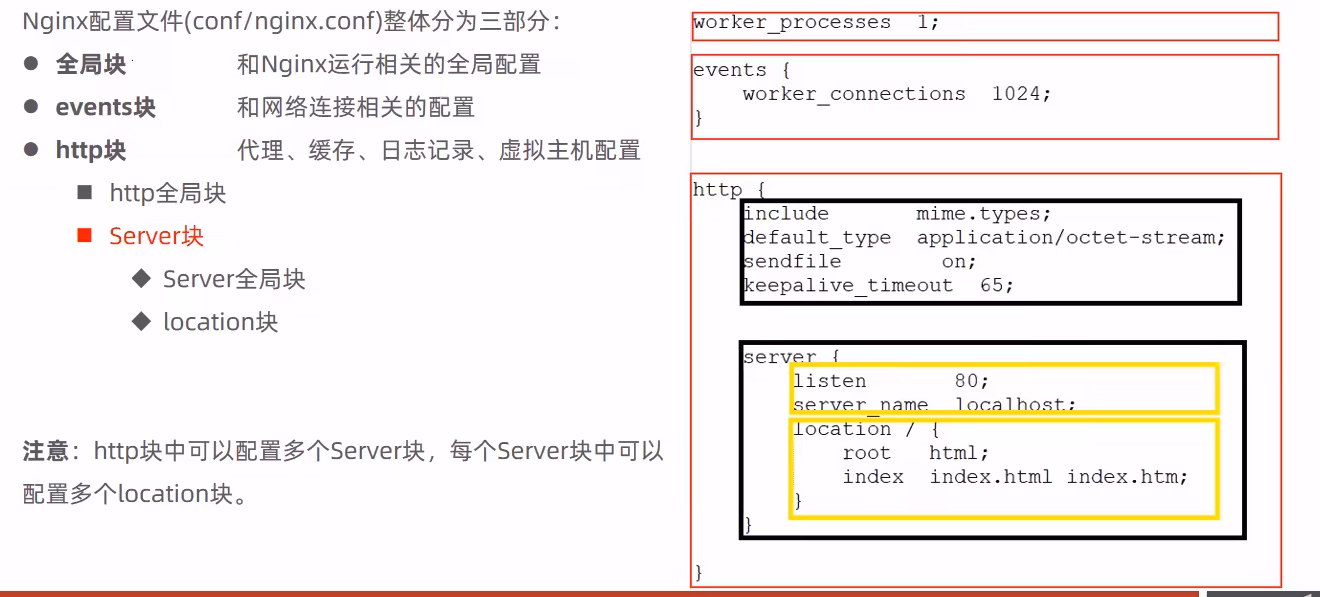
3.3、配置文件的结构
3.4、具体应用
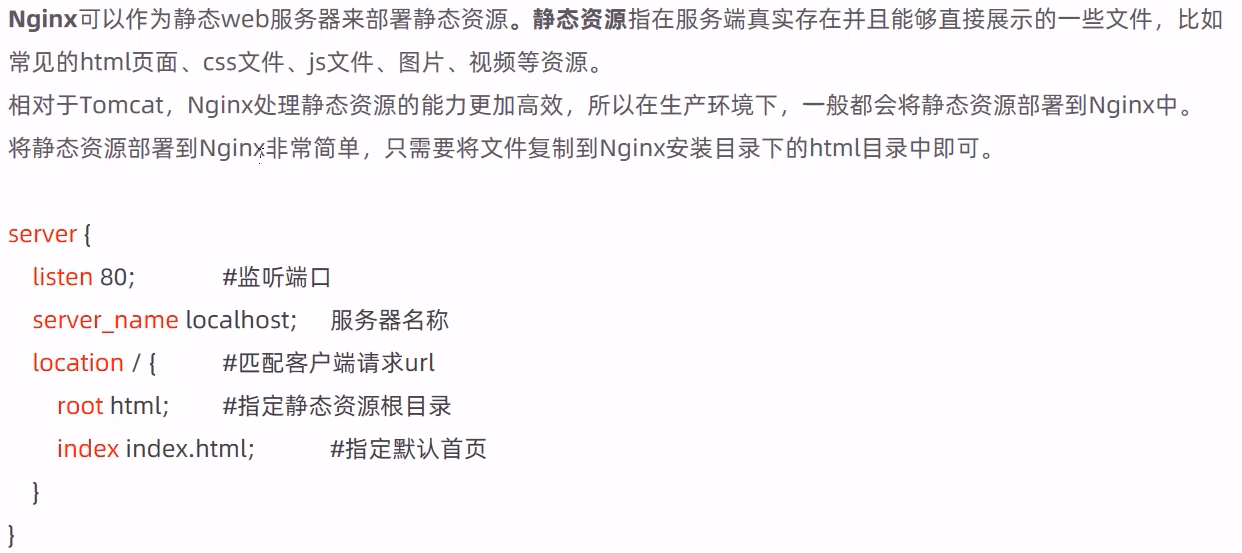
部署静态资源
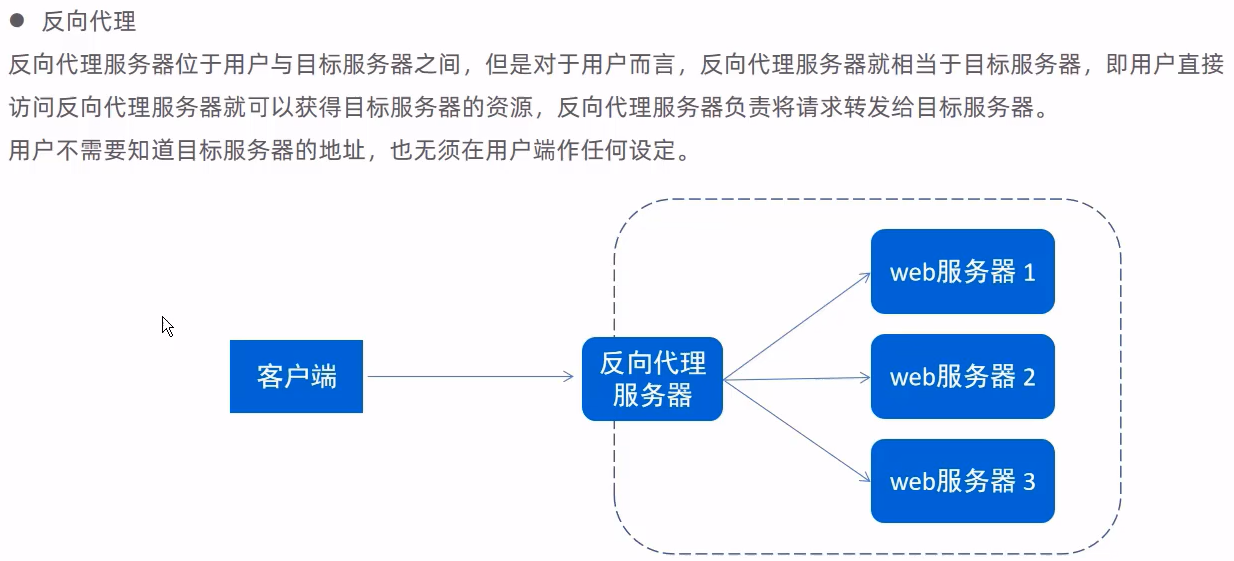
反向代理
介绍

配置

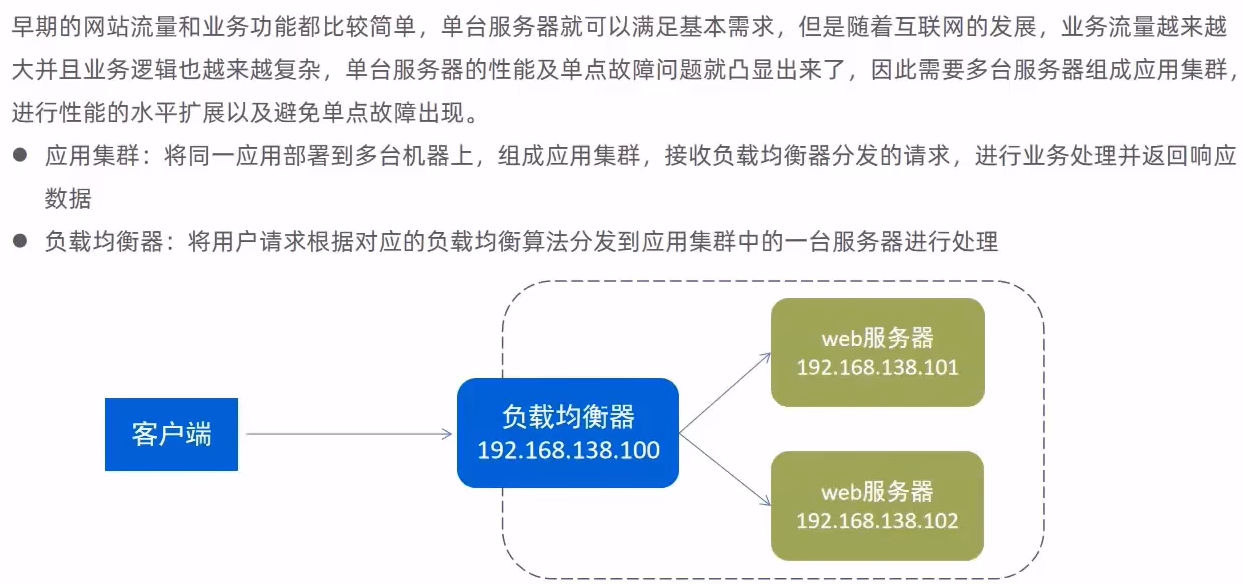
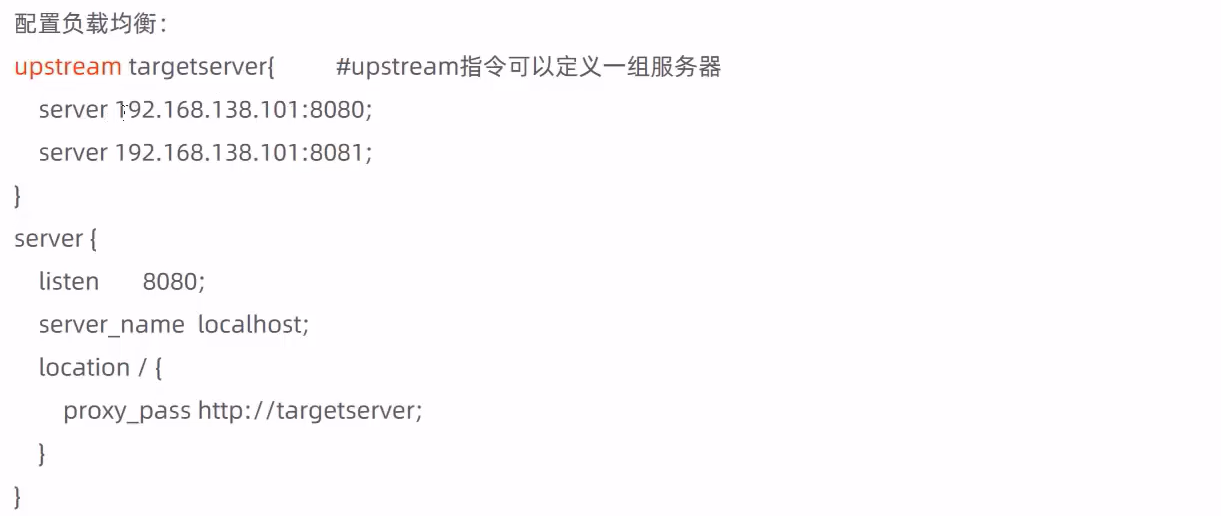
负载均衡
介绍
配置
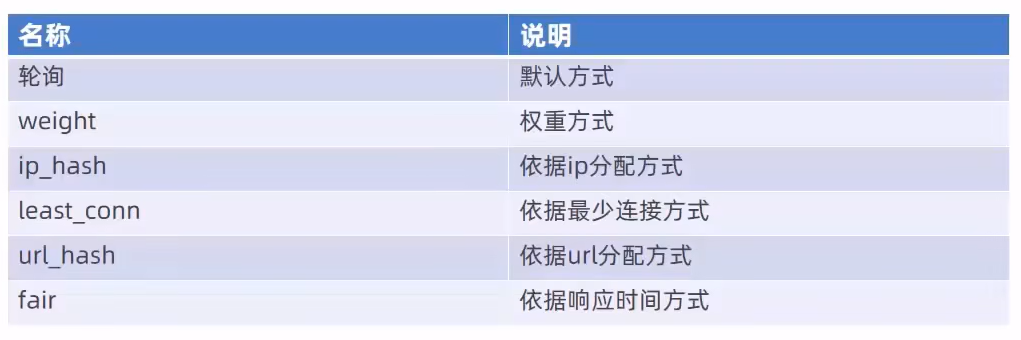
负载均衡策略
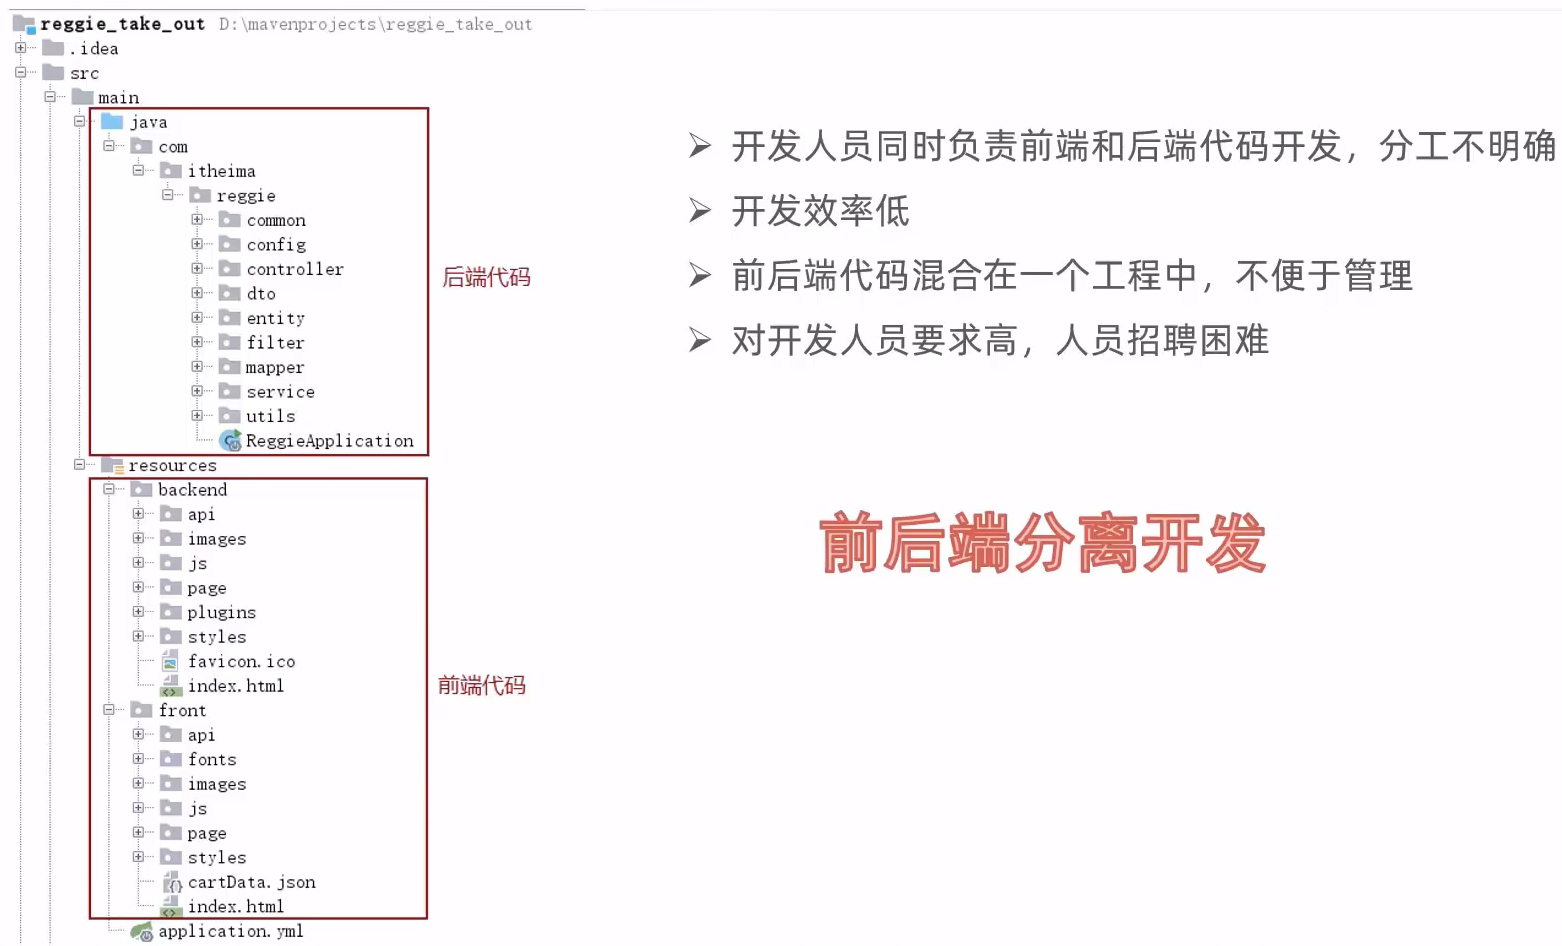
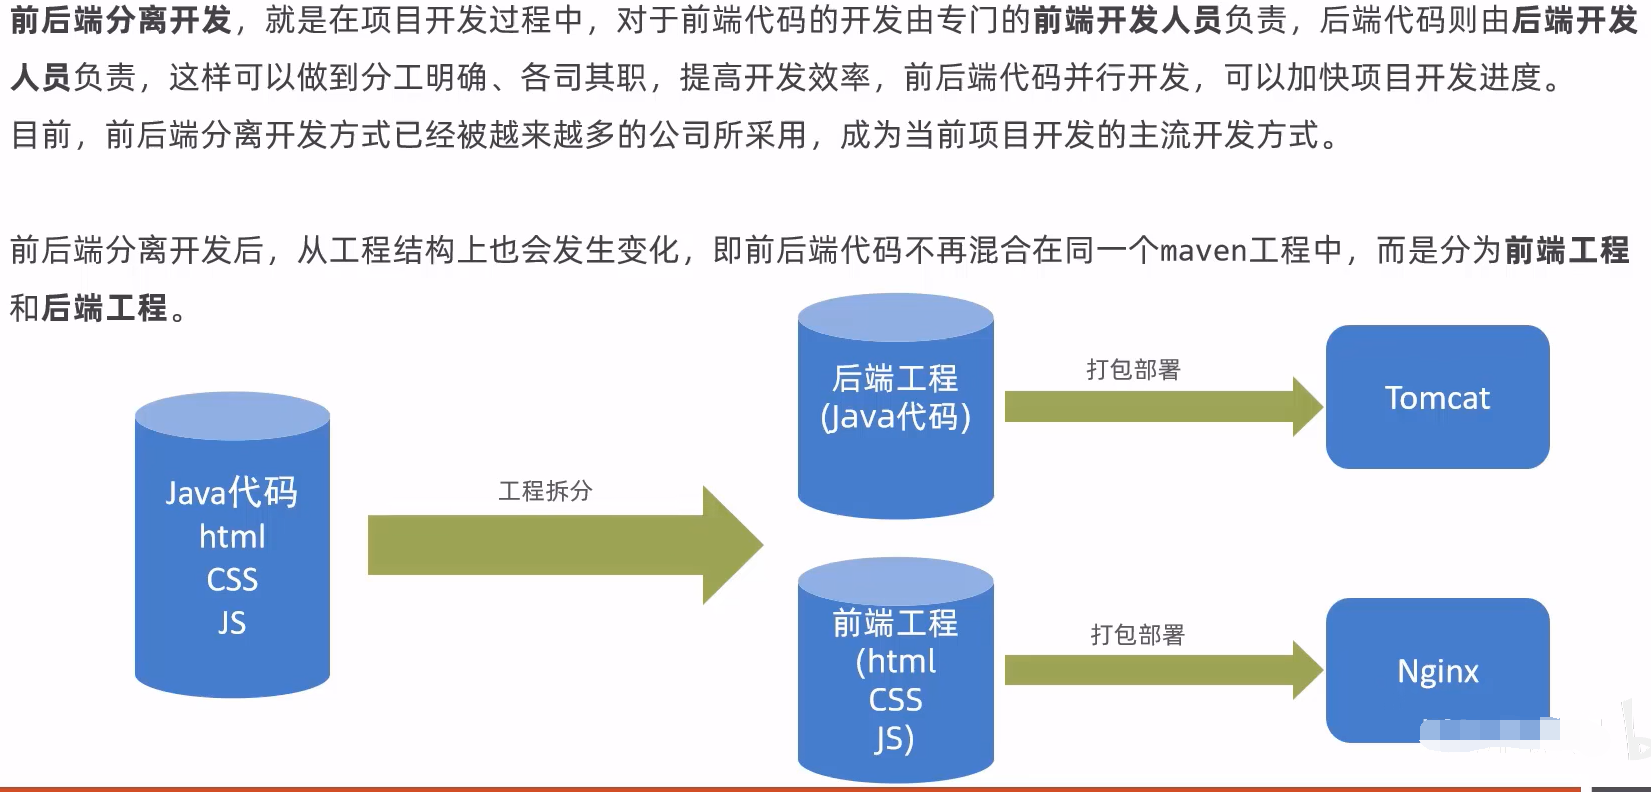
4、前后端分离
问题
[外链图片转存失败,源站可能有防盗链机制,建议将图片保存下来直接上传(img-NvB6CWsL-1677236950620)(E:/typora/image-20230224124113816.png)]
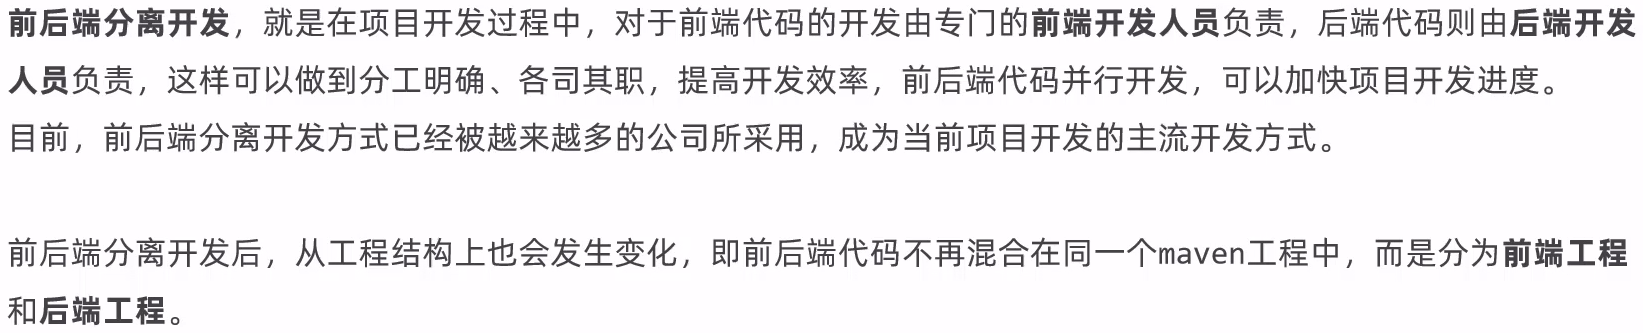
4.1、前后端分离开发
介绍
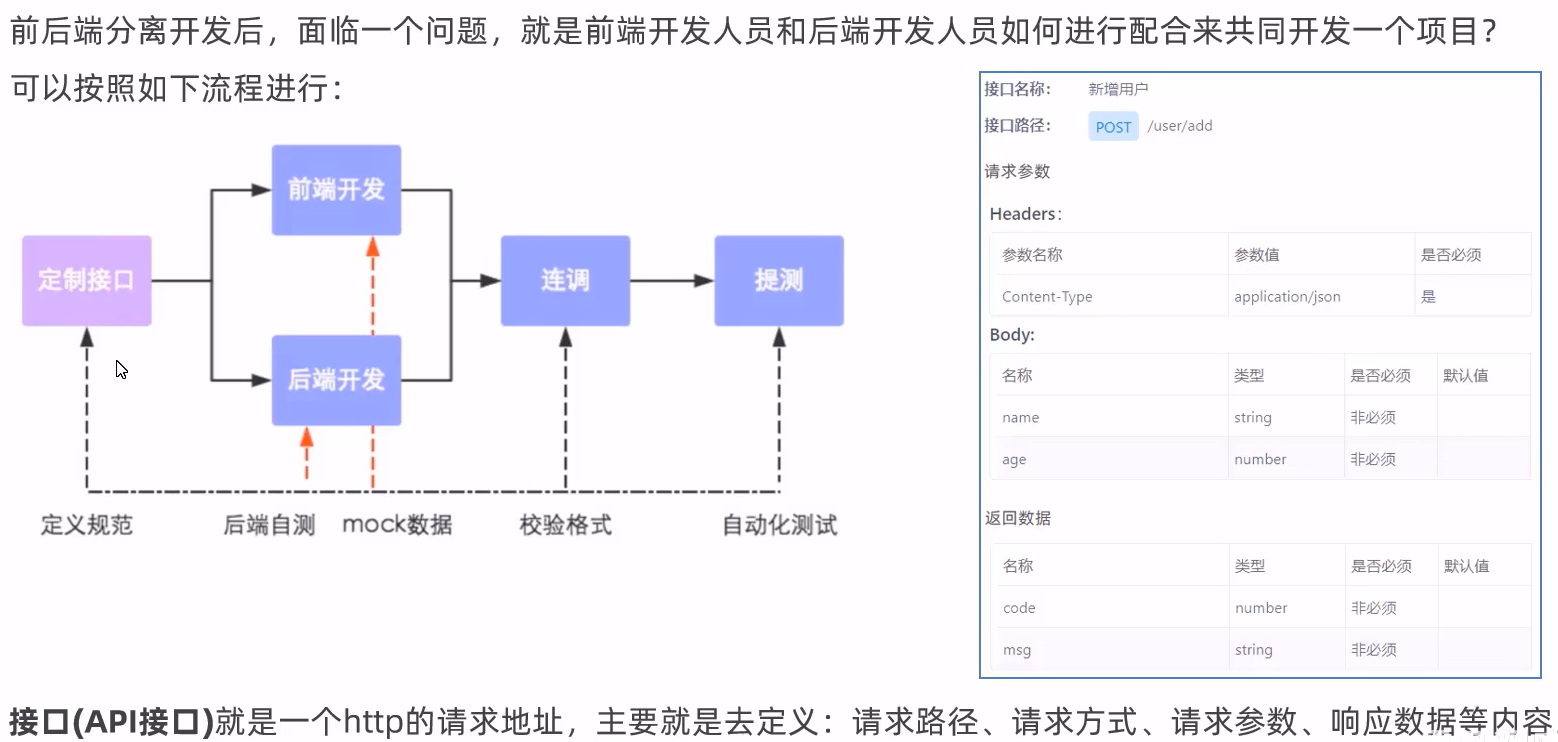
开发流程
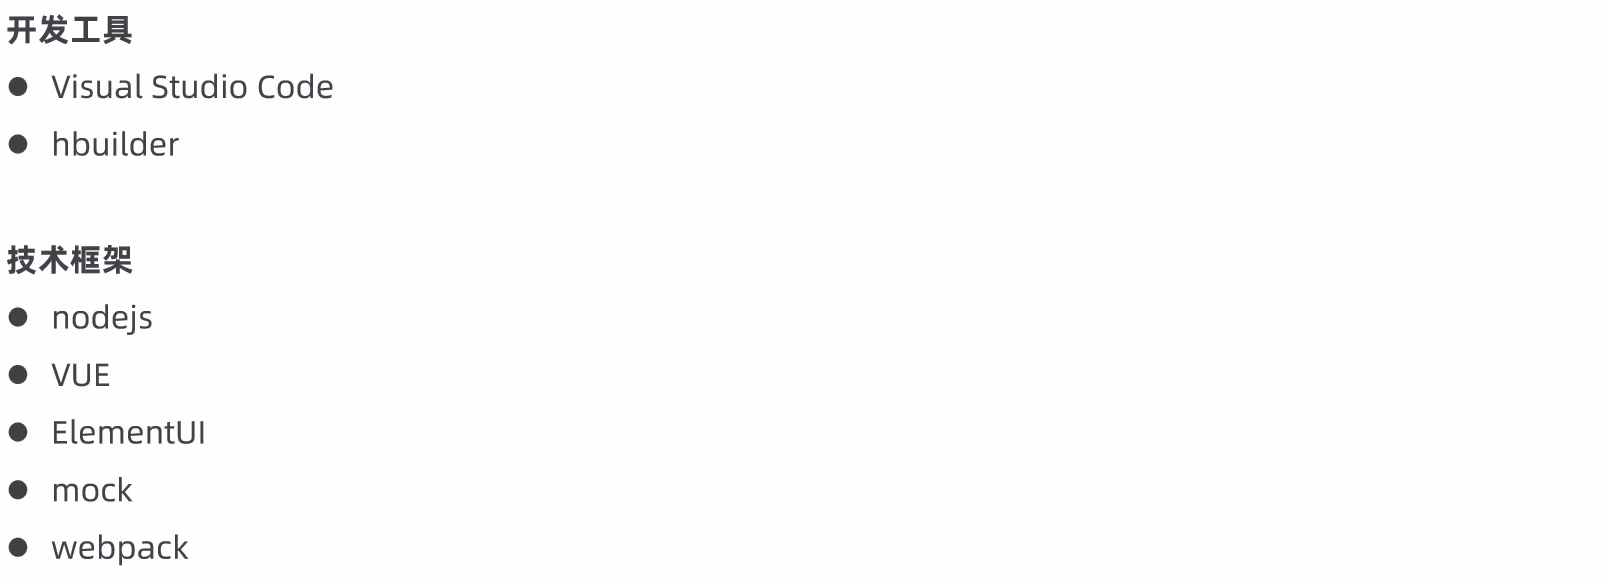
前端技术栈
4.2、YApi/FastApi/Apifox
介绍
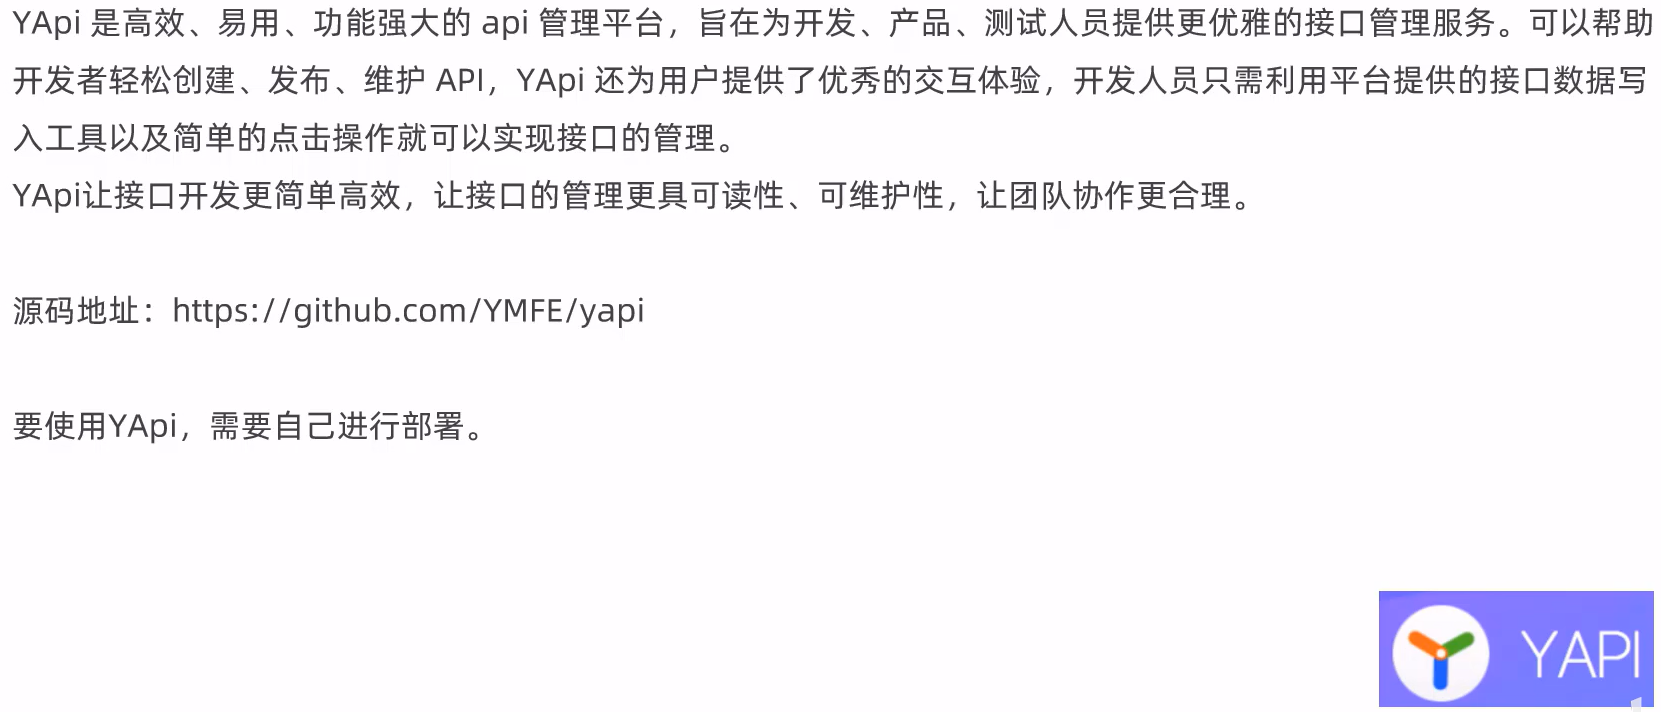
使用
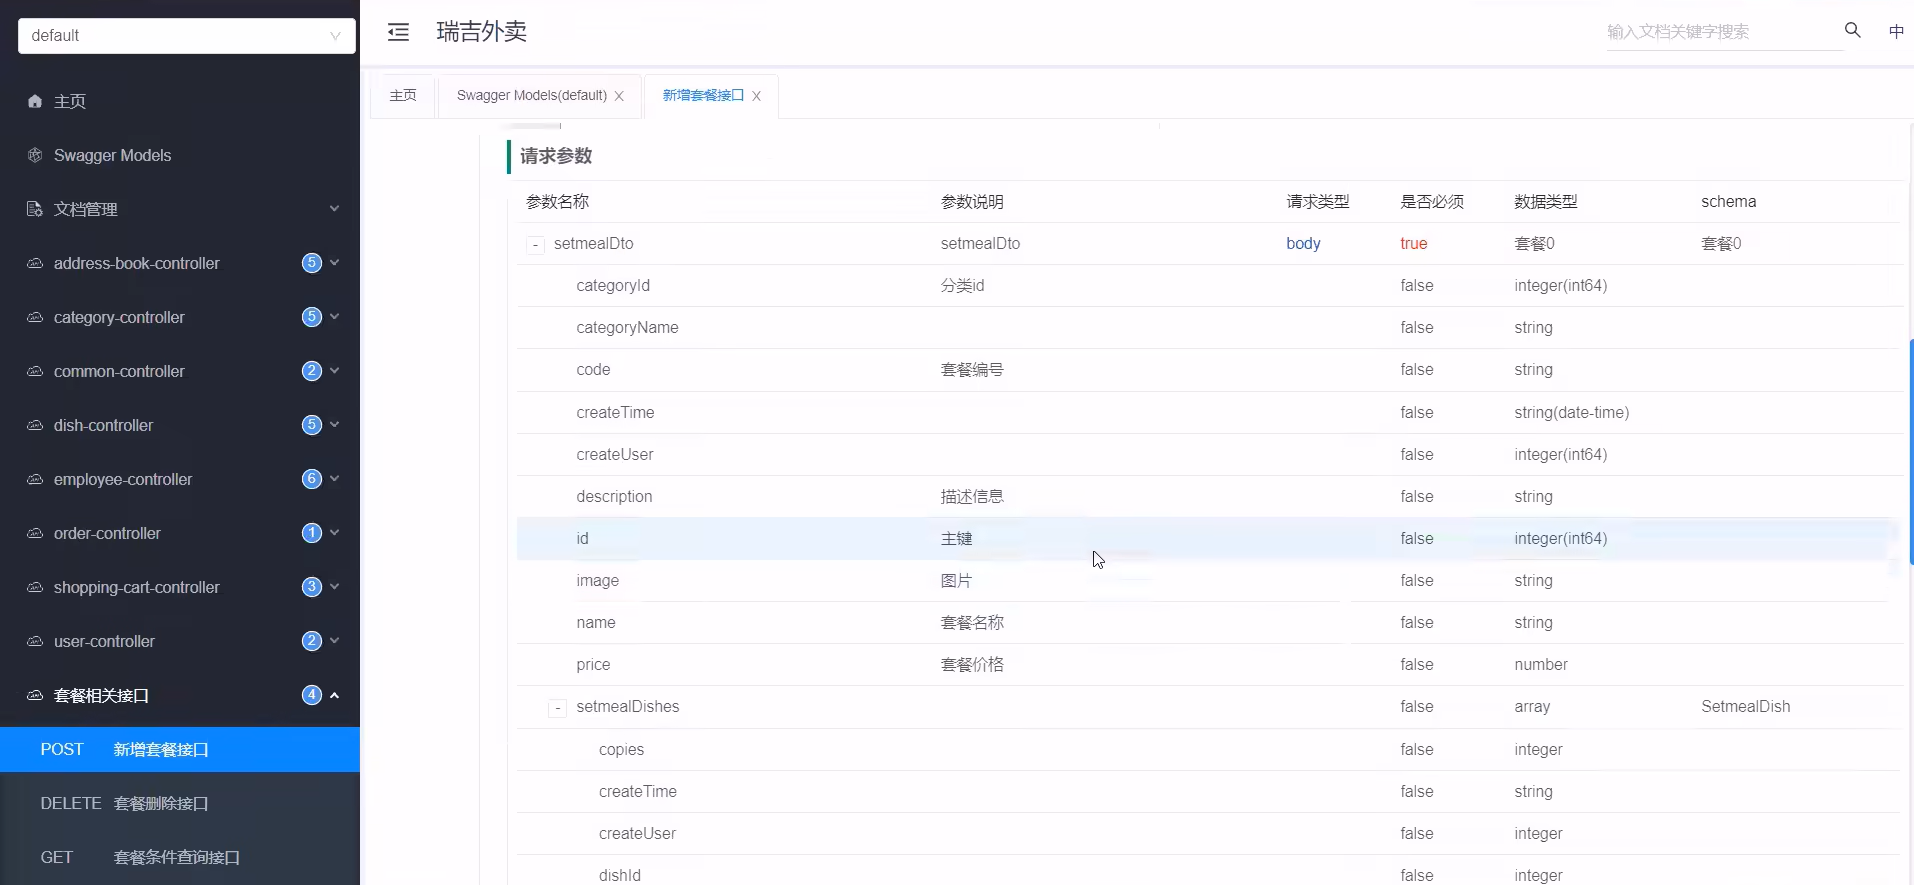
4.3、Swagger
介绍
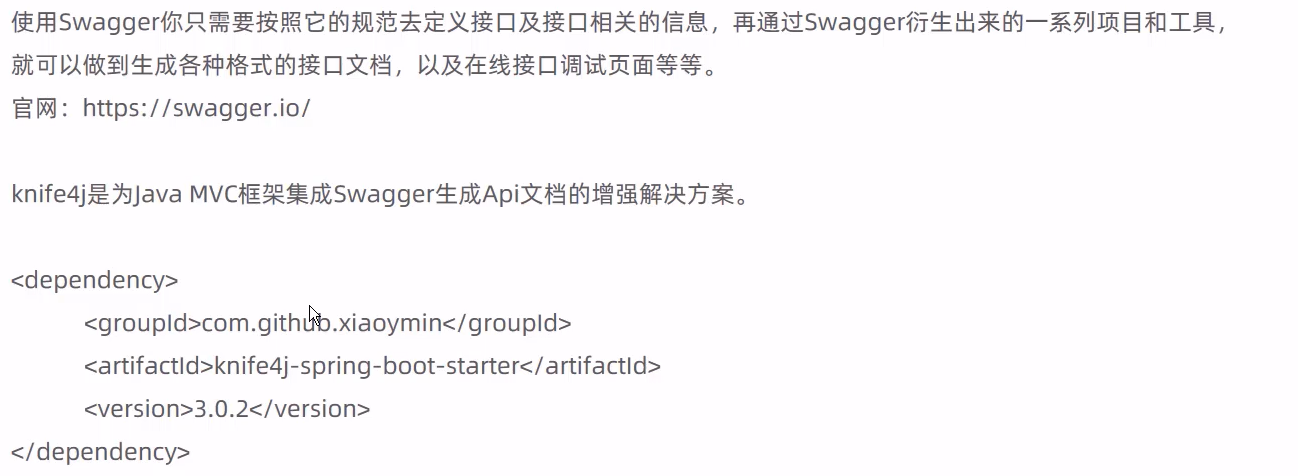
使用

pom
        <dependency>
            <groupId>com.github.xiaoymin</groupId>
            <artifactId>knife4j-spring-boot-starter</artifactId>
            <version>3.0.2</version>
        </dependency>
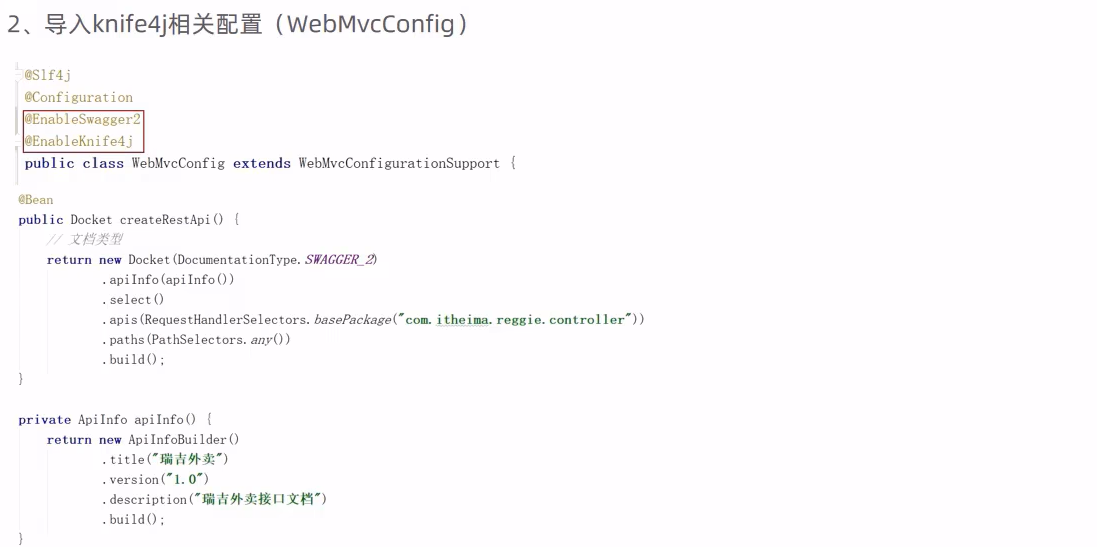
    @Bean
    public Docket createRestApi() {


        // 文档类型
        return new Docket(DocumentationType.SWAGGER_2)
                .apiInfo(apiInfo())
                .select()
                .apis(RequestHandlerSelectors.basePackage("com.itheima.reggie.controller"))
                .paths(PathSelectors.any())
                .build();
    }

    private ApiInfo apiInfo() {


        return new ApiInfoBuilder()
                .title("瑞吉外卖")
                .version("1.0")
                .description("瑞吉外卖接口文档")
                .build();
    }
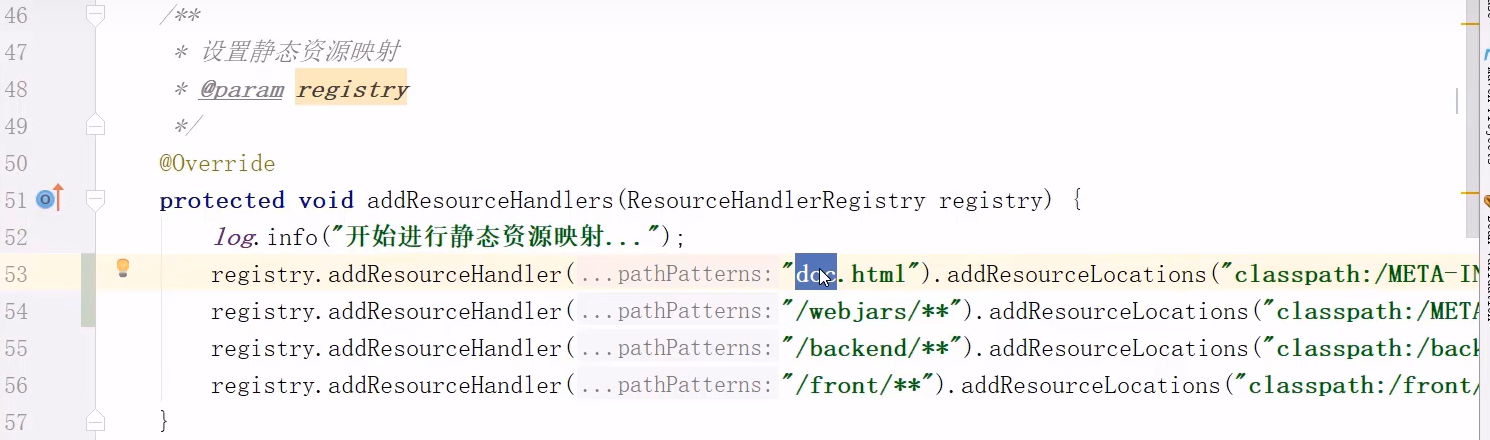
WebMvcConfig
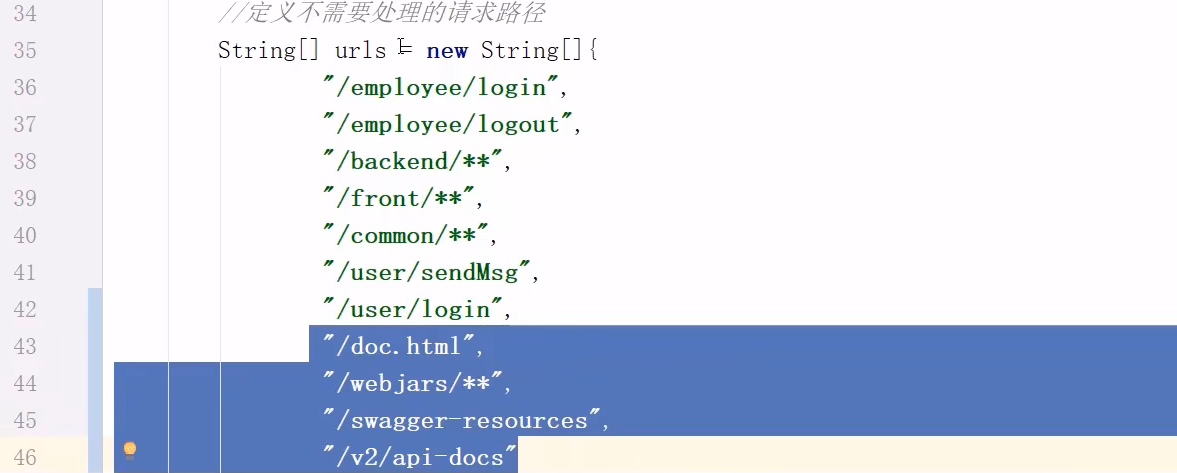
LoginCheckFilter
启动项目
进入网址:www.localhost:8080/doc.html 就会生成对应的接口文档
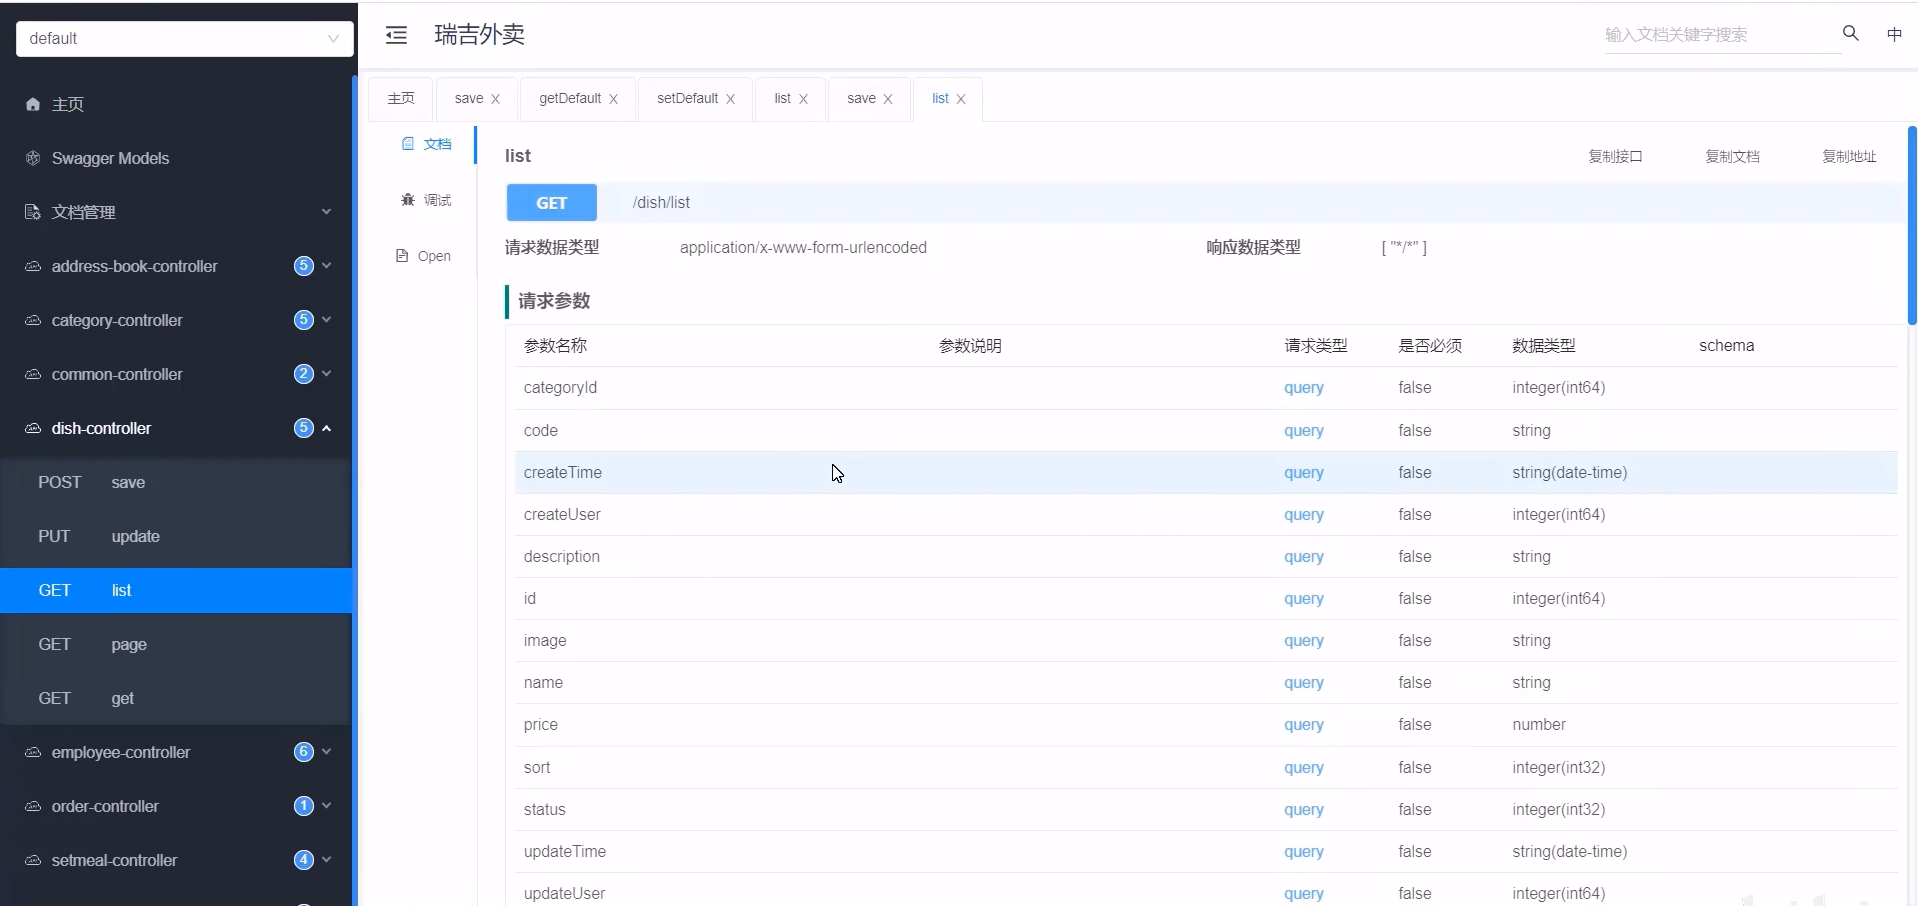
常用注解

将这些注解加在对应的类上,属性上,生成的doc文档就含有中文解释
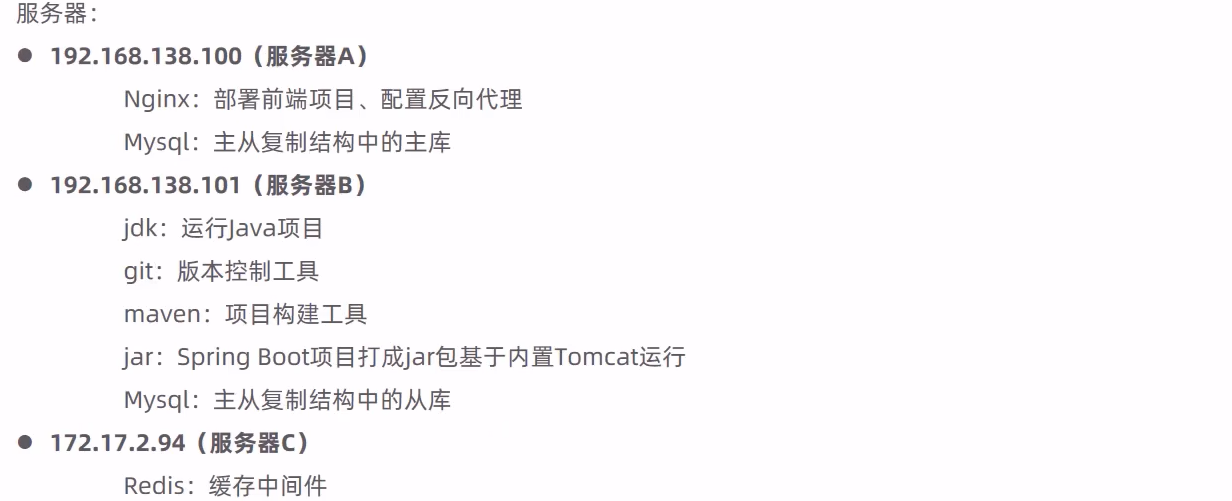
4.4、项目部署
部署架构
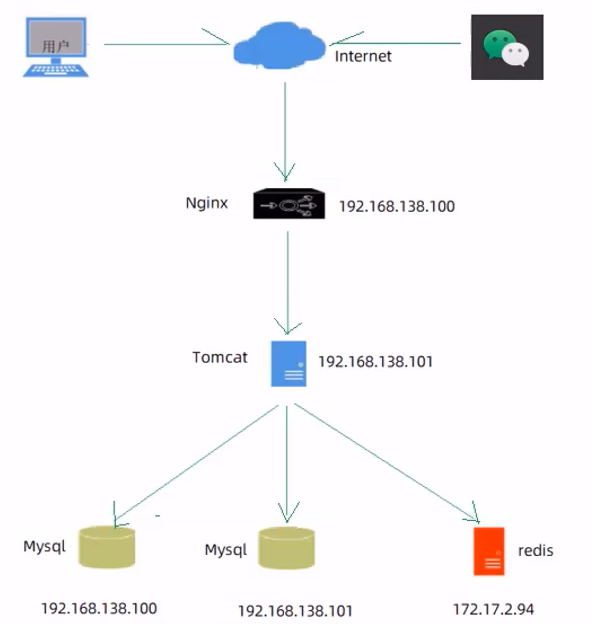
部署环境说明
–end–