LAMP介绍:
Linux+Apache+Mysql/MariaDB+Perl/PHP/Python一组常用来搭建或者服务器的开源软件,本身都是各自独立的程序,但是因为常被放在一起使用,拥有了越来越高的兼容度,共同组成了一个强大的Web应用程序平台。
目前LAMP架构是大多数中小企业最青睐的PHP架构选择,也是众多Linux SA喜欢选择的一套架构。
版本要求:
Apache/2.4.68
5.5.68-MariaDB
PHP 8.0.17
phpMyAdmin-4.4.15.10-6.el7.noarch
一.环境配置:
1.初始环境ping通网络即可。模式nat网络下
[root@localhost ~]cd /etc/yum.repo #切换到yum源下

[root@localhost yum.repos.d]# setenforce 0 #设置SELinux 成为permissive模式permissive(宽松模式)
[root@localhost ~]mkdir /mnt/centos #创建挂载点
[root@localhost ~]mount /dev/cdrom /mnt/centos #挂载在/dev/cdrom/mnt/下
[root@localhost ~]vim /etc/yum.repos.d/local.repo #编辑yum源
[centos] #yum源名字
name=centos #仓库名字
baseurl=file:///mnt/centos #挂载镜像创建的目录及路径
enabled=1 #yum源是否启用 1-启用 0-不启用
gpgcheck=0 #安全检测 1-开启 0-不开启
[root@localhost ~]yum makecache #建立缓存 解决睡眠问题:rm -rf /var/run/yum.pid #激活睡眠程序
[root@localhost ~]yum repolist #检测yum源是否能用
[root@localhost ~]# cd /etc/yum.repos.d #切换到yum源目录下
2.需配网络yum源,ip为自动获取:
[root@localhost ~]# cd /etc/yum.repos.d #切换到yum仓库下
[root@localhost yum.repos.d]# rm -rf* #删除自带yum源
[root@localhost yum.repos.d]wget -O CentOS-Base.repo http://mirrors.aliyun.com/repo/Centos-7.repo #下载阿里yum源
[root@localhost yum.repos.d]# yum clean all
[root@localhost yum.repos.d]# yum makecache #清除yum缓存及更新yum
二.Apache安装及配置
[root@localhost yum.repos.d]# yum -y install httpd #安装Apacher软件包
[root@localhost yum.repos.d]# httpd –v #查看Apache版本信息

[root@localhost yum.repos.d]# cp /etc/httpd/conf/httpd.conf /etc/httpd/conf/httpd.conf.bask #备份主配置文件
[root@localhost yum.repos.d]# vim /etc/httpd/conf/httpd.conf #编辑主配置文件
将125行中AllowOverride None 中的 None 改为 All如下图


[root@localhost yum.repos.d]# systemctl restart httpd #重启服务
[root@localhost yum.repos.d]# systemctl enable httpd #设置开机自启

[root@localhost yum.repos.d]# systemctl status httpd #查看httpd服务状态,及目的查看httpd是否运行运行及正确:

[root@localhost yum.repos.d]# netstat -lntup | grep httpd #查看httpd端口

三.MariaDB安装及配置
[root@localhost yum.repos.d]# yum install mariadb-server mariadb #安装数据库软件[root@localhost yum.repos.d]# systemctl restart mariadb.service #重启数据库 [root@localhost yum.repos.d]# systemctl enable mariadb.service #设置开机自启

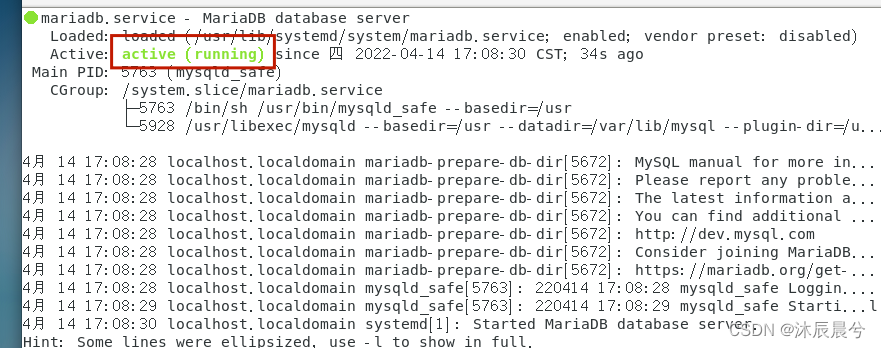
[root@localhost yum.repos.d]# systemctl status mariadb.service #查看数据库是否运行状态
[root@localhost yum.repos.d]# mysql_secure_installation #初始化数据库及进行图下操作
Enter current password for root (enter for none): 【输入数据库超级管理员root密码,注意不是系统root的密码,第一次进入还没有设置直接回车】
Set root password? [Y/n] Y 【设置密码】New password:Re-enter new password: 【再次输入密码】
Remove anonymous users? [Y/n] y 【移除匿名用户Y】
Disallow root login remotely? [Y/n] n 【拒绝root远程登录n】
Remove test database and access to it? [Y/n] y 【删除test数据库,y:删除】
Reload privilege tables now? [Y/n] y 【重新加载权限表y】


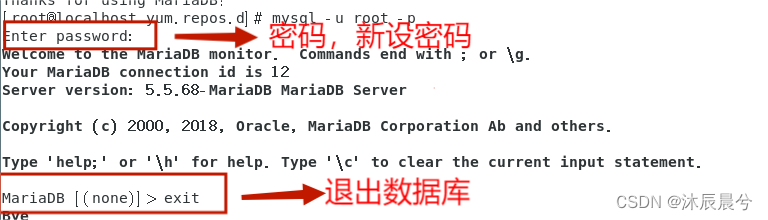
[root@localhost yum.repos.d]# mysql -u root -p #登录mysql
四.PHP安装及配置
[root@localhost yum.repos.d]# yum -y install epel-release yum-utils #安装 epel-release源和 源管理工具yum-utils
[root@localhost yum.repos.d]# yum -y install https://rpms.remirepo.net/enterprise/remi-release-7.rpm #安装Remi软件源
[root@localhost yum.repos.d]# yum-config-manager --enable remi-php80 #启用remi源的php8.0模块
[root@localhost yum.repos.d]# yum -y install yum-utils #安装php插件
[root@localhost yum.repos.d]# yum install php php-cli php-fpm php-mysqlnd php-zip php-devel php-gd php-mbstring php-curl php-xml php-pear php-bcmath php-json php-redis #安装php软件包
[root@localhost yum.repos.d]# php -v #查看php版本信息

五.phpMyAdmin安装及配置
[root@localhost yum.repos.d]# yum -y install epel-release #安装依赖环境
[root@localhost yum.repos.d]# yum -y install phpmyadmin #安装软件包
[root@localhost yum.repos.d]# vim /etc/httpd/conf.d/phpMyAdmin.conf #修改主配置
文件
编辑17行与18行在它们前面添加#号


[root@localhost yum.repos.d]# systemctl restart httpd.service # 重启 httpd服务
[root@localhost yum.repos.d]# setenforce 0 #修改seliunx状态
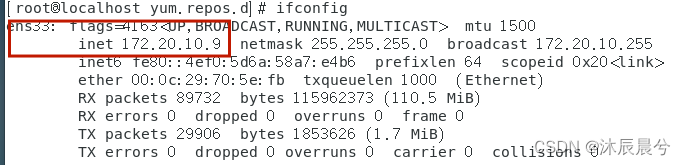
[root@localhost yum.repos.d]# ifconfig #查询IP
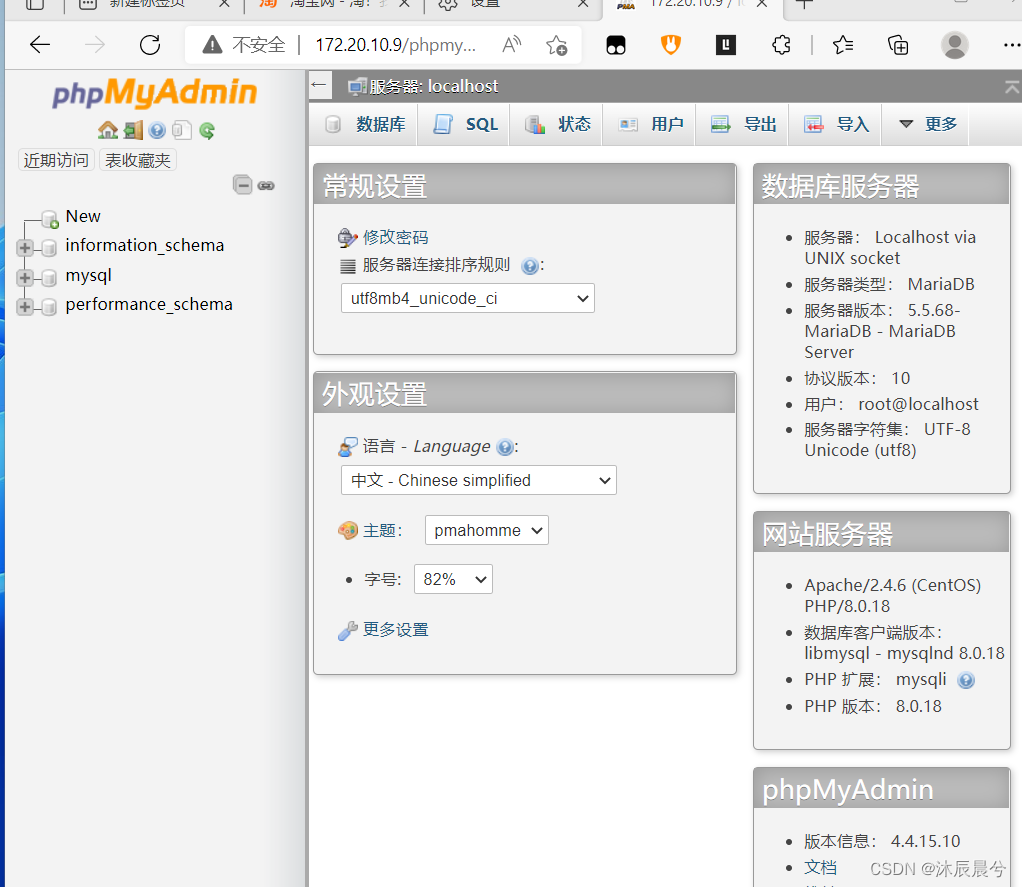
访问数据库:
1.在浏览器输入http://172.20.10.9/phpmyadmin
2.进入登陆页面

3.输入密码及刚才设置的mysql新密码
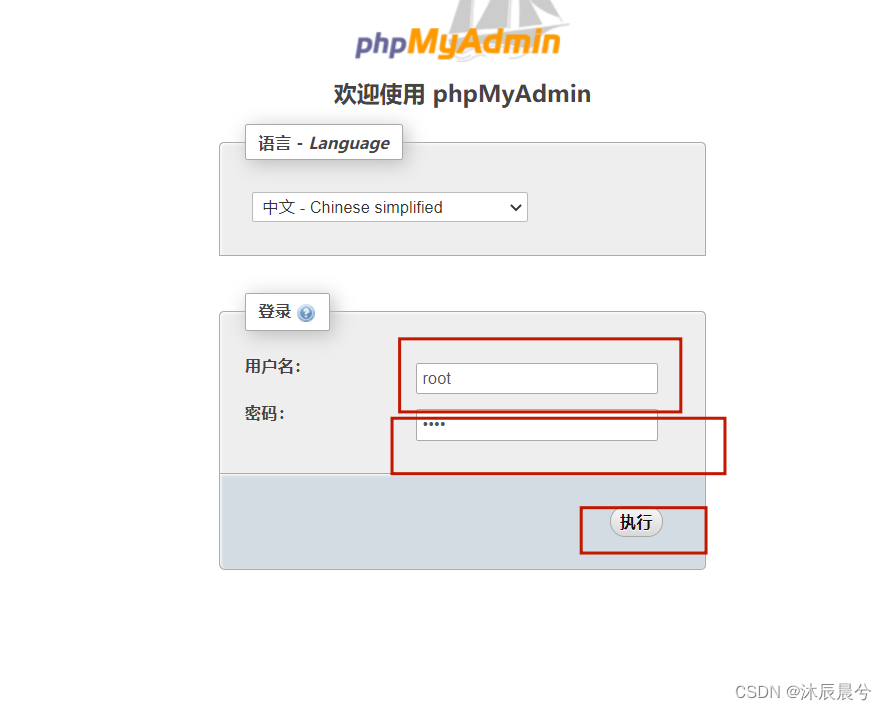
4.进入mysql界面
六.基于lAMP架构部署wordpress项目
[root@localhost yum.repos.d]# mkdir -p /www/html #批量创建/www/html/文件
[root@localhost yum.repos.d]# cd /var/www/html #切换到网站根目录下
[root@localhost html]# wget https://cn.wordpress.org/wordpress-5.9.3-zh_CN.tar.gz #下载安装包
[root@localhost html]# tar zxvf wordpress-5.9.3-zh_CN.tar.gz #解压安装包
[root@localhost html]# cd wordpress/ #进入项目
[root@localhost wordpress]# mv * /var/www/html/ #将网站默认页面移至根目录
[root@localhost wordpress]# chmod -R 775 /var/www/html/ #更改网站目录权限
[root@localhost wordpress]# chown -R apache:root /var/www/html/ #更改文件属主
[root@localhost wordpress]# mysql -u root -p #登录数据库
Create database wordpressdb;
Create user wsz@localhost identified by '123456';
Grant all privileges on wordpressdb.* to pgz@localhost; (自己名字)
Flush privileges;
Exit
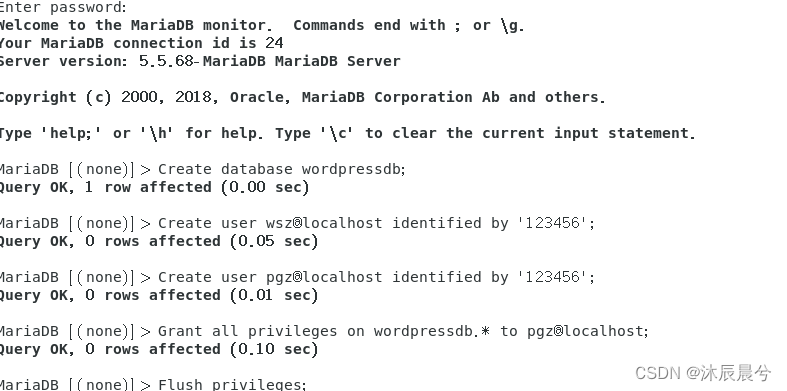
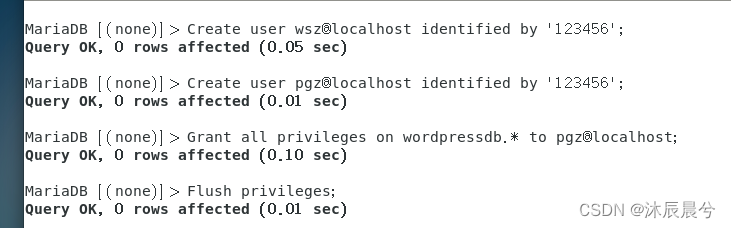
创建数据库,创建用户,赋予权限
systemctl restart httpd
systemctl restart mariadb #重启服务
cd /var/www/html/ #切换网站根目录
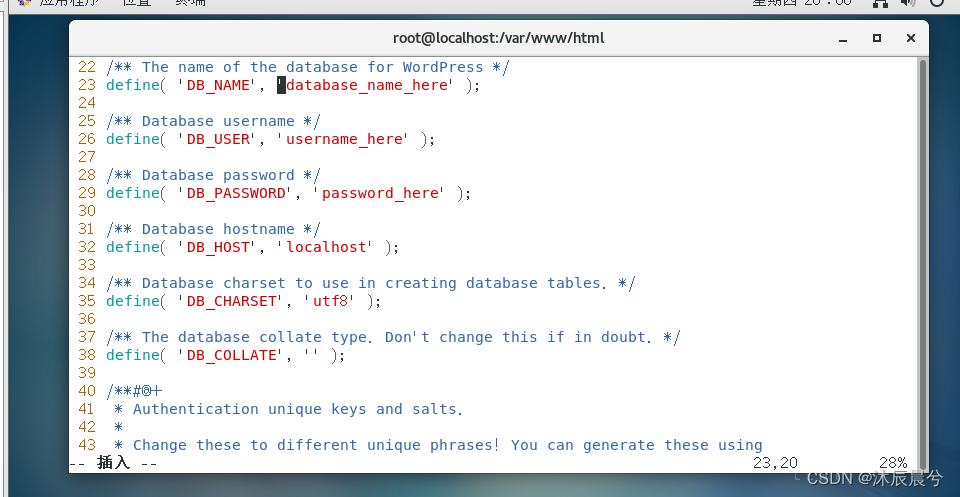
cp wp-config-sample.php wp-config.php #拷贝文件
vim wp-config.php #编辑php配置文件

[root@localhost html]# vim /etc/hosts #修改hosts文件
把文件内容删完,添加内容为自己IP加www.pgz.com.com(域名 可以任意修改)。

验证:打开火狐输入IP或域名即可,成功及为下图:

七.Wordpress主题设置
[root@localhost html]# cd /var/www/html/wp-content/themes #切换至wordores主题目录下
[root@localhost themes]# wget https://github.com/mashirozx/sakura/archive/refs/heads/3.x.zip #下载自选主题
[root@localhost themes]# yum install unzip #安装解压工具
[root@localhost themes]# unzip 3.x.zip #解压主题包
[root@localhost themes]# mv sakura-3.x/ Sakura #重命名
八.实验最后验证:浏览器完成
1.在虚拟机上直接输入IP(172.20.10.9)会出现如下图:
2.按要求输入,登录即可。

3.出现下图即为成功
