目录
前言
Spring Boot是由Pivotal团队提供的全新框架,其设计目的是用来简化新Spring应用的初始搭建以及开发过程。该框架使用了特定的方式来进行配置,从而使开发人员不再需要定义样板化的配置。通过这种方式,Spring Boot致力于在蓬勃发展的快速应用开发领域(rapid application development)成为领导者。
准备工作
1、初始化一个springboot项目
参考地址:https://joseke.blog.csdn.net/article/details/127196743
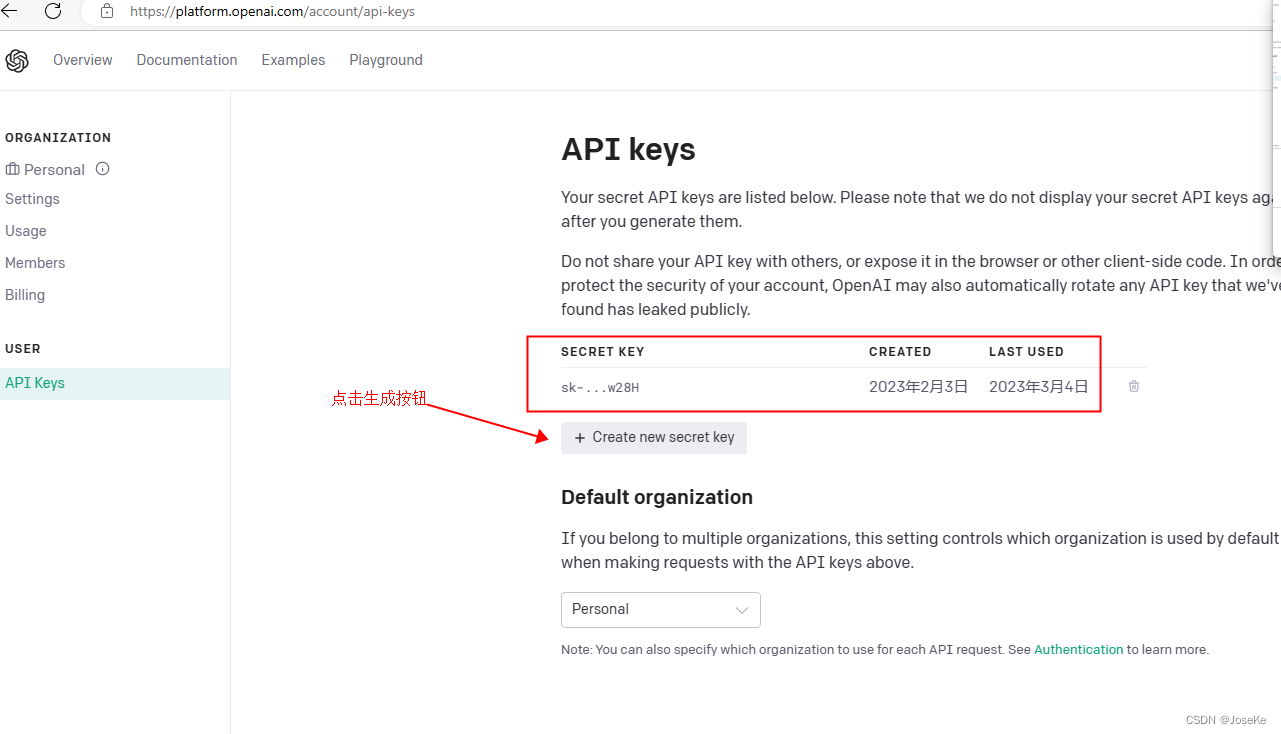
2、访问OPENAI官网获取API密钥
地址:https://platform.openai.com/account/api-keys
3、通过OPENA开源的JAVA SDK (OpenAI-Java)访问 API
地址:GitHub - TheoKanning/openai-java: OpenAI GPT-3 Api Client in Java
集成达芬奇模型
1、编写SpringBoot项目中的pom文件
<dependency>
   <groupId>com.theokanning.openai-gpt3-java</groupId>
   <artifactId>client</artifactId>
   <version>0.9.0</version>
</dependency>
2、初始化OpenAiService类
import com.theokanning.openai.OpenAiService;
import org.springframework.beans.factory.annotation.Value;
import org.springframework.context.annotation.Bean;
import org.springframework.context.annotation.Configuration;

import java.time.Duration;

/**
 * openai 配置类
 */
@Configuration
public class OpenAiConfiguration {

    @Value("${open.ai.key}")
    private String openAiKey;
    @Value("${open.ai.request.timeout}")
    private long timeout;

    @Bean
    public OpenAiService openAiService(){
        return new OpenAiService(openAiKey, Duration.ofSeconds(timeout));
    }
}
3、配置密钥、超时时间和使用的模型
#application.properties
server.port=8081
#密钥
open.ai.key=xxxxxxxx
#超时时间
open.ai.request.timeout=100000
#达芬奇模型
open.ai.model=text-davinci-003
3、编写访问业务类
import com.google.common.collect.Maps;
import com.theokanning.openai.OpenAiService;
import com.theokanning.openai.completion.CompletionRequest;
import com.theokanning.openai.completion.CompletionResult;
import lombok.extern.slf4j.Slf4j;
import org.apache.commons.lang3.StringUtils;
import org.springframework.beans.factory.annotation.Autowired;
import org.springframework.beans.factory.annotation.Value;
import org.springframework.stereotype.Service;

import java.util.Arrays;
import java.util.Map;

@Slf4j
@Service
public class OpenAiChatBiz {

    @Value("${open.ai.model}")
    private String openAiModel;
    @Autowired
    private OpenAiService openAiService;
    /**
     * 聊天
     * @param prompt
     * @return
     */
    public String chat(String prompt){
        CompletionRequest completionRequest = CompletionRequest.builder()
                .prompt(prompt)
                .model(openAiModel)
                .echo(true)
                .temperature(0.7)
                .topP(1d)
                .frequencyPenalty(0d)
                .presencePenalty(0d)
                .maxTokens(1000)
                .build();
        CompletionResult completionResult = openAiService.createCompletion(completionRequest);
        String text = completionResult.getChoices().get(0).getText();
        return text;
    }
}
4、编写访问接口
import org.apache.commons.lang3.StringUtils;
import org.springframework.beans.factory.annotation.Autowired;
import org.springframework.web.bind.annotation.RequestMapping;
import org.springframework.web.bind.annotation.RequestMethod;
import org.springframework.web.bind.annotation.RequestParam;
import org.springframework.web.bind.annotation.RestController;

@RestController
public class OpenAiChatApi {

    @Autowired
    private OpenAiChatBiz openAiChatBiz;

    @RequestMapping(path = "/chat/question",method = RequestMethod.GET)
    public String openAiChat(@RequestParam("question")String question){
        if(StringUtils.isBlank(question)){
            return "Please Input";
        }
        return openAiChatBiz.chat(question);
    }
}
效果展示
使用google的API Tester插件进行测试
