https://dblab.xmu.edu.cn/blog/631/
https://dblab.xmu.edu.cn/blog/31/
实验过程
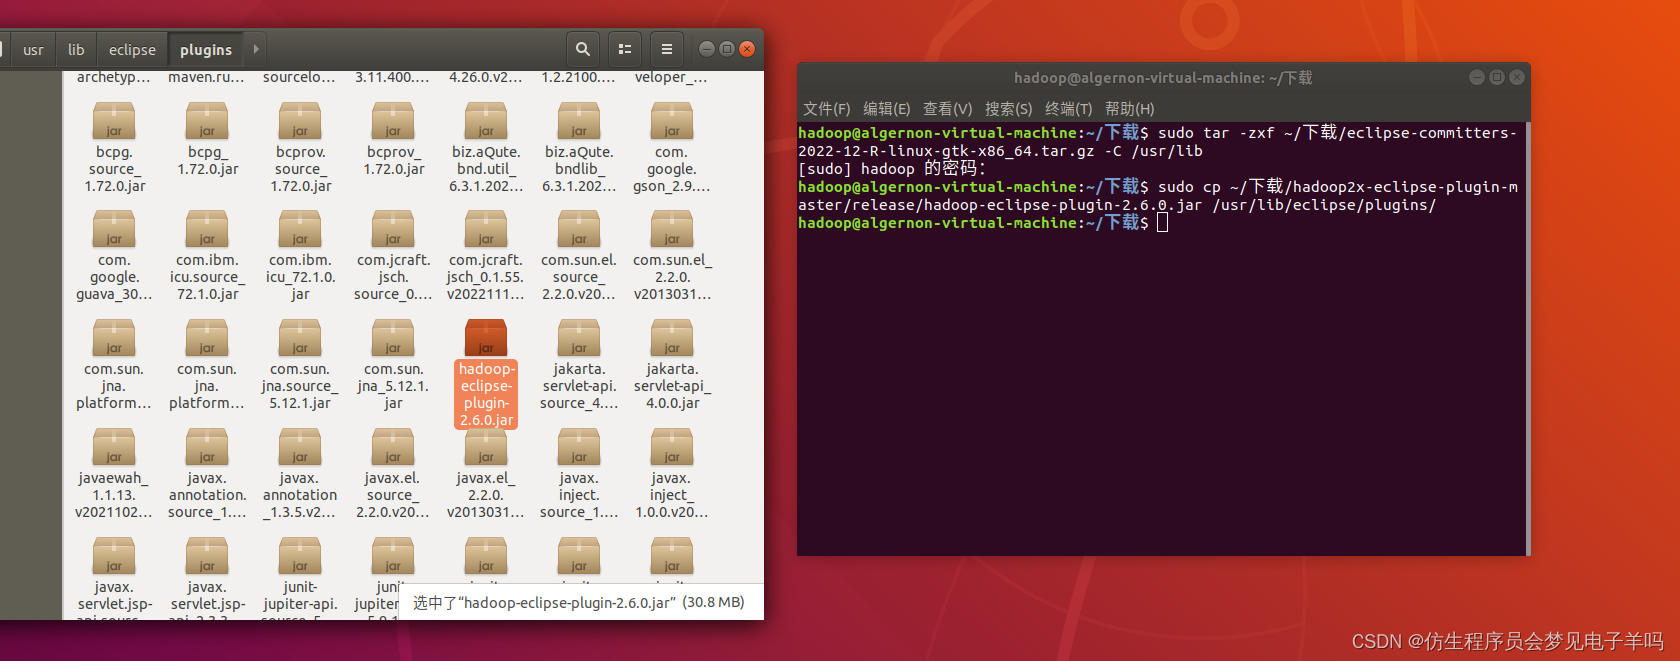
下载hadoop-eclipse-plugin,将 release 中的 hadoop-eclipse-kepler-plugin-2.6.0.jar (还提供了 2.2.0 和 2.4.1 版本)复制到 Eclipse 安装目录的 plugins 文件夹中,运行 eclipse -clean 重启 Eclipse 即可(添加插件后只需要运行一次该命令,以后按照正常方式启动就行了)。
unzip -qo ~/下载/hadoop2x-eclipse-plugin-master.zip -d ~/下载 # 解压到 ~/下载 中
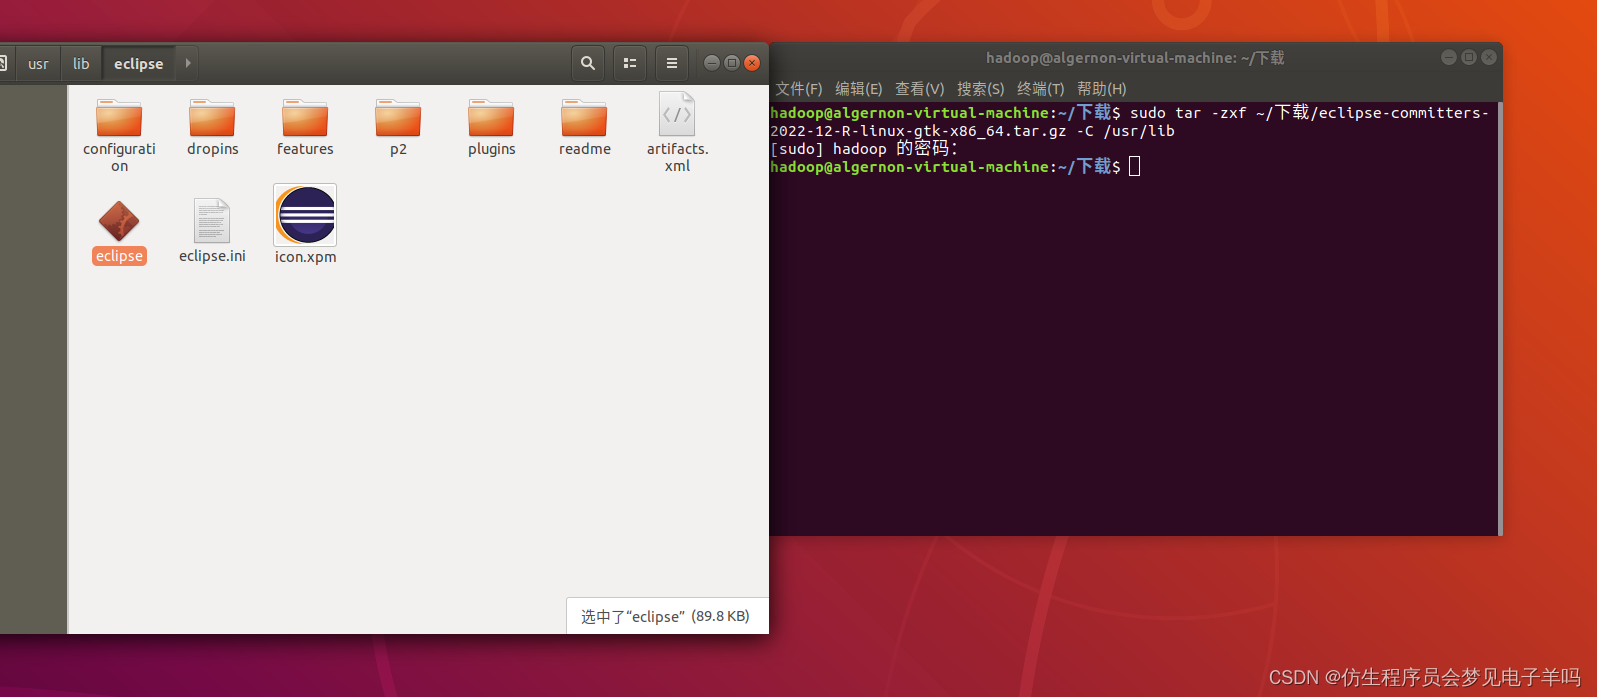
sudo cp ~/下载/hadoop2x-eclipse-plugin-master/release/hadoop-eclipse-plugin-2.6.0.jar /usr/lib/eclipse/plugins/ # 复制到 eclipse 安装目录的 plugins 目录下
/usr/lib/eclipse/eclipse -clean # 添加插件后需要用这种方式使插
配置 Hadoop-Eclipse-Plugin
在继续配置前请确保已经开启了 Hadoop。
插件需要进一步的配置。
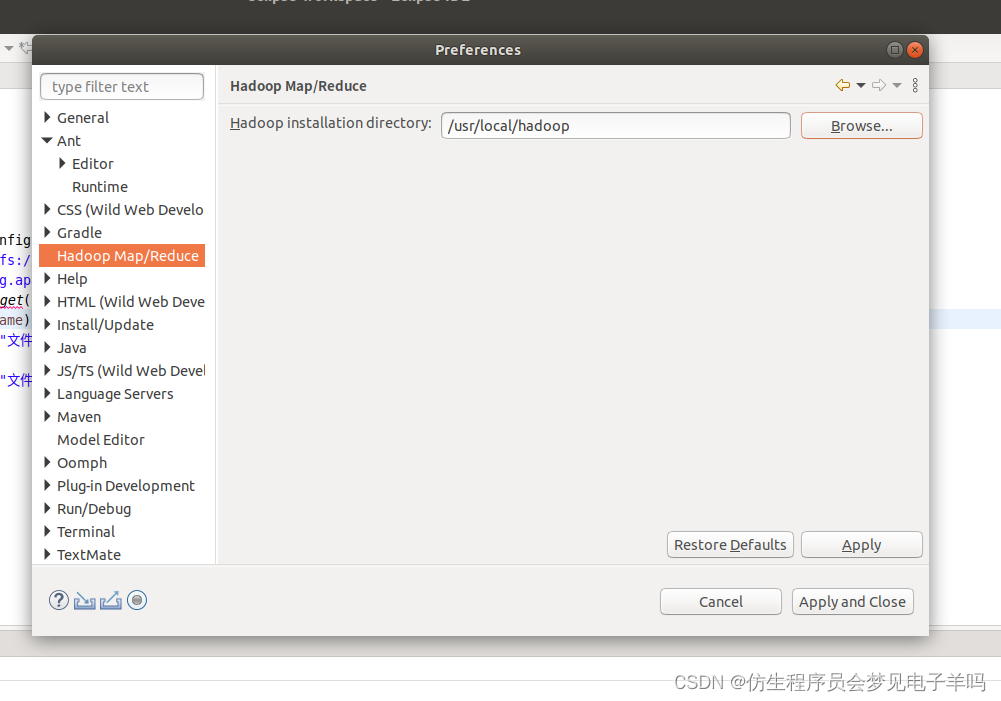
第一步:选择 Window 菜单下的 Preference。
此时会弹出一个窗体,窗体的左侧会多出 Hadoop Map/Reduce 选项,点击此选项,选择 Hadoop 的安装目录(如/usr/local/hadoop,Ubuntu不好选择目录,直接输入就行)。
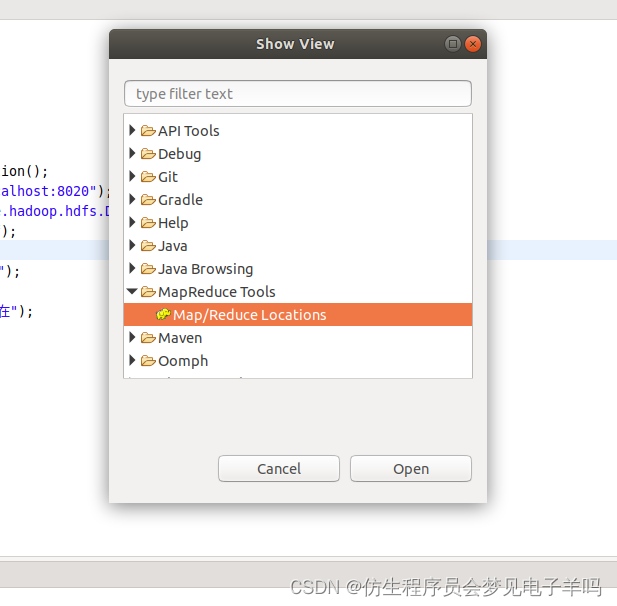
第二步:切换 Map/Reduce 开发视图,选择 Window 菜单下选择 Open Perspective -> Other(CentOS 是 Window -> Perspective -> Open Perspective -> Other),弹出一个窗体,从中选择 Map/Reduce 选项即可进行切换。
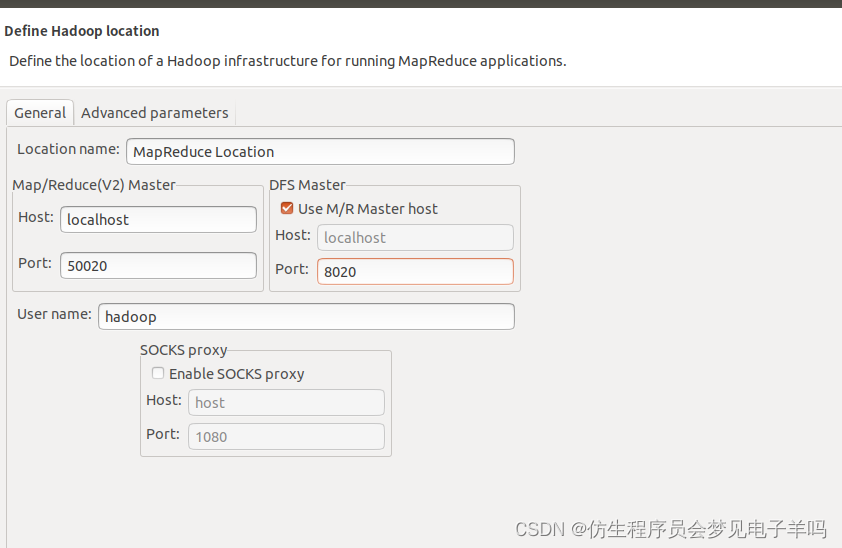
第三步:建立与 Hadoop 集群的连接,点击 Eclipse软件右下角的 Map/Reduce Locations 面板,在面板中单击右键,选择 New Hadoop Location。

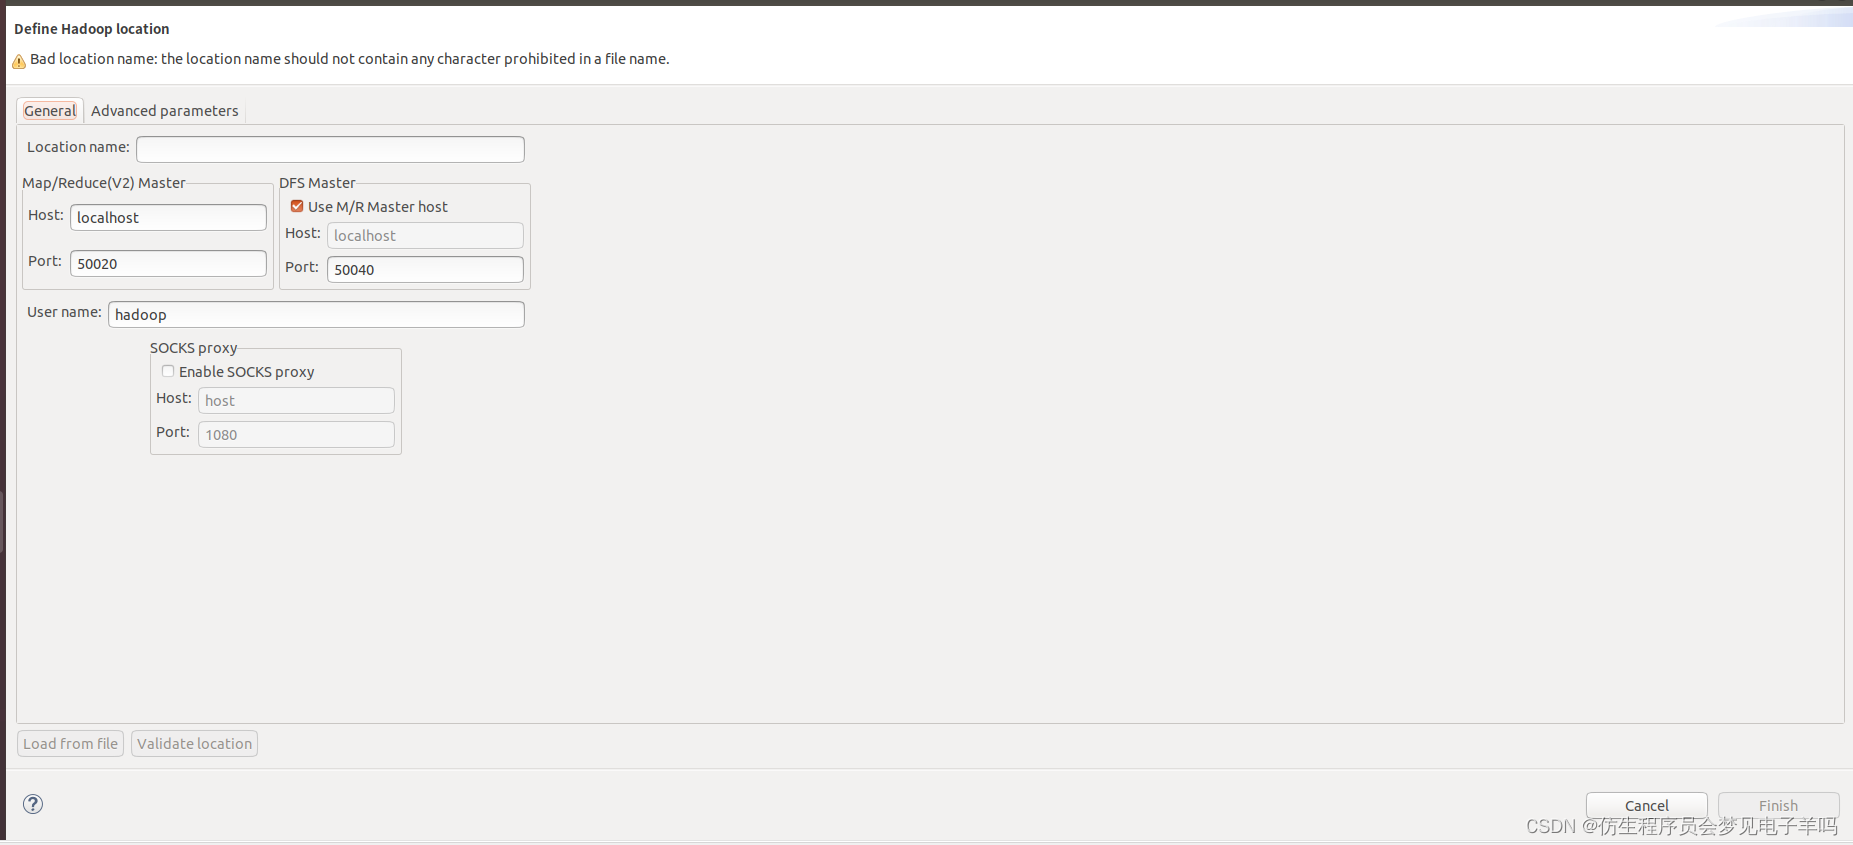
最后的设置如下图所示:
在 Eclipse 中操作 HDFS 中的文件
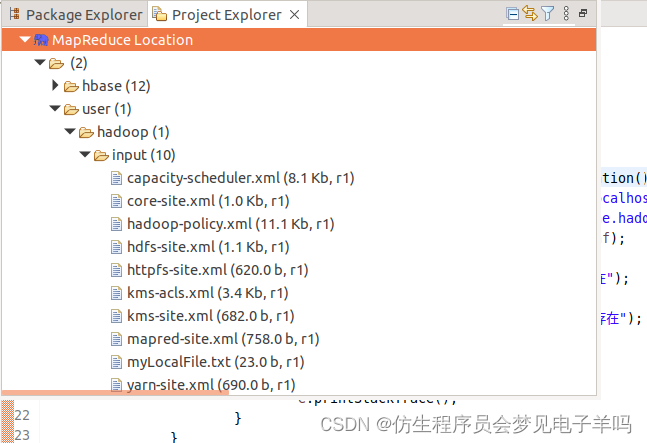
配置好后,点击左侧 Project Explorer 中的 MapReduce Location (点击三角形展开)就能直接查看 HDFS 中的文件列表了(HDFS 中要有文件,如下图是 WordCount 的输出结果),双击可以查看内容,右键点击可以上传、下载、删除 HDFS 中的文件,无需再通过繁琐的 hdfs dfs -ls 等命令进行操作了。
以下output/part-r-00000文件记录了输出结果。
如果无法查看,可右键点击 Location 尝试 Reconnect 或重启 Eclipse。
Tips: HDFS 中的内容变动后,Eclipse 不会同步刷新,需要右键点击 Project Explorer中的 MapReduce Location,选择 Refresh,才能看到变动后的文件。
在 Eclipse 中创建 MapReduce 项目
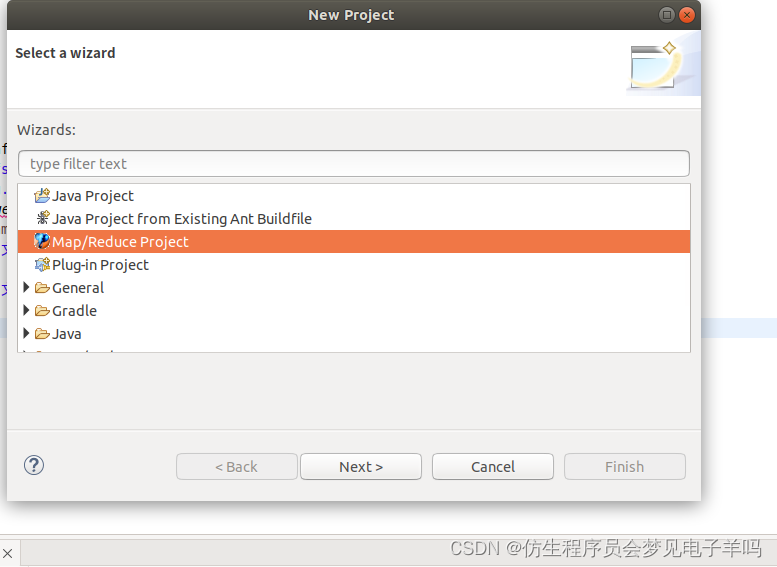
点击 File 菜单,选择 New -> Project…:
选择 Map/Reduce Project,点击 Next。
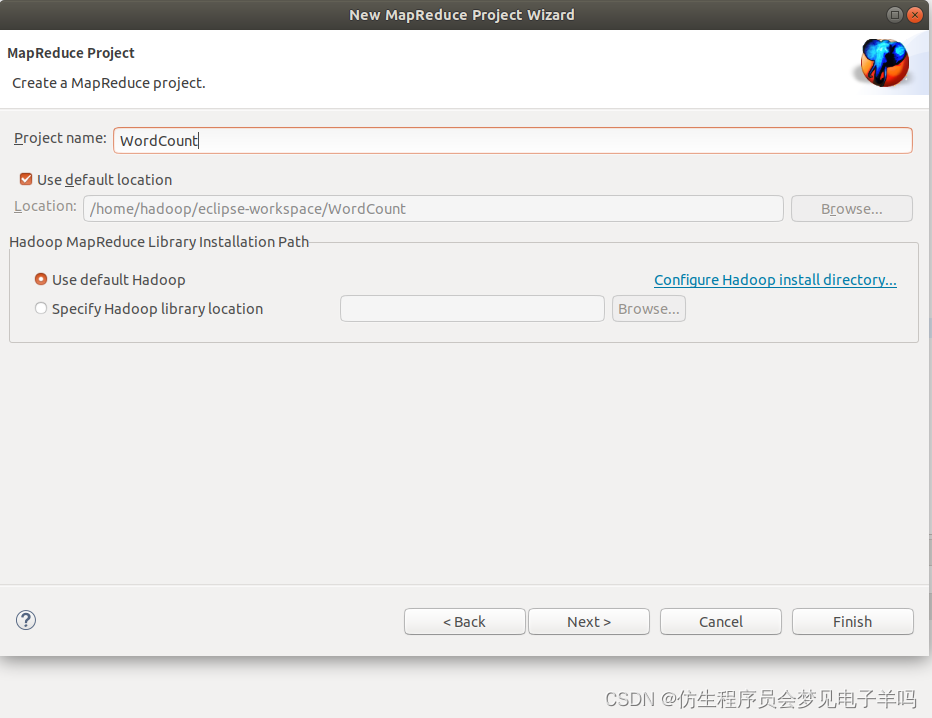
填写 Project name 为 WordCount 即可,点击 Finish 就创建好了项目。
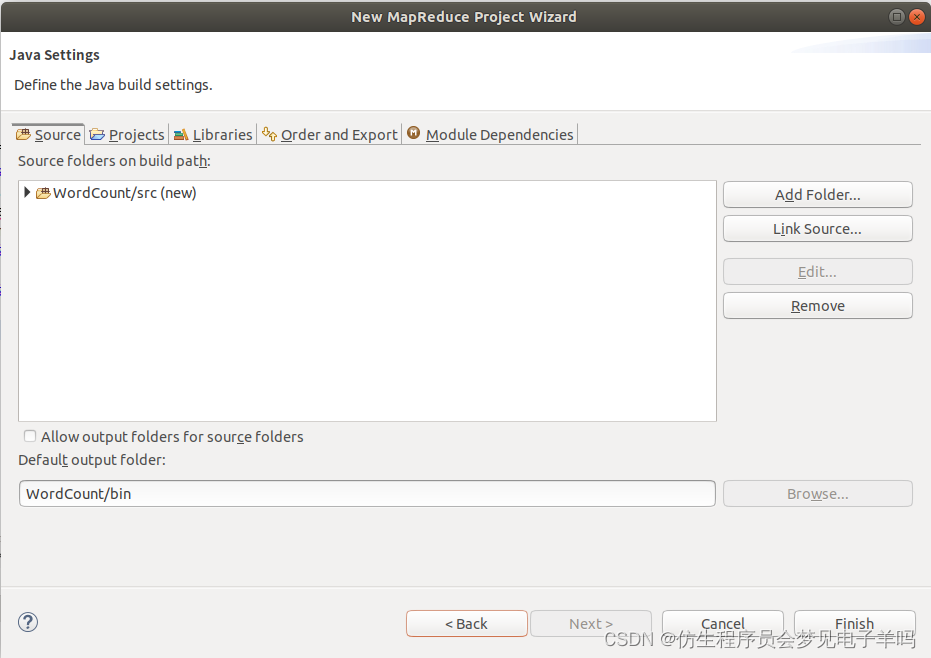
此时在左侧的 Project Explorer 就能看到刚才建立的项目了。

接着右键点击刚创建的 WordCount 项目,选择 New -> Class
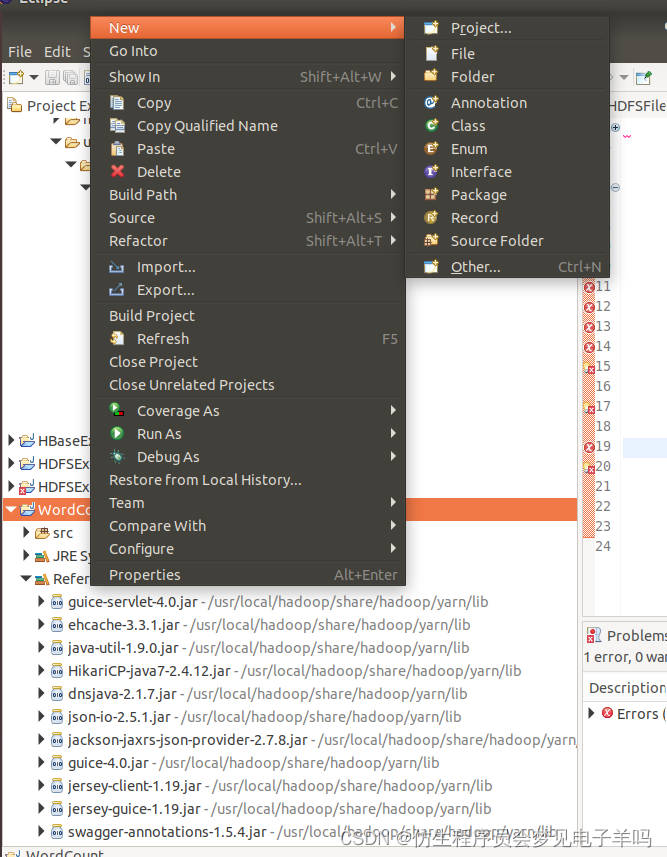
需要填写两个地方:在 Package 处填写 org.apache.hadoop.examples;在 Name 处填写 WordCount。
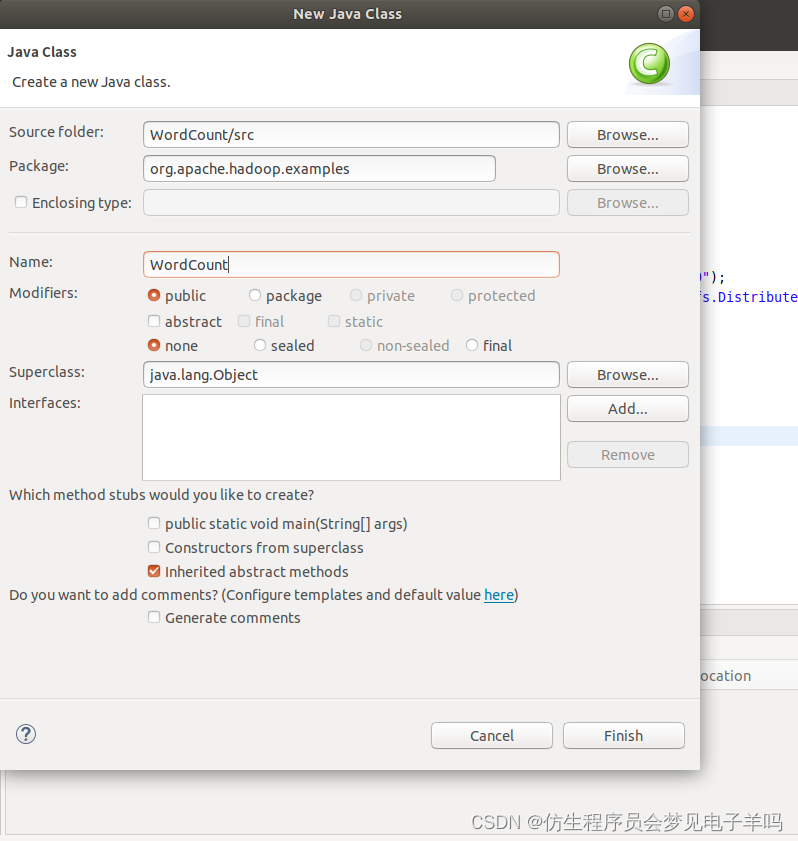
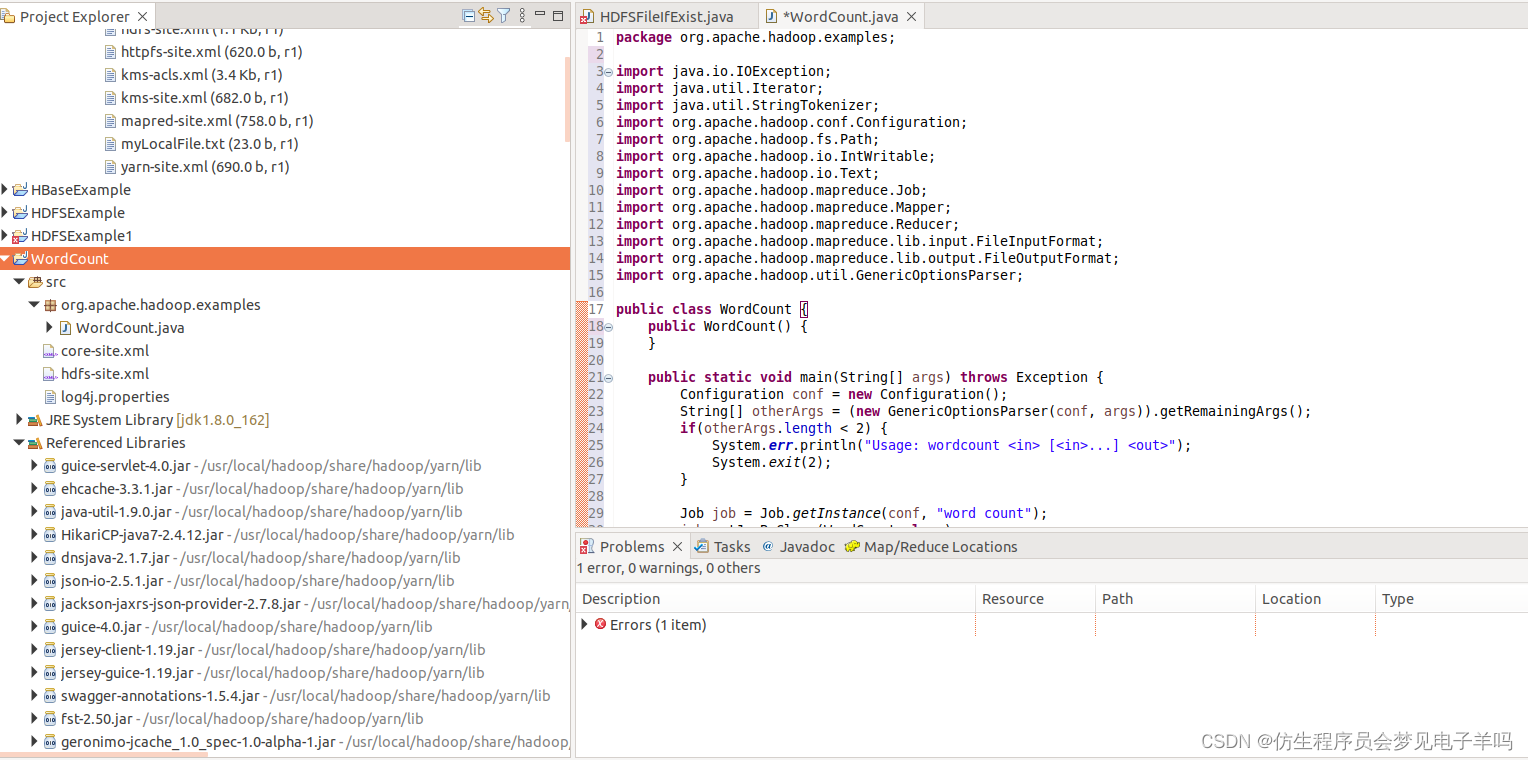
创建 Class 完成后,在 Project 的 src 中就能看到 WordCount.java 这个文件。将如下 WordCount 的代码复制到该文件中。
package org.apache.hadoop.examples;

import java.io.IOException;
import java.util.Iterator;
import java.util.StringTokenizer;
import org.apache.hadoop.conf.Configuration;
import org.apache.hadoop.fs.Path;
import org.apache.hadoop.io.IntWritable;
import org.apache.hadoop.io.Text;
import org.apache.hadoop.mapreduce.Job;
import org.apache.hadoop.mapreduce.Mapper;
import org.apache.hadoop.mapreduce.Reducer;
import org.apache.hadoop.mapreduce.lib.input.FileInputFormat;
import org.apache.hadoop.mapreduce.lib.output.FileOutputFormat;
import org.apache.hadoop.util.GenericOptionsParser;

public class WordCount {


    public WordCount() {


    }

    public static void main(String[] args) throws Exception {


        Configuration conf = new Configuration();
        String[] otherArgs = (new GenericOptionsParser(conf, args)).getRemainingArgs();
        if(otherArgs.length < 2) {


            System.err.println("Usage: wordcount <in> [<in>...] <out>");
            System.exit(2);
        }

        Job job = Job.getInstance(conf, "word count");
        job.setJarByClass(WordCount.class);
        job.setMapperClass(WordCount.TokenizerMapper.class);
        job.setCombinerClass(WordCount.IntSumReducer.class);
        job.setReducerClass(WordCount.IntSumReducer.class);
        job.setOutputKeyClass(Text.class);
        job.setOutputValueClass(IntWritable.class);

        for(int i = 0; i < otherArgs.length - 1; ++i) {


            FileInputFormat.addInputPath(job, new Path(otherArgs[i]));
        }

        FileOutputFormat.setOutputPath(job, new Path(otherArgs[otherArgs.length - 1]));
        System.exit(job.waitForCompletion(true)?0:1);
    }

    public static class IntSumReducer extends Reducer<Text, IntWritable, Text, IntWritable> {


        private IntWritable result = new IntWritable();

        public IntSumReducer() {


        }

        public void reduce(Text key, Iterable<IntWritable> values, Reducer<Text, IntWritable, Text, IntWritable>.Context context) throws IOException, InterruptedException {


            int sum = 0;

            IntWritable val;
            for(Iterator i$ = values.iterator(); i$.hasNext(); sum += val.get()) {


                val = (IntWritable)i$.next();
            }

            this.result.set(sum);
            context.write(key, this.result);
        }
    }

    public static class TokenizerMapper extends Mapper<Object, Text, Text, IntWritable> {


        private static final IntWritable one = new IntWritable(1);
        private Text word = new Text();

        public TokenizerMapper() {


        }

        public void map(Object key, Text value, Mapper<Object, Text, Text, IntWritable>.Context context) throws IOException, InterruptedException {


            StringTokenizer itr = new StringTokenizer(value.toString());

            while(itr.hasMoreTokens()) {


                this.word.set(itr.nextToken());
                context.write(this.word, one);
            }

        }
    }
}
通过 Eclipse 运行 MapReduce
在运行 MapReduce 程序前,还需要执行一项重要操作(也就是上面提到的通过复制配置文件解决参数设置问题):将 /usr/local/hadoop/etc/hadoop 中将有修改过的配置文件(如伪分布式需要 core-site.xml 和 hdfs-site.xml),以及 log4j.properties 复制到 WordCount 项目下的 src 文件夹(~/workspace/WordCount/src)中:
cp /usr/local/hadoop/etc/hadoop/core-site.xml ~/workspace/WordCount/src
cp /usr/local/hadoop/etc/hadoop/hdfs-site.xml ~/workspace/WordCount/src
cp /usr/local/hadoop/etc/hadoop/log4j.properties ~/workspace/WordCount/src
这里写代码有权限问题,我们直接在图形化界面上复制:
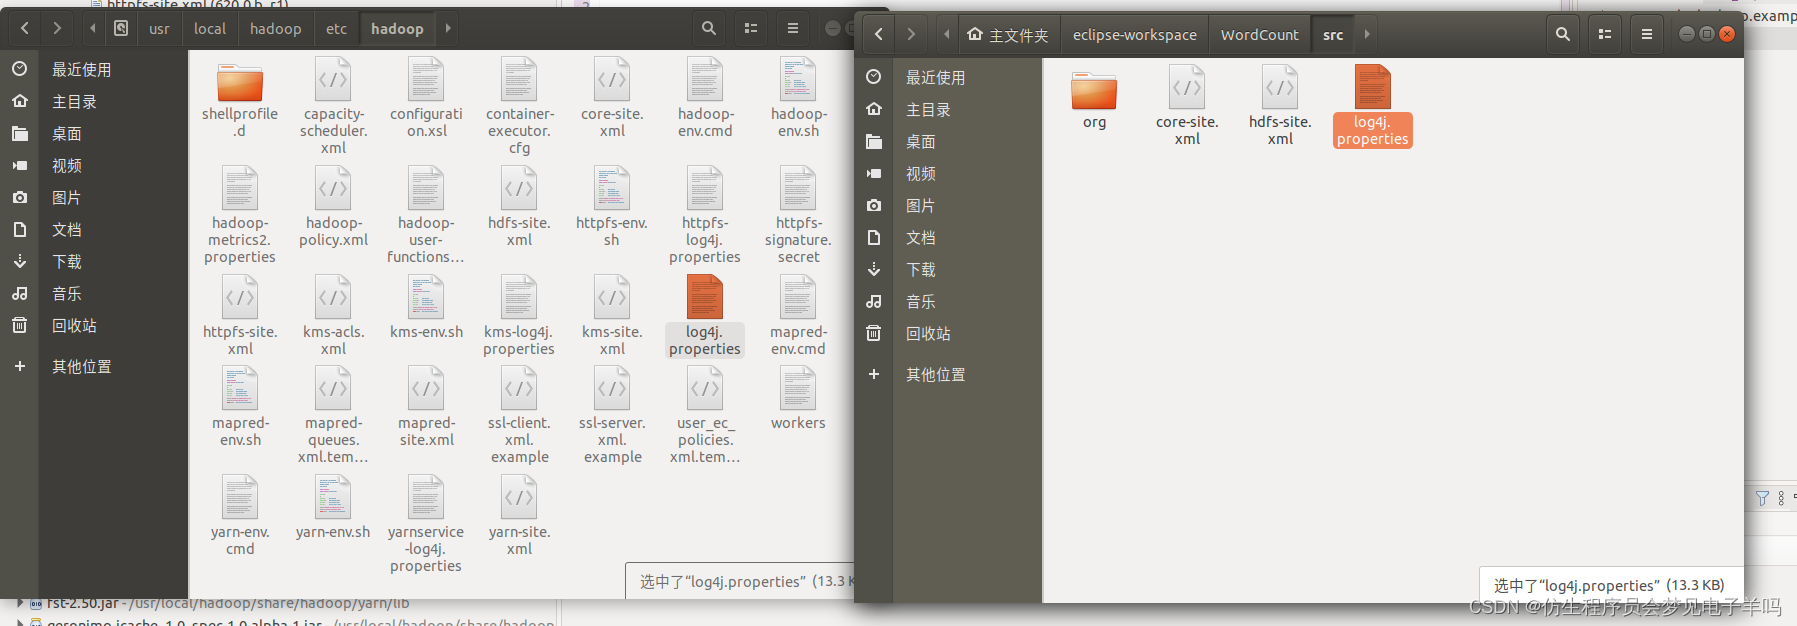
复制完成后,务必右键点击 WordCount 选择 refresh 进行刷新(不会自动刷新,需要手动刷新),可以看到文件结构如下所示:
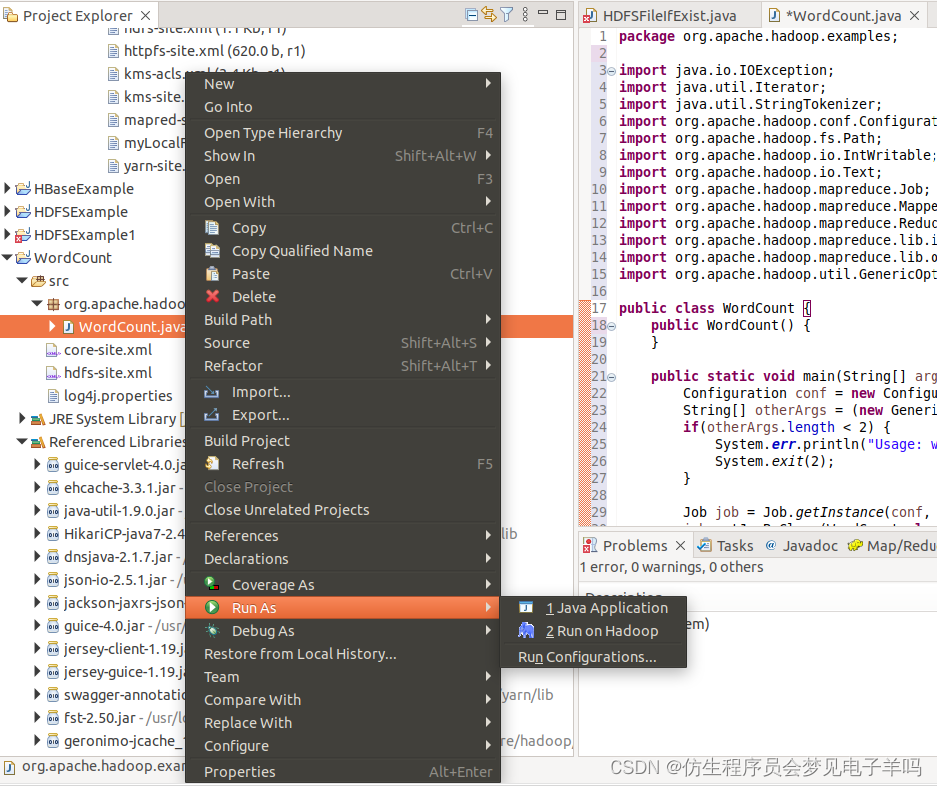
点击工具栏中的 Run 图标,或者右键点击 Project Explorer 中的 WordCount.java,选择 Run As -> Run on Hadoop,就可以运行 MapReduce 程序了。不过由于没有指定参数,运行时会提示 "Usage: wordcount ",需要通过Eclipse设定一下运行参数。
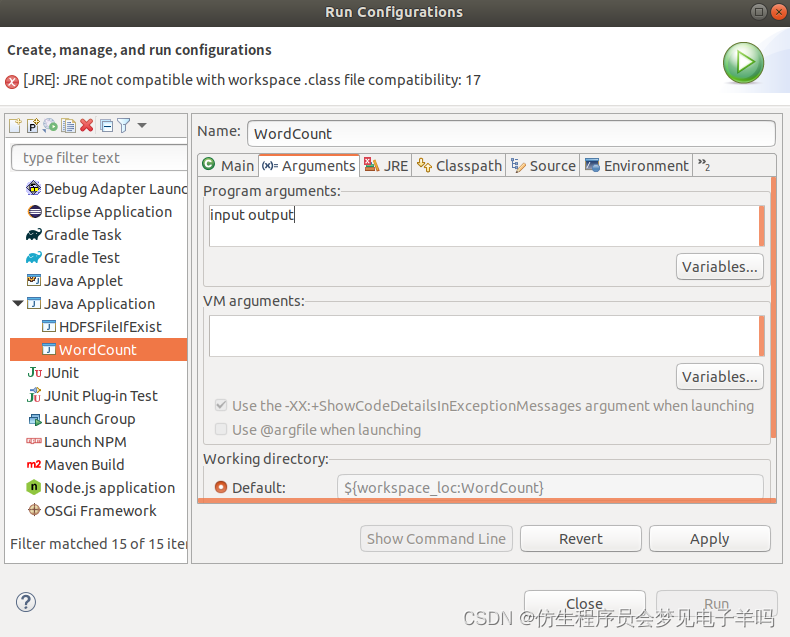
右键点击刚创建的 WordCount.java,选择 Run As -> Run Configurations,在此处可以设置运行时的相关参数(如果 Java Application 下面没有 WordCount,那么需要先双击 Java Application)。切换到 “Arguments” 栏,在 Program arguments 处填写 “input output” 就可以了。
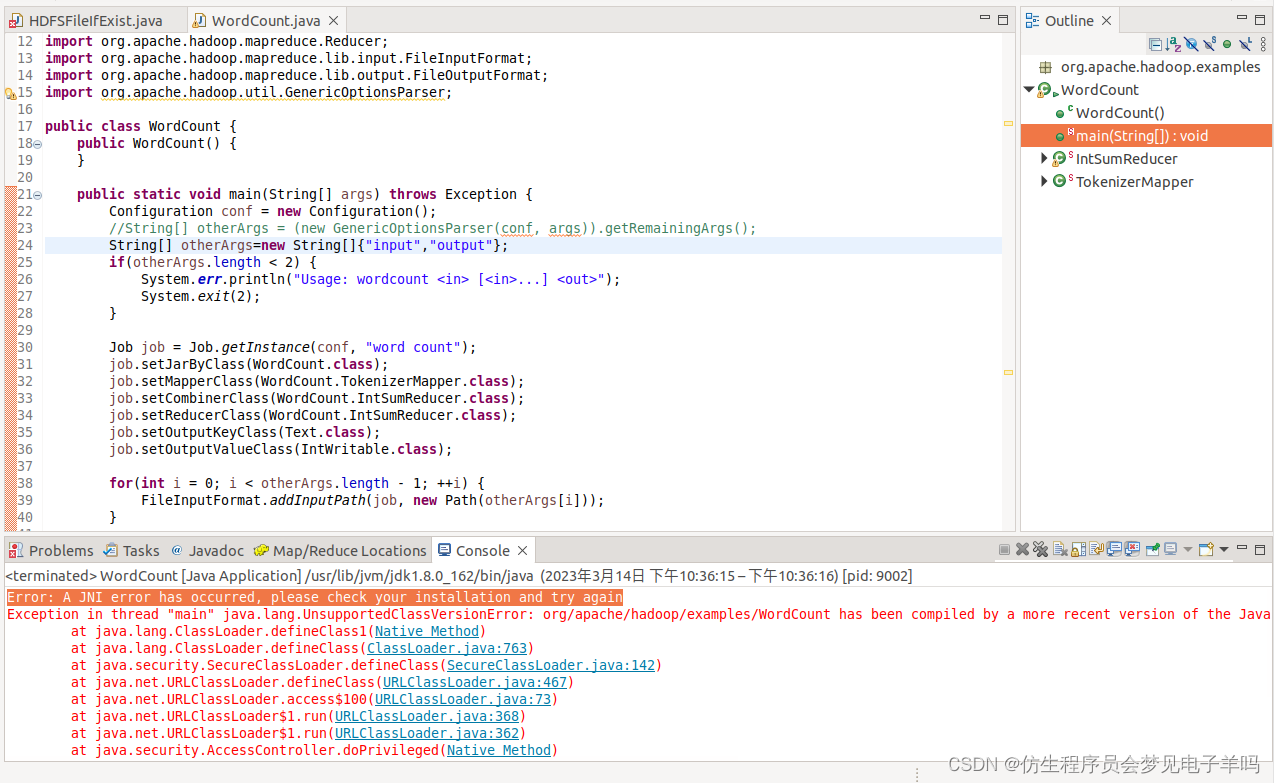
或者也可以直接在代码中设置好输入参数。可将代码 main() 函数的 String[] otherArgs = new GenericOptionsParser(conf, args).getRemainingArgs(); 改为:
// String[] otherArgs = new GenericOptionsParser(conf, args).getRemainingArgs();
String[] otherArgs=new String[]{

    "input","output"}; /* 直接设置输入参数 */
设定参数后,再次运行程序,可以看到运行成功的提示,刷新 DFS Location 后也能看到输出的 output 文件夹。
然后就可以使用 Eclipse 方便的进行 MapReduce程序的开发了。
问题及处理
1 无法解压并移动文件
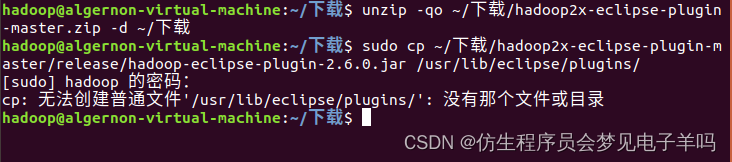
原因:eclipse是在ubuntu自带的snap商店里下载的,而snap有很高的权限,即使用sudo和su也不好修改。
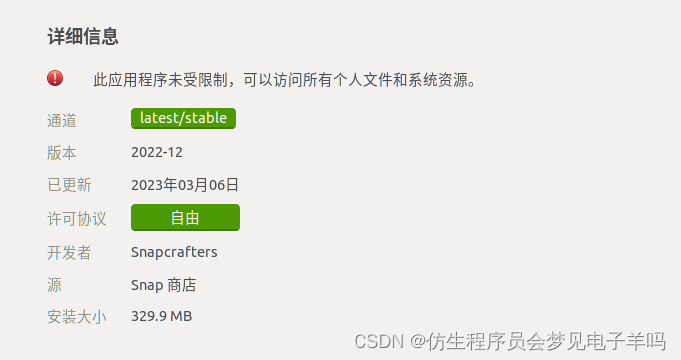
解决方法:从软件安装中心卸载,并使用安装包重新安装在对应地址。
sudo cp ~/下载/hadoop2x-eclipse-plugin-master/release/hadoop-eclipse-plugin-2.6.0.jar /snap/eclipse/66/plugins/
2 java安装包版本不匹配
解决方法:
https://blog.csdn.net/weixin_44156420/article/details/106906023
这是版本的问题,为了之后实验顺畅进行,就不强行更改了。
心得与体会
这次实验比较简单,最大的障碍是上文中的问题1:无法解压并移动文件,在经过一上午和老师的讨论,以及查找资料后发现,ubuntu软件安装中心的安装地址在snap下,而这个的权限很高,直接使用sudo无法修改,所以中午回去使用官网的安装包,解压安装一步到位。之后的流程就很顺畅了。