一.创建VUE3工程写移动端导航栏实例
1.1 项目大纲
需求:根据图片内容完成项目代码

先创建一个新的VUE项目,使用脚手架汇总vite方式创建。
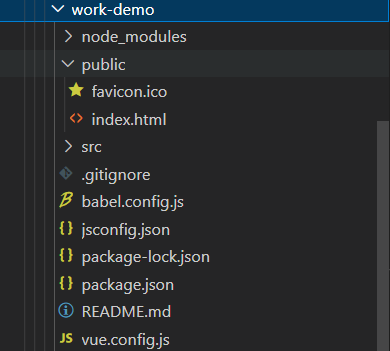
项目主入口为App.vue(父),创建TabControl.vue(子)组件。
需要的图片放到:(本作业使用动态src绑定)
Vue3\01_TypeScript\03_Vue3\work-demo\src\assets
1.2 App.vue
- template层:
<div>
    <tab-control :titles="titles" @titleClick="titleClick"></tab-control>
    <h2>{

   { contents[currentIndex] }}</h2>
</div>
解释:
tab-control是自定义标签,对应子组件。
:titles=“titles”,将titles的值传给子组件。
@titleClick=“titleClick”,点击事件,检查页面下标。
{ { contents[currentIndex] }}:对应页面的内容。
- JS代码层:
规范的VUE项目,这里应该写TS代码,由于企业课程没有讲ts所以这里使用JS。
import TabControl from './components/TabControl.vue';
export default {


  components: {


    TabControl
  }, data() {


    return {


      titles: [{

     name: "首页", urld: 22, urlo: 27 }, {

     name: "新品", urld: 23, urlo: 28 }, {

     name: "逛", urld: 24, urlo: 29 },
      {

     name: "购物车", urld: 25, urlo: 30 }, {

     name: "我的", urld: 26, urlo: 31 }],
      contents: ["1", "2", "3", "4", "5"],
      currentIndex: 0
    }
  },
  methods: {


    titleClick(index) {


      this.currentIndex = index;
    }
  }
}
解释:
import TabControl from ‘./components/TabControl.vue’;:引入子组件
components->TabControl:放行TabControl子组件
return : 返回定义值。
methods:方法,这里写自定义函数,目的,获取子组件传参,进行改变页面内容。
[{ name: “首页”, urld: 22, urlo: 27 }:titles解释:name为导航栏文字,urld为未选中图标,urlo为选中图标。
1.3 TabControl.vue
1.template层:
div盒子的类名用驼峰命名法,将单词之间使用-连接,改为小写。
<div class="tab-control-item" :class="{ active: currentIndex === index }" v-for="(title, index) in titles"
            v-bind:key="title" @click="itemClick(index)">
            <div v-if=" currentIndex === index">
                <img :src="require(`@/assets/${title.urlo}.png`)" alt="" style="width: 25px; height: 25px;"><br/>
            </div>
            <div v-if=" currentIndex != index">
                <img :src="require(`@/assets/${title.urld}.png`)" alt="" style="width: 25px; height: 25px;"><br/>
            </div>
            <span>{

   { title.name }}</span>
        </div>
主要代码解释:
:class="{ active: currentIndex === index }:主要作用于文字选中下标红色,如果currentIndex(当前页面下标)和index (循环下标)相同时,返回Ture,class标签新加active,下面css代码有所体现。
v-for=“(title, index) in titles” v-bind:key=“title” :使用for循环,将父页面的titles进行循环渲染(5个按钮文字)。
@click="itemClick(index):获取点击事件,获取当前页面下标。
下方代码解释:
使用判断语句,继续筛选渲染,如果下标相同说明选中改图标,显示选中图标,反之选中正常图标。
特殊说明:img标签在一开始发现无法正确的获取到地址,然后使用src动态绑定的方法,见下方代码:
<div v-if=" currentIndex === index">
    <img :src="require(`@/assets/${title.urlo}.png`)" alt="" style="width: 25px; height: 25px;"><br/>
</div>
<div v-if=" currentIndex != index">
    <img :src="require(`@/assets/${title.urld}.png`)" alt="" style="width: 25px; height: 25px;"><br/>
</div>
2.JS层:
export default {


    emits: ["titleClick"],
    props: {


        titles: {


            type: Array,
            default() {


                return []
            }
        }
    },
    data() {


        return {


            currentIndex: 0
        }
    },
    methods: {


        itemClick(index) {


            console.log(this.currentIndex);
            this.currentIndex = index;
            this.$emit("titleClick", index);
        }
    }
解释:
props:一个组件需要显式声明它所接受的 props,这样 Vue 才能知道外部传入的哪些是 props,哪些是透传 attribute
这里声明titles。
数据返回当前选中页面的下标。
methods:获取到当前页面下标,返回值给父组件。
3.CSS:CSS没有什么需要解释的。
<style scoped>
.tab-control {


    display: flex;
    flex-wrap:wrap;
}

.tab-control-item {


    flex: 1;
    text-align: center;
}

.tab-control-item.active {


    color: red;
}

.tab-control-item.active span {


    border-bottom: 3px solid red;
    padding: 5px 10px;
}
</style>
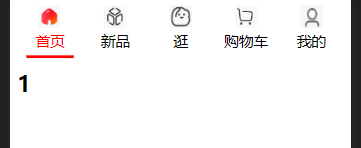
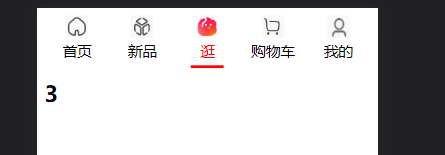
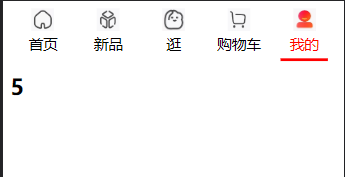
二.效果展示
测试没有问题,写的时候吧内容放到了下面,不过功能已经实现,这个并不重要,介意的直接把app.vue里的内容和导航栏互换一下位置,然后把导航栏进行一个绝对定位即可完成。