文章目录
使用Prometheus监控MySQL
1.实验环境
如表:
| 操纵系统 | 服务器IP | 主机名 |
|---|---|---|
| CentOS7.6 | 192.168.66.61(server端) | localhost61 |
| CentOS7.6 | 192.168.66.63(node端) | localhost63 |
1.1.查看相应的参数
1.查看操纵系统:
[root@localhost ~]# cat /etc/redhat-release
CentOS Linux release 7.6.1810 (Core)
2.查看hostname
[root@localhost ~]# hostnamectl set-hostname localhost61
[root@localhost ~]# bash
[root@localhost61 ~]# hostname
localhost61
3.查看IP
[root@localhost61 ~]# ifconfig | grep inet | awk 'NR=1{print $2}'
192.168.66.61
fe80::9d57:84cb:3342:a387
192.168.138.61
fe80::ac61:2cfd:e94e:212c
127.0.0.1
::1
2.安装MySQL5.7
2.1.配置yum源
1.安装MySQL5.7需要配置网络源和MySQL官网提供的rpm包
阿里云官网:
https://developer.aliyun.com/mirror/centos?spm=a2c6h.13651102.0.0.3e221b11w6NqlN

#从阿里云下载需要的网络源
[root@localhost61 ~]# yum -y install wget	#若没有wget命令,需要提前安装
[root@localhost61 ~]# wget -O /etc/yum.repos.d/CentOS-Base.repo https://mirrors.aliyun.com/repo/Centos-7.repo
[root@localhost61 ~]# ls /etc/yum.repos.d/
back  CentOS-Base.repo  CentOS-Media.repo
[root@localhost61 ~]# yum clean all	#清除系统所有的yum缓存
[root@localhost61 ~]# yum makecache	#生成yum缓存
[root@localhost61 ~]# yum update	#更新yum仓库
2.下载官网提供的rpm包
[root@localhost61 ~]# wget https://dev.mysql.com/get/mysql57-community-release-el7-9.noarch.rpm
[root@localhost61 ~]# ls
anaconda-ks.cfg    prometheus
mysql57-community-release-el7-9.noarch.rpm
2.2.安装MySQL之前的环境检查
注意:CentOS7之后的操纵系统中,不能直接安装MySQL,默认是mariadb,所以安装前要清空系统中是否有其他的MySQL包
[root@localhost61 ~]# rpm -qa | mysql
-bash: mysql: 未找到命令
[root@localhost61 ~]# rpm -qa | mariadb
-bash: mariadb: 未找到命令

#如果有按下列方法移除
[root@localhost61 ~]# rpm -e 软件包名 --nodeps

#查找老版本的MySQL相关的安装目录
[root@localhost61 ~]# find / -name mysql
/etc/selinux/targeted/active/modules/100/mysql
/usr/lib64/mysql
/usr/share/mysql
#查出来后删除
[root@localhost61 ~]# rm -rf /etc/selinux/targeted/active/modules/100/mysql
[root@localhost61 ~]# rm -rf /usr/lib64/mysql
[root@localhost61 ~]# rm -rf /usr/share/mysql
2.3.开始使用yum安装
1.使用rpm命令配置MySQL源
[root@localhost61 ~]# rpm -ivh mysql57-community-release-el7-9.noarch.rpm
警告:mysql57-community-release-el7-9.noarch.rpm: 头V3 DSA/SHA1 Signature, 密钥 ID 5072e1f5: NOKEY
准备中...                          ################################# [100%]
正在升级/安装...
   1:mysql57-community-release-el7-9  ################################# [100%]
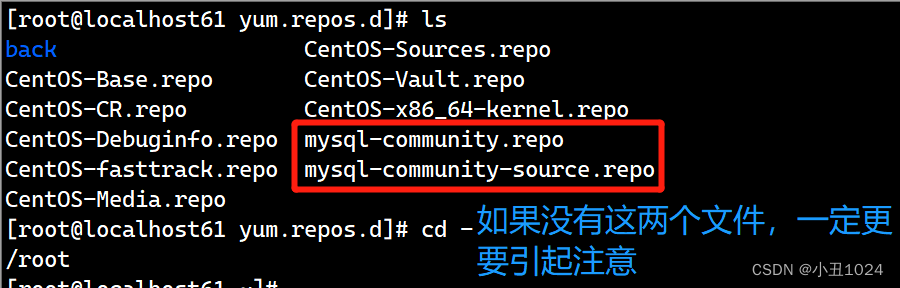
注意:安装完成后,会在/etc/yum.repo.d目录下生成MySQL-community.repo文件
[root@localhost61 ~]# cd /etc/yum.repos.d/
[root@localhost61 yum.repos.d]# ls
back                   CentOS-Sources.repo
CentOS-Base.repo       CentOS-Vault.repo
CentOS-CR.repo         CentOS-x86_64-kernel.repo
CentOS-Debuginfo.repo  mysql-community.repo
CentOS-fasttrack.repo  mysql-community-source.repo
CentOS-Media.repo
2.使用yum安装MySQL
[root@localhost61 ~]# yum -y install mysql-community-server
1.若安装过程中出现下列状况:
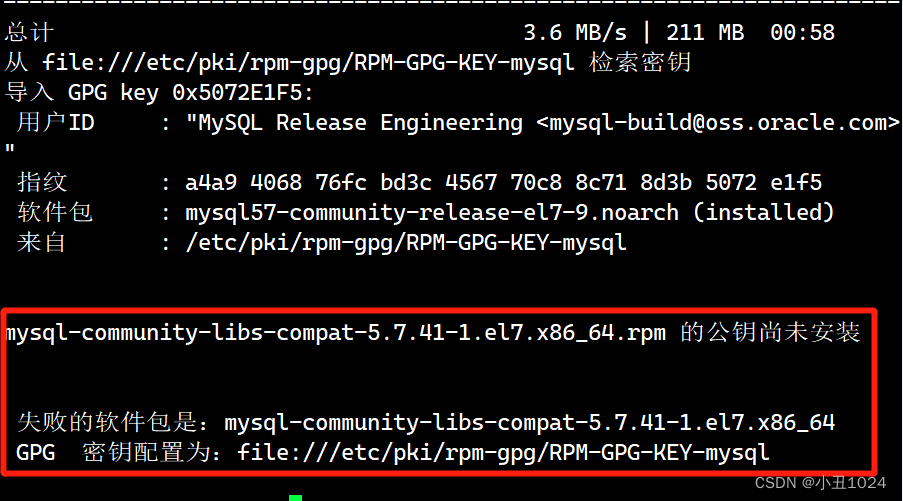
2.可以执行
#导入RPM-GPG-KEY-mysql-2022签名文件
[root@localhost61 ~]# rpm --import https://repo.mysql.com/RPM-GPG-KEY-mysql-2022
3.之后再继续安装一下
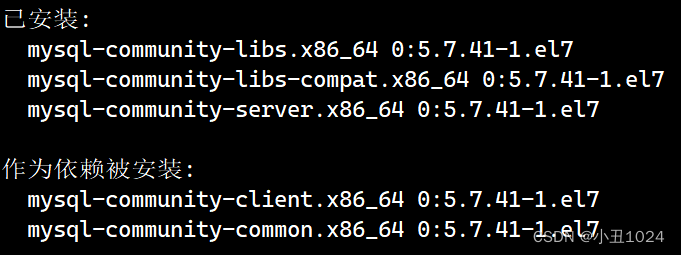
[root@localhost61 ~]# yum -y install mysql-community-server

#安装成功如图:
2.4.启动MySQL并测试
1.直接启动MySQL,并查看是否启动
[root@localhost61 ~]# systemctl start mysqld
[root@localhost61 ~]# systemctl status mysqld
● mysqld.service - MySQL Server
   Loaded: loaded (/usr/lib/systemd/system/mysqld.service; enabled; vendor preset: disabled)
   Active: active (running) since 二 2023-02-14 10:55:15 CST; 13s ago
     Docs: man:mysqld(8)
           http://dev.mysql.com/doc/refman/en/using-systemd.html
  Process: 75518 ExecStart=/usr/sbin/mysqld --daemonize --pid-file=/var/run/mysqld/mysqld.pid $MYSQLD_OPTS (code=exited, status=0/SUCCESS)
  Process: 75467 ExecStartPre=/usr/bin/mysqld_pre_systemd (code=exited, status=0/SUCCESS)
 Main PID: 75522 (mysqld)
   CGroup: /system.slice/mysqld.service
           └─75522 /usr/sbin/mysqld --daemonize --pid-file=/var/ru...

2月 14 10:55:13 localhost61 systemd[1]: Starting MySQL Server...
2月 14 10:55:15 localhost61 systemd[1]: Started MySQL Server.
2.设置MySQL的新密码
1.先找到原来的密码
[root@localhost61 ~]# grep "temporary password" /var/log/mysqld.log
[root@localhost61 ~]# mysql -uroot -p

2.然后修改密码
mysql> alter user 'root'@'localhost' identified by "Lilinbo123!";  #修改密码
Query OK, 0 rows affected (0.00 sec)
3.安装MySQL_exporter
3.1.MySQL_exporter介绍
广义上讲所有可以向Prometheus提供监控样本数据的程序都可以被称为一个exporter。而exporter的一个实例称为target
prometheus 通过轮询的方式定期从这些target中获取样本数据。
MySQL数据库的exporter 主要监控Mysql数据库的稳定性、吞吐量、连接情况、缓冲池使用情况、查询性能等各项指标,是我们压测时常常需要监控的一些指标。
3.2.MySQL_exporter的安装
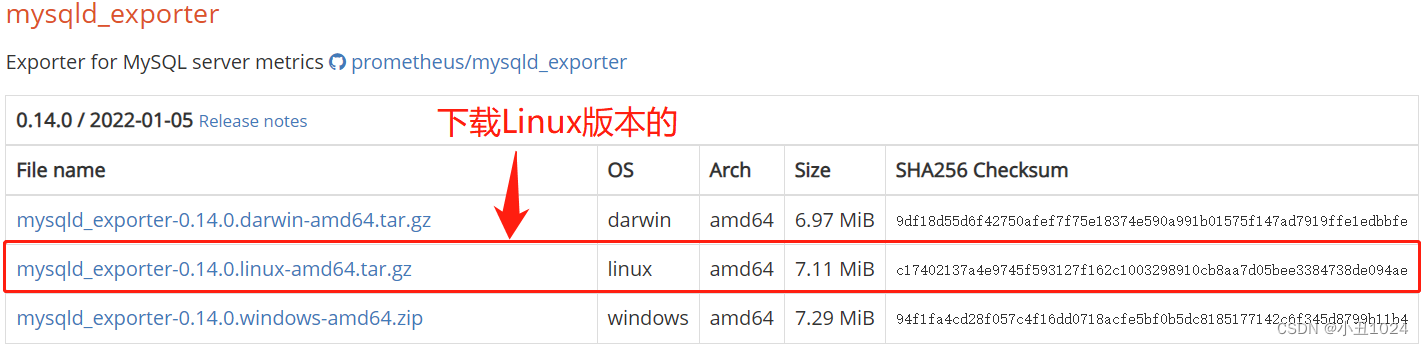
1.下载需要的MySQL_exporter软件包
MySQL_exporter软件包下载地址:
https://prometheus.io/download/
2.上传MySQL_exporter软件包
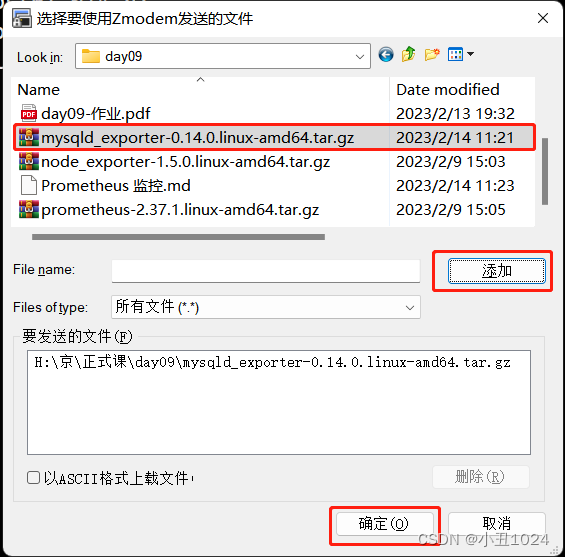
[root@localhost61 ~]# ls
anaconda-ks.cfg
mysql57-community-release-el7-9.noarch.rpm
mysqld_exporter-0.14.0.linux-amd64.tar.gz
prometheus
3.解压MySQL_exporter软件包
[root@localhost61 ~]# tar -xvf mysqld_exporter-0.14.0.linux-amd64.tar.gz
[root@localhost61 ~]# mv mysqld_exporter-0.14.0.linux-amd64 mysqld_exporter
[root@localhost61 ~]# cd mysqld_exporter


#可以看到mysql_exporter解压后,有个可执行文件:
[root@localhost61 mysqld_exporter]# ls
LICENSE  mysqld_exporter  NOTICE
4.设置MySQL账户,用于数据收集
1.在这里我们创建要给用户:MySQL_monitor 从本地访问数据库,使用密码:Lilinbo123!来访问数据库
[root@localhost61 ~]# mysql -uroot -pLilinbo123!
mysql: [Warning] Using a password on the command line interface can be insecure.
Welcome to the MySQL monitor.  Commands end with ; or \g.
Your MySQL connection id is 4
Server version: 5.7.41 MySQL Community Server (GPL)

Copyright (c) 2000, 2023, Oracle and/or its affiliates.

Oracle is a registered trademark of Oracle Corporation and/or its
affiliates. Other names may be trademarks of their respective
owners.

Type 'help;' or '\h' for help. Type '\c' to clear the current input statement.

mysql>
mysql> grant select,replication client,process ON *.* to 'mysql_monitor'@'localhost' identified by 'Lilinbo123!';#
Query OK, 0 rows affected, 1 warning (0.00 sec)

mysql> flush privileges;	#刷新权限
Query OK, 0 rows affected (0.00 sec)
2.我们在目录MySQL_exporter目录中创建配置文件,把刚刚设置好的用户名和密码写入进去:这个配置文件默认是没有的,需要手动创建
[root@localhost61 ~]# cd mysqld_exporter
[root@localhost61 mysqld_exporter]# vim my.conf
[client]
user=mysql_monitor
password=Lilinbo123
[root@localhost61 mysqld_exporter]# cat my.conf
[client]
user=mysql_monitor
password=Lilinbo123!
3.3.启动MySQL_exporter
1.启动的时候要指定刚刚设置的配置文件
[root@localhost61 mysqld_exporter]# nohup ./mysqld_exporter --config.my-cnf=/root/mysqld_exporter/my.conf &
[1] 74995
[root@localhost61 mysqld_exporter]# nohup: 忽略输入并把输出追加到"nohup.out"
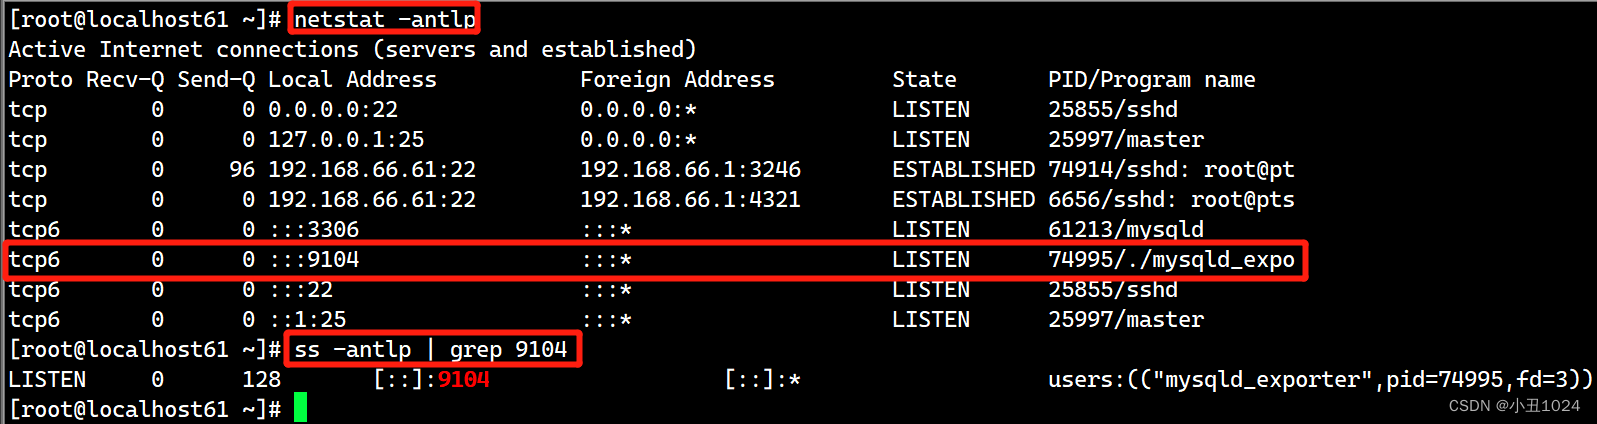
2.查看是否启动成功
[root@localhost61 ~]# ss -antlp | grep 9104
LISTEN     0      128       [::]:9104                  [::]:*                   users:(("mysqld_exporter",pid=74995,fd=3))

#看到端口号,说明启动成功,接下来,需要到server端配置文件中指定IP和端口
3.4.配置server服务端拉取数据
1.修改配置文件
前两个我们在之前的文章中配置过了,下面只需要修改最后三行即可
[root@localhost61 ~]# cd prometheus/
[root@localhost61 prometheus]# vim prometheus.yml
文章末尾添加:
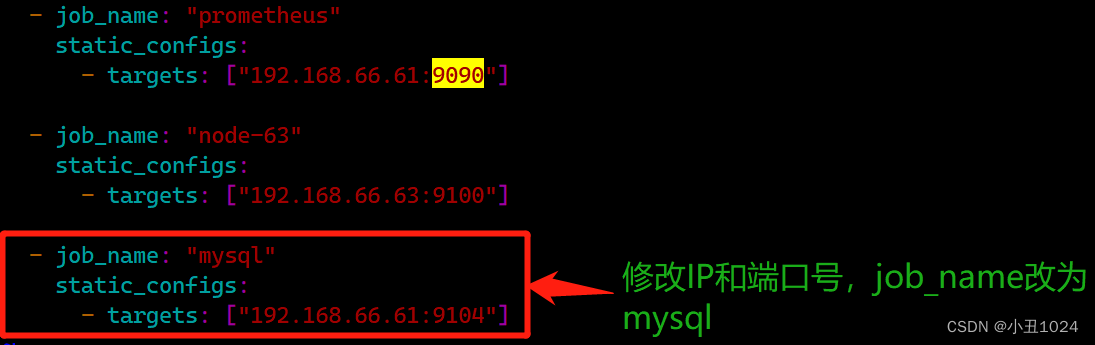
- job_name: "mysql_exporter"
static_configs:
- targets: ["192.168.66.61:9104"]
修改方式如图:
修改IP和端口号,job_name改为mysql
2.修改配置文件后重启Prometheus
[root@localhost61 prometheus]# ./prometheus &

3.5.到网页端查看监控情况
1.从下图可以看到,已经监控到MySQL了
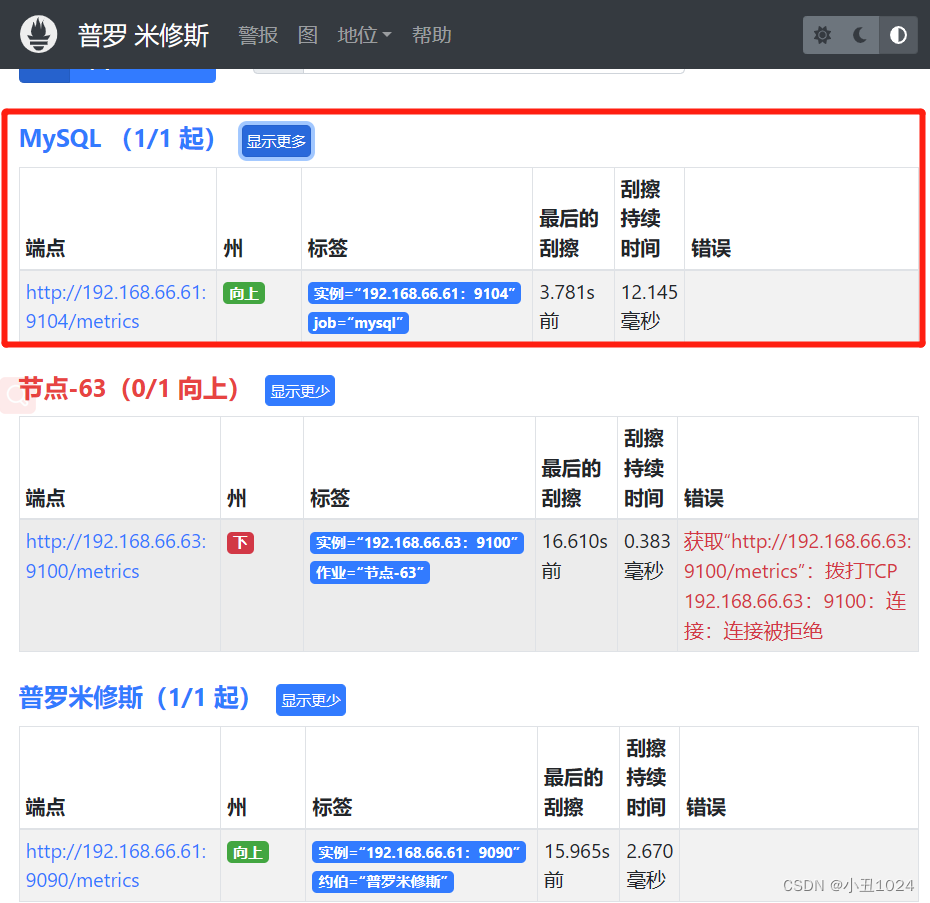
三个常见的单词:
Alerts(警报):可以看到自定义的告警规则。

Graph(图):按查询条件进行数据查询,并生成指定图形。

Status(状态/地位):可以查看配置信息、规则、节点目标等,其中Targets表示本地和远端的监控,可以查看各节点运行情况
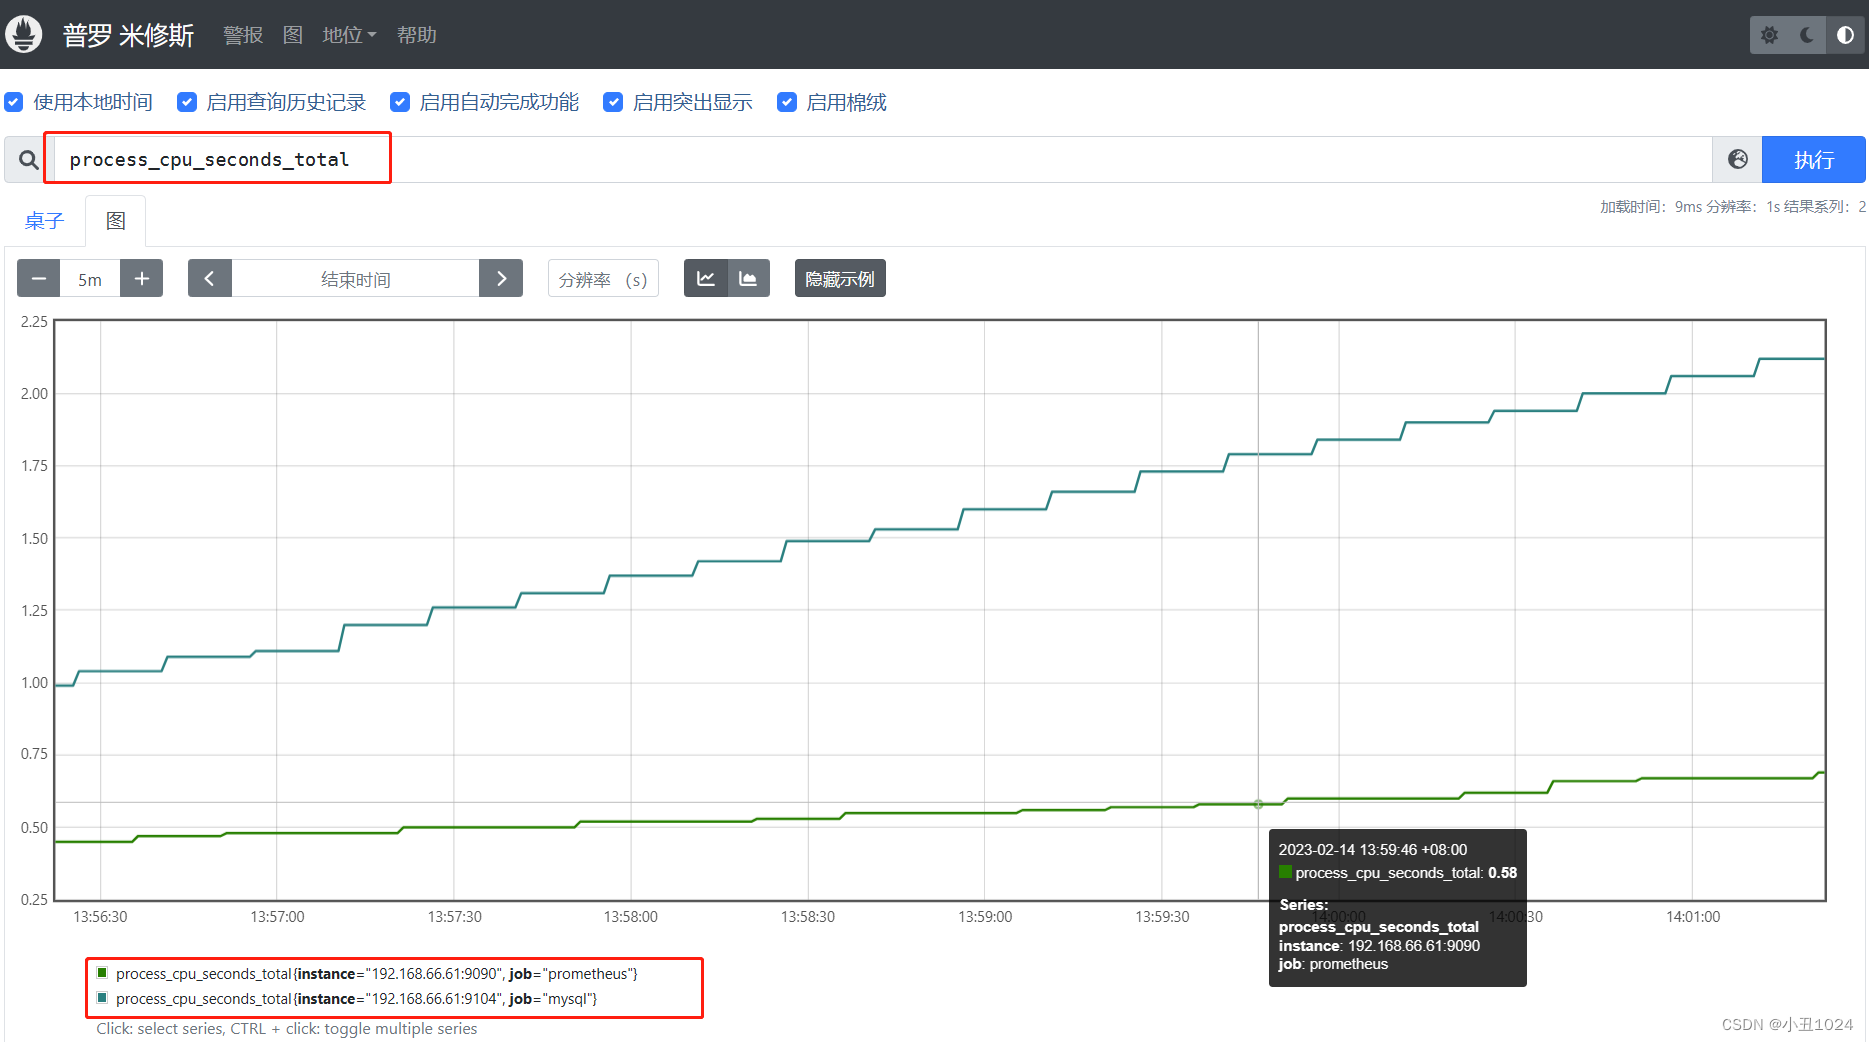
2.通过控制面板查看:process_cpu_seconds_total,查看CPU指标
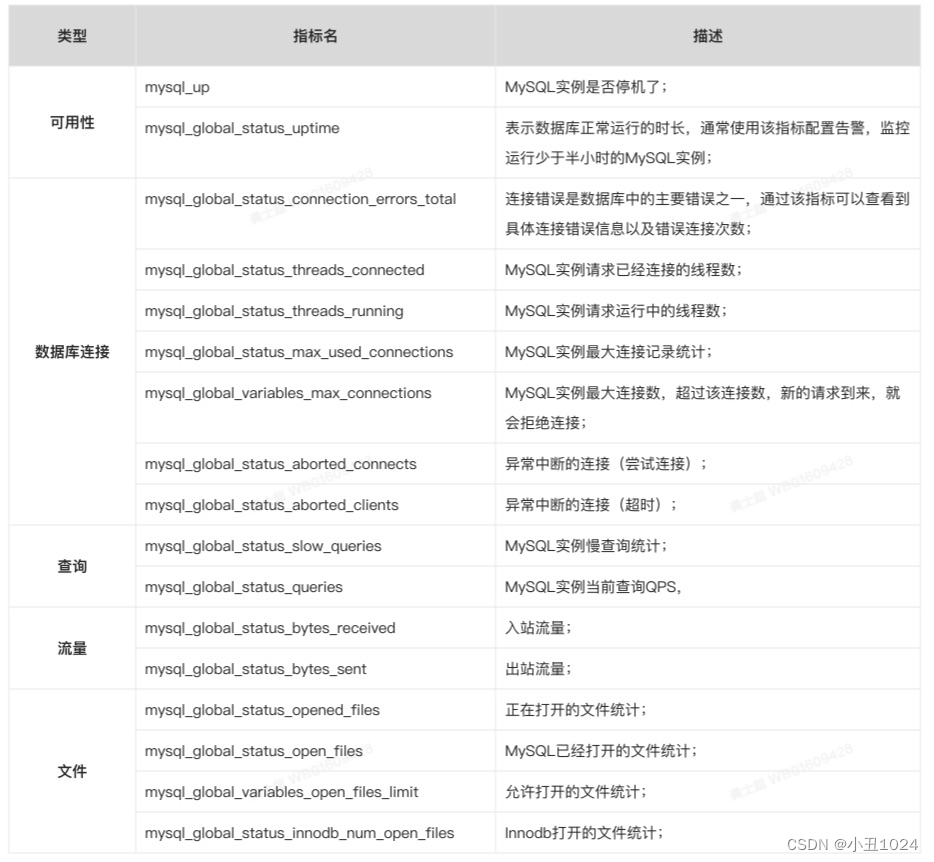
4.MySQL中常见的监控指标:
Google 提出系统监控的 Latency,Traffic,Saturation,Errors 作为黄金指标。而 MySQL 作为资源类服务系统出现,我们将之进行细化,从可用性、数据库连接、查询、流量、文件五大维度入手: