我本人比较常用的单片机就是ESP32了,因为它相较于Arduino来说,板子自身就自带WIFI模块,就不需要想Arduino那样再去外接一个ESP8266去实现联网了。相较于STM32来说,ESP32比较小巧,而且使用起来比较简单。

1、ESP32代码
首先是对ESP32代码进行编写,在这里我找了ESP32的库文件,但遗憾的是,我在ESP32库文件中找到的是一个GET请求的例程。这与我原本的想法并不一直,我是打算使用POST请求的。
所以我去找了以下Arduino开发板的库文件,在它的库文件中,我找到了POST请求的例程。最后我将二者相结合,制作出了ESP32的POST请求的代码。如下:
/**
   PostHTTPClient.ino

    Created on: 21.11.2016

*/

#include <WiFi.h>

#include <HTTPClient.h>
/* this can be run with an emulated server on host:
        cd esp8266-core-root-dir
        cd tests/host
        make ../../libraries/ESP8266WebServer/examples/PostServer/PostServer
        bin/PostServer/PostServer
   then put your PC's IP address in SERVER_IP below, port 9080 (instead of default 80):
*/
#define SERVER_IP "10.0.1.7:9080" // 这里填写你的接口的ip地址以及端口号

#ifndef STASSID
#define STASSID "your-ssid" //填写你需要连接的WIFI名称
#define STAPSK  "your-password"//填写你需要连接的WIFI密码
#endif

void setup() {

  Serial.begin(9600);    //设置波特率

  Serial.println();
  Serial.println();
  Serial.println();

  WiFi.begin(STASSID, STAPSK);

  while (WiFi.status() != WL_CONNECTED) {
    delay(500);
    Serial.print(".");
  }
  Serial.println("");
  Serial.print("Connected! IP address: ");
  Serial.println(WiFi.localIP());

}

void loop() {
  // wait for WiFi connection
  if ((WiFi.status() == WL_CONNECTED)) {

    WiFiClient client;
    HTTPClient http;

    Serial.print("[HTTP] begin...\n");
    // configure traged server and url
    http.begin(client, "http://" SERVER_IP "/postplain/"); //这里是你所需要请求的接口的url
    http.addHeader("Content-Type", "application/json");//设置请求头

    Serial.print("[HTTP] POST...\n");
    // start connection and send HTTP header and body
    int httpCode = http.POST("{\"mailBox\":\"[email protected]\" , \"mailTopic\":\"测试\" , \"mailContent\":\"内容\" }");      //所请求接口所需要的参数,由于我想实现的是邮件发送,所以我请求的接口的参数便是我的QQ邮箱、邮件主题、邮件内容

    // httpCode will be negative on error
    if (httpCode == 200) { //配置接口返回值,我的接口设置成功,则返回200
      // HTTP header has been send and Server response header has been handled
      Serial.printf("[HTTP] POST... code: %d\n", httpCode);

      // file found at server
      if (httpCode == HTTP_CODE_OK) {
        const String& payload = http.getString();
        Serial.println("received payload:\n<<");
        Serial.println(payload);
        Serial.println(">>");
      }
    } else {
      Serial.printf("[HTTP] POST... failed, error: %s\n", http.errorToString(httpCode).c_str());
    }

    http.end();
  }

  delay(10000);
}
2、后端接口
简单的实现了邮件发送,并没有过多的考虑其他的需求,所以代码也比较简单
package com.chen.sendmail.controller;
import cn.hutool.core.util.StrUtil;
import com.chen.sendmail.common.chen.LimitRequest;
import com.chen.sendmail.pojo.MailInfo;
import org.springframework.beans.factory.annotation.Value;
import org.springframework.mail.MailSendException;
import org.springframework.mail.SimpleMailMessage;
import org.springframework.mail.javamail.JavaMailSender;
import org.springframework.web.bind.annotation.PostMapping;
import org.springframework.web.bind.annotation.RequestBody;
import org.springframework.web.bind.annotation.RequestMapping;
import org.springframework.web.bind.annotation.RestController;
import javax.annotation.Resource;
@RequestMapping("/mail")
@RestController
public class MailController {
@Value("${mail.fromMail.sender}")
private String sender;// 发送者
@Resource
private JavaMailSender javaMailSender;
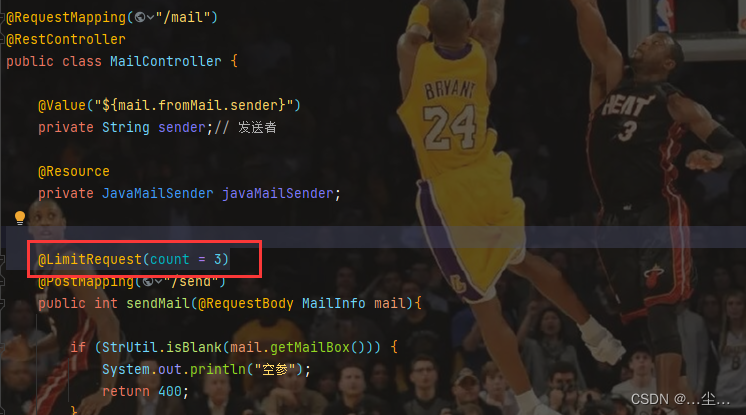
@LimitRequest(count = 3)
@PostMapping("/send")
public int sendMail(@RequestBody MailInfo mail){
if (StrUtil.isBlank(mail.getMailBox())) {
System.out.println("空参");
return 400;
}
SimpleMailMessage message = new SimpleMailMessage();
message.setFrom(sender);
message.setTo(mail.getMailBox());
message.setSubject(mail.getMailTopic());// 标题
message.setText(mail.getMailContent());// 内容
try {
javaMailSender.send(message);
System.out.println("发送成功");
return 200;
} catch (MailSendException e) {
System.out.println("目标邮箱不存在");
return 401;
} catch (Exception e) {
System.out.println("发送失败");
return 402;
}
}
}
这里涉及到Spring Boot邮件发送的相关内容,如果你对这方面不是很了解的话,可以去看看我的另一篇博客,里面讲的应该也算比较详细的了(我自认为)
附上链接:Spring Boot实现QQ邮件发送,用户注册功能——前后端分离版
3、对后端接口做限制
因为我的硬件是没4秒上传一次数据,所以可能会导致接口请求的比较频繁,这样可能会导致我们的接口被同一个事件占用过多的资源。所以我给它做了一个限制,
- 添加依赖
        <!-- expiringmap -->
        <dependency>
            <groupId>net.jodah</groupId>
            <artifactId>expiringmap</artifactId>
            <version>0.5.10</version>
</dependency>- 自定义注解
package com.chen.sendmail.common.chen;


import java.lang.annotation.*;

@Documented
@Target(ElementType.METHOD) // 说明该注解只能放在方法上面
@Retention(RetentionPolicy.RUNTIME)
public @interface LimitRequest {

    long time() default 30000; // 限制时间 单位:毫秒
    int count() default 1; // 允许请求的次数

}
- 自定义AOP切面
对于AOP,相比学过Sping的同学都知道,什么是AOP
(1)面向切面编程(方面),利用 AOP 可以对业务逻辑的各个部分进行隔离,从而使得 业务逻辑各部分之间的耦合度降低,提高程序的可重用性,同时提高了开发的效率。
(2)通俗描述:不通过修改源代码方式,在主干功能里面添加新功能
package com.chen.sendmail.common.chen.aspect;


import com.chen.sendmail.common.chen.LimitRequest;
import net.jodah.expiringmap.ExpirationPolicy;
import net.jodah.expiringmap.ExpiringMap;
import org.aspectj.lang.ProceedingJoinPoint;
import org.aspectj.lang.annotation.Around;
import org.aspectj.lang.annotation.Aspect;
import org.aspectj.lang.annotation.Pointcut;
import org.springframework.stereotype.Component;
import org.springframework.web.context.request.RequestAttributes;
import org.springframework.web.context.request.RequestContextHolder;
import org.springframework.web.context.request.ServletRequestAttributes;

import javax.servlet.http.HttpServletRequest;
import java.util.concurrent.ConcurrentHashMap;
import java.util.concurrent.TimeUnit;

@Aspect
@Component
class LimitRequestAspect {

    private static ConcurrentHashMap<String, ExpiringMap<String, Integer>> book = new ConcurrentHashMap<>();

    // 定义切点
    // 让所有有@LimitRequest注解的方法都执行切面方法
    @Pointcut("@annotation(limitRequest)")
    public void excudeService(LimitRequest limitRequest) {
    }

    @Around("excudeService(limitRequest)")
    public Object doAround(ProceedingJoinPoint pjp, LimitRequest limitRequest) throws Throwable {

        // 获得request对象
        RequestAttributes ra = RequestContextHolder.getRequestAttributes();
        ServletRequestAttributes sra = (ServletRequestAttributes) ra;
        HttpServletRequest request = sra.getRequest();

        // 获取Map对象, 如果没有则返回默认值
        // 第一个参数是key, 第二个参数是默认值
        ExpiringMap<String, Integer> uc = book.getOrDefault(request.getRequestURI(), ExpiringMap.builder().variableExpiration().build());
        Integer uCount = uc.getOrDefault(request.getRemoteAddr(), 0);


        if (uCount >= limitRequest.count()) { // 超过次数,不执行目标方法
            return "接口请求超过次数";
            //return JsonResult.error("请求次数过多,已经限制");
        } else if (uCount == 0) { // 第一次请求时,设置有效时间
//            /** Expires entries based on when they were last accessed */
//            ACCESSED,
//            /** Expires entries based on when they were created */
//            CREATED;
            uc.put(request.getRemoteAddr(), uCount + 1, ExpirationPolicy.CREATED, limitRequest.time(), TimeUnit.MILLISECONDS);
        } else { // 未超过次数, 记录加一
            uc.put(request.getRemoteAddr(), uCount + 1);
        }
        book.put(request.getRequestURI(), uc);

        // result的值就是被拦截方法的返回值
        Object result = pjp.proceed();

        return result;
    }


}
- 添加注解
在我们所需要的接口上面添加我们的注解——@LimitRequest 即可