关于linux搭建svn服务器并实现php代码自动部署到线上服务器
写在前面
该文章中很大部分引用了一个前辈的博客,其中加入了我在部署中遇到的一些问题,对一些地方做出了修改,但因为当时写这篇有道云的时间太久了,已经找不到原文地址,如原作者有异议请与我联系我将按您的意见进行处理.
个人建议
个人建议最好使用gitlab作为代码管理工具,目前我已将我们公司从svn全部搬迁到gitlab,至于原因
1.追求逼格 大家都在用git
2.gitlab的分支比svn高端的不是一丁半点
3.gitlab就自动部署php的代码来说更加方便,如果代码管理工具服务器为a,服务器为b,个人电脑为c
gitlab可以将c提交的代码直接同步到b
而svn则必须a与b为同一台电脑(好像是有可以不同的方案但有点麻烦)
今天太晚了暂且休息,下次将会把部署gitlab以及gitlab的自动部署到服务器整理出来分享一下
步骤:
1、检查是否已经有svn
2、安装subversion
3、检查是否安装成功
4、创建svn资源仓库
5、新增用户及密码,配置权限,配置资源库权限
6、开放防火墙
7、启动或者重启服务
8、从机安装subversion
9、设置代码同步
一、检查是否已经有svn
如果没有安装就会是下面的样子,提示找不到命令。
[root@localhost ~]# svnserve --version
-bash: svnserve: command not found
如果已经安装,会显示版本信息:
[root@localhost ~]#  svnserve --version
svnserve, version 1.6.11 (r934486)
   compiled Aug 17 2015, 08:37:43

Copyright (C) 2000-2009 CollabNet.
Subversion is open source software, see http://subversion.tigris.org/
This product includes software developed by CollabNet (http://www.Collab.Net/).

The following repository back-end (FS) modules are available:

* fs_base : Module for working with a Berkeley DB repository.
* fs_fs : Module for working with a plain file (FSFS) repository.

Cyrus SASL authentication is available.
以上为版本信息
二、安装
在Linux下安装的是subversion,直接用yum 安装即可。
[root@localhost ~]#
[root@localhost ~]# yum install -y subversion
三、检查安装是否成功
同样用的是 svnserve –version成功安装会显示版本信息
[root@localhost ~]# svnserve --version
四、创建svn资源仓库
配置文件就是在这一步生成。我将仓库建立在home目录下
[root@iZ5bbc7dzs11kiZ home]# mkdir svnDB
[root@iZ5bbc7dzs11kiZ home]# cd svnDB
[root@iZ5bbc7dzs11kiZ home]# mkdir dsc    //建立具体项目文件夹
[root@iZ5bbc7dzs11kiZ home]# # svnadmin /home/svnDB/dsc  建立仓库
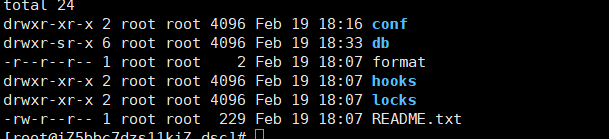
这时进入文件夹即可看到文件夹中出现多个文件 这些就是项目文件了
五、新增用户及密码,配置权限 配置文件在conf文件夹中
authz #权限配置文件
passwd #用户名密码文件
svnserve.conf #资源库配置文件
新增用户
[root@localhost conf]# cd conf
[root@localhost conf]# vim passwd
### This file is an example password file for svnserve.
### Its format is similar to that of svnserve.conf. As shown in the
### example below it contains one section labelled [users].
### The name and password for each user follow, one account per line.

[users]
# harry = harryssecret
# sally = sallyssecret
biji = 123456     //添加账号与密码
~
配置权限
[root@localhost conf]# vim authz


[groups]
# harry_and_sally = harry,sally
# harry_sally_and_joe = harry,sally,&joe

[/]
* = r
# @admin = rw
# dangerman =

# [svndir:/]
# @admin = rw
[/]          //对那个文件夹有操作权限
biji = rw    //拥有什么权限   rw读写权限
资源库配置 找到几行做一下注释 分别为10 11 18 25 30行
anon-access = read
auth-access = write
password-db = passwd
authz-db = authz
realm = My First Repository

六、配置防火墙端口(如果需要):
不一定每个人都需要设置,可以先测试后再看是否需要打开端口
# vi /etc/sysconfig/iptables
添加一下内容:添加到最后一句的上面
-A INPUT -p tcp -m state --state NEW -m tcp --dport 3690 -j ACCEPT
保存后重启防火墙
/etc/init.d/iptables save
service iptables restart
七、启动svn
# svnserve -d -r /home/svnDB
查看SVN进程
ps -ef|grep svn|grep -v grep
检测SVN端口
netstat -apn | grep 3690
停止重启SVN:
# killall svnserve //停止
# svnserve -d -r /home/svnDB // 启动
八、连接地址为svn://xx.xx.xx.xx:3690/dsc 服务器端安装客户端
九、设置服务器同步
进入项目目录复制copost-commit (复制这份模板文件,因为svn将要执行的是post-commit文件)
cp post-commit.tmpl post-commit
vim post-commit

#!/bin/sh
REPOS="$1"
REV="$2"
export LANG="zh_CN.UTF-8"
svn update /mnt/test --username 用户名 --password 密码 --no-auth-cache
增加可执行权限
chmod 777 post-commit
重启服务
先在服务器检出
svn co svn://xxx.xxx.xxx.xxx/dsc /mnt/test --username 用户名 --password 密码
然后客户端提交即可