往期回顾
Spring Cloud Gateway集成Sentinel流控
前面我们已经介绍了Sentinel的各种特性,接下来我们一起来看看OpenFeign对Sentinel的集成吧
引入依赖
Feign 适配整合在 Spring Cloud Alibaba 中,所以我们直接引入spring cloud alibaba中的组件就好
<dependency>
    <groupId>com.alibaba.cloud</groupId>
    <artifactId>spring-cloud-starter-alibaba-sentinel</artifactId>
</dependency>
除此之外,我们还需要引入OpenFeign和Nacos的依赖
        <!--添加loadbalancer依赖
            由于 Netflix Ribbon 进入停更维护阶段,因此 SpringCloud 2020.0.1 版本之后 删除了eureka中的ribbon,
            替代ribbon的是spring cloud自带的LoadBalancer,默认使用的是轮询的方式
            新版本的 Nacos discovery 都已经移除了 Ribbon ,此时我们需要引入 loadbalancer 代替,才能调用服务提供者提供的服务
        -->
        <dependency>
            <groupId>org.springframework.cloud</groupId>
            <artifactId>spring-cloud-starter-loadbalancer</artifactId>
        </dependency>
        <dependency>
            <groupId>com.alibaba.cloud</groupId>
            <artifactId>spring-cloud-starter-alibaba-nacos-config</artifactId>
        </dependency>
        <dependency>
            <groupId>org.springframework.cloud</groupId>
            <artifactId>spring-cloud-starter-bootstrap</artifactId>
        </dependency>
        <dependency>
            <groupId>org.springframework.cloud</groupId>
            <artifactId>spring-cloud-starter-openfeign</artifactId>
        </dependency>
生产者接口
在配置消费者之前,我们需要先编写好生产者的相关代码,这里引用之前的user-service,不再赘述,只贴出一些核心代码,完整的源码可以在gitee或者github上找到,文末会给出仓库地址
package cuit.epoch.pymjl.controller;

import com.alibaba.csp.sentinel.annotation.SentinelResource;
import com.alibaba.csp.sentinel.slots.block.BlockException;
import cuit.epoch.pymjl.entity.User;
import cuit.epoch.pymjl.exception.AppException;
import cuit.epoch.pymjl.result.CommonResult;
import cuit.epoch.pymjl.result.ResultUtils;
import cuit.epoch.pymjl.service.UserService;
import lombok.extern.log4j.Log4j2;
import org.springframework.beans.factory.annotation.Value;
import org.springframework.web.bind.annotation.GetMapping;
import org.springframework.web.bind.annotation.PathVariable;
import org.springframework.web.bind.annotation.RequestMapping;
import org.springframework.web.bind.annotation.RestController;

import javax.annotation.Resource;
import javax.servlet.http.HttpServletRequest;
import java.net.InetAddress;
import java.net.UnknownHostException;
import java.util.concurrent.atomic.AtomicInteger;

/**
 * @author Pymjl
 * @version 1.0
 * @date 2022/8/25 12:48
 **/
@RestController
@RequestMapping("/user")
@Log4j2
public class UserController {


    private static final AtomicInteger ATOMIC_INTEGER = new AtomicInteger(0);

    @Resource
    UserService userService;

    @Value("${server.port}")
    private String port;

    @GetMapping("/test")
    @SentinelResource(value = "test", blockHandler = "handleTest")
    public CommonResult<String> test(HttpServletRequest request) throws UnknownHostException {


        System.out.printf("被[/%s:%s]调用了一次%n", request.getRemoteHost(), request.getRemotePort());
        String hostAddress = InetAddress.getLocalHost().getHostAddress() + ":" + port;
        return ResultUtils.success(hostAddress);
    }

    @GetMapping("/register")
    @SentinelResource("register")
    public CommonResult<String> register() {


        userService.register();
        return ResultUtils.success();
    }

    @GetMapping("/get/{id}")
    @SentinelResource(value = "getUser")
    public CommonResult<User> get(@PathVariable("id") Long id) {


        int cnt = ATOMIC_INTEGER.incrementAndGet();
        log.info("cnt=={}", cnt);
        if (cnt % 2 == 0) {


            throw new AppException("发生了异常");
        }
        return ResultUtils.success(userService.get(id));
    }

    public CommonResult<String> handleTest(HttpServletRequest request, BlockException blockException) {


        log.error("调用/user/test失败");
        return ResultUtils.fail("Sentinel流控,调用失败");
    }

}
配置消费者
这里我们结合着Sentinel控制台进行演示,所以我们需要先配置控制台的相关信息,在消费者的bootstrap.yaml 中如下配置
spring:
  application:
    name: user-openfeign-consumer
  cloud:
    nacos:
      discovery:
        server-addr: 192.168.199.128:8848 #Nacos地址
      config:
        server-addr: 192.168.199.128:8848 #Nacos地址
        file-extension: yaml #这里我们获取的yaml格式的配置
    #sentinel控制台
    sentinel:
      transport:
        #配置 Sentinel dashboard 地址
        dashboard: 192.168.199.128:8858
        #默认8719端口,假如被占用会自动从8719开始依次+1扫描,直至找到未被占用的端口
        port: 8719

#开启sentinel的支持
feign:
  sentinel:
    enabled: true
我们还需要在主启动类上添加注解,开启对OpenFeign的支持
package cuit.epoch.pymjl;

import cuit.epoch.pymjl.config.OpenFeignConfig;
import org.springframework.boot.SpringApplication;
import org.springframework.boot.autoconfigure.SpringBootApplication;
import org.springframework.cloud.openfeign.EnableFeignClients;

/**
 * @author Pymjl
 * @version 1.0
 * @date 2022/8/31 23:37
 **/
@SpringBootApplication
@EnableFeignClients(defaultConfiguration = OpenFeignConfig.class)
public class OpenFeignApplication {


    public static void main(String[] args) {


        SpringApplication.run(OpenFeignApplication.class, args);
    }
}
编写FeignClient和相关配置,前面在Nacos整合OpenFegin实现RPC调用已经介绍过,这里直接给代码
/**
 * 在启动类的注解@EnableFeignClients上指定
 * 局部生效就在@FeignClient中指定,不能加@Configuration注解
 *
 * @author Pymjl
 * @version 1.0
 * @date 2022/9/1 13:17
 **/
public class OpenFeignConfig {


    @Bean
    public Logger.Level feignLogLevel() {


        // 日志级别为BASIC
        return Logger.Level.FULL;
    }
}
service接口
package cuit.epoch.pymjl.service;

import cuit.epoch.pymjl.entity.User;
import cuit.epoch.pymjl.feign.FeignServiceFallback;
import cuit.epoch.pymjl.result.CommonResult;
import org.springframework.cloud.openfeign.FeignClient;
import org.springframework.web.bind.annotation.GetMapping;
import org.springframework.web.bind.annotation.PathVariable;

/**
 * @author Pymjl
 * @version 1.0
 * @date 2022/9/1 0:03
 **/
@FeignClient(value = "user-service", fallback = FeignServiceFallback.class)
public interface UserFeignClient {


    /**
     * 注册
     *
     * @return {@code CommonResult<String>}
     */
    @GetMapping("/user/register")
    CommonResult<String> register();

    /**
     * 得到
     *
     * @param id id
     * @return {@code CommonResult<User>}
     */
    @GetMapping("/user/get/{id}")
    CommonResult<User> get(@PathVariable("id") Long id);
}
编写降级异常处理类
package cuit.epoch.pymjl.feign;

import cuit.epoch.pymjl.constant.ResultEnum;
import cuit.epoch.pymjl.entity.User;
import cuit.epoch.pymjl.result.CommonResult;
import cuit.epoch.pymjl.result.ResultUtils;
import cuit.epoch.pymjl.service.UserFeignClient;
import org.springframework.stereotype.Component;

/**
 * @author Pymjl
 * @version 1.0
 * @date 2022/9/17 22:06
 **/
@Component
public class FeignServiceFallback implements UserFeignClient {


    @Override
    public CommonResult<String> register() {


        return ResultUtils.fail(ResultEnum.SENTINEL_FALLBACK_ERROR);
    }

    @Override
    public CommonResult<User> get(Long id) {


        return ResultUtils.fail(ResultEnum.SENTINEL_FALLBACK_ERROR);
    }
}
测试
接下来,启动项目,进行测试。我们先调用消费者的接口,然后可以在控制台中Sentinel看到

然后我们添加如图所示的降级规则:

各种流控降级规则你还不是很了解的话请参考前文:Sentinel的流控与熔断降级规则详解
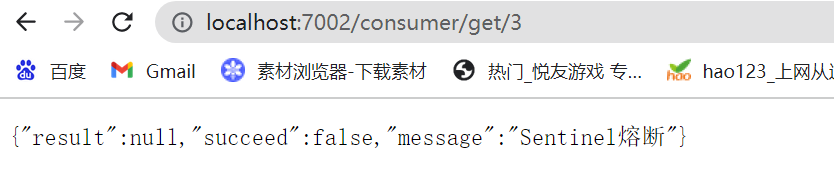
随后我们对接口进行测试访问:
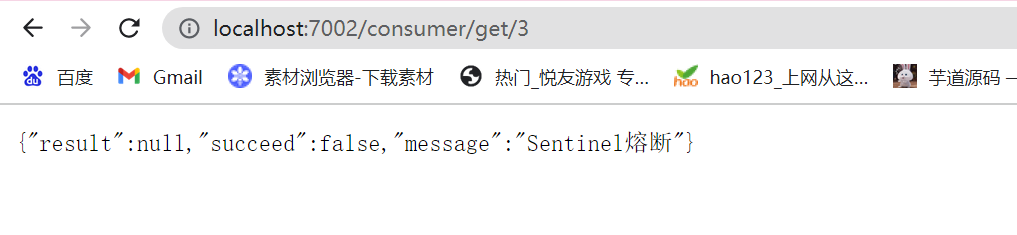
如图所示,当请求次数为偶数时就会抛出异常,然后服务进行降级,生产者代码逻辑如下:
	private static final AtomicInteger ATOMIC_INTEGER = new AtomicInteger(0);

	@GetMapping("/get/{id}")
    @SentinelResource(value = "getUser")
    public CommonResult<User> get(@PathVariable("id") Long id) {


        int cnt = ATOMIC_INTEGER.incrementAndGet();
        log.info("cnt=={}", cnt);
        if (cnt % 2 == 0) {


            throw new AppException("发生了异常");
        }
        return ResultUtils.success(userService.get(id));
    }
当请求次数为奇数时就可以正常访问

然后当我们快速连续的访问多次该接口以后,服务会根据我们配置的降级规则,Sentinel会对服务进行熔断,熔断后无论请求次数为奇数还是偶数,请求都会被拒绝,只有等熔断时长过了后才有可能恢复服务
小结
总之,因为Spring Cloud Alibab已经集成了Sentinel,所以我们使用Spring Cloud来集成Sentinel非常方便,总结下来就这几个步骤:
- 引入对应的依赖
- 开启Sentinel支持
- 编写FeignClient,并为FeignClient指定对应的降级处理类
- 编写对应的降级异常处理类,该类需要实现FeignClient
Sentinel控制台配置的降级规则是保存到服务内存中的,服务一旦重启,所有规则都将丢失,生产环境下会使用远程数据源推送的方式,具体请参考:Sentinel集成Nacos对流控与降级规则的持久化
好了,今天的讲解就到这里了,你可以在这找到项目源码:gitee github,谢谢大家的观看
如果对您有用的话还请三连支持一下呀,谢谢各位看官老爷啦~