linux系统中Python+Selenium环境搭建及执行python定时任务(APScheduler定时框架)
1. Python+Selenium环境搭建
使用wget下载最新的goole浏览器
wget https://dl.google.com/linux/direct/google-chrome-stable_current_x86_64.rpm

#使用yum安装刚下载的安装包
[root@myhost opt]# yum install google-chrome-stable_current_x86_64.rpm
#安装通过后,使用google-chrome --version查看浏览器版本
[root@myhost opt]# google-chrome --version
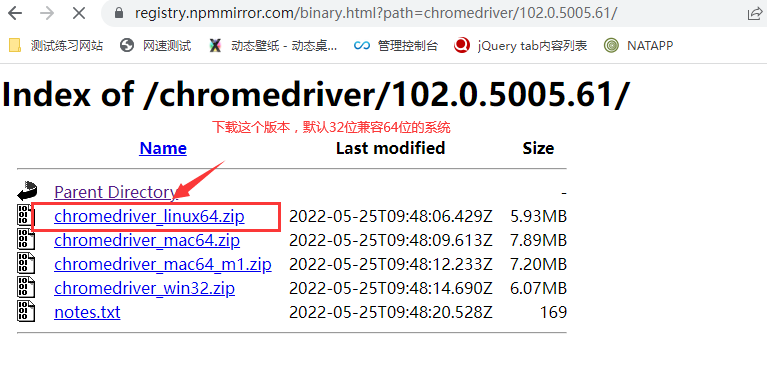
#安装对应版本的chromedriver (必须与google-chrome版本对应)
#chrome下载地址:https://registry.npmmirror.com/binary.html?path=chromedriver/
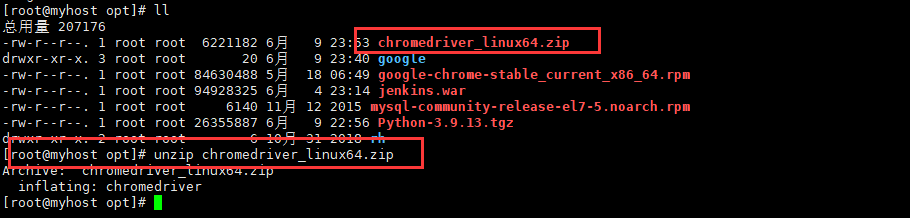
#解压下载后上传的driver
[root@myhost opt]# unzip chromedriver_linux64.zip
#下载对应的版本将chromedriver移动到/usr/bin目录下面并设置为可执行权限
[root@myhost opt]# chmod +x chromedriver
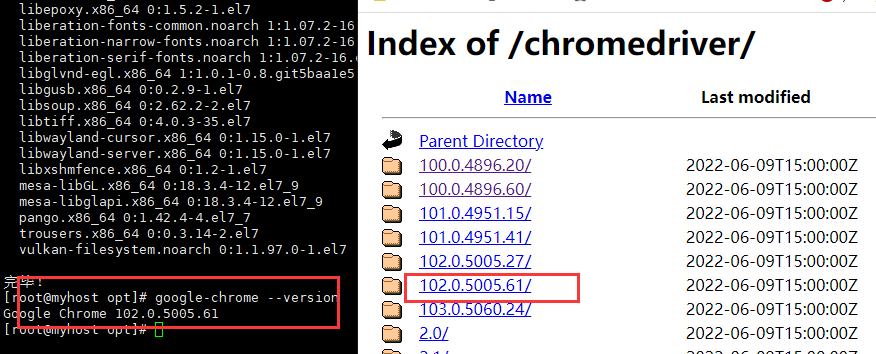

成功安装google和chromedriver后确定版本是否一致

python安装selenium、pytest库,使用pip install selenium直接安装

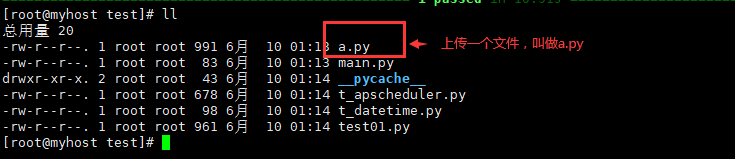
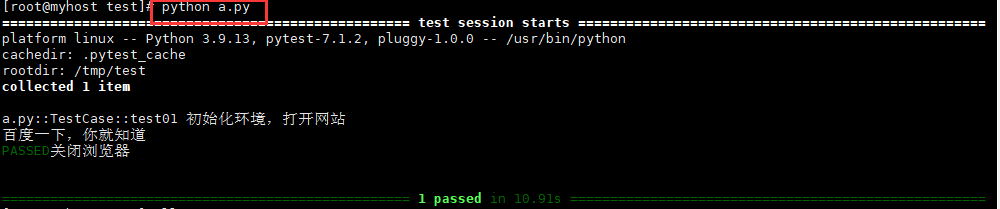
#a.py的内容
#!/usr/bin/python3
# coding:utf-8
from selenium import webdriver
import pytest

class TestCase:
    global ch_options
    global driver

    def setup_class(self):
        TestCase.ch_options = webdriver.ChromeOptions()
        # 为Chrome配置无头模式
        TestCase.ch_options.add_argument("--headless")
        TestCase.ch_options.add_argument('--no-sandbox')
        TestCase.ch_options.add_argument('--disable-gpu')
        TestCase.ch_options.add_argument('--disable-dev-shm-usage')
        # 在启动浏览器时加入配置
        TestCase.driver = webdriver.Chrome(options=TestCase.ch_options)
        TestCase.driver.get('https://www.baidu.com')
        print('初始化环境,打开网站')

    def teardown_class(self):
        print('关闭浏览器')
        TestCase.driver.quit()

    def test01(self):
        # 打印页面title信息
        print(TestCase.driver.title)


if __name__ == '__main__':
    pytest.main(['-sv', 'a.py'])
使用python a.py执行自动化程序
2. 执行python定时任务(APScheduler定时框架)
写一个用于触发器python文件:t_apscheduler.py
这个文件有两个作用:
用APScheduler写触发器(date定时执行;interval间隔调度;cron特定时间周期触发)
写一个函数,这个函数用os.system写要执行的py脚本
import os
from apscheduler.schedulers.blocking import BlockingScheduler
from datetime import datetime, date


def execute():
    os.system('python t_datetime.py')


scheduler = BlockingScheduler()
# 在某个时间点执行一次
# scheduler.add_job(execute, 'date', run_date=datetime(2022, 3, 16, 17, 13, 30))

# 每隔N时间执行一次。为了演示的更直观,就用这个每隔两秒运行一次
scheduler.add_job(execute, 'interval', seconds=2)

# 特定时间内,周期性触发
# scheduler.add_job(execute, 'cron', day_of_week='0-6', hour=17, minute=21)
scheduler.start()
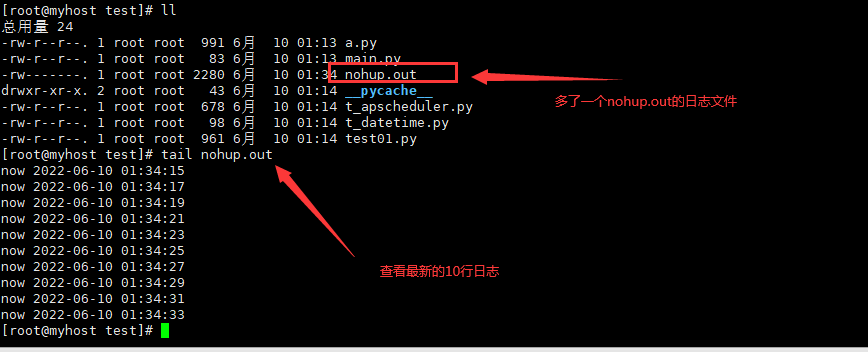
随意写一个要执行的py:t_datetime.py
import datetime

now = datetime.datetime.now().strftime("%Y-%m-%d %H:%M:%S")
print("now", now)
把要执行的py(t_datetime.py)和这个触发器py(t_apscheduler.py),都放在服务器上。(注意服务器先安装好APScheduler包:pip install apscheduler)
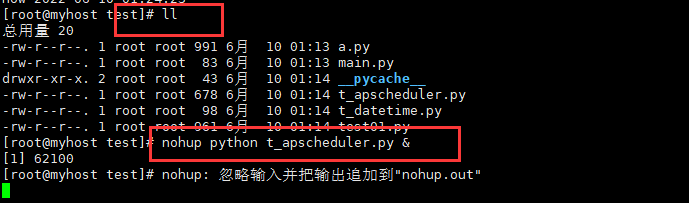
执行命令: nohup python t_apscheduler.py &
ctrl+c 停止运行
执行成功,没报错。目标完成!