上篇说到《framework开发环境搭建》,本篇继续介绍Android源码的下载、编译、刷机
先贴上Android源码官网地址:https://source.android.com/docs/setup/start/,俗称AOSP,Android开源项目,这里我总结一下具体该怎么操作。
1、安装repo
Android源码同时使用git和repo进行管理,repo是基于git的代码管理工具,类似github、gitee,所以需要同时安装git和repo
  sudo apt-get update
  sudo apt-get install repo
如果是ubuntu20.04,执行上述命令会提示无法定位repo包,那么这个时候需要手动安装repo
curl https://storage.googleapis.com/git-repo-downloads/repo > ~/bin/repo
chmod a+x ~/bin/repo
export PATH=~/bin:$PATH
如果没有~/bin/repo目录,需要先创建一下,安装好后验证是否安装成功
repo verison
如果出现
<repo not installed>
repo launcher version 2.15
(from /usr/bin/repo)
说明安装成功了,repo安装好后可以开始下载源码了
2、下载源码
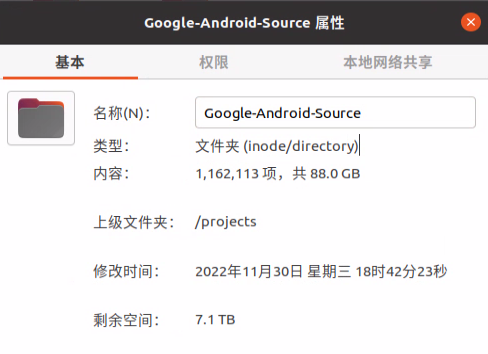
首先需要创建一个文件夹来存放源码
sudo mkdir /projects/Google-Android-Source/
sudo chmod 777 /projects/Google-Android-Source/
当然使用git还需要设置一下git全局配置
git config --global user.name "jason"
git config --global user.email "[email protected]"
准备工作完毕,可以直接从Google仓库拉代码了,首先初始化仓库地址
repo init -u https://android.googlesource.com/platform/manifest
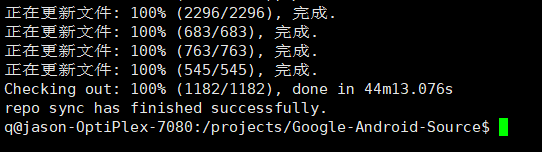
这里需要注意下,由于Android源码在Google服务器上,国内访问Google服务器需要VPN,所以,我们可以使用国内镜像,其中稳定的镜像地址是中国科学技术大学的镜像地址,具体可参考中科大官网的步骤,据说清华大学的镜像源也很稳定。本人使用的是公司网络,有访问Google的权限,所以就直接从Google服务器下载的。因为Android源码非常大,我下载的Android 13的源码,有88GB

整个下载过程大概需要7个小时,所以建议你睡觉前开启下载,一觉醒来就下载完了。下载完成后大概是这样子的
3、下载厂商驱动
下载好源码后先别着急编译,需要先去下载设备对应的驱动文件,这样刷完机之后才能正常使用,可以看官网说明
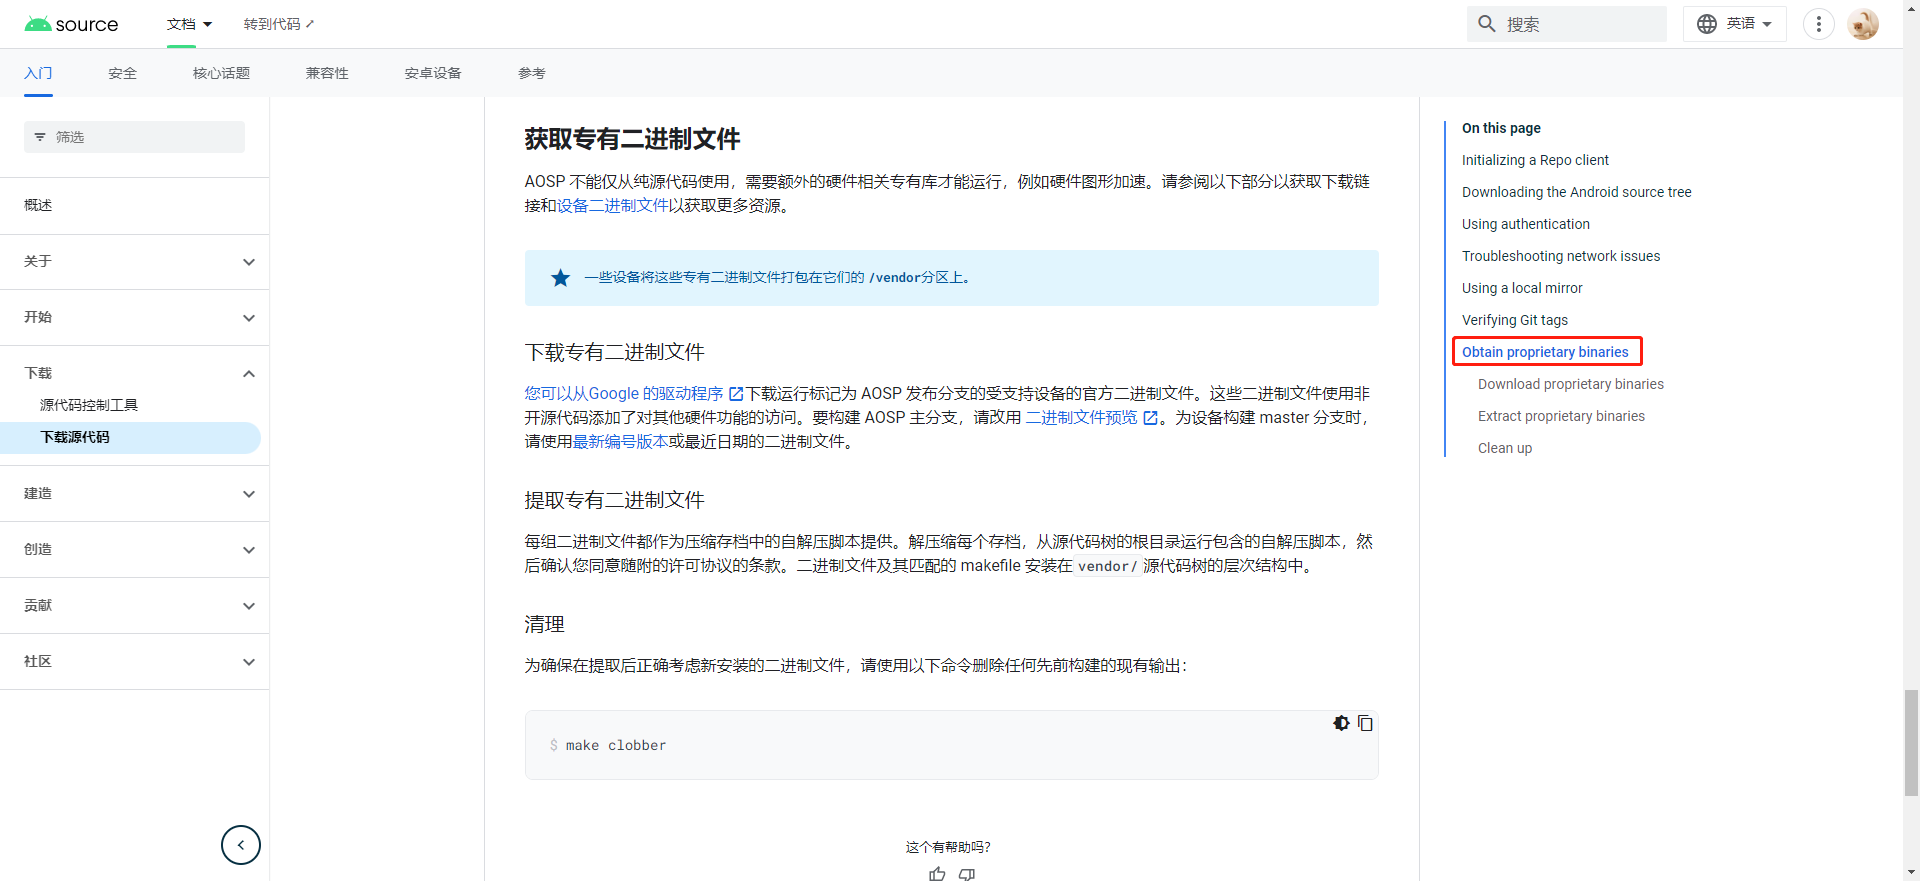
根据你的设备型号下载对应的驱动即可,下载地址:https://developers.google.cn/android/drivers
我下载的是barbet Android 13
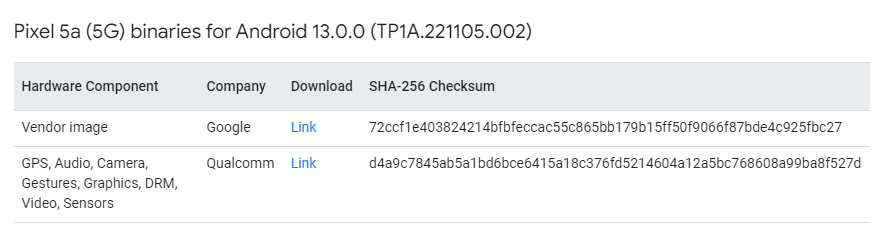
下载完毕以后会得到两个tgz压缩文件,将其拷贝到源码根目录,然后然后解压,得到两个sh脚本文件

执行两个sh脚本文件,会显示license信息,按D键向下翻页,最后输入I ACCPET同意条款

此时驱动文件已准备就绪,下一步就可以开始编译源码了。
4、编译源码
编译前看一下Android源码目录结构

关于目录结构介绍,可查看我这篇文章《Android源码目录结构介绍》,直接开始编译
第一步,准备构建脚本所需要的环境
source build/envsetup.sh
第二步,选择构建的目标版本
lunch
执行完lunch会列出所有的目标版本,总共有75个
You're building on Linux

Lunch menu .. Here are the common combinations:
     1. aosp_arm-eng
     2. aosp_arm64-eng
     3. aosp_barbet-userdebug
     4. aosp_bluejay-userdebug
     5. aosp_bramble-userdebug
     6. aosp_bramble_car-userdebug
     7. aosp_car_arm-userdebug
     8. aosp_car_arm64-userdebug
     9. aosp_car_x86-userdebug
     10. aosp_car_x86_64-userdebug
     11. aosp_cf_arm64_auto-userdebug
     12. aosp_cf_arm64_phone-userdebug
     13. aosp_cf_x86_64_auto-userdebug
     14. aosp_cf_x86_64_foldable-userdebug
     15. aosp_cf_x86_64_pc-userdebug
     16. aosp_cf_x86_64_phone-userdebug
     17. aosp_cf_x86_64_tv-userdebug
     18. aosp_cf_x86_phone-userdebug
     19. aosp_cf_x86_tv-userdebug
     20. aosp_cheetah-userdebug
     21. aosp_cloudripper-userdebug
     22. aosp_coral-userdebug
     23. aosp_coral_car-userdebug
     24. aosp_flame-userdebug
     25. aosp_flame_car-userdebug
     26. aosp_oriole-userdebug
     27. aosp_oriole_car-userdebug
     28. aosp_panther-userdebug
     29. aosp_raven-userdebug
     30. aosp_raven_car-userdebug
     31. aosp_ravenclaw-userdebug
     32. aosp_redfin-userdebug
     33. aosp_redfin_car-userdebug
     34. aosp_redfin_vf-userdebug
     35. aosp_slider-userdebug
     36. aosp_sunfish-userdebug
     37. aosp_sunfish_car-userdebug
     38. aosp_trout_arm64-userdebug
     39. aosp_trout_x86-userdebug
     40. aosp_whitefin-userdebug
     41. aosp_x86-eng
     42. aosp_x86_64-eng
     43. arm_krait-eng
     44. arm_v7_v8-eng
     45. armv8-eng
     46. armv8_cortex_a55-eng
     47. armv8_kryo385-eng
     48. beagle_x15-userdebug
     49. beagle_x15_auto-userdebug
     50. car_ui_portrait-userdebug
     51. car_x86_64-userdebug
     52. db845c-userdebug
     53. gsi_car_arm64-userdebug
     54. gsi_car_x86_64-userdebug
     55. hikey-userdebug
     56. hikey64_only-userdebug
     57. hikey960-userdebug
     58. hikey960_tv-userdebug
     59. hikey_tv-userdebug
     60. poplar-eng
     61. poplar-user
     62. poplar-userdebug
     63. qemu_trusty_arm64-userdebug
     64. rb5-userdebug
     65. sdk_car_arm-userdebug
     66. sdk_car_arm64-userdebug
     67. sdk_car_md_x86_64-userdebug
     68. sdk_car_portrait_x86_64-userdebug
     69. sdk_car_x86-userdebug
     70. sdk_car_x86_64-userdebug
     71. sdk_pc_x86_64-userdebug
     72. silvermont-eng
     73. uml-userdebug
     74. yukawa-userdebug
     75. yukawa_sei510-userdebug
不同的目标版本对应的设备也不同,因为不同的设备硬件配置也不一样,比如有的设备处理器架构是x86的,有的是arm64的,并且你也可以选择编译user/userdebug/engineer版本,具体参考官网说明:https://source.android.com/docs/setup/build/running#selecting-device-build
根据刷机设备的型号,选择对应的目标版本,这里我选择的是aosp_barbet-userdebug
最后开始编译
m -j16
-j16表示开启多少个线程来编译,这个取决于你的电脑配置,我的是八核十六线程,所以配置了最大线程数来编译,最大程度减少编译时间,当然,也可以不配置,系统将自动选择最合适的线程数。
接下来就是漫长的编译等待了
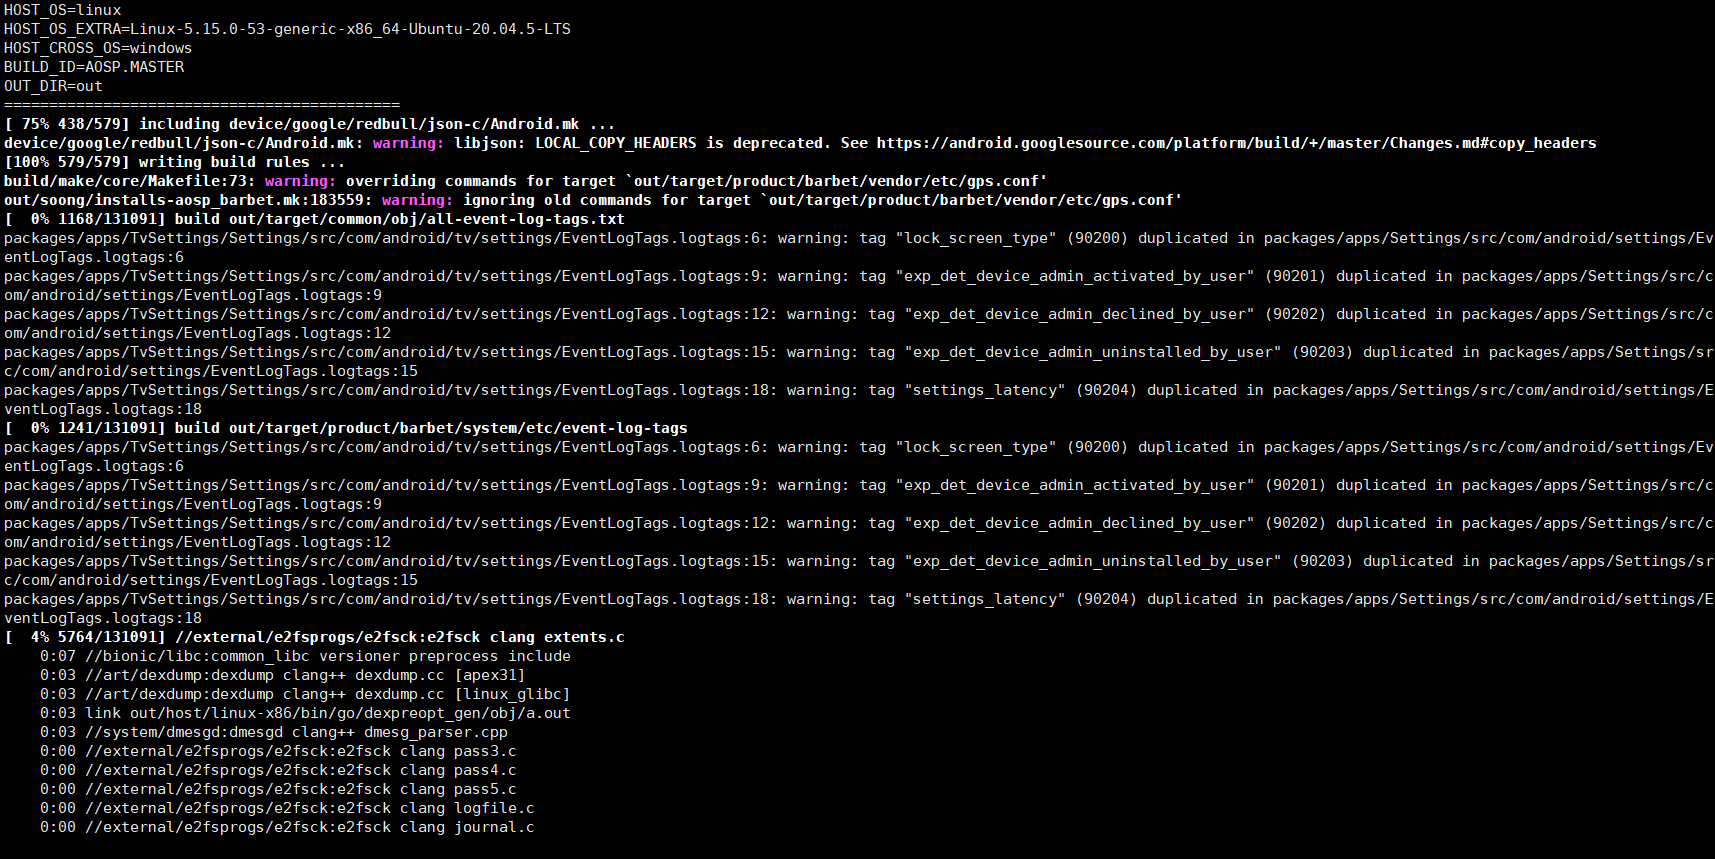
Android 13的整体编译大概需要4个小时,具体时间却决于你的电脑配置,所以,现在你可以起身活动一下,或者去喝杯咖啡,陪女朋友聊聊天等等。
如果不幸编译失败,很大可能是因为编译环境没有配置齐全,具体可以参考我之前的文章《framework开发环境搭建》。
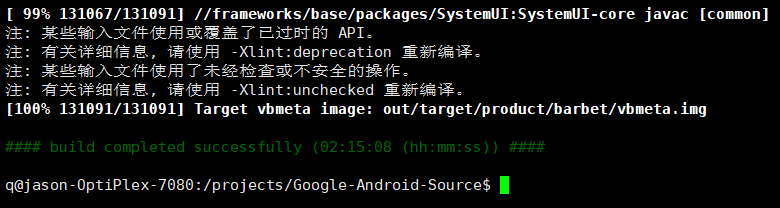
编译完成后大概是这个样子的
5、烧写镜像
烧写镜像俗称刷机,就是将编译生成的镜像文件拷贝到设备中。编译生成的镜像位于out/target/product/barbet/,barbet是我选择的目标版本,查看一下该目录下都有哪些镜像

可以看到里面生成的.img文件都是各个模块的镜像文件,如dtbo.img、system.img等。通过fastboot将这个镜像全部push到模块的ROM中。
使用usb线连接好设备跟主机,执行
adb devices
查看设备是否在线

此时可以开始fastboot刷机了,依次执行
#进入fastboot模式
adb reboot bootloader
#将所有镜像刷入设备
fastboot flashall -w
#重启设备
fastboot reboot
刷机具体说明见官网,贴一张进入fastboot模式后的截图

此时等待设备重启后就OK啦。
至此,Android 13源码下载、编译、刷机的流程就介绍完了,赶紧去试试吧。