“ 种一棵树最好的时间是十年前,其次就是现在!”
目录
3、添加mybatis-config.xml文件(核心配置文件)
1、简介
1.1 什么是MyBtis框架
MyBatis是一个优秀的基于java的持久层框架,它内部封装了jdbc,使开发者只需要关注sql语句本身,而不需要花费精力去处理加载驱动、创建连接、创建statement等繁杂的过程。
1.2 为什么要学习MyBatis框架
-
使用传统JDBC访问数据库
-
使用JDBC访问数据库有重复的代码(例如注册驱动、获取连接、获取传输器、释放资源等)
-
JDBC自身没有连接池,需要频繁的创建链接和关闭链接,效率低
-
SQL语句是写在程序中的,一旦修改SQL,需要对程序重新编译
-
对查询SQL语句返回的结果集对象,需要手动去处理,有时会特别麻烦
-
-
使用MyBatis框架访问数据库
-
MyBatis对JDBC进行了封装,简化了之前重复的代码
-
MyBatis自身支持连接池(也可以配置其他的连接池),因此可以提高程序的效率
-
MyBatis是将SQL语句卸载Mapper语句中,MyBtis框架会帮我们处理,将结果集对象转换成java对象
-
总之,JDBC中所有的问题(代码繁琐,重复的代码,操作太多对象,释放资源,结果集处理等),在MyBtis框架中几乎都得到了解决。
2、MyBatis快速入门
2.1 准备数据,创建库和表
创建库db1
create database if not exists db10 charset utf8;
选择db1
use db1
在db1库中创建student表
CREATE TABLE `student` (
`id` varchar(20) NOT NULL DEFAULT '',
`name` varchar(20) NOT NULL DEFAULT '',
`birth` varchar(20) NOT NULL DEFAULT '',
`sex` varchar(10) NOT NULL DEFAULT '',
PRIMARY KEY (`id`)
) ENGINE=MyISAM DEFAULT CHARSET=utf8;
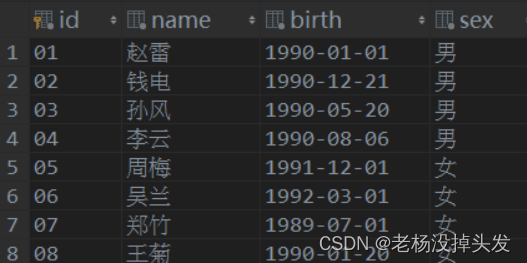
在student表中插入若干条数据
INSERT INTO `student` VALUES ('01', '赵雷', '1990-01-01', '男');
INSERT INTO `student` VALUES ('02', '钱电', '1990-12-21', '男');
INSERT INTO `student` VALUES ('03', '孙风', '1990-05-20', '男');
INSERT INTO `student` VALUES ('04', '李云', '1990-08-06', '男');
INSERT INTO `student` VALUES ('05', '周梅', '1991-12-01', '女');
INSERT INTO `student` VALUES ('06', '吴兰', '1992-03-01', '女');
INSERT INTO `student` VALUES ('07', '郑竹', '1989-07-01', '女');
INSERT INTO `student` VALUES ('08', '王菊', '1990-01-20', '女');2.2 创建maven工程,导入所需要的jar包
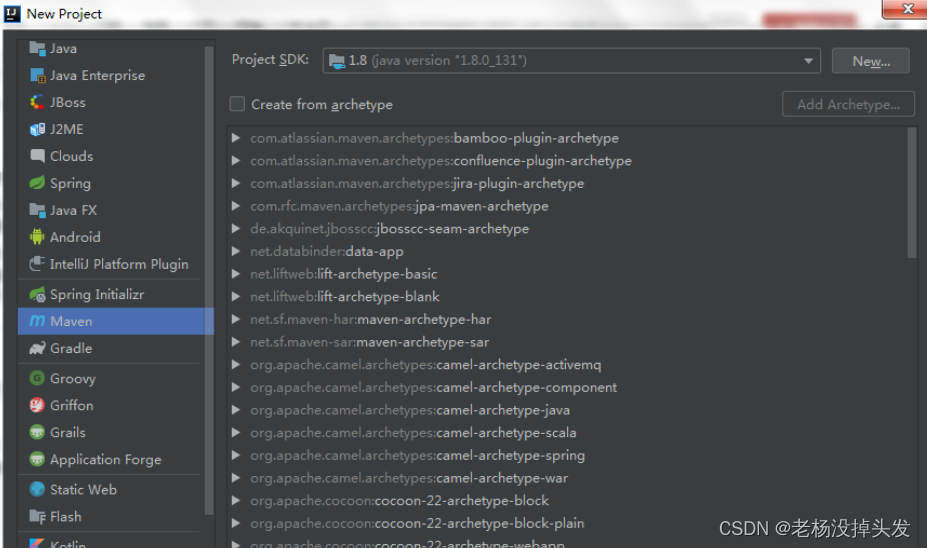
-
选中Maven,直接点击Next即可
-
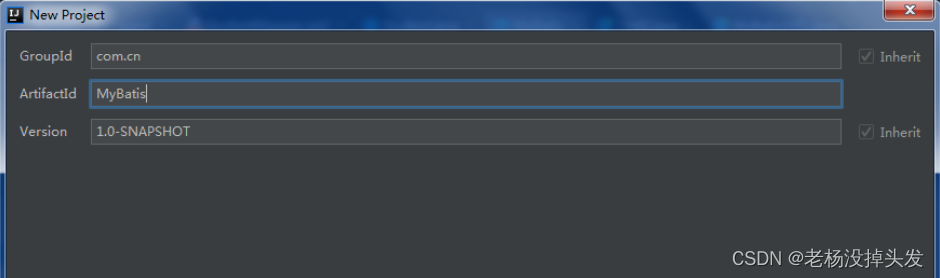
依次填写groupid和artifactid后点击next即可
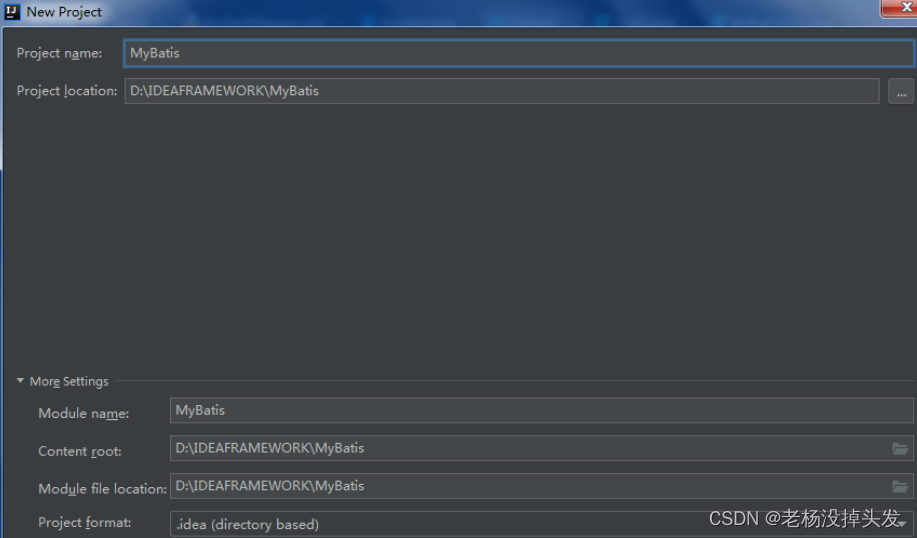
- 输入项目名称MyBatis,点击Next即可
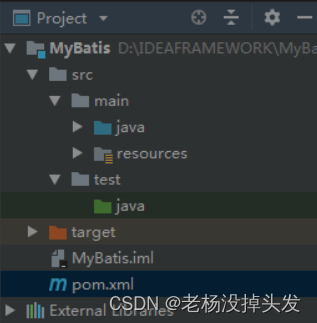
- 这样就创建好了一个名称为Mybatis的maven项目,结构如下图:
- 在pom.xml文件中导入所需要的的jar包
<dependencies>
    <!--mybatis配置-->
    <dependency>
        <groupId>org.mybatis</groupId>
        <artifactId>mybatis</artifactId>
        <version>3.1.1</version>
    </dependency>
    <!-- mysql驱动 -->
    <dependency>
        <groupId>mysql</groupId>
        <artifactId>mysql-connector-java</artifactId>
        <version>5.1.47</version>
    </dependency>
    <!-- 整合log4j -->
    <dependency>
        <groupId>log4j</groupId>
        <artifactId>log4j</artifactId>
        <version>1.2.16</version>
    </dependency>
    <dependency>
        <groupId>org.projectlombok</groupId>
        <artifactId>lombok</artifactId>
        <version>1.18.8</version>
    </dependency>
</dependencies>
3、添加mybatis-config.xml文件(核心配置文件)
-
在resources文件包下创建db.properties文件

- 在resources文件包下创建mybatis-config.xml文件
<?xml version="1.0" encoding="UTF-8"?>
<!DOCTYPE configuration
        PUBLIC "-//mybatis.org//DTD Config 3.0//EN"
        "http://mybatis.org/dtd/mybatis-3-config.dtd">

<!-- MyBatis的全局配置文件 -->
<configuration>
    <properties resource="db.properties"></properties>
    <!-- 1.配置开发环境,标签内可以配置多个环境,比如develop,test等 -->
    <environments default="develop">
        <environment id="develop">
            <!-- 1.1.配置事务管理方式:JDBC/MANAGED
                    JDBC:将事务交给JDBC管理(推荐)
                    MANAGED:自己管理事务
                    -->
            <transactionManager type="JDBC"></transactionManager>
            <!-- 1.2.配置数据源,即连接池方式:JNDI/POOLED/UNPOOLED
                    JNDI:已过时
            POOLED:使用连接池(推荐)
            UNPOOLED:不使用连接池
            -->
            <dataSource type="POOLED" >
                <property name="driver" value="${database.driver}"></property>
                <property name="url" value="${database.url}"></property>
                <property name="username" value="${database.username}"></property>
                <property name="password" value="${database.password}"></property>
            </dataSource>
        </environment>
    </environments>

    <!-- 2.加载Mapper配置文件,路径以斜杠间隔: xx/xx/../xx.xml -->
    <mappers>
        <mapper resource="mapper/StudentMapper.xml"></mapper>
    </mappers>
    <!-- 以上配置, 与Spring整合后, 都由spring管理 -->

</configuration>- 创建Student实体类,并提供对应的get,set,toString方法,可以使用lombok注解代替
package com.cn.pojo;
import lombok.Data;
@Data
public class Student {
    private String id;
    private String name;
    private String birth;
    private String sex;

    public Student() {
    }

    public Student(String id, String name, String birth, String sex) {
        this.id = id;
        this.name = name;
        this.birth = birth;
        this.sex = sex;
    }
}- 创建StudentMapper接口类,并提供getStudentById方法
package com.cn.mapper;
import com.cn.pojo.Student;
public interface StudentMapper {
    public Student getStudentById(String id);
}- 创建StudentMapper.xml文件(实体类的映射文件)
<?xml version="1.0" encoding="utf-8" ?>
<!DOCTYPE mapper PUBLIC "-//mybatis.org//DTD Mapper 3.0//EN"
        "http://mybatis.org/dtd/mybatis-3-mapper.dtd">
<!--
  namespace一般指定为当前文件的所在包路径+文件名(现在定义的是接口名)
  在程序中通过[ namespace + id ]定位到执行哪一条SQL语句
 -->
<mapper namespace="com.cn.mapper.StudentMapper">
    <!--根据id查找学生信息-->
    <select id="getStudentById" parameterType="String" resultType="com.cn.pojo.Student">
      SELECT * FROM Student where id = #{id};
    </select>
</mapper>- 编写测试类,并测试
package com.cn.utils;
import com.cn.mapper.StudentMapper;
import com.cn.pojo.Student;
import org.apache.ibatis.io.Resources;
import org.apache.ibatis.session.SqlSession;
import org.apache.ibatis.session.SqlSessionFactory;
import org.apache.ibatis.session.SqlSessionFactoryBuilder;
import java.io.IOException;
import java.io.Reader;
public class Test1 {
public static void main(String[] args) throws IOException {
//1.读取mybatis的核心配置文件(mybatis-config.xml)
Reader reader = Resources.getResourceAsReader("mybatis-config.xml");
//2.通过配置信息获取一个SqlSessionFactory工厂对象
SqlSessionFactory factory = new SqlSessionFactoryBuilder().build(reader);
//3.通过工厂获取一个SqlSession对象
SqlSession sqlSession = factory.openSession();
//4.通过namespace+id找到要执行的sql语句并执行sql语句
StudentMapper mapper = sqlSession.getMapper(StudentMapper.class);
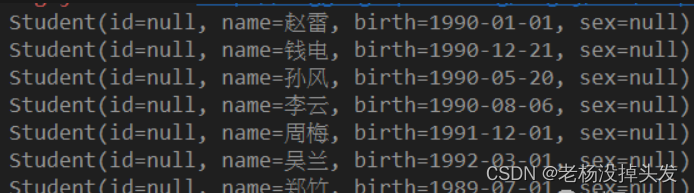
Student student = mapper.getStudentById("01");
//5.输出结果
System.out.println(student);
}
}结果输出为:

4、代码优化
4.1 编写MyBatisUtil工具类
测试类中的代码如果CRUD方法很多的话就会造成重复代码(读取配置文件、获取SqlSessionFactory对象)冗余,因此我们需要把代码优化封装成一个工具类,代码如下:
package com.cn.utils;
import org.apache.ibatis.io.Resources;
import org.apache.ibatis.session.SqlSession;
import org.apache.ibatis.session.SqlSessionFactory;
import org.apache.ibatis.session.SqlSessionFactoryBuilder;
import java.io.IOException;
import java.io.Reader;
import java.sql.Connection;

public class MyBatisUtils {

    private static ThreadLocal<SqlSession> threadLocal = new ThreadLocal<SqlSession>();

    private static SqlSessionFactory sqlSessionFactory;

    //静态块加载配置文件
    static {
        try {
            Reader reader = Resources.getResourceAsReader("mybatis-config.xml");
            sqlSessionFactory = new SqlSessionFactoryBuilder().build(reader);
        } catch (IOException e) {
            e.printStackTrace();
        }
    }

    //禁止外界通过new方法创建
    private MyBatisUtils(){};

    /**
     * 获取sqlSession
     * @return
     */
    public static SqlSession getSqlSession(){
        SqlSession sqlSession = threadLocal.get();
        if(sqlSession == null){
            //设置事务自动提交
            sqlSession = sqlSessionFactory.openSession(true);
            threadLocal.set(sqlSession);
        }
        return sqlSession;
    }

    /**
     * 关闭sqlSession
     */
    public static void closeSqlSession(){
        SqlSession sqlSession = threadLocal.get();
        if (sqlSession != null){
            sqlSession.close();
            threadLocal.remove();
        }
    }

    /**
     * 测试
     * @param args
     */
    public static void main(String[] args) {
        Connection connection = MyBatisUtils.getSqlSession().getConnection();
        System.out.println(connection);
    }
}
输出结果为:

测试类的代码可以修改为:
package com.cn.utils;

import com.cn.mapper.StudentMapper;
import org.apache.ibatis.session.SqlSession;
import java.io.IOException;

public class Test1 {
    public static void main(String[] args) throws IOException {
        SqlSession sqlSession = MyBatisUtils.getSqlSession();
        StudentMapper studentMapper = sqlSession.getMapper(StudentMapper.class);
        System.out.println(studentMapper.getStudentById("01"));
    }
}
5、MyBatis工作流程
-
通过Resources读取MyBatis的核心配置文件(mybatis-config.xml)
-
通过新建SqlSessionFactoryBuilder对象创建SqlSessionFactory对象
-
通过工厂对象获取一个 SqlSession对象
-
事务默认开启
-
通过SqlSession读取映射文件中的操作id,从而执行Sql语句
-
提交事务
-
关闭资源
5.1 完成CRUD操作
5.2 增加学生
编辑StudentMapper接口类,并提供add方法
void add(Student student);编辑StudentMapper.xml文件,提供增加学生的Sql语句
  <!--新增学生-->
 <insert id="add" parameterType="com.cn.pojo.Student">
      INSERT INTO Student(id,name,birth,sex) VALUES (#{id}, #{name}, #{birth}, #{sex});
 </insert>
编写测试类,并测试
@Test
public void add(){
SqlSession sqlSession = MyBatisUtils.getSqlSession();
StudentMapper studentMapper = sqlSession.getMapper(StudentMapper.class);
Student student = new Student("09","小明","1990-05-20","男");
studentMapper.add(student);
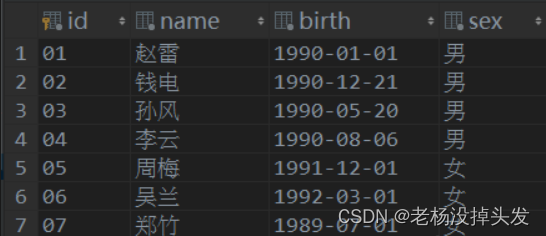
}查看数据库,成功插入一条数据
因为之前在工具类MyBatisUtil中设置了事务自动提交,所以这里我们在修改了数据库信息后不需要在提交事务。
5.3 删除学生
编辑StudentMapper接口类,并提供deleteById方法
void deleteById(String id);编辑StudentMapper.xml文件,提供删除学生的Sql语句
 <!--根据ID删除学生信息-->
 <delete id="deleteById" parameterType="string">
      DELETE FROM Student WHERE id = #{id};
 </delete>
编写测试类,并测试
  @Test
    public void deleteById(){
        SqlSession sqlSession = MyBatisUtils.getSqlSession();
        StudentMapper studentMapper = sqlSession.getMapper(StudentMapper.class);
        studentMapper.deleteById("09");
    }
查看数据库,成功删除一条数据

5.4 修改学生
编辑StudentMapper接口类,并提供update方法
void update(Student student);编辑StudentMapper.xml文件,提供修改学生的Sql语句
<!--根据id修改学生信息-->
<update id="update" parameterType="com.cn.pojo.Student">
      UPDATE Student SET name=#{name}, birth=#{birth}, sex=#{sex} where id=#{id};
</update编写测试类,并测试
@Test
public void update(){
SqlSession sqlSession = MyBatisUtils.getSqlSession();
StudentMapper mapper = sqlSession.getMapper(StudentMapper.class);
Student student = mapper.getStudentById("08");
student.setName("郑竹");
student.setBirth("1989-07-01");
student.setSex("女");
mapper.update(student);
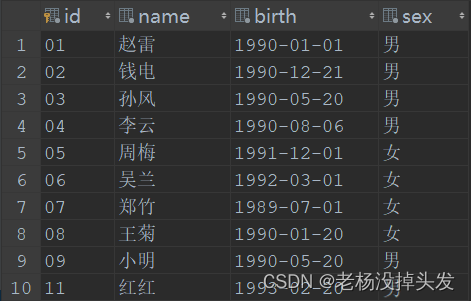
}查看数据库,成功修改id为08的一条数据
#{}占位符
#{}占位符的作用就是Sql语句中的参数值是传递过来的,在语句执行的时候自动将传过来的值替换Sql语句中的占位符
上面文章的CRUD操作已经讲到过如何使用#{}占位符,例如:
<!--根据ID删除学生信息-->
 <delete id="deleteById" parameterType="string">
      DELETE from Student where id = #{id};
 </delete>
<!--根据id修改学生信息-->
<update id="update" parameterType="com.cn.pojo.Student">
      UPDATE Student SET name=#{name}, birth=#{birth}, sex=#{sex} where id=#{id};
</update>${}占位符
${}占位符的作用就是如果传递过来的不是参数值,而是一个Sql片段,目的就是要拼接在Sql语句中
查询所有学生的姓名和生日
编辑StudentMapper接口类,并提供find方法
List<Student> find(Map map);编辑StudentMapper.xml文件,提供查询学生指定信息的Sql语句
  <select id="find" resultType="com.cn.pojo.Student">
      SELECT ${cols} FROM Student
  </select>
编写测试类,并测试
  @Test
    public void find(){
        SqlSession sqlSession = MyBatisUtils.getSqlSession();
        StudentMapper studentMapper = sqlSession.getMapper(StudentMapper.class);
        Map map = new HashMap();
        map.put("cols","name,birth");
        List<Student> list = studentMapper.find1(map);
        for (Student s : list) {
            System.out.println(s);
        }
    }
输出结果为:
需要注意的是,在传递${}占位符对应的值时,需要将值传入到Map集合中。
动态Sql语句
if,where元素
if元素用于对某一字段进行判断,也就是根据判断传过来的参数是否为空,从而决定是否将该片段包含在Sql语句中
where元素用于对包含在内的Sql语句进行检索,需要是剔除多余的连接词(例如and或者or),并且在需要时添加where语句
编辑StudentMapper接口类,并提供findAllByBirth方法
List<Student> findAllByBirth(Map map);编辑StudentMapper.xml文件,提供查询学生的Sql语句
 <!--条件查询学生信息-->
    <select id="findAllByBirth" resultType="com.cn.pojo.Student">
        SELECT * from Student
        <where>
            <if test="min != null" >
                and birth <![CDATA[ > ]]> #{min}
            </if>
            <if test="max != null" >
                and birth <![CDATA[ < ]]> #{max}
            </if>
        </where>
</select> 被<![CDATA[]]>这个标记所包含的内容将表示为纯文本,比如
<![CDATA[<]]>表示文本内容“<”
在xml文档中,"<"、">"、"&" 等字符是不能直接存入的,否则xml语法检查时会报错,如果想在xml中使用这些符号,必须将其转义为实体, 上面使用的是标记符号,也可以使用转义字符如"<",">","&",这样才能保存到xml文档中
编写测试类,并测试
 @Test
    public void findAllByBirth(){
        SqlSession sqlSession = MybatisUtil.getSqlSession();
        StudentMapper mapper = sqlSession.getMapper(StudentMapper.class);
        HashMap map = new HashMap();
        map.put("min","1990-01-01");
        map.put("max","1990-12-31");
        List<Student> list = mapper.findAllByBirth(map);
        for (Student student : list) {
            System.out.println(student);
        }
    }
输出结果为:

set元素
set元素用于对包含在其中的Sql语句进行检索,在需要时可以剔除多余的连接符(比如逗号),并且在需要时好可以添加set关键字
编辑StudentMapper接口类,并提供update1方法
void update1(Student student);编辑StudentMapper.xml文件,提供编辑学生的Sql语句
 <!--根据参数传输与否,修改表中的列-->
    <update id="update1" parameterType="com.cn.pojo.Student">
        UPDATE student
        <set>
            <if test="name != null">
                name=#{name},
            </if>
            <if test="birth != null">
                birth=#{birth},
            </if>
            <if test="sex != null">
                sex=#{sex},
            </if>
        </set>
        where id = #{id};
    </update>
编写测试类,并测试
  @Test
    public void update1(){
        SqlSession sqlSession = MybatisUtil.getSqlSession();
        StudentMapper mapper = sqlSession.getMapper(StudentMapper.class);
        Student student = mapper.getStudentById("11");
        student.setName("红红");
        student.setBirth("1993-02-20");
        student.setSex("男");
        mapper.update1(student);
    }
查看数据库,成功修改id为11的一条数据
可以尝试不传递name,birth,sex中的某些值,运行程序,查看修改就的结果
foreach元素
foreach元素用于迭代传递给Sql语句中的array、list、map元素
编辑StudentMapper接口类,并提供deleteByIds方法
void deleteByIds(Integer[] ids);编辑StudentMapper.xml文件,提供删除学生的Sql语句
  <!--根据ID批量删除学生信息-->
    <!--foreach标签用于迭代数组
        open 表示开始符号
        separator  表示元素间的间隔符
        close 表示结束符号
        item  表示集合中元素迭代时的别名
        collection  分以下三种情况
                    1: collection="array" 表示传入的是单参数且元素类型是arrays数组
                    2:collection="list"  表示传入的是单参数且元素类型是list集合
                    3:如果传入的参数是多个的时候,我们就需要把它们封装成一个Map了,当然单参数也可以
    -->
    <delete id="deleteByIds" parameterType="string">
      DELETE from Student where id in
          <foreach collection="array" open="("  separator=","  close=")" item="id" >
              #{id}
          </foreach>
    </delete>
编写测试类,并测试
 @Test
    public void deleteByIds(){
        SqlSession sqlSession = MybatisUtil.getSqlSession();
        StudentMapper mapper = sqlSession.getMapper(StudentMapper.class);
        Integer[] ids = {01,03,05,07};
        mapper.deleteByIds(ids);
    }
查看数据库,成功修改id为01,03,05, 07的数据

到目前为止MyBatis框架入门第一篇就已经讲解完毕,下一篇文章我们开始对MyBatis框架的缓存机制和逆向工程进行入门讲解。