脚本执行顺序
默认脚本是无序执行,也就是哪个脚本先执行,哪个脚本后执行是未知的。
也可以手动指定执行顺序,
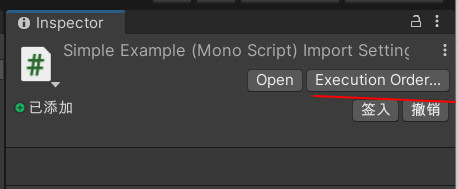
在如上图所示中,可以点击 加号 按钮,然后添加脚本的顺序,数值越大,执行顺序越靠后。
消息函数
Awake 初始化执行,仅执行一次,在Start方法前,脚本被禁用后依旧会执行,
Start 初始化执行,仅执行一次,脚本被禁用后不会执行
Update , 帧更新,每帧调用一次,
OnEnable, 脚本组件启用时调用一次,
OnDisable, 脚本组件禁用时调用一次,
消息调用
此处的消息调用和消息函数不一样,看起来名字相同而已。
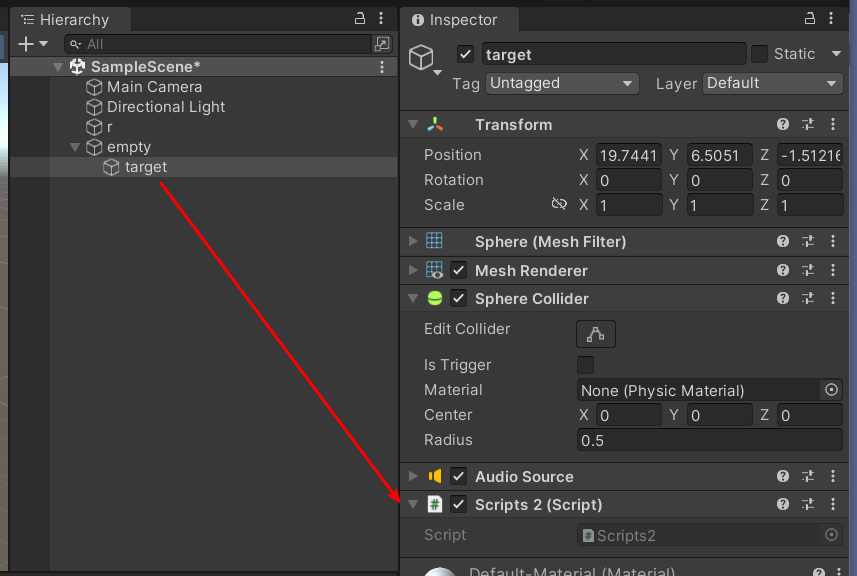
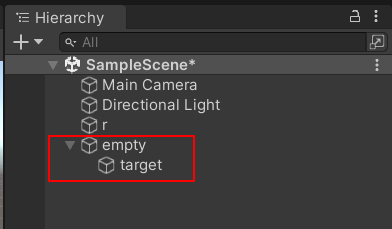
在target物体上挂了一个Script2的脚本,在r物体上挂了一个SimpleExample的脚本。
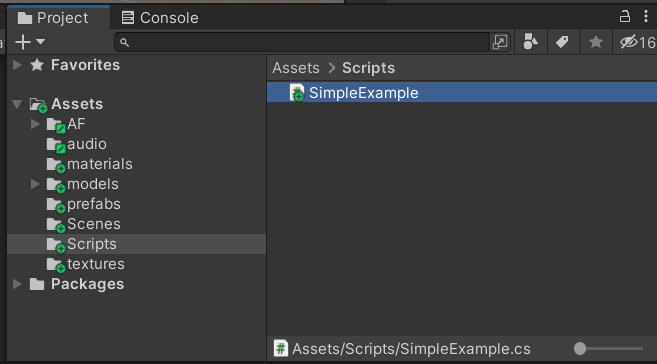
SimpleExample中代码如下所示,
GameObject target = null;
// Start is called before the first frame update
void Start()
{
    Application.targetFrameRate = 60;
    target = GameObject.Find("/empty/target");
}

// Update is called once per frame
void Update()
{
    if (Input.GetKeyDown(KeyCode.UpArrow))
    {
        target.SendMessage("musicVolume", 20f);
    }
    else if (Input.GetKeyDown(KeyCode.DownArrow))
    {
        target.SendMessage("musicVolume", -1f);
    }
}
获取到target物体后,通过SendMessage就可以通过反射调用Script2脚本中的musicVolume方法,这个方法如下所示,
public void musicVolume(float volume)
{
    audioSource.volume = volume;
}
此 SendMessage(methodName,Object args); 两个参数中,第一个是方法名,第二个是Object参数,那么也就意味着可以传入一个数组等。
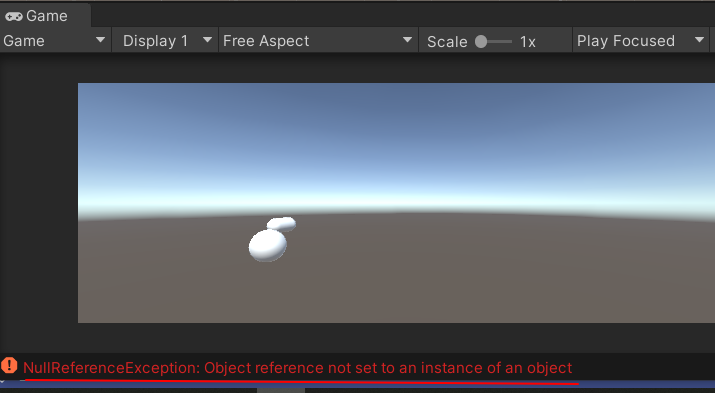
此处不知道为何,第二个参数填0的时候就报错。
target.SendMessage("musicVolume", 0f);

物体增加脚本
右击,Create->C# Script , 新建一个*.cs的文件,然后双击在Visual Studio中打开。
在GameObject上挂载上这个脚本 Add Component --> Script
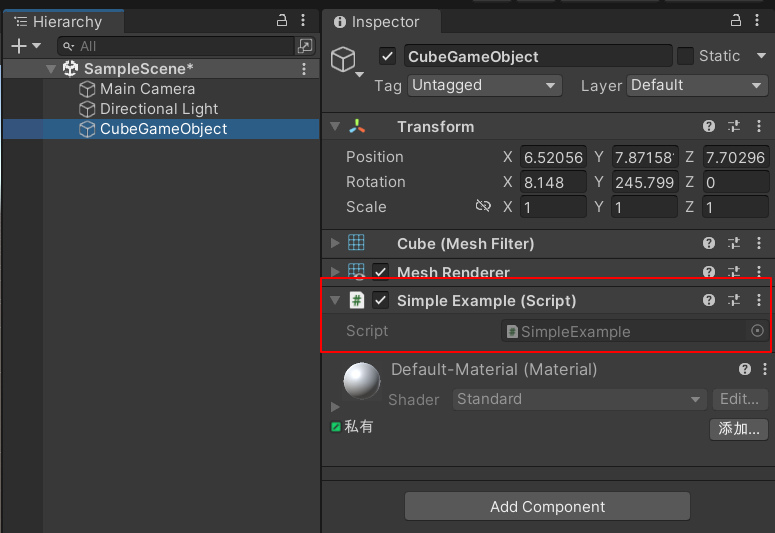
脚本原始就是这些代码。
简单信息打印
void Start()
{
    GameObject go = this.gameObject;
    Debug.Log("info:"+go);
    Debug.Log("info:" + go.name);
    Debug.Log("info:" + go.transform.position);
}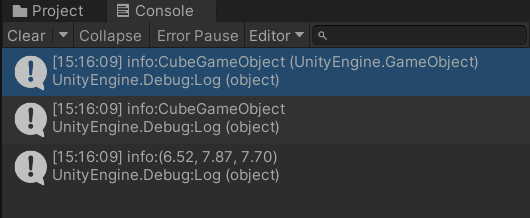
this代表的是SimpleExample这个CS脚本,this.gameObject自然就是它挂载的GameObject了。
transform.position打印的是世界坐标系的坐标,只有用localPosition打印的才是本地坐标系的坐标,也就是相对坐标。
但和界面上本地坐标系和世界坐标系不同在于,世界坐标指的是在Scene中的坐标,而localPosition是相对父物体的坐标。
物体移动
方法一
不断的修改localPosition的数值,
void Update()
{
    Vector3 localPosition = this.transform.localPosition;
    localPosition.x += 0.01f;
    this.transform.localPosition = localPosition;
}
this.transform 是 this.gameObject.transform的缩写。
方法二
Translate(x,y,z)方法,此处的x,y,z是增量值,即 x+= ? ,y+=? , z+=?
void Update()
{
    this.transform.Translate(0.01f,0,0);
}
这两种方法都可以让物体在X轴上每帧移动0.01的距离。
点击Translate()方法后,反编译发现,其实也是设置世界坐标。
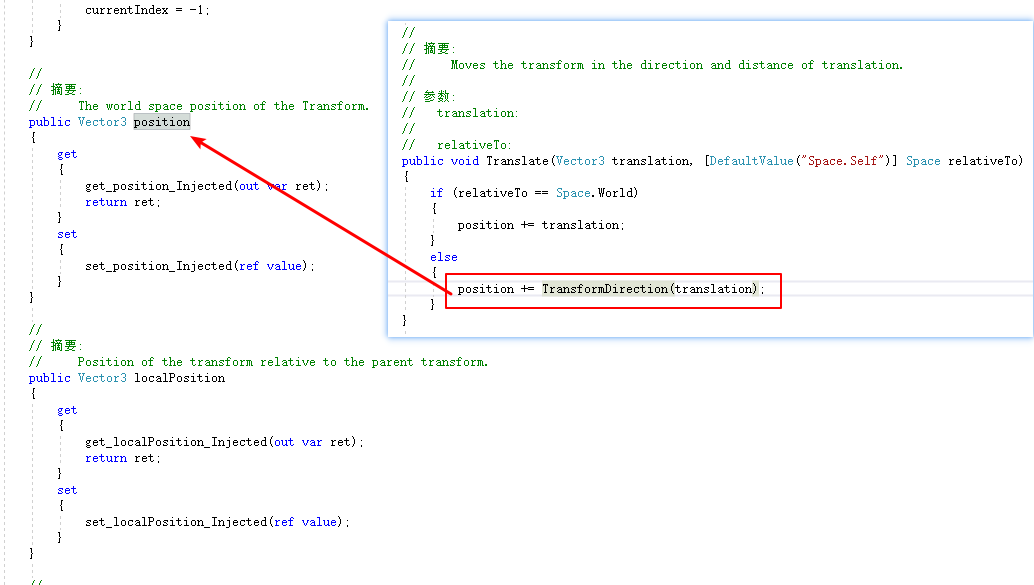
此处会执行else中语句。
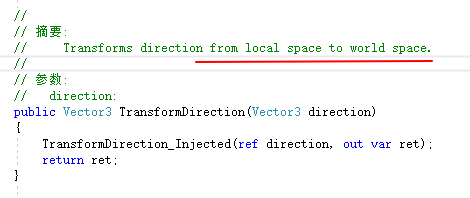
TransformDirection_Injected就无法看到了,但从注释可以看出,应该是将本地坐标系转换为世界坐标。
在移动时有两个坐标系参考,一个是世界坐标系,一个是自身的坐标系。
参考
此处为语雀内容卡片,点击链接查看:https://www.yuque.com/liudazhuangdeshan/yp3bqv/konq1e#WHHfU
所以Translate()方法还有第四个参数,Space.World和Space.Self,分别表示参考世界坐标系,和自身坐标系。
朝物体移动
朝物体移动首先需要转向,用到LookAt方法,这个方法是将物体旋转,使Z轴指向目标物体。
target = GameObject.Find("target");
this.transform.LookAt(target.transform); //Z轴指向目标物体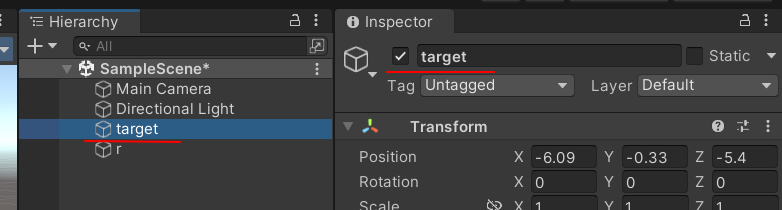
朝物体移动后还需要判断和物体的距离,
Vector3 positionSelf = this.transform.position;
Vector3 positionTarget = this.target.transform.position;
Vector3 distanceV = positionSelf - positionTarget;
float distance = distanceV.magnitude; //判断距离
if (distance > 2)
{
    this.transform.Translate(0,0,0.1f,Space.Self);
}
物体旋转
方法一
Vector3 localAngles = this.transform.localEulerAngles;
localAngles.y += 0.5f;
this.transform.localEulerAngles = localAngles;
通过调整localEulerAngles这个角度,能让物体不断的旋转。
方法二
用Rotate方法,
this.transform.Rotate(0, 0.5f, 0, Space.Self);脚本参数
在脚本中设置全局变量即可,Tooltip是提示,当鼠标悬浮时可以显示提示文字。
[ Tooltip("Y轴移动速度")]
public float speed = 0.3f;

鼠标按键
Input.GetMouseButtonDown() 鼠标按下
Input.GetMouseButtonUp() 鼠标抬起
Input.GetMouseButton() 正在按鼠标 鼠标状态的探测
0 鼠标左键
1 鼠标右键
2 鼠标中键
if (Input.GetMouseButtonDown(0))
{
    Debug.Log("按下鼠标左键");
}
else if (Input.GetMouseButtonDown(1))
{
    Debug.Log("按下鼠标右键");
}
else if (Input.GetMouseButtonDown(2))
{
    Debug.Log("按下鼠标中键");
}
鼠标按键问题点
鼠标按下是个全局事件,也就是说并不是像 html页面一样,给某个元素设置一个 @click 事件,所以如何判断鼠标点击了哪个物体?
在3D游戏中,看起来是3D的,但其实屏幕是2D,也就是说其实只存在x,y两个坐标系就可以判断位置在屏幕中的范围。
屏幕左下角是(0,0)坐标,从左下角开始向上和向右。
Vector3 mousePos = Input.mousePosition;//鼠标点击在屏幕中位置上面就可以获取到鼠标在屏幕中点击的位置。
Vector3 objWorldPos = this.transform.position;
Vector3 objScreenPos = Camera.main.WorldToScreenPoint(objWorldPos);
上面两行代码,获取物体的三维坐标,并将三维坐标转换为屏幕坐标,此时objScreenPos就只有x,y是有效值,z并没有参考价值了。
int screenWidth = Screen.width;
int screenHeight = Screen.height;
上述两行代码可以获取屏幕的宽高,
Vector3 objWorldPos = this.transform.position;
Vector3 objScreenPos = Camera.main.WorldToScreenPoint(objWorldPos);

Vector3 mouseWorldPos = Input.mousePosition;
Vector3 mouseScreenPos = Camera.main.WorldToScreenPoint(mouseWorldPos);

Vector3 distanceV = objScreenPos-mouseScreenPos;
float distance = distanceV.magnitude;


if (objScreenPos.x < 0 || objScreenPos.x > Screen.width
    || objScreenPos.y < 0 || objScreenPos.y > Screen.height)
{

}
键盘事件
Input.GetKeyDown() 按键事件,按下键
Input.GetKeyUp() 按键事件,抬起键
Input.GetKey() 按键状态,某个键正被按着
if (Input.GetKey(KeyCode.W))
{
    this.transform.Translate(0,0,0.3f,Space.Self);
}else if (Input.GetKey(KeyCode.S))
{
    this.transform.Translate(0, 0, -0.3f, Space.Self);
}
一般可以用Input.GetKey来让物体移动,其中KeyCode的值可以在unity的api文档中找到。
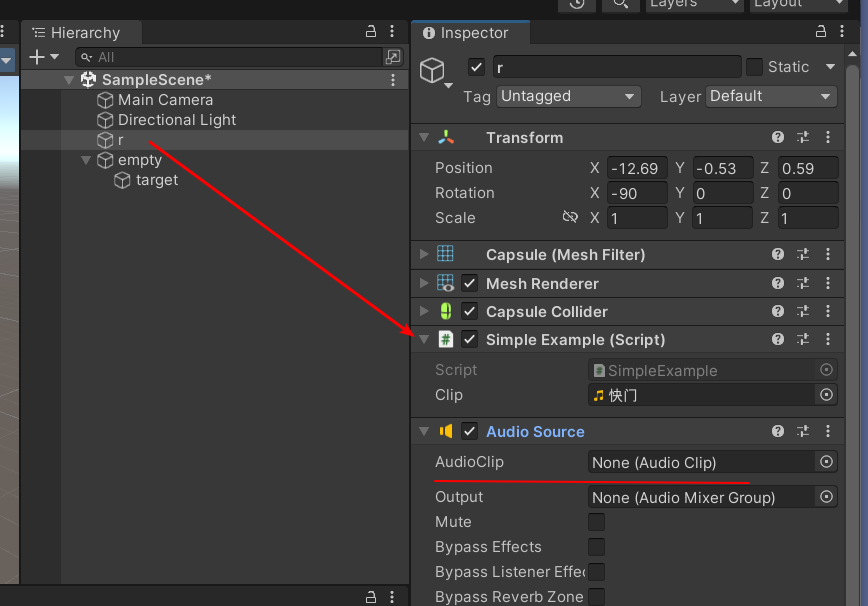
AudioSource组件调用
给r这个GameObject挂上Audio Source组件,然后就可以通过脚本获取组件,用组件来控制播放的开始和暂停等。

AudioSource audioSource = null;

// Start is called before the first frame update
void Start()
    {
        Application.targetFrameRate = 60;
        //获取此脚本上GameObject的AudioSource组件
        audioSource = GetComponent<AudioSource>();

    }

// Update is called once per frame
void Update()
    {
        if (Input.GetMouseButtonDown(0))//鼠标左击
        {
            if (audioSource.isPlaying)//正在播放
            {
                audioSource.Pause();
            }
            else
            {
                audioSource.Play();
            }
        }
    }
GetComponent<AudioSource>(); 是 this.gameObject.GetComponent<>的缩写,也可以缩写为this.GetComponent<>。
通过完整的写法可以知道,如果把this改为其他物体的GameObject,那么就能获取到其他物体上挂载的组件。
代码播放音效
如上图所示,不给AudioSource文件指定音乐文件,而是在脚本中指定音乐文件,然后播放。
public AudioClip clip;

AudioSource audioSource;

// Start is called before the first frame update
void Start()
{
    Application.targetFrameRate = 60;
    this.audioSource = GetComponent<AudioSource>();
}

// Update is called once per frame
void Update()
{
    if (Input.GetMouseButtonDown(0))
    {
        audioSource.PlayOneShot(clip);
    }

}
PlayOneShot方法常用来播放游戏枪声音效。
物体获取
方法一
在脚本参数中有设置一个speed的参数,在unity编辑器界面就可以设置数值。
那么也可以设置一个变量是GameObject,AudioSource等。
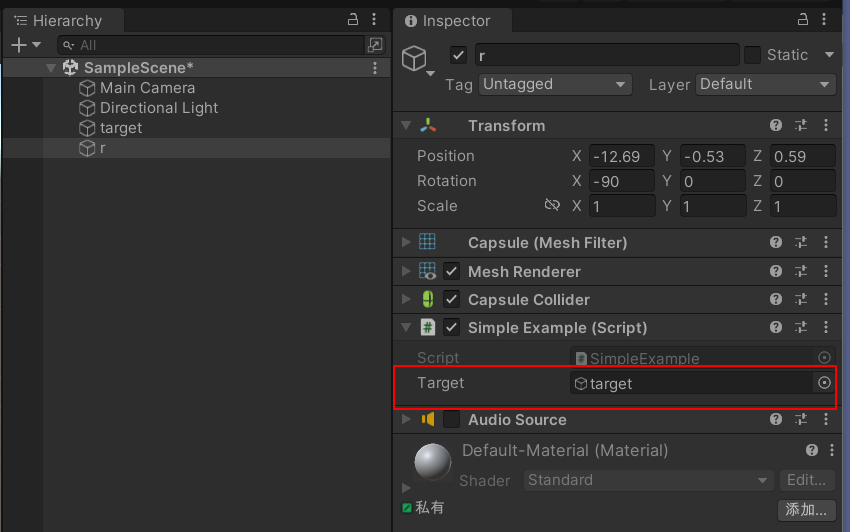

在target上挂载AudioSource组件,在r上挂载脚本,把target作为一个赋值传入。
public GameObject target = null;

    AudioSource audioSource = null;

    // Start is called before the first frame update
    void Start()
    {
        Application.targetFrameRate = 60;
        //target上的组件
        audioSource = target.GetComponent<AudioSource>();
    }

    // Update is called once per frame
    void Update()
    {
        if (Input.GetMouseButtonDown(0))//鼠标左击
        {
            if (audioSource.isPlaying)//正在播放
            {
                audioSource.Pause();
            }
            else
            {
                audioSource.Play();
            }
        }
    }
方法二
 GameObject target = GameObject.Find("target");
audioSource = target.GetComponent<AudioSource>();
直接利用GameObject的Find方法
如果Find方法里面的单词写错了,会报下面的空指针异常。
GameObject target = GameObject.Find("/empty/target");
 GameObject target = GameObject.Find("empty/target");
如果像这种挂载在其他节点下,那么就需要加上路径,上面两种路径都可以找到target。
父物体获取
target = GameObject.Find("/empty/target");
GameObject empty = target.transform.parent.gameObject;
如上代码所示,获取target的父物体empty。
从上面代码也可以看出,维持父子间关系的是transform类,只有获取transform类才能获取到parent,此时获取的也只是父节点的transform,要继续获取GameObject还得加上parent.gameObject才行。
如果维持父子间关系的是GameObject类,那么就可以直接 target.parent,就能获取父节点的GameObject对象了。
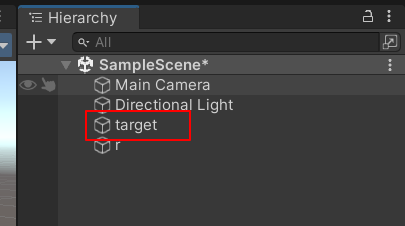
父物体设置

如图所示,运行时将target父节点设置为r物体。
target = GameObject.Find("/empty/target");
target.transform.SetParent(this.transform);
当设置为SetParent(null)时,就是放在根节点下。
脚本获取
其实脚本获取和物体获取,组件获取一样,脚本也是组件的一种。
如何获取其他物体上挂载的脚本?
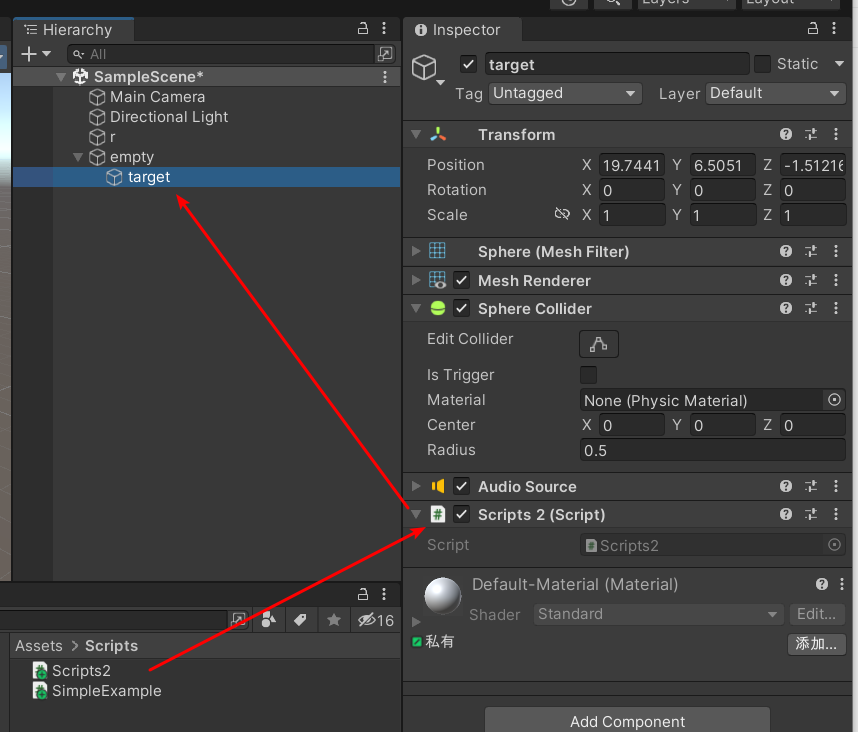
Script2.cs脚本挂载到target上,在SimpleExample中获取Scripts脚本。
Scripts2 scripts2 = null;
// Start is called before the first frame update
void Start()
{
    Application.targetFrameRate = 60;
    GameObject target = GameObject.Find("/empty/target");
    scripts2 = target.GetComponent<Scripts2>();
}
如上述所示,其实和获取组件一样,都是通过GameObject。
void Update()
{
    scripts2.musicPlay();
    if (Input.GetKeyDown(KeyCode.UpArrow))
    {
        scripts2.volume++;
    }else if (Input.GetKeyDown(KeyCode.DownArrow))
    {
        scripts2.volume--;
    }
}在SimpleExample.cs的Update()方法中,就可以调用Script2.cs中public的方法和变量了。
Script2.cs中代码如下,
AudioSource audioSource = null;
    public float volume = 0f;//音量

    // Start is called before the first frame update
    void Start()
    {
        audioSource = this.GetComponent<AudioSource>();
        audioSource.volume = volume;
    }

    // Update is called once per frame
    void Update()
    {
       audioSource.volume = volume;
    }

    public void musicPlay()
    {
        if (Input.GetMouseButtonDown(0))//鼠标左击
        {
            if (audioSource.isPlaying)//正在播放
            {
                audioSource.Pause();
            }
            else
            {
                audioSource.Play();
            }
        }
    }
物体激活和隐藏
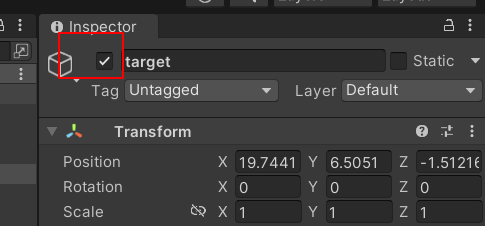
对应到界面就是这个小勾。
 GameObject target = GameObject.Find("/empty/target");
if (target.activeSelf)
{
    target.SetActive(false);
}
物体处于激活状态,就隐藏。
修改物体材质
材质使用Meshranderer中material修改即可。
public Material[] materials;

int nowIndex = 0;

// Start is called before the first frame update
void Start()
{
    Application.targetFrameRate = 60;
}

// Update is called once per frame
void Update()
{
    if (Input.GetMouseButtonDown(0))
    {
        nowIndex = ++nowIndex%materials.Length;
        MeshRenderer meshRenderer = GetComponent<MeshRenderer>();
        meshRenderer.material = materials[nowIndex];
    }

}
定时器
有两种定时器,只执行一次的定时器Invoke和重复执行的InvokeRepeat,有点像javascript中的setTimeout和setInterval方法。
Invoke
注意Invoke里是反射,第二个参数单位是秒。
而且放在Start()方法中即可,放在Update中就是重复执行了,Update本身就是重复执行的方法。
此处的this代表的是Script组件,也就是说获取了其他GameObject上的Script组件后,也可以调用其他脚本里的方法。
void Start()
{
    Application.targetFrameRate = 60;
    this.Invoke("repeatFunction", 2f);
}

// Update is called once per frame
void Update()
{

}

private void repeatFunction()
{
    Debug.Log("repeatFuntion:" + Time.time);
}
InvokeRepeating
第二个参数是脚本加载1秒后开始执行第一次,
第三个参数是每隔2秒执行一次。
this.InvokeRepeating("repeatFunction", 1f, 2f);

//判断是否要执行,可以取消定时任务
if (this.IsInvoking("repeatFunction"))
{
    this.CancelInvoke("repeatFunction");
}
获取线程号
using System.Threading;
int threadId = Thread.CurrentThread.ManagedThreadId;
物体向量
长度
使用magnitude即可。
Vector2 vector2 = new Vector2(2, 3);
float magnitude2 = vector2.magnitude;

Vector3 vector3 = new Vector3(2,3,3);
float magnitude3 = vector3.magnitude;
单位向量
使用normalized将此向量变为长度为1的单位向量,长度为1即

Vector3 vector3 = new Vector3(2,3,3);
Vector3 v3Normal = vector3.normalized;
常用向量简写
Vector3.zero (0,0,0)
Vector3.up (0,1,0)
Vector3.right (1,0,0)
Vector3.forward (0,0,1)
向量运算
Vector3 a = new Vector3(1,1,1);
Vector3 b = new Vector3(2,2,2);
两个向量相加就是 a+b = (3,3,3) 分别x,y,z相加。
相减就是 a-b = (-1,-1,-1) 分别x,y,z相减。
向量乘以常量 a*2 = (2,2,2) x,y,z分别乘以这个常量。
距离
Vector3 a = new Vector3(2,3,3);
Vector3 b = new Vector3(2, 3, 3);

Vector3 c = b - a;
float distance = c.magnitude;//两个向量点位置之间的距离

float distance = Vector3.distance(a,b); //这是封装的方法,求距离的
动态创建实例
使用 Object.Instantiate,第一个参数是一个Object对象,即预制体,第二个是挂载到的父节点,是一个Transform对象。
public class SimpleExample : MonoBehaviour
{
    [ Tooltip("预制体")]
    public GameObject prefab;

    // Start is called before the first frame update
    void Start()
    {
        Application.targetFrameRate = 60;

    }

    // Update is called once per frame
    void Update()
    {
        if (Input.GetMouseButtonDown(0))
        {
           GameObject go01 = Object.Instantiate(prefab,null);
           GameObject go02 = Object.Instantiate(prefab);
           go01.transform.position = Vector3.zero;
           go02.transform.position = Vector3.zero;
        }
    }
}
上面第二个参数null,或者为空都是挂载到根节点下。
销毁实例
使用 Object.Destroy(销毁对象,延迟销毁时间); 时间单位秒,第一个参数通常传GameObject
public class SimpleExample : MonoBehaviour
{
    [Tooltip("预制体")]
    public GameObject prefab;

    private GameObject gameObject;

    // Start is called before the first frame update
    void Start()
    {
        Application.targetFrameRate = 60;

    }

    // Update is called once per frame
    void Update()
    {
        if (Input.GetMouseButtonDown(0))
        {
            if (gameObject != null) {
                Object.Destroy(gameObject);  //销毁实例
            }
            else
            {
                gameObject = Object.Instantiate(prefab, null);
                gameObject.transform.position = Vector3.zero;
            }
        }
    }
}