Spring Boot开发之Mybatis-Plus、SpringSercurity
- 一、Mybatis-Plus
- 二、基本用法
-
- 1、打开上次项目以及数据库,在pom.xml中引入依赖包,并点击同步
- 2、修改application.properties,把mybatis都改为mybatis-plus
- 3、修改Springboot2Application
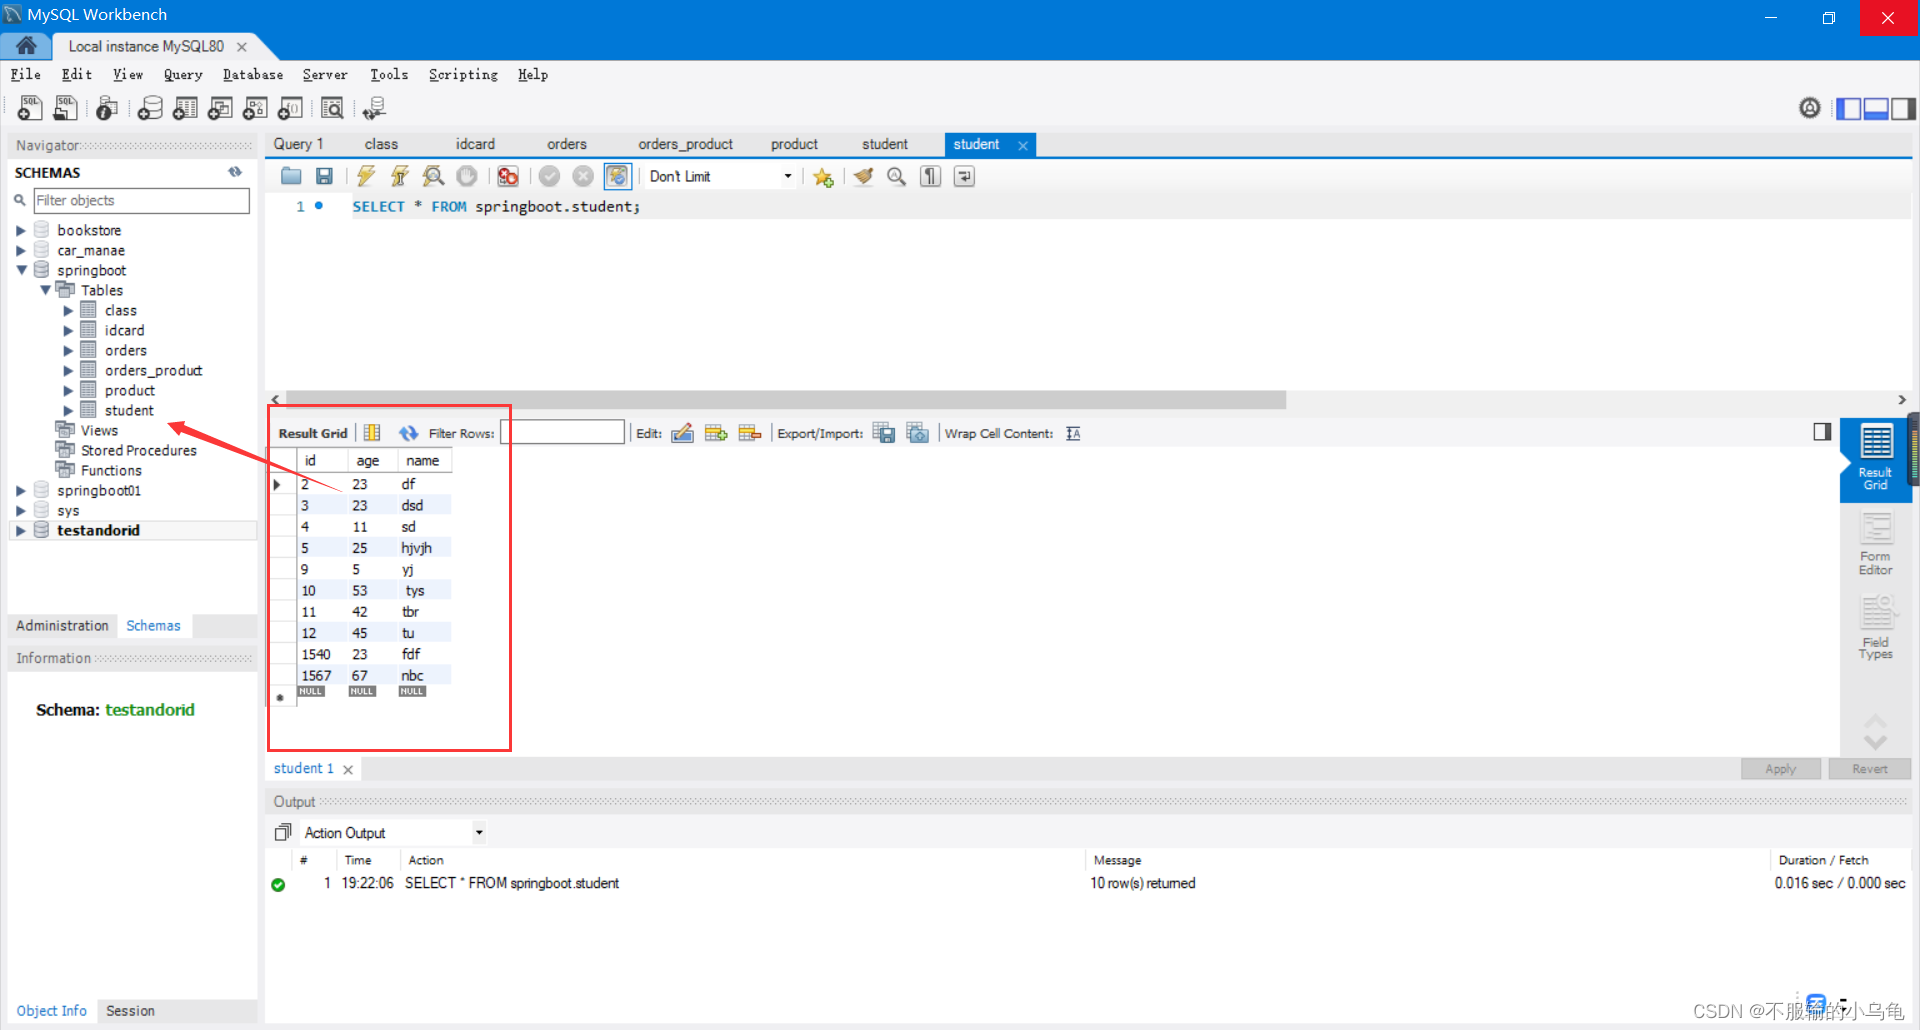
- 4、打开MySQL Workbench,在上次数据库中新建student表,字段名有id,age,name;并添加一些数据
- 5、在pojo文件夹下新建Student类
- 6、在dao文件夹下新建StudentMapper类
- 7、在resources文件夹的mappers文件夹下新建StudentMapper.xml,里面不需要写内容,但必须有!
- 8、在service文件夹下新建StudentService类
- 9、在impl文件夹下新建StudentServiceImpl实现类
- 10、在controller文件夹下新建StudentController类
- 11、在templates文件夹下新建studentlist.html
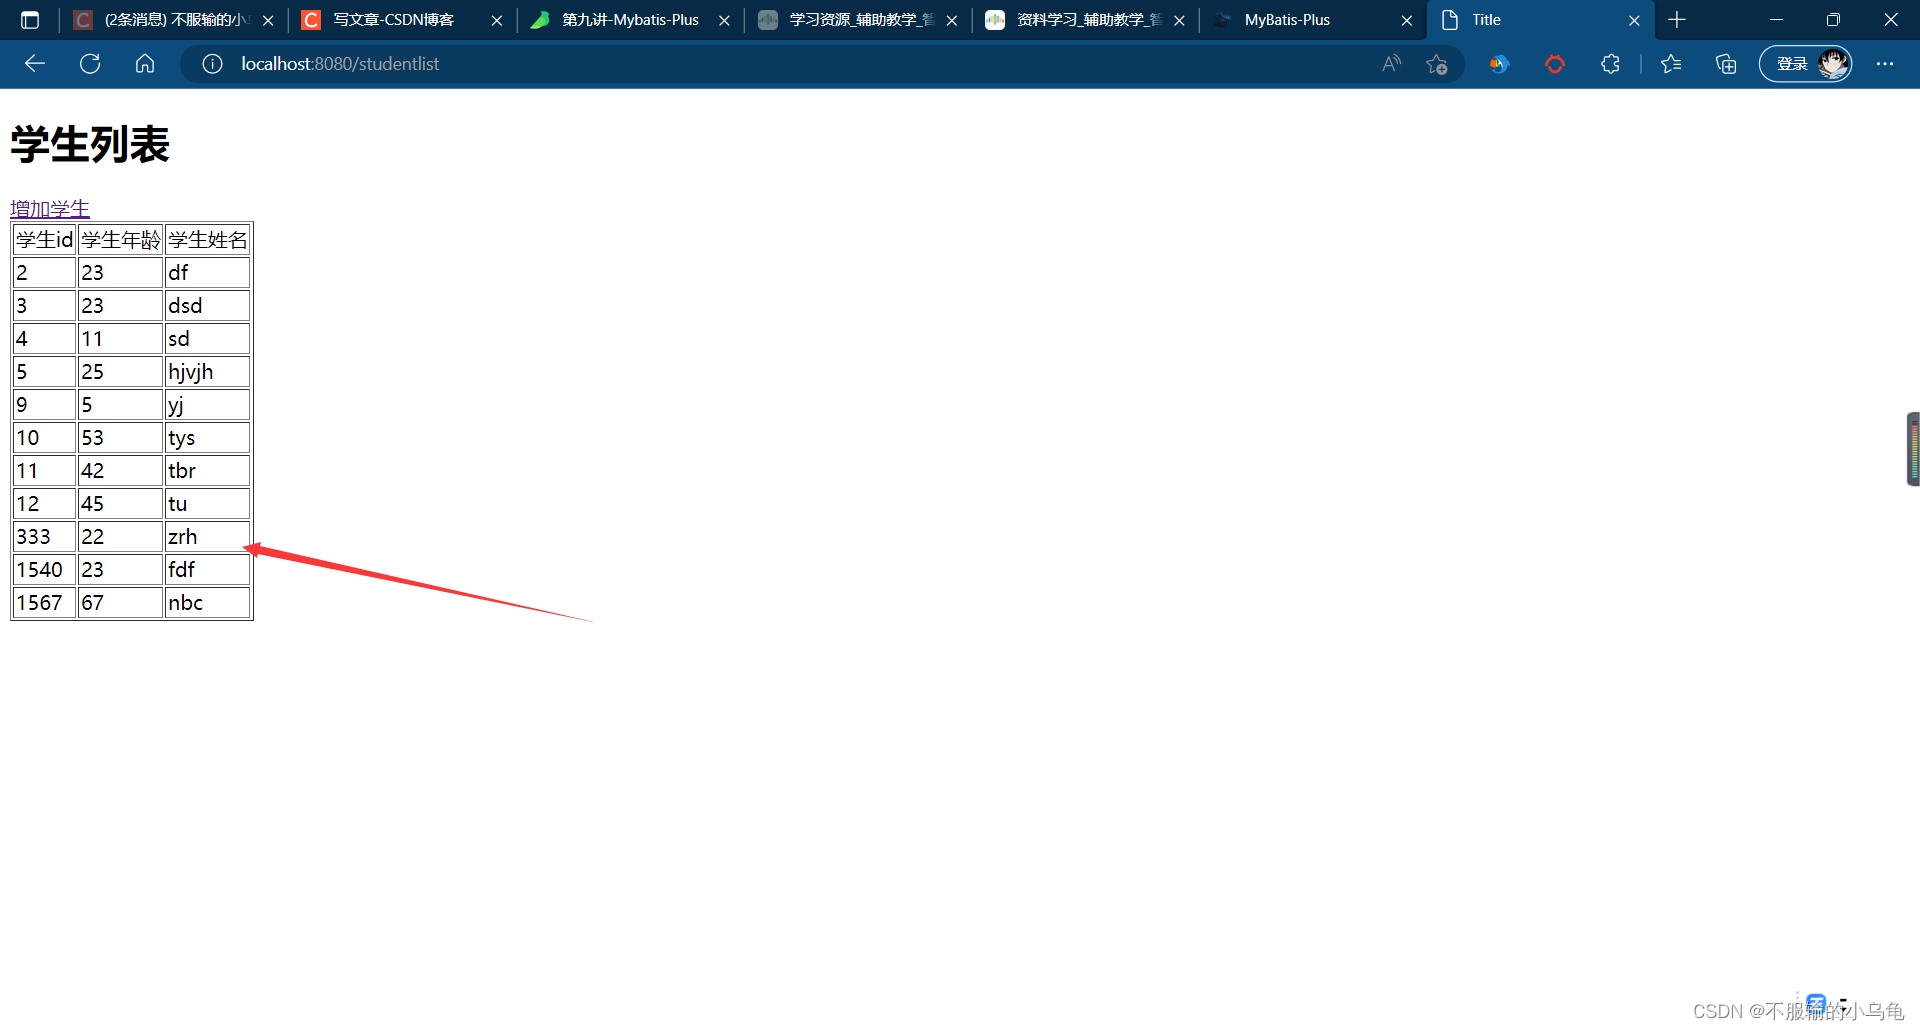
- 12、点击运行,查询成功!
- 13、增加学生操作
- 14、删除学生操作
- 15、更新学生操作
- 三、代码生成器
- 四、条件构造器
- 五、分页
- 六、SpringSercurity
前面我们利用Mybatis进行1对1、1对多以及多对多查询,但是有许多代码要写,比较麻烦,今天我们使用Mybatis-Plus进行多表查询。
一、Mybatis-Plus
Mybatis-Plus官网:https://baomidou.com/
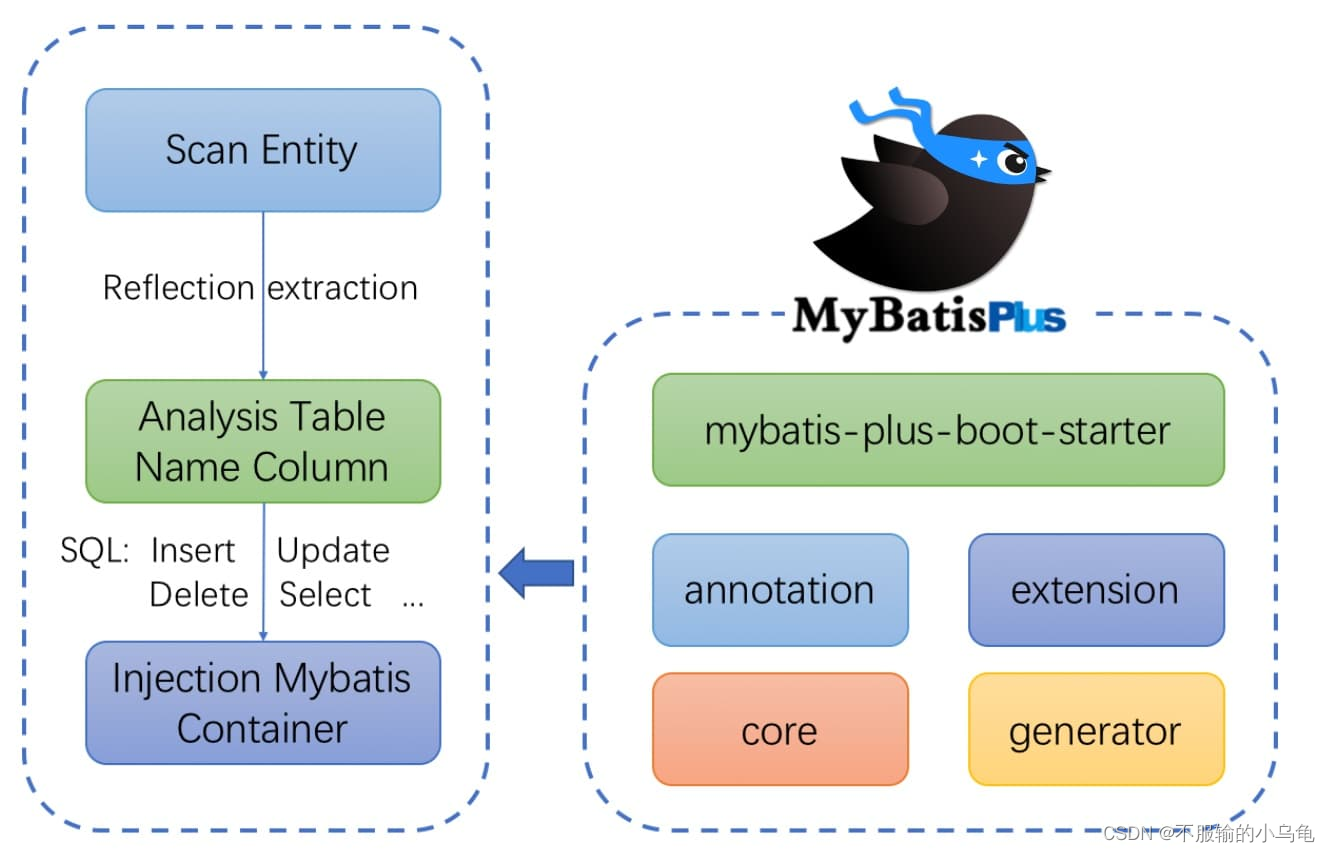
1、简介
MyBatis-Plus (opens new window)(简称 MP)是一个 MyBatis (opens new window)的增强工具,在 MyBatis 的基础上只做增强不做改变,为简化开发、提高效率而生。
2、特性
- 无侵入:只做增强不做改变,引入它不会对现有工程产生影响,如丝般顺滑
- 损耗小:启动即会自动注入基本 CURD,性能基本无损耗,直接面向对象操作
- 强大的 CRUD 操作:内置通用 Mapper、通用 Service,仅仅通过少量配置即可实现单表大部分 CRUD 操作,更有强大的条件构造器,满足各类使用需求
- 支持 Lambda 形式调用:通过 Lambda 表达式,方便的编写各类查询条件,无需再担心字段写错
- 支持主键自动生成:支持多达 4 种主键策略(内含分布式唯一 ID 生成器 - Sequence),可自由配置,完美解决主键问题
- 支持 ActiveRecord 模式:支持 ActiveRecord 形式调用,实体类只需继承 Model 类即可进行强大的 CRUD 操作
- 支持自定义全局通用操作:支持全局通用方法注入( Write once, use anywhere )
- 内置代码生成器:采用代码或者 Maven 插件可快速生成 Mapper 、 Model 、 Service 、 Controller 层代码,支持模板引擎,更有超多自定义配置等您来使用
- 内置分页插件:基于 MyBatis 物理分页,开发者无需关心具体操作,配置好插件之后,写分页等同于普通 List 查询
- 分页插件支持多种数据库:支持 MySQL、MariaDB、Oracle、DB2、H2、HSQL、SQLite、Postgre、SQLServer 等多种数据库
- 内置性能分析插件:可输出 SQL 语句以及其执行时间,建议开发测试时启用该功能,能快速揪出慢查询
- 内置全局拦截插件:提供全表 delete 、 update 操作智能分析阻断,也可自定义拦截规则,预防误操作
3、支持数据库
任何能使用 MyBatis 进行 CRUD, 并且支持标准 SQL 的数据库,具体支持情况如下,如果不在下列表查看分页部分教程 PR 您的支持。
- MySQL,Oracle,DB2,H2,HSQL,SQLite,PostgreSQL,SQLServer,Phoenix,Gauss ,ClickHouse,Sybase,OceanBase,Firebird,Cubrid,Goldilocks,csiidb
- 达梦数据库,虚谷数据库,人大金仓数据库,南大通用(华库)数据库,南大通用数据库,神通数据库,瀚高数据库
4、框架结构
二、基本用法
1、打开上次项目以及数据库,在pom.xml中引入依赖包,并点击同步
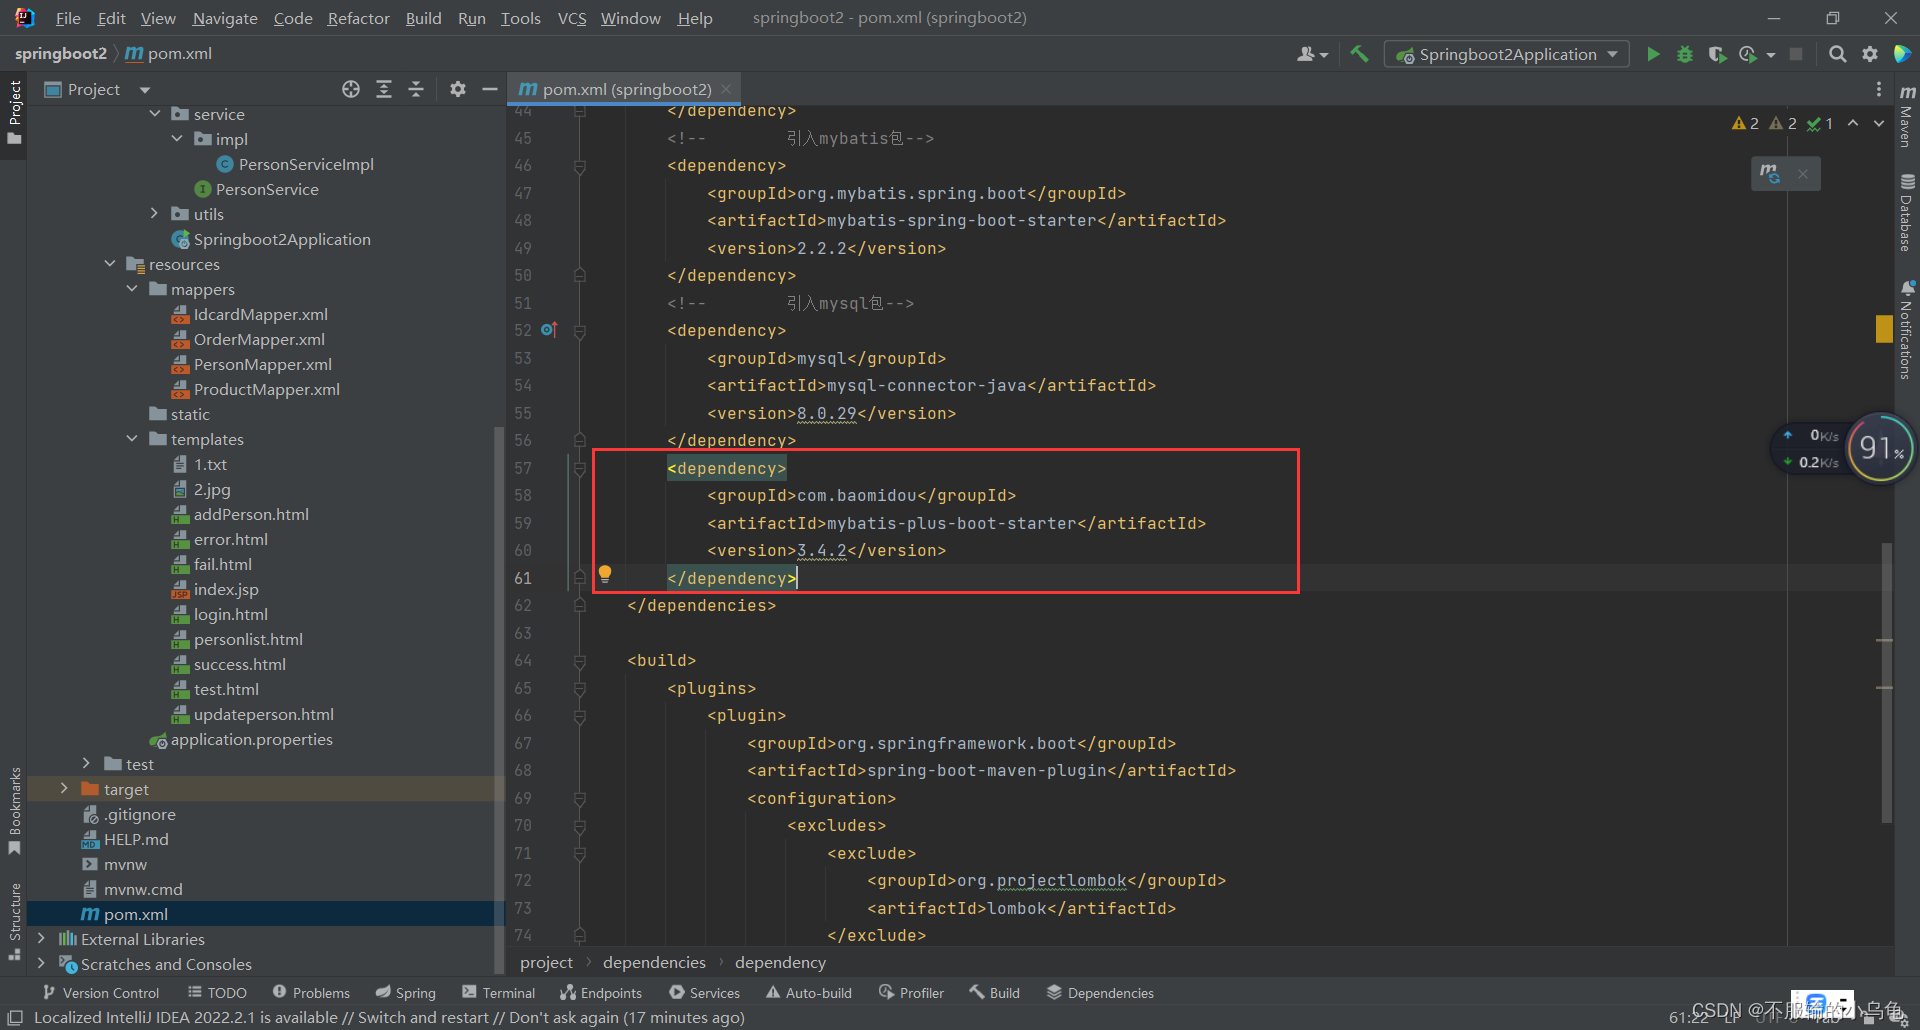
		<dependency>
			<groupId>com.baomidou</groupId>
			<artifactId>mybatis-plus-boot-starter</artifactId>
			<version>3.4.2</version>
		</dependency>
2、修改application.properties,把mybatis都改为mybatis-plus
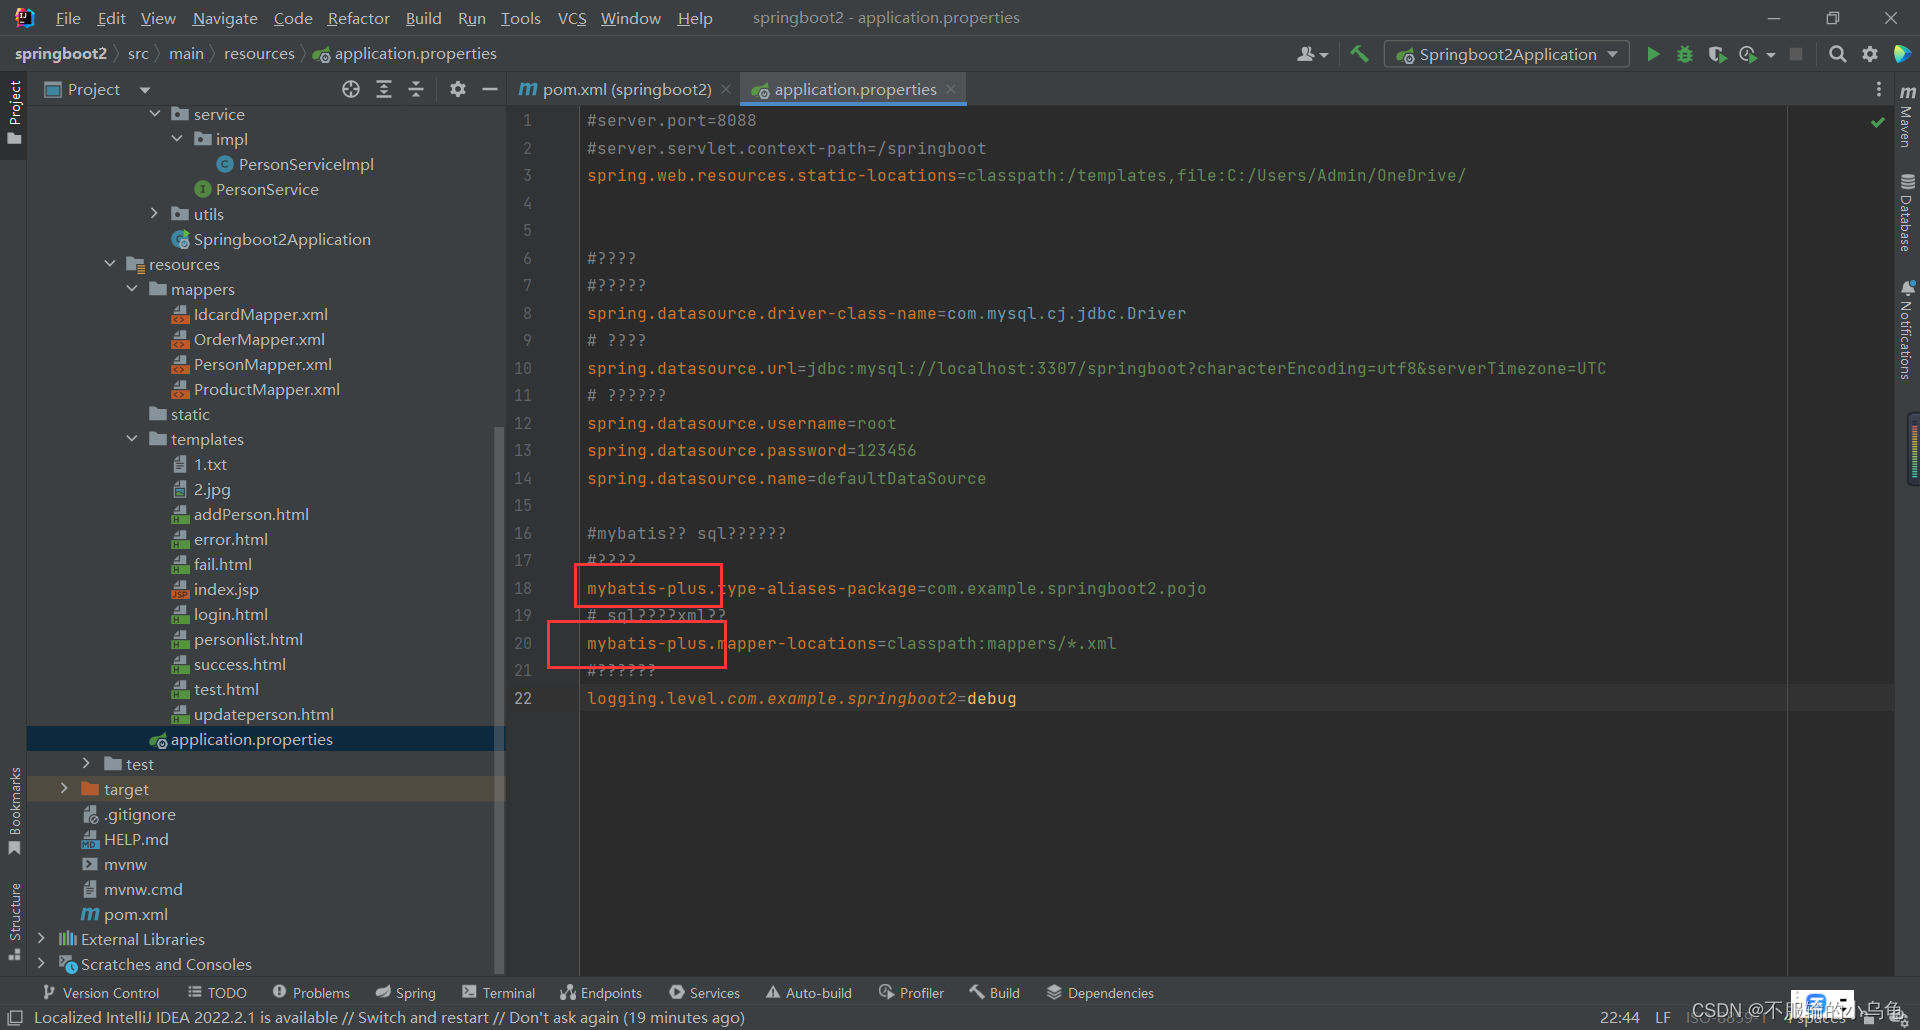
#server.port=8088
#server.servlet.context-path=/springboot
#spring.web.resources.static-locations=classpath:/templates,file:C:/Users/Admin/OneDrive/


#????
#?????
spring.datasource.driver-class-name=com.mysql.cj.jdbc.Driver
# ????
spring.datasource.url=jdbc:mysql://localhost:3307/springboot?characterEncoding=utf8&serverTimezone=UTC
# ??????
spring.datasource.username=root
spring.datasource.password=123456
spring.datasource.name=defaultDataSource

#mybatis?? sql??????
#????
mybatis-plus.type-aliases-package=com.example.springboot2.pojo
# sql????xml??
mybatis-plus.mapper-locations=classpath:mappers/*.xml
#??????
logging.level.com.example.springboot2=debug
3、修改Springboot2Application
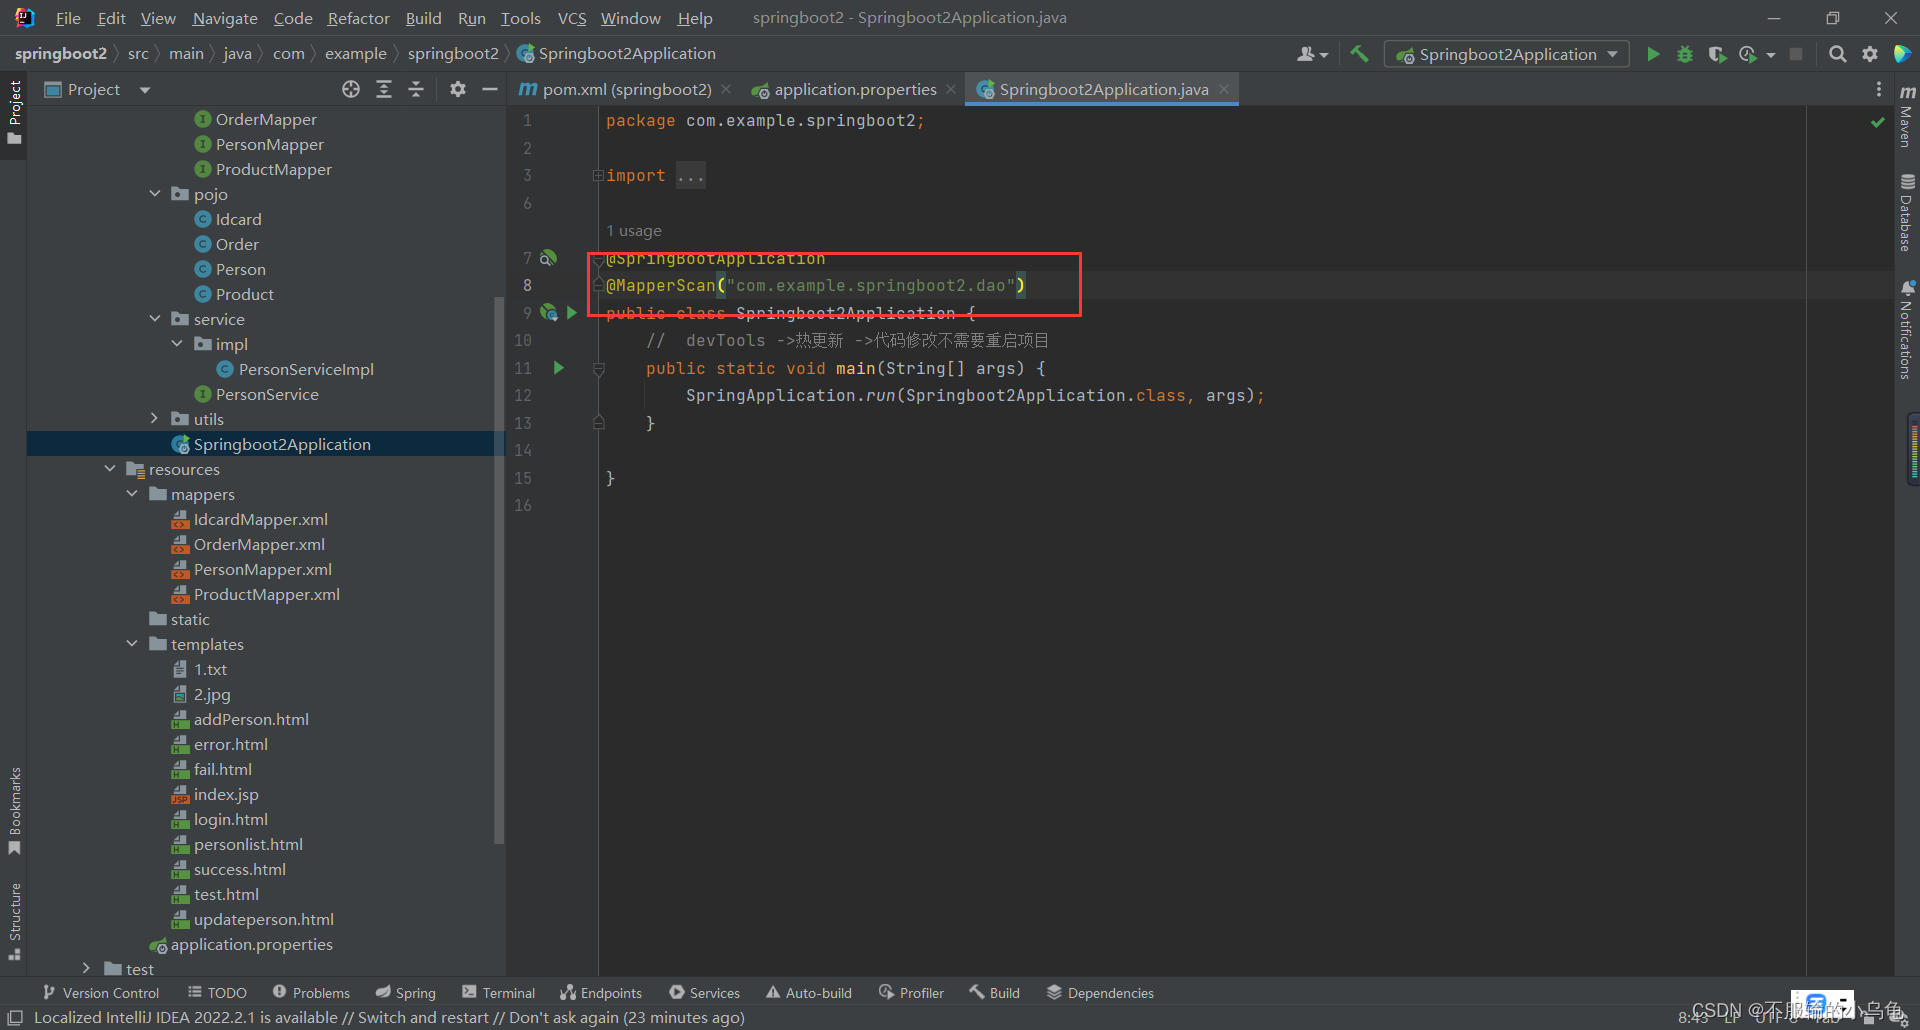
package com.example.springboot2;

import org.mybatis.spring.annotation.MapperScan;
import org.springframework.boot.SpringApplication;
import org.springframework.boot.autoconfigure.SpringBootApplication;

@SpringBootApplication
@MapperScan("com.example.springboot2.dao")
public class Springboot2Application {


	//	devTools ->热更新 ->代码修改不需要重启项目
	public static void main(String[] args) {


		SpringApplication.run(Springboot2Application.class, args);
	}

}
4、打开MySQL Workbench,在上次数据库中新建student表,字段名有id,age,name;并添加一些数据
5、在pojo文件夹下新建Student类
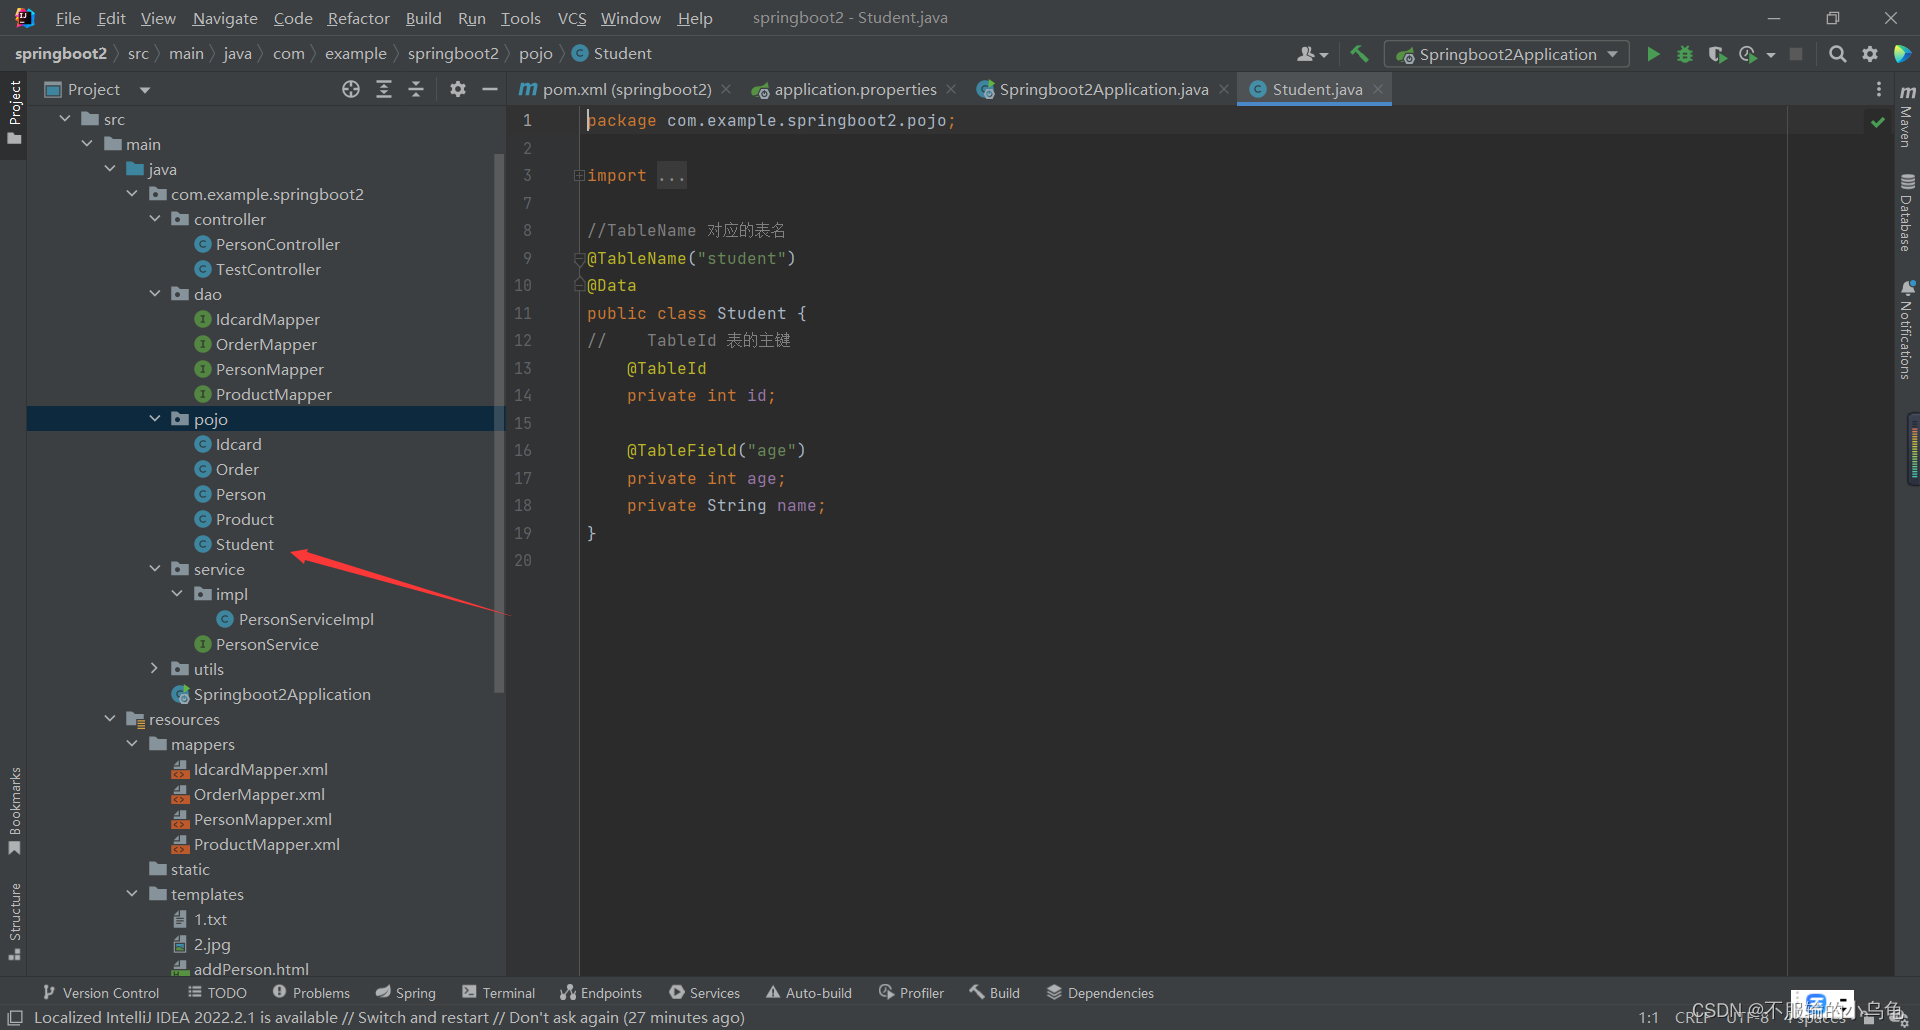
package com.example.springboot2.pojo;

import com.baomidou.mybatisplus.annotation.TableField;
import com.baomidou.mybatisplus.annotation.TableId;
import com.baomidou.mybatisplus.annotation.TableName;
import lombok.Data;

//TableName 对应的表名
@TableName("student")
@Data
public class Student {


//    TableId 表的主键
    @TableId
    private int id;

    @TableField("age")
    private int age;
    private String name;
}
6、在dao文件夹下新建StudentMapper类
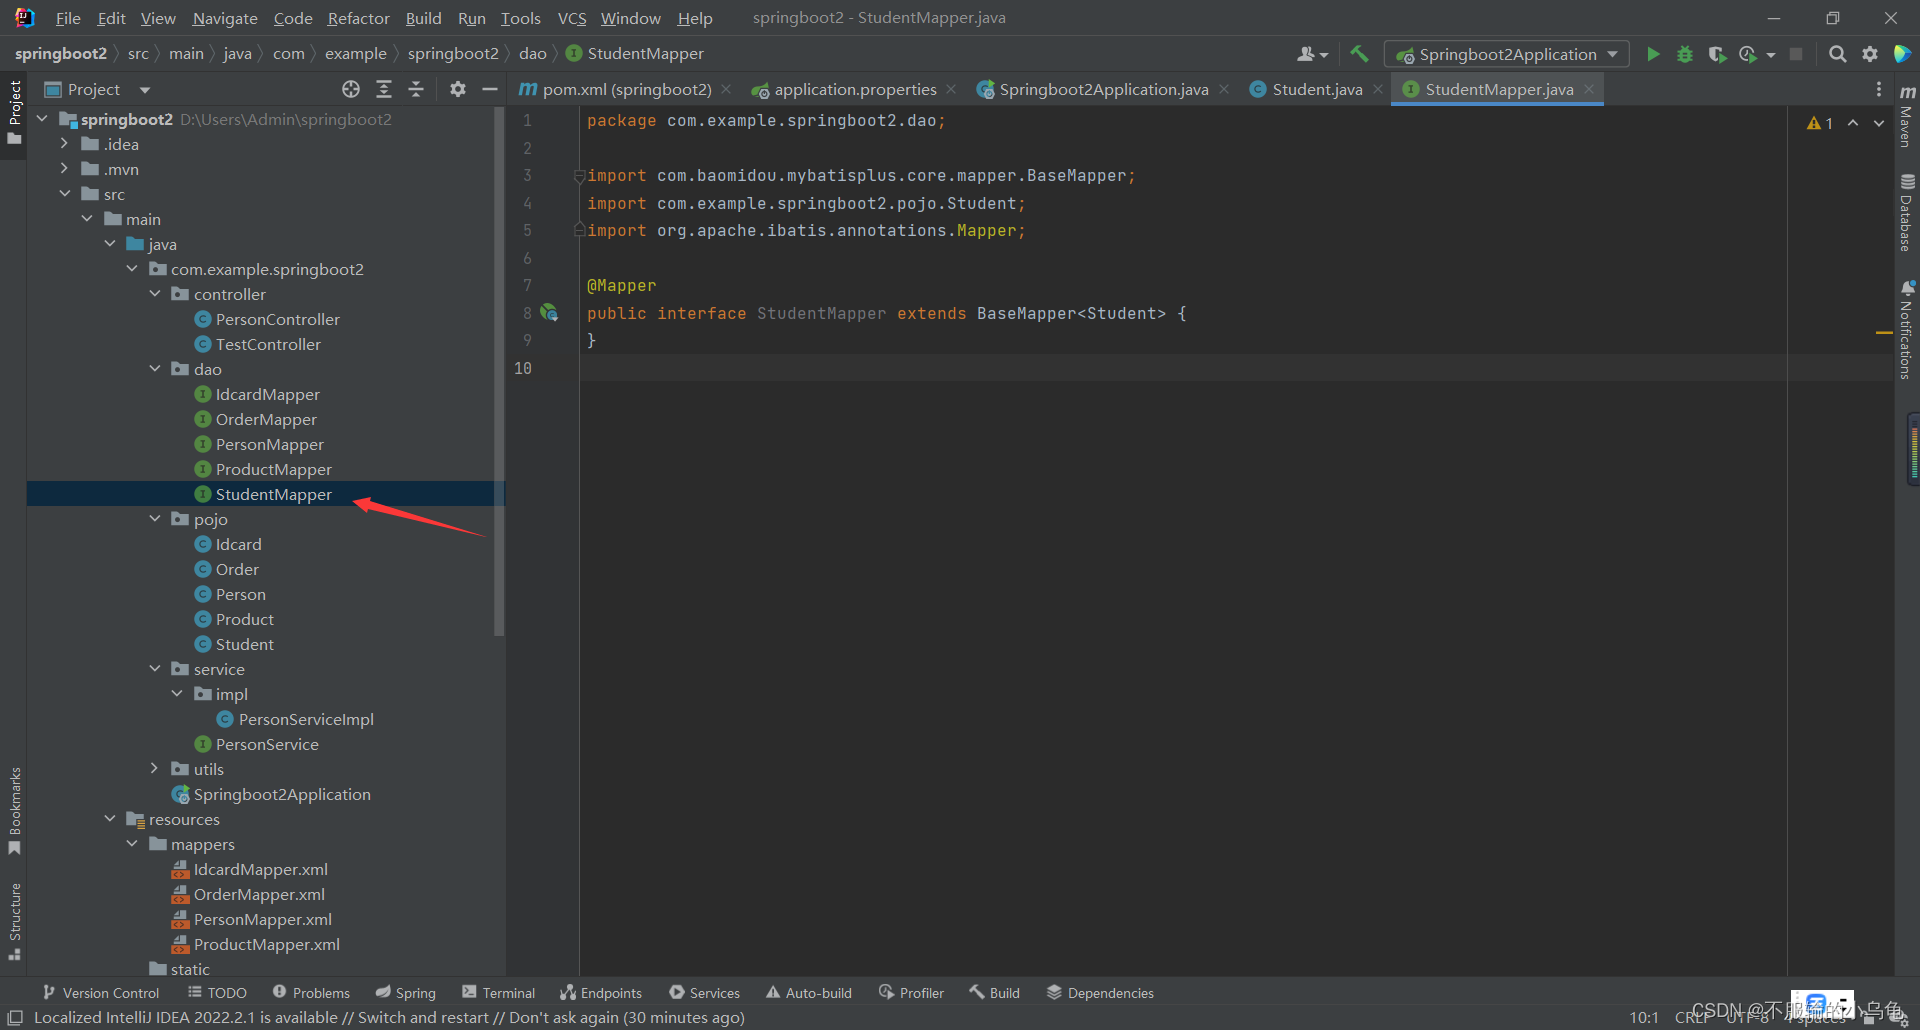
package com.example.springboot2.dao;

import com.baomidou.mybatisplus.core.mapper.BaseMapper;
import com.example.springboot2.pojo.Student;
import org.apache.ibatis.annotations.Mapper;

@Mapper
public interface StudentMapper extends BaseMapper<Student> {


}
7、在resources文件夹的mappers文件夹下新建StudentMapper.xml,里面不需要写内容,但必须有!
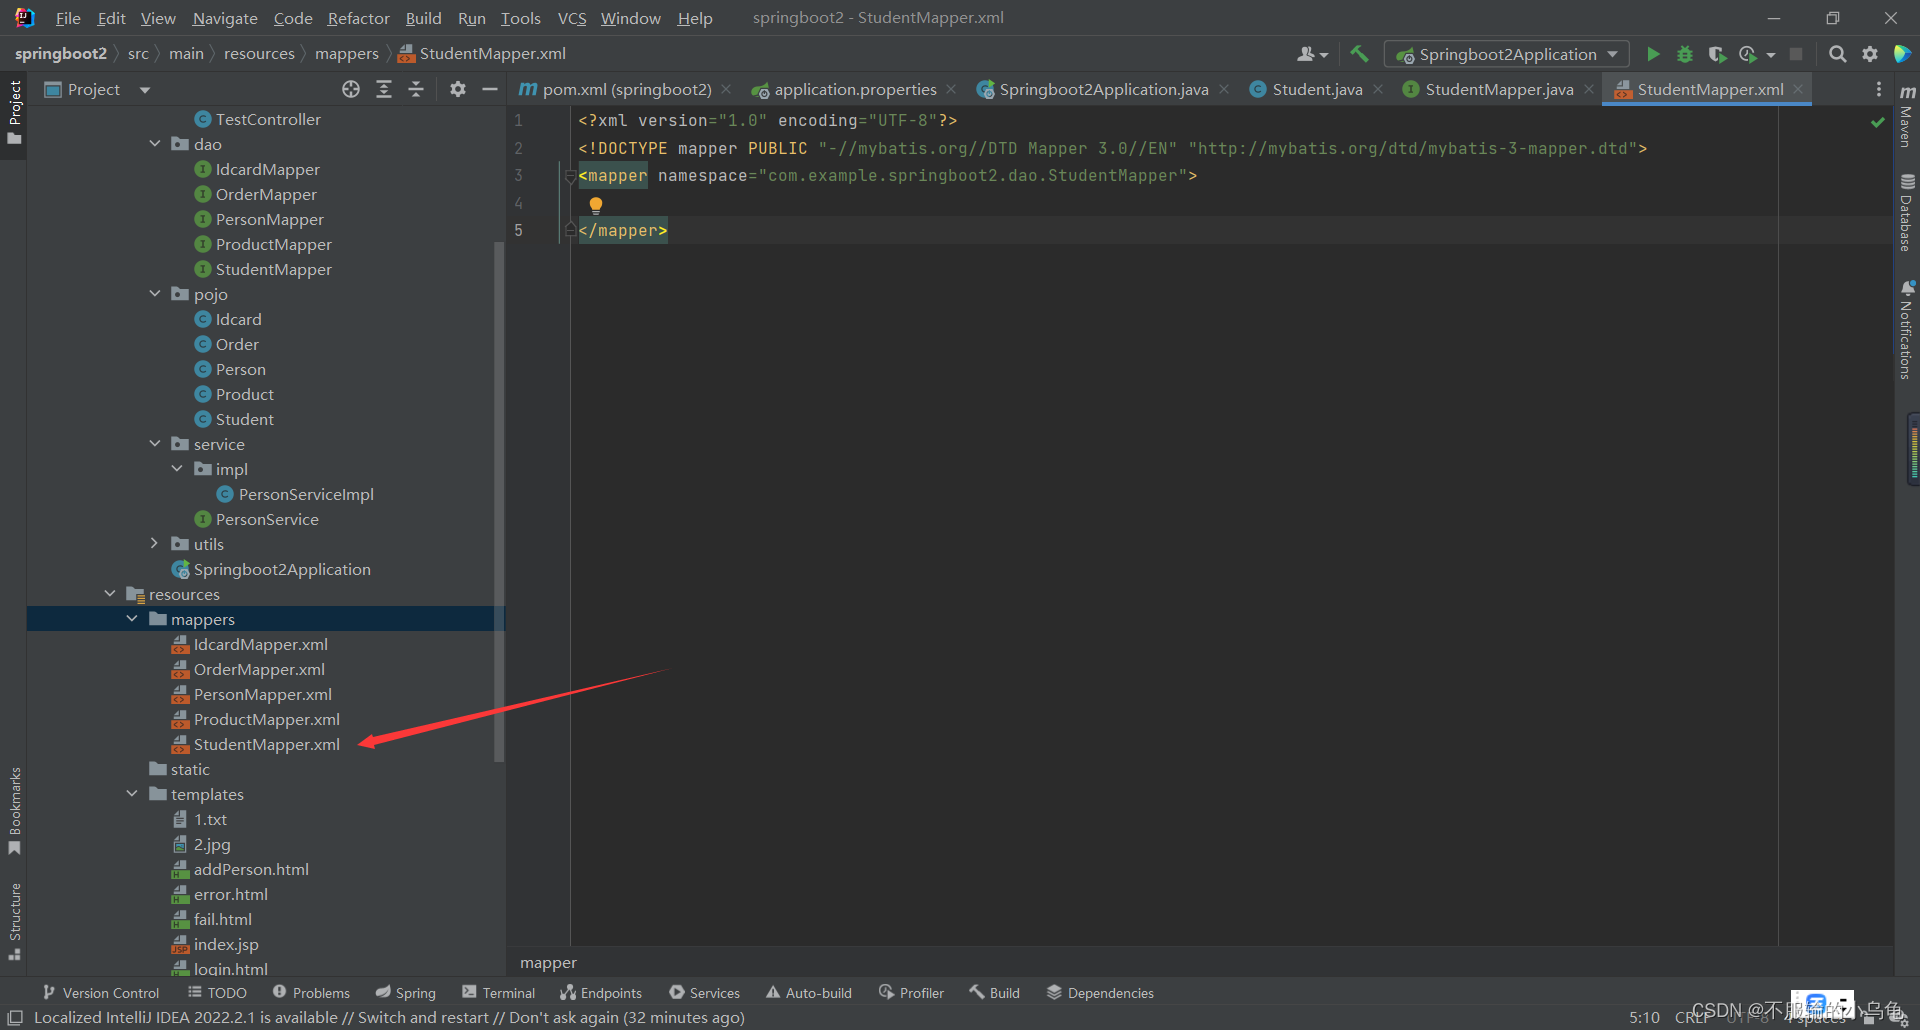
<?xml version="1.0" encoding="UTF-8"?>
<!DOCTYPE mapper PUBLIC "-//mybatis.org//DTD Mapper 3.0//EN" "http://mybatis.org/dtd/mybatis-3-mapper.dtd">
<mapper namespace="com.example.springboot2.dao.StudentMapper">

</mapper>
8、在service文件夹下新建StudentService类
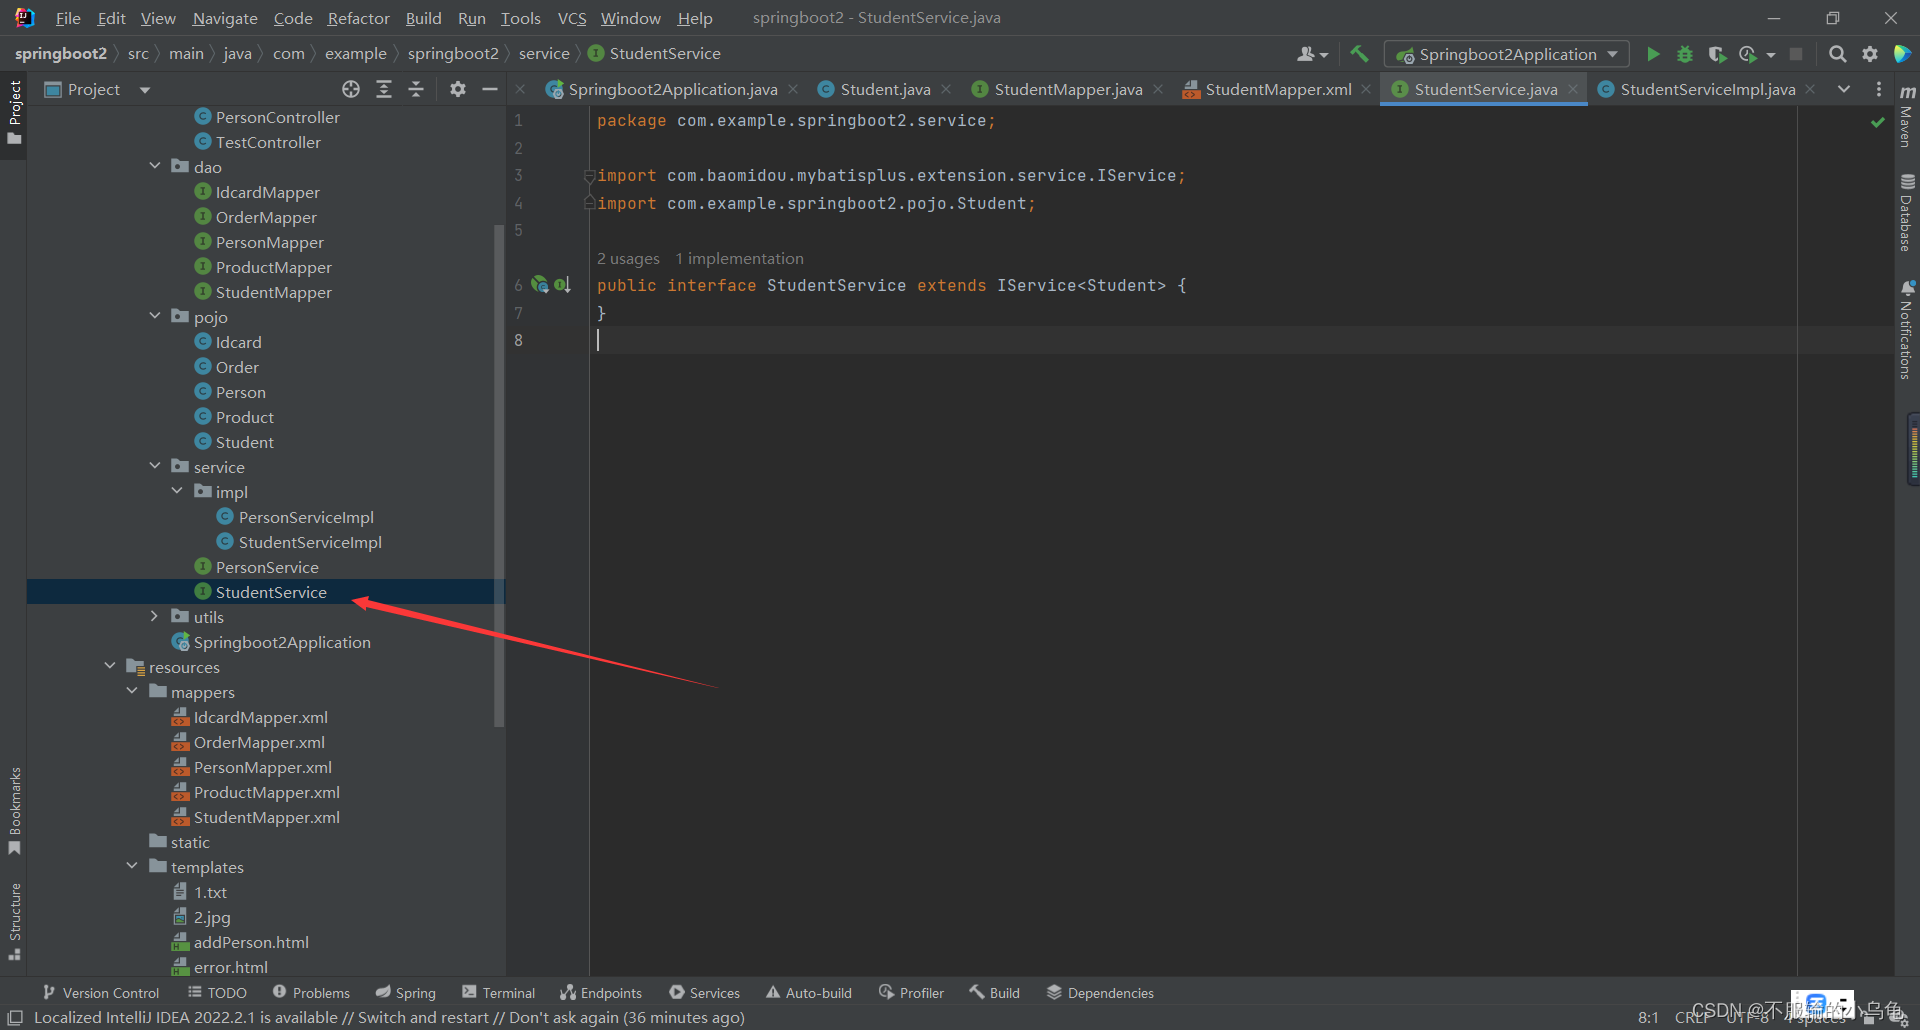
package com.example.springboot2.service;

import com.baomidou.mybatisplus.extension.service.IService;
import com.example.springboot2.pojo.Student;

public interface StudentService extends IService<Student> {


}
9、在impl文件夹下新建StudentServiceImpl实现类
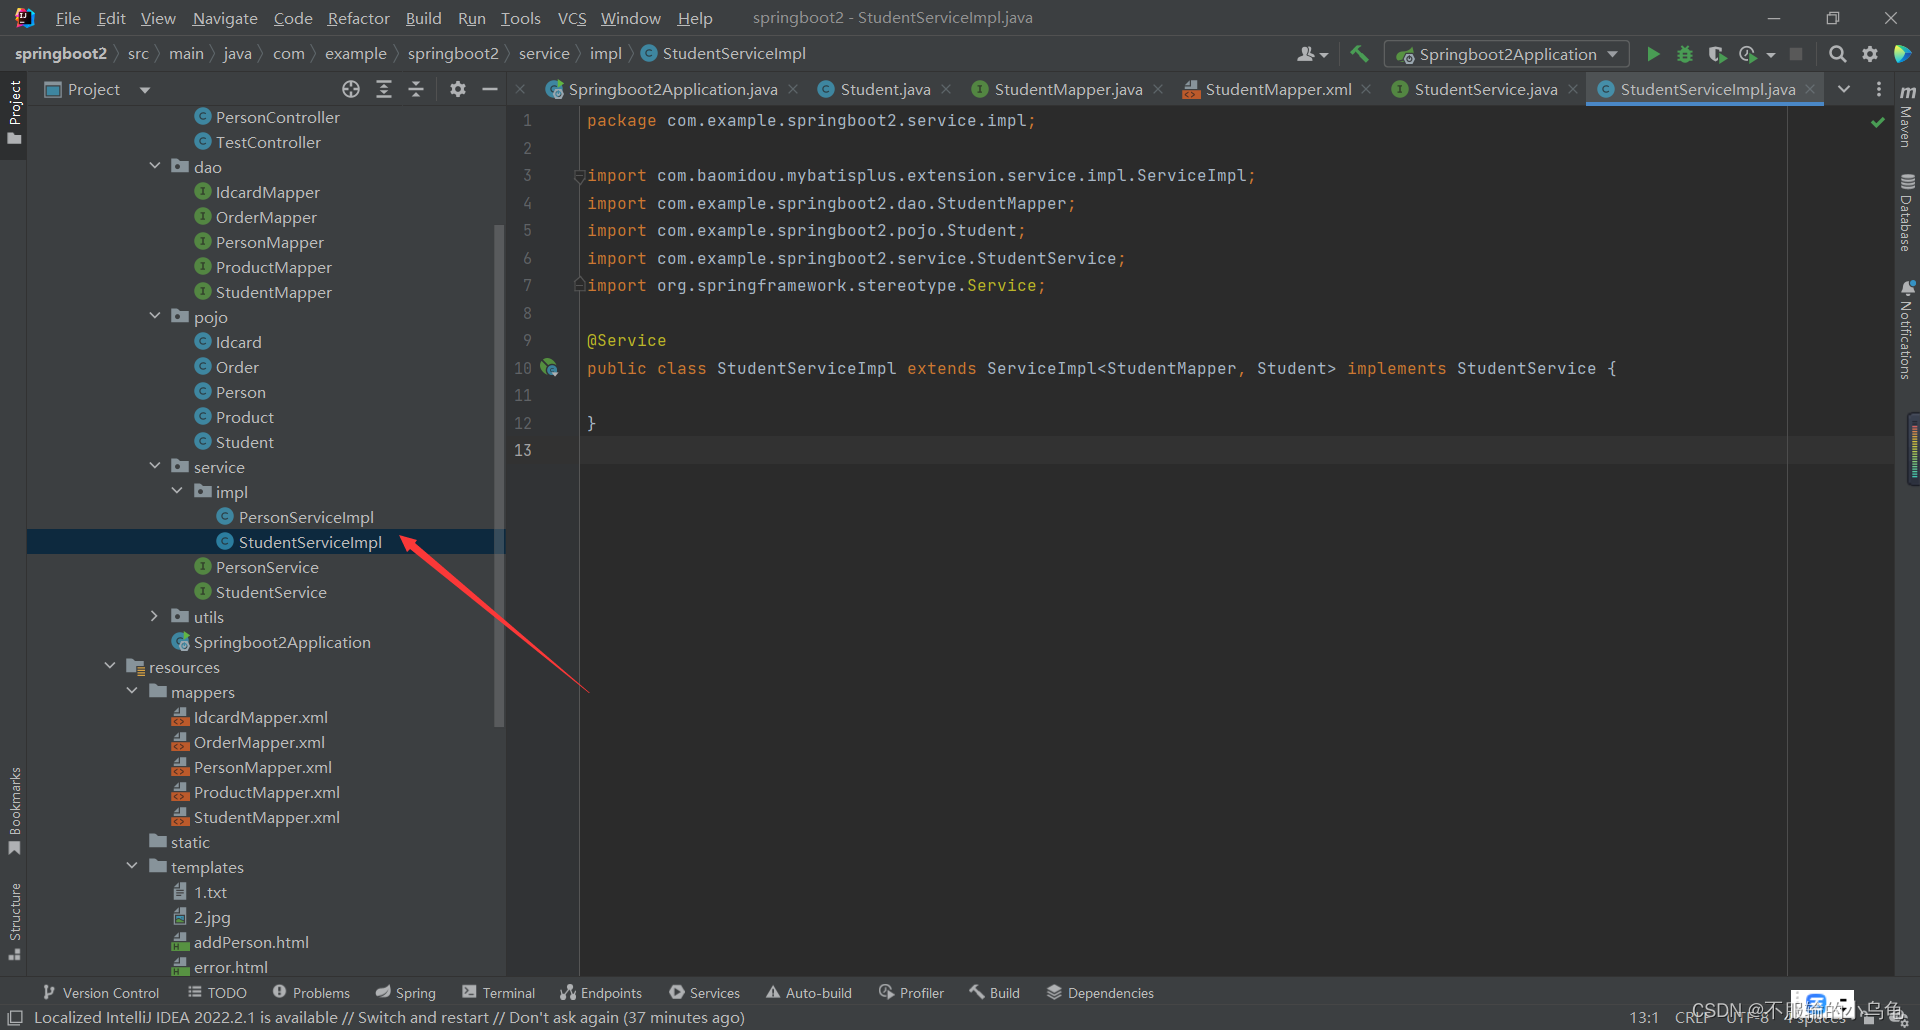
package com.example.springboot2.service.impl;

import com.baomidou.mybatisplus.extension.service.impl.ServiceImpl;
import com.example.springboot2.dao.StudentMapper;
import com.example.springboot2.pojo.Student;
import com.example.springboot2.service.StudentService;
import org.springframework.stereotype.Service;

@Service
public class StudentServiceImpl extends ServiceImpl<StudentMapper, Student> implements StudentService {


}
10、在controller文件夹下新建StudentController类

package com.example.springboot2.controller;

import com.baomidou.mybatisplus.core.metadata.IPage;
import com.baomidou.mybatisplus.extension.plugins.pagination.Page;
import com.example.springboot2.pojo.Student;
import com.example.springboot2.service.StudentService;
import org.springframework.beans.factory.annotation.Autowired;
import org.springframework.stereotype.Controller;
import org.springframework.ui.Model;
import org.springframework.web.bind.annotation.RequestMapping;

@Controller
public class StudentController {


    @Autowired
    StudentService studentService;

    @RequestMapping("studentlist")
    public String studentlist(Model model){


        model.addAttribute("studentlist",studentService.list());
        return "studentlist.html";
    }

}
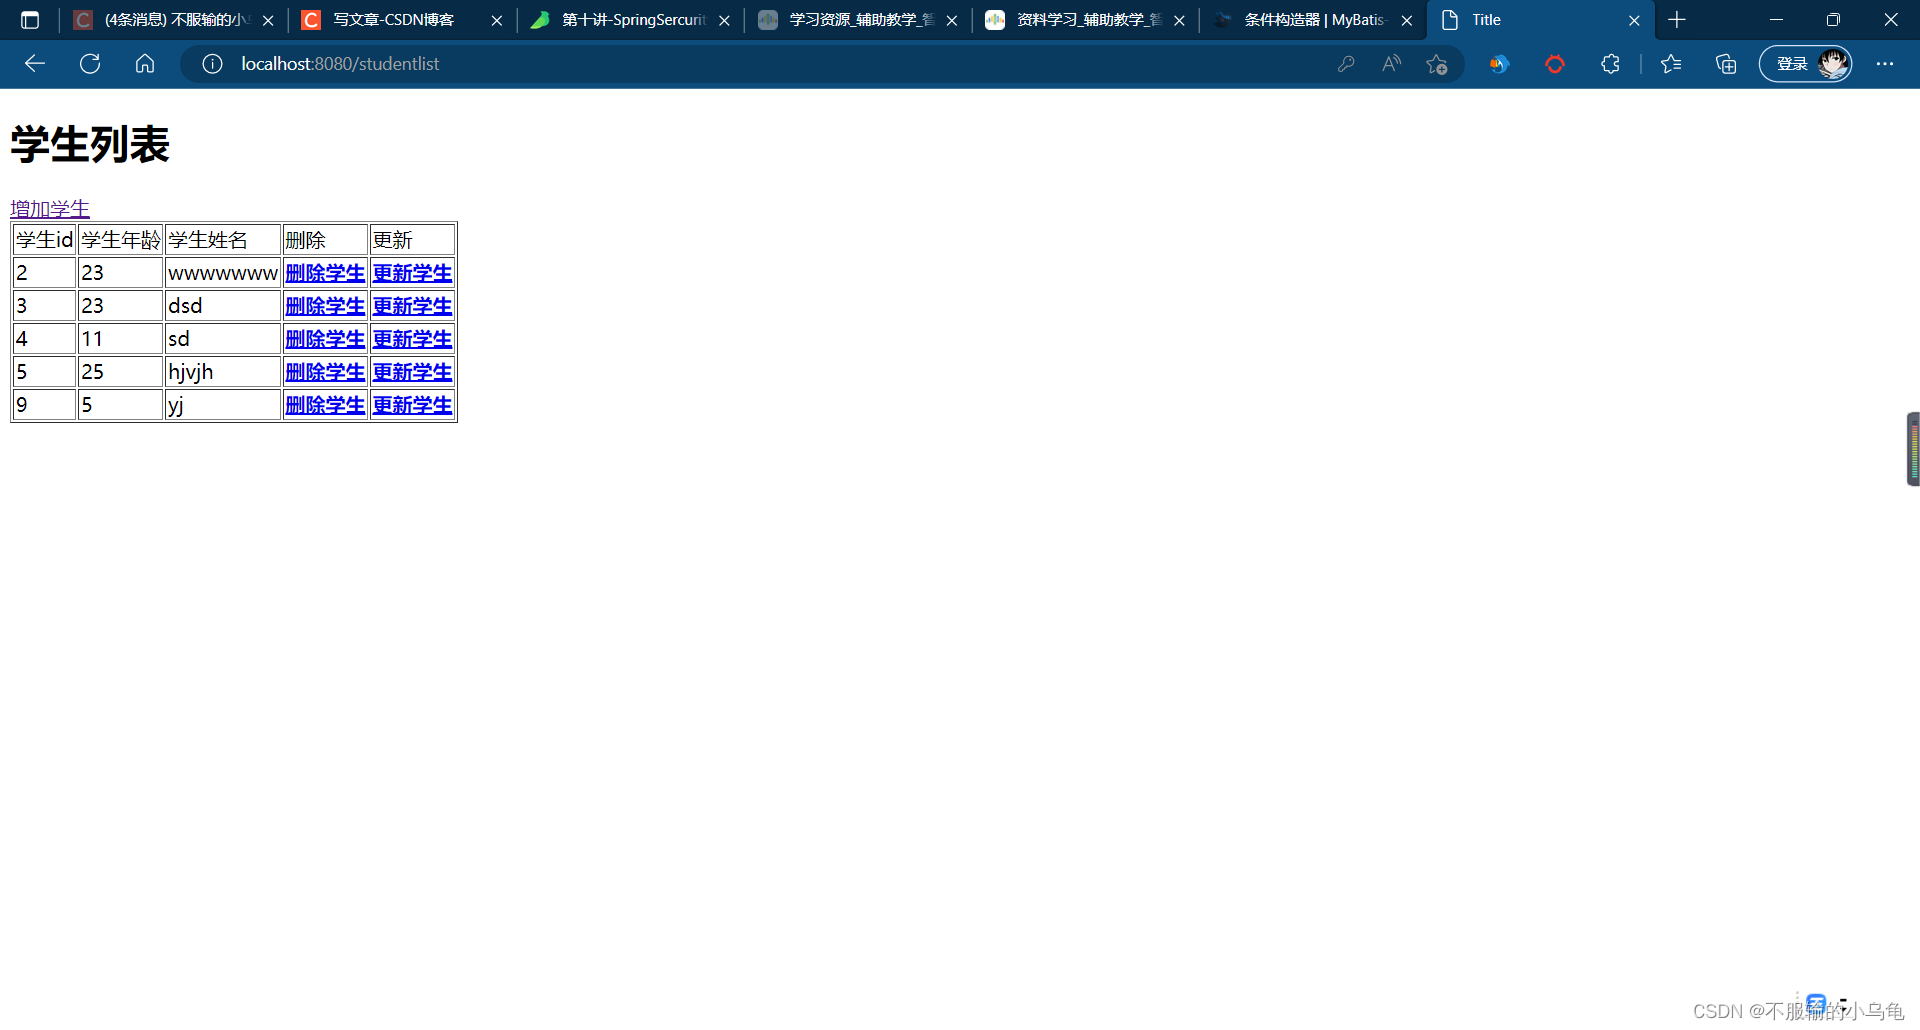
11、在templates文件夹下新建studentlist.html
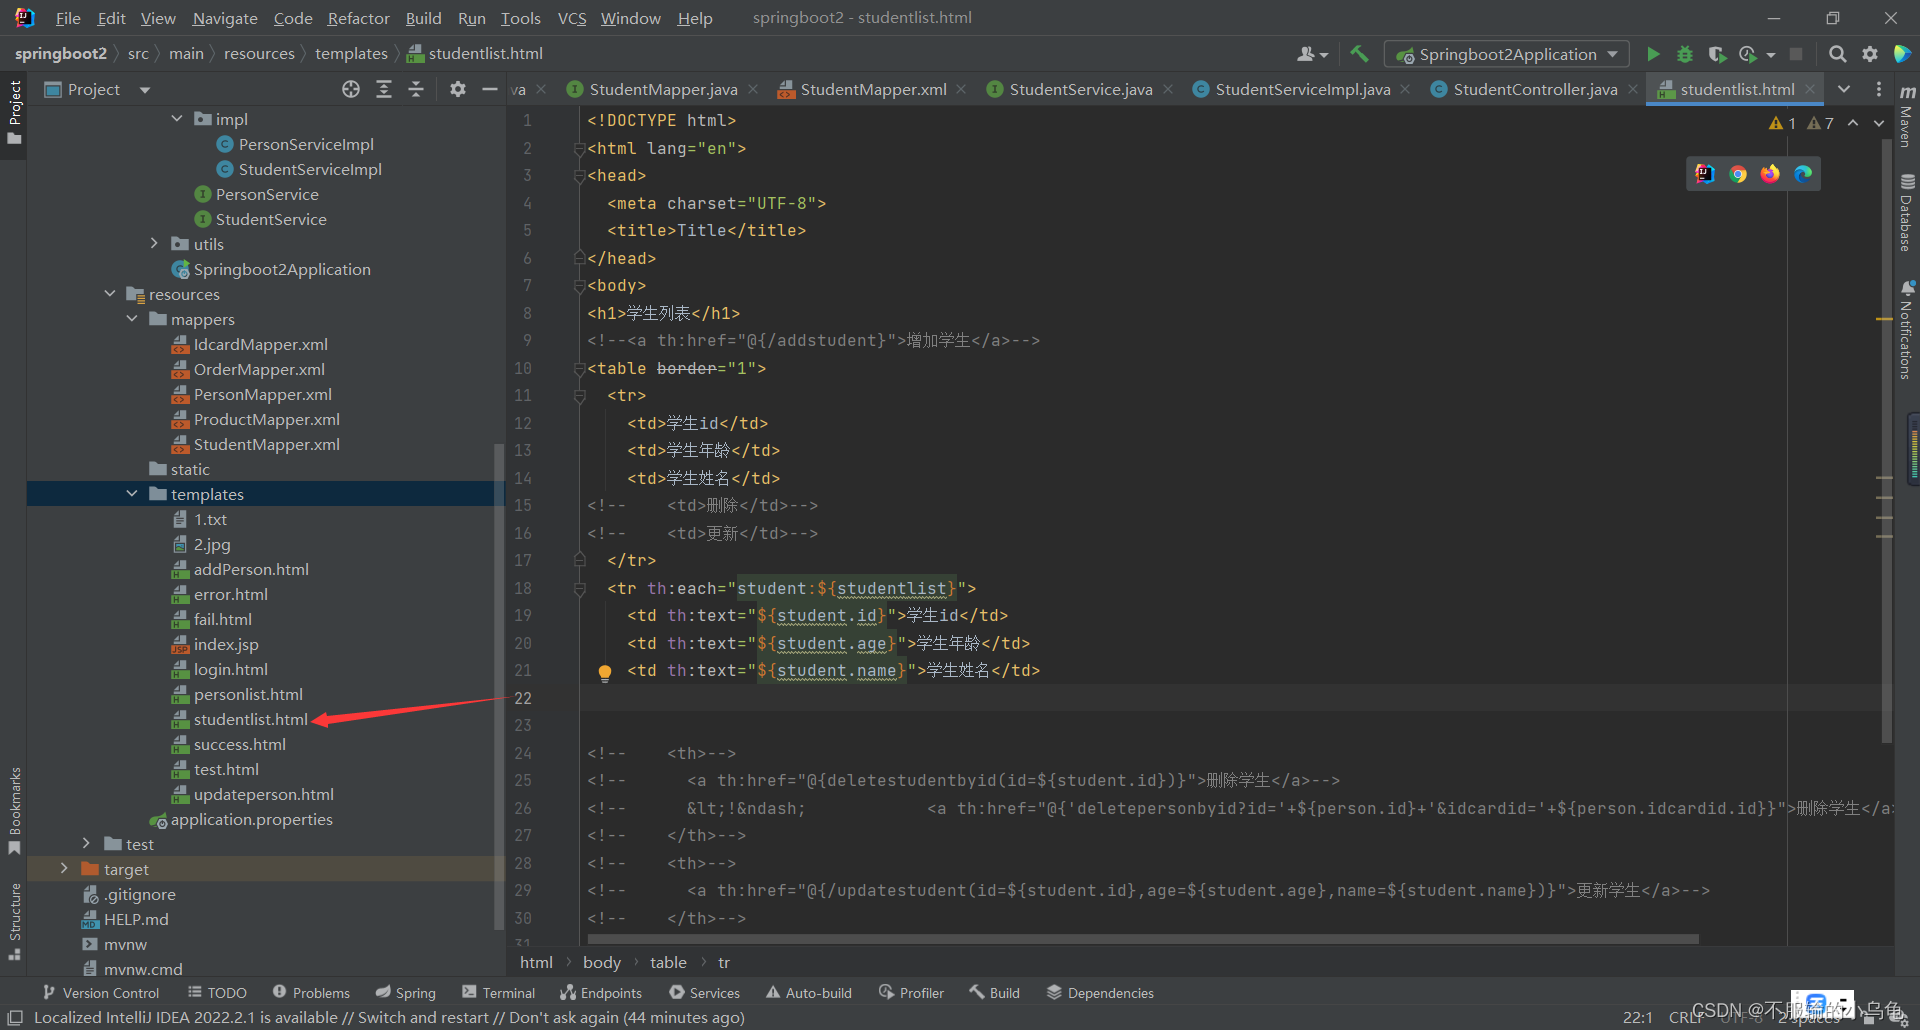
<!DOCTYPE html>
<html lang="en">
<head>
  <meta charset="UTF-8">
  <title>Title</title>
</head>
<body>
<h1>学生列表</h1>
<table border="1">
  <tr>
    <td>学生id</td>
    <td>学生年龄</td>
    <td>学生姓名</td>
  </tr>
  <tr th:each="student:${studentlist}">
    <td th:text="${student.id}">学生id</td>
    <td th:text="${student.age}">学生年龄</td>
    <td th:text="${student.name}">学生姓名</td>
  </tr>
</table>
</body>
</html>
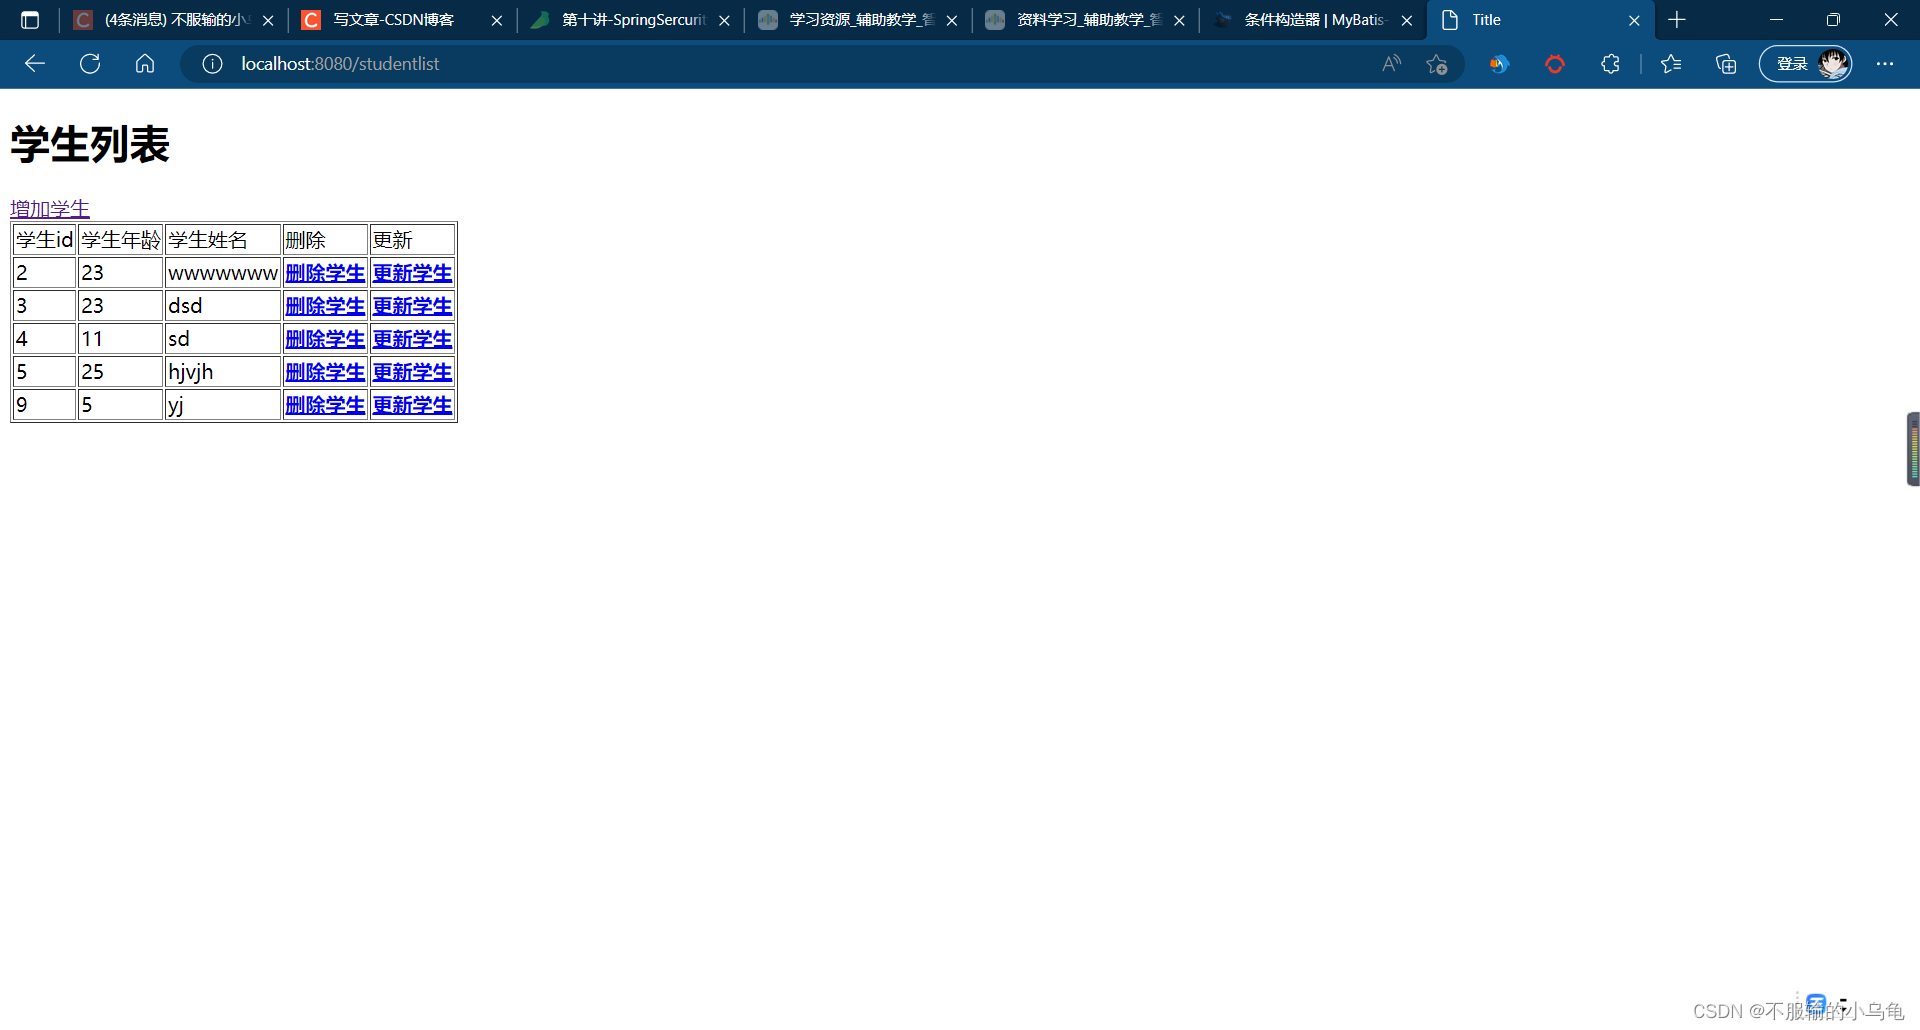
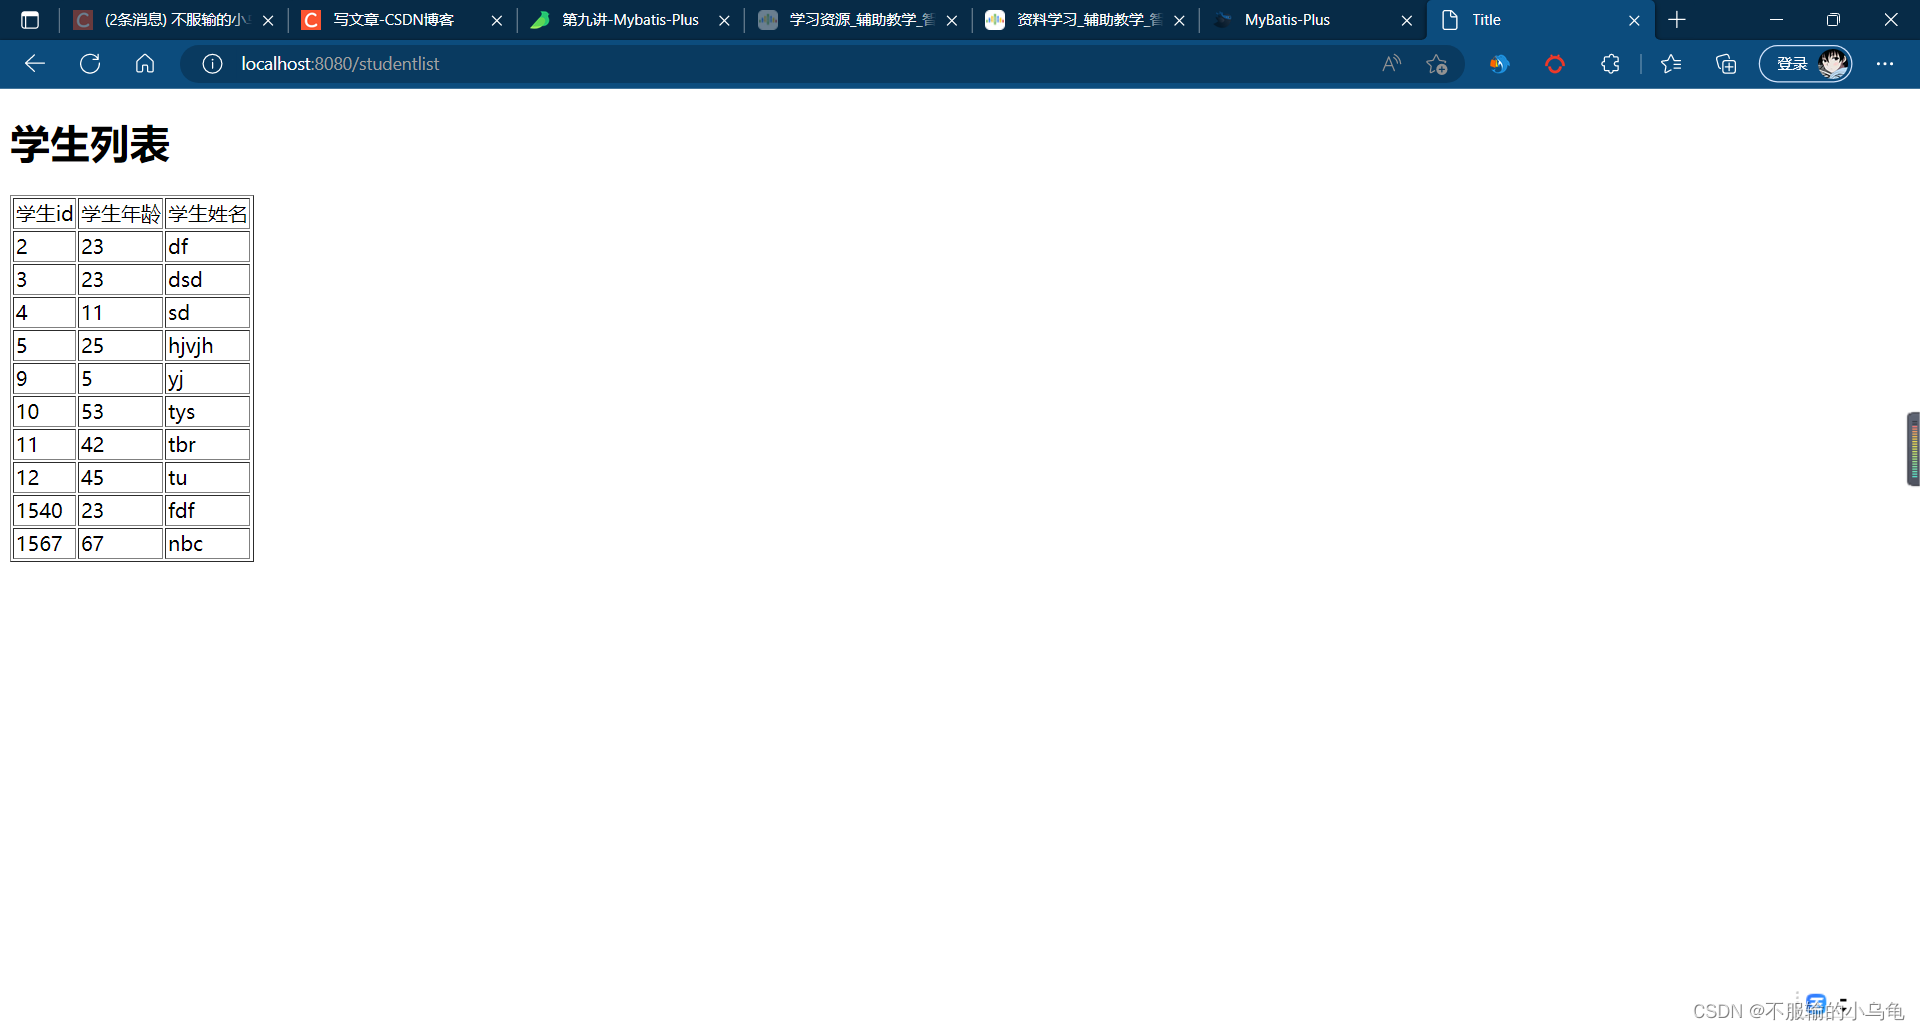
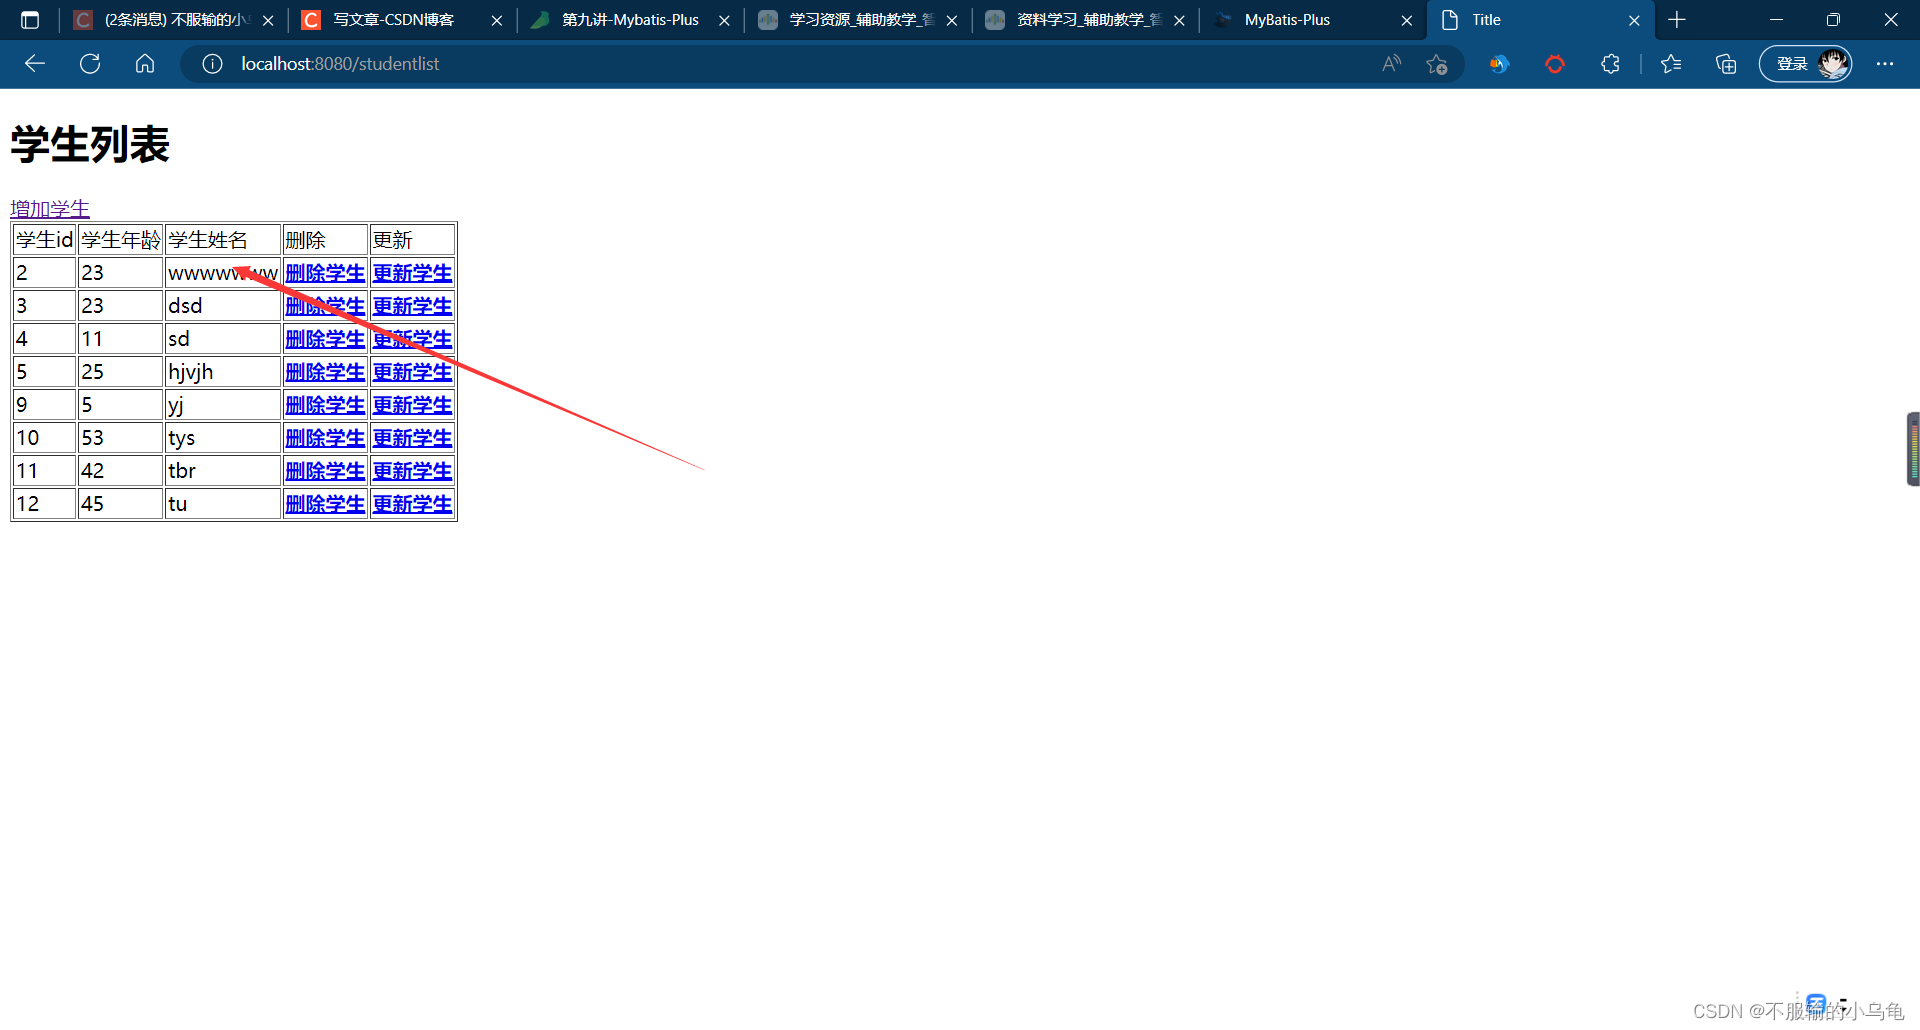
12、点击运行,查询成功!
13、增加学生操作
(1)修改StudentController类
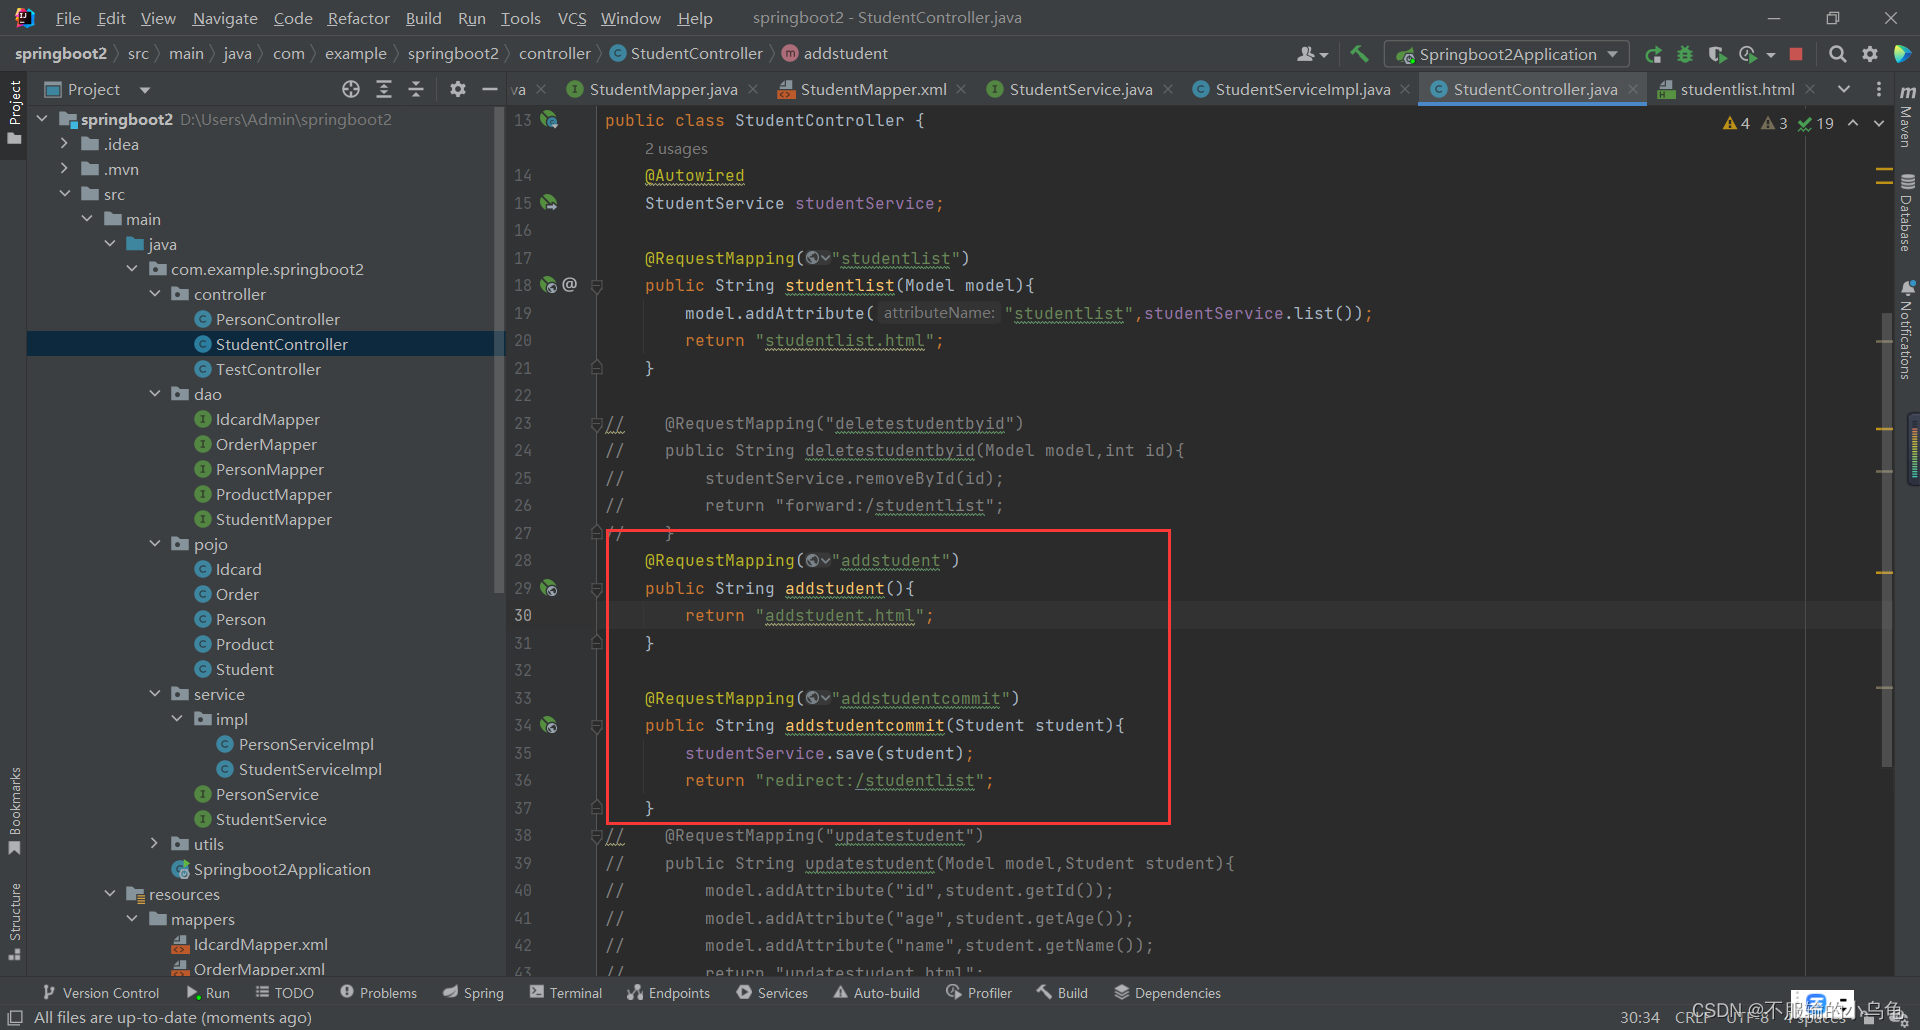
    @RequestMapping("addstudent")
    public String addstudent(){


        return "addstudent.html";
    }

    @RequestMapping("addstudentcommit")
    public String addstudentcommit(Student student){


        studentService.save(student);
        return "redirect:/studentlist";
    }
(2)在templates文件夹下新建addstudent.html
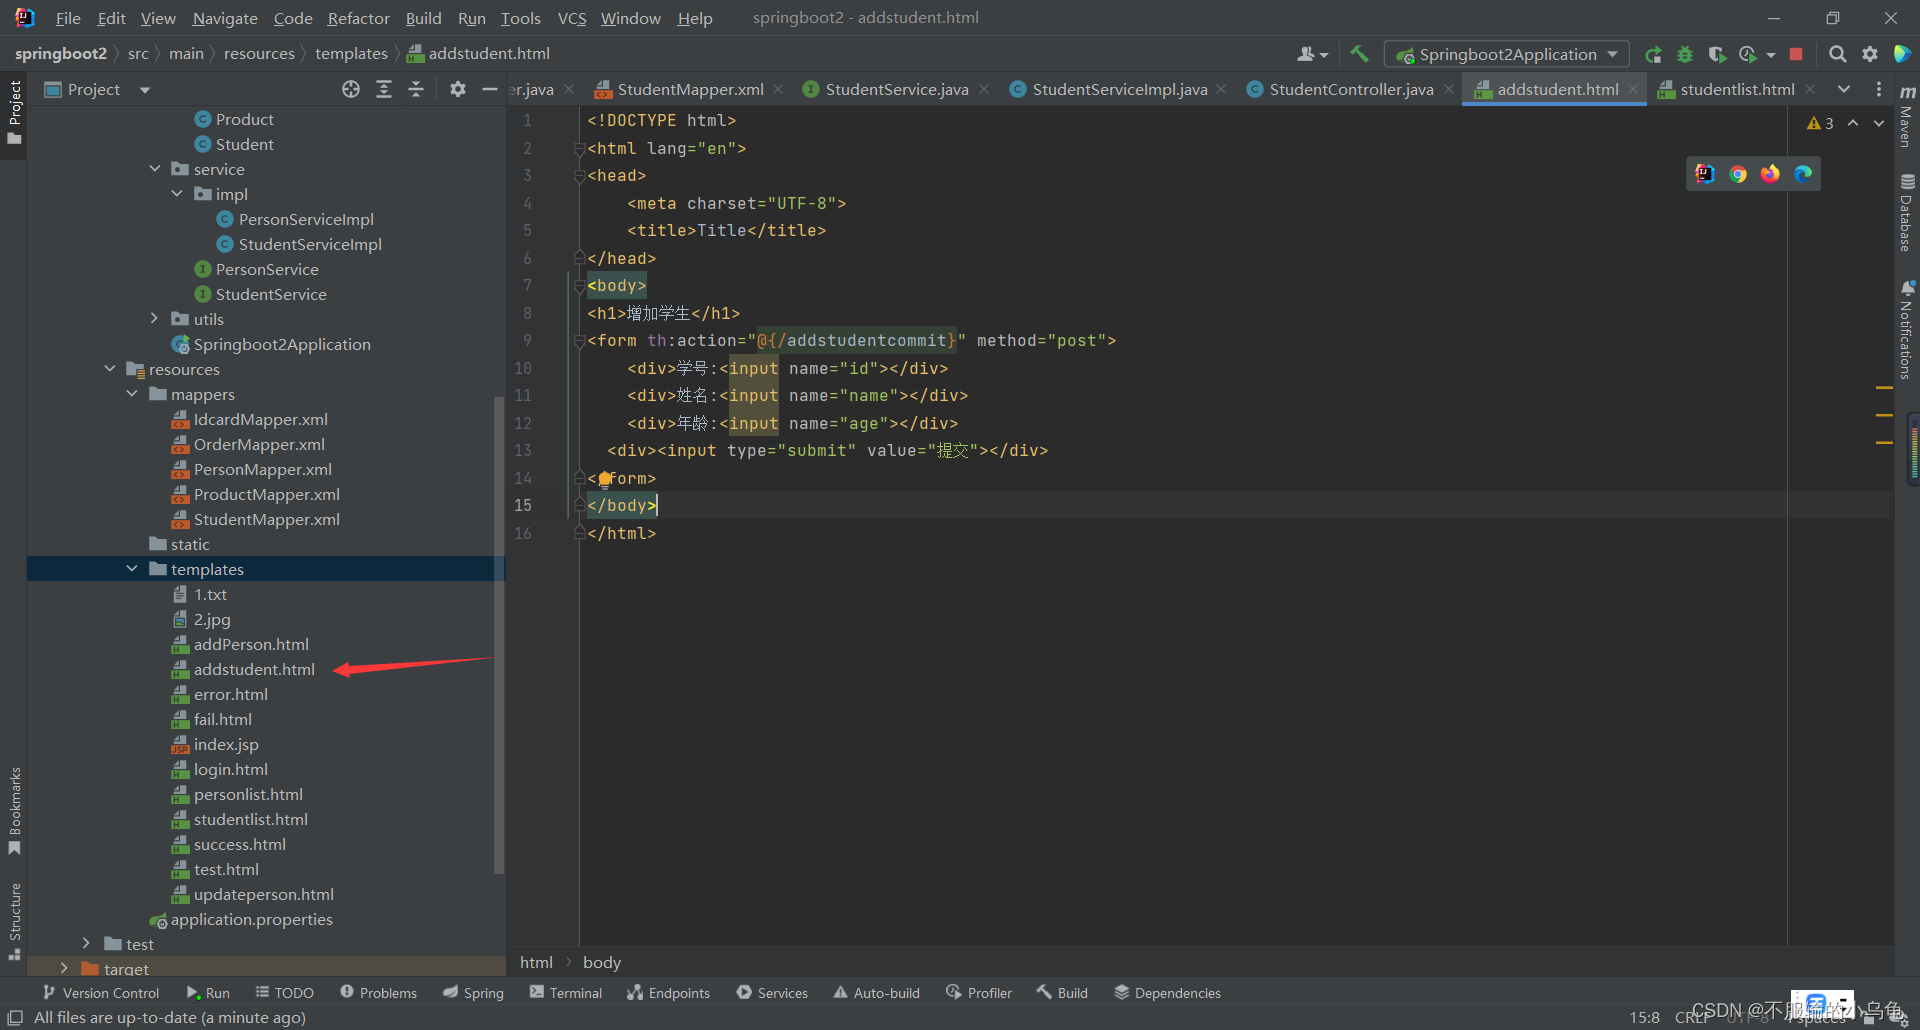
<!DOCTYPE html>
<html lang="en">
<head>
    <meta charset="UTF-8">
    <title>Title</title>
</head>
<body>
<h1>增加学生</h1>
<form th:action="@{/addstudentcommit}" method="post">
 <div>学号:<input name="id"></div>
  <div>姓名:<input name="name"></div>
  <div>年龄:<input name="age"></div>
  <div><input type="submit" value="提交"></div>
</form>
</body>
</html>
(3)我们还可以把增加页面放到studenlist页面中
<a th:href="@{/addstudent}">增加学生</a>
(4)点击运行,增加学生成功!
14、删除学生操作
(1)修改StudentController类

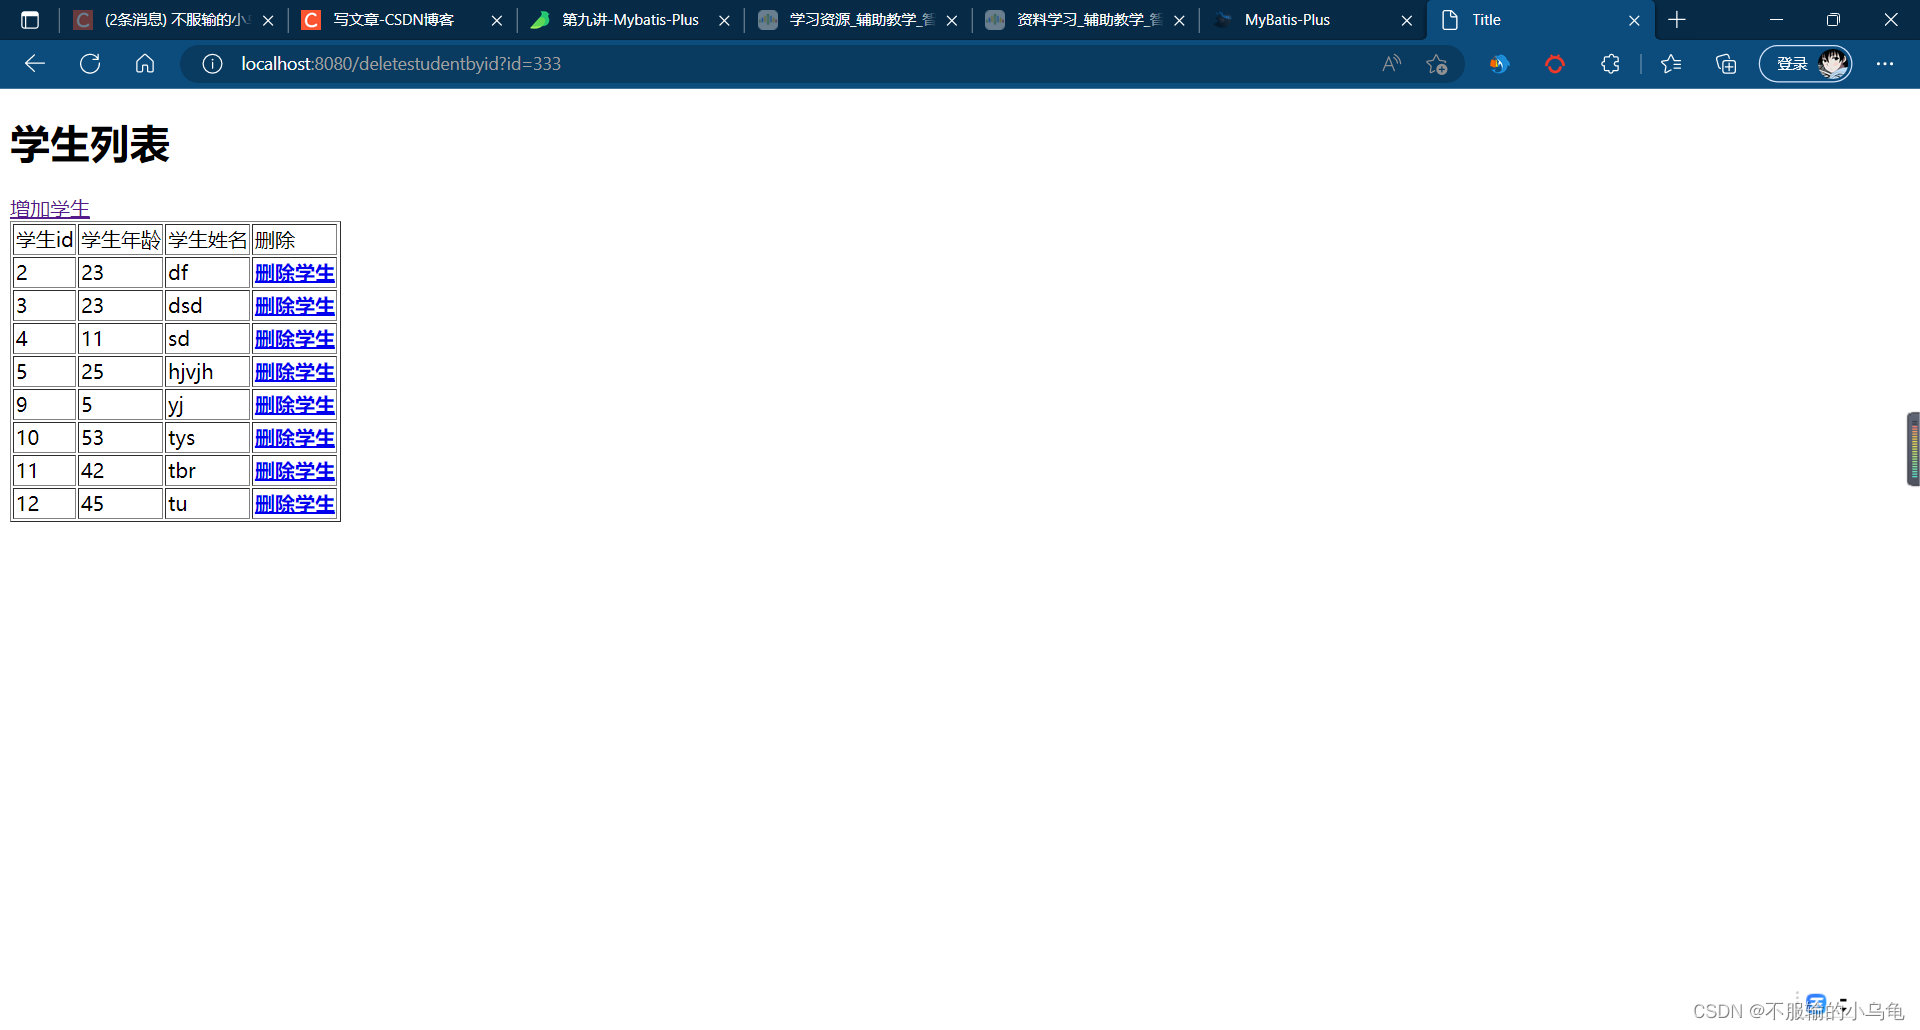
    @RequestMapping("deletestudentbyid")
    public String deletestudentbyid(Model model,int id){


        studentService.removeById(id);
        return "forward:/studentlist";
    }
(2)修改studenlist.html
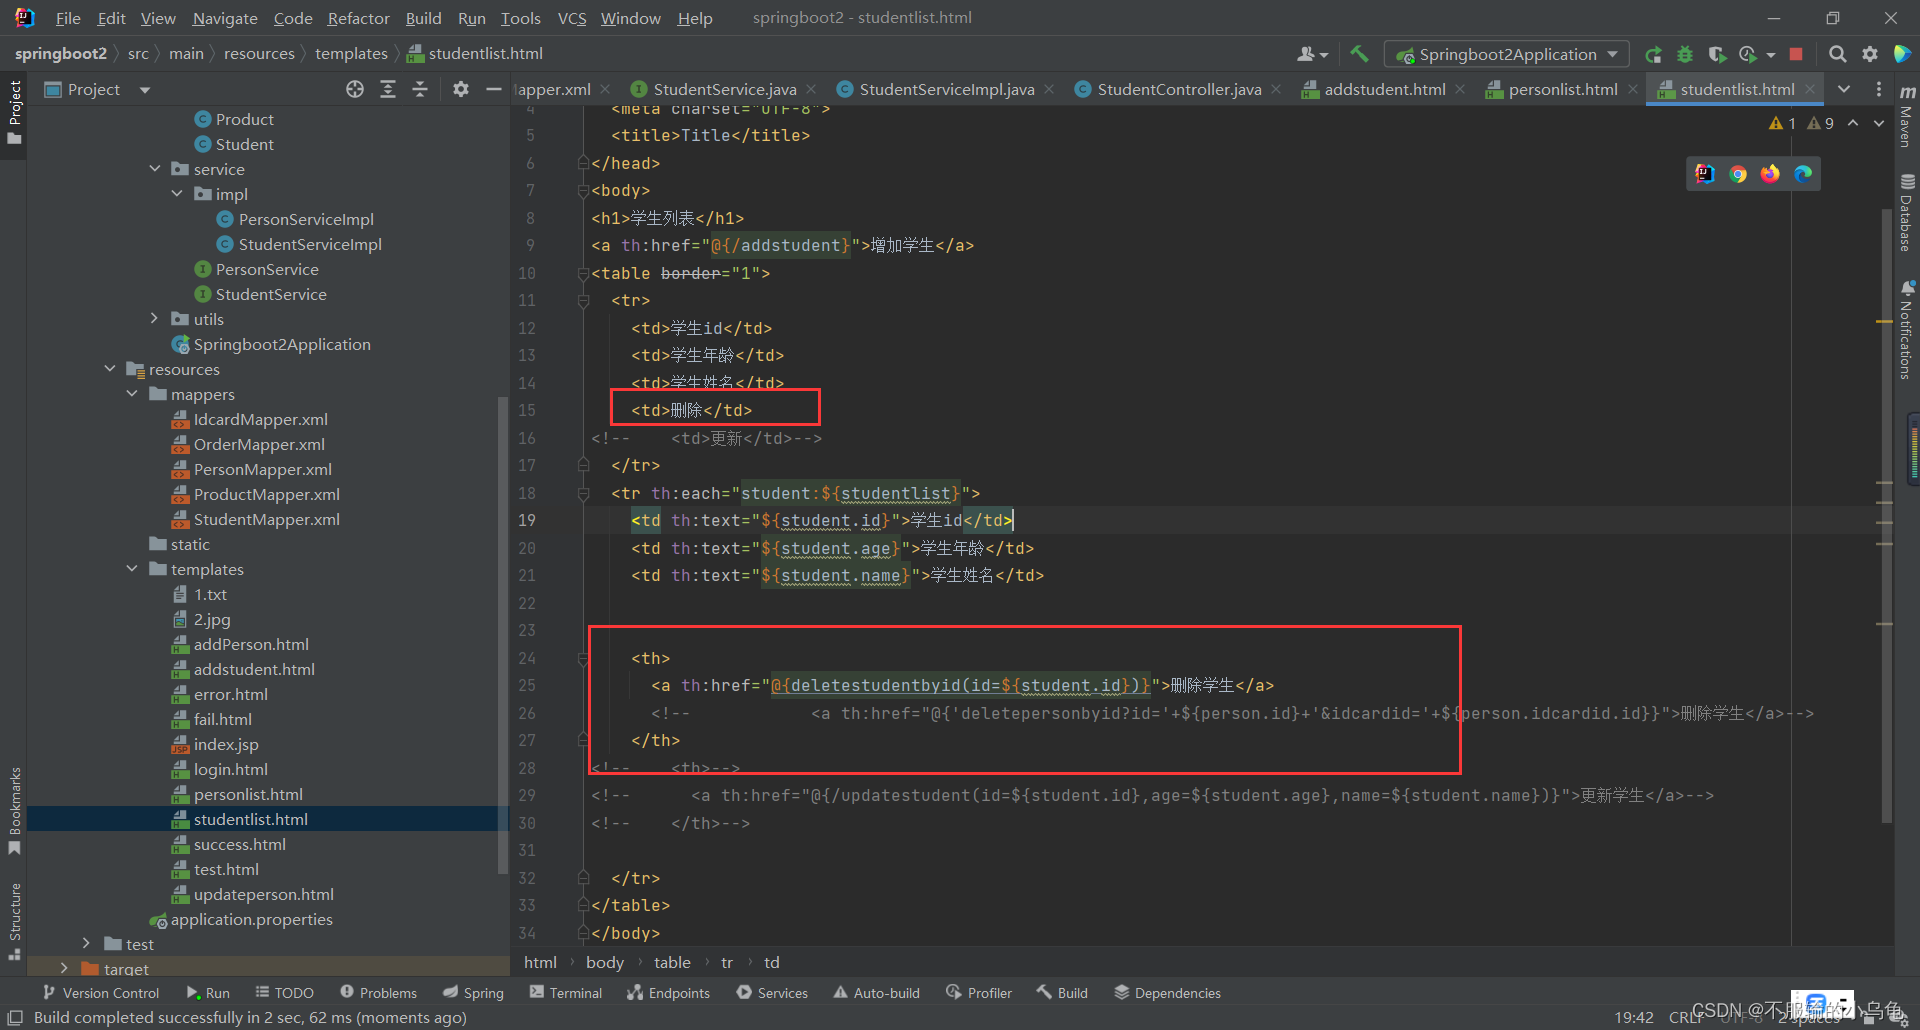
<!DOCTYPE html>
<html lang="en">
<head>
  <meta charset="UTF-8">
  <title>Title</title>
</head>
<body>
<h1>学生列表</h1>
<a th:href="@{/addstudent}">增加学生</a>
<table border="1">
  <tr>
    <td>学生id</td>
    <td>学生年龄</td>
    <td>学生姓名</td>
    <td>删除</td>
  </tr>
  <tr th:each="student:${studentlist}">
    <td th:text="${student.id}">学生id</td>
    <td th:text="${student.age}">学生年龄</td>
    <td th:text="${student.name}">学生姓名</td>


    <th>
      <a th:href="@{deletestudentbyid(id=${student.id})}">删除学生</a>
    </th>

  </tr>
</table>
</body>
</html>
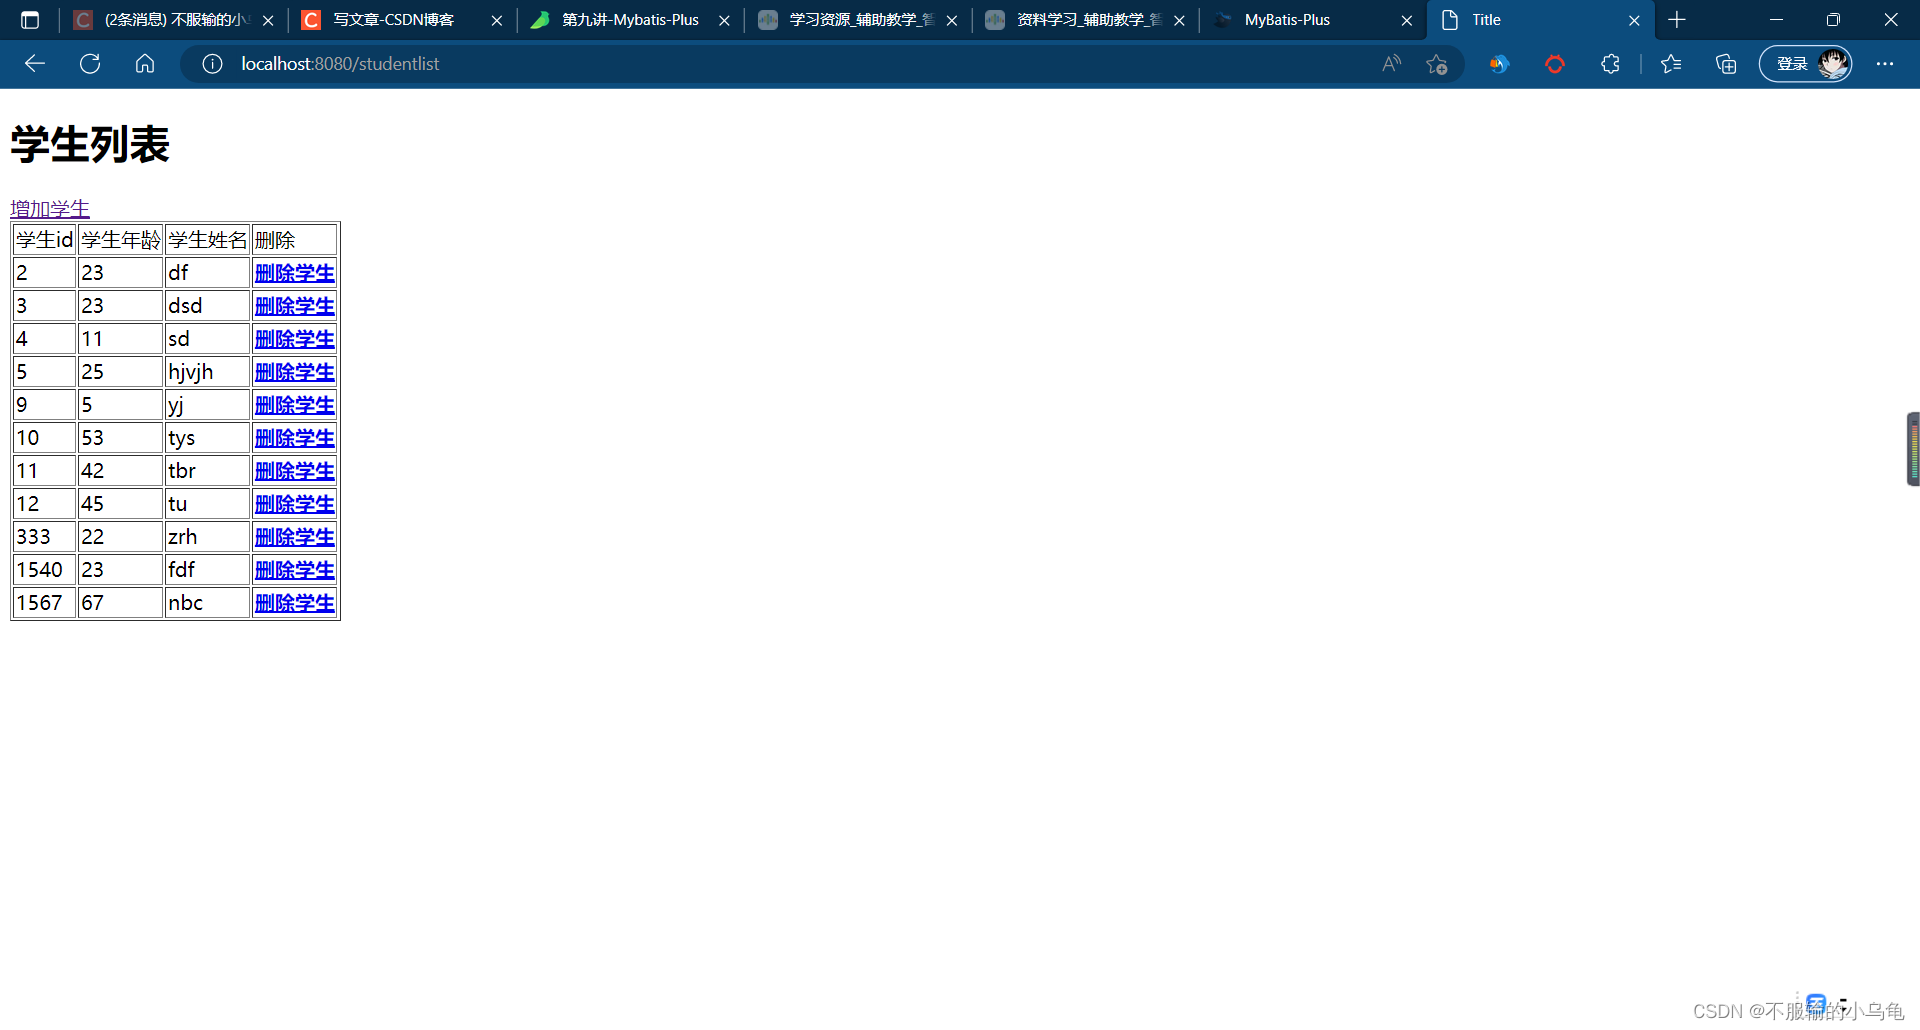
(3)点击运行,删除学生成功!
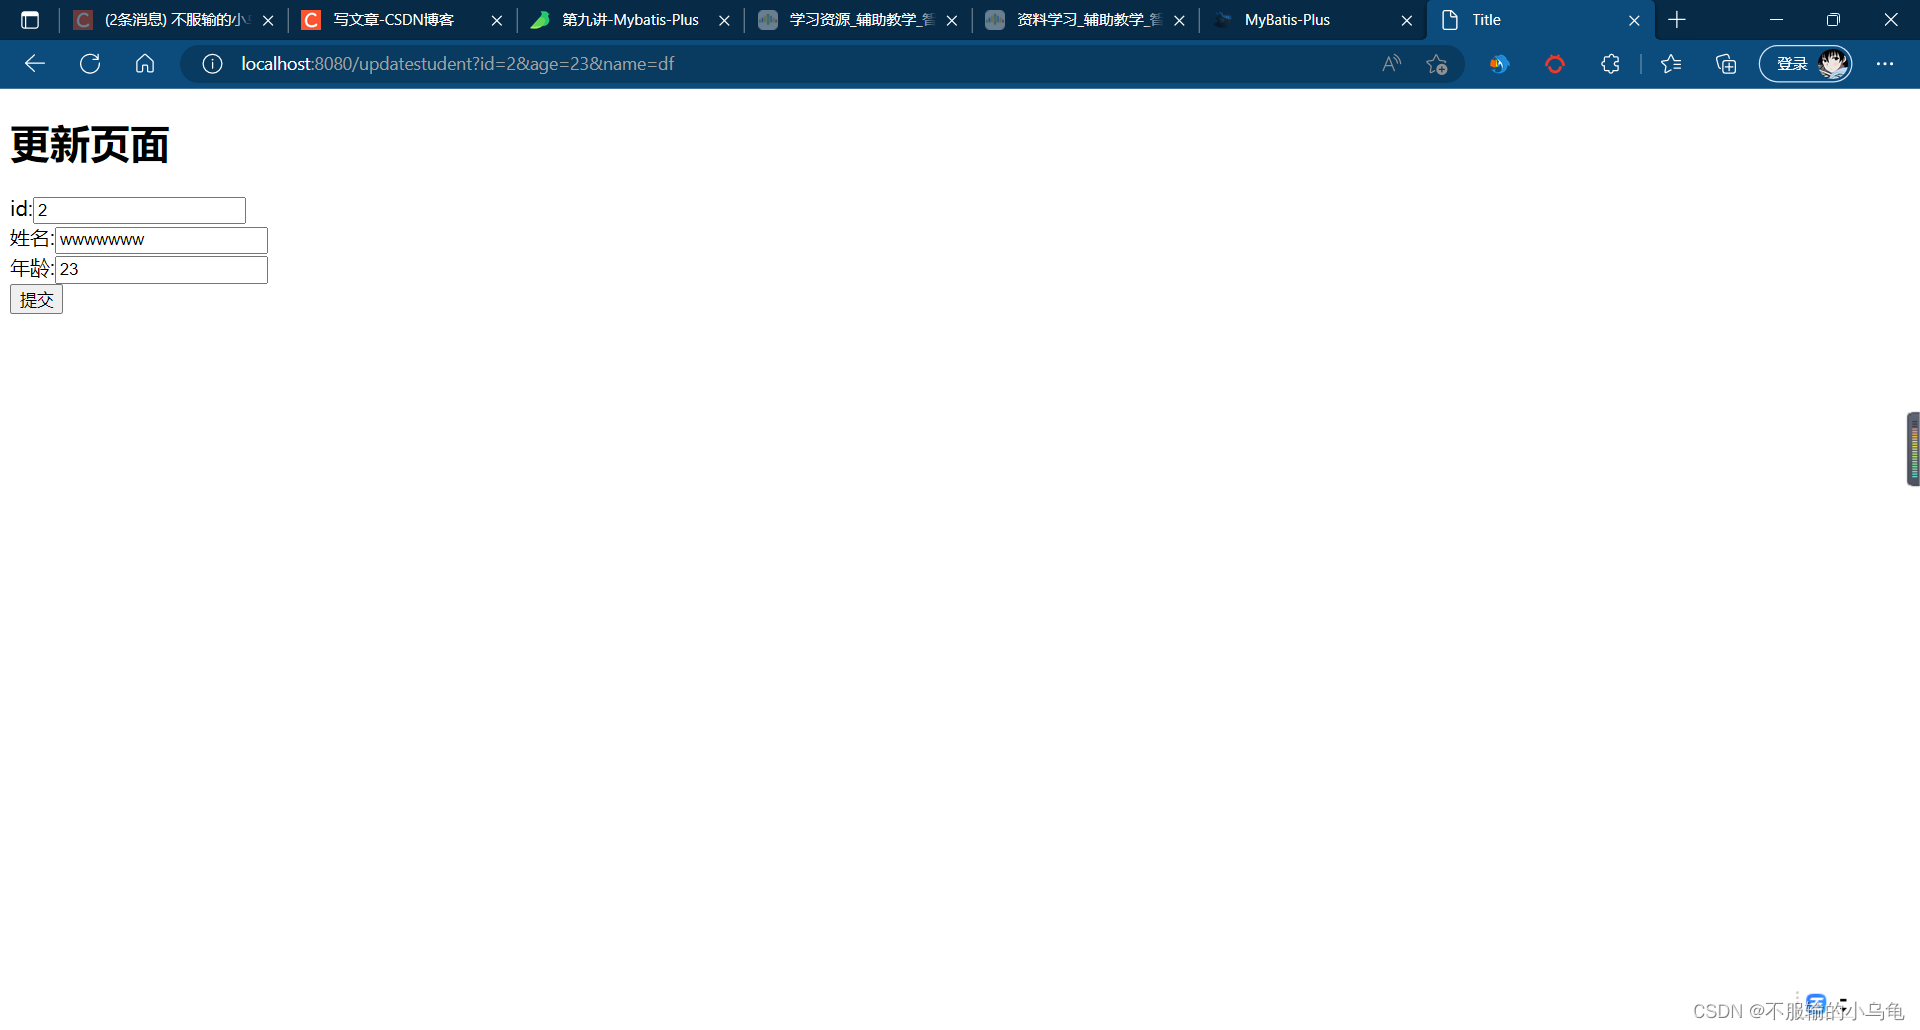
15、更新学生操作
(1)修改StudentController类

    @RequestMapping("updatestudent")
    public String updatestudent(Model model,Student student){


        model.addAttribute("id",student.getId());
        model.addAttribute("age",student.getAge());
        model.addAttribute("name",student.getName());
        return "updatestudent.html";
    }

    @RequestMapping("updatestudentcommit")
    public String updatestudentcommit(Student student){


        studentService.updateById(student);
        return "redirect:/studentlist";
    }
(2)在templates文件夹下新建updatestudent.html
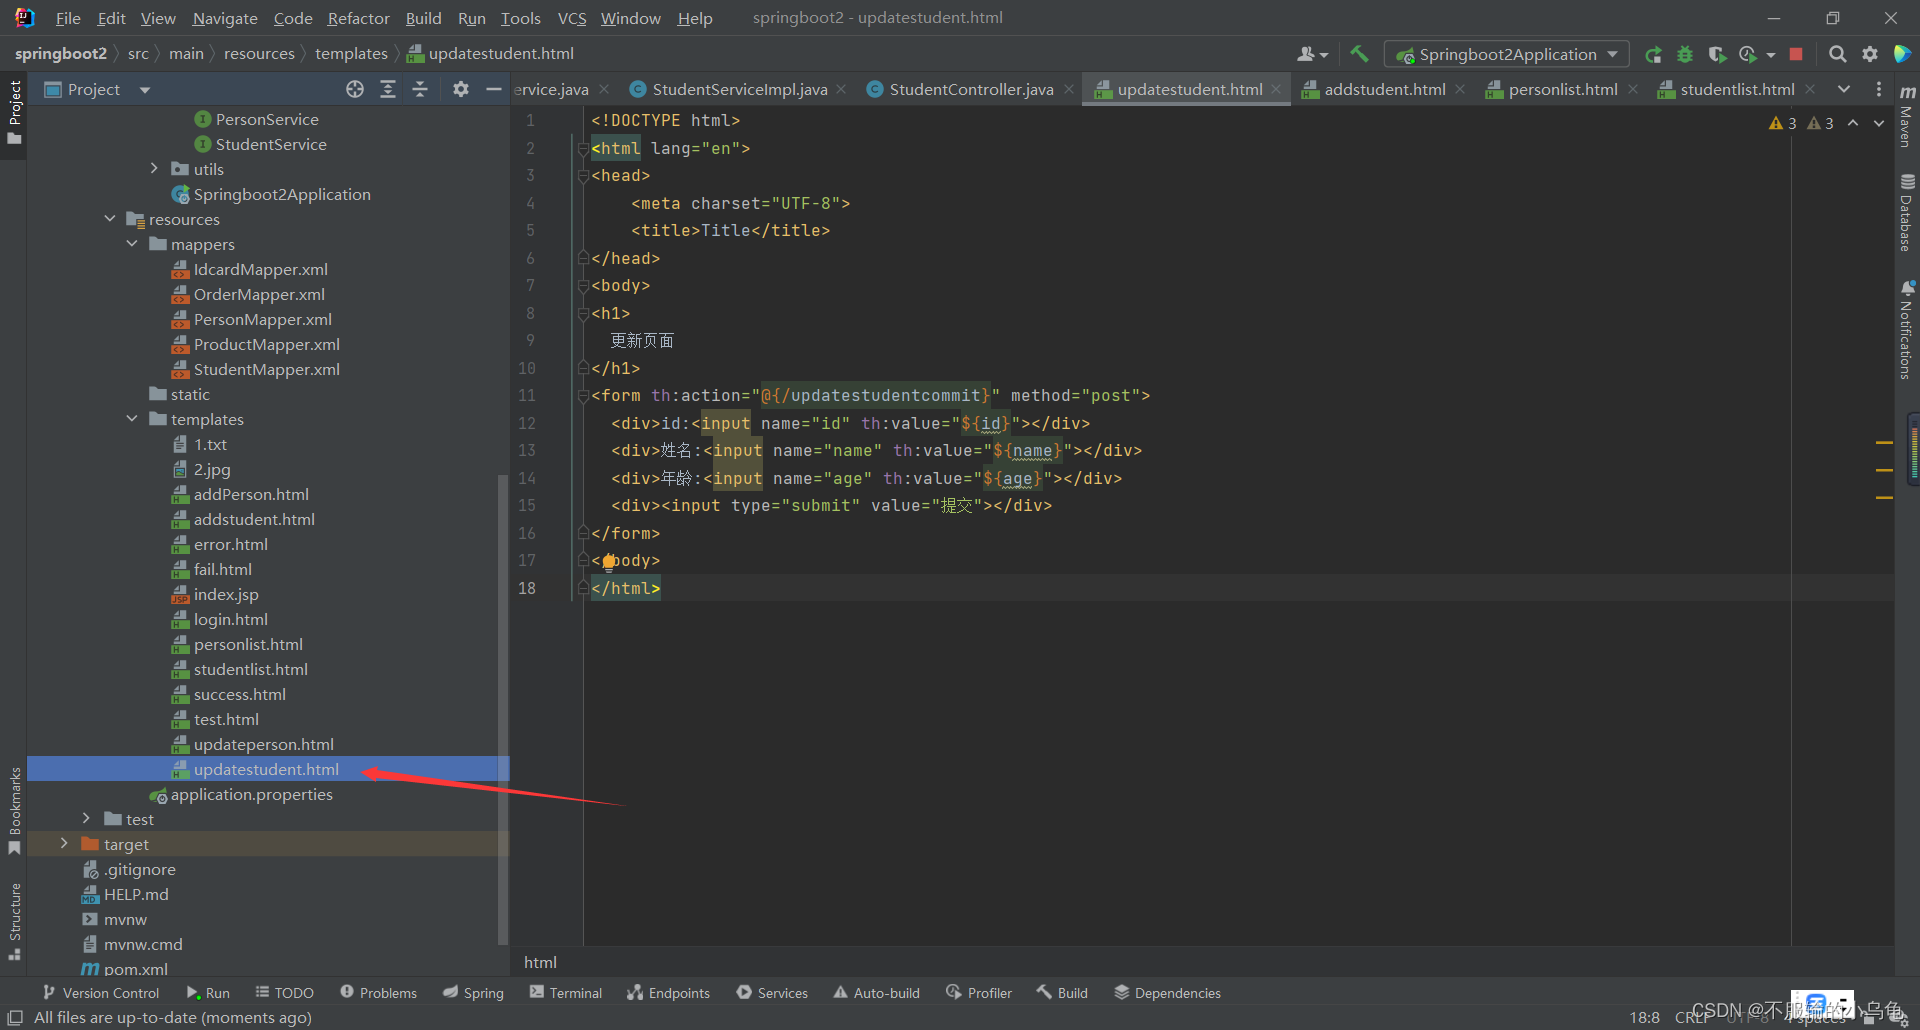
<!DOCTYPE html>
<html lang="en">
<head>
    <meta charset="UTF-8">
    <title>Title</title>
</head>
<body>
<h1>
  更新页面
</h1>
<form th:action="@{/updatestudentcommit}" method="post">
  <div>id:<input name="id" th:value="${id}"></div>
  <div>姓名:<input name="name" th:value="${name}"></div>
  <div>年龄:<input name="age" th:value="${age}"></div>
  <div><input type="submit" value="提交"></div>
</form>
</body>
</html>
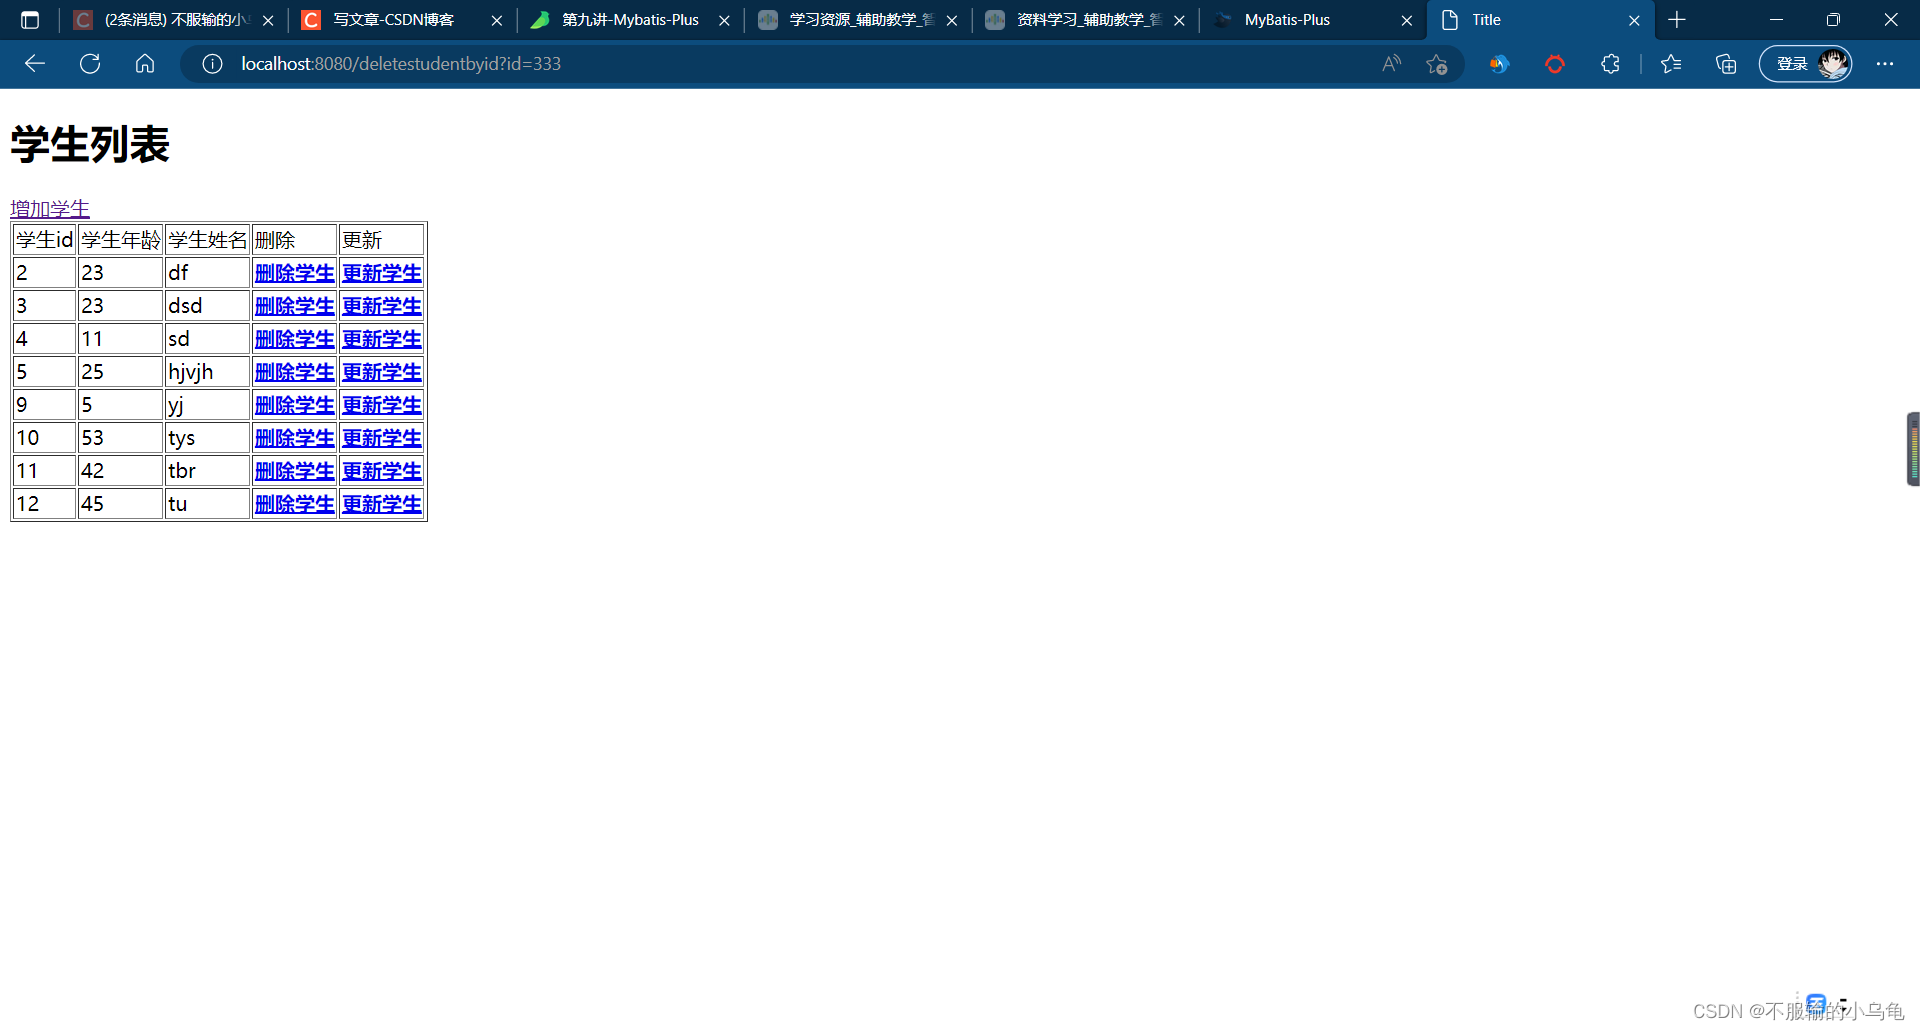
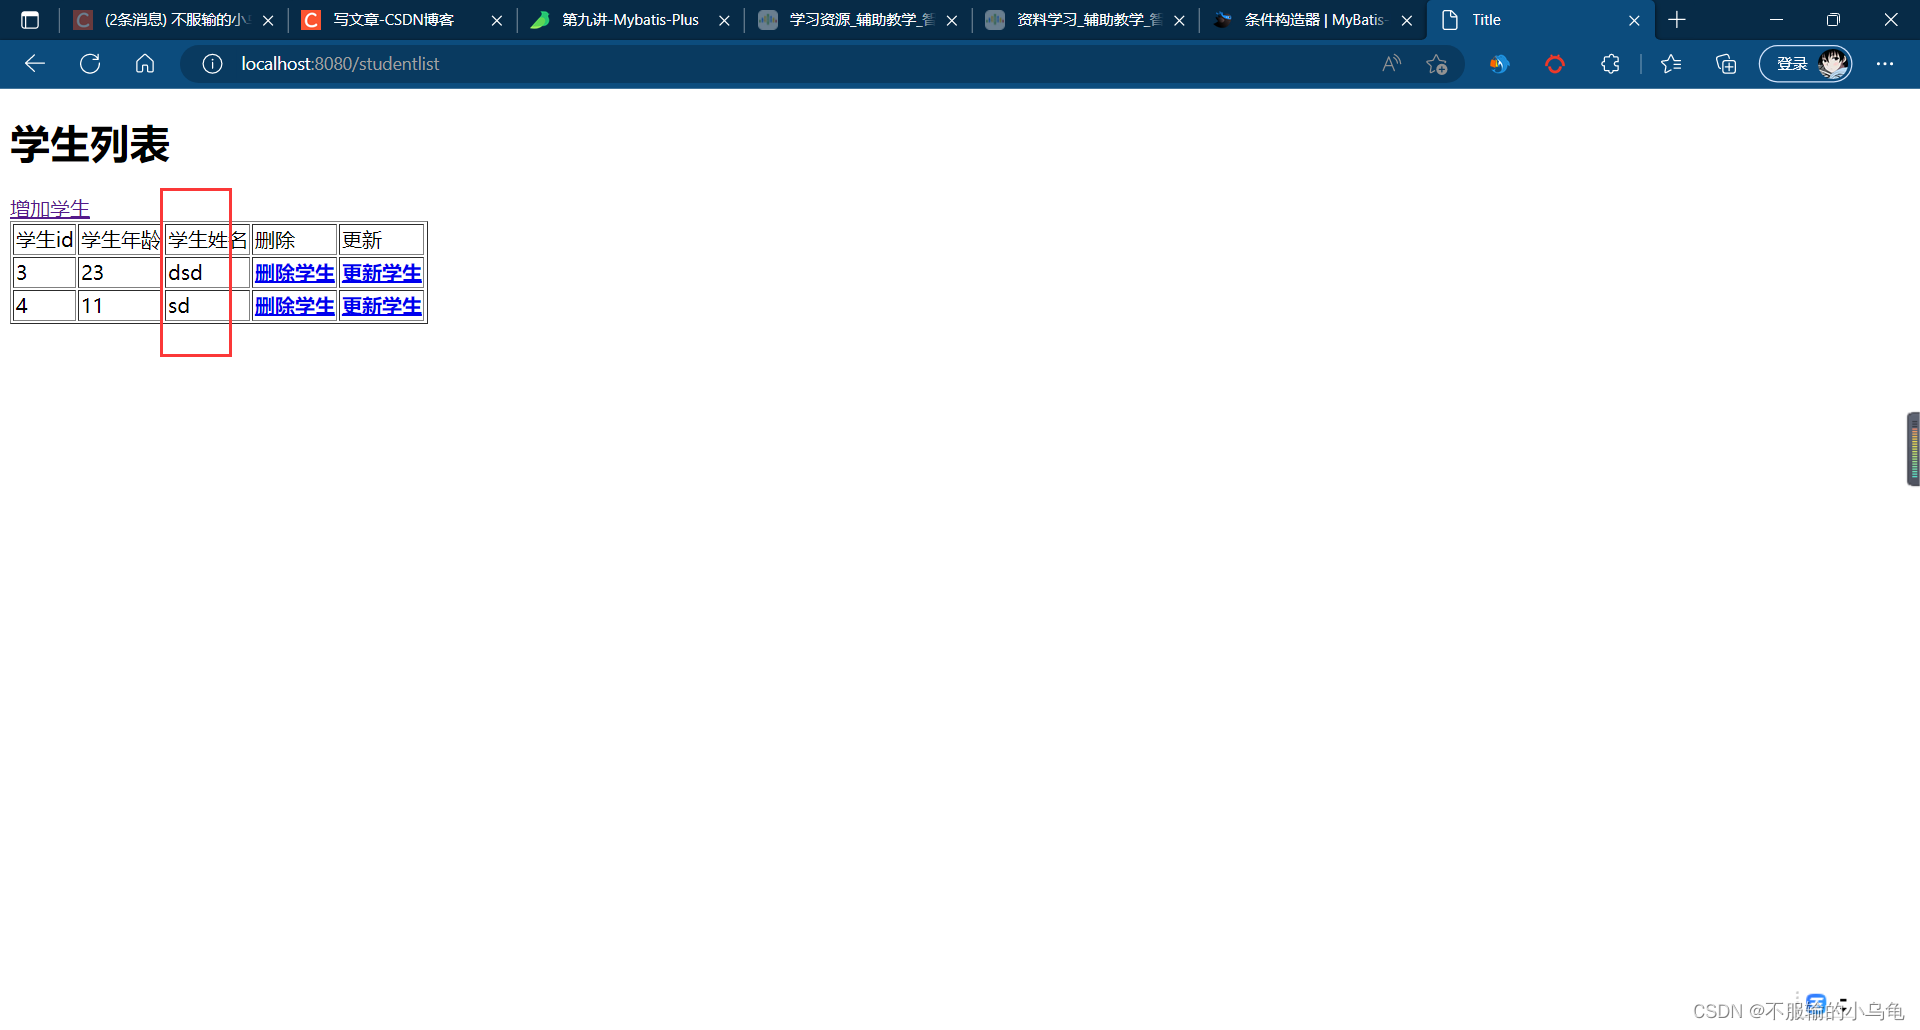
(3)修改studentlist.html
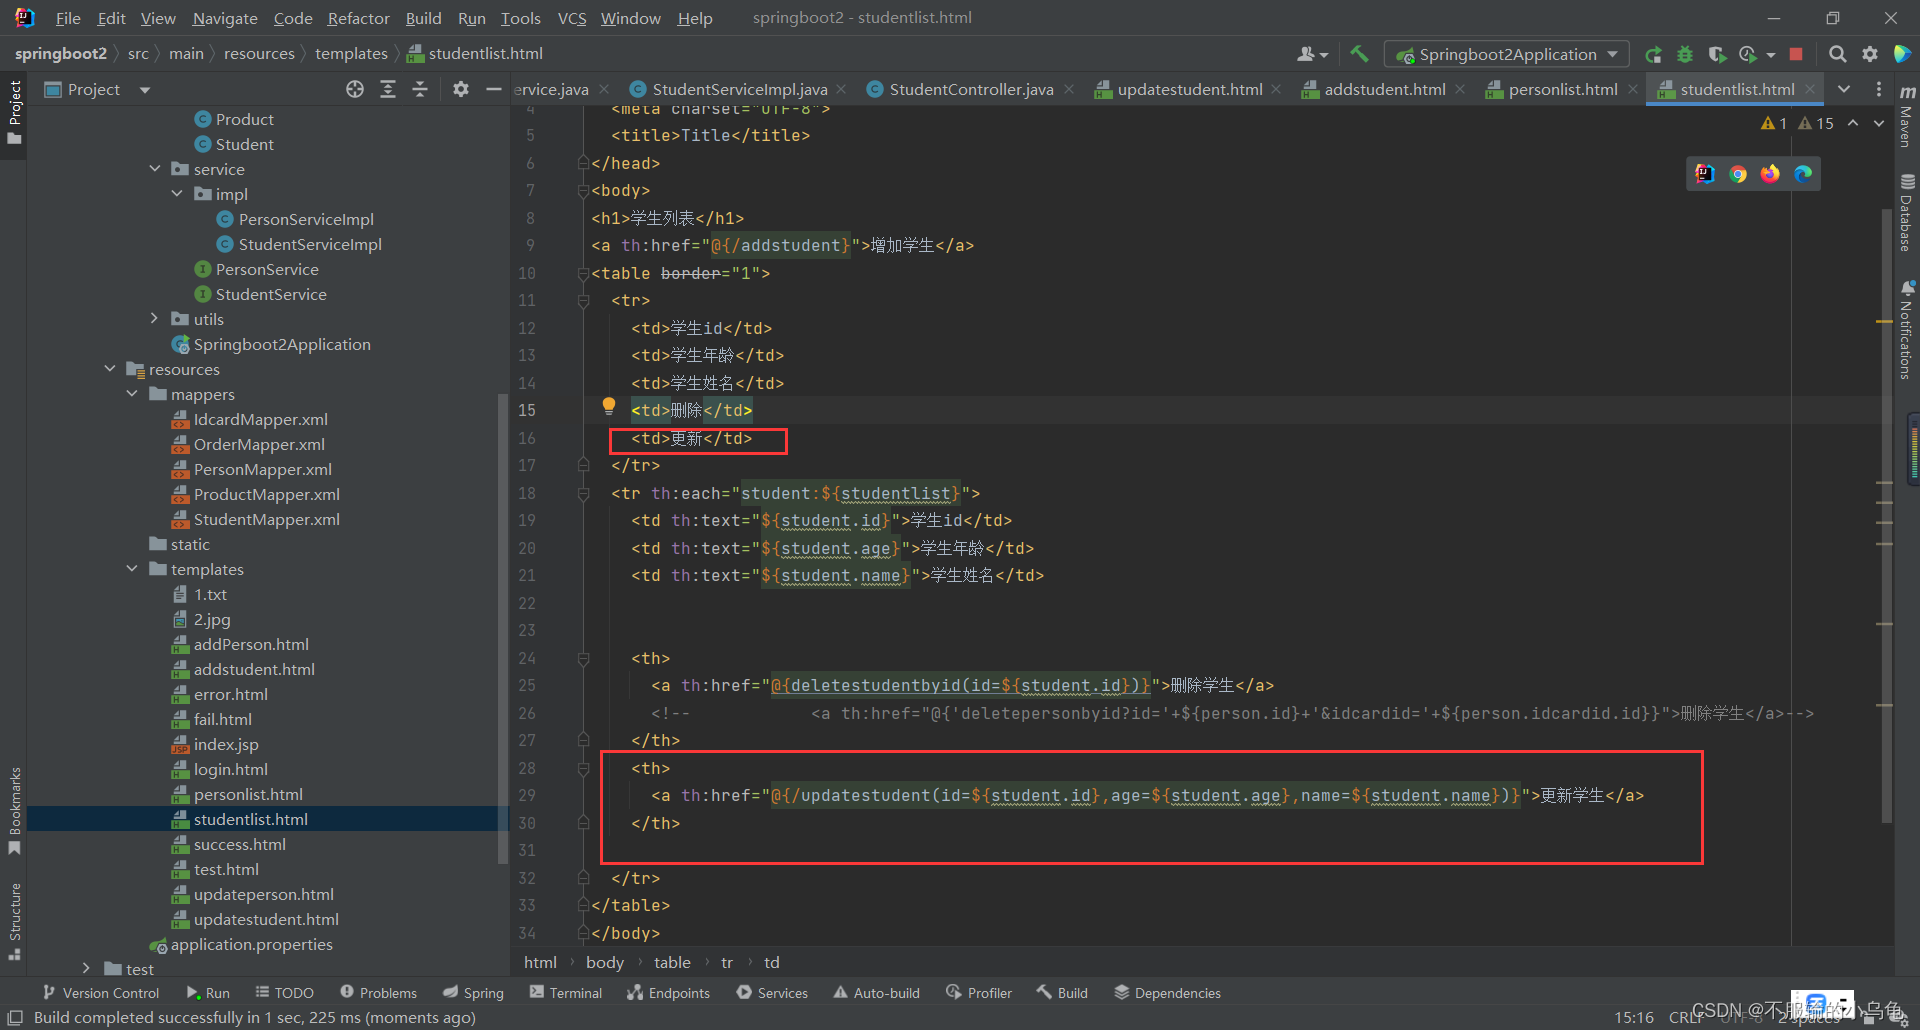
<!DOCTYPE html>
<html lang="en">
<head>
  <meta charset="UTF-8">
  <title>Title</title>
</head>
<body>
<h1>学生列表</h1>
<a th:href="@{/addstudent}">增加学生</a>
<table border="1">
  <tr>
    <td>学生id</td>
    <td>学生年龄</td>
    <td>学生姓名</td>
    <td>删除</td>
    <td>更新</td>
  </tr>
  <tr th:each="student:${studentlist}">
    <td th:text="${student.id}">学生id</td>
    <td th:text="${student.age}">学生年龄</td>
    <td th:text="${student.name}">学生姓名</td>


    <th>
      <a th:href="@{deletestudentbyid(id=${student.id})}">删除学生</a>
    </th>
    <th>
      <a th:href="@{/updatestudent(id=${student.id},age=${student.age},name=${student.name})}">更新学生</a>
    </th>

  </tr>
</table>
</body>
</html>
(4)点击运行,更新学生成功!
三、代码生成器
AutoGenerator 是 MyBatis-Plus 的代码生成器,通过 AutoGenerator 可以快速生成 Entity、Mapper、Mapper XML、Service、Controller 等各个模块的代码,极大的提升了开发效率。
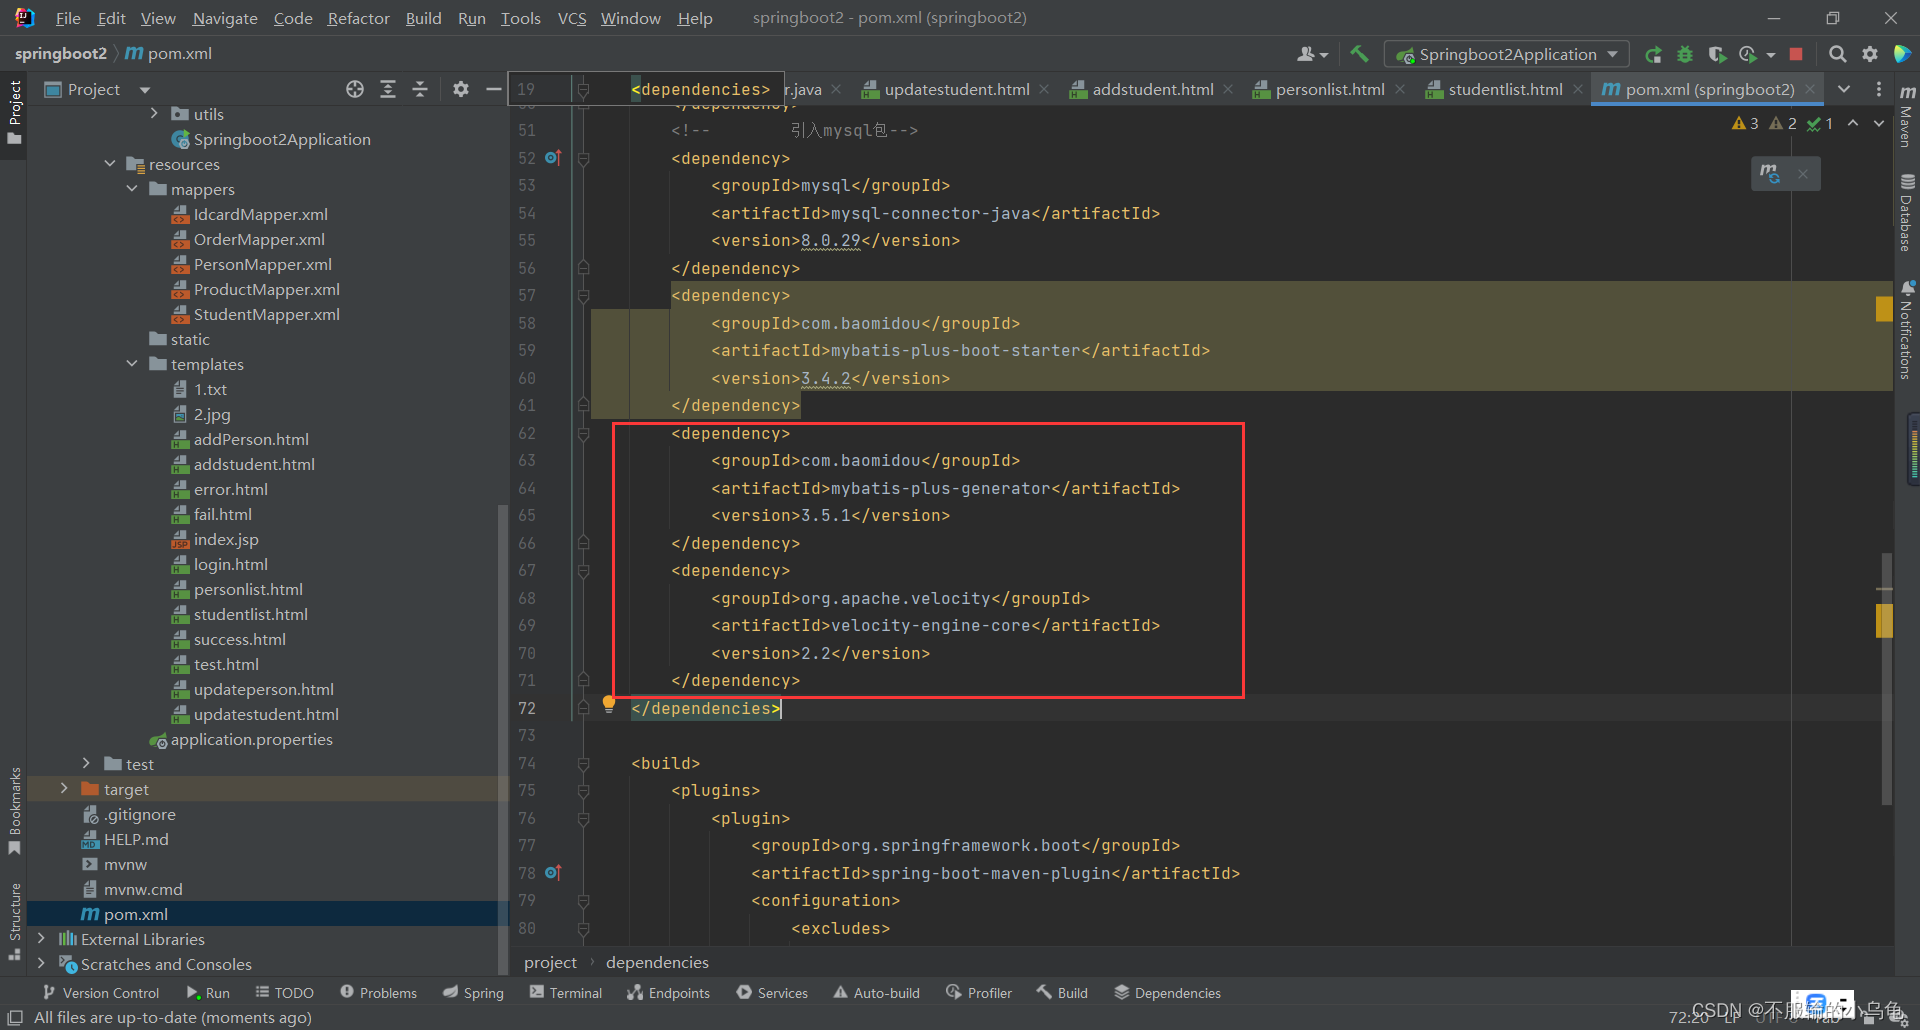
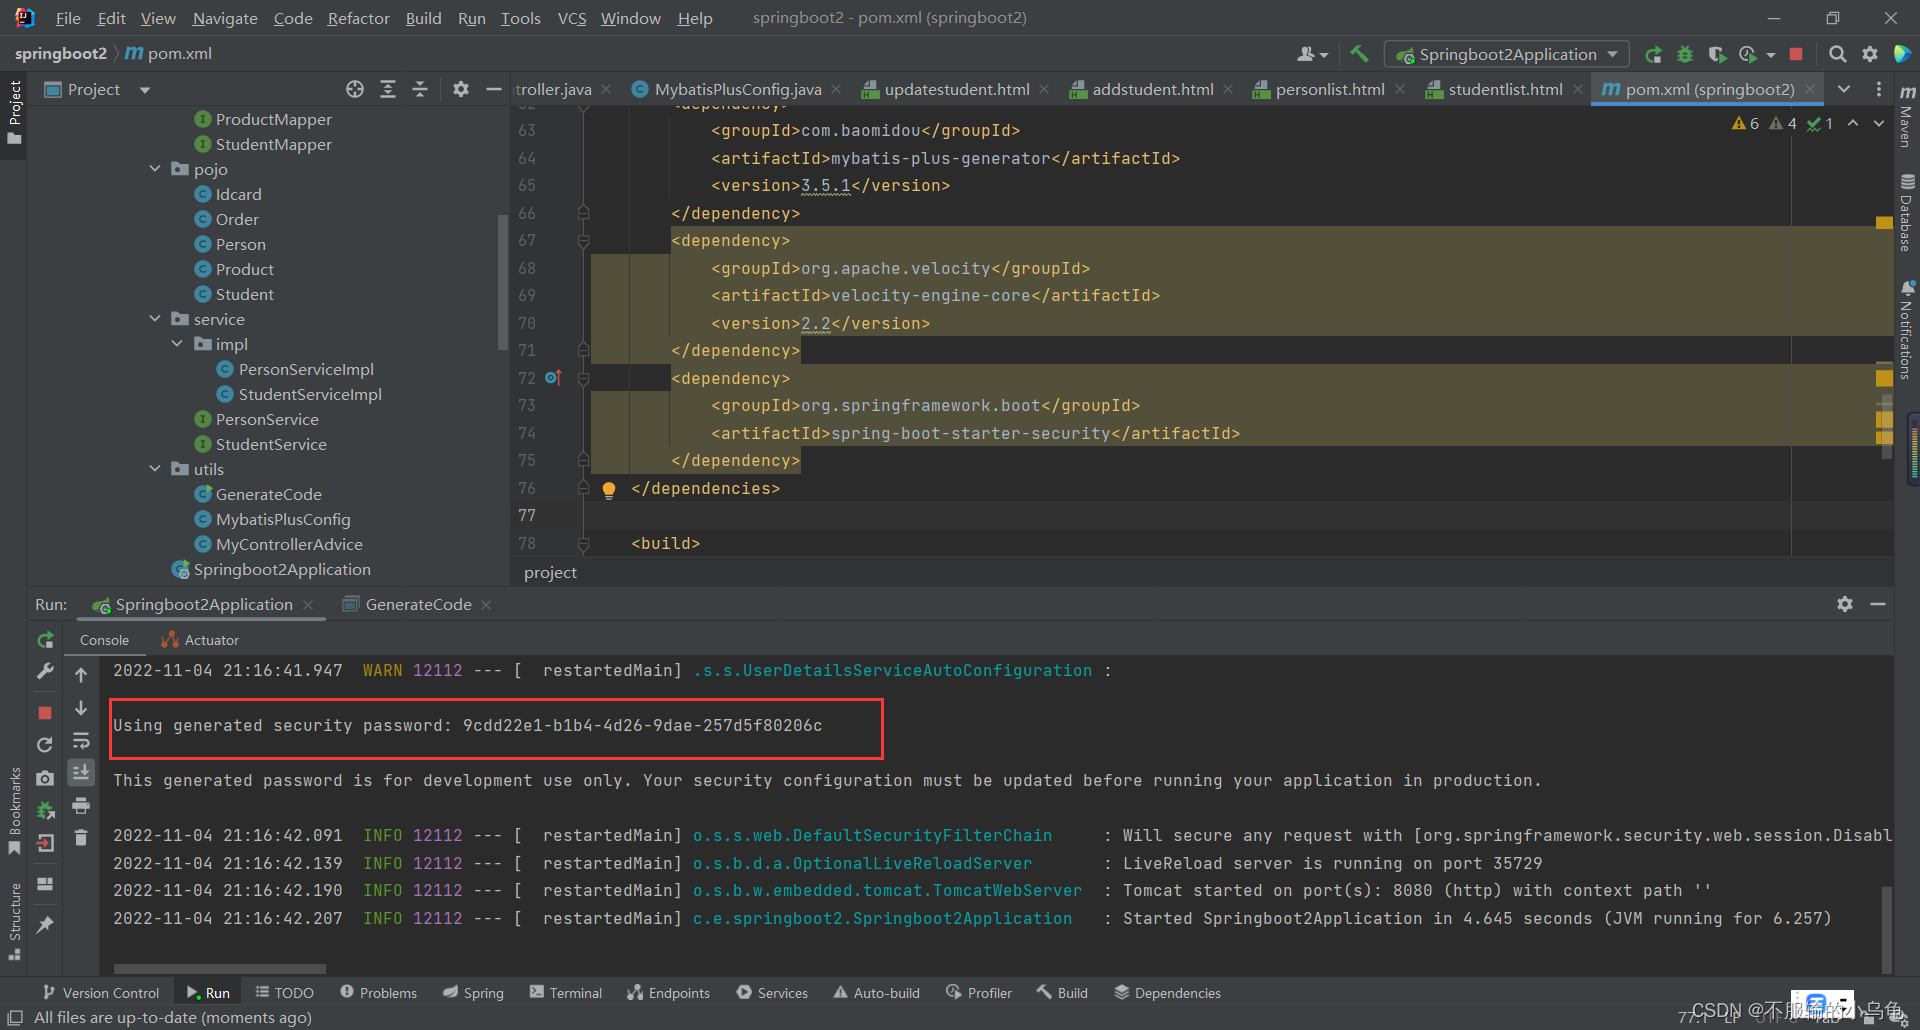
1、在pom.xml中导入依赖包
        <dependency>
            <groupId>com.baomidou</groupId>
            <artifactId>mybatis-plus-generator</artifactId>
            <version>3.5.1</version>
        </dependency>

        <dependency>
            <groupId>org.apache.velocity</groupId>
            <artifactId>velocity-engine-core</artifactId>
            <version>2.2</version>
        </dependency>
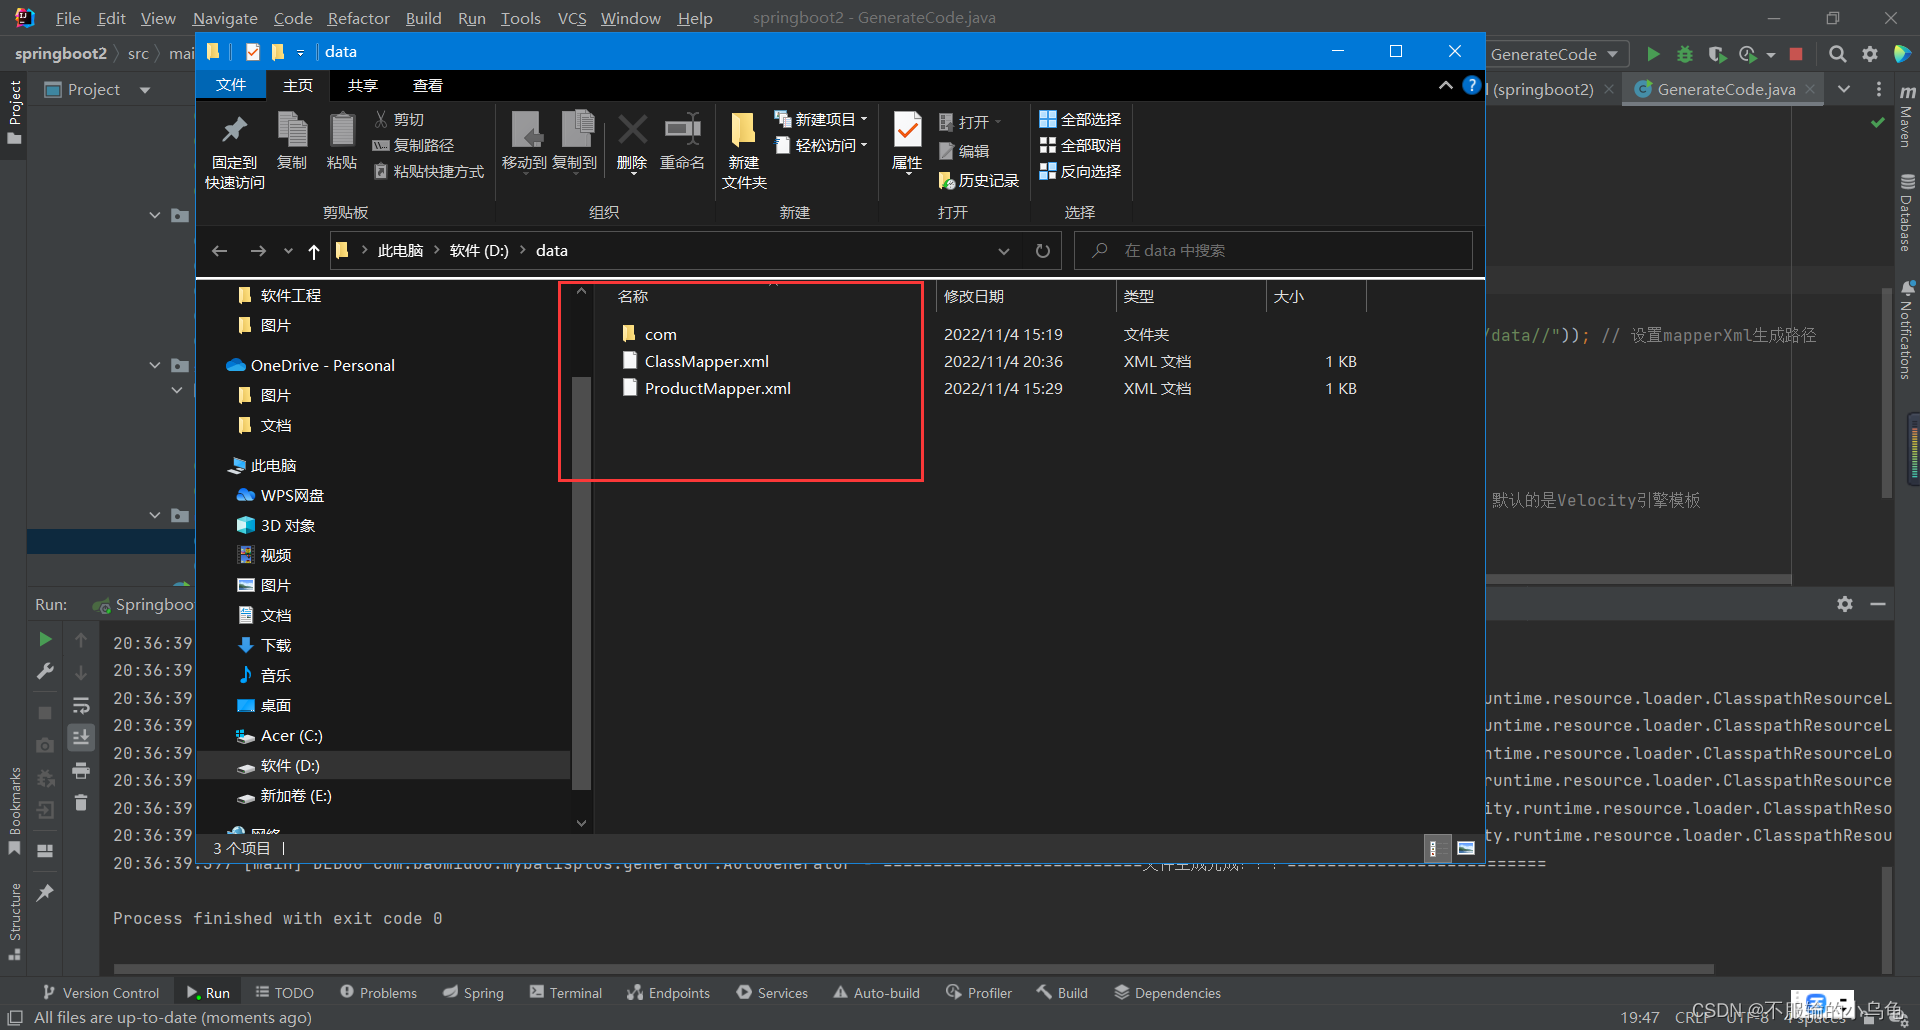
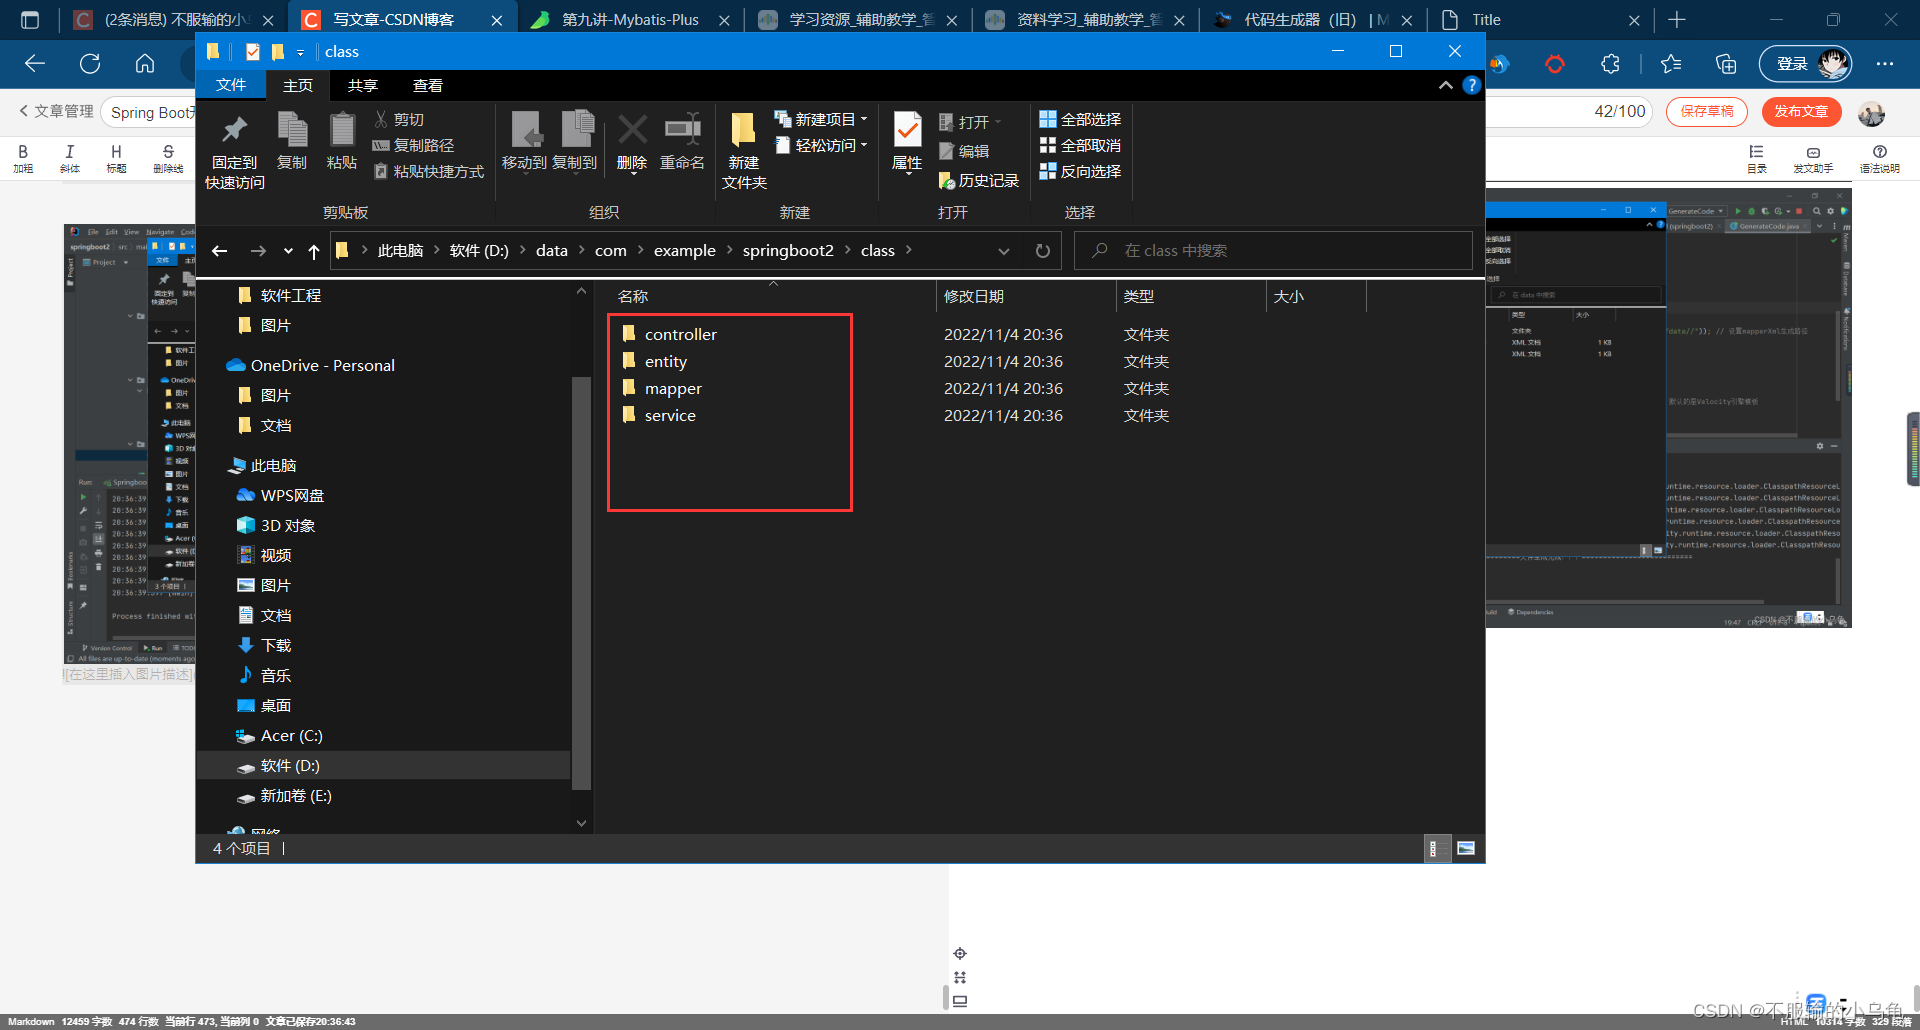
2、在utils文件夹下新建GenerateCode类,把数据库端口号、名称、用户名以及密码,作者名、输出的目录、父包名、父包模块名、mapperXml生成路径以及需要生成的表名全部改为自己的
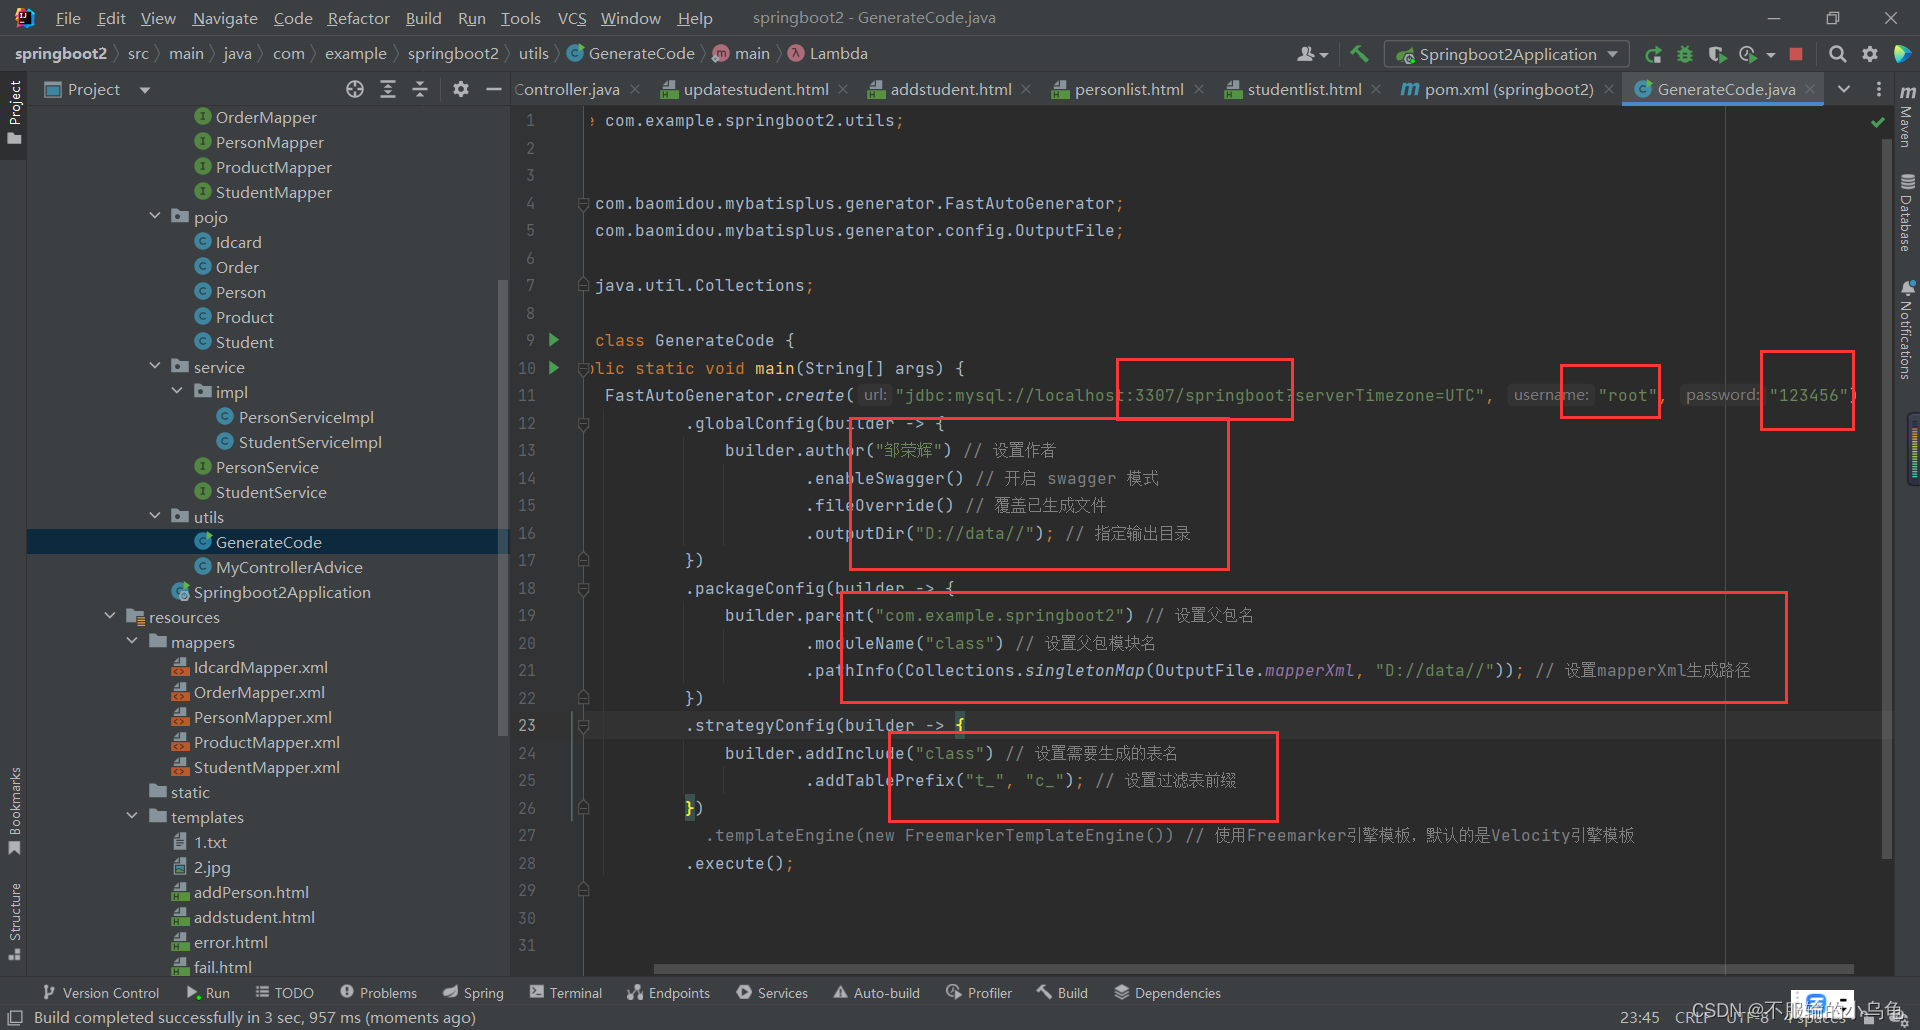
package com.example.springboot2.utils;


import com.baomidou.mybatisplus.generator.FastAutoGenerator;
import com.baomidou.mybatisplus.generator.config.OutputFile;

import java.util.Collections;

public class GenerateCode {


    public static void main(String[] args) {


        FastAutoGenerator.create("jdbc:mysql://localhost:3307/springboot?serverTimezone=UTC", "root", "123456")
                .globalConfig(builder -> {


                    builder.author("邹荣辉") // 设置作者
                            .enableSwagger() // 开启 swagger 模式
                            .fileOverride() // 覆盖已生成文件
                            .outputDir("D://data//"); // 指定输出目录
                })
                .packageConfig(builder -> {


                    builder.parent("com.example.springboot2") // 设置父包名
                            .moduleName("class") // 设置父包模块名
                            .pathInfo(Collections.singletonMap(OutputFile.mapperXml, "D://data//")); // 设置mapperXml生成路径
                })
                .strategyConfig(builder -> {


                    builder.addInclude("class") // 设置需要生成的表名
                            .addTablePrefix("t_", "c_"); // 设置过滤表前缀
                })
//                .templateEngine(new FreemarkerTemplateEngine()) // 使用Freemarker引擎模板,默认的是Velocity引擎模板
                .execute();
    }
}
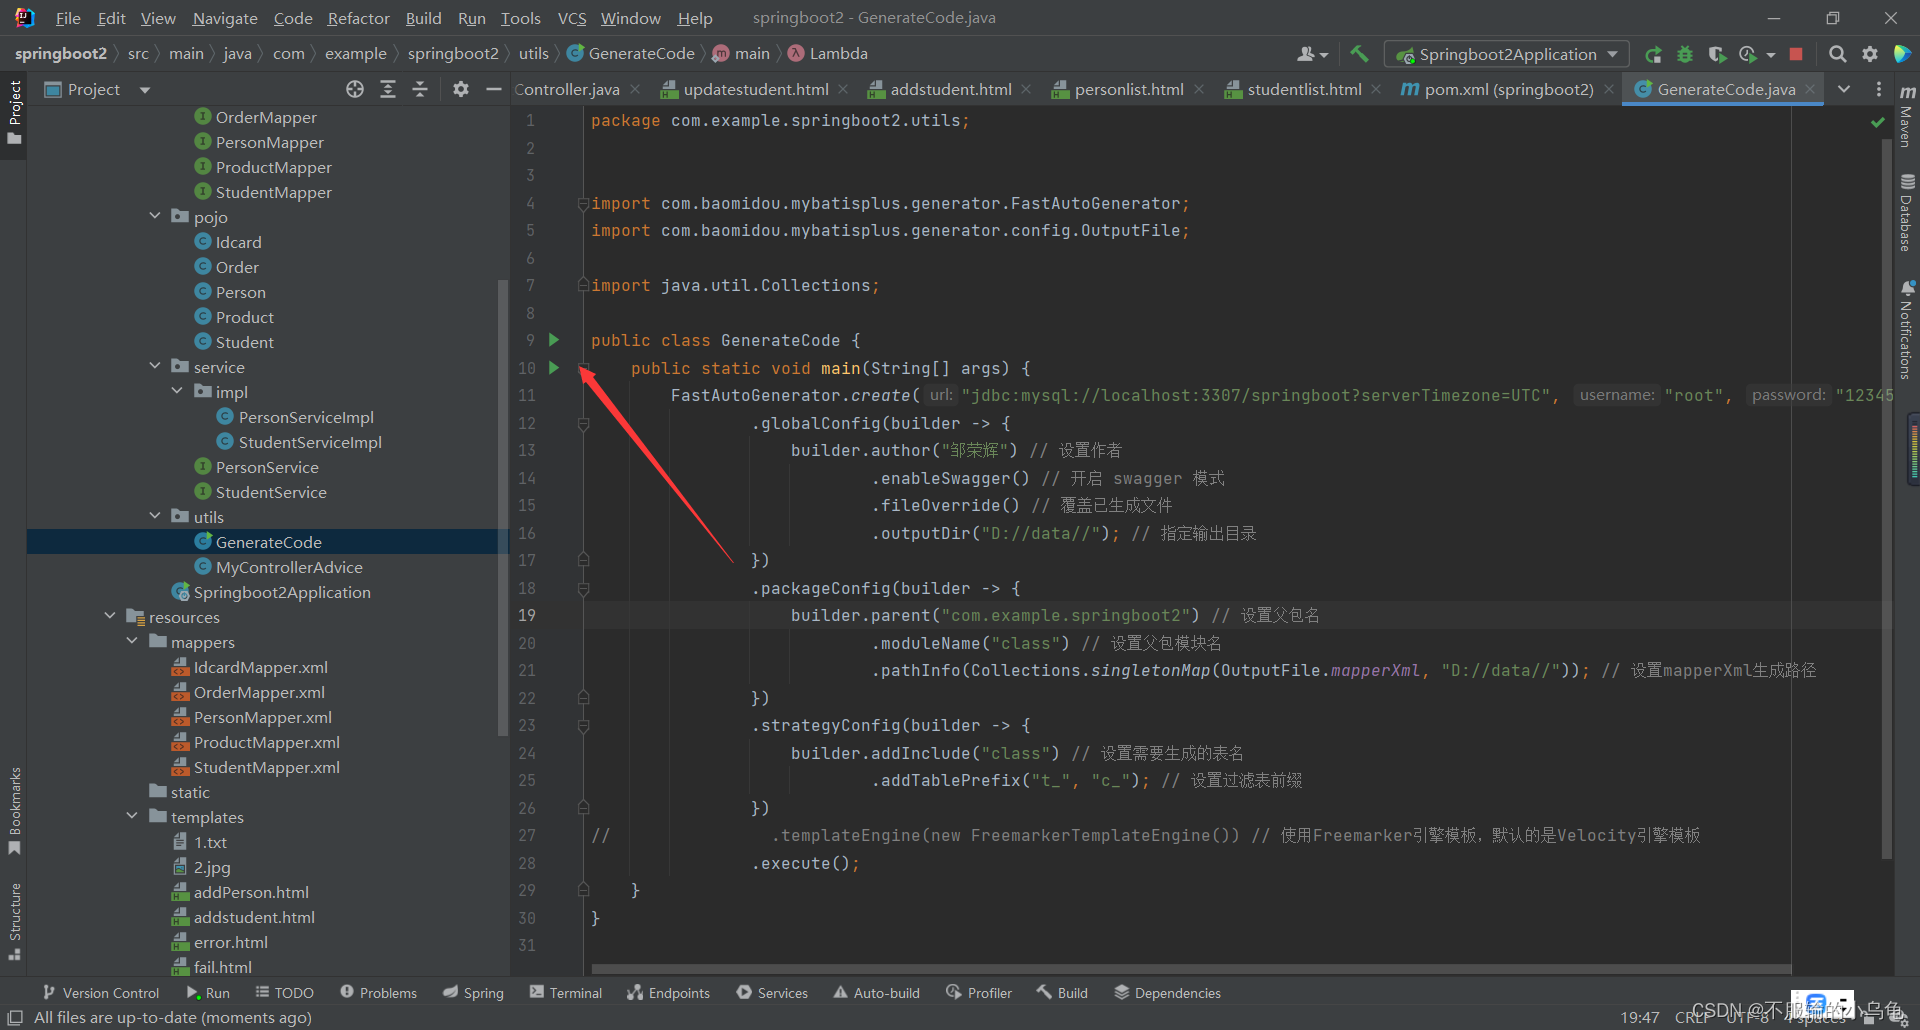
3、点击其中的绿色三角形运行main方法,在你设置的路径就会自动生成各个模块的代码
四、条件构造器
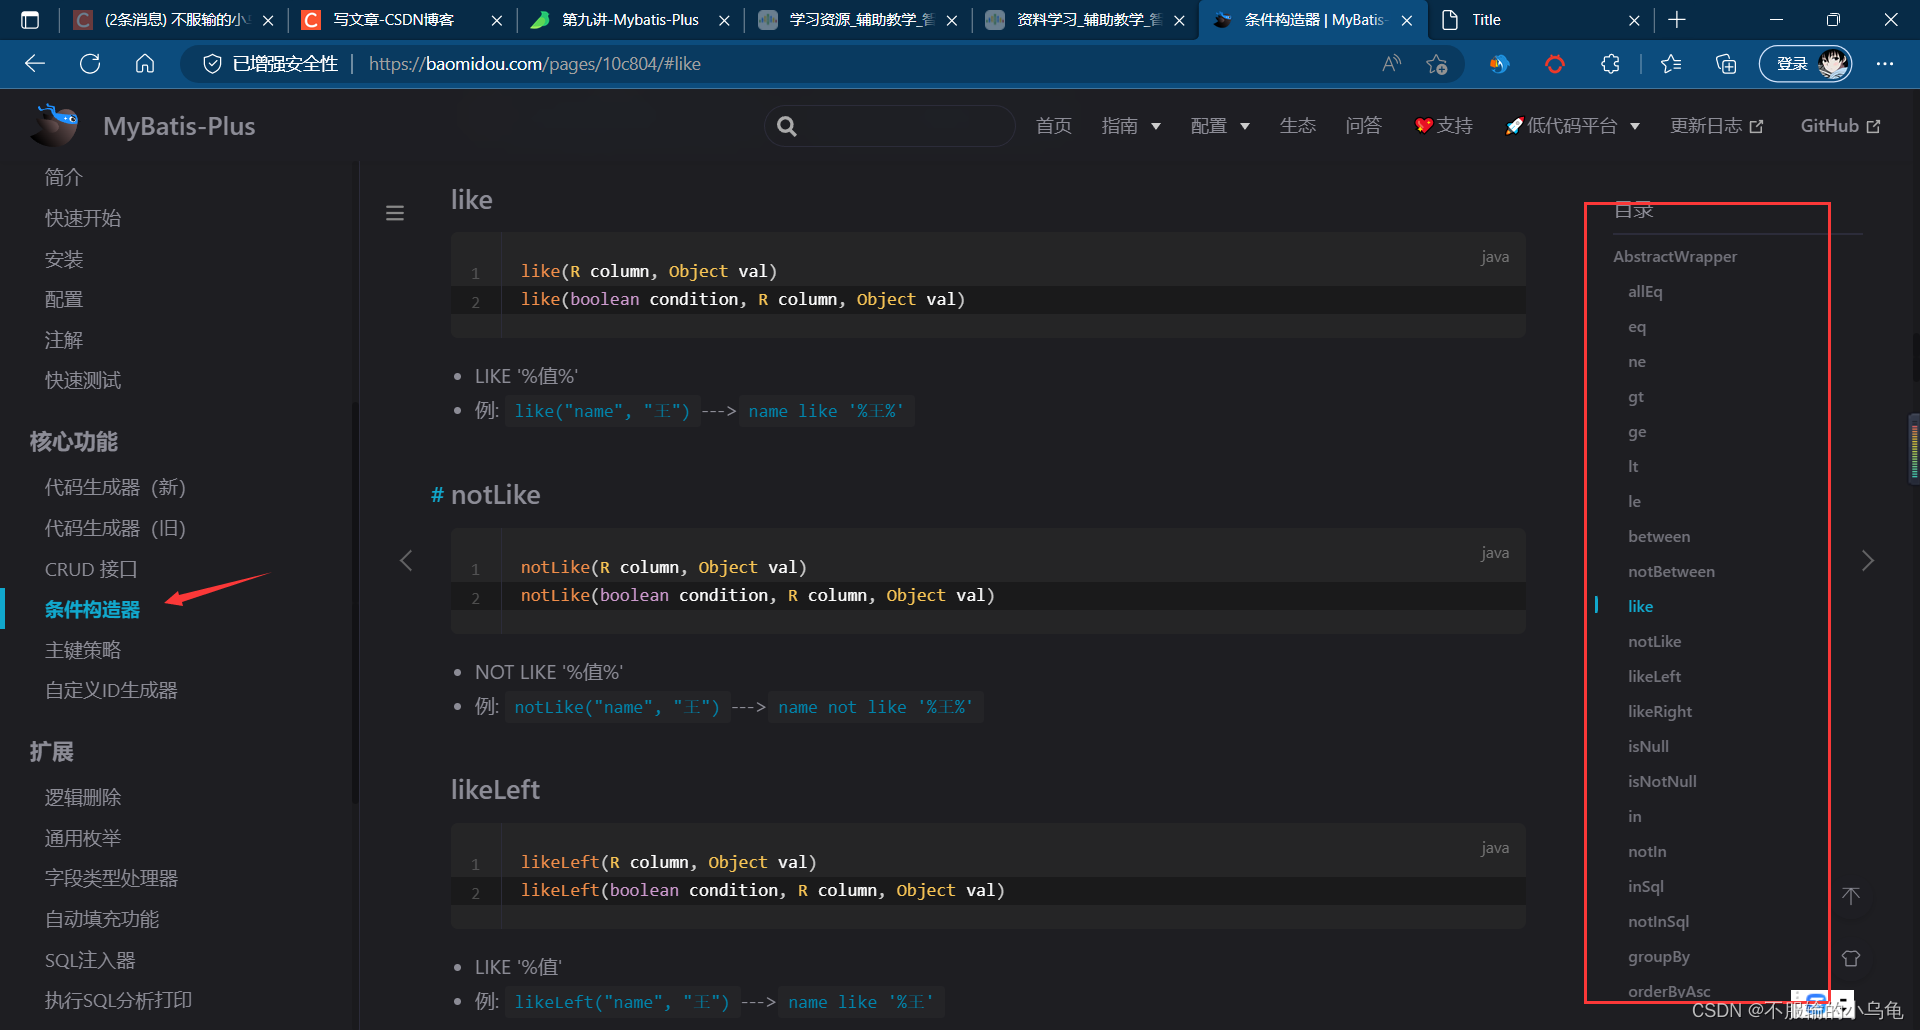
1、修改StudentController类,这里我们只写一个like作为事例,想了解更多可以去官网文档中查看
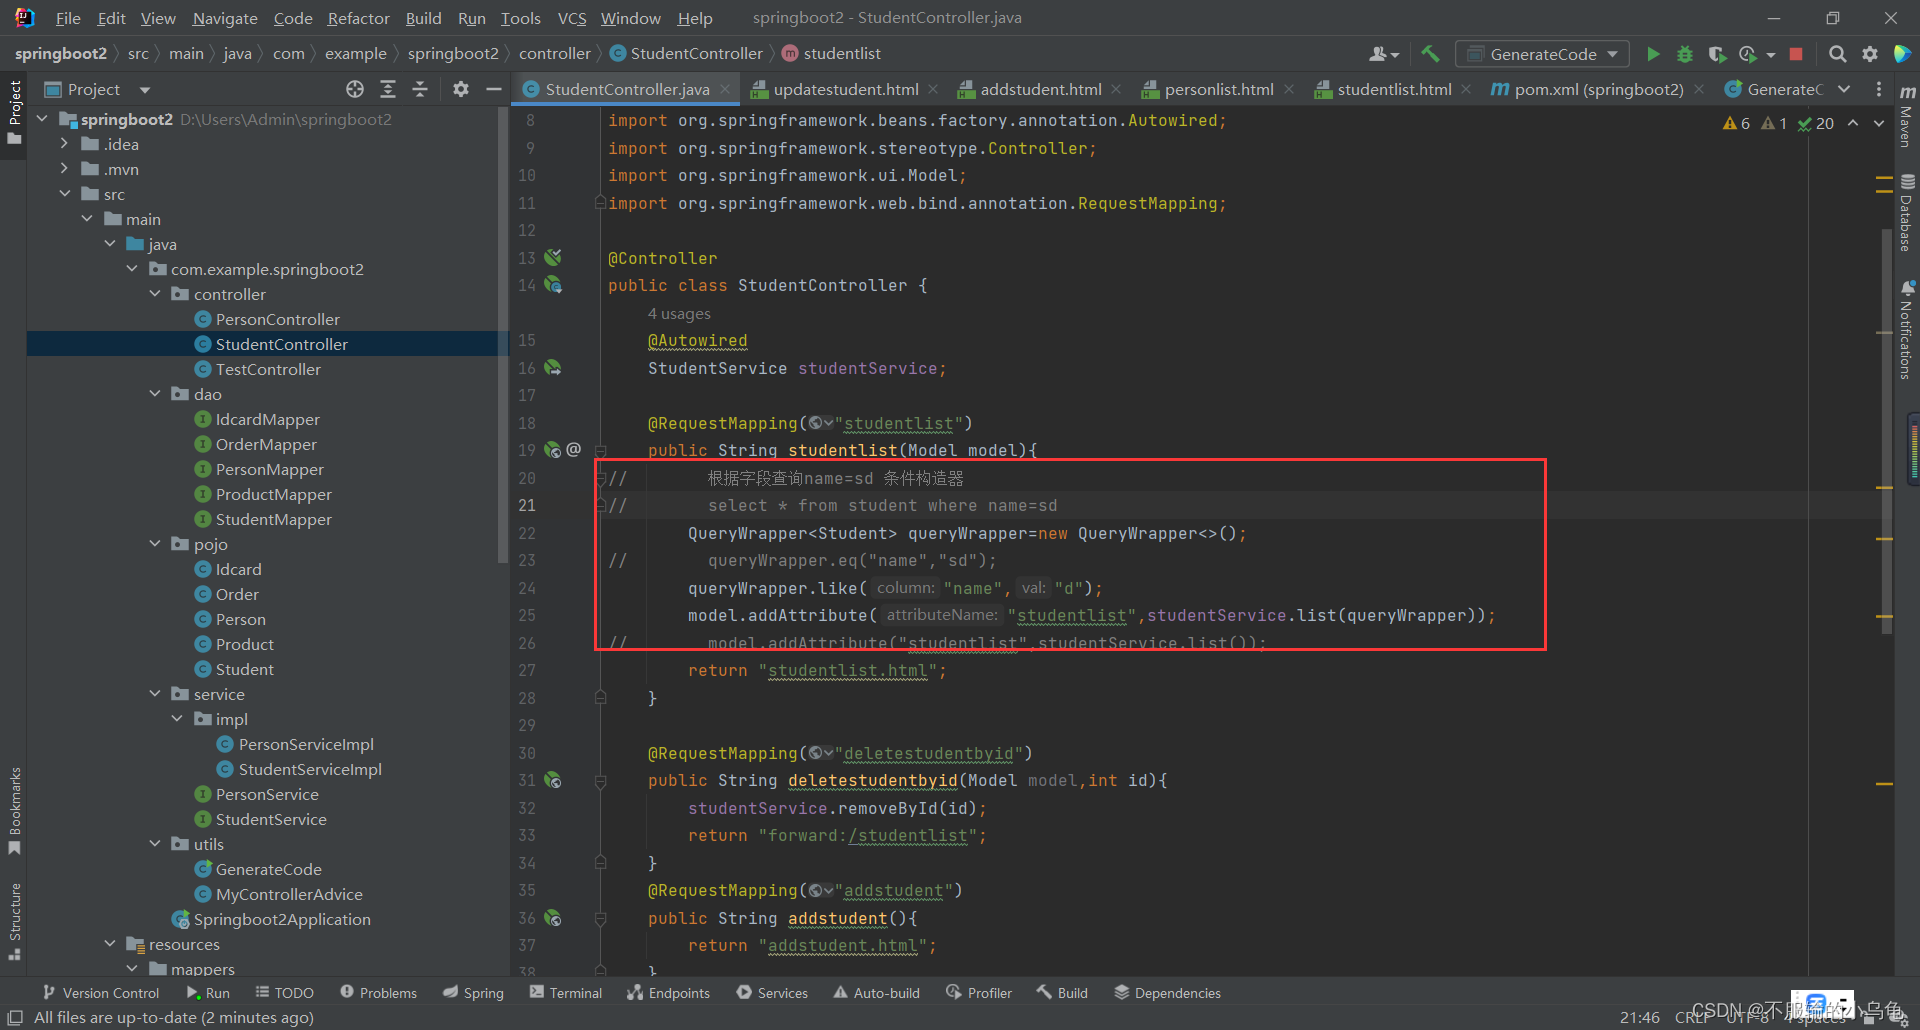
    @RequestMapping("studentlist")
    public String studentlist(Model model){


//        根据字段查询name=sd 条件构造器
//        select * from student where name=sd
        QueryWrapper<Student> queryWrapper=new QueryWrapper<>();
//        queryWrapper.eq("name","sd");
        queryWrapper.like("name","d");
        model.addAttribute("studentlist",studentService.list(queryWrapper));
//        model.addAttribute("studentlist",studentService.list());
        return "studentlist.html";
    }
2、点击运行,就会将名字里有d的学生信息查询出来
五、分页
1、修改StudentController类,可以设置每页显示的学生信息数量
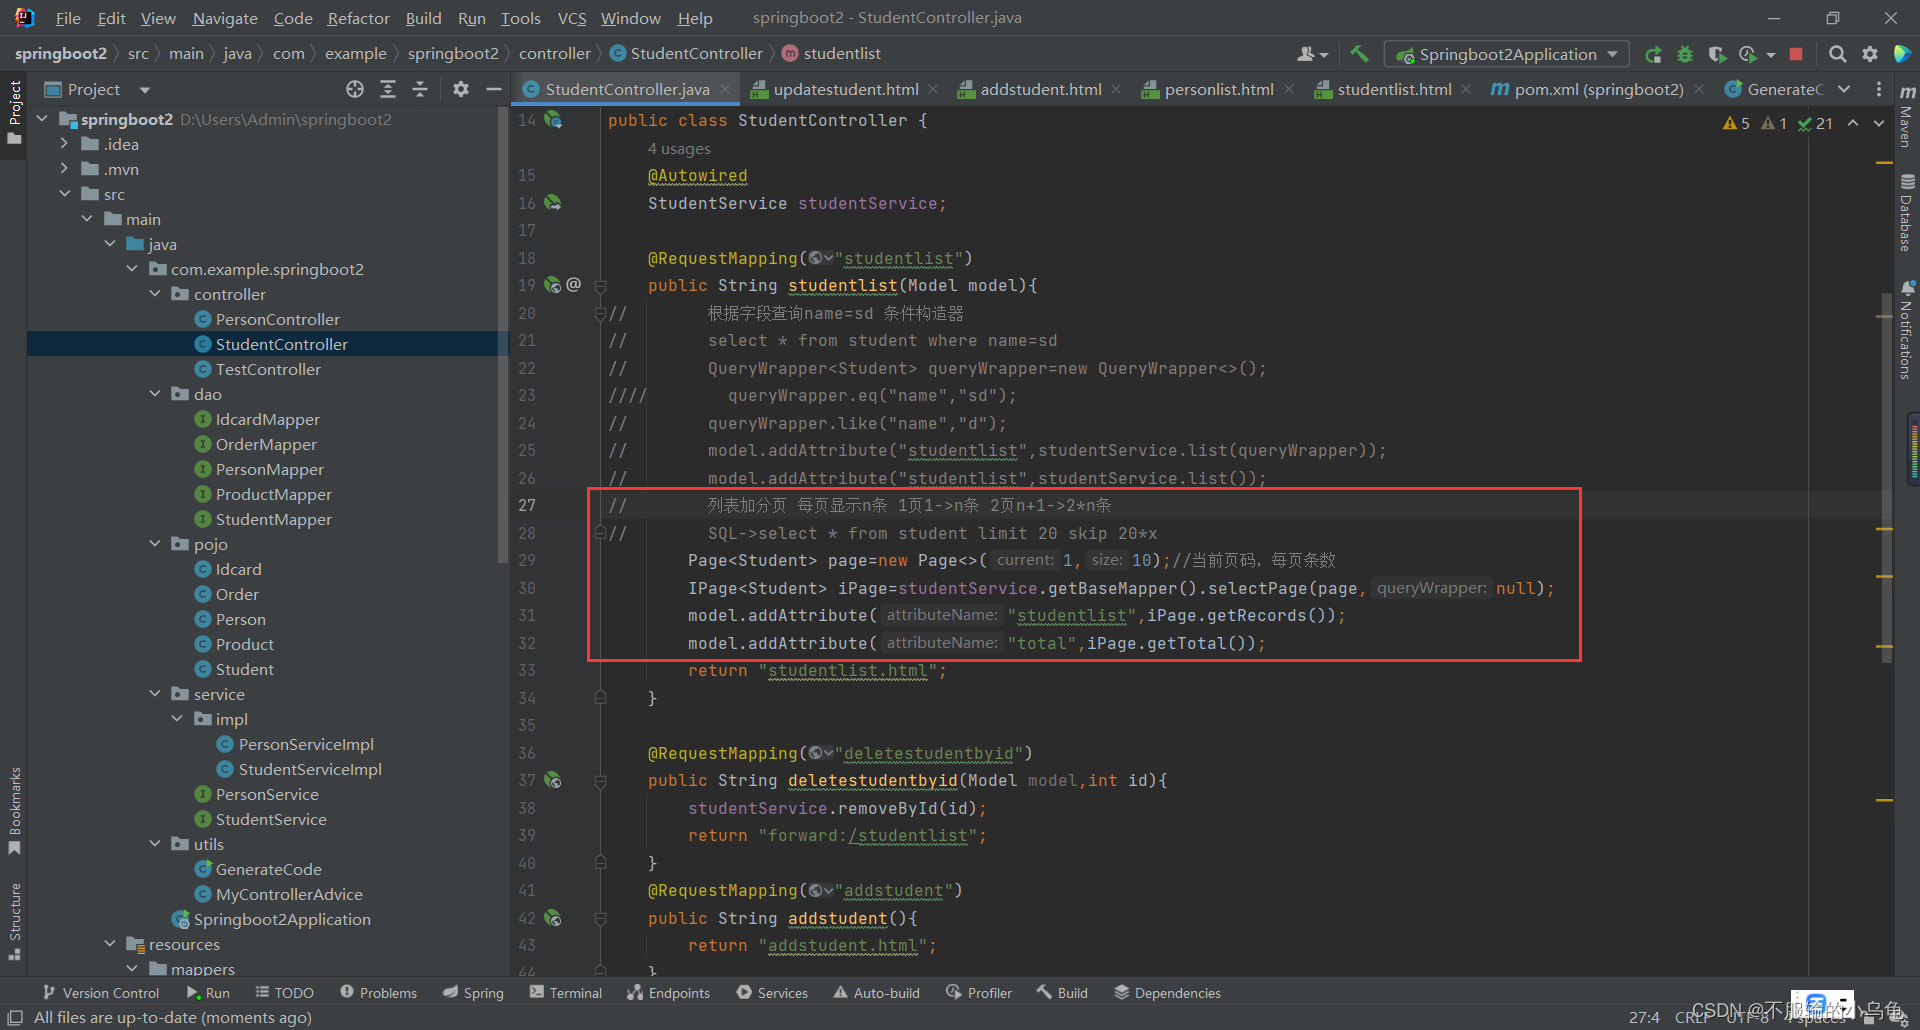
    @RequestMapping("studentlist")
    public String studentlist(Model model){


//        根据字段查询name=sd 条件构造器
//        select * from student where name=sd
//        QueryWrapper<Student> queryWrapper=new QueryWrapper<>();
        queryWrapper.eq("name","sd");
//        queryWrapper.like("name","d");
//        model.addAttribute("studentlist",studentService.list(queryWrapper));
//        model.addAttribute("studentlist",studentService.list());
//        列表加分页 每页显示n条 1页1->n条 2页n+1->2*n条
//        SQL->select * from student limit 20 skip 20*x
        Page<Student> page=new Page<>(1,5);//当前页码,每页条数
        IPage<Student> iPage=studentService.getBaseMapper().selectPage(page,null);
        model.addAttribute("studentlist",iPage.getRecords());
        model.addAttribute("total",iPage.getTotal());
        return "studentlist.html";
    }
2、配置拦截器,在utils文件夹下新建MybatisPlusConfig类
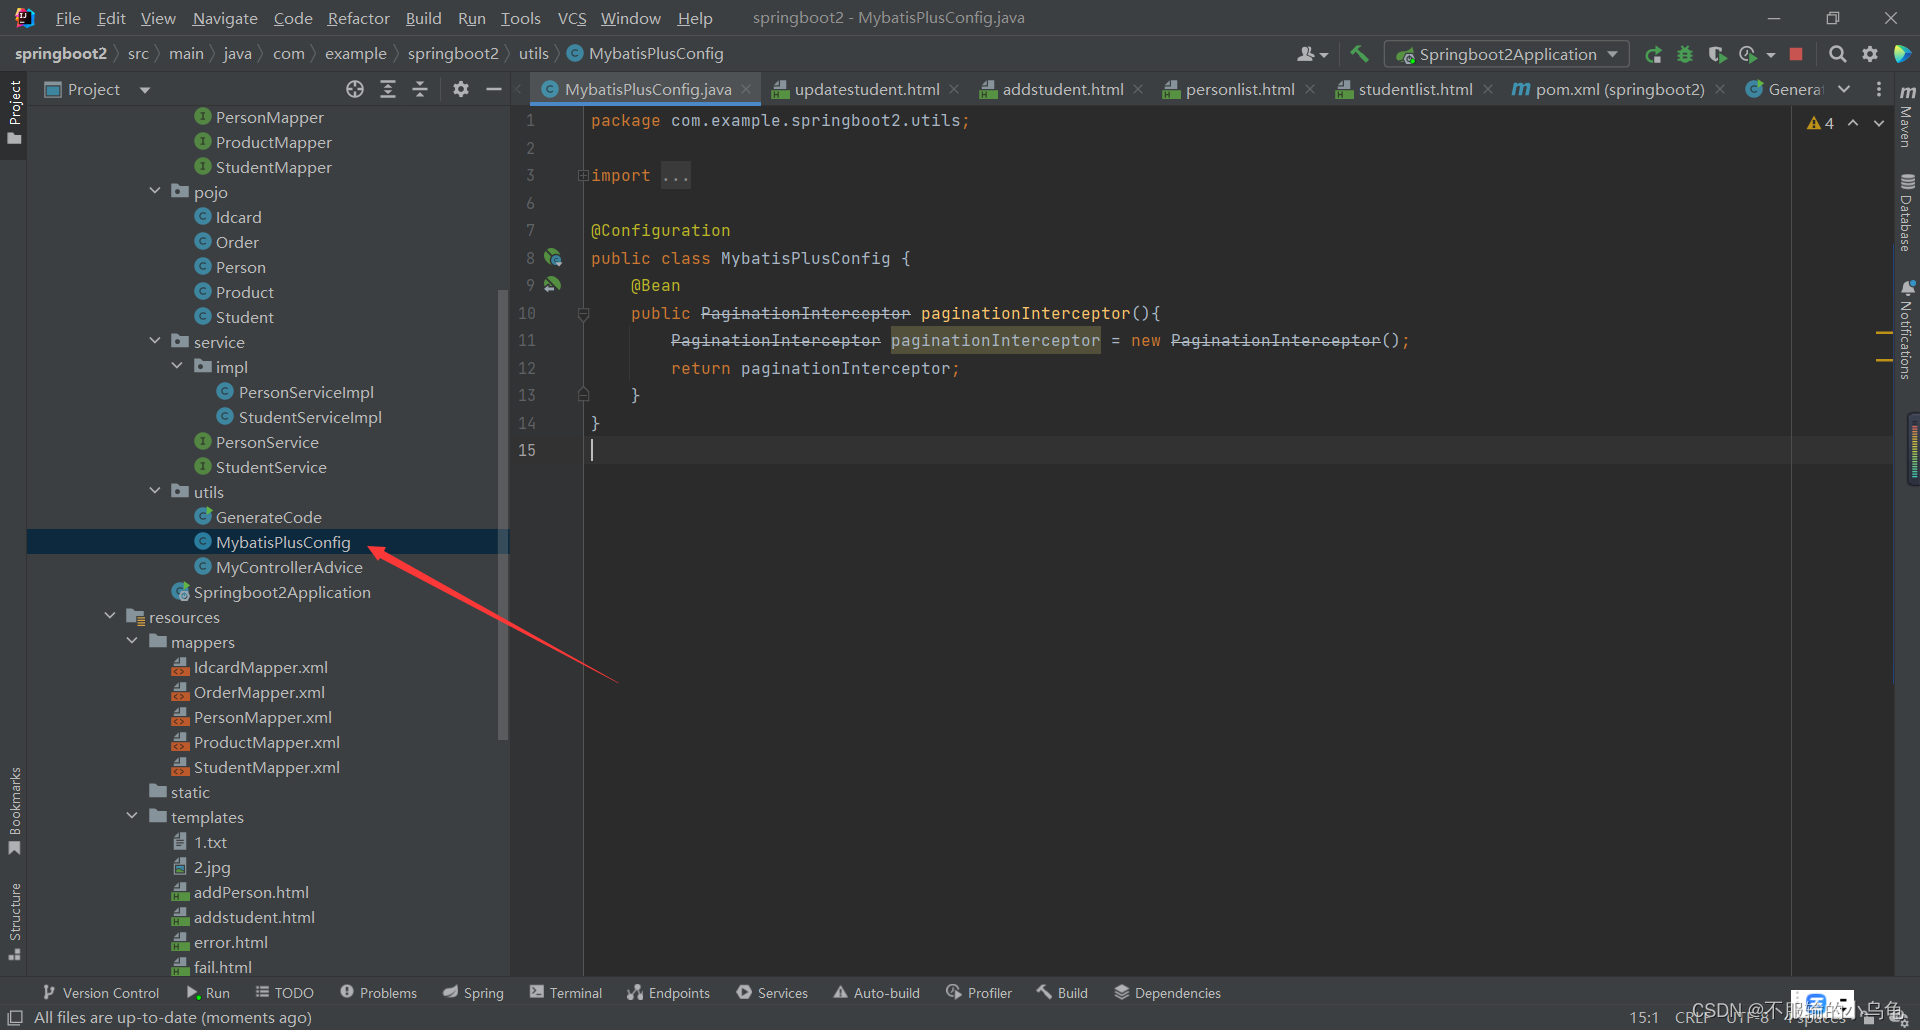
package com.example.springboot2.utils;

import com.baomidou.mybatisplus.extension.plugins.PaginationInterceptor;
import org.springframework.context.annotation.Bean;
import org.springframework.context.annotation.Configuration;

@Configuration
public class MybatisPlusConfig {


    @Bean
    public PaginationInterceptor paginationInterceptor(){


        PaginationInterceptor paginationInterceptor = new PaginationInterceptor();
        return paginationInterceptor;
    }
}
3、点击运行,分页查询成功!,我设置的每页显示5条,所以每页只可以看到5条学生信息

六、SpringSercurity
1、有的页面 不登录也能访问 首页 登录 注册
2、有的页面 需要登录才访问 个人信息有关
3、有的页面需要登录并需要有一定权限才能访问 新建作业(管理员或教师)
技术实现->SpringSercurity 验证用户登录(认证) 验证用户权限(授权)
1、在pom.xml中导入依赖包
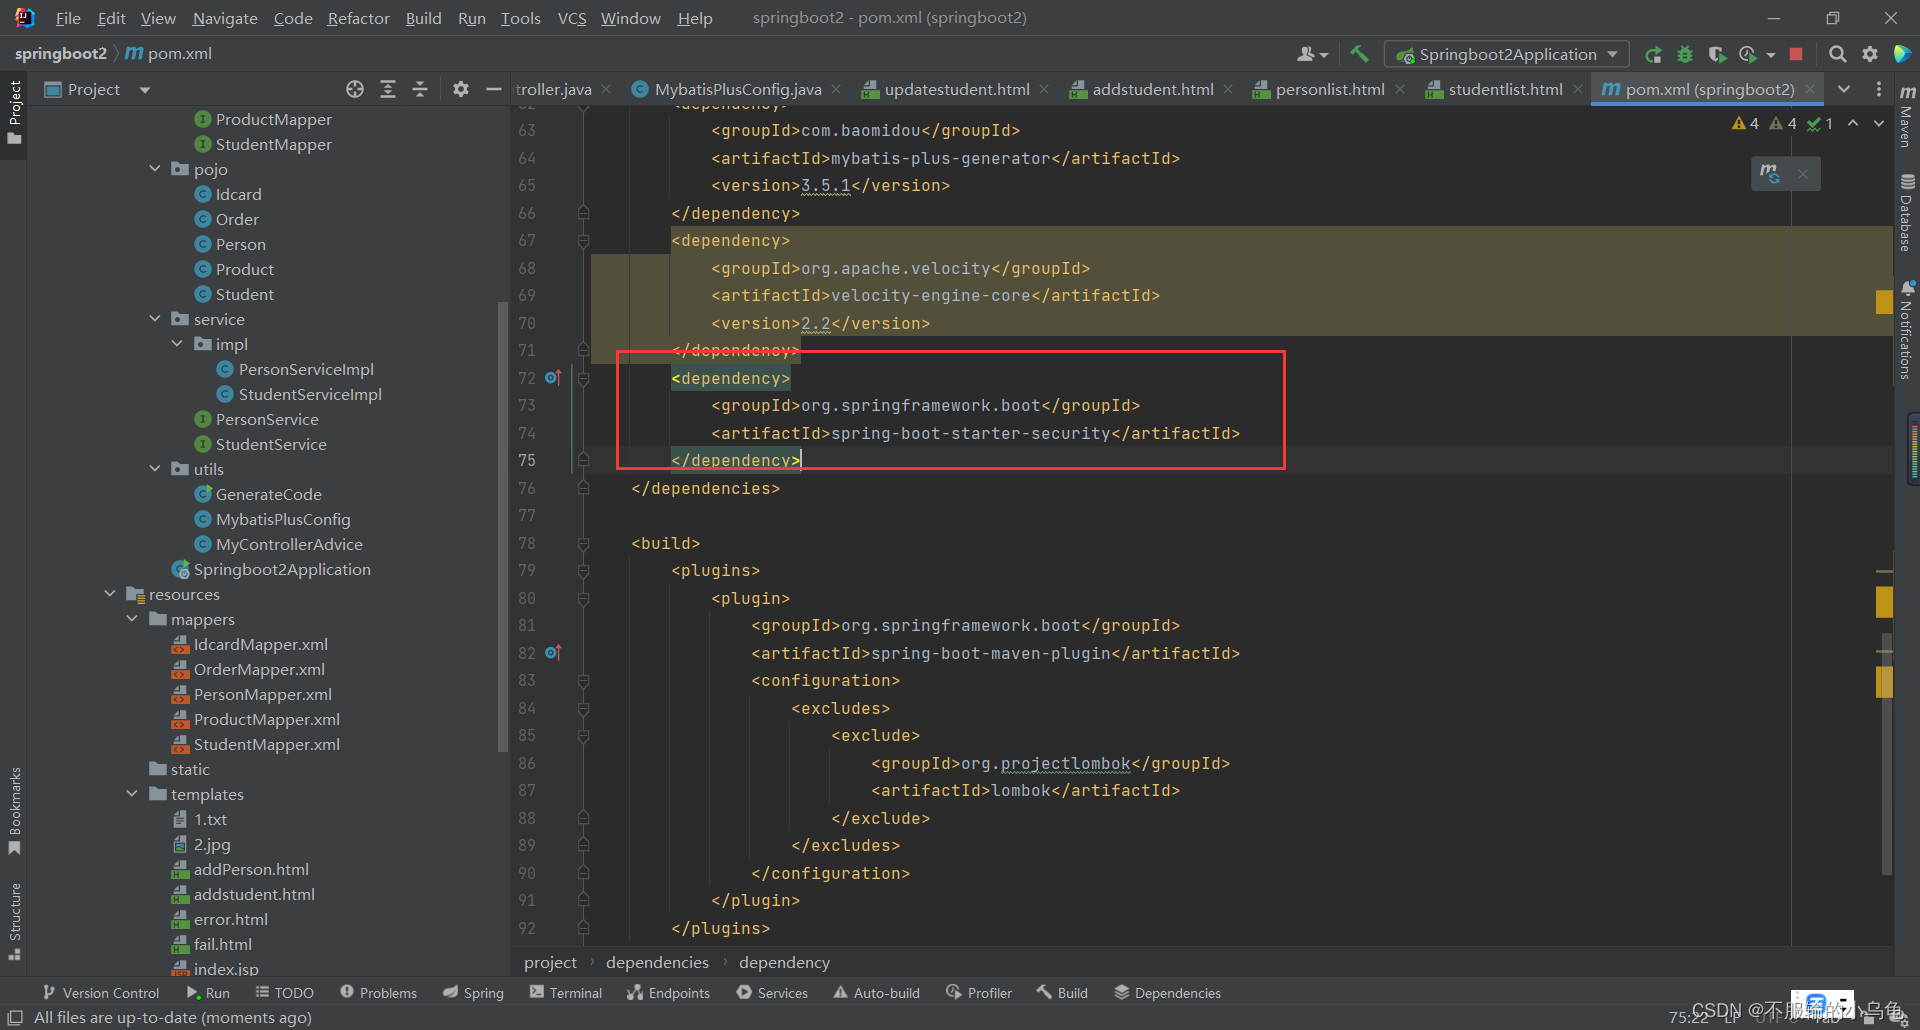
		<dependency>
			<groupId>org.springframework.boot</groupId>
			<artifactId>spring-boot-starter-security</artifactId>
		</dependency>
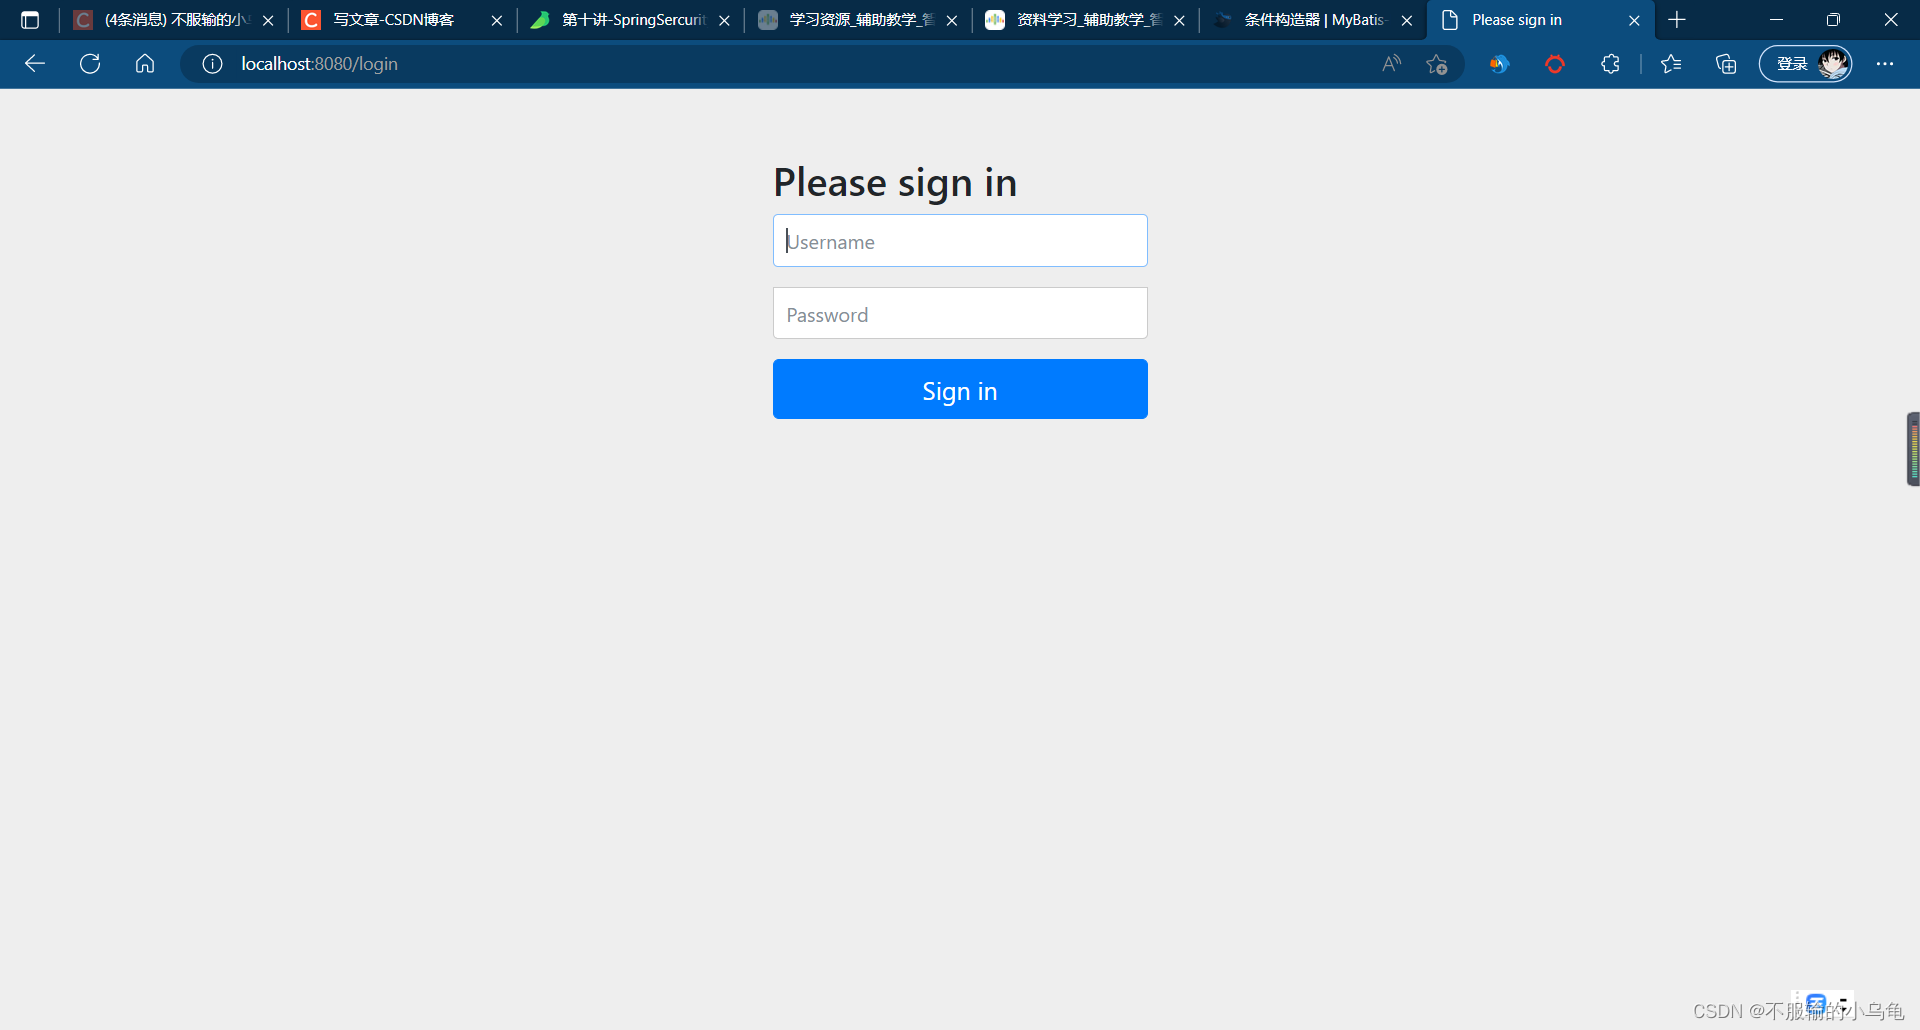
2、点击运行,会发现无论访问上面哪个页面,都会先跳到登录页面,登录成功才能访问其他页面,默认用户名为user,密码在Console中会显示

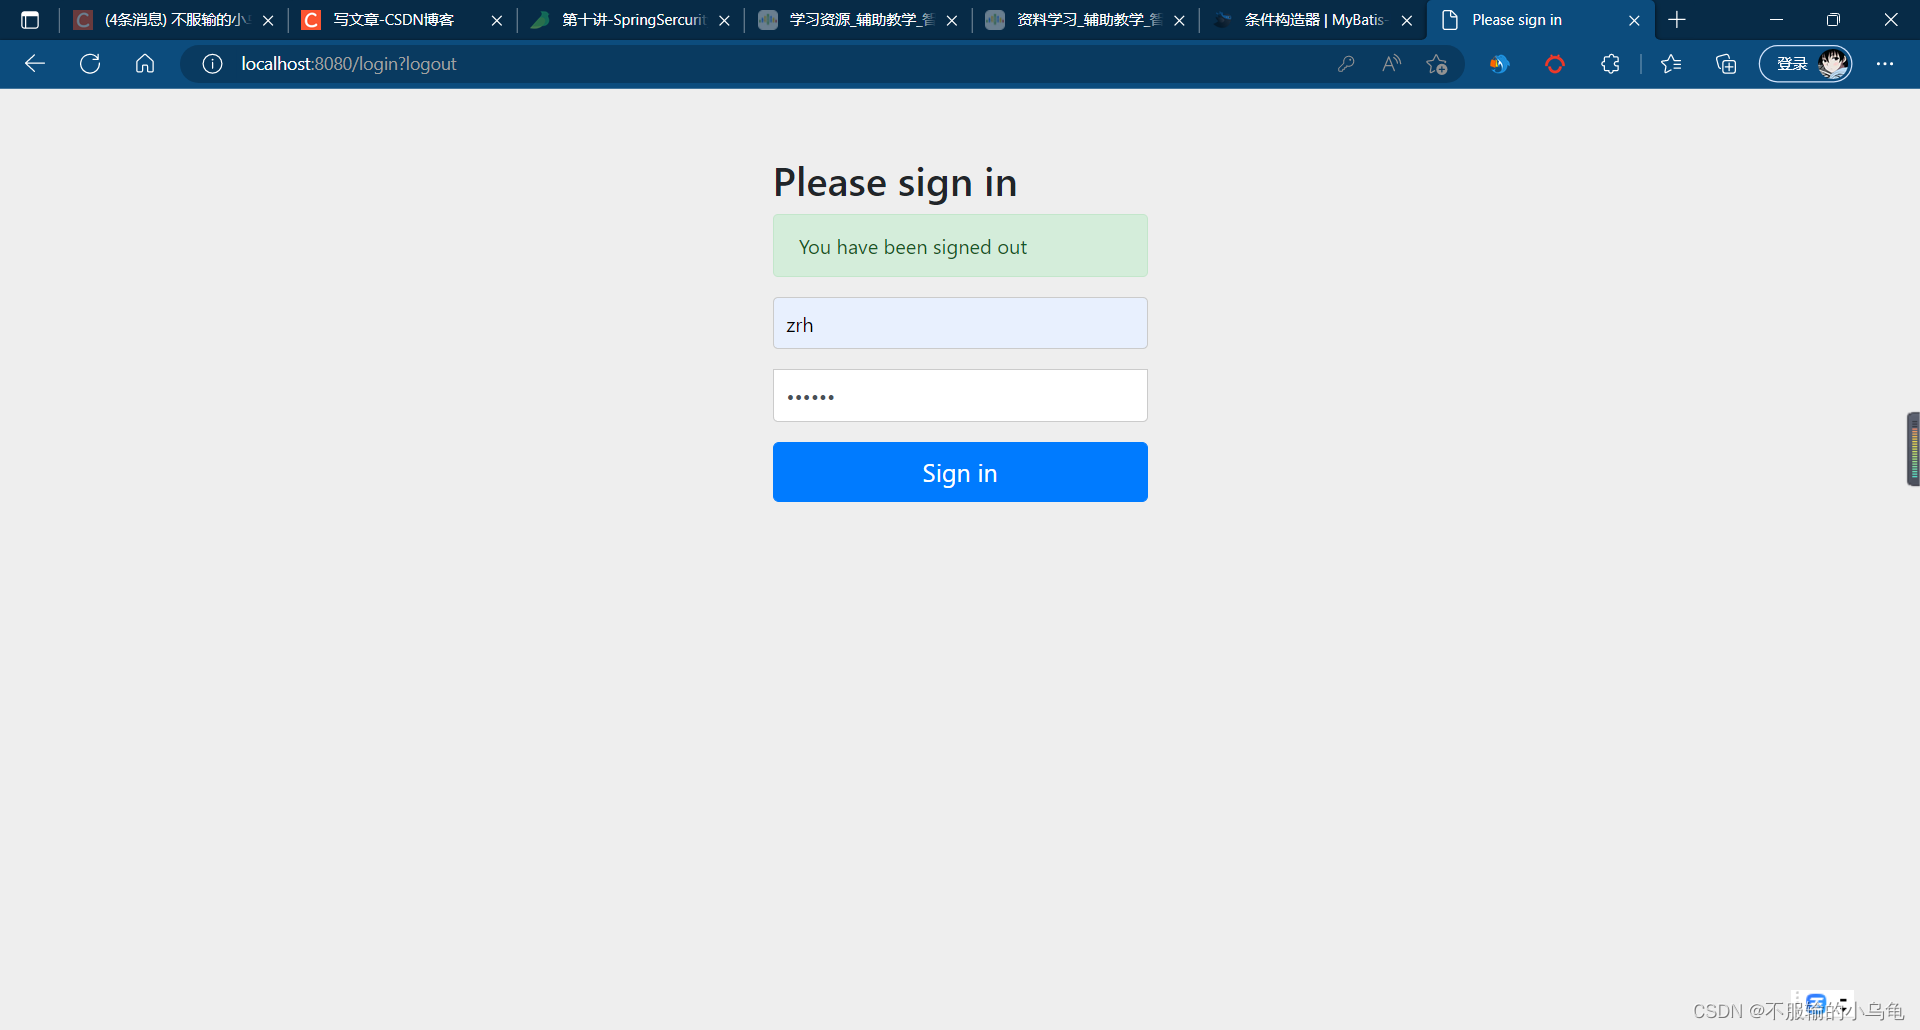
3、访问logout可以退出登录,会重新跳到登录页面


4、用户认证
(1)在utils文件夹下新建MySercurityConfig类,可以手动设置用户名和密码

package com.example.springboot2.utils;

import org.springframework.context.annotation.Bean;
import org.springframework.security.config.annotation.authentication.builders.AuthenticationManagerBuilder;
import org.springframework.security.config.annotation.web.configuration.EnableWebSecurity;
import org.springframework.security.config.annotation.web.configuration.WebSecurityConfigurerAdapter;
import org.springframework.security.crypto.bcrypt.BCryptPasswordEncoder;
import org.springframework.security.crypto.password.PasswordEncoder;

@EnableWebSecurity
public class MySercurityConfig extends WebSecurityConfigurerAdapter {


//  认证
    @Override
    protected void configure(AuthenticationManagerBuilder auth) throws Exception{


        auth.inMemoryAuthentication()
                .withUser("zrh")
                .password(new BCryptPasswordEncoder().encode("123456"))
                .authorities("user");
    }
    @Bean
    PasswordEncoder passwordEncoder(){


        return new BCryptPasswordEncoder();
    }

}
(2)点击运行,输入自己设置的用户名和密码即可登录访问其他页面