该篇文章已经被专栏《从零开始学k8s》收录
上一篇文章:Kubernetes核心技术Service实战

继续我们上一章没讲完的内容!
创建Service:type类型是NodePort
1、创建一个 pod 资源
[root@k8smaster service]# vim pod_nodeport.yaml
apiVersion: apps/v1
kind: Deployment
metadata:
  name: my-nginx-nodeport
spec:
  selector:
    matchLabels:
      run: my-nginx-nodeport
  replicas: 2
  template:
    metadata:
      labels:
        run: my-nginx-nodeport
    spec:
      containers:
      - name: my-nginx-nodeport-container
        image: nginx
        imagePullPolicy: IfNotPresent
        ports:
        - containerPort: 80
#更新资源清单文件
[root@k8smaster service]# kubectl apply -f pod_nodeport.yaml
deployment.apps/my-nginx-nodeport created
#查看 pod 是否创建成功
[root@k8smaster service]# kubectl get pods -l run=my-nginx-nodeport
NAME                                 READY   STATUS    RESTARTS   AGE
my-nginx-nodeport-5fccbb754b-jdj67   1/1     Running   0          19s
my-nginx-nodeport-5fccbb754b-w5f8l   1/1     Running   0          19s

2、创建 service,代理 pod
[root@xianchaomaster1 ~]# vim service_nodeport.yaml
apiVersion: v1
kind: Service
metadata:
  name: my-nginx-nodeport
  labels:
    run: my-nginx-nodeport
spec:
  type: NodePort
  ports:
  - port: 80
    protocol: TCP
    targetPort: 80
    nodePort: 30380
  selector:
    run: my-nginx-nodeport

#更新资源清单文件
[root@k8smaster service]# kubectl apply -f service_nodeport.yaml
service/my-nginx-nodeport created

#查看刚才创建的 service
[root@k8smaster service]# kubectl get svc -l run=my-nginx-nodeport
NAME                TYPE       CLUSTER-IP     EXTERNAL-IP   PORT(S)        AGE
my-nginx-nodeport   NodePort   10.97.89.147   <none>        80:30380/TCP   111s

[root@k8smaster service]# kubectl get pods -o wide
NAME                                 READY   STATUS    RESTARTS   AGE     IP            NODE       NOMINATED
my-nginx-nodeport-5fccbb754b-jdj67   1/1     Running   0          9m14s   10.244.1.37   k8snode2   <none>
my-nginx-nodeport-5fccbb754b-w5f8l   1/1     Running   0          9m14s   10.244.2.38   k8snode    <none>
[root@k8smaster service]# kubectl describe svc my-nginx-nodeport
Name:                     my-nginx-nodeport
Namespace:                default
Labels:                   run=my-nginx-nodeport
Annotations:              Selector:  run=my-nginx-nodeport
Type:                     NodePort
IP:                       10.97.89.147
Port:                     <unset>  80/TCP
TargetPort:               80/TCP
NodePort:                 <unset>  30380/TCP
Endpoints:                10.244.1.37:80,10.244.2.38:80
Session Affinity:         None
External Traffic Policy:  Cluster
Events:                   <none>
#ip一样的

#访问 service
[root@k8smaster service]# curl 10.97.89.147
<!DOCTYPE html>
<html>
<head>
<title>Welcome to nginx!</title>
注意:
10.100.156.7 是 k8s 集群内部的 service ip 地址,只能在 k8s 集群内部访问,在集群外无法访问。
都是80端口也没事,不冲突,会有新的ip加入到防火墙规则。

#在集群外访问 service
[root@k8smaster service]# curl 192.168.11.139:30380
<!DOCTYPE html>
<html>
<head>
<title>Welcome to nginx!</title>

#在浏览器访问 service
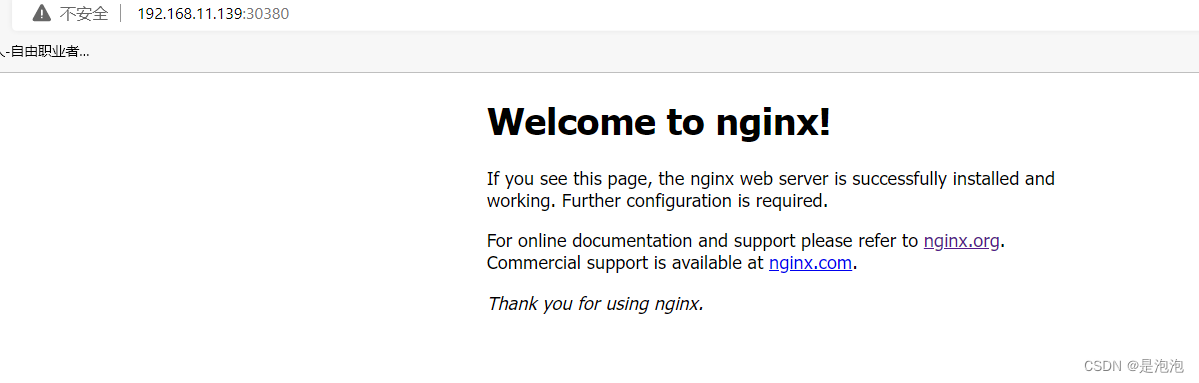
服务请求走向
Client-node ip:30380->service ip:80->pod ip:container port
Client->192.168.11.139:30380->10.97.89.147:80->pod ip:80
创建Service:type类型是ExternalName
应用场景:跨名称空间访问
需求:default 名称空间下的 client 服务想要访问 nginx-ns 名称空间下的 nginx-svc 服务

docker load -i busybox.tar.gz
node1,2下载busybox
[root@k8smaster service]# vim client.yaml
apiVersion: apps/v1
kind: Deployment
metadata:
  name: client
spec:
  replicas: 1
  selector:
    matchLabels:
      app: busybox
  template:
    metadata:
      labels:
        app: busybox
    spec:
      containers:
      - name: busybox
        image: busybox
        imagePullPolicy: IfNotPresent
        command: ["/bin/sh","-c","sleep 36000"]
[root@k8smaster service]# kubectl apply -f client.yaml
deployment.apps/client created
[root@k8smaster service]# vim client_svc.yaml
apiVersion: v1
kind: Service
metadata:
  name: client-svc
spec:
  type: ExternalName
  externalName: nginx-svc.nginx-ns.svc.cluster.local
  ports:
  - name: http
    port: 80
    targetPort: 80
该文件中指定了到 nginx-svc 的软链,让使用者感觉就好像调用自己命名空间的服务一样,访问 client-svc 会代理到 nginx-svc.nginx-ns.svc.cluster.local

[root@k8smaster service]# kubectl apply -f client_svc.yaml
service/client-svc created

查看 pod 是否正常运行
[root@k8smaster service]# kubectl get pods
NAME                     READY   STATUS    RESTARTS   AGE
client-849cbd69b-76hcp   1/1     Running   0          5m22s
[root@k8smaster service]# kubectl describe svc client-svc
Name:              client-svc
Namespace:         default
Labels:            <none>
Annotations:       Selector:  <none>
Type:              ExternalName
IP:
External Name:     nginx-svc.nginx-ns.svc.cluster.local		#FQDN
Port:              http  80/TCP								#服务本身端口
TargetPort:        80/TCP
Endpoints:         <none>									#因为没有定义selector所以也是空
Session Affinity:  None
Events:            <none>
#新建一个命名空间,把nginx的东西放在下面。
[root@k8smaster service]# kubectl create ns nginx-ns
namespace/nginx-ns created
[root@k8smaster service]# vim server_nginx.yaml
apiVersion: apps/v1
kind: Deployment
metadata:
  name: nginx
  namespace: nginx-ns
spec:
  replicas: 1
  selector:
    matchLabels:
      app: nginx
  template:
    metadata:
      labels:
        app: nginx
    spec:
      containers:
      - name: nginx
        image: nginx
        imagePullPolicy: IfNotPresent
#nginx默认暴露80,所以可以找到deploy控制器创建的pod,进入到pod封装的容器nginx里面。
[root@k8smaster service]# kubectl apply -f server_nginx.yaml
deployment.apps/nginx created
#查看 pod 是否创建成功
[root@k8smaster service]# kubectl get pods -n nginx-ns
NAME                     READY   STATUS    RESTARTS   AGE
nginx-5957f949fc-9nwbh   1/1     Running   0          10s

[root@xianchaomaster1 exter]# vim nginx_svc.yaml
apiVersion: v1
kind: Service
metadata:
  name: nginx-svc
  namespace: nginx-ns
spec:
  selector:
    app: nginx
  ports:
  - name: http
    protocol: TCP
    port: 80
    targetPort: 80
[root@k8smaster service]# kubectl apply -f nginx_svc.yaml
service/nginx-svc created
[root@k8smaster service]# kubectl describe svc nginx-svc -n nginx-ns
Name:              nginx-svc
Namespace:         nginx-ns
Labels:            <none>
Annotations:       Selector:  app=nginx
Type:              ClusterIP
IP:                10.101.124.84
Port:              http  80/TCP
TargetPort:        80/TCP
Endpoints:         10.244.1.39:80      #ip是一样的 这个service通过标签选择器选择app=nginx的pod也就是第二个模板创建的
Session Affinity:  None
Events:            <none>
[root@k8smaster service]# kubectl get pods -o wide -n nginx-ns
NAME                     READY   STATUS    RESTARTS   AGE     IP            NODE
nginx-5957f949fc-9nwbh   1/1     Running   0          7m49s   10.244.1.39   k8snode2
[root@k8smaster service]# curl 10.101.124.84
<!DOCTYPE html>
<html>
<head>
<title>Welcome to nginx!</title>
#登录到 client pod
[root@xianchaomaster1 exter]# kubectl exec -it client-849cbd69b-76hcp -- /bin/sh
/ # wget -q -O - client-svc.default.svc.cluster.local
wget -q -O - nginx-svc.nginx-ns.svc.cluster.local
#上面两个请求的结果一样,这个实验是为了有些情况下想通过默认命名空间下的全局限定域名到其他命名空间下的服务和服务区域通信访问。
映射外部服务案例
k8s 集群引用外部的 mysql 数据库
node2安装mysql
[root@k8snode2 ~]# yum install mariadb-server.x86_64 -y
[root@k8snode2 ~]# systemctl start mariadb
[root@k8snode2 ~]# systemctl enable mariadb
[root@k8smaster ~]# mkdir mysql
[root@k8smaster ~]# cd mysql/
[root@k8smaster mysql]# vim mysql_service.yaml
apiVersion: v1
kind: Service
metadata:
  name: mysql
spec:
  type: ClusterIP
  ports:
  - port: 3306
[root@k8smaster mysql]# kubectl apply -f mysql_service.yaml
service/mysql created
[root@k8smaster mysql]# kubectl get svc | grep mysql
mysql        ClusterIP      10.103.7.164   <none>                                 3306/TCP   4s

[root@k8smaster mysql]# kubectl describe svc mysql
Name:              mysql
Namespace:         default
Labels:            <none>
Annotations:       Selector:  <none>
Type:              ClusterIP
IP:                10.103.7.164
Port:              <unset>  3306/TCP
TargetPort:        3306/TCP
Endpoints:         <none>		#还没有 endpoint
Session Affinity:  None
Events:            <none>
[root@k8smaster mysql]# vim mysql_endpoint.yaml        endpoint和svc的名字保持一致
apiVersion: v1
kind: Endpoints
metadata:
  name: mysql
subsets:
- addresses:
  - ip: 192.168.40.182
  ports:
  - port: 3306
[root@k8smaster mysql]# kubectl apply -f mysql_endpoint.yaml
endpoints/mysql created
[root@k8smaster mysql]# kubectl describe svc mysql
Name:              mysql
Namespace:         default
Labels:            <none>
Annotations:       Selector:  <none>
Type:              ClusterIP
IP:                10.103.7.164
Port:              <unset>  3306/TCP
TargetPort:        3306/TCP
Endpoints:         192.168.40.182:3306			#这就是定义的外部数据库
Session Affinity:  None
Events:            <none>
mysql.default.svc.cluster.local    	#这就是它的全局域名
上面配置就是将外部 IP 地址和服务引入到 k8s 集群内部(其他节点),由 service 作为一个代理来达到能够访问外部服务的目的。
写在最后
创作不易,如果觉得内容对你有帮助,麻烦给个三连关注支持一下我!如果有错误,请在评论区指出,我会及时更改!
目前正在更新的系列:从零开始学k8s
感谢各位的观看,文章掺杂个人理解,如有错误请联系我指出~
