文章目录
腾讯云短信服务实现 Java 发送手机验证码(SpringBoot+Redis 实现)
前置:需要腾讯云的账号,后期授权需要,不需要买云服务器,有需要的可以购买短信套餐(几块钱)
1、打开腾讯云短信服务
搜索框输入短信,可以买一个短信套餐包,便宜不贵,进入短信服务的控制台
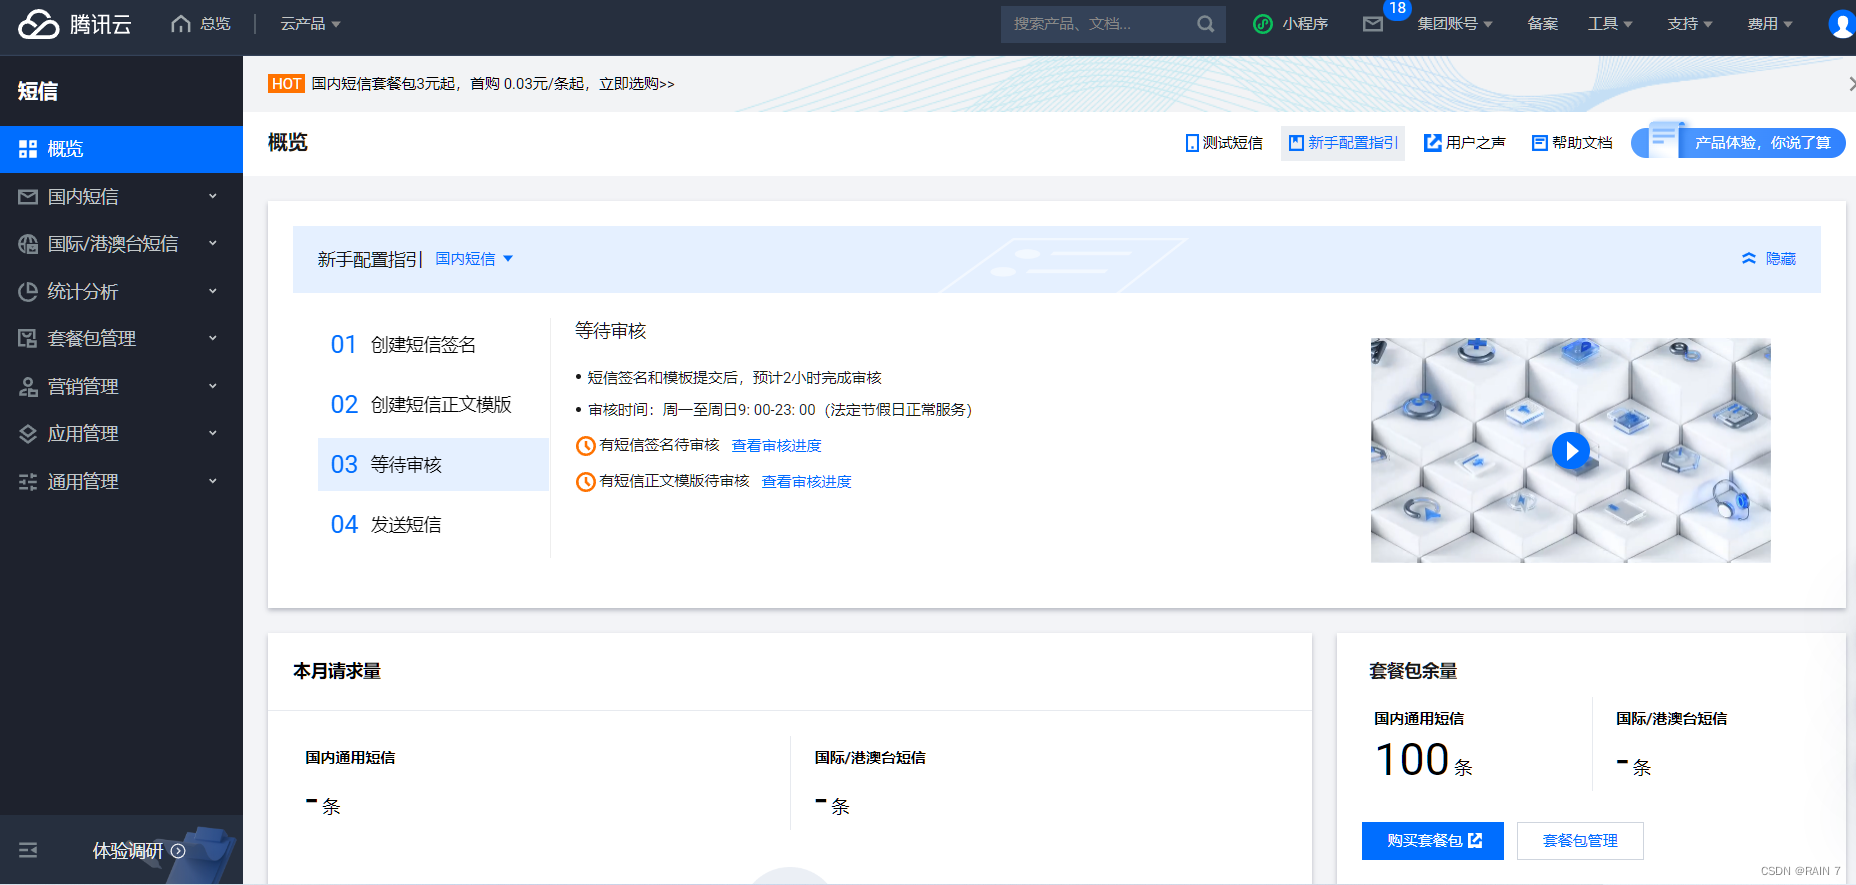
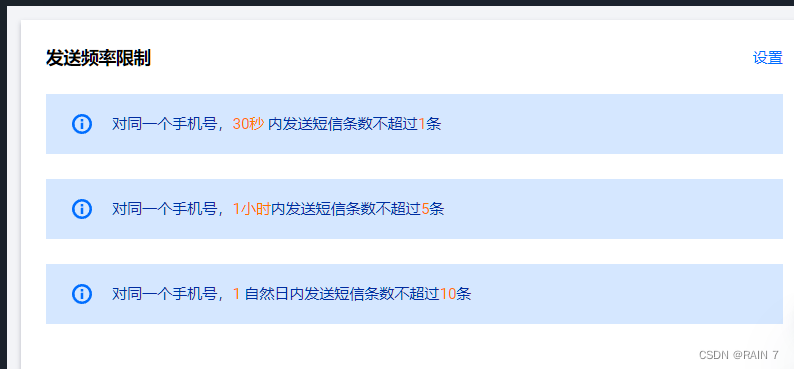
发送短信有频率限制,企业用户可以修改设置
之后我们需要对短信内容进行设置
2、创建短信签名
类型有网站、app、公众号、小程序等,如果大家只是想测试一下短信服务的功能,自己创建一个公众号使用最好,其他都需要企业注册等很多要求。
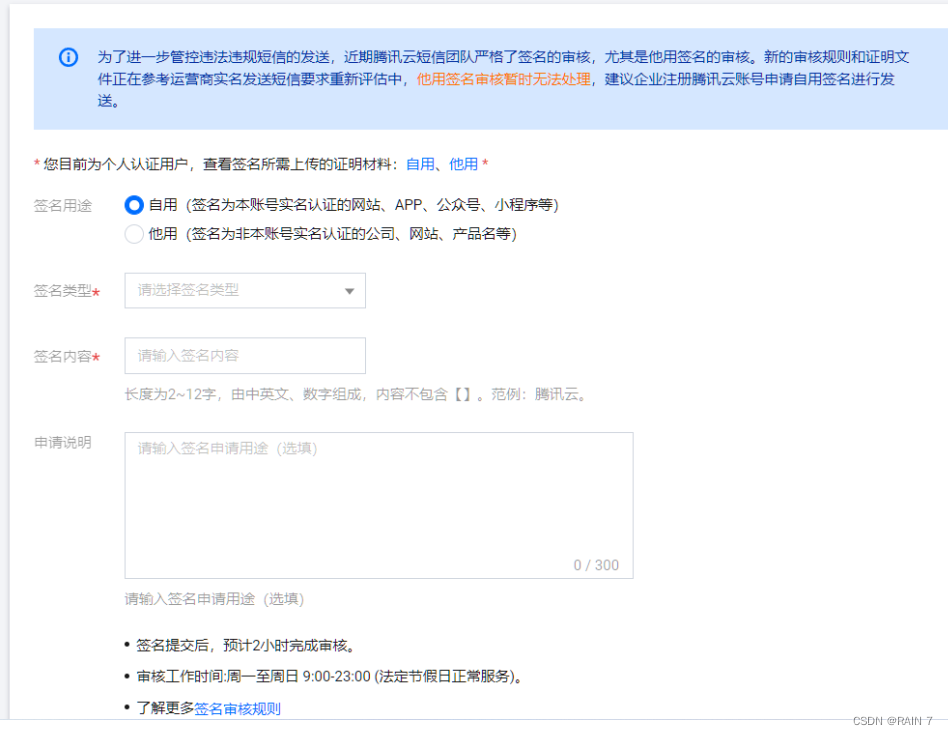
最好自己创建一个微信公众号,类型是公众号,上传公众号设置界面的截图即可,签名必须为公众号名字,申请说明必须填上正当理由,之后等待审核

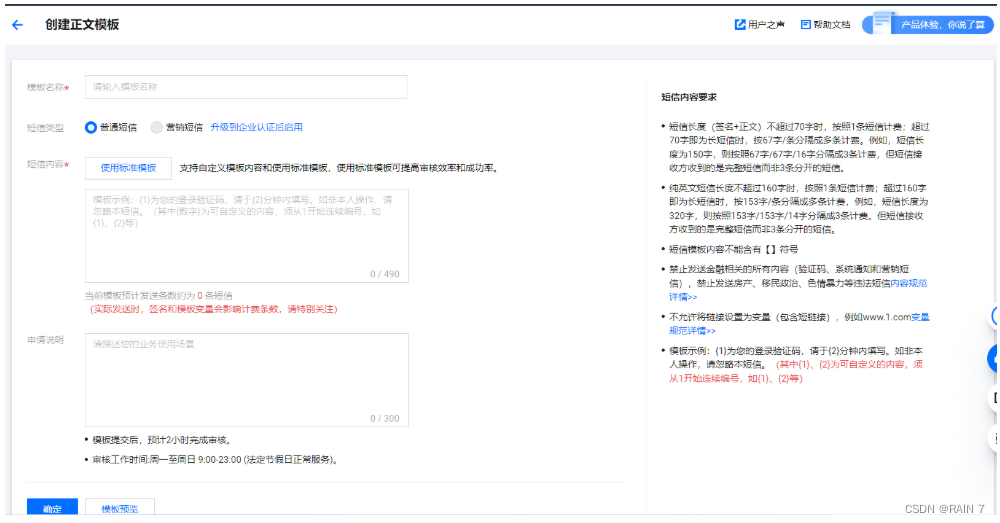
3、创建短信正文模板
输入模板内容,注意短信内容要求,可使用提供的短信内容模板
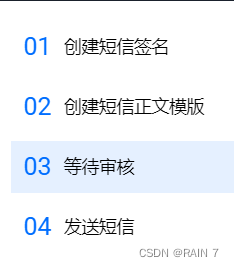
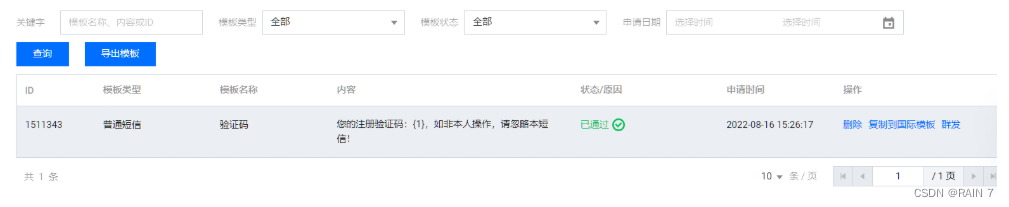
4、等待全部审核完毕即可
签名审核完毕,在之后的api中有一个参数必须写通过审核的签名,才能发送

短信内容审核完毕,在之后的api中参数有需要填写 内容ID的,需要我们复制前面的 id
5、发送短信
我们使用 API发送短信,下面详细介绍
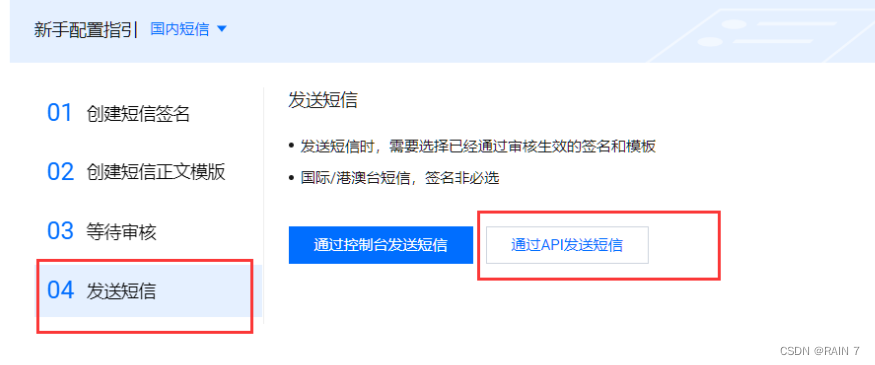
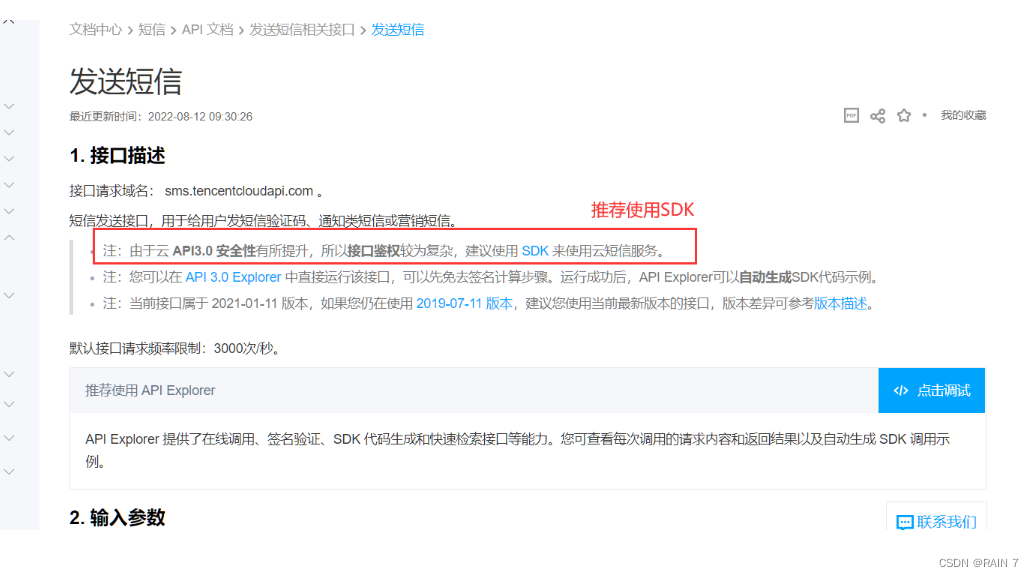
点击通过api发送短信后,这里有接口描述,参数描述,返回信息描述等,有api的具体信息点击调试即可,我们会使用 Java SDK 来使用云短信服务,怎么使用呢? 点击 SDK,进入SDK文档
Java SDK 使用短信API说明
https://cloud.tencent.com/document/product/382/43194
按照文档的内容一步一步来即可,如果要使用短信相关的功能,直接复用代码即可
安装sdk,直接使用 maven 即可
<dependency>
    <groupId>com.tencentcloudapi</groupId>
    <artifactId>tencentcloud-sdk-java</artifactId>
    <!-- go to https://search.maven.org/search?q=tencentcloud-sdk-java and get the latest version. -->
    <!-- 请到https://search.maven.org/search?q=tencentcloud-sdk-java查询所有版本,最新版本如下 -->
    <version>3.1.571</version>
</dependency>
6、短信业务实战(SpringBoot+Redis)
我们提出一个业务要求,要求实现手机验证码注册或者登陆,同时设置验证码的有效期为5分钟,五分钟后失效
使用SpringBoot创建项目,Redis实现过期的效果
(1)设置配置信息
# 应用名称
spring.application.name=demo
# 应用服务 WEB 访问端口
server.port=8080

#配置redis
spring.redis.host=
spring.redis.port=6379
spring.redis.password=
(2)使用腾讯云发送短信的API
(1)设置接口
public interface SendSms {

     /**
 *
 * @param phoneNum 短信发送的手机号
 * @param templateCode 使用的短信模板id
 * @param code 发送的手机验证码
 * @return 返回是否发送成功
 */
        public boolean send(String phoneNum,String templateCode,String code);
}
(2)设置实现类,所有的信息都在注释里写的非常明确了,也是从腾讯云粘贴下来的,有些信息需要从腾讯云账户获取
package com.study.service;


import org.springframework.beans.factory.annotation.Autowired;
import org.springframework.beans.factory.annotation.Qualifier;
import org.springframework.data.redis.core.RedisTemplate;
import org.springframework.stereotype.Service;
import com.tencentcloudapi.common.Credential;
import com.tencentcloudapi.common.exception.TencentCloudSDKException;

//导入可选配置类
import com.tencentcloudapi.common.profile.ClientProfile;
import com.tencentcloudapi.common.profile.HttpProfile;

// 导入对应SMS模块的client
import com.tencentcloudapi.sms.v20210111.SmsClient;

// 导入要请求接口对应的request response类
import com.tencentcloudapi.sms.v20210111.models.SendSmsRequest;
import com.tencentcloudapi.sms.v20210111.models.SendSmsResponse;
@Service
public class SendSmsImpl implements SendSms{


     /**
      * @param phoneNum 短信发送的手机号
      * @param templateCode 使用的短信模板id
      * @param code 发送的手机验证码
      * @return 返回是否发送成功
     */

    @Override
    public boolean send(String phoneNum, String templateCode, String code) {


        try {


            /* 必要步骤:
             * 实例化一个认证对象,入参需要传入腾讯云账户密钥对secretId,secretKey。
             * 这里采用的是从环境变量读取的方式,需要在环境变量中先设置这两个值。
             * 你也可以直接在代码中写死密钥对,但是小心不要将代码复制、上传或者分享给他人,
             * 以免泄露密钥对危及你的财产安全。
             * SecretId、SecretKey 查询: https://console.cloud.tencent.com/cam/capi */
            Credential cred = new Credential("secreId", "SecretKey");

            // 实例化一个http选项,可选,没有特殊需求可以跳过
            HttpProfile httpProfile = new HttpProfile();
            // 设置代理(无需要直接忽略)
            // httpProfile.setProxyHost("真实代理ip");
            // httpProfile.setProxyPort(真实代理端口);
            /* SDK默认使用POST方法。
             * 如果你一定要使用GET方法,可以在这里设置。GET方法无法处理一些较大的请求 */
            httpProfile.setReqMethod("POST");
            /* SDK有默认的超时时间,非必要请不要进行调整
             * 如有需要请在代码中查阅以获取最新的默认值 */
            httpProfile.setConnTimeout(60);
            /* 指定接入地域域名,默认就近地域接入域名为 sms.tencentcloudapi.com ,也支持指定地域域名访问,例如广州地域的域名为 sms.ap-guangzhou.tencentcloudapi.com */
            httpProfile.setEndpoint("sms.tencentcloudapi.com");

            /* 非必要步骤:
             * 实例化一个客户端配置对象,可以指定超时时间等配置 */
            ClientProfile clientProfile = new ClientProfile();
            /* SDK默认用TC3-HMAC-SHA256进行签名
             * 非必要请不要修改这个字段 */
            clientProfile.setSignMethod("HmacSHA256");
            clientProfile.setHttpProfile(httpProfile);
            /* 实例化要请求产品(以sms为例)的client对象
             * 第二个参数是地域信息,可以直接填写字符串ap-guangzhou,支持的地域列表参考 https://cloud.tencent.com/document/api/382/52071#.E5.9C.B0.E5.9F.9F.E5.88.97.E8.A1.A8 */
            SmsClient client = new SmsClient(cred, "ap-guangzhou",clientProfile);
            /* 实例化一个请求对象,根据调用的接口和实际情况,可以进一步设置请求参数
             * 你可以直接查询SDK源码确定接口有哪些属性可以设置
             * 属性可能是基本类型,也可能引用了另一个数据结构
             * 推荐使用IDE进行开发,可以方便的跳转查阅各个接口和数据结构的文档说明 */
            SendSmsRequest req = new SendSmsRequest();

            /* 填充请求参数,这里request对象的成员变量即对应接口的入参
             * 你可以通过官网接口文档或跳转到request对象的定义处查看请求参数的定义
             * 基本类型的设置:
             * 帮助链接:
             * 短信控制台: https://console.cloud.tencent.com/smsv2
             * 腾讯云短信小助手: https://cloud.tencent.com/document/product/382/3773#.E6.8A.80.E6.9C.AF.E4.BA.A4.E6.B5.81 */

            /* 短信应用ID: 短信SdkAppId在 [短信控制台] 添加应用后生成的实际SdkAppId,示例如1400006666 */
            // 应用 ID 可前往 [短信控制台](https://console.cloud.tencent.com/smsv2/app-manage) 查看
            String sdkAppId = "XXXXX";
            req.setSmsSdkAppId(sdkAppId);

            /* 短信签名内容: 使用 UTF-8 编码,必须填写已审核通过的签名 */
            // 签名信息可前往 [国内短信](https://console.cloud.tencent.com/smsv2/csms-sign) 或 [国际/港澳台短信](https://console.cloud.tencent.com/smsv2/isms-sign) 的签名管理查看
            String signName = "XXX公众号";
            req.setSignName(signName);

            /* 模板 ID: 必须填写已审核通过的模板 ID */
            // 模板 ID 可前往 [国内短信](https://console.cloud.tencent.com/smsv2/csms-template) 或 [国际/港澳台短信](https://console.cloud.tencent.com/smsv2/isms-template) 的正文模板管理查看
            String templateId = templateCode;
            req.setTemplateId(templateId);

            /* 模板参数: 模板参数的个数需要与 TemplateId 对应模板的变量个数保持一致,若无模板参数,则设置为空 */
            String[] templateParamSet = {

    code};
            req.setTemplateParamSet(templateParamSet);

            /* 下发手机号码,采用 E.164 标准,+[国家或地区码][手机号]
             * 示例如:+8613711112222, 其中前面有一个+号 ,86为国家码,13711112222为手机号,最多不要超过200个手机号 */
            String[] phoneNumberSet = {

    "+86"+phoneNum};
            req.setPhoneNumberSet(phoneNumberSet);


            /* 通过 client 对象调用 SendSms 方法发起请求。注意请求方法名与请求对象是对应的
             * 返回的 res 是一个 SendSmsResponse 类的实例,与请求对象对应 */
            SendSmsResponse res = client.SendSms(req);

            // 输出json格式的字符串回包
            System.out.println(SendSmsResponse.toJsonString(res));
            return true;

            // 也可以取出单个值,你可以通过官网接口文档或跳转到response对象的定义处查看返回字段的定义
            // System.out.println(res.getRequestId());

        } catch (TencentCloudSDKException e) {


            e.printStackTrace();
        }
        return false;
    }

}
(3)重新配置Redis的序列化
建一个config包,创建RedisConfig,加上@Config 注解,这些信息也是固定的套路,网上都有
package com.study.config;

import com.fasterxml.jackson.annotation.JsonAutoDetect;
import com.fasterxml.jackson.annotation.PropertyAccessor;
import com.fasterxml.jackson.databind.ObjectMapper;
import org.springframework.beans.factory.annotation.Autowired;
import org.springframework.boot.autoconfigure.condition.ConditionalOnMissingBean;
import org.springframework.context.annotation.Bean;
import org.springframework.context.annotation.Configuration;
import org.springframework.data.redis.connection.RedisConnectionFactory;
import org.springframework.data.redis.core.RedisTemplate;
import org.springframework.data.redis.serializer.Jackson2JsonRedisSerializer;
import org.springframework.data.redis.serializer.StringRedisSerializer;

import java.net.UnknownHostException;

@Configuration
public class RedisConfig {


    //配置我们自己的redisTemplate  固定模板

    @Bean
    @SuppressWarnings("all") //告诉编译器忽略全部的警告,不用在编译完成后出现警告信息
    public RedisTemplate<String, Object> redisTemplate(RedisConnectionFactory factory)
            throws UnknownHostException {


        //我们为了自己开发方便,一般直接使用<String, Object>类型
        RedisTemplate<String, Object> template = new RedisTemplate<String,Object>();
        //连接工厂
        template.setConnectionFactory(factory);

        //Json的序列化配置
        Jackson2JsonRedisSerializer jackson2JsonRedisSerializer = new Jackson2JsonRedisSerializer(Object.class);
        ObjectMapper om = new ObjectMapper(); //JackSon对象
        om.setVisibility(PropertyAccessor.ALL, JsonAutoDetect.Visibility.ANY);
        om.enableDefaultTyping(ObjectMapper.DefaultTyping.NON_FINAL);
        jackson2JsonRedisSerializer.setObjectMapper(om);

        //String类型的序列化配置
        StringRedisSerializer stringRedisSerializer = new StringRedisSerializer();


        //Key采用String的序列化操作
        template.setKeySerializer(stringRedisSerializer);
        //Hash的key也采用String的序列化方式
        template.setHashKeySerializer(stringRedisSerializer);
        //value序列化采用jackson
        template.setValueSerializer(jackson2JsonRedisSerializer);
        //Hash的value序列化也采用jackson
        template.setHashValueSerializer(jackson2JsonRedisSerializer);

        //配置完之后将所有的properties设置进去
        template.afterPropertiesSet();
        return template;
    }
}
(4)设置接口,实现验证码的发送
要实现的业务
(1)生成6位数的随机验证码
(2)对手机号参数进行发送验证码
(3)验证码信息保存到 Redis 数据库中,时效性为5分钟
package com.study.controller;
import com.study.service.SendSmsImpl;
import org.apache.commons.lang3.StringUtils;
import org.springframework.beans.factory.annotation.Autowired;
import org.springframework.data.redis.core.RedisTemplate;
import org.springframework.stereotype.Controller;
import org.springframework.web.bind.annotation.CrossOrigin;
import org.springframework.web.bind.annotation.RequestMapping;
import org.springframework.web.bind.annotation.RequestParam;
import org.springframework.web.bind.annotation.RestController;
import java.util.Random;
@RestController
@CrossOrigin
public class SmsApiController {
@Autowired
public SendSmsImpl sendSms;
@Autowired
public RedisTemplate<String,Object> redisTemplate;
public Random random = new Random();
@RequestMapping("/send")
public String sendCode(@RequestParam(value = "phone",required = true) String phone) {
//调用发送的方法即可
//1、连接Redis,查找手机验证码是否存在
String code = (String)redisTemplate.opsForValue().get(phone);
//====================================================
// 1、1如果存在的话,说明在5分钟内已经发送过验证码了,不能再发了
if (!StringUtils.isEmpty(code)) {
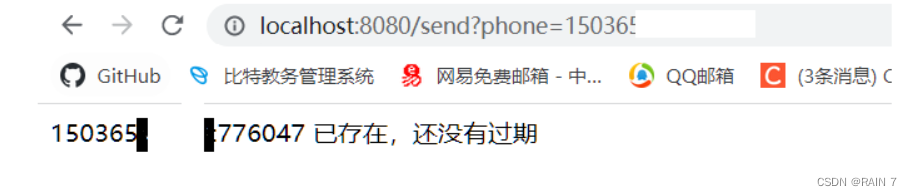
System.out.println("已存在,还没有过期,不能再次发送");
return phone+":"+code+" 已存在,还没有过期";
}
//=====================================================
//1。2 如果不存在的话,那么redis创建键值对生成验证码并存储,设置过期时间
String newCode = "";
// 生成6位随机验证码
for (int i = 0; i < 6; i++) {
newCode += random.nextInt(10);
}
// 将6位随机验证码对手机号进行发送
boolean idSend = sendSms.send(phone,"XXXXX",newCode);
//=====================================================
// 因为有短信轰炸的情况,短信服务对每次发送限制次数,所以有发送不成功的情况,要考虑
if(idSend){
//如果发送成功将验证码存储到redis中
redisTemplate.opsForValue().set(phone, newCode, 300);
System.out.println("发送成功!");
return phone+":"+newCode+" 发送成功!";
}else{
System.out.println("发送失败!");
return "发送失败!";
}
}
}
(5)效果验证
第一次传递手机号参数发送验证码短信

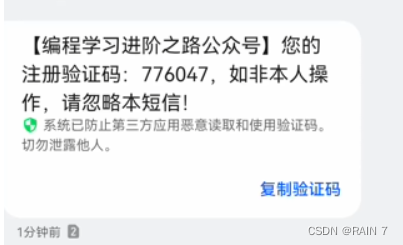
手机收到腾讯云短信服务发送的短信
在5分钟内再次发送短信,此时验证码还未过期所以无法发送
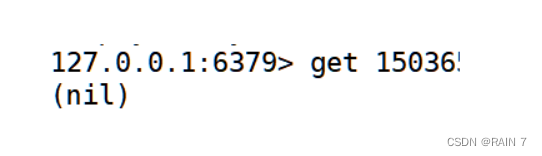
5分钟之后再次查看redis客户端发现 验证码在5分钟后已经过期
结语
项目代码GitHub 链接,有需要的可以直接查看源代码