Preface
The document is about to introduce some specialties on PLM development and maintenance activities, we weren’t going to state everything about Git Usage. All content of the document written here describe only most helpful commands and steps.
Before you begin…
Before you begin reading, you should have already known some information about PLM, if you are unfamiliar with PLM absolutely, please refer to PLM Guide Document firstly.
Project Directories
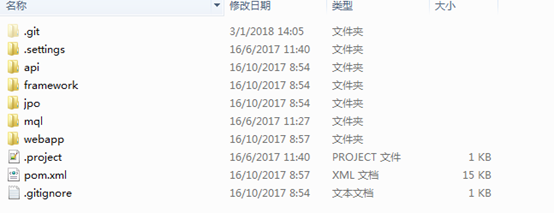
Description: when you login Git server at the first time, you can view the directorys below.

At first, you need to know what projects must be downloaded for normal work. “appl-v6r2016x” and “tools”, the two one must be downloaded. Other projects are useful for improvement on PLM after you become an expert on PLM.
appl-v6r2016x:
it is project source code which could be modified through legal processes, containing all business source code and configuration property files customized for Luxottica PLM. All developers will modify the project if necessary.
interface:
PLM system will interact with SAP system, although, as a PLM professionals, SAP functionalities is not belonging to the domain of acknowledge for our work, but ,we have to know these interactive approaches between PLM and SAP system. So this project is related to this sake.
Tools:
Tools targets to help developers to revise some source code and make their modified code work normally in environment. Of course, developers could make their modification of source code work via uploading or deploying file to real environment manually. But it will be inefficient when they schedule to resolve many issues in parallel.
matrixone:
matrixone project almost contains all framework code. The source code of the project is good tutorial for senior programmer for researching internal technical information and learning more knowledge on software designed thought. I recommend you to learn the internal implementation if you feel bored and not exhausted after completion of tasks.
Establishment of Local Repository
Git Installation
Description: you can only install Git Client on your windows.
Most of staffs in Luxottica can’t download executable file from internet. Even they are able to obtain the installable package from elsewhere, installing any executable file requires administrative authentication before entering guidance program of software. Therefore, please contact Tristar IT support operation team that is in charge of all issues and jobs on software and hardware.
Clone Remote Repository
Description: after Git Installation completed, developers can download source code from remote repository.
- To attain the duplication of repository URL for cloning.

2. To locate a personalized directory that hold local source code repository, then get started of Git bash prompt in the directory.

3. Here is ‘clone’ command introduced to download resource code from remote Git repository.

Note:Git bash will prompt you to confirm the authenticity of host “lwplmgitp01(ip address)”, because your PC never connect to the Git server before, so you PC didn’t save public key of Git server. The prompt likely is :

Additionally, you must notice the message infos“Permission denied(publickey)”, it means you didn’t generate your PC’s publickey to Git server, Git server also need to verify client’s information with your PC’s public key.
Now, if you execute ‘clone’ command again, then the prompt will probably tell you:

if you don’t understand what I said above, please refer to SSH key document and set up SSH key firstly in order to be convenient later. After completion of SSH key, return here to continue to clone resource code.

4. After cloning process finished, go into the project directory downloaded just now.
Use “git branch” or ‘git branch -l’ to see local branch of the project.

5. As you can see from last step, perhaps there is only one branch mapped to remote Git repository. But if developers desire to track more branches in the local context. What commands could help them for the intention?
‘Git branch -r’ git command only help coders for listing all remote branches of the project, as you can see from the following result. There is pointer(origin/HEAD) representing to one of remote branches. (HEAD is a vital term across Git Usage, meaningful for you if you can understand, I described the concepts and what it was applied on daily works, click here for reference if you are interested)

6. So, there are alternatives you can download into local directory for more work.
Run the following command:
git checkout ‘branch_name’
here, for example :”git checkout v6r2016r”

Then, run command “git branch -l” to check if you have already downloaded successfully from remote server.

Editing
Checkout Repository
Description: for sure that you have already cloned resource code from remote server through the previous steps. I think you have already comprehended a little about ‘checkout’ command. Briefly, ‘checkout’ is a little dangerous command easily causing some unexpected loss of work effort if you don’t understand the usage of it. On advisory tips, I recommend you to study further about the command and firstly to set up a comprehensive understanding of the command before you get started in real work.
Assume that readers know how to download code from Git remote server, the following part is introduced to demonstrate several commands on ‘appl-v6r2016x’ project.

The above snapshot presents different local branches of ‘appl-v6r2016x’ project, but to be incredible, how do different branches exist in only a directory ’ D:\workspace\appl-v6r2016x’?
Please note all subdirectories of the directory, ‘.git’ is a special directory supposed to be used to support Git system. All necessary information is included to ‘.git’ directory. Differences from different branches are stored into the directory in a git-style format which Git easily handle. In order to get an absolute restoration of a branch, .git directory has to record changed information or logs before developer exchange branch from this branch to another one.
‘dev’ branch is the best branch you should choose firstly to add some new code for development task. After test is done successfully in dev branch, you should do the same modification in ‘cert’ and ‘prod’ branch as dev branch simultaneously.
the following pic shows the entire mechanic working in ‘.git’ directory.
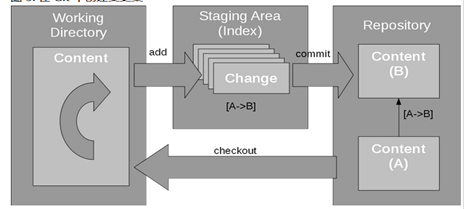
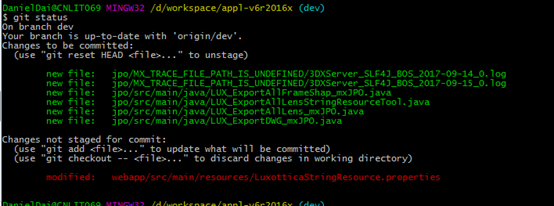
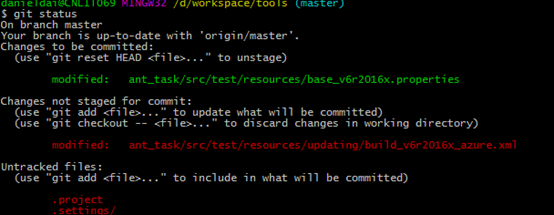
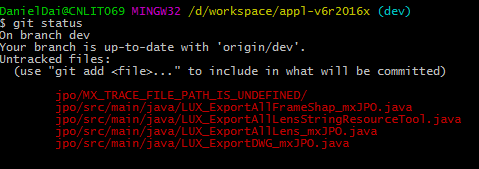
The most surprising thing is that the entire cycle is unrelated to Git remote repository. The total cycle only runs beneath ‘.git’ directory. Execute command “git status”, check if you modified some codes, of course, if you don’t have any revision on resource code, ignoring it.
If Git shell bash prompt tell you did something unsaved (the red part clearly display the unsaved file).
What does that ‘Changes not staged for commit’ means? Let me explain more subsequently.
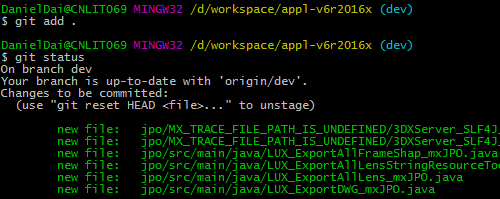
As you can see from the below structure of local Git system, you changed a file named “LuxotticaStringResource.properties” within the scope of Working Directory, before you can commit your change to Repository(local), the transmit place is staging area. You can execute command ‘git add ’ to move your changed resources files to staging area.

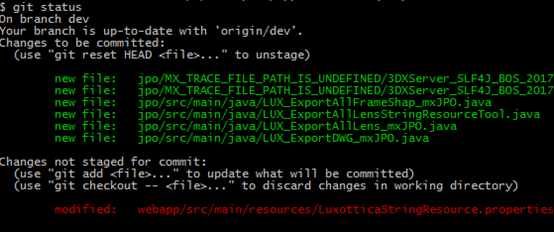
So the green part shows all files which I add them to staging area before.
Now, if I execute ‘git commit’ for committing my changed resource code, the green parts will be saved into repository (local), the red part will not be saved into Repository (local).
Why does the Git management need the area? One of reasons is that we can commit our changing resource file multiple times for different tickets respectively, perhaps you can know all reasons after you get understanding of Git comprehensively.
There are two other confusing log information, one shows the ‘git reset HEAD’ command, one shows the ‘git checkout ’ command.
As you can see from the below snapshot, ‘git checkout’ command can discard changes in working area, as I said before, the checkout command is a little dangerous, it can remove that you changed but not move to staging area.
For more information about reset command, please refer to Git official documentation.
Here I only explain the key word HEAD,
Try to execute command ‘git checkout prod’
Configuring your personalized Git settings
Description: make sure you have installed Git Client in your computer. Now you should configure personalized Git Settings
SSH Key:
Before access to GitLab, you need to generate SSH key. SSH protocol provides security and allows you to authenticate to GitLab remote server without supplying your username and password each time. Please click here to see what SSH key is and how you configure SSH key.
Config file:


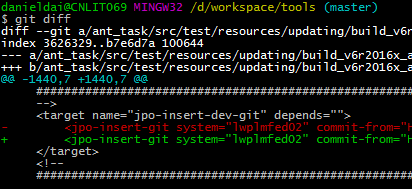
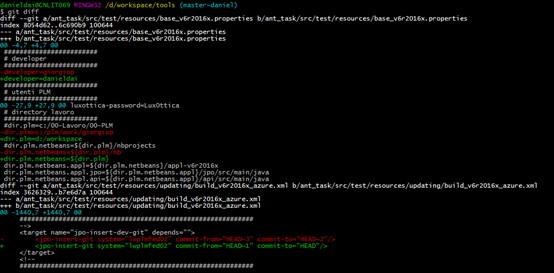
Check differences between two commits.
About HEAD
HEAD is important key work representing a key concept that Git users mention and use frequently. it is intrinsically a pointer which point to a commit (or you can understand it as revision) of a branch, usually the current commit of the current branch on which you are working.


Revision of remote GitLab Server
Description: Due to some reasons, PLM development team have to revise Gitlab Server address, moving all source codes and historical commits to other valid server. So developers should know how to adapt the activity. The following stages are going to tell you the details via an example.
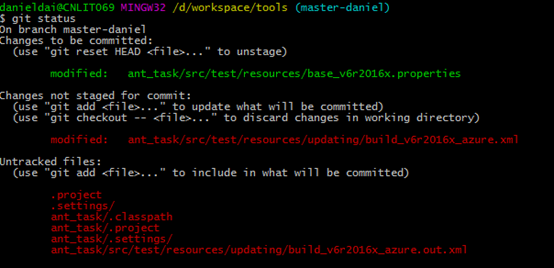
- Immediately saving your important changes and local output (such as, customized files, source code files), git command: git status can help you for location of your needs.
2. Git command : git add . help you make your changes staged(if you don’t know what staged state is, you should refer to Git official site for it).
Git Stash
But before change from a branch to another branch, probably you didn’t save all modification you have done in this branch, so
‘git status’ command help you for details that you have done in the branch.