1.redis支持哪些语言可以操作

 2.Java连接redis
2.1使用jedis
(1)添加jedis依赖
        <dependency>
            <groupId>redis.clients</groupId>
            <artifactId>jedis</artifactId>
            <version>3.8.0</version>
        </dependency>
(2)测试
连接redis---->必须保证你的redis服务允许远程连接bind 0.0.0.0 87行

@Test
    public void test01(){
        //连接redis--->必须保证你的redis服务运行远程连接。
        //该对象中把每个redis命令封装成对应的方法了。
        Jedis jedis=new Jedis("192.168.223.155",6380);
        //对于字符串操作的命令
        String s = jedis.set("k1", "v1");
        System.out.println(s);
        String setex = jedis.setex("k2", 30l, "v2");
        System.out.println(setex);
        Long aLong = jedis.setnx("k3", "v11");
        System.out.println(aLong);

        //对于hash操作
        jedis.hset("k4","name","刘德华");
        jedis.hset("k4","age","15");

        Map<String,String> map=new HashMap();
        map.put("name","张需要");
        map.put("age","28");
        jedis.hset("k5",map);


        jedis.close();

    }
2.2使用连接池连接redis
public void test02(){
        //创建连接池的配置类
        JedisPoolConfig jedisPoolConfig=new JedisPoolConfig();
        jedisPoolConfig.setMaxIdle(20);
        jedisPoolConfig.setMinIdle(5);
        jedisPoolConfig.setMaxWait(Duration.ofMillis(3000));
        JedisPool jedisPool=new JedisPool(jedisPoolConfig,"192.168.223.155",6380);

        long start=System.currentTimeMillis();

        for (int i = 0; i <1000 ; i++) {
            //从jedis连接池获取资源
            Jedis jedis = jedisPool.getResource();
            String ping = jedis.ping();
            jedis.close();//是否资源到池子
        }

        long end=System.currentTimeMillis();

        System.out.println("总耗时:"+(end-start));

    }
注意:如果是ssm框架
<bean id="" class="JedisPoolConfig">
<property name="maxIdle" value="20">
</bean> 然后用autowired创建对象
2.3 java连接redis集群模式

@Test
    public void test03(){
        Set<HostAndPort> nodes=new HashSet<>();
        nodes.add(new HostAndPort("192.168.223.155",6001));
        nodes.add(new HostAndPort("192.168.223.155",6002));
        nodes.add(new HostAndPort("192.168.223.155",6003));
        nodes.add(new HostAndPort("192.168.223.155",6004));
        nodes.add(new HostAndPort("192.168.223.155",6005));
        nodes.add(new HostAndPort("192.168.223.155",6006));
        JedisCluster jedisCluster=new JedisCluster(nodes);

        jedisCluster.set("k6","刘德华和闫克起");

        jedisCluster.close();

    }
3.springboot整合redis
springboot对redis的操作封装了两个StringRedisTemplate和RedisTemplate类,StringRedisTemplate是RedisTemplate的子类,StringRedisTemplate它只能存储字符串类型,无法存储对象类型。要想用StringRedisTemplate存储对象必须把对象转为json字符串。
扫描二维码关注公众号,回复: 14464487 查看本文章
StringRedisTemplate
(1) 引入相关的依赖
<dependency>
            <groupId>org.springframework.boot</groupId>
            <artifactId>spring-boot-starter-data-redis</artifactId>
        </dependency>
(2)注入StringRedisTemplate该类对象
@Autowired
 private StringRedisTemplate redisTemplate;
(3)使用StringRedisTemplate
该类把对每种数据类型的操作,单独封了相应的内部类。
package com.qy151.qy151redisspringboot;

import org.junit.jupiter.api.Test;
import org.springframework.beans.factory.annotation.Autowired;
import org.springframework.boot.test.context.SpringBootTest;
import org.springframework.data.redis.core.HashOperations;
import org.springframework.data.redis.core.StringRedisTemplate;
import org.springframework.data.redis.core.ValueOperations;

import java.util.HashMap;
import java.util.List;
import java.util.Map;
import java.util.Set;
import java.util.concurrent.TimeUnit;

@SpringBootTest
class Qy151RedisSpringbootApplicationTests {

    //里面所有的key还是value field它的类型必须都是String类型。
    //因为key和value获取field他们使用的都是String的序列化方式
    @Autowired
    private StringRedisTemplate redisTemplate;


    @Test
    public void test02(){
        //对hash类型的操作。
        HashOperations<String, Object, Object> forHash = redisTemplate.opsForHash();
        forHash.put("k1","name","张三");
        forHash.put("k1","age","15");
        Map<String,String> map=new HashMap<>();
        map.put("name","李四");
        map.put("age","25");
        forHash.putAll("k2",map);

        Object o = forHash.get("k1", "name");
        System.out.println(o);

        Set<Object> k1 = forHash.keys("k1");
        System.out.println(k1);
        List<Object> k11 = forHash.values("k1");
        System.out.println(k11);


        //获取k1对于的所有的field和value
        Map<Object, Object> k12 = forHash.entries("k1");
        System.out.println(k12);

    }

    @Test
    void contextLoads() {
        //删除指定的key
//        redisTemplate.delete();
        //查看所有的key
//        redisTemplate.keys()
        //是否存在指定的key
//         redisTemplate.hasKey()

        //对字符串数据类型的操作ValueOperations
        ValueOperations<String, String> forValue = redisTemplate.opsForValue();
        //存储字符串类型--key  value long unit  setex();
        forValue.set("k1","张三",30, TimeUnit.SECONDS);
        //等价于setnx  存入成功返回true,失败返回false
        Boolean absent = forValue.setIfAbsent("k11", "李四", 30, TimeUnit.SECONDS);
        System.out.println(absent);
        Integer append = forValue.append("k11", "真帅");
        String key = forValue.get("k11");


    }

}
RedisTemplate
package com.qy151.qy151redisspringboot;

import org.junit.jupiter.api.Test;
import org.springframework.beans.factory.annotation.Autowired;
import org.springframework.boot.test.context.SpringBootTest;
import org.springframework.data.redis.core.HashOperations;
import org.springframework.data.redis.core.RedisTemplate;
import org.springframework.data.redis.core.StringRedisTemplate;
import org.springframework.data.redis.core.ValueOperations;
import org.springframework.data.redis.serializer.GenericJackson2JsonRedisSerializer;
import org.springframework.data.redis.serializer.Jackson2JsonRedisSerializer;
import org.springframework.data.redis.serializer.StringRedisSerializer;

import java.util.HashMap;
import java.util.List;
import java.util.Map;
import java.util.Set;
import java.util.concurrent.TimeUnit;

@SpringBootTest
class Qy151RedisSpringbootApplicationTests02 {

     //当你存储的value类型为对象类型使用redisTemplate
    //存储的value类型为字符串。StringRedisTemplate  验证码
     @Autowired
     private RedisTemplate redisTemplate;

     @Test
     public void test01(){
         //必须认为指定序列化方式
         redisTemplate.setKeySerializer(new StringRedisSerializer());
         redisTemplate.setValueSerializer(new Jackson2JsonRedisSerializer<Object>(Object.class));

         //对String类型操作类
         ValueOperations forValue = redisTemplate.opsForValue();
         //redis中key和value都变成乱码了。
         //key和value都没有指定序列化方式,默认采用jdk的序列化方式。
         forValue.set("k1","张三");


         //value默认采用jdk,类必须实现序列化接口
         forValue.set("k2",new User(1,"刘德华",22));
     }

}
上面的RedisTemplate需要每次都指定key value以及field的序列化方式,能不能搞一个配置类,已经为RedisTemplate指定好序列化。以后再用就无需指定。
package com.ysh.qy151redisspringboot.config;

import com.fasterxml.jackson.annotation.JsonAutoDetect;
import com.fasterxml.jackson.annotation.PropertyAccessor;
import com.fasterxml.jackson.databind.ObjectMapper;
import org.springframework.context.annotation.Bean;
import org.springframework.context.annotation.Configuration;
import org.springframework.data.redis.connection.RedisConnectionFactory;
import org.springframework.data.redis.core.RedisTemplate;
import org.springframework.data.redis.serializer.Jackson2JsonRedisSerializer;
import org.springframework.data.redis.serializer.RedisSerializer;
import org.springframework.data.redis.serializer.StringRedisSerializer;

/**
 * @program: qy151-redis-springboot
 * @description:
 * @author: YSH
 * @create: 2022-08-02 15:16
 **/
@Configuration
public class RedisConfig {

    @Bean
    public RedisTemplate<String, Object> redisTemplate(RedisConnectionFactory factory) {
        RedisTemplate<String, Object> template = new RedisTemplate<>();
        RedisSerializer<String> redisSerializer = new StringRedisSerializer();
        Jackson2JsonRedisSerializer jackson2JsonRedisSerializer = new Jackson2JsonRedisSerializer(Object.class);
        ObjectMapper om = new ObjectMapper();
        om.setVisibility(PropertyAccessor.ALL, JsonAutoDetect.Visibility.ANY);
        om.enableDefaultTyping(ObjectMapper.DefaultTyping.NON_FINAL);
        jackson2JsonRedisSerializer.setObjectMapper(om);
        template.setConnectionFactory(factory);
        //key序列化方式
        template.setKeySerializer(redisSerializer);
        //value序列化
        template.setValueSerializer(jackson2JsonRedisSerializer);
        //value hashmap序列化  filed value
        template.setHashValueSerializer(jackson2JsonRedisSerializer);
        template.setHashKeySerializer(redisSerializer);
        return template;
    }
}
4.redis的使用场景
4.1作为缓存
(1)数据存储在内存中,数据查询速度快。可以分摊数据库压力 。

(2)什么样的数据适合放入缓存
查询频率比较高,修改频率比较低。
安全系数低的数据
(3)使用redis作为缓存
package com.ysh.qy151redisspringboot.service;

import com.ykq.qy151redisspringboot.dao.DeptMapper;
import com.ykq.qy151redisspringboot.entity.Dept;
import org.springframework.beans.factory.annotation.Autowired;
import org.springframework.data.redis.core.RedisTemplate;
import org.springframework.data.redis.core.ValueOperations;
import org.springframework.stereotype.Service;
import org.springframework.transaction.annotation.Transactional;

import java.util.concurrent.TimeUnit;

/**
 * @program: qy151-redis-springboot
 * @description:
 * @author: YSH
 * @create: 2022-08-02 15:55
 **/
@Service
public class DeptService {

    @Autowired
    private DeptMapper deptMapper;

    @Autowired
    private RedisTemplate redisTemplate;

    //业务代码
    public Dept findById(Integer id){
        ValueOperations forValue = redisTemplate.opsForValue();
        //查询缓存
        Object o = forValue.get("dept::" + id);
        //缓存命中
        if(o!=null){
            return (Dept) o;
        }
        Dept dept = deptMapper.selectById(id);
        if(dept!=null){
            //存入缓存中
            forValue.set("dept::"+id,dept,2, TimeUnit.HOURS);
        }
        return dept;
    }

    public int deleteById(Integer id){
        redisTemplate.delete("dept::"+id);
        int row = deptMapper.deleteById(id);
        return row;
    }

    public Dept insert(Dept dept){
        int insert = deptMapper.insert(dept);
        return dept;
    }

    public Dept update(Dept dept){
        ValueOperations forValue = redisTemplate.opsForValue();
        forValue.set("dept::"+dept.getId(),dept,2, TimeUnit.HOURS);
        int insert = deptMapper.updateById(dept);
        return dept;
    }
}
查看的缓存: 前部分代码相同@before通知,后部分代码也相同后置通知。 我们可以AOP完成缓存代码和业务代码分离。
spring框架它应该也能想到。--使用注解即可完成。解析该注解。
(1)把缓存的配置类加入
@Bean
    public CacheManager cacheManager(RedisConnectionFactory factory) {
        RedisSerializer<String> redisSerializer = new StringRedisSerializer();
        Jackson2JsonRedisSerializer jackson2JsonRedisSerializer = new Jackson2JsonRedisSerializer(Object.class);
        //解决查询缓存转换异常的问题
        ObjectMapper om = new ObjectMapper();
        om.setVisibility(PropertyAccessor.ALL, JsonAutoDetect.Visibility.ANY);
        om.enableDefaultTyping(ObjectMapper.DefaultTyping.NON_FINAL);
        jackson2JsonRedisSerializer.setObjectMapper(om);
        // 配置序列化(解决乱码的问题),过期时间600秒
        RedisCacheConfiguration config = RedisCacheConfiguration.defaultCacheConfig()
                .entryTtl(Duration.ofSeconds(600)) //缓存过期10分钟 ---- 业务需求。
                .serializeKeysWith(RedisSerializationContext.SerializationPair.fromSerializer(redisSerializer))//设置key的序列化方式
                .serializeValuesWith(RedisSerializationContext.SerializationPair.fromSerializer(jackson2JsonRedisSerializer)) //设置value的序列化
                .disableCachingNullValues();
        RedisCacheManager cacheManager = RedisCacheManager.builder(factory)
                .cacheDefaults(config)
                .build();
        return cacheManager;
    }
(2)使用开启缓存注解

(3)使用注解
//业务代码
    //使用查询注解:cacheNames表示缓存的名称 key:唯一标志---dept::key
    //先从缓存中查看key为(cacheNames::key)是否存在,如果存在则不会执行方法体,如果不存在则执行方法体并把方法的返回值存入缓存中
    @Cacheable(cacheNames = {"dept"},key="#id")
    public Dept findById(Integer id){
        Dept dept = deptMapper.selectById(id);
        return dept;
    }
//先删除缓存在执行方法体。
    @CacheEvict(cacheNames = {"dept"},key = "#id")
    public int deleteById(Integer id){
        int row = deptMapper.deleteById(id);
        return row;
    }

    //这个注释可以确保方法被执行,同时方法的返回值也被记录到缓存中,实现缓存与数据库的同步更新。
    @CachePut(cacheNames = "dept",key="#dept.id")
    public Dept update(Dept dept){
        int insert = deptMapper.updateById(dept);
        return dept;
    }
4.2分布式锁
下面使用用这个项目来示范多线程并发带来的问题:
Dao:
package com.ykq.distrinctlock.dao;

import org.apache.ibatis.annotations.Mapper;

@Mapper
public interface ProductStockDao {

    public Integer findStockByProductId(Integer id);

    public void updateStockByProductId(Integer id);
}
Service:
package com.ykq.distrinctlock.service;
public interface ProductStockService {
    //减少库存
    public String decreaseStock( Integer productId);
}
ServiceImpl:
package com.ykq.distrinctlock.service.impl;

import com.ykq.distrinctlock.dao.ProductStockDao;
import com.ykq.distrinctlock.service.ProductStockService;
import org.springframework.beans.factory.annotation.Autowired;
import org.springframework.stereotype.Service;

@Service
public class ProductStockServiceImpl2 implements ProductStockService {
    @Autowired
    private ProductStockDao productStockDao;

    @Override
    public  String decreaseStock(Integer productId) {

                  //查看该商品的库存数量
                  Integer stock = productStockDao.findStockByProductId(productId);
                  if (stock > 0) {
                      //修改库存每次-1
                      productStockDao.updateStockByProductId(productId);
                      System.out.println("扣减成功!剩余库存数:" + (stock - 1));
                      return "success";
                  } else {
                      System.out.println("扣减失败!库存不足!");
                      return "fail";
                  }


    }
}
Controller:
package com.ysh.distrinctlock.controller;
import com.ykq.distrinctlock.service.ProductStockService;
import org.springframework.beans.factory.annotation.Autowired;
import org.springframework.http.HttpRequest;
import org.springframework.web.bind.annotation.PathVariable;
import org.springframework.web.bind.annotation.RequestMapping;
import org.springframework.web.bind.annotation.RestController;
import javax.servlet.http.HttpServletRequest;
@RestController
@RequestMapping("productStock")
public class ProductStockController {
@Autowired
private ProductStockService productStockService;
//减库存
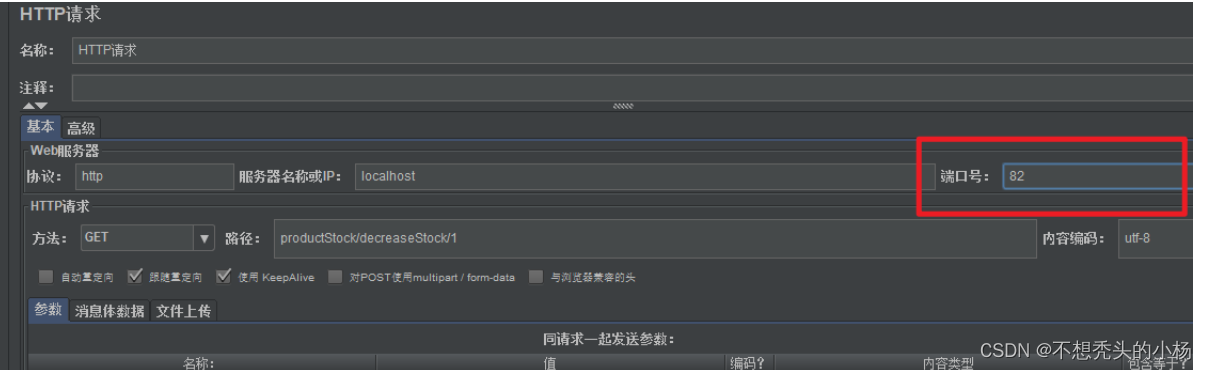
@RequestMapping("decreaseStock/{productId}")
public String decreaseStock(@PathVariable("productId") Integer productId){
return productStockService.decreaseStock(productId);
}
}ProductStockMapper.xml:
<?xml version="1.0" encoding="UTF-8"?>
<!DOCTYPE mapper PUBLIC "-//mybatis.org//DTD Mapper 3.0//EN" "http://mybatis.org/dtd/mybatis-3-mapper.dtd">
<mapper namespace="com.ysh.distrinctlock.dao.ProductStockDao">
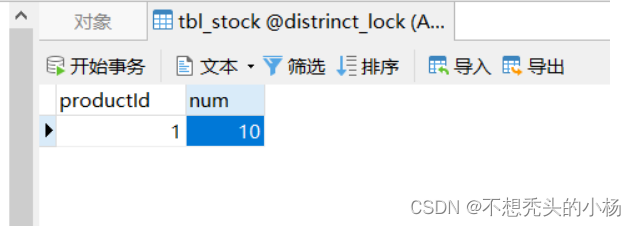
<select id="findStockByProductId" resultType="integer">
select num from tbl_stock where productId=#{productId}
</select>
<update id="updateStockByProductId">
update tbl_stock set num=num-1 where productId=#{productId}
</update>
</mapper>application.properties:
server.port=8001
spring.datasource.username=root
spring.datasource.password=123456
spring.datasource.driver-class-name=com.mysql.cj.jdbc.Driver
spring.datasource.url=jdbc:mysql://localhost:3306/distrinct_lock?serverTimezone=Asia/Shanghai
mybatis.mapper-locations=classpath:/mapper/*.xml
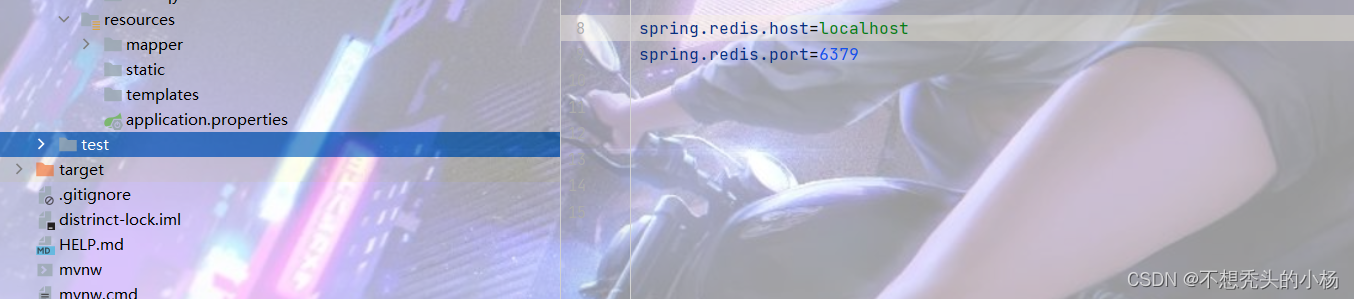
spring.redis.host=自己的ip地址
spring.redis.port=端口号
pom.xml:
<dependencies>
        <dependency>
            <groupId>org.redisson</groupId>
            <artifactId>redisson</artifactId>
            <version>3.13.4</version>
        </dependency>
        <dependency>
            <groupId>org.springframework.boot</groupId>
            <artifactId>spring-boot-starter-data-redis</artifactId>
        </dependency>
        <dependency>
            <groupId>org.springframework.boot</groupId>
            <artifactId>spring-boot-starter-web</artifactId>
        </dependency>
        <dependency>
            <groupId>org.mybatis.spring.boot</groupId>
            <artifactId>mybatis-spring-boot-starter</artifactId>
            <version>2.1.3</version>
        </dependency>

        <dependency>
            <groupId>org.springframework.boot</groupId>
            <artifactId>spring-boot-devtools</artifactId>
            <scope>runtime</scope>
            <optional>true</optional>
        </dependency>
        <dependency>
            <groupId>mysql</groupId>
            <artifactId>mysql-connector-java</artifactId>
            <scope>runtime</scope>
        </dependency>
        <dependency>
            <groupId>org.springframework.boot</groupId>
            <artifactId>spring-boot-configuration-processor</artifactId>
            <optional>true</optional>
        </dependency>
        <dependency>
            <groupId>org.projectlombok</groupId>
            <artifactId>lombok</artifactId>
            <optional>true</optional>
        </dependency>
        <dependency>
            <groupId>org.springframework.boot</groupId>
            <artifactId>spring-boot-starter-test</artifactId>
            <scope>test</scope>
            <exclusions>
                <exclusion>
                    <groupId>org.junit.vintage</groupId>
                    <artifactId>junit-vintage-engine</artifactId>
                </exclusion>
            </exclusions>
        </dependency>
</dependencies>使用压测工具jmeter测试高并发下带来线程安全问题


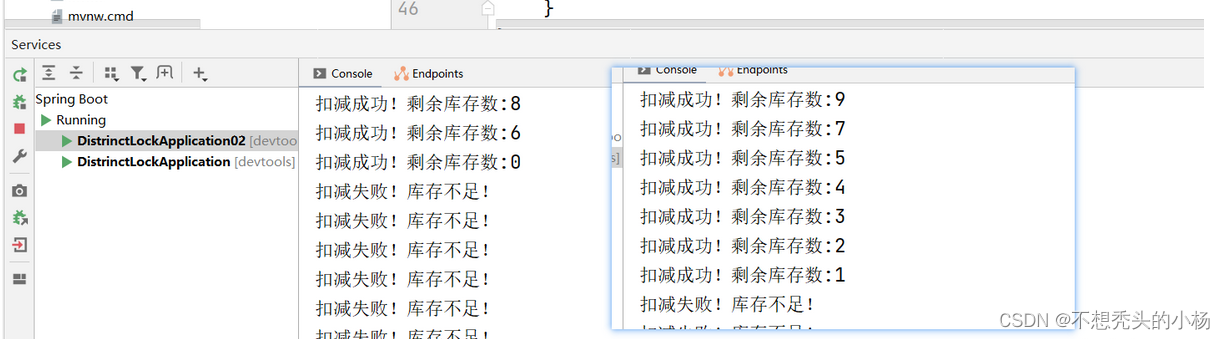
问题:
我们看到同一个库存被使用了n次。以及数据库中库存为负数。 线程安全问题导致。
解决方案:
使用 synchronized 或者lock锁
package com.ysh.distrinctlock.service.impl;

import com.ysh.distrinctlock.dao.ProductStockDao;
import com.ysh.distrinctlock.service.ProductStockService;
import org.springframework.beans.factory.annotation.Autowired;
import org.springframework.stereotype.Service;

@Service
public class ProductStockServiceImpl2 implements ProductStockService {
    @Autowired
    private ProductStockDao productStockDao;

    @Override
    public  String decreaseStock(Integer productId) {
              synchronized (this) {
                  //查看该商品的库存数量
                  Integer stock = productStockDao.findStockByProductId(productId);
                  if (stock > 0) {
                      //修改库存每次-1
                      productStockDao.updateStockByProductId(productId);
                      System.out.println("扣减成功!剩余库存数:" + (stock - 1));
                      return "success";
                  } else {
                      System.out.println("扣减失败!库存不足!");
                      return "fail";
                  }
              }

    }
}
4.2.1.idea搭建集群项目
使用synchronized 或者lock锁 如果我们搭建了项目集群,那么该锁无效。

这里我们用idea搭建集群项目
(1)创建另一个tomcat


(2)配置nginx.conf并开启nginx(这里我们下载了window版的nginx) 建议不要下载到中文路径下

记得修改测压的端口号跟上边保持一致
(3)开启两个项目

再次压测,发现又出现: 重复数字以及库存为负数。

我们可以使用 redis作为锁 ,来获取锁和释放锁

package com.ysh.distrinctlock.service.impl;

import com.ysh.distrinctlock.dao.ProductStockDao;
import com.ysh.distrinctlock.service.ProductStockService;
import org.springframework.beans.factory.annotation.Autowired;
import org.springframework.data.redis.core.StringRedisTemplate;
import org.springframework.data.redis.core.ValueOperations;
import org.springframework.stereotype.Service;

@Service
public class ProductStockServiceImpl_redis implements ProductStockService {
    @Autowired
    private ProductStockDao productStockDao;

    @Autowired
    private StringRedisTemplate redisTemplate;

    @Override
    public  String decreaseStock(Integer productId) {
        ValueOperations<String, String> forValue = redisTemplate.opsForValue();
        //必须保证一开始没有该key 也就是说flag必须为true
        Boolean flag = forValue.setIfAbsent("aaa::" + productId, "~~~~~~~~~~~~~~~~~~~~~~");
            if(flag) {
                try {
                //查看该商品的库存数量
                Integer stock = productStockDao.findStockByProductId(productId);
                if (stock > 0) {

                        //修改库存每次-1
                        productStockDao.updateStockByProductId(productId);
                        System.out.println("扣减成功!剩余库存数:" + (stock - 1));
                        return "success";

                } else {
                    System.out.println("扣减失败!库存不足!");
                    return "fail";
                }
                }finally {
                    redisTemplate.delete("aaa::" + productId);
                }

            }


        return "服务器正忙,请稍后在试......";
    }
}
记得开启redis服务,不然无法存储锁
3.redis的解决分布式锁的bug
Redis分布式锁不能解决超时的问题,分布式锁有一个超时时间,程序的执行如果超出了锁的超时时间就会出现问题。
可以使用:redission依赖,redission解决redis超时问题的原理。

为持有锁的线程开启一个守护线程,守护线程会每隔10秒检查当前线程是否还持有锁,如果持有则延迟生存时间。
(1)引入redisson依赖
        <dependency>
            <groupId>org.redisson</groupId>
            <artifactId>redisson</artifactId>
            <version>3.13.4</version>
        </dependency>
(2)配置redission对象并交于spring容器管理
    @Bean
    public Redisson redisson(){
        Config config =new Config();
        config.useSingleServer().
                setAddress("redis://localhost:6379").
                //redis默认有16个数据库
                setDatabase(0);
        return (Redisson) Redisson.create(config);
    }

这里的redis是window下的redis而不是Linux下的虚拟机,目的是为了方便
测试:
package com.ysh.distrinctlock.service.impl;

import com.ysh.distrinctlock.dao.ProductStockDao;
import com.ysh.distrinctlock.service.ProductStockService;
import org.redisson.Redisson;
import org.redisson.api.RLock;
import org.springframework.beans.factory.annotation.Autowired;
import org.springframework.data.redis.core.StringRedisTemplate;
import org.springframework.data.redis.core.ValueOperations;
import org.springframework.stereotype.Service;

import java.util.concurrent.TimeUnit;

@Service
public class ProductStockServiceImpl_redisson implements ProductStockService {
    @Autowired
    private ProductStockDao productStockDao;

    @Autowired
    private Redisson redisson;

    @Override
    public  String decreaseStock(Integer productId) {
        //获取锁对象
        RLock lock = redisson.getLock("aaa::" + productId);
        try {
            //加锁
            lock.lock(30,TimeUnit.SECONDS);
            //查看该商品的库存数量
            Integer stock = productStockDao.findStockByProductId(productId);
            if (stock > 0) {

                //修改库存每次-1
                productStockDao.updateStockByProductId(productId);
                System.out.println("扣减成功!剩余库存数:" + (stock - 1));
                return "success";

            } else {
                System.out.println("扣减失败!库存不足!");
                return "fail";
            }
        }finally{
            //释放锁
            lock.unlock();
        }
    }
}
4. redis中常见的面试题
4.1 什么是缓存穿透?怎么解决?
1. 数据库中没有该记录,缓存中也没有该记录,这时由人恶意大量访问这样的数据。这样就会导致该请求绕过缓存,直接访问数据,从而造成数据库压力过大。
2.解决办法:
[1]在controller加数据校验。
[2]我们可以在redis中存入一个空对象,而且要设置过期时间不能太长。超过5分钟
[3]我们使用布隆过滤器。底层:有一个bitmap数组,里面存储了该表的所有id.
//伪代码
String get(String key) { //布隆过滤器钟存储的是数据库表钟对应的id
    String value = redis.get(key);  //先从缓存获取。
    if (value  == null) { //缓存没有命中
        if(!bloomfilter.mightContain(key)){//查看布隆过滤器钟是否存在
            return null;
        }else{
            value = db.get(key); //查询数据库
            redis.set(key, value);
        }
    }
    return value;
}
4.2 什么是缓存击穿?如何解决?
缓存击穿是指缓存中没有但数据库中有的数据(一般是缓存时间到期),这时由于并发用户特别多,同时读缓存没读到数据,又同时去数据库去取数据,引起数据库压力瞬间增大,造成过大压力。
缓存击穿解决方案:
1.设置永久不过期。【这种只适合内存】
2.使用互斥锁(mutex key)业界比较常用的做法。

4.3什么是缓存雪崩?如何解决?
缓存雪崩是指缓存中数据大批量到过期时间,而查询数据量巨大,引起数据库压力过大甚至down机。和缓存击穿不同的是, 缓存击穿指并发查同一条数据,缓存雪崩是不同数据都过期了,很多数据都查不到从而查数据库。
1.什么下会发生缓存雪崩:
[1]项目刚上线,缓存中没有任何数据
[2]缓存出现大量过期。
[3]redis宕机
2.解决办法:
1.上线前预先把一些热点数据放入缓存。
2.设置过期时间为散列值
3.搭建redis集群
4.4Redis 淘汰策略有哪些?
