系列文章目录
【JavaScript】Promise(零) —— 准备工作(实例对象、函数对象、回调函数分类、捕获抛出错误)
【JavaScript】Promise(一) —— 理解和使用(是什么、怎么使用、与 Ajax 配合使用、涉及的API)
【JavaScript】Promise(二) —— 几个关键问题
【JavaScript】Promise(三) —— async 与 await、宏任务与微任务
文章目录
一、async & await
1. async 和 await 的基本使用
await 必须在 async 内使用
async 和 await 配合使用
const p1 = new Promise((resolve, reject) => {
setTimeout(() => {
resolve('a')
}, 1000)
})
const p2 = new Promise((resolve, reject) => {
setTimeout(() => {
resolve('b')
}, 2000)
})
const p3 = new Promise((resolve, reject) => {
setTimeout(() => {
resolve('c')
}, 3000)
});
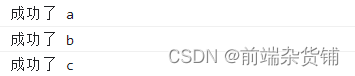
(async () => {
try {
const result1 = await p1
console.log(result1);
const result2 = await p2
console.log(result2);
const result3 = await p3
console.log(result3);
} catch (error) {
console.log(error);
}
})()
2. await 的应用
await 的应用:try 里面是可能发生错误的代码,catch 里面打印错误
	// 封装ajax请求
    function sendAjax(url) {


        return new Promise((resolve, reject) => {


            // 实例xhr
            const xhr = new XMLHttpRequest()
            // 绑定监听
            xhr.onreadystatechange = () => {


                if (xhr.readyState === 4) {


                    if (xhr.status >= 200 && xhr.status < 300) {


                        resolve(xhr.response);
                    } else {


                        reject(`请求出了点问题`);
                    }
                }
            }
            xhr.open('GET', url)
            xhr.responseType = 'json'
            xhr.send()
        })
    }

    !(async () => {


        try {


            const result1 = await sendAjax('https://api.apiopen.top/api/sentences')
            console.log('第1次请求成功了', result1);
            const result2 = await sendAjax('https://api.apiopen.top/api/sentences')
            console.log('第2次请求成功了', result2);
            const result3 = await sendAjax('https://api.apiopen.top/api/sentences')
            console.log('第3次请求成功了', result3);
        } catch (error) {


            console.log(error);
        }
    })()

扫描二维码关注公众号,回复:
14384142 查看本文章

3. async 与 await 的规则
- async 修饰的函数
- 函数的返回值为 Promise 对象
- Promise 实例的结果由 async 函数执行的返回值决定
- await 表达式
await 右侧的表达式一般为
Promise 实例对象,但也可以是其他的值
(1)如果表达式是 Promise 实例对象,await 后的返回值是 promise 成功的值
(2)如果表达式是其它值,直接将此值作为 await 的返回值
- 注意点
- await 必须写在 async 函数中,但 async 函数中可以没有 await
- 如果 await 的 Promise 实例对象失败了,就会抛出异常,需要通过 try…catch 来捕获处理
	const p = new Promise((resolve, reject) => {


        setTimeout(() => {


            resolve('100')
        }, 500)
    })

    async function demo() {


        const a = await p
        console.log(a);
    }
    demo()
0.5s 后输出结果:

4. await 的原理
- 使用 async 配合 await 这种写法:
- 表面上不出现任何的回调函数
- 但实际上底层把我们写的代码进行了加工,把回调函数"还原"回来了
- 最终运行的代码时依然是有回调的,只是程序员没有看见
- 程序员的写法:
    const p = new Promise((resolve, reject) => {


        setTimeout(() => {


            resolve('a')
        }, 1000)
    })
    async function demo() {


        const result = await p
        console.log(result);
        console.log(100);
    }
    demo()
1s 后一块输出:

- 浏览器翻译后的代码:
    const p = new Promise((resolve, reject) => {


        setTimeout(() => {


            resolve('a')
        }, 1000)
    })
    async function demo() {


        p.then(
            result => {


                console.log(result);
                console.log(100);
            }
        )
    }
    demo()
1s 后一块输出:

二、宏任务与微任务
1. 基本理解
宏队列:[宏任务1,宏任务2…]
微队列:[微任务1,微任务2…]
(宏任务:setTimeout、 setInterval,、DOM渲染、 AJAX)
(微任务:微任务有 Promise、async/await)
规则:微任务先于宏任务
每次要执行宏队列里的一个任务之前,先看微队列里是否有待执行的微任务
- 如果有,先执行微任务
- 如果没有,按照宏队列里任务的顺序,依次执行
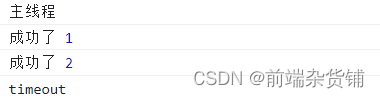
实例:判断以下代码的输出顺序
    setTimeout(() => {


        console.log('timeout');
    }, 0)

    Promise.resolve(1).then(
        value => console.log('成功了', value)
    )
    Promise.resolve(2).then(
        value => console.log('成功了', value)
    )
    console.log('主线程');
执行顺序:主线程—微任务—宏任务
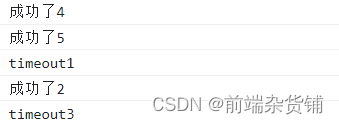
2. 实例巩固
- 先执行微任务,再执行宏任务。
- 如果宏任务里面有微任务,则执行下一个宏任务之前会先执行这个微任务。
    setTimeout(() => {


        console.log('timeout1');
        Promise.resolve(5).then(
            value => console.log('成功了2')
        )
    })
    setTimeout(() => {


        console.log('timeout3');
    })
    Promise.resolve(3).then(
        value => console.log('成功了4')
    )
    Promise.resolve(4).then(
        value => console.log('成功了5')
    )
执行顺序 4-5-1-2-3:
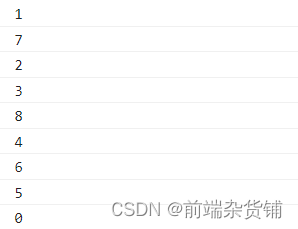
3. 更难的一个例子
分析下面代码的输出顺序:
	setTimeout(() => {


        console.log("0");
    }, 0)
    new Promise((resolve, reject) => {


        console.log('1');
        resolve()
    }).then(() => {


        console.log('2');
        new Promise((resolve, reject) => {


            console.log('3');
            resolve()
        }).then(() => {


            console.log('4');
        }).then(() => {


            console.log('5');
        })
    }).then(() => {


        console.log('6');
    })
    new Promise((resolve, reject) => {


        console.log('7');
        resolve()
    }).then(() => {


        console.log('8');
    })
结果如下:
不积跬步无以至千里 不积小流无以成江海
点个关注不迷路,持续更新中…