参考:
Paddle官网:https://www.paddlepaddle.org.cn/documentation/docs/zh/dev_guides/git_guides/submit_pr_guide_cn.html
https://blog.csdn.net/qq_44183661/article/details/114665784
https://blog.csdn.net/qq_44183661/article/details/114665668
1、fork要提PR的项目
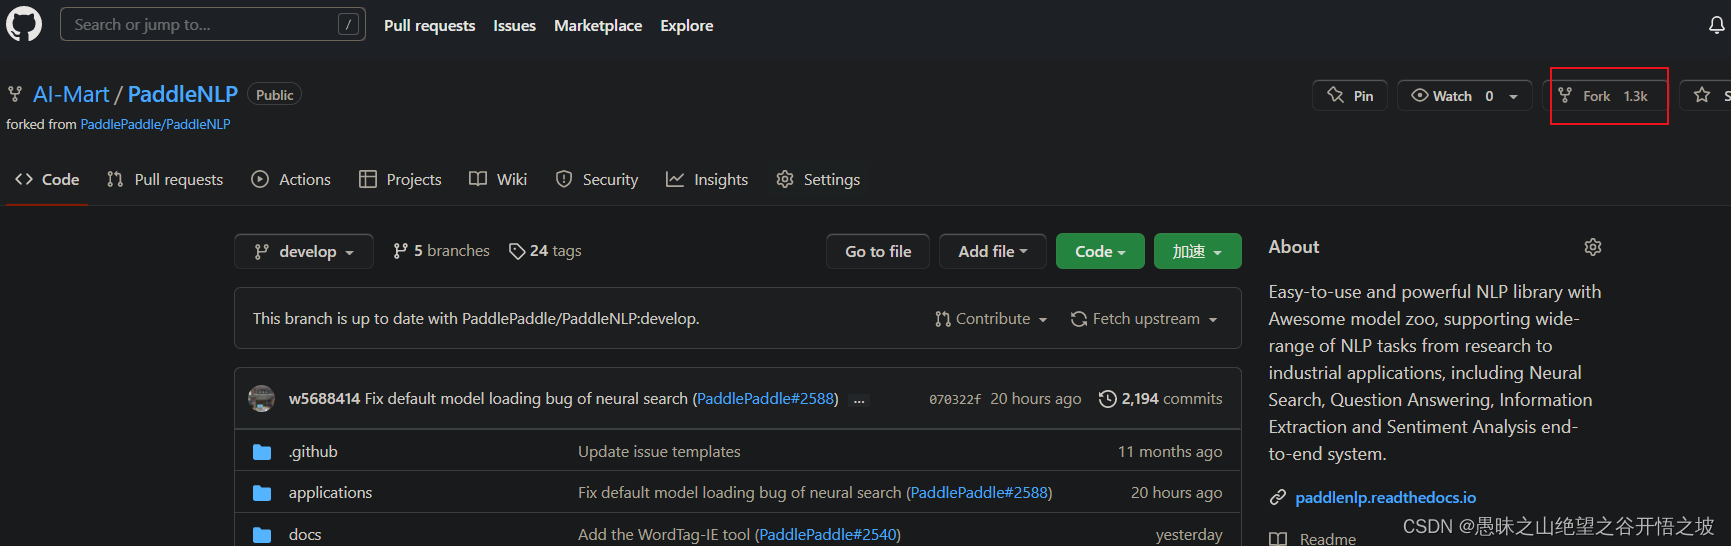
2、在本地Clone该项目
如果网络不好卡住了,退出重新执行以下指令
git clone https://github.com/AI-Mart/PaddleNLP.git
3、进入目录
cd PaddleNLP
4、切换到远程分支develop
git checkout develop
5、基于远程分支develop新建本地分支new-feature
git checkout -b new-feature
以下指令可以查看所有分支情况,以及当前编辑分支
git branch -a
6、此时可以在线更改这个分支的代码,或者本地电脑更改后拷贝到服务器
7、安装pre-commit
pre-commit工具来管理Git预提交钩子。它可以帮助我们格式化源代码Python,在提交(commit)前自动检查一些基本事宜(如每个文件只有一个 EOL,Git 中不要添加大文件等)。pre-commit测试是 Travis-CI 中单元测试的一部分,不满足钩子的PR不能被提交到Paddle,首先安装并在当前目录运行它。
pip install pre-commit
pre-commit install
8、查看更改内容
git status
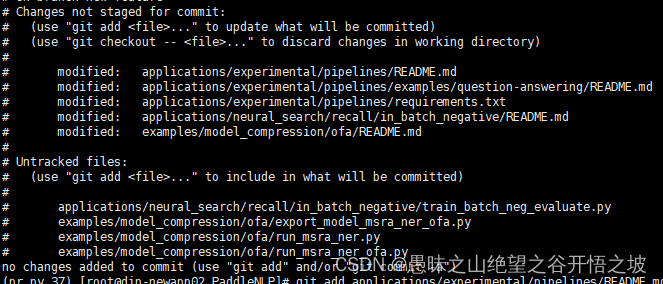
9、添加要提交的内容
git add applications/experimental/pipelines/README.md applications/experimental/pipelines/examples/question-answering/README.md applications/experimental/pipelines/requirements.txt applications/neural_search/recall/in_batch_negative/README.md examples/model_compression/ofa/README.md applications/neural_search/recall/in_batch_negative/train_batch_neg_evaluate.py examples/model_compression/ofa/export_model_msra_ner_ofa.py examples/model_compression/ofa/run_msra_ner.py examples/model_compression/ofa/run_msra_ner_ofa.py
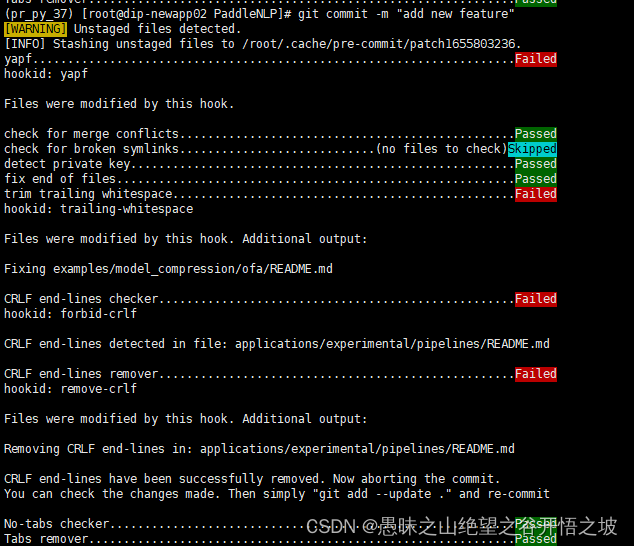
10、提交
git commit -m "add new feature"
报错提示
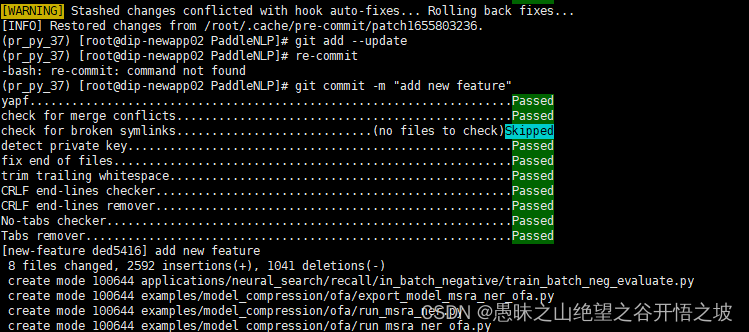
11、修正
git add --update
12、再次提交
git commit -m "add new feature"
通过
13、确认本地代码处于最新状态
在准备发起Pull Request之前,需要同步原仓库最新的代码。
通过 git remote 查看当前远程仓库的名字。
在准备发起 Pull Request 之前,需要同步原仓库(https://github.com/PaddlePaddle/PaddleNLP)最新的代码。
13.1、首先通过 git remote 查看当前远程仓库的名字。
git remote
origin
13.2、首先通过 git remote 查看当前远程仓库的名字。
git remote -v
origin https://github.com/USERNAME/Paddle (fetch)
origin https://github.com/USERNAME/Paddle (push)
这里 origin 是我们 clone 的远程仓库的名字,也就是自己用户名下的 Paddle,
13.3、接下来我们创建一个原始 Paddle 仓库的远程主机,命名为 upstream。
git remote add upstream https://github.com/PaddlePaddle/PaddleNLP
13.4、通过 git remote 查看当前远程仓库的名字。
git remote
origin
upstream
13.5、获取 upstream 的最新代码并更新当前分支。
git fetch upstream
git pull upstream develop
13.6、推送本地分支new-feature到自己的仓库
git push origin new-feature
13.7、输入账户密码后报错,提示报错

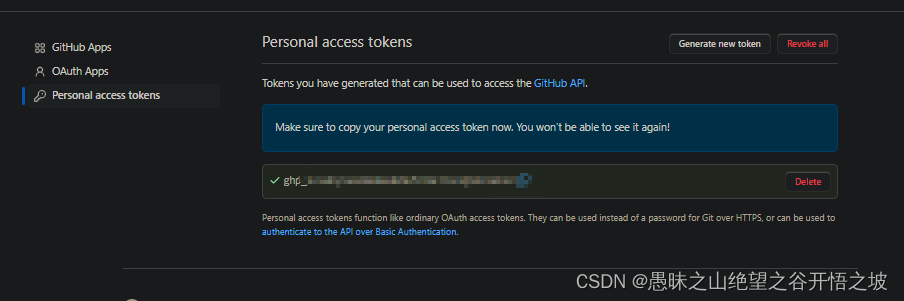
13.8、需要输入单独生成的token
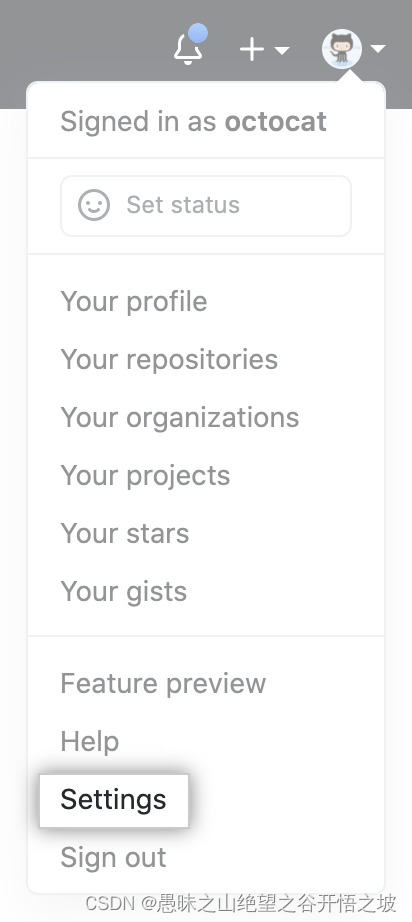
13.8.1、在任何页面的右上角,单击您的个人资料照片,然后单击 Settings(设置)。
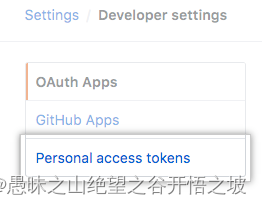
13.8.2、在左侧栏中,单击 开发者设置。
13.8.3、在左侧边栏中,单击 Personal access tokens(个人访问令牌)。
13.8.4、单击 Generate new token(生成新令牌)。

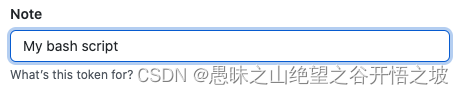
13.8.5、Give your token a descriptive name.
13.8.6、To give your token an expiration, select the Expiration drop-down menu, then click a default or use the calendar picker.

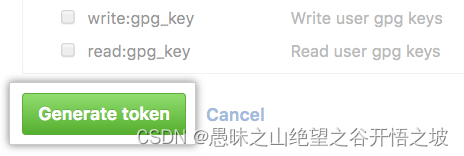
13.8.7、Select the scopes, or permissions, you’d like to grant this token. To use your token to access repositories from the command line, select repo.

13.8.8、Click Generate token.
13.8.9、复制token作为代替github的密码,重新输入和提交

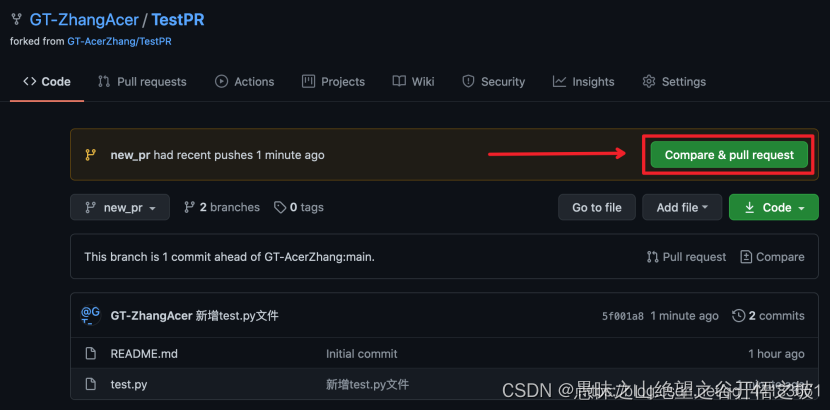
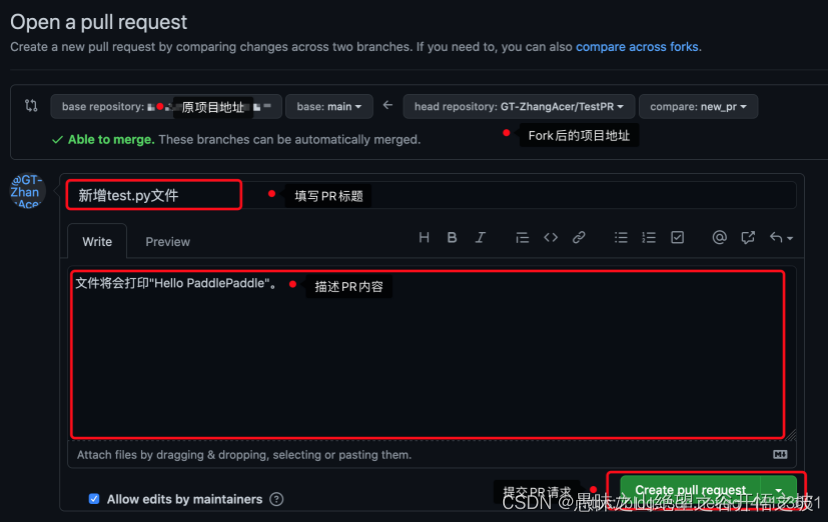
14、在GitHub上提交PR
回到刚刚Fork后的GitHub项目页面,点击出现的”Compare & pull request”按钮即可开始PR操作。
15、End
在提交PR后将会有Reviewers对提交的代码进行审阅,如需修改代码重新提交可从Step 7开始修改并完成后续步骤,这样即可在原PR请求基础上进行更新。