1 编写jenkins.yaml文件,内容如下:
apiVersion: v1
kind: Namespace
metadata:
name: devops
---
apiVersion: apps/v1
kind: Deployment
metadata:
name: devops-jenkins
namespace: devops
spec:
replicas: 1
revisionHistoryLimit: 5
strategy:
type: RollingUpdate
selector:
matchLabels:
app: devops-jenkins
template:
metadata:
labels:
app: devops-jenkins
spec:
volumes:
- name: devops-jenkins
nfs:
server: xx.xx.xx.xx
path: /root/data/nfs/jenkins/devops
containers:
- name: devops-jenkins
image: jenkins/jenkins
env:
- name: LIMITS_MEMORY
valueFrom:
resourceFieldRef:
resource: limits.memory
divisor: 1Mi
- name: JAVA_OPTS
value: -Xmx$(LIMITS_MEMORY)m -XshowSettings:vm -Dhudson.slaves.NodeProvisioner.initialDelay=0 -Dhudson.slaves.NodeProvisioner.MARGIN=50 -Dhudson.slaves.NodeProvisioner.MARGIN0=0.85
imagePullPolicy: Always
ports:
- containerPort: 8080
volumeMounts:
- name: devops-jenkins
mountPath: /var/jenkins_home
---
apiVersion: v1
kind: Service
metadata:
name: devops-jenkins
namespace: devops
spec:
ports:
- port: 8080
protocol: TCP
targetPort: 8080
nodePort: 30002
selector:
app: devops-jenkins
type: NodePort
sessionAffinity: ClientIP
---
apiVersion: v1
kind: ServiceAccount
metadata:
name: devops-jenkins
namespace: devops
---
kind: Role
apiVersion: rbac.authorization.k8s.io/v1
metadata:
name: devops-jenkins
namespace: devops
rules:
- apiGroups: [""]
resources: ["pods","events"]
verbs: ["create","delete","get","list","patch","update","watch"]
- apiGroups: [""]
resources: ["pods/exec"]
verbs: ["create","delete","get","list","patch","update","watch"]
- apiGroups: [""]
resources: ["pods/log"]
verbs: ["get","list","watch"]
- apiGroups: [""]
resources: ["secrets","events"]
verbs: ["get"]
---
apiVersion: rbac.authorization.k8s.io/v1
kind: RoleBinding
metadata:
name: devops-jenkins
namespace: devops
roleRef:
apiGroup: rbac.authorization.k8s.io
kind: Role
name: devops-jenkins
subjects:
- kind: ServiceAccount
name: devops-jenkins
2 对挂载的存储修改所属组
mkdir -p /root/data/nfs/jenkins/devops
chown -R 1000 /root/data/nfs/jenkins/devops
3 执行如下命令创建Jenkins
kubectl apply -f jenkins.yaml
4 使用如下命令查看创建的Pod状态
kubectl get pod -n devops
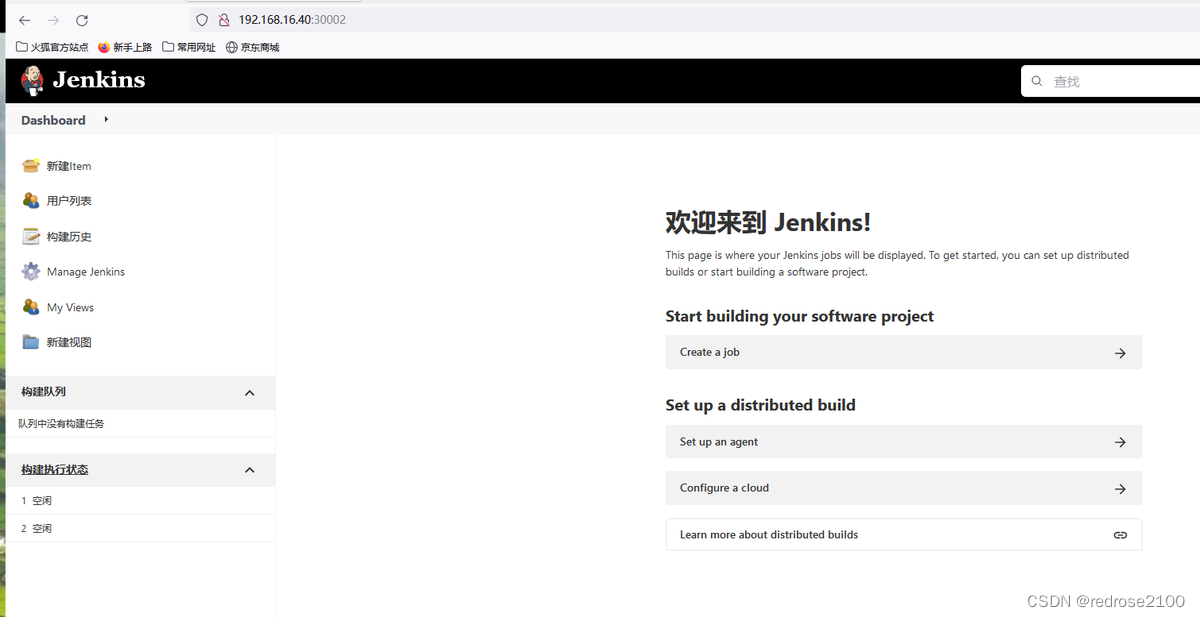
5 在浏览器通过ip+端口访问,这里端口为30002
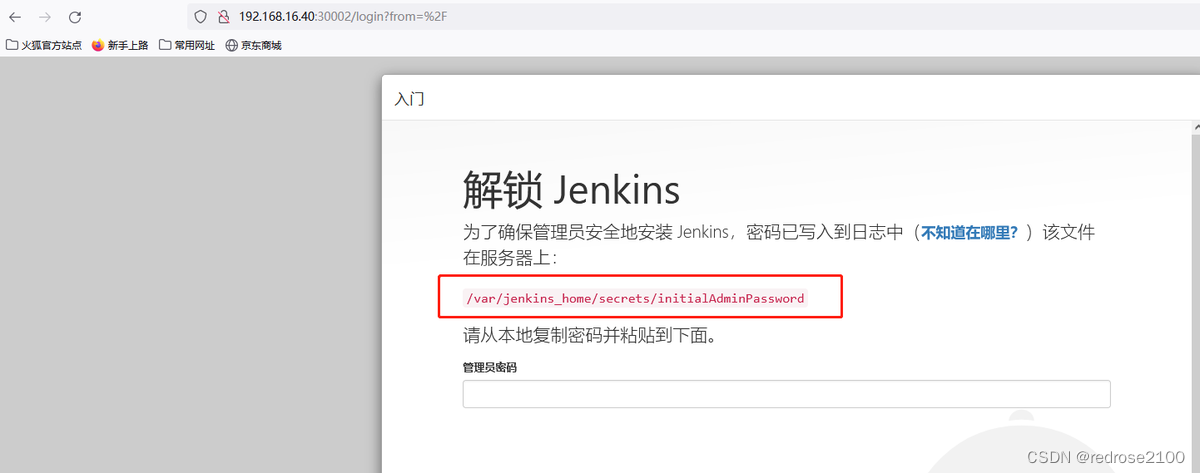
6 根据上面提示,使用如下命令查看密码
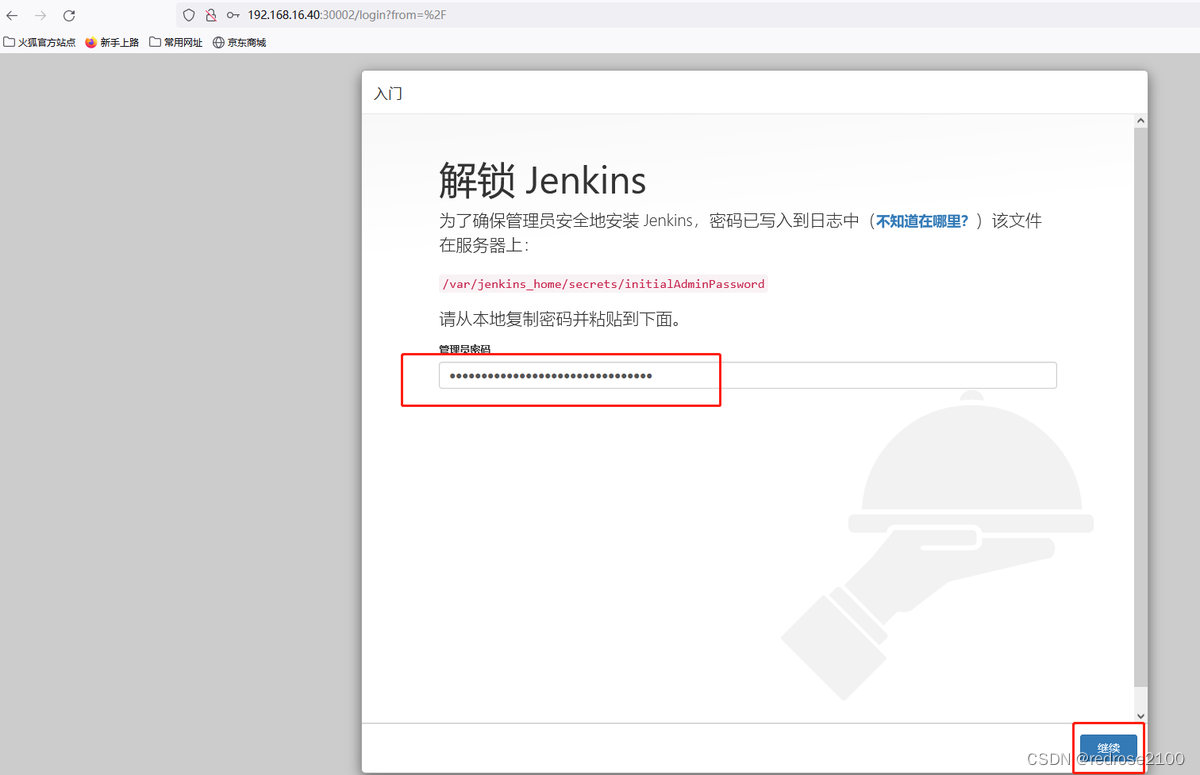
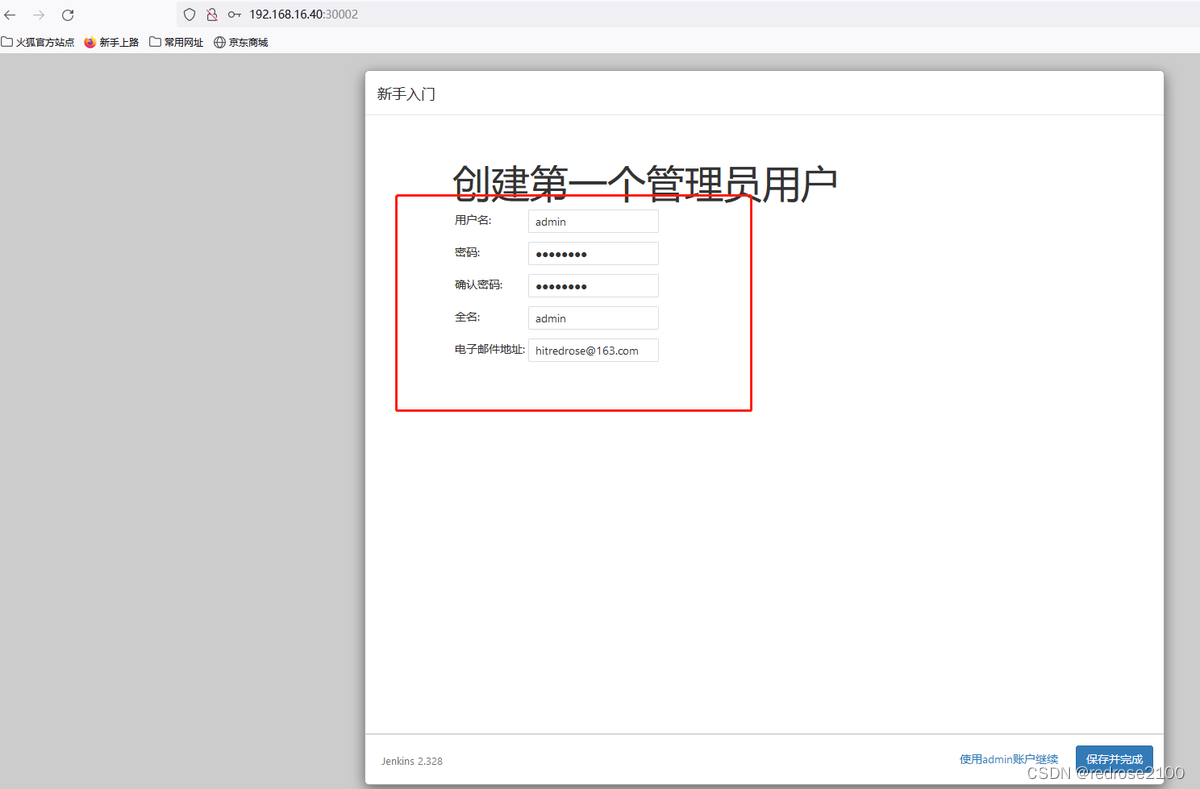
kubectl exec -it devops-jenkins-9d4555c89-xzz55 /bin/cat /var/jenkins_home/secrets/initialAdminPassword -n devops
7 复制上述密码,填入WEB登录页面
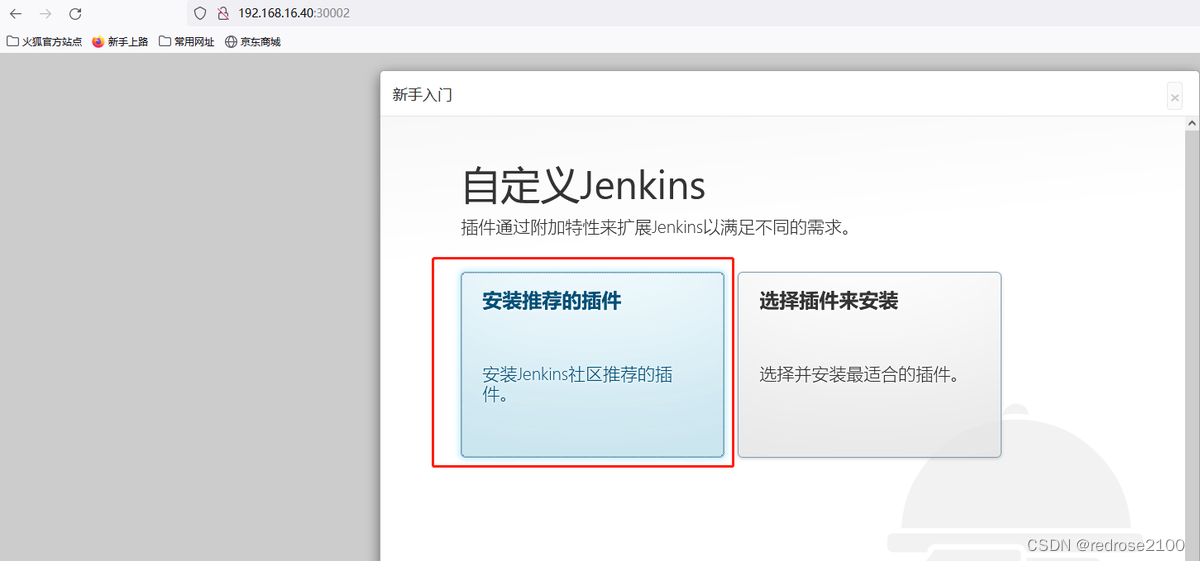
8 为了方便,这里可以选择推荐插件安装,如果自定义安装的话,需要对Jenkins的常用插件比较了解
9 然后设置管理员用户名密码等
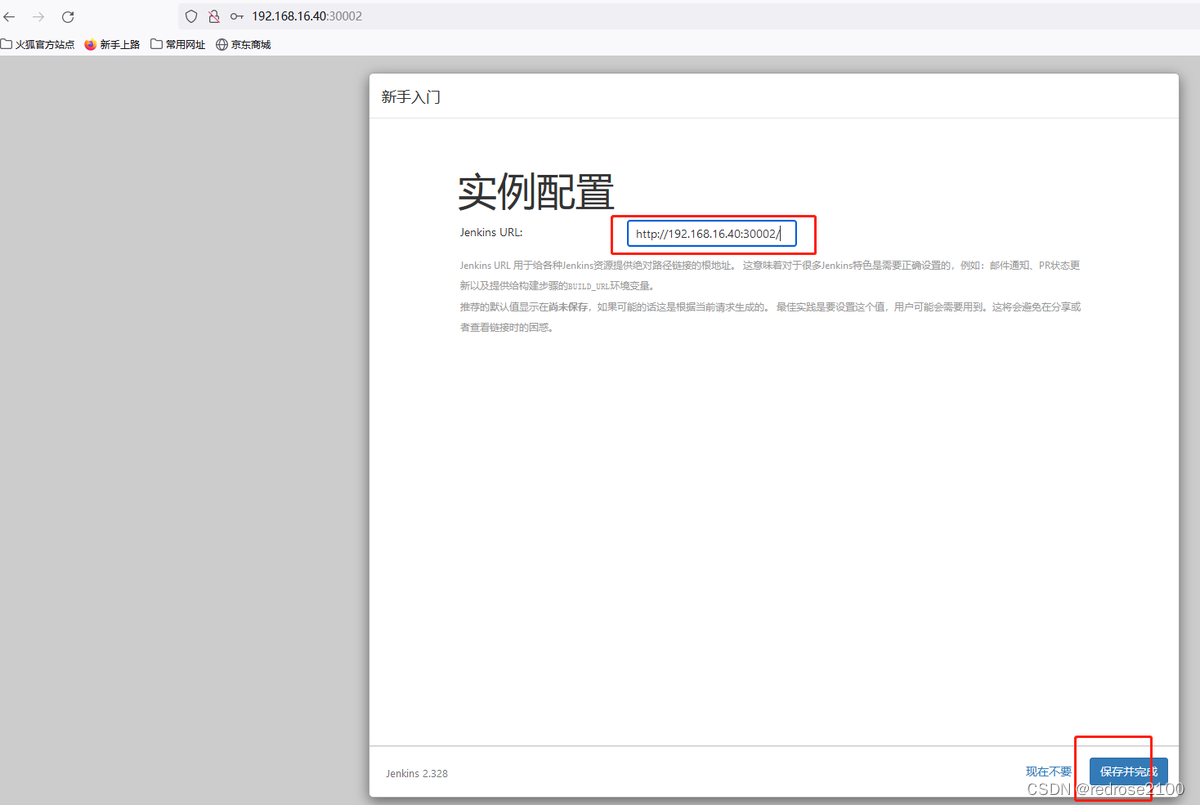
10 确认Jenkins的Url
11 点击【开始使用Jenkins】
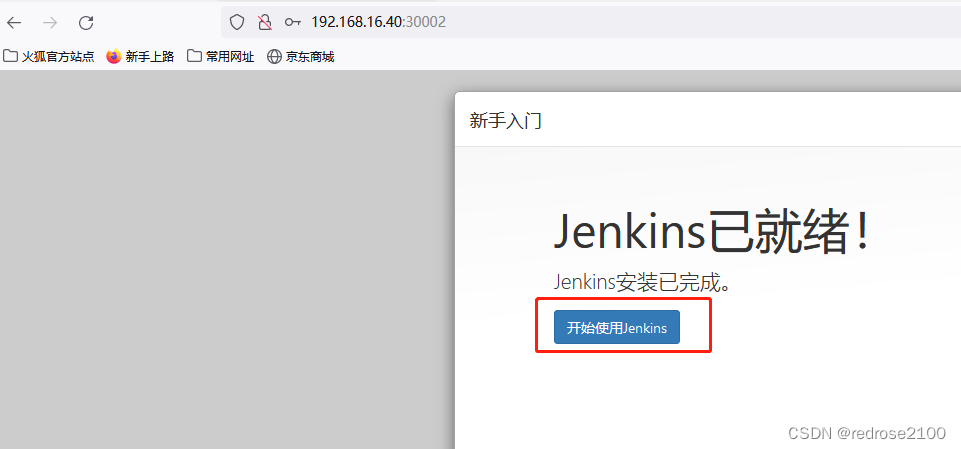
12 至此,Jenkins就安装完成了