目录
一、父子组件传值
1.最常用的
01-父组件传递数据
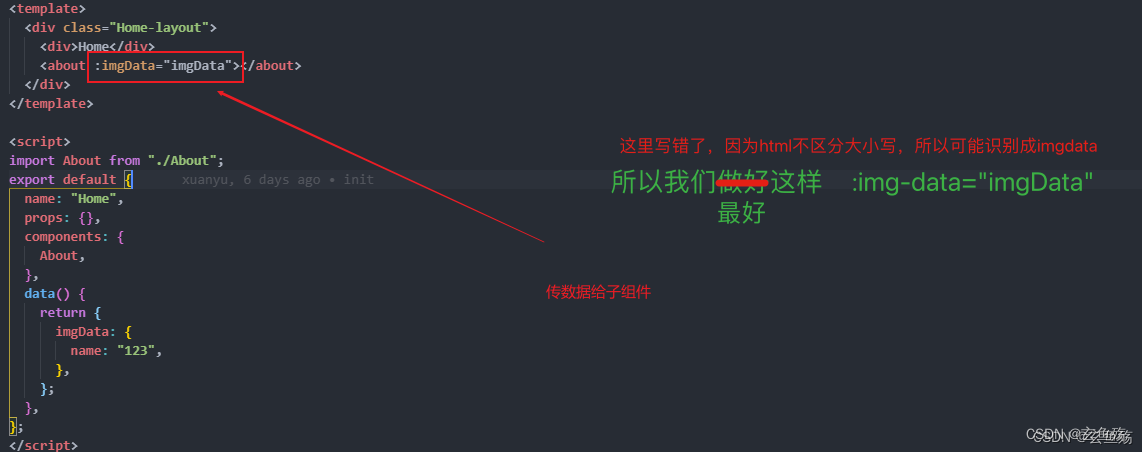
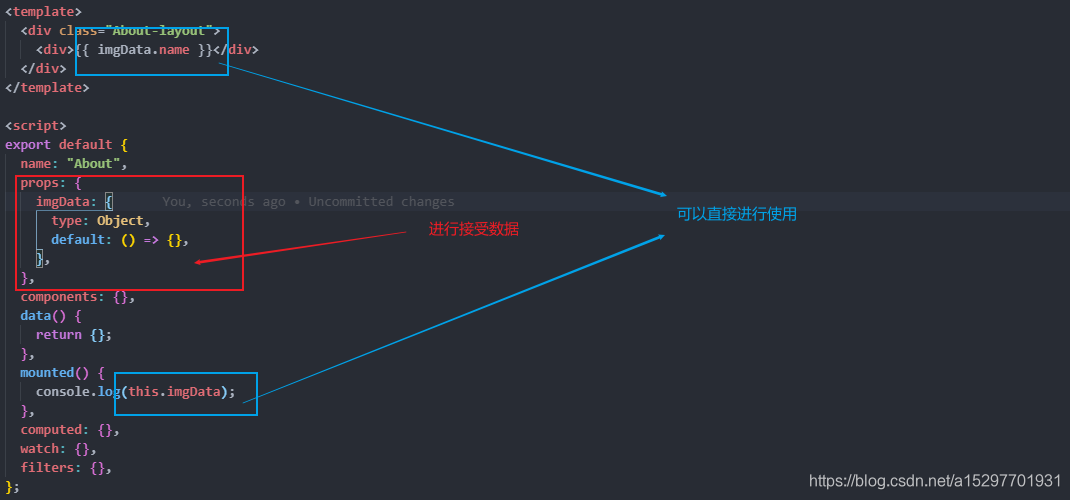
02-子组件接受数据
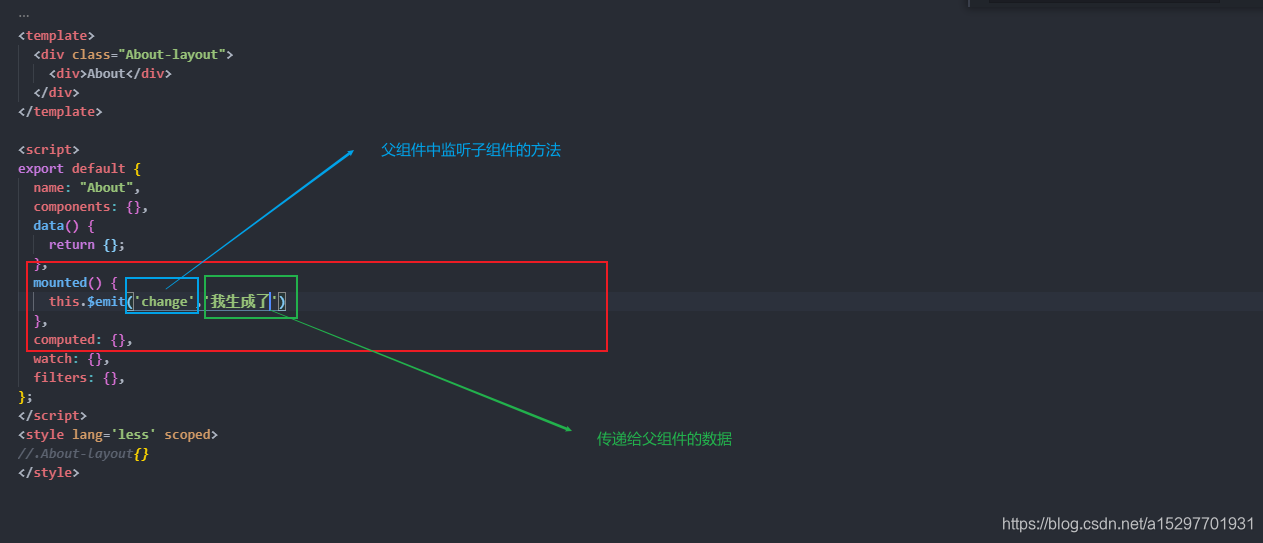
03-子组件发射事件
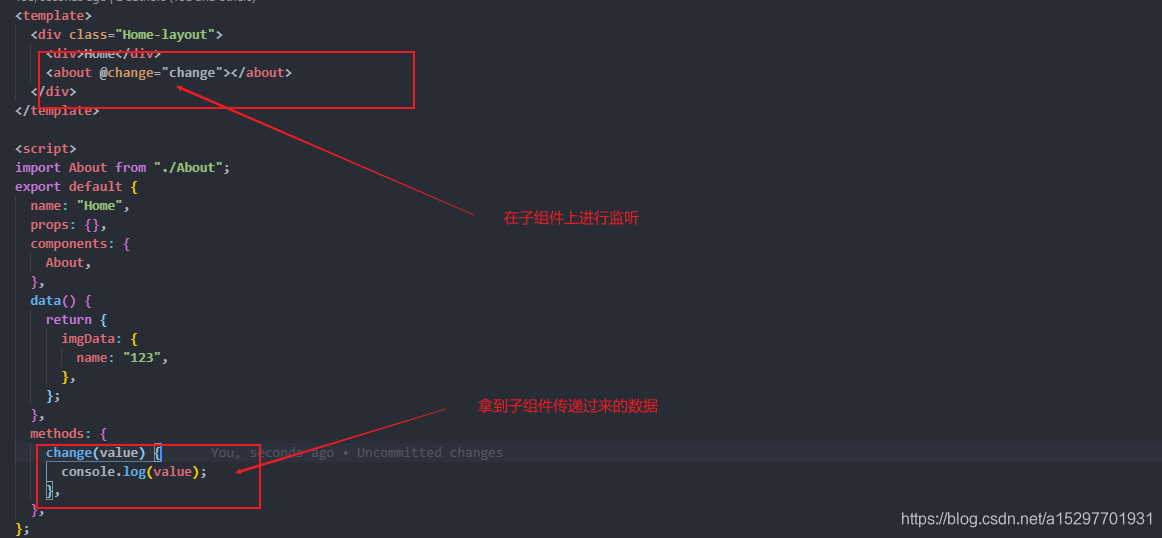
04-父组件中感知
2.使用$Refs|$parent | $root
$parent | $root 很少使用,会使代码变得混乱,不推荐使用
tip : 在vue3中,$children,已经被移除了!!!
子组件
<template>
  <div class="son-layout">
    <h3>{

    { name }}</h3>
  </div>
</template>
<script>
export default {
  name: 'son',
  data() {
    return {
      name: 'son'
    };
  },
  mounted(){
    //使用$parent拿到父组件的name数据 (不推荐)
    this.$parent.name
    //使用$root拿到根组件( 一般是app.vue ) (不推荐)
    this.$root
  },
  methods: {
    getName() {
      console.log('son :>> ', this.name);
    }
  }
};
</script>
<style></style>
父组件
<template>
<!-- 设定ref -->
<son ref="sonRef" />
<button @click="getSonInfo">getSonInfo</button>
</template>
<script>
import Son from './son.vue';
export default {
components: { Son },
data() {
return {
name:'我是父组件'
};
},
methods: {
getSonInfo() {
// this.$refs.sonRef 获取到子组件
// 获取子组件中数据
console.log(this.$refs.sonRef.name);
// 更改子组件中数据 tip : 强烈不建议更改,不易于维护
this.$refs.sonRef.name = '我更改了'
// 使用子组件中方法
this.$refs.sonRef.getName();
// 注意:这样使用 this.$refs.sonRef 拿到的是组件实例
// 如果需要拿到dom根元素,需要这样
const domEl = this.$refs.sonRef.$el
}
}
};
</script>
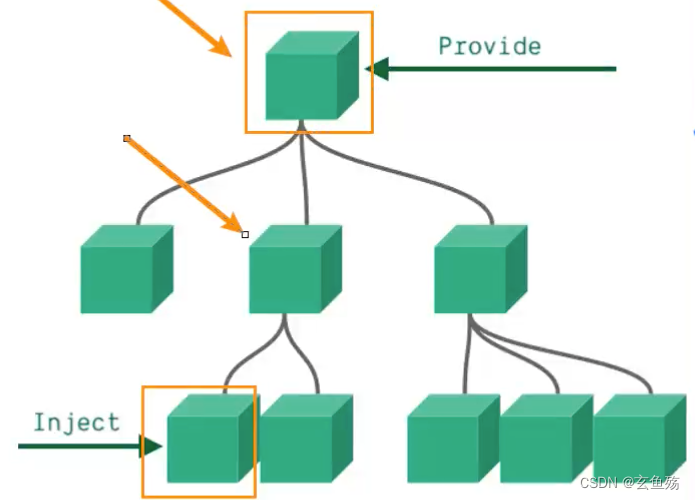
<style scoped></style>二、非直接父子传值 ( 有嵌套关系 )
使用provide 与 inject
比如一些深度嵌套的子组件,想要获取父组件的部分内容
父组件 ( 祖先组件 ) :provide 提供数据
子组件 :inject 使用这个数据
父组件 ( 祖先组件 )
- 静态数据
export default {
  name: 'ancestor',
  // 提供数据
  provide:{
    name:'我是祖先',
    age:345
  }
};-
使用data中的数据
export default {
  name: 'ancestor',
  // 注意,如果需要拿data中的数据,需要这么来写,provide写成一个方法
  provide() {
    return {
      name: '我是祖先',
      // 这样才能拿到数据,vue内部做了个绑定
      age: this.ageArr
    };
  },
  data() {
    return {
      ageArr: [18, 19, 20, 21]
    };
  }
}- 使用data中的数据
tip : 在vue3中,如果没有响应式,可以这样写 , 现在不使用应该也是响应式的
// 从vue中导入computed函数
import { computed } from 'vue'

export default {
  name: 'ancestor',
  provide() {
    return {
      name: '我是祖先',
      // 使用computed包裹一下
      age: computed(() => this.ageArr)
    };
  },
  data() {
    return {
      ageArr: [18, 19, 20, 21]
    };
  }
}
子组件
<template>
  <div class="Home-layout">
    <!-- 使用数据 -->
    {

    {name}} - {

    {age}}
  </div>
</template>
<script>
export default {
  name: 'son',
  // 拿到需要的祖先数据
  inject: ['name', 'age']
};
</script>
三、非父子传值 ( 无嵌套关系 )
1.vuex的存取值
可以看我之前写的vuex的文章哦~
2.全局事件总线 (vue2)
// 在入口 main.js 中,创建一个 bus 总线,这样全局都可以使用
Vue.prototype.$bus = new Vue()

// 在组件中使用

发射事件    this.$bus.$emit('change')

接受事件    this.$bus.$on('change', ()=>{} )

// 记得注销
//通常绑定在钩子函数beforeDestroy()或者destroyed()中
//如果使用了keep-alive包裹,可以写在deactivated钩子函数中
注销事件    this.$bus.$off('change')
3. 全局事件总线Mitt(vue3)
vue3中移除了$on、$off、$once方法,所以想要继续使用,要通过第三方库,使用mitt
01-安装
npm install mitt02-封装一下
新建eventbus.js
// 导入
import mitt from 'mitt';
// 创建
const emitter = mitt();
// 导出
export default emitter;
03-发射事件
<template>
  <div class="son-layout">
    <button @click="emitSon">son</button>
  </div>
</template>
<script>
// 导入封装的
import emitter from '../assets/eventBus';
export default {
  name: 'son',
  methods: {
    emitSon() {
      console.log('我发射啦');
      // 使用
      emitter.emit('sonEmit', { name: '我是son' });
    }
  }
};
</script>
<style></style>
04-监听事件
<template>
  <div class="zhong-layout">zhong</div>
</template>
<script>
// 导入
import emitter from '../assets/eventBus';
export default {
  name: 'zhong',
  mounted() {
    // 监听sonEmit事件
    emitter.on('sonEmit', (value) => {
      console.log(value.name, '收到啦');
    });

    // 监听所有事件  type : 事件的名字  info:对应的数据
    // 如果有两个事件,会执行两次,不会有冲突哒~
    emitter.on('*', (type, info) => {
      console.log(info);
      console.log('* listener', type, info);
    });
  },
};
</script>
<style>
</style>
05-取消事件
// 取消所有的事件监听
emitter.all.clear()

// 取消指定事件监听,方法要使用同一个 如 : sonEmit.
function onFoo(){}
emitter.on('sonEmit', onFoo)
emitter.off('sonEmit', onFoo)