本专栏将从基础开始,循序渐进的讲解Vue的基本概念以及使用,希望大家都能够从中有所收获,也请大家多多支持。
专栏地址: Vue专栏
相关软件地址: 相关安装包地址
如果文章知识点有错误的地方,请指正!大家一起学习,一起进步。
文章目录
1.路由的使用
1.1 路由的安装
使用如下指令:
cnpm install vue-router --save
路由的官方教程:https://router.vuejs.org/zh/guide/
1.2 工程中使用路由
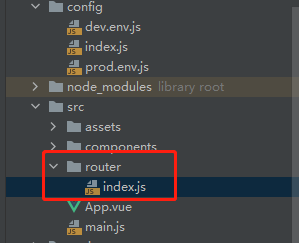
一般在项目开发中会新建一个js用于存储路由信息,如下图所示:
在该js中创建路由:
// The Vue build version to load with the `import` command
// (runtime-only or standalone) has been set in webpack.base.conf with an alias.
import Vue from 'vue'
import VueRouter from 'vue-router'
//@表示根目录
import AxiosDemo from "@/components/AxiosDemo";
import HelloWorld from "../components/HelloWorld";
import Base from "../components/Base";
import Http from "../components/Http";
import Learn from "../components/Learn";
import NotFound from "../components/NotFound"

Vue.use(VueRouter)
//创建路由
export default new VueRouter({


  routes:[
    {


      //1.访问hello的时候才会加载HelloWorld组件
      path:"/hello",
      name:"HelloWorld",
      component:HelloWorld
    },
  ]
})
然后在main.js中import即可:
import router from "./router"
1.3 动态路由传参
- 在routes中配置路由:
{


  //1.访问hello/..的时候才会加载
  path:"/hello/:helloParam",
  name:"HelloWorld",
  component:HelloWorld
},
2.1 方式1,使用url传递的方式
<!--      参数传递-->
      <router-link tag="li" to="/axiosDemo/1">axios</router-link>

<router-view/>
2.2 方式2,使用具名路由的方式
//<router-link>是跳转操作,点击后url会变成http://localhost:8080/to,只有当前路径对应的组件以及父组件会生效,其他的组件不显示,生效的组件会在<router-view/>中显示
<router-link tag="li" :to="{name:'HelloWorld',params:{helloParam:helloParam}}">具名路由,跳转到HelloWorld组件</router-link>
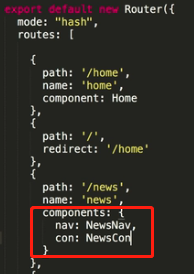
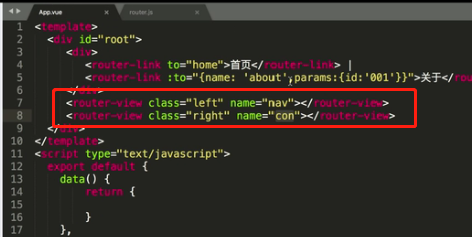
//router-view 将匹配到的组件将渲染在这里,相当于一个特定的容器,<router-link>只能对应一个<router-view/>,如果使用多个<router-view>,需要在路由文件中使用components配置组件对象,然后使用<router-view name=""/>的形式使用具名路由
<router-view/>
注:使用这种方法不需要在index.js中配置需要传递的参数
具名路由的使用如下图所示:
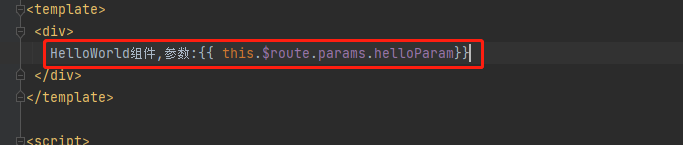
- 在组件中使用
this.$route.params.helloParam
如下图所示:
1.4 嵌套路由
- 创建嵌套路由
{


  path:"/learn",
  name:"Learn",
  component:Learn,
  children:[{


    path:"base",
    component:Base
    //如果还有路由,继续添加children
  },
    {


      path:"http",
      component:Http
    }]
},
- 使用嵌套路由
<ul>
  <router-link to="/learn/base">基础</router-link>
  <router-link to="/learn/http">进阶</router-link>
</ul>

<router-view/>
1.5 编程式的导航
//4.1 直接跳转
this.$router.push("/learn")
  //4.2 使用对象
this.$router.push({

    path:"/learn"})
  //4.3 使用replace不会向history添加记录,也就是说后退不到上一次的页面
this.$router.replace({

    path:"/learn"})
  //4.4 go 回到上一次路径
this.$router.go(-1)
//  4.5 push的时候也可以传参
//使用这种方法需要在index.js中配置需要传递的参数,跳转到name为HelloWorld对应的路由,如果提供了 path,params 会被忽略
this.$router.push({

    name:'HelloWorld',params:{

    helloParam:this.helloParam}})
  //4.6 带参查询,路径会变成 http://localhost:8080/#/HelloWorld?helloParam=test
  this.$router.push({

    path:'HelloWorld',query:{

    helloParam:'test'}})
1.6 路由高亮
1.6.1 直接配置
在App.vue中配置
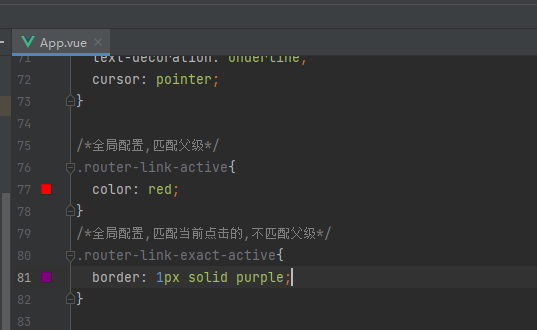
1.6.2 指定样式
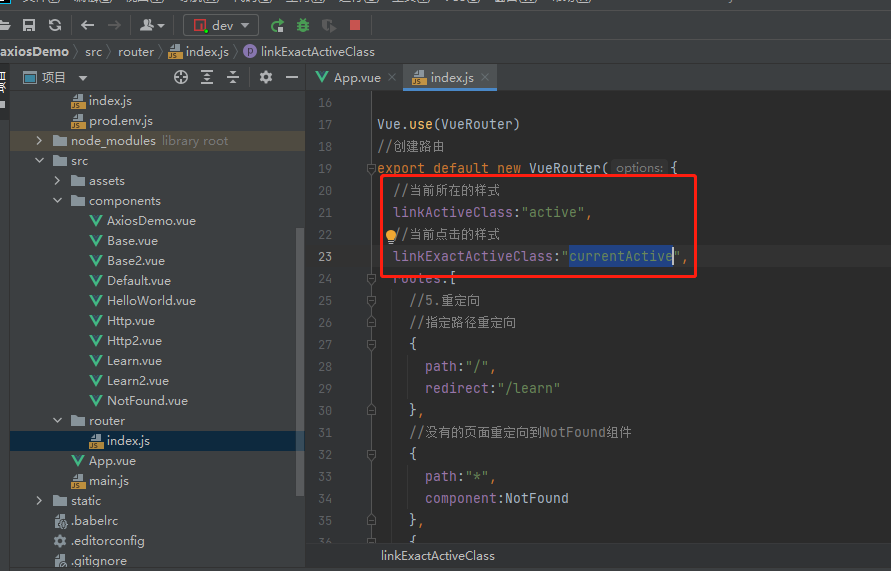
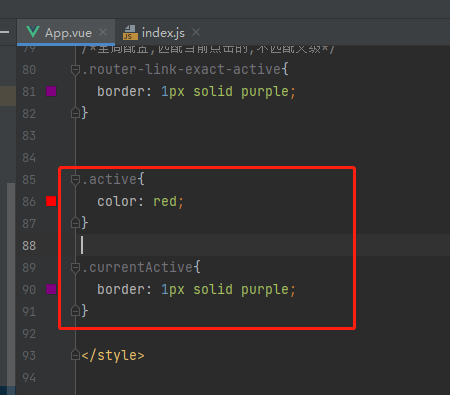
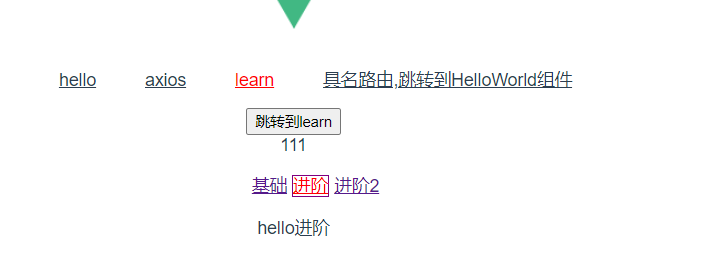
效果如下图所示:
1.6 杂项
1.6.1 获取路由对象属性
computed:{


  getCurrentUrl(){


    // return this.$route.path
    return this.$route.fullPath
  }
}
详见:https://router.vuejs.org/zh/api/#%E8%B7%AF%E7%94%B1%E5%AF%B9%E8%B1%A1
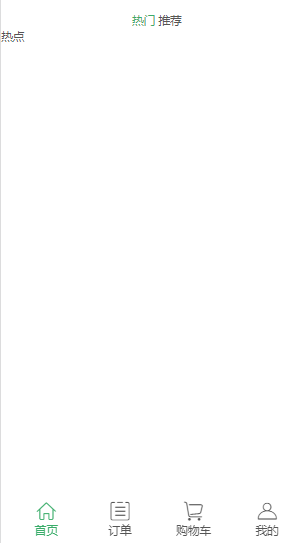
1.7 案例
案例截图:
图标库:https://www.iconfont.cn/
- 将下载的图标css文件和字体放入assets文件夹
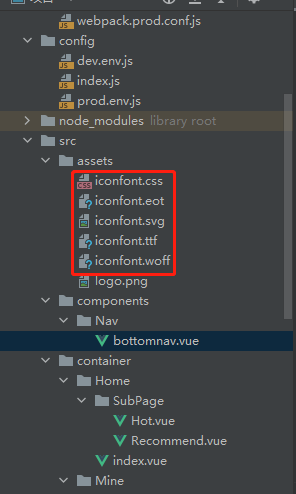
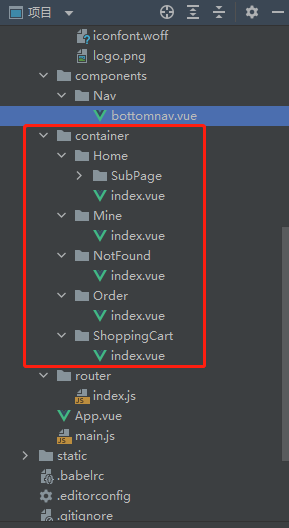
- 为了便于管理,新建container文件夹,并创建四个容器对应下方的四个按钮,如下图所示
- 配置路由
// The Vue build version to load with the `import` command
// (runtime-only or standalone) has been set in webpack.base.conf with an alias.
import Vue from 'vue'
import VueRouter from 'vue-router'
import Home from "@/container/Home"
import Mine from "@/container/Mine"
import Order from "@/container/Order"
import ShoppingCart from "@/container/ShoppingCart"
import NotFound from "@/container/NotFound"
import Hot from "../container/Home/SubPage/Hot";
import Recommend from "../container/Home/SubPage/Recommend";

Vue.use(VueRouter)
//创建路由
export default new VueRouter({


  linkActiveClass:"active",
  routes:[
    {


      path:'*',
      component:NotFound
    },
    {


      path:'/',
      redirect:"/home"
    },
    {


      path:'/home',
      redirect:"/home/hot",
      name:'Home',
      component:Home,
      children:[
        {


          path:'hot',
          component:Hot
        },
        {


          path:'recommend',
          component:Recommend
        }
      ]
    },
    {


      path:'/mine',
      name:'Mine',
      component:Mine
    },
    {


      path:'/order',
      name:'Order',
      component:Order
    },
    {


      path:'/shoppingCart',
      name:'ShoppingCart',
      component:ShoppingCart
    }
  ]
})
- App.vue添加,以及初始化样式,初始化样式参考地址:https://segmentfault.com/a/1190000009369872
<template>
  <div id="app">
    <router-view/>
  </div>
</template>

<script>

export default {


  name: 'App',
  components: {


  },
  methods:{


  },
  data(){


    return{


    }
  }
}
</script>

<style>
/*添加初始化样式*/
* {


  -webkit-box-sizing: border-box;
  -moz-box-sizing: border-box;
  box-sizing: border-box;
}
*:before,
*:after {


  -webkit-box-sizing: border-box;
  -moz-box-sizing: border-box;
  box-sizing: border-box;
}
body, div, dl, dt, dd, ul, ol, li, h1, h2, h3, h4, h5, h6, pre, code, form, fieldset, legend, input, button, textarea, p, blockquote, th, td {


  margin: 0;
  padding: 0;
}
body {


  background: #fff;
  color: #555;
  font-size: 14px;
  font-family: "Arial", "Microsoft YaHei", "黑体", "宋体", sans-serif;
}
td, th, caption {


  font-size: 14px;
}
h1, h2, h3, h4, h5, h6 {


  font-weight: normal;
  font-size: 100%;
}
address, caption, cite, code, dfn, em, strong, th, var {


  font-style: normal;
  font-weight: normal;
}
a {


  color: #555;
  text-decoration: none;
}
a:hover {


  text-decoration: underline;
}
img {


  border: none;
  vertical-align: middle;
}
ol, ul, li {


  list-style: none;
}
input, textarea, select, button {


  font: 14px "Arial", "Microsoft YaHei", "黑体", "宋体", sans-serif;
}
table {


  border-collapse: collapse;
}
html {


  overflow-y: scroll;
}
.clearfix:before,
.clearfix:after {


  content: " ";
  display: inline-block;
  height: 0;
  clear: both;
  visibility: hidden;
}
.clearfix {


  *zoom: 1;
}

/*公共类*/
.fl {


  float: left
}
.fr {


  float: right
}
.al {


  text-align: left
}
.ac {


  text-align: center
}
.ar {


  text-align: right
}
.hide {


  display: none
}


</style>
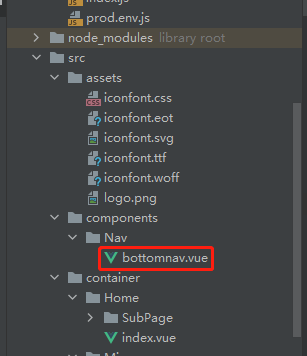
- 编写下边栏bottomnav组件
<template>
  <div class="nav">
    <ul>
      <router-link to="/home">
        <i class="iconfont icon-shouye"/>
        <span class="title">首页</span>
      </router-link>
      <router-link to="/order">
        <i class="iconfont icon-wodedingdan"/>
        <span class="title">订单</span>
      </router-link>
      <router-link to="/shoppingCart">
        <i class="iconfont icon-gouwuche"/>
        <span class="title">购物车</span>
      </router-link>
      <router-link to="/mine">
        <i class="iconfont icon-wodejuhuasuan"/>
        <span class="title">我的</span>
      </router-link>
    </ul>
  </div>
</template>

<script>
import "@/assets/iconfont.css"
export default {


  name: "bottomnav",
  data(){


    return{


    }
  }
}
</script>

<style scoped>
  .nav{


    position: fixed;
    left: 0;
    right:0;
    bottom: 0;
    height: 70px;
    padding: 10px;

  }
  .nav ul{


    height: 40px;
    width: 100%;
    display: flex;
  }

  .nav ul a{


    text-align: center;
    flex: 1;
  }

  .nav ul a i{


    font-size: 25px;
    margin-top: 5px;
  }

  .title{


    display: block;
  }

  .active{


    color:#39ac69;
  }
</style>
- 在四个容器中添加组件,以下以Home目录为例,其他的容器类似
<template>
<div class="home">
  <ul>
    <router-link tag="li" to="/home/hot">热门</router-link>
    <router-link tag="li" to="/home/recommend">推荐</router-link>
  </ul>
  <router-view></router-view>
  <bottomnav/>
</div>
</template>

<script>

import bottomnav from "../../components/Nav/bottomnav";

export default {


  name: "index",
  components:{


    bottomnav
  }
}
</script>

<style scoped>
  ul{


    width: 100%;
    text-align: center;
    margin-top: 20px;
  }
  ul li{


    display: inline-block;
  }

  .active{


    color:#39ac69;
  }
</style>
详细代码:https://gitee.com/codinginn/public-code-storage/tree/master/axiosDemo
2.axios的使用
2.1. axios基础使用
axios中文说明地址:https://www.kancloud.cn/yunye/axios/234845
axios安装:
cnpm install --save axios
引入axios:
Vue.prototype.$axios = Axios
Vue.config.productionTip = false
2.2. axios get请求
2.2.1 不带参数的get请求
- 方式1
this.$axios.get(this.HOSTMyTest +  'customer?id=10')
.then(res => {


  console.log(res);
})
.catch(error => {


  console.log(error);
})
- 方式2
this.$axios({


        method:this.HOSTMyTest + 'customer?id=10',
        url:url
    })
    .then(res => {


      console.log(res)
    })
    .catch(error => {


      console.log(res)
    })
2.2.2 带参数的get请求
注意:params是添加到url的请求字符串中的,用于get请求。
而data是添加到请求体(body)中的, 用于post请求。
- 方式1
    this.$axios.get(this.HOSTMyTest + 'customer' , {


      params:{


        id:10
      }
    })
    .then(res => {


      console.log(res);
    })
    .catch(error => {


      console.log(error);
    })
- 方式2
  this.$axios({


        method:'get',
        url:this.HOSTMyTest + 'customer',
        params:{


		id:10
        }
    })
    .then(res => {


      console.log(res)
    })
    .catch(error => {


      console.log(res)
    })
2.3 axios post请求
注意:params是添加到url的请求字符串中的,用于get请求。
而data是添加到请求体(body)中的, 用于post请求。
- 方式1
//解决参数格式转码问题 ?name=aaa&password=123 <=> {name:aaa,password:123}
import qs from "qs";

var url = this.HOSTMyTest;

    this.$axios.post(url,qs.stringify({


      user_id:'user_id',
      password:'password',
      verification_code:'aaaa'
    }))
      .then(res => {


        console.log(res)
      })
      .catch(error => {


        console.log(error)
      });
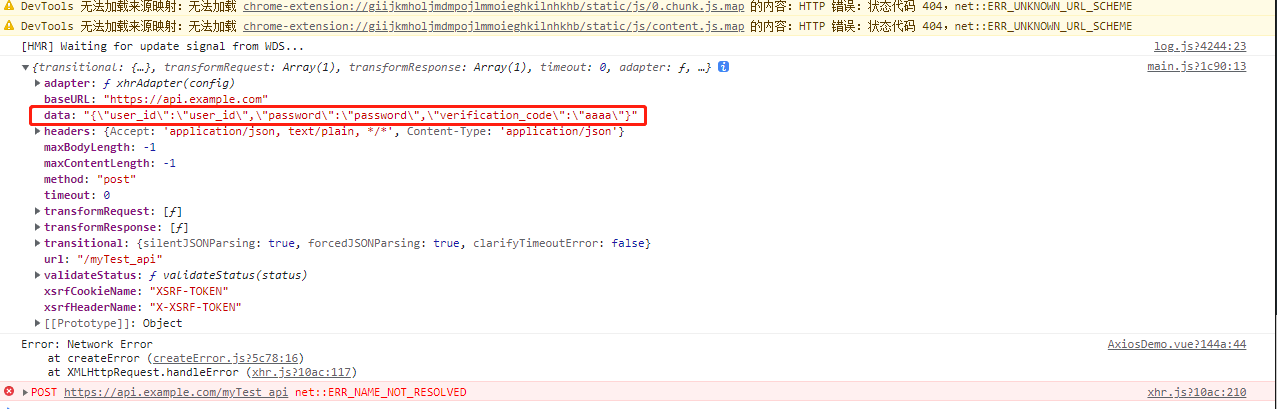
- 方式2
var url = this.HOSTMyTest;

this.$axios({


      method:'post',
      url:url,
    //通过data传递信息
      data:{


        user_id:'user_id',
        password:'password',
        verification_code:'aaaa'
      }
    })
      .then(res => {


        console.log(res)
      })
      .catch(error => {


        console.log(error)
      });
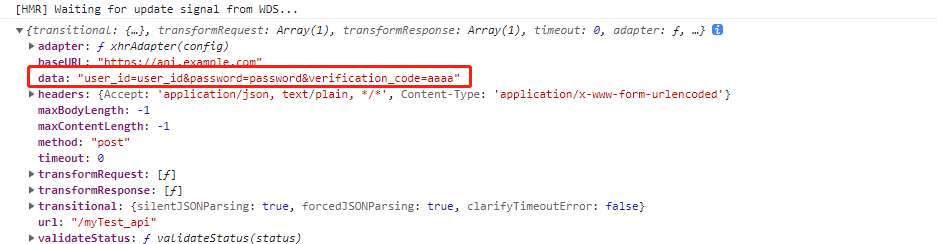
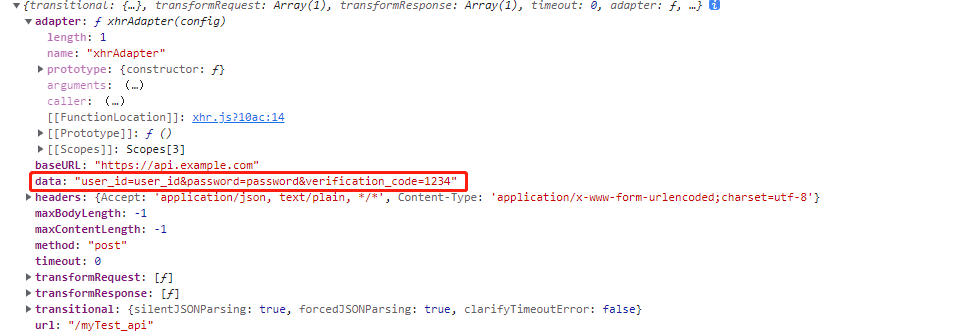
如下图所示,直接在data中使用对象,传递的是对象的字符串形式.
因此需要转成Ajax的data形式,有两种转化方式.
第一种:使用qs
//post请求
 var url = this.HOSTMyTest;
this.$axios({


    method:'post',
    url:url,
    data:qs.stringify({


      user_id:'user_id',
      password:'password',
      verification_code:'aaaa'
    })
  })
    .then(res => {


      console.log(res)
    })
    .catch(error => {


      console.log(error)
    });
},
第二种:使用URLSearchParams
//post请求
  var url = this.HOSTMyTest;
  var params = new URLSearchParams();
  params.append('user_id','user_id')
  params.append('password','password')
  params.append('verification_code','aaaa')

  this.$axios({


    method:'post',
    url:url,
    data:params
  })
    .then(res => {


      console.log(res)
    })
    .catch(error => {


      console.log(error)
    });
},
第三种:使用拦截器
在main.js中配置拦截器:
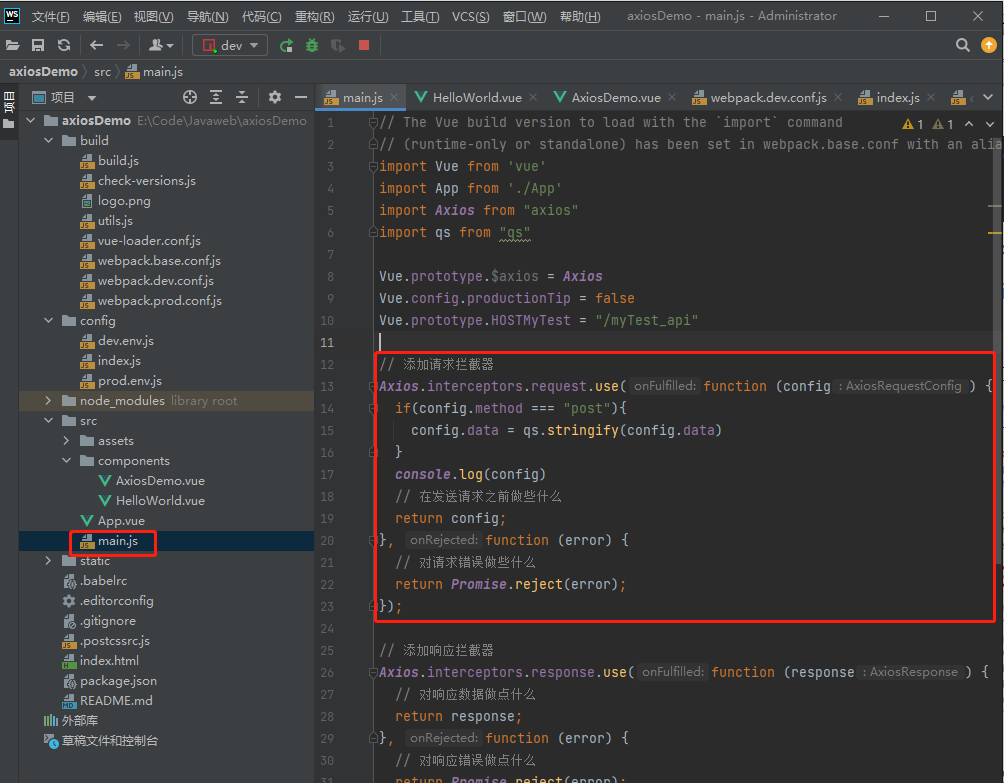
请求如下图:
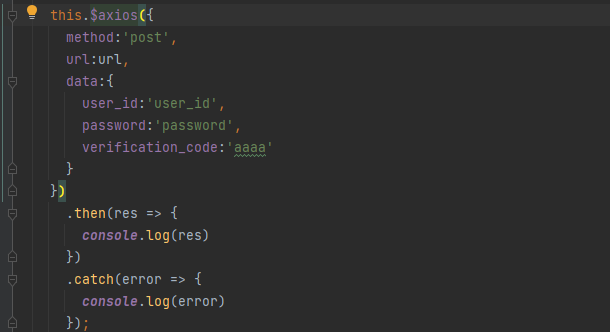
代码如下:
//请求的代码:
    this.$axios({


      method:'post',
      url:url,
      data:{


        user_id:'user_id',
        password:'password',
        verification_code:'aaaa'
      }
    })
      .then(res => {


        console.log(res)
      })
      .catch(error => {


        console.log(error)
      });
//main.js中拦截器的代码:
Axios.interceptors.request.use(function (config) {


  if(config.method === "post"){


    config.data = qs.stringify(config.data)
  }
  console.log(config)
  // 在发送请求之前做些什么
  return config;
}, function (error) {


  // 对请求错误做些什么
  return Promise.reject(error);
});
以上三种方法的效果都如下图所示:
2.4. Axios配置
2.4.1 全局axios默认值
Axios.defaults.baseURL = 'https://api.example.com';
//Axios.defaults.headers.common['Authorization'] = AUTH_TOKEN;
Axios.defaults.headers.post['Content-Type'] = 'application/x-www-form-urlencoded';
详见:https://www.kancloud.cn/yunye/axios/234845的请求配置小节
2.4.2 拦截器
// 添加请求拦截器
Axios.interceptors.request.use(function (config) {


    // 在发送请求之前做些什么
    return config;
  }, function (error) {


    // 对请求错误做些什么
    return Promise.reject(error);
  });

// 添加响应拦截器
Axios.interceptors.response.use(function (response) {


    // 对响应数据做点什么
    return response;
  }, function (error) {


    // 对响应错误做点什么
    return Promise.reject(error);
  });
**案例:**配置post请求的处理,以及响应的处理:
// 添加请求拦截器
Axios.interceptors.request.use(function (config) {


  if(config.method === "post"){


    config.data = qs.stringify(config.data)
  }
  console.log(config)
  // 在发送请求之前做些什么
  return config;
}, function (error) {


  // 对请求错误做些什么
  return Promise.reject(error);
});

// 添加响应拦截器
Axios.interceptors.response.use(function (response) {


  if(!response.data){


    return{


      msg:"数据返回不合理"
    }
  }
  // 对响应数据做点什么
  return response;
}, function (error) {


  // 对响应错误做点什么
  return Promise.reject(error);
});
2.5 跨域处理
可以看到图1所示的Vue框架中,webpack.dev.conf.js这里配置了代理,对应于config目录下的dev.proxylable类,如图2所示.
图1 webpack.dev.conf.js:
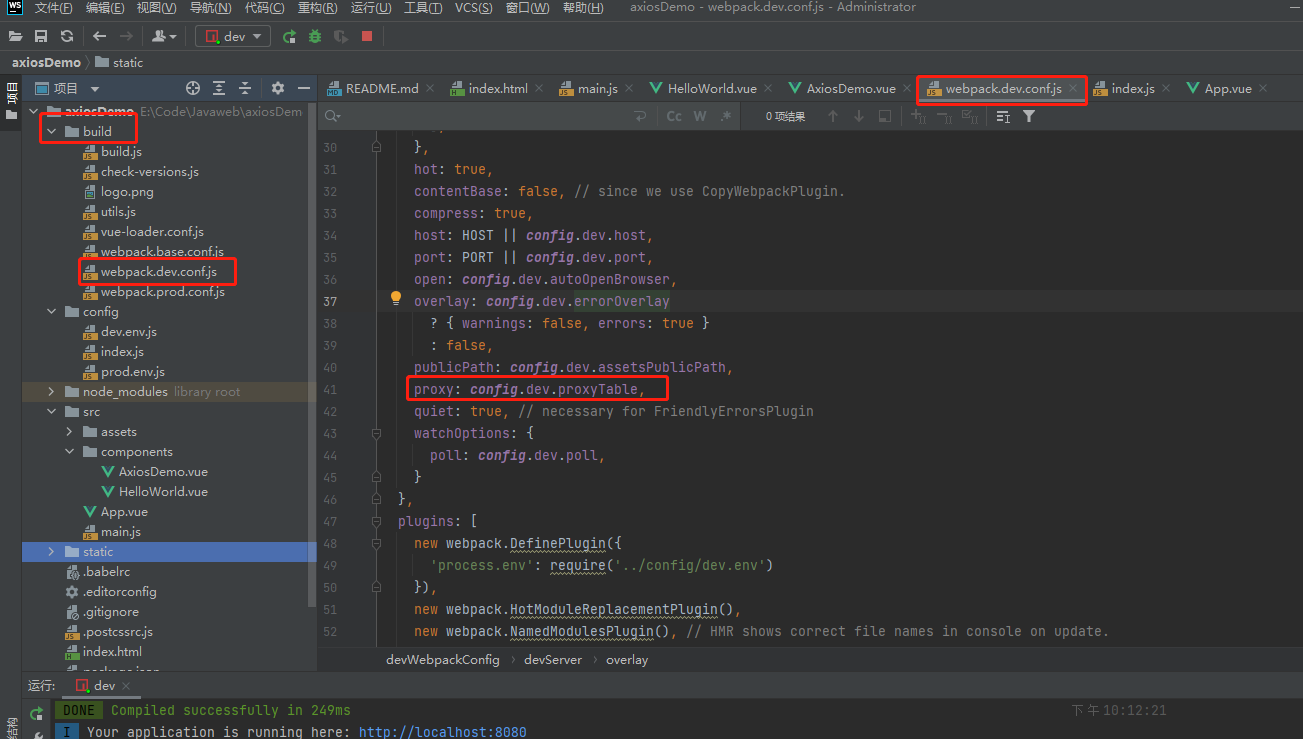
图2 配置index.js中的proxyTable:
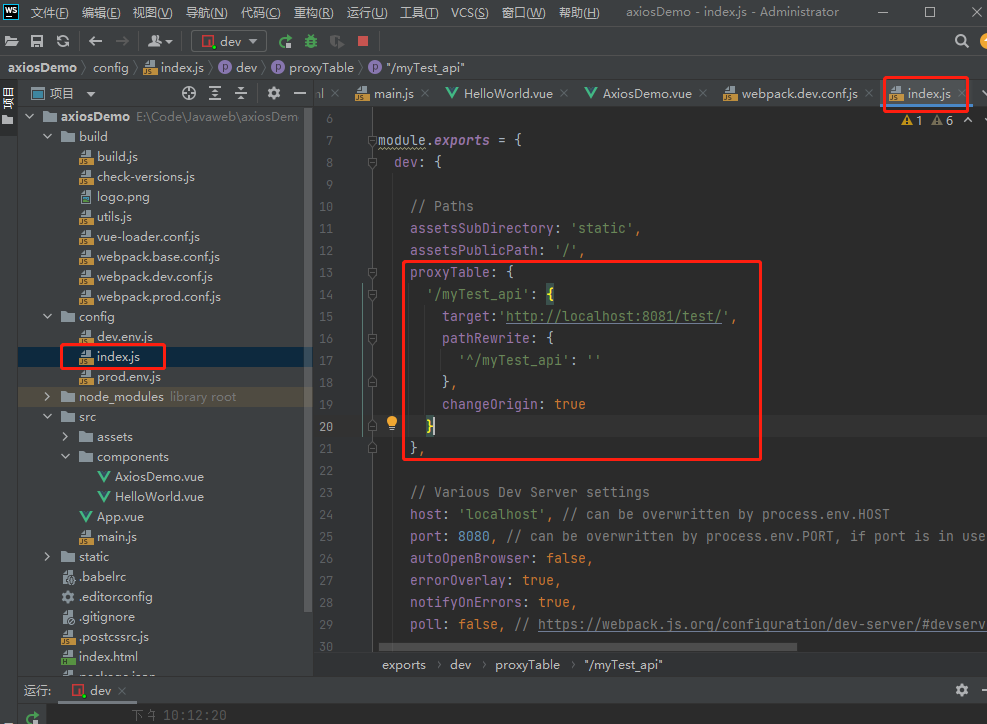
代码如下:
proxyTable: {


  '/myTest_api': {


    target:'http://localhost:8081/test/',
    pathRewrite: {


      '^/myTest_api': ''
    },
    changeOrigin: true
  }
}
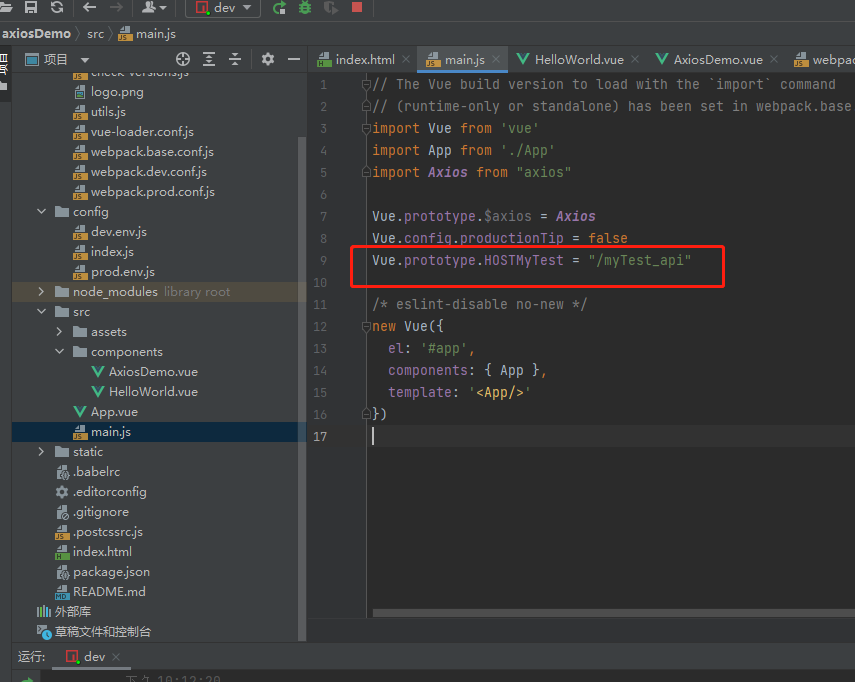
配置main.js
跨域访问的代码如下所示
<template>
<div>
  AxiosDemo
</div>
</template>

<script>
export default {


  data(){


    return {


    }
  },
  mounted() {


    var url = this.HOSTMyTest + 'customer/10';
    this.$axios({


        method:'get',
        url:url
    })
    .then(res => {


      console.log(res)
    })
    .catch(error => {


      console.log(res)
    })
  }
}
</script>

<style scoped>

</style>