一、ES集群结构
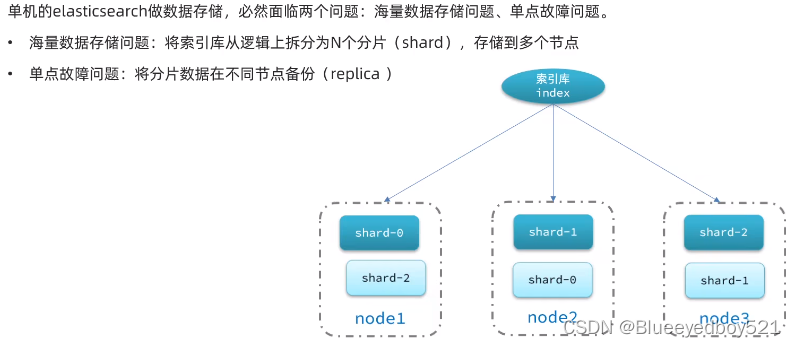
二、部署
通过docker-compose部署es集群。es最新版本:7.5.1
1、准备
mkdir -p /usr/local/es-group/elasticsearch/config

mkdir /usr/local/es-group/elasticsearch/{

    data1,data2,data3}
# 进入目录
cd /usr/local/es-group
# 把版本号设置到环境变量
echo 'ELK_VERSION=7.5.1' > .env
查看目录结构
tree .

.
├── docker-compose.yml
└── elasticsearch
    ├── config
    │   └── elasticsearch.yml
    ├── data1
    ├── data2
    ├── data3
    └── Dockerfile

5 directories, 3 files
2、修改Dockerfile
vim /usr/local/es-group/elasticsearch/Dockerfile
修改内容如下:
ARG ELK_VERSION=7.5.1

# https://github.com/elastic/elasticsearch-docker
# FROM docker.elastic.co/elasticsearch/elasticsearch:${ELK_VERSION}
FROM elasticsearch:${ELK_VERSION}
# Add your elasticsearch plugins setup here
# Example: RUN elasticsearch-plugin install analysis-icu
3、修改elasticsearch.yml
vim /usr/local/es-group/elasticsearch/config/elasticsearch.yml
内容如下:
---
## Default Elasticsearch configuration from Elasticsearch base image.
## https://github.com/elastic/elasticsearch/blob/master/distribution/docker/src/docker/config/elasticsearch.yml
#
cluster.name: "es-docker-cluster"
network.host: 0.0.0.0

## X-Pack settings
## see https://www.elastic.co/guide/en/elasticsearch/reference/current/setup-xpack.html
#
xpack.license.self_generated.type: trial                                #trial为试用版,一个月期限,可更改为basic版本
xpack.security.enabled: true
xpack.monitoring.collection.enabled: true

http.cors.enabled: true
http.cors.allow-origin: "*"
http.cors.allow-headers: Authorization,X-Requested-With,Content-Length,Content-Type
4、新建docker-compose.yml
version: '3.7'
services:
  es01:
    build:
      context: elasticsearch/
      args:
        ELK_VERSION: $ELK_VERSION
    container_name: es01
    volumes:
      - type: bind
        source: ./elasticsearch/config/elasticsearch.yml
        target: /usr/share/elasticsearch/config/elasticsearch.yml
        read_only: true
      - type: volume
        source: data01
        target: /usr/share/elasticsearch/data
    ports:
      - 9200:9200
    environment:
      - node.name=es01
      - cluster.name=es-docker-cluster
      - discovery.seed_hosts=es02,es03
      - cluster.initial_master_nodes=es01,es02,es03
      - bootstrap.memory_lock=true
      - "ES_JAVA_OPTS=-Xms512m -Xmx512m"
    ulimits:
      memlock:
        soft: -1
        hard: -1
    networks:
      - elastic
  es02:
    build:
      context: elasticsearch/
      args:
        ELK_VERSION: $ELK_VERSION
    container_name: es02
    volumes:
      - type: bind
        source: ./elasticsearch/config/elasticsearch.yml
        target: /usr/share/elasticsearch/config/elasticsearch.yml
        read_only: true
      - type: volume
        source: data02
        target: /usr/share/elasticsearch/data
    environment:
      - node.name=es02
      - cluster.name=es-docker-cluster
      - discovery.seed_hosts=es01,es03
      - cluster.initial_master_nodes=es01,es02,es03
      - bootstrap.memory_lock=true
      - "ES_JAVA_OPTS=-Xms512m -Xmx512m"
    ulimits:
      memlock:
        soft: -1
        hard: -1
    networks:
      - elastic
  es03:
    build:
      context: elasticsearch/
      args:
        ELK_VERSION: $ELK_VERSION
    container_name: es03
    volumes:
      - type: bind
        source: ./elasticsearch/config/elasticsearch.yml
        target: /usr/share/elasticsearch/config/elasticsearch.yml
        read_only: true
      - type: volume
        source: data03
        target: /usr/share/elasticsearch/data
    environment:
      - node.name=es03
      - cluster.name=es-docker-cluster
      - discovery.seed_hosts=es01,es02
      - cluster.initial_master_nodes=es01,es02,es03
      - bootstrap.memory_lock=true
      - "ES_JAVA_OPTS=-Xms512m -Xmx512m"
    ulimits:
      memlock:
        soft: -1
        hard: -1
    networks:
      - elastic

volumes:
  data01:
    driver: local
    driver_opts:
      type: none
      o: bind
      device: /usr/local/es-group/elasticsearch/data1

  data02:
    driver: local
    driver_opts:
      type: none
      o: bind
      device: /usr/local/es-group/elasticsearch/data2

  data03:
    driver: local
    driver_opts:
      type: none
      o: bind
      device: /usr/local/es-group/elasticsearch/data3

networks:
  elastic:
    driver: bridge
还可以这样定义:
version: '3.7'
services:
  es01:
    image: elasticsearch:7.5.1
    container_name: es01
    volumes:
      - data01:/usr/share/elasticsearch/data
    ports:
      - 9200:9200
    environment:
      - node.name=es01
      - cluster.name=es-docker-cluster
      - discovery.seed_hosts=es02,es03
      - cluster.initial_master_nodes=es01,es02,es03
      - bootstrap.memory_lock=true
      - "ES_JAVA_OPTS=-Xms512m -Xmx512m"
    networks:
      - elastic
  es02:
    image: elasticsearch:7.5.1
    container_name: es02
    volumes:
      - data02:/usr/share/elasticsearch/data
    ports:
      - 9201:9200
    environment:
      - node.name=es02
      - cluster.name=es-docker-cluster
      - discovery.seed_hosts=es01,es03
      - cluster.initial_master_nodes=es01,es02,es03
      - bootstrap.memory_lock=true
      - "ES_JAVA_OPTS=-Xms512m -Xmx512m"
    networks:
      - elastic
  es03:
    image: elasticsearch:7.5.1
    container_name: es03
    volumes:
      - data03:/usr/share/elasticsearch/data
    ports:
      - 9202:9200
    environment:
      - node.name=es03
      - cluster.name=es-docker-cluster
      - discovery.seed_hosts=es01,es02
      - cluster.initial_master_nodes=es01,es02,es03
      - bootstrap.memory_lock=true
      - "ES_JAVA_OPTS=-Xms512m -Xmx512m"
    networks:
      - elastic

volumes:
  data01:
    driver: local

  data02:
    driver: local

  data03:
    driver: local

networks:
  elastic:
    driver: bridge
5、es运行需要修改linux系统权限
方法一 逐行执行
# 编辑/etc/sysctl.conf
vi /etc/sysctl.conf
# 添加下面内容
vm.max_map_count=655360
# 然后执行命令让配置生效
sysctl -p
方法二 新建build.sh
if [ $(grep 'vm.max_map_count' /etc/sysctl.conf |wc -l) -eq 0 ] ; \
then echo 'vm.max_map_count=655360' >> /etc/sysctl.conf; \
fi
sysctl -p
执行
chmod +x build.sh
./build.sh
6、执行构建
docker-compose up --build -d
效果
docker ps

CONTAINER ID        IMAGE               COMMAND                  CREATED             STATUS              PORTS                              NAMES
5af70e32dbb8        elfk_es01           "/usr/local/bin/dock…"   14 seconds ago      Up 6 seconds        0.0.0.0:9200->9200/tcp, 9300/tcp   es01
793bab4160b7        elfk_es03           "/usr/local/bin/dock…"   14 seconds ago      Up 6 seconds        9200/tcp, 9300/tcp                 es03
93ffa61c639f        elfk_es02           "/usr/local/bin/dock…"   14 seconds ago      Up 6 seconds        9200/tcp, 9300/tcp                 es02
7、查看日志
docker logs -f es01
docker logs -f es02
docker logs -f es03
三、集群状态监控cerebro
1、简介
Cerebro 是 Elasticsearch 版本5.x 以前插件 Elasticsearch Kopf 的演变,可以通过图形界面查看分片分配和执行常见的索引操作。
Cerebro是一个使用Scala,Play Framework,AngularJS和Bootstrap构建的开源(MIT许可)elasticsearch web管理工具,比Kibana轻量很多,很适用与生产和测试等环境的es集群管理。
它是kopf的升级版本,更改了个名字,包含kopf的功能(监控工具,并包含head插件的部分功能,可图形化的进行新建索引等操作。
现在kopf已经不再更新,只对cerebro进行维护。
Cerebro的运行需要Java 1.8或更高版本才能运行。

官网:https://github.com/lmenezes/cerebro/releases
2、安装
下载
解压

启动
进入bin目录
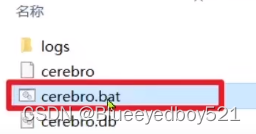
双击其中的cerebro.bat即可启动服务,端口是9000
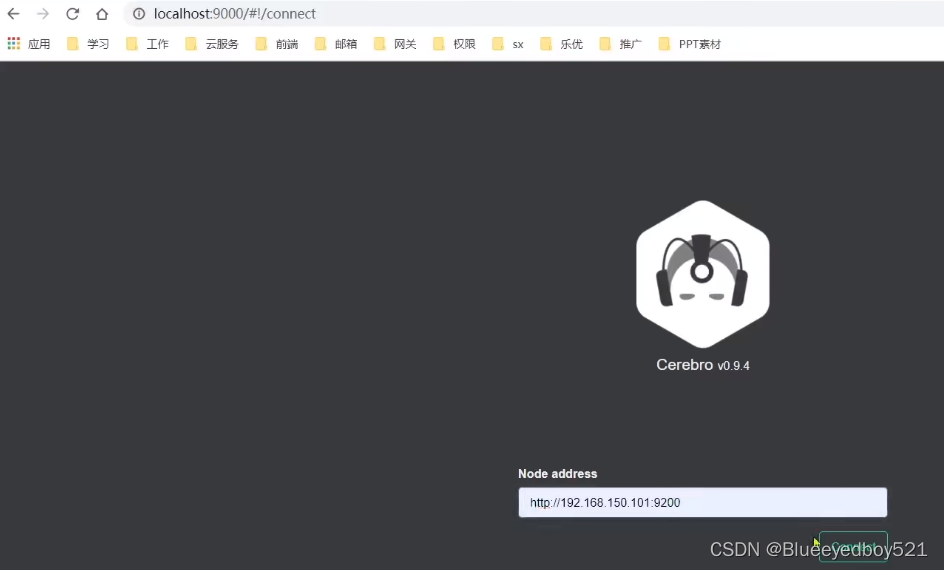
访问其中一个es

四、创建索引库
1、利用kibana的DevTools创建索引库
在DevTools中输入指令
PUT /itcast
{


	"settings": {


		"number_of_shards": 3, // 分片数量
		"number_of_replicas": 1 // 副本数量
	},
	"mappings": {


		"properties": {


			// mapping映射定义 ...
		}
	}
}
2、利用cerebro创建
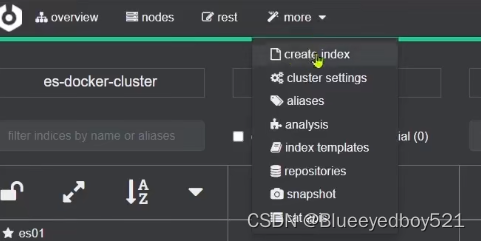

集群分片,备份效果:
