一、脚手架环境安装xios
命令:npm i axios
 二、在组件中引入axios
import axios from 'axios'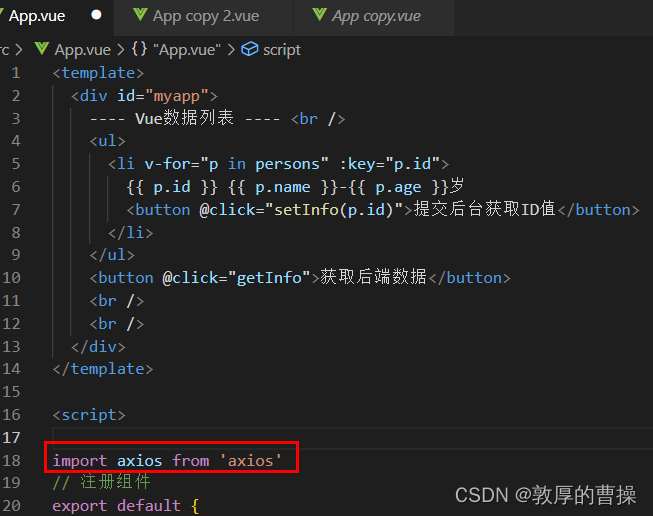
三、设置代理服务器
打开vue.config.js文件,添加以下代码(注意:端口号是第三方的端口号):
方式一:单个端口(不推荐使用)
  // 开启代理服务器
  devServer: {
    proxy: 'http://localhost:22911'
  }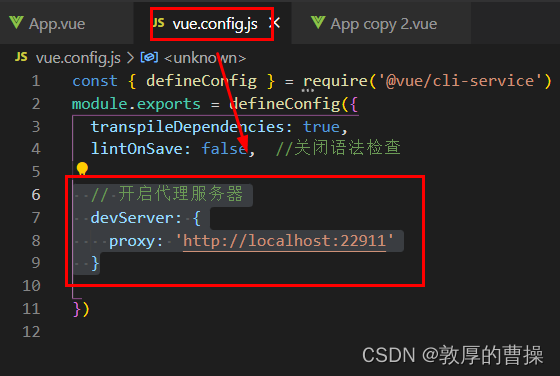
方式二:多个端口(推荐使用)vue.config.js
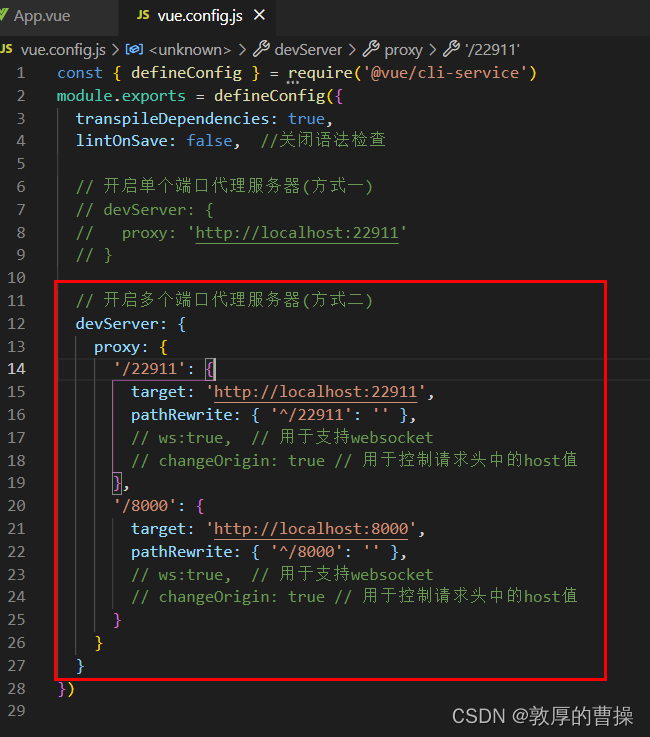
const { defineConfig } = require('@vue/cli-service')
module.exports = defineConfig({
  transpileDependencies: true,
  lintOnSave: false,  //关闭语法检查

  // 开启单个端口代理服务器(方式一)
  // devServer: {
  //   proxy: 'http://localhost:22911'
  // }

  // 开启多个端口代理服务器(方式二)
  devServer: {
    proxy: {
      '/22911': {
        target: 'http://localhost:22911',
        pathRewrite: { '^/22911': '' },
        // ws:true,  // 用于支持websocket
        // changeOrigin: true // 用于控制请求头中的host值
      },
      '/8000': {
        target: 'http://localhost:8000',
        pathRewrite: { '^/8000': '' },
        // ws:true,  // 用于支持websocket
        // changeOrigin: true // 用于控制请求头中的host值
      }
    }
  }
})
四、重新启动脚手架
先按ctrl+C退出,再npm run serve运行

五、App.vue组件
注意:使用方式二(多个端口)
代码中的8080端口不变,需要在后面增加一个/22911,就是你在vue.config.js文件中

<template>
<div id="myapp">
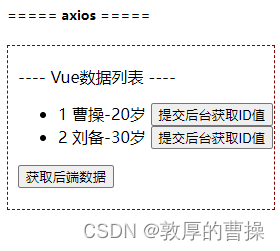
---- Vue数据列表 ---- <br />
<ul>
<li v-for="p in persons" :key="p.id">
{
{ p.id }} {
{ p.name }}-{
{ p.age }}岁
<button @click="setInfo(p.id)">提交后台获取ID值</button>
</li>
</ul>
<button @click="getInfo">获取后端数据</button>
<br />
<br />
</div>
</template>
<script>
import axios from "axios";
// 注册组件
export default {
name: "App",
data() {
return {
persons: [
{
id: "1",
name: "张飞",
age: 20,
},
{
id: "2",
name: "刘备",
age: 30,
},
{
id: "3",
name: "吕布",
age: 22,
},
],
};
},
methods: {
// 获取后端数据
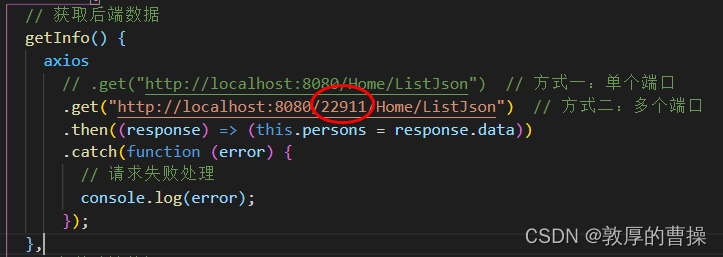
getInfo() {
axios
// .get("http://localhost:8080/Home/ListJson") // 方式一:单个端口
.get("http://localhost:8080/22911/Home/ListJson") // 方式二:多个端口
.then((response) => (this.persons = response.data))
.catch(function (error) {
// 请求失败处理
console.log(error);
});
},
// 发送后端数据
setInfo(a) {
alert("把当前记录ID:[" + a + "]提交给后台.");
axios
// .post("http://localhost:8080/Home/SubmitJson", // 方式一:单个端口
.post("http://localhost:8080/22911/Home/SubmitJson", // 方式二:多个端口
{
paramA: a,
})
.then((response) => alert(response.data))
.catch(function (error) {
// 请求失败处理
console.log(error);
});
},
},
};
</script>
<style scoped>
#myapp {
border: 1px rgb(134, 0, 0) dashed;
/* height: 400px; */
padding-top: 20px;
padding-left: 10px;
/* background-color: aqua; */
}
</style>