关于VirtualApk
VirtualApk github : https://github.com/didi/VirtualAPK
VirtualAPK wiki : https://github.com/didi/VirtualAPK/wiki
工程介绍
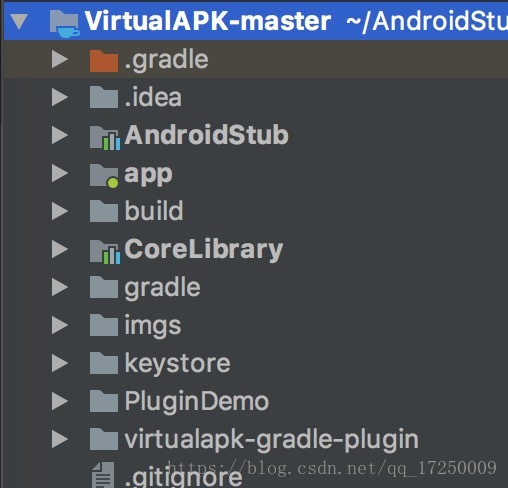
- CoreLibrary是VirtualApk(以下简称VA)的核心库,因为其中hook了一些被@hide注解的framework类,这些类无法被调用,所以这些无法被调用的类都放在了使用provided(Gradle3.0之后改为了compileOnly)依赖的库工程AndroidStub中,且路径与源码路径一致。
- AndroidStub : 无法被直接调用的系统类,仅在编译时获得引用。
- app :宿主程序
- PluginDemo : 示例插件程序
- VirtralApk-gradle-plugin : 自定义的Gradle插件
整个工程结构还是很清晰的,其中CoreLibrary是我们重点关注的对象
初始化 : PluginManager.getInstance(base).init()
VA的使用很简洁,首先在Application中初始化,在需要的地方load下插件APK,之后就可以像同一个工程一样去调用插件中的四大组件。看起来非常简洁,但是简洁不意味着简单。首先看下Application中的初始化。
public class VAApplication extends Application {

    @Override
    protected void attachBaseContext(Context base) {
        super.attachBaseContext(base);
        long start = System.currentTimeMillis();
        PluginManager.getInstance(base).init();
        Log.d("ryg", "use time:" + (System.currentTimeMillis() - start));
    }
}
从类名及方法名中可以看出PluginManager为全局插件管理单例对象,跟进。
    private PluginManager(Context context) {
        Context app = context.getApplicationContext();
        if (app == null) {
            this.mContext = context;
        } else {
            this.mContext = ((Application)app).getBaseContext();
        }
        prepare();
    }

    private void prepare() {
        Systems.sHostContext = getHostContext();
        this.hookInstrumentationAndHandler();
        if (Build.VERSION.SDK_INT >= 26) {
            this.hookAMSForO();
        } else {
            this.hookSystemServices();
        }
    }

    public void init() {
        mComponentsHandler = new ComponentsHandler(this);
        RunUtil.getThreadPool().execute(new Runnable() {
            @Override
            public void run() {
                doInWorkThread();
            }
        });
    }

    private void doInWorkThread() {
    }
在prepare()方法中先hook了Instrumentation和Handler,之后针对8.0之前和之后分别hook了AMS和SystemServices。做过测试的同学肯定对Instrumentation这个类很熟悉,它能实现一些比较niubility的功能,这里不再延伸。先看下怎么hook的这几个类吧。
hook Instrumentation and H
    private void hookInstrumentationAndHandler() {
        try {
            Instrumentation baseInstrumentation = ReflectUtil.getInstrumentation(this.mContext);
            if (baseInstrumentation.getClass().getName().contains("lbe")) {
                // reject executing in paralell space, for example, lbe.
                System.exit(0);
            }

            final VAInstrumentation instrumentation = new VAInstrumentation(this, baseInstrumentation);
            Object activityThread = ReflectUtil.getActivityThread(this.mContext);
            ReflectUtil.setInstrumentation(activityThread, instrumentation);
            ReflectUtil.setHandlerCallback(this.mContext, instrumentation);
            this.mInstrumentation = instrumentation;
        } catch (Exception e) {
            e.printStackTrace();
        }
    }

    public static Instrumentation getInstrumentation(Context base) {
        if (getActivityThread(base) != null) {
            try {
                sInstrumentation = (Instrumentation) ReflectUtil.invoke(
                        sActivityThread.getClass(), sActivityThread, "getInstrumentation");
            } catch (Exception e) {
                e.printStackTrace();
            }
        }

        return sInstrumentation;
    }

    public static Object getActivityThread(Context base) {
        if (sActivityThread == null) {
            try {
                Class<?> activityThreadClazz = Class.forName("android.app.ActivityThread");
                Object activityThread = null;
                try {
                    activityThread = ReflectUtil.getField(activityThreadClazz, null, "sCurrentActivityThread");
                } catch (Exception e) {
                    // ignored
                }
                if (activityThread == null) {
                    activityThread = ((ThreadLocal<?>) ReflectUtil.getField(activityThreadClazz, null, "sThreadLocal")).get();
                }
                sActivityThread = activityThread;
            } catch (Exception e) {
                e.printStackTrace();
            }
        }

        return sActivityThread;
    }
1.通过反射获取到ActivityThread中的sCurrentActivityThread对象,其实就是获取ActivityThread实例
2.通过反射ActivityThread#getInstrumentation方法获取系统的getInstrumentation对象
3.实例化继承自Instrumentation并且实现了Handler.Callback接口的VAInstrumentation对象
    public static void setInstrumentation(Object activityThread, Instrumentation instrumentation) {
        try {
            ReflectUtil.setField(activityThread.getClass(), activityThread, "mInstrumentation", instrumentation);
        } catch (Exception e) {
            e.printStackTrace();
        }
    }
4.通过反射将VAInstrumentation对象设置给ActivityThread的mInstrumentation属性
    public static void setHandlerCallback(Context base, Handler.Callback callback) {
        try {
            Object activityThread = getActivityThread(base);
            Handler mainHandler = (Handler) ReflectUtil.invoke(activityThread.getClass(), activityThread, "getHandler", (Object[])null);
            ReflectUtil.setField(Handler.class, mainHandler, "mCallback", callback);
        } catch (Exception e) {
            e.printStackTrace();
        }
    }
5.通过反射ActivityThread#getHandler方法获取ActivityThread中的mH对象,mH对象是H的一个实例,H继承自Handler。系统对四大组件包括生命周期等的调用,本质上都是通过这个叫做mH的Handler对象完成的。
6.因为VAInstrumentation实现了Handler.Callback接口,所以可以通过反射将VAInstrumentation对象设置给mH对象。
以上“六脉神剑”操作完成之后,系统再调用ActivityThread中的mInstrumentation或者mH,首先会进入到VAInstrumentation对应的方法中,这样就完成了对Instrumentation及mH的hook。
ps:这里有个小细节
public class VAInstrumentation extends Instrumentation implements Handler.Callback {
    @Override
    public boolean handleMessage(Message msg) {
        if (msg.what == LAUNCH_ACTIVITY) {
            ...
        }

        return false;
    }
}
VAInstrumentation#handleMessage直接return false。在Handler#dispatchMessage中
public void dispatchMessage(Message msg) {
        if (msg .callback != null) {
            handleCallback(msg);
        } else {
            if (mCallback != null) {
                if (mCallback .handleMessage(msg)) {
                    return;
                }
            }
            handleMessage( msg);
        }
}
VAInstrumentation相当于其中的mCallback对象,VAInstrumentation#handleMessage方法return false之后,不影响系统继续处理。目前实际来看,VAInstrumentation#handleMessage只是处理了插件包中Activity的theme信息。
对于插件化加载Activity的处理上面已经足够了,进一步的操作会在Activity章节分析。
hook IActivityManager(AMS)
    private void hookSystemServices() {
        try {
            Singleton<IActivityManager> defaultSingleton = (Singleton<IActivityManager>) ReflectUtil.getField(ActivityManagerNative.class, null, "gDefault");
            IActivityManager activityManagerProxy = ActivityManagerProxy.newInstance(this, defaultSingleton.get());

            // Hook IActivityManager from ActivityManagerNative
            ReflectUtil.setField(defaultSingleton.getClass().getSuperclass(), defaultSingleton, "mInstance", activityManagerProxy);

            if (defaultSingleton.get() == activityManagerProxy) {
                this.mActivityManager = activityManagerProxy;
            }
        } catch (Exception e) {
            e.printStackTrace();
        }
}通过反射获取ActivityManagerNative的gDefault属性(8.0之后是IActivityManagerSingleton属性,以下gDefault等同IActivityManagerSingleton),gDefault.get()返回的是AMS对象。这个过程可以参考Android Launcher启动应用程序流程源码解析中的“AMS中Binder机制简析”小节,直接搜索即可。
ActivityManagerProxy#newInstance使用动态代理的方式返回了代理AMS的ActivityManagerProxy对象,为了处理Service的声明周期问题(比如启动一个已经alive的service,不再次执行onCreate方法,只再次执行onStartCommend方法),在代理对象中拦截了startService、stopService、bindService、unbindService等操作,不在指定范围内的操作继续执行AMS原有操作。
通过反射设置gDefault对象的mInstance属性为代理AMS的ActivityManagerProxy对象
ps:这里有点小疑惑:hookAMSForO中没有像hookSystemServices中给mActivityManager属性赋值,那么在LocalService中反射调用service#attach的时候AMS为null,目测会有问题(service启动出错,更谈不上声明周期),已提issue。
加载插件 : PluginManager.getInstance(base).loadPlugin(apk)
    public void loadPlugin(File apk) throws Exception {
        ...
        LoadedPlugin plugin = LoadedPlugin.create(this, this.mContext, apk);
        if (null != plugin) {
            this.mPlugins.put(plugin.getPackageName(), plugin);
            // try to invoke plugin's application
            plugin.invokeApplication();
        }
    }
加载插件大概分为三步:
1. 解析插件APK所有信息并封装为LoadedPlugin对象
2. 把加载过的插件apk放进缓存Map,key为插件包名,value为封装完成的LoadedPlugin对象。可见VA是通过包名来区分不同的插件,并且重复加载相同包名的插件会报错throw new RuntimeException("plugin has already been loaded : " + mPackageInfo.packageName)
3. 反射调用插件包的Application
下面跟进上述步骤一和步骤三的细节
解析插件APK并封装为LoadedPlugin对象
public final class LoadedPlugin {

    public static LoadedPlugin create(PluginManager pluginManager, Context host, File apk) throws Exception {
        return new LoadedPlugin(pluginManager, host, apk);
    }
    LoadedPlugin(PluginManager pluginManager, Context context, File apk) throws PackageParser.PackageParserException {
        this.mPluginManager = pluginManager;
        this.mHostContext = context;
        this.mLocation = apk.getAbsolutePath();
        this.mPackage = PackageParserCompat.parsePackage(context, apk, PackageParser.PARSE_MUST_BE_APK);
        this.mPackage.applicationInfo.metaData = this.mPackage.mAppMetaData;
        this.mPackageInfo = new PackageInfo();
        this.mPackageInfo.applicationInfo = this.mPackage.applicationInfo;
        this.mPackageInfo.applicationInfo.sourceDir = apk.getAbsolutePath();
        this.mPackageInfo.signatures = this.mPackage.mSignatures;
        this.mPackageInfo.packageName = this.mPackage.packageName;
        if (pluginManager.getLoadedPlugin(mPackageInfo.packageName) != null) {
            throw new RuntimeException("plugin has already been loaded : " + mPackageInfo.packageName);
        }
        this.mPackageInfo.versionCode = this.mPackage.mVersionCode;
        this.mPackageInfo.versionName = this.mPackage.mVersionName;
        this.mPackageInfo.permissions = new PermissionInfo[0];
        this.mPackageManager = new PluginPackageManager();
        this.mPluginContext = new PluginContext(this);
        this.mNativeLibDir = context.getDir(Constants.NATIVE_DIR, Context.MODE_PRIVATE);
        this.mResources = createResources(context, apk);
        this.mClassLoader = createClassLoader(context, apk, this.mNativeLibDir, context.getClassLoader());

        tryToCopyNativeLib(apk);

        // Cache instrumentations
        Map<ComponentName, InstrumentationInfo> instrumentations = new HashMap<ComponentName, InstrumentationInfo>();
        for (PackageParser.Instrumentation instrumentation : this.mPackage.instrumentation) {
            instrumentations.put(instrumentation.getComponentName(), instrumentation.info);
        }
        this.mInstrumentationInfos = Collections.unmodifiableMap(instrumentations);
        this.mPackageInfo.instrumentation = instrumentations.values().toArray(new InstrumentationInfo[instrumentations.size()]);

        // Cache activities
        Map<ComponentName, ActivityInfo> activityInfos = new HashMap<ComponentName, ActivityInfo>();
        for (PackageParser.Activity activity : this.mPackage.activities) {
            activityInfos.put(activity.getComponentName(), activity.info);
        }
        this.mActivityInfos = Collections.unmodifiableMap(activityInfos);
        this.mPackageInfo.activities = activityInfos.values().toArray(new ActivityInfo[activityInfos.size()]);

        // Cache services
        Map<ComponentName, ServiceInfo> serviceInfos = new HashMap<ComponentName, ServiceInfo>();
        for (PackageParser.Service service : this.mPackage.services) {
            serviceInfos.put(service.getComponentName(), service.info);
        }
        this.mServiceInfos = Collections.unmodifiableMap(serviceInfos);
        this.mPackageInfo.services = serviceInfos.values().toArray(new ServiceInfo[serviceInfos.size()]);

        // Cache providers
        Map<String, ProviderInfo> providers = new HashMap<String, ProviderInfo>();
        Map<ComponentName, ProviderInfo> providerInfos = new HashMap<ComponentName, ProviderInfo>();
        for (PackageParser.Provider provider : this.mPackage.providers) {
            providers.put(provider.info.authority, provider.info);
            providerInfos.put(provider.getComponentName(), provider.info);
        }
        this.mProviders = Collections.unmodifiableMap(providers);
        this.mProviderInfos = Collections.unmodifiableMap(providerInfos);
        this.mPackageInfo.providers = providerInfos.values().toArray(new ProviderInfo[providerInfos.size()]);

        // Register broadcast receivers dynamically
        Map<ComponentName, ActivityInfo> receivers = new HashMap<ComponentName, ActivityInfo>();
        for (PackageParser.Activity receiver : this.mPackage.receivers) {
            receivers.put(receiver.getComponentName(), receiver.info);

            try {
                BroadcastReceiver br = BroadcastReceiver.class.cast(getClassLoader().loadClass(receiver.getComponentName().getClassName()).newInstance());
                for (PackageParser.ActivityIntentInfo aii : receiver.intents) {
                    this.mHostContext.registerReceiver(br, aii);
                }
            } catch (Exception e) {
                e.printStackTrace();
            }
        }
        this.mReceiverInfos = Collections.unmodifiableMap(receivers);
        this.mPackageInfo.receivers = receivers.values().toArray(new ActivityInfo[receivers.size()]);
    }
}
代码有点小长,但看起来非常整洁。一步步的看。
- 调用了PackageParserCompat.parsePackage解析插件apk里面的各种信息,parsePackage中调用了系统的PackageParser去解析各种信息,并做了不同版本的兼容处理。我猜这段是APK安装过程中的模板解析代码,不过我没看过这个,暂时就假设这里能获取所有需要的信息吧,so sad…
- 区分是否是Constants.COMBINE_RESOURCES模式,构造不同Resources。后续单独分析
- 创建每个插件apk的DexClassLoader,区分是否是Constants.COMBINE_CLASSLOADER模式,true(默认),则合并插件APK的dex文件到宿主APK的dex文件中。false,则不合并。并且无论合并还是不合并,LoadedPlugin中都保存了插件APK对应的DexClassLoader。
- 获取所有四大组件信息
- 动态注册所有静态Receiver
那么多代码主是解析并保存插件APK的所有信息,之后对插件apk的所有操作,通过对应的LoadedPlugin对象操作即可。
两种方式构造Resources
Constants.COMBINE_RESOURCES == true模式(默认)
在这种模式下,会将插件APK的资源和宿主APK的资源合并。这里还要再区分下Android L之前和之后。
由于资源做过分区,则在Android L后直接将插件包的apk地址addAssetPath之后就可以,但是在Android L之前,addAssetPath只是把补丁包加入到资源路径列表里,但是资源的解析其实是在很早的时候就已经执行完了。所以在 Android L 之前是需要想办法构造一个新的AssetManager里mResources才行。VirtualAPK 资源篇
class ResourcesManager {

    public static synchronized Resources createResources(Context hostContext, String apk) {
        Resources hostResources = hostContext.getResources();
        Resources newResources = null;
        // 宿主AssetManager
        AssetManager assetManager;
        try {
            if (Build.VERSION.SDK_INT < Build.VERSION_CODES.LOLLIPOP) {
                // L之前通过反射重新构造AssetManager
                assetManager = AssetManager.class.newInstance();
                ReflectUtil.invoke(AssetManager.class, assetManager, "addAssetPath", hostContext.getApplicationInfo().sourceDir);
            } else {
                // L及以后,直接获取AssetManager即可
                assetManager = hostResources.getAssets();
            }
            // 加载插件apk资源
            ReflectUtil.invoke(AssetManager.class, assetManager, "addAssetPath", apk);
            List<LoadedPlugin> pluginList = PluginManager.getInstance(hostContext).getAllLoadedPlugins();
            // 加载所有已经load过的插件apk资源
            for (LoadedPlugin plugin : pluginList) {
                ReflectUtil.invoke(AssetManager.class, assetManager, "addAssetPath", plugin.getLocation());
            }
            ...
            // 更新所有Resources对象都指向newResources
            for (LoadedPlugin plugin : pluginList) {
                plugin.updateResources(newResources);
            }
        } catch (Exception e) {
            e.printStackTrace();
        }

        return newResources;

    }
Constants.COMBINE_RESOURCES == false模式
    @WorkerThread
    private static Resources createResources(Context context, File apk) {
        if (Constants.COMBINE_RESOURCES) {
            Resources resources = ResourcesManager.createResources(context, apk.getAbsolutePath());
            ResourcesManager.hookResources(context, resources);
            return resources;
        } else {
            Resources hostResources = context.getResources();
            AssetManager assetManager = createAssetManager(context, apk);
            return new Resources(assetManager, hostResources.getDisplayMetrics(), hostResources.getConfiguration());
        }
    }

    private static AssetManager createAssetManager(Context context, File apk) {
        try {
            AssetManager am = AssetManager.class.newInstance();
            ReflectUtil.invoke(AssetManager.class, am, "addAssetPath", apk.getAbsolutePath());
            return am;
        } catch (Exception e) {
            e.printStackTrace();
            return null;
        }
}这种使用插件APK的Resources对象,插件APK的资源由插件Resources对象查找,宿主APK资源由宿主Resources对象查找。这种多Resources方式也是之前分析过的换肤框架AndSkin动态加载外部资源的方式。
两种对dex的处理
Constants.COMBINE_CLASSLOADER = false
    private static ClassLoader createClassLoader(Context context, File apk, File libsDir, ClassLoader parent) {
        File dexOutputDir = context.getDir(Constants.OPTIMIZE_DIR, Context.MODE_PRIVATE);
        String dexOutputPath = dexOutputDir.getAbsolutePath();
        DexClassLoader loader = new DexClassLoader(apk.getAbsolutePath(), dexOutputPath, libsDir.getAbsolutePath(), parent);
        if (Constants.COMBINE_CLASSLOADER) {
            DexUtil.insertDex(loader);
        }
        return loader;
    }
对插件dex不做任何处理,需要load插件类的时候,直接调用这里对应的DexClassLoader即可。
Constants.COMBINE_CLASSLOADER = true(默认)
DexUtil.insertDex(loader)在生成DexClassLoader的基础上,再将插件APK的dex文件添加到到宿主APK dex文件的末尾,大概过程如下
    public static void insertDex(DexClassLoader dexClassLoader) throws Exception {
        Object baseDexElements = getDexElements(getPathList(getPathClassLoader()));
        Object newDexElements = getDexElements(getPathList(dexClassLoader));
        Object allDexElements = combineArray(baseDexElements, newDexElements);
        Object pathList = getPathList(getPathClassLoader());
        ReflectUtil.setField(pathList.getClass(), pathList, "dexElements", allDexElements);

        insertNativeLibrary(dexClassLoader);

    }
貌似这里合并dex与否,似乎都不影响loadClass的过程,并没有看到合并dex文件真正起作用的地方。照常理,合并dex之后可以采用单ClassLoader去load插件类,笔者尝试将VAInstrumentation#newActivity中的
Activity activity = mBase.newActivity(plugin.getClassLoader(), targetClassName, intent)修改为
Activity activity = mBase.newActivity(cl, targetClassName, intent)发现确实像预期中一样:合并dex之后,可以用宿主的ClassLoader去加载插件中的类。这里姑且斗胆揣摩作者设置Constants.COMBINE_CLASSLOADER模式是为了切换日后方便切换单ClassLoder和多ClassLoader架构。
有一种热修复方案是采用合并dex,只需要将patch.dex插在在宿主dex前面即可。JVM在patch.dex中加载到目标类(修复过bug的类)之后,不会再去下一个dex中查找,这样就完成了热修复的过程。
反射调用插件包的Application
    public void invokeApplication() {
        if (mApplication != null) {
            return;
        }

        // make sure application's callback is run on ui thread.
        RunUtil.runOnUiThread(new Runnable() {
            @Override
            public void run() {
                mApplication = makeApplication(false, mPluginManager.getInstrumentation());
            }
        }, true);
    }

    private Application makeApplication(boolean forceDefaultAppClass, Instrumentation instrumentation) {
        if (null != this.mApplication) {
            return this.mApplication;
        }

        String appClass = this.mPackage.applicationInfo.className;
        if (forceDefaultAppClass || null == appClass) {
            appClass = "android.app.Application";
        }

        try {
            this.mApplication = instrumentation.newApplication(this.mClassLoader, appClass, this.getPluginContext());
            instrumentation.callApplicationOnCreate(this.mApplication);
            return this.mApplication;
        } catch (Exception e) {
            e.printStackTrace();
            return null;
        }
    }
这个过程比较简单,在newApplication方法中会反射获取Application实例并调用Application#attach,callApplicationOnCreate方法名已经够清楚了…这个过程是模仿系统LoadedApk#makeApplication()方法创建插件Application并调用Application#attach和Application#onCreate。
Activity
前面叙述了一大堆初始化和loadPlugin的逻辑,在启动插件Activity的时候,关键信息有如下几个:
- hook Instrumentation
- hook H
- 两种结构的resource
- 两种模式的ClassLoader(对于插件,实际只用了插件的ClassLoader)
VA使用占坑的方式启动插件Activity。为了适配不同的LaunchMode、Theme,VA在CoreLibrary的AndroidManifest.xml中注册了很多占坑Activity。因为VA启动插件Activity表面上没做骚操作(其实骚操作都在hook的类中),所以这里必须要对Activity的启动流程有一些了解,强烈推荐阅读:
由于插件Activity没有在宿主Activity中注册(可以提前注册,不过没必要),所以需要躲过AMS对插件Activity是否存在的验证,VA的做法是在验证前,将插件Activity的名字替换为占坑Activity类名,在真正加载及实例化Activity的时候再讲占坑类名替换为插件Activity,如此,变完成了“偷梁换柱”的过程。
无论调用StartActivity()还是startActivityForResult(),最终调用的都是startActivityForResult()。在startActivityForResult中调用了Instrumentation#execStartActivity。VA hook了这个API。
    public ActivityResult execStartActivity(
            Context who, IBinder contextThread, IBinder token, Activity target,
            Intent intent, int requestCode, Bundle options) {
        mPluginManager.getComponentsHandler().transformIntentToExplicitAsNeeded(intent);
        // null component is an implicitly intent
        if (intent.getComponent() != null) {
            Log.i(TAG, String.format("execStartActivity[%s : %s]", intent.getComponent().getPackageName(),
                    intent.getComponent().getClassName()));
            // resolve intent with Stub Activity if needed
            this.mPluginManager.getComponentsHandler().markIntentIfNeeded(intent);
        }

        ActivityResult result = realExecStartActivity(who, contextThread, token, target,
                    intent, requestCode, options);

        return result;

    }

    private ActivityResult realExecStartActivity(
            Context who, IBinder contextThread, IBinder token, Activity target,
            Intent intent, int requestCode, Bundle options) {
        ActivityResult result = null;
        try {
            Class[] parameterTypes = {Context.class, IBinder.class, IBinder.class, Activity.class, Intent.class,
            int.class, Bundle.class};
            result = (ActivityResult)ReflectUtil.invoke(Instrumentation.class, mBase,
                    "execStartActivity", parameterTypes,
                    who, contextThread, token, target, intent, requestCode, options);
        } catch (Exception e) {
            if (e.getCause() instanceof ActivityNotFoundException) {
                throw (ActivityNotFoundException) e.getCause();
            }
            e.printStackTrace();
        }

        return result;
    }
从这里开始,脑子一直要有两条线:1、加载的是宿主Activity,2、加载的是插件Activity。在VAInstrumentation#execStartActivity中依据插件Activity的LaunchMode、Theme找到合适的占坑类,之后反射调用系统的execStartActivity方法。对于启动插件Activity的Intent还会put几个插件Activity相关的信息
    public void markIntentIfNeeded(Intent intent) {
        if (intent.getComponent() == null) {
            return;
        }

        String targetPackageName = intent.getComponent().getPackageName();
        String targetClassName = intent.getComponent().getClassName();
        // search map and return specific launchmode stub activity
        if (!targetPackageName.equals(mContext.getPackageName()) && mPluginManager.getLoadedPlugin(targetPackageName) != null) {
            intent.putExtra(Constants.KEY_IS_PLUGIN, true);
            intent.putExtra(Constants.KEY_TARGET_PACKAGE, targetPackageName);
            intent.putExtra(Constants.KEY_TARGET_ACTIVITY, targetClassName);
            dispatchStubActivity(intent);
        }
    }
上文虽然替换了插件Activity为占坑类,但load的时候还是要处理插件Activity,而不是占坑类。所以这里只是相当于保存了一下插件Activity信息。
ActivityThread在收到mH(已被hook)的LAUNCH_ACTIVITY消息后,才会真正装载Activity继而调用attach、onCreate。
public final class ActivityThread {
    ...
    final H mH = new H();
    ...
        private class H extends Handler {
        public static final int LAUNCH_ACTIVITY         = 100;
        ...
        public void handleMessage(Message msg) {
            switch (msg.what) {
                case LAUNCH_ACTIVITY: {
                    handleLaunchActivity(r, null);
                } break;
                ...
            }
        }
    }
}

    private final void handleLaunchActivity(ActivityClientRecord r, Intent customIntent) {
        ......
        // 加载activity,然后调用onCreate,onStart方法
        Activity a = performLaunchActivity(r, customIntent);
        if (a != null) {
            // 调用onResume方法
            handleResumeActivity(r.token, false, r.isForward,
                    !r.activity.mFinished && !r.startsNotResumed);
            ...
        }
        ...
    }

    private Activity performLaunchActivity(ActivityClientRecord r, Intent customIntent) {
            activity = mInstrumentation.newActivity(cl, component.getClassName(), r.intent);
            if (r.isPersistable()) {
                mInstrumentation.callActivityOnCreate(activity, r.state, r.persistentState);
            } else {
                mInstrumentation.callActivityOnCreate(activity, r.state);
            }
            ...
    }
VA在VAInstrumentation中hook了newActivity、callActivityOnCreate、LAUNCH_ACTIVITY消息
LAUNCH_ACTIVITY消息
LAUNCH_ACTIVITY是第一步,其中判断是否为插件Activity,如果是,则替换Theme。
    public boolean handleMessage(Message msg) {
        if (msg.what == LAUNCH_ACTIVITY) {
            // ActivityClientRecord r
            Object r = msg.obj;
            try {
                Intent intent = (Intent) ReflectUtil.getField(r.getClass(), r, "intent");
                intent.setExtrasClassLoader(VAInstrumentation.class.getClassLoader());
                ActivityInfo activityInfo = (ActivityInfo) ReflectUtil.getField(r.getClass(), r, "activityInfo");

                if (PluginUtil.isIntentFromPlugin(intent)) {
                    int theme = PluginUtil.getTheme(mPluginManager.getHostContext(), intent);
                    if (theme != 0) {
                        Log.i(TAG, "resolve theme, current theme:" + activityInfo.theme + "  after :0x" + Integer.toHexString(theme));
                        activityInfo.theme = theme;
                    }
                }
            } catch (Exception e) {
                e.printStackTrace();
            }
        }

        return false;
    }
newActivity
VA对插件Activity的骚操作就在这里
    @Override
    public Activity newActivity(ClassLoader cl, String className, Intent intent) throws InstantiationException, IllegalAccessException, ClassNotFoundException {
        try {
            cl.loadClass(className);
        } catch (ClassNotFoundException e) {
            LoadedPlugin plugin = this.mPluginManager.getLoadedPlugin(intent);
            String targetClassName = PluginUtil.getTargetActivity(intent);

            Log.i(TAG, String.format("newActivity[%s : %s]", className, targetClassName));

            if (targetClassName != null) {
                Log.i(TAG, String.format("newActivity[%s : %s]", className, targetClassName));
                Activity activity = mBase.newActivity(plugin.getClassLoader(), targetClassName, intent);
                // 单ClassLoder架构
//                Activity activity = mBase.newActivity(cl, targetClassName, intent);
                activity.setIntent(intent);

                try {
                    // for 4.1+
                    ReflectUtil.setField(ContextThemeWrapper.class, activity, "mResources", plugin.getResources());
                } catch (Exception ignored) {
                    // ignored.
                }

                return activity;
            }
        }

        return mBase.newActivity(cl, className, intent);
    }
先尝试加载类,如果是宿主Activity,那么肯定能找到,直接交给系统处理就好,如果是插件Activity,这里的className为占坑类名,那么会发生ClassNotFoundException。也就意味着,如果发生ClassNotFoundException,那么直接对插件Activity进行处理就好。因为之前在Ientent中put了Constants.KEY_IS_PLUGIN,这里其实还可以从Intent中取value判断。在catch代码中先从Intent中依据之前put进去的key取出插件Activity类名,再替换占坑类名为为插件Activity类名,如此、便完成了一出精彩的“偷梁换柱”。
Service
在初始化中通过动态代理的方式hook了AMS并设置为ActivityManagerProxy对象,之后对AMS任何方法的调用都会先进入到ActivityManagerProxy#invoke方法。在invoke方法中可以拦截指定操作。
VA启动插件Service的套路
通过动态代理hook了AMS,并拦截启动/停止Service的API。首先判断是否为宿主Service,如果是,那么不做任何操作;如果不是,hook API实现自己的操作。具体体现为启动插件Service之前,依据是否是多进程模式,启动代理LocalService/RemoteService,在代理Service中实现对目标Service声明周期的调用。下面是一些具体细节的跟进。
framework对startService的简单执行流程如下
ContextImpl#startService->ContextImpl#startServiceCommon->AMS#startService/AMS#bindService
这个hook的入口比较靠前,只hook了几个启动/停止Service相关的API。
启动代理Service
    public Object invoke(Object proxy, Method method, Object[] args) throws Throwable {
        if ("startService".equals(method.getName())) {
            try {
                return startService(proxy, method, args);
            } catch (Throwable e) {
                Log.e(TAG, "Start service error", e);
            }
        } else if ("bindService".equals(method.getName())) {
            try {
                return bindService(proxy, method, args);
            } catch (Throwable e) {
                Log.e(TAG, "Stop Service error", e);
            }
        }
        ...
        return method.invoke(this.mActivityManager, args);
    }
这里以sample中bindService为例。在ActivityManagerProxy(以下简称AMP)中,hook了bindService API。
    private Object bindService(Object proxy, Method method, Object[] args) throws Throwable {
        Intent target = (Intent) args[2];
        ResolveInfo resolveInfo = this.mPluginManager.resolveService(target, 0);
        if (null == resolveInfo || null == resolveInfo.serviceInfo) {
            // is host service
            return method.invoke(this.mActivityManager, args);
        }

        Bundle bundle = new Bundle();
        PluginUtil.putBinder(bundle, "sc", (IBinder) args[4]);
        startDelegateServiceForTarget(target, resolveInfo.serviceInfo, bundle, RemoteService.EXTRA_COMMAND_BIND_SERVICE);
        mPluginManager.getComponentsHandler().remberIServiceConnection((IBinder) args[4], target);
        return 1;
    }
首先查询是否为宿主Service,对于宿主Service什么都不用做,直接调用并return即可。args[4]为ServiceConnection对象,先put进Bundle。之后便是启动代理Service。
    private ComponentName startDelegateServiceForTarget(Intent target, ServiceInfo serviceInfo, Bundle extras, int command) {
        Intent wrapperIntent = wrapperTargetIntent(target, serviceInfo, extras, command);
        return mPluginManager.getHostContext().startService(wrapperIntent);
    }

    private Intent wrapperTargetIntent(Intent target, ServiceInfo serviceInfo, Bundle extras, int command) {
        // fill in service with ComponentName
        target.setComponent(new ComponentName(serviceInfo.packageName, serviceInfo.name));
        String pluginLocation = mPluginManager.getLoadedPlugin(target.getComponent()).getLocation();

        // start delegate service to run plugin service inside
        boolean local = PluginUtil.isLocalService(serviceInfo);
        Class<? extends Service> delegate = local ? LocalService.class : RemoteService.class;
        Intent intent = new Intent();
        intent.setClass(mPluginManager.getHostContext(), delegate);
        intent.putExtra(RemoteService.EXTRA_TARGET, target);
        intent.putExtra(RemoteService.EXTRA_COMMAND, command);
        intent.putExtra(RemoteService.EXTRA_PLUGIN_LOCATION, pluginLocation);
        if (extras != null) {
            intent.putExtras(extras);
        }

        return intent;
}startDelegateServiceForTarget中首先替换插件Service为代理Service,之后启动代理Service。在AMP#wrapperTargetIntent方法中,首先依据进程名是否相同决定启动LocalService/RemoteService,之后重新创建了一个Intent,为了后面启动插件Service,然后把之前的Intent当做一个value传递给了重新创建的Intent,最后启动代理Service。VA对Service的“偷梁换柱”就发生在这里,之后对插件Service的启动包括生命周期的管理都放在了代理Service中。跟进。
sample中bindService的BookManagerService另开了一个进程,所以对应启动的是RemoteService。因为RemoteService继承LocalService,所以startService启动RemoteService,对应的生命周期为
RemoteService#onCreate -> LocalService#onCreate -> RemoteService#onCreate#onStartCommand -> LocalService#onStartCommand
新开了一个名为“package:daemon”进程,在RemoteService#onCreate#onStartCommand只是做了一个检测插件APK是否被load的操作,主要内容还是在LocalService中。
public class LocalService extends Service {
    @Override
    public int onStartCommand(Intent intent, int flags, int startId) {
        if (null == intent || !intent.hasExtra(EXTRA_TARGET) || !intent.hasExtra(EXTRA_COMMAND)) {
            return START_STICKY;
        }

        Intent target = intent.getParcelableExtra(EXTRA_TARGET);
        int command = intent.getIntExtra(EXTRA_COMMAND, 0);
        if (null == target || command <= 0) {
            return START_STICKY;
        }

        ComponentName component = target.getComponent();
        LoadedPlugin plugin = mPluginManager.getLoadedPlugin(component);
        // ClassNotFoundException when unmarshalling in Android 5.1
        target.setExtrasClassLoader(plugin.getClassLoader());
        switch (command) {
            case EXTRA_COMMAND_BIND_SERVICE: {
                ActivityThread mainThread = (ActivityThread)ReflectUtil.getActivityThread(getBaseContext());
                IApplicationThread appThread = mainThread.getApplicationThread();
                Service service = null;

                if (this.mPluginManager.getComponentsHandler().isServiceAvailable(component)) {
                    service = this.mPluginManager.getComponentsHandler().getService(component);
                } else {
                    try {
                        service = (Service) plugin.getClassLoader().loadClass(component.getClassName()).newInstance();

                        Application app = plugin.getApplication();
                        IBinder token = appThread.asBinder();
                        Method attach = service.getClass().getMethod("attach", Context.class, ActivityThread.class, String.class, IBinder.class, Application.class, Object.class);
                        IActivityManager am = mPluginManager.getActivityManager();

                        attach.invoke(service, plugin.getPluginContext(), mainThread, component.getClassName(), token, app, am);
                        service.onCreate();
                        this.mPluginManager.getComponentsHandler().rememberService(component, service);
                    } catch (Throwable t) {
                        t.printStackTrace();
                    }
                }
                try {
                    IBinder binder = service.onBind(target);
                    IBinder serviceConnection = PluginUtil.getBinder(intent.getExtras(), "sc");
                    IServiceConnection iServiceConnection = IServiceConnection.Stub.asInterface(serviceConnection);
                    if (Build.VERSION.SDK_INT >= 26) {
                        ReflectUtil.invokeNoException(IServiceConnection.class, iServiceConnection, "connected",
                                new Class[]{ComponentName.class, IBinder.class, boolean.class},
                                new Object[]{component, binder, false});
                    } else {
                        iServiceConnection.connected(component, binder);
                    }
                } catch (Exception e) {
                    e.printStackTrace();
                }
                break;
                ...
            }
        return START_STICKY;
    }
}
首先从Intent中取出之前set进去的一些对象,名为target的Intent对象才是启动插件Service的Intent。之后依据command,去做相应的操作,这里command为bindService对应的EXTRA_COMMAND_BIND_SERVICE。
插件Service的加载及生命周期的处理
在EXTRA_COMMAND_BIND_SERVICE分支中,首先判断插件Service是否存活,这个判断的逻辑比较简单,ComponentsHandler有个缓存的Map,启动插件Service的时候往这个Map添加,停止插件Service的时候移除。判断下这个Map对象指定key是否能查询到value即可。这里分两种情况:
- 插件Service已经存活,获取Service对象即可。
- 插件Service没有存活,需要手动load serviceClass,然后调用newInstance获取插件Service实例,最后调用Service#attach(反射)和Service#onCreate。
现在无论之前插件Service是否存活,现在都完成了Service调用attach onCreate这么一个操作。之后手动调用Service#onBind,最后调用ServiceConnection#onServiceConnected即可。通过代理Service的一通操作,就实现了插件Service的加载及生命周期管理。打完收工~
BroadCast
将所有静态广播修改为动态注册,由此带来的一些限制详见wiki。
ContentProvider
// TODO 工作中貌似就没用过ContentProvider,不想看了….