目录
前言
本文研究支持多种代理的一个工具,nps
github:https://github.com/ehang-io/nps
一、概述
1、简介
写于2018年,持续更新,用Go编写,支持多种协议,有GUI
- 需要管理员权限
- 协议支持全面,:tcp、udp、http(s)、socks5、p2p、http代理…
- 全平台兼容(linux、windows、macos、群辉等),支持一键安装为系统服务
- 控制全面,同时支持服务端和客户端控制
- https集成,支持将后端代理和web服务转成https,同时支持多证书
- 操作简单,只需简单的配置即可在web ui上完成其余操作
- 展示信息全面,流量、系统信息、即时带宽、客户端版本等
- 扩展功能强大,该有的都有了(缓存、压缩、加密、流量限制、带宽限制、端口复用等等)
- 域名解析具备自定义header、404页面配置、host修改、站点保护、URL路由、泛解析等功能
- 服务端支持多用户和用户注册功能
2、原理
内容太丰富了,是个大集合
3、用法
参见官网:https://ehang-io.github.io/nps/#/
(1)服务端
配置文件nps/conf/nps.conf
安装
- 对于linux|darwin:
sudo ./nps install - 对于windows,管理员身份运行cmd,进入安装目录
nps.exe install
启动
- 对于linux|darwin:
sudo nps start - 对于windows,管理员身份运行cmd,进入程序目录:
nps.exe start
安装后windows配置文件位于 C:\Program Files\nps,linux和darwin位于/etc/nps
停止和重启可用,stop和restart
- 访问服务端
ip:web服务端口(默认为8080) - 使用用户名和密码登陆(默认admin/123,正式使用一定要更改)
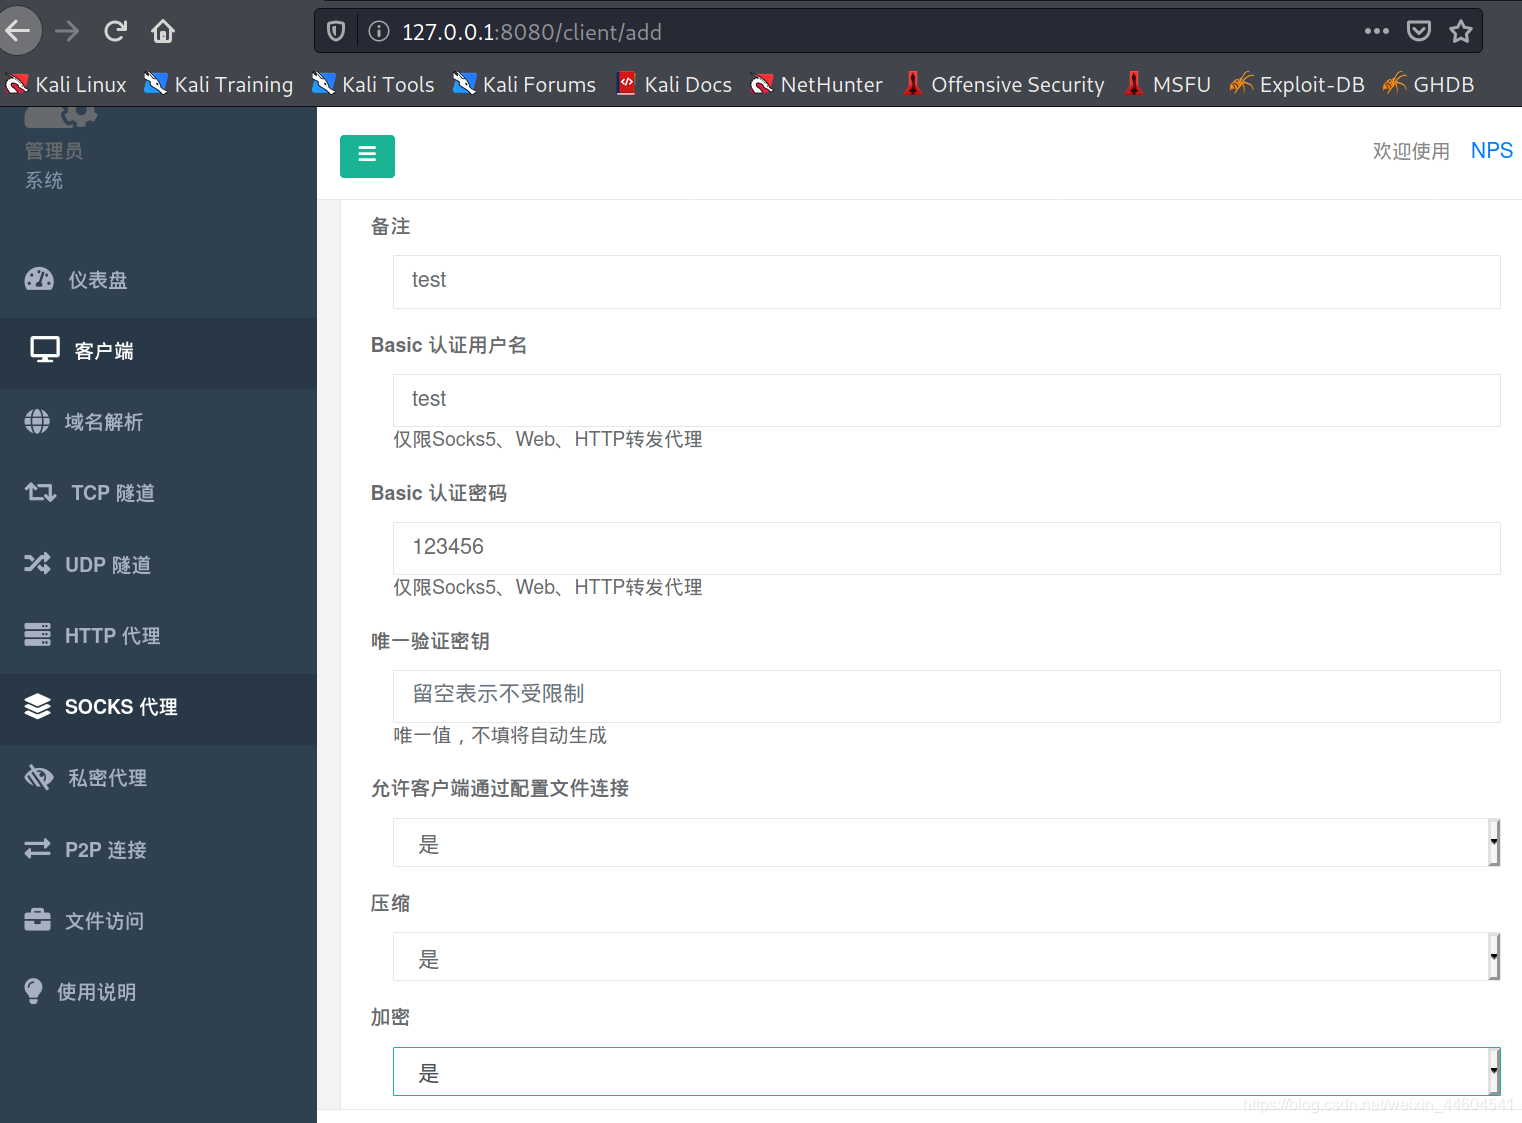
- 创建客户端
(2)客户端
可以无配置文件,直接在服务端做好配置,然后将命令在客户端执行
./npc -server=ip:port -vkey=web界面中显示的密钥
也可以设置配置文件,那功能就多了,参见官网
二、实践
1、测试场景
攻击机(服务端):kali 192.168.10.128
目标机(客户端):ubuntu 192.168.10.129
2、建立隧道
(1)服务端
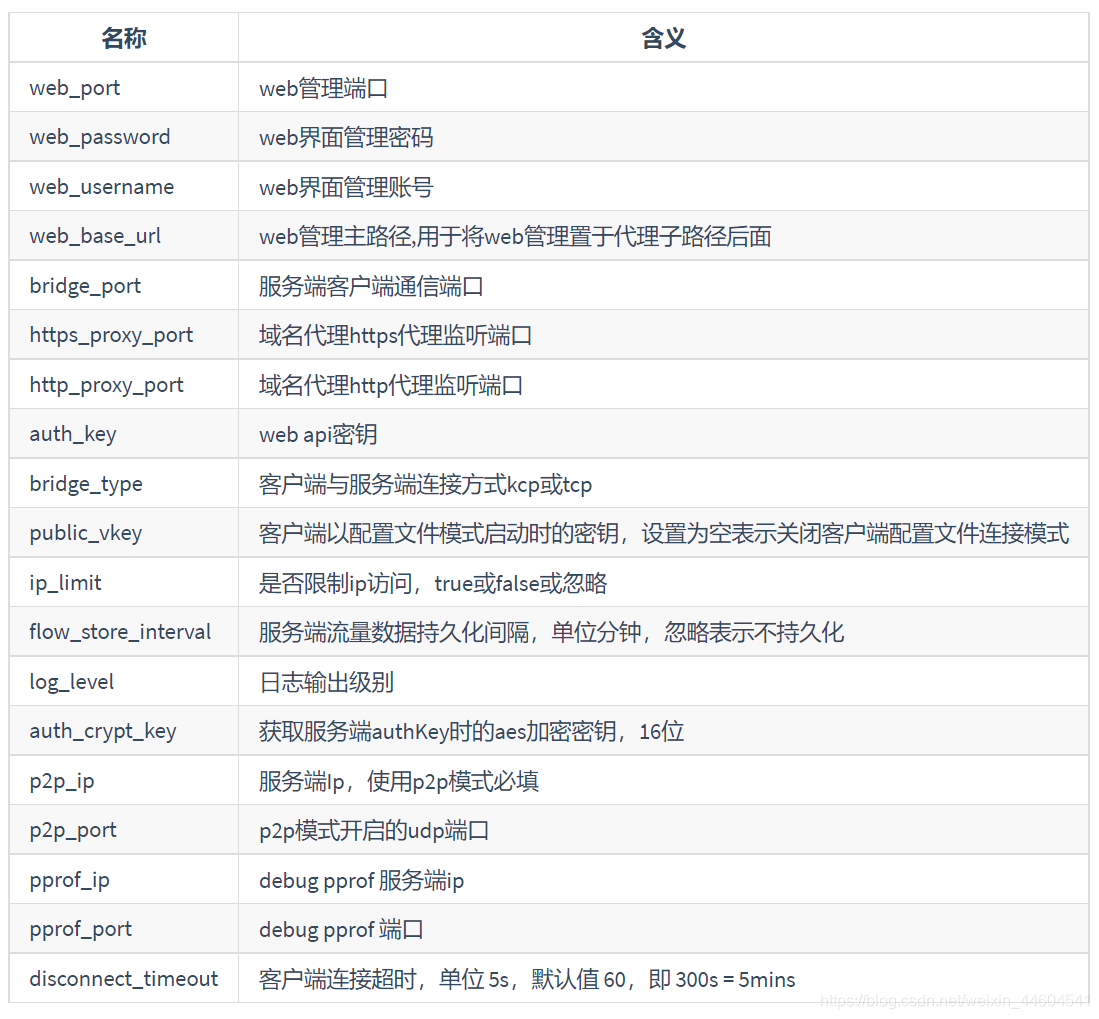
配置文件,内容非常多,根据需要修改
appname = nps
#Boot mode(dev|pro)
runmode = dev

#HTTP(S) proxy port, no startup if empty
http_proxy_ip=0.0.0.0
http_proxy_port=80
https_proxy_port=443
https_just_proxy=true
#default https certificate setting
https_default_cert_file=conf/server.pem
https_default_key_file=conf/server.key

##bridge
bridge_type=tcp
bridge_port=8024
bridge_ip=0.0.0.0

# Public password, which clients can use to connect to the server
# After the connection, the server will be able to open relevant ports and parse related domain names according to its own configuration file.
public_vkey=123

#Traffic data persistence interval(minute)
#Ignorance means no persistence
#flow_store_interval=1

# log level LevelEmergency->0  LevelAlert->1 LevelCritical->2 LevelError->3 LevelWarning->4 LevelNotice->5 LevelInformational->6 LevelDebug->7
log_level=7
#log_path=nps.log

#Whether to restrict IP access, true or false or ignore
#ip_limit=true

#p2p
#p2p_ip=127.0.0.1
#p2p_port=6000

#web
web_host=a.o.com
web_username=kali
web_password=kali
web_port = 8080
web_ip=0.0.0.0
web_base_url=
web_open_ssl=false
web_cert_file=conf/server.pem
web_key_file=conf/server.key
# if web under proxy use sub path. like http://host/nps need this.
#web_base_url=/nps

#Web API unauthenticated IP address(the len of auth_crypt_key must be 16)
#Remove comments if needed
#auth_key=test
auth_crypt_key =1234567812345678

#allow_ports=9001-9009,10001,11000-12000

#Web management multi-user login
allow_user_login=false
allow_user_register=false
allow_user_change_username=false


#extension
allow_flow_limit=false
allow_rate_limit=false
allow_tunnel_num_limit=false
allow_local_proxy=false
allow_connection_num_limit=false
allow_multi_ip=false
system_info_display=false

#cache
http_cache=false
http_cache_length=100

#get origin ip
http_add_origin_header=false

#pprof debug options
#pprof_ip=0.0.0.0
#pprof_port=9999

#client disconnect timeout
disconnect_timeout=60
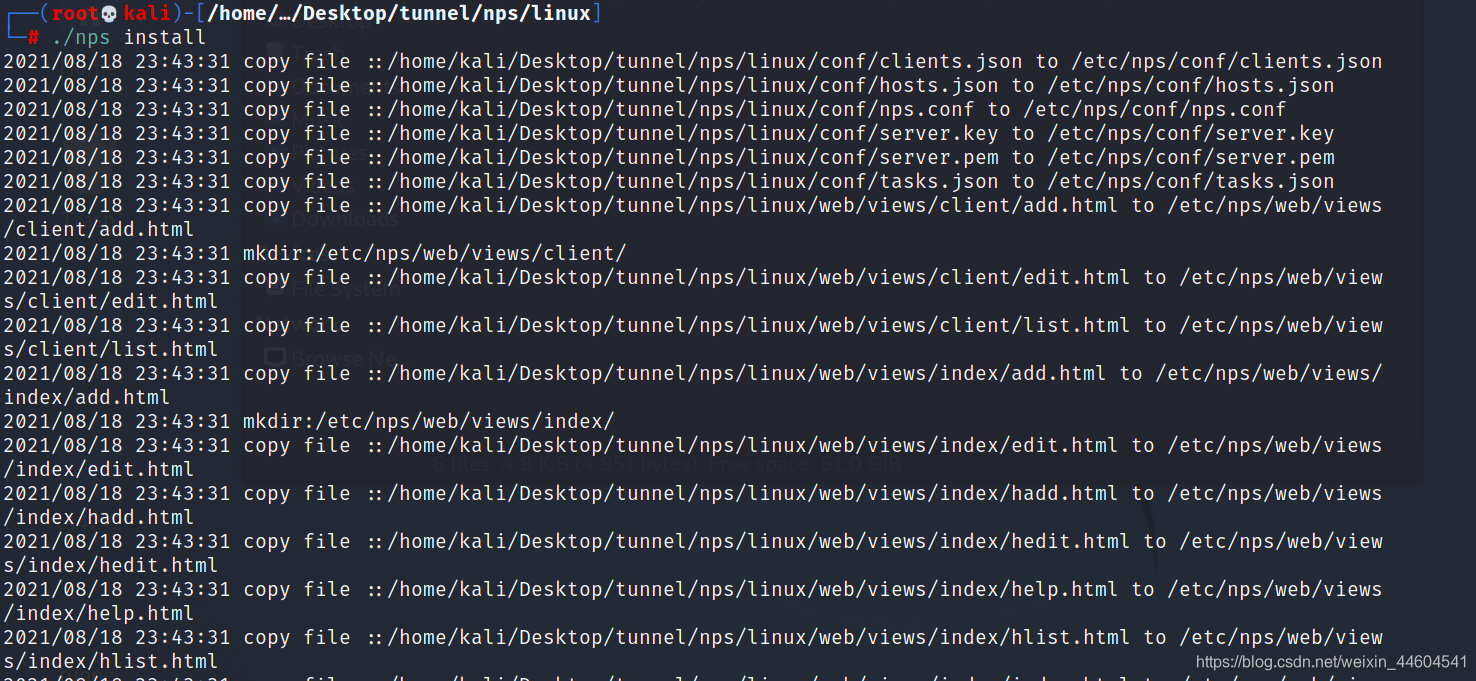
安装
./nps install
启动
nps start

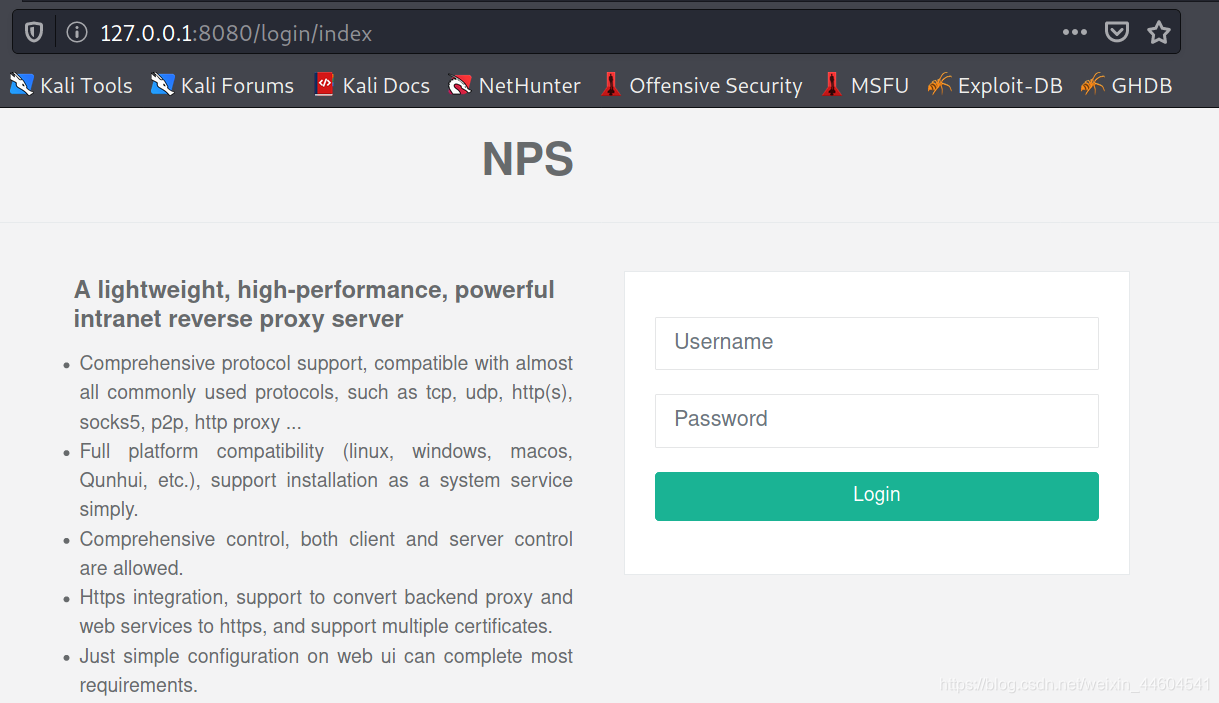
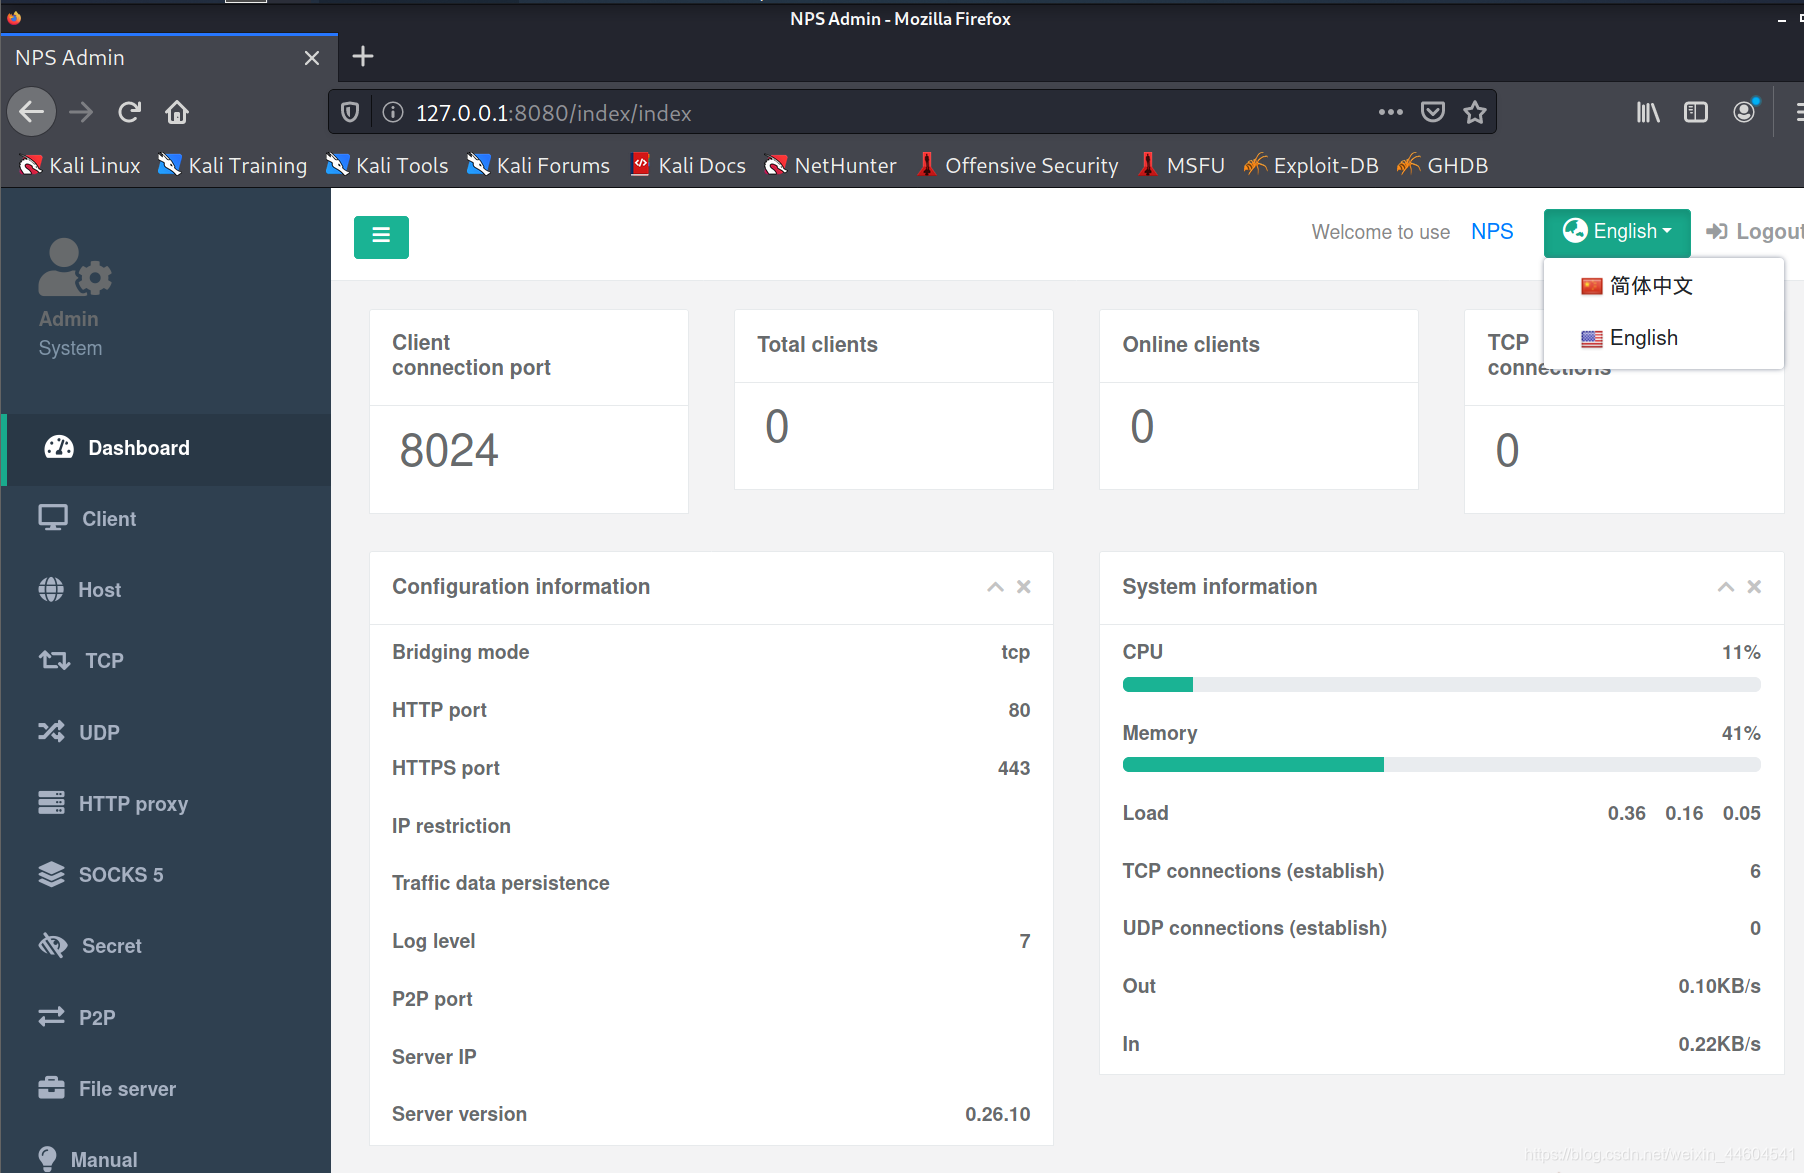
登录(看这个界面就给跪了,太强了)
设置一个客户端

点击上图的隧道


(2)客户端
启动
./npc -server=192.168.10.128:8024 -vkey=nfzp2xp2n742ge3h -type=tcp

(3)隧道建立
显示连接

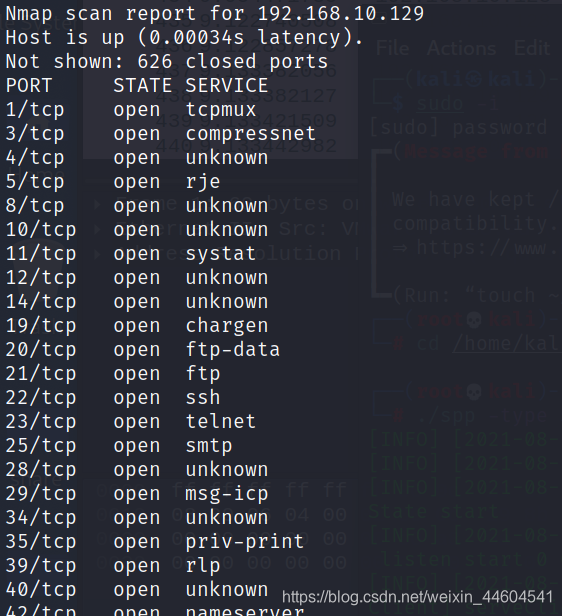
可以通过proxychains来代理流量到上面设置的1080端口
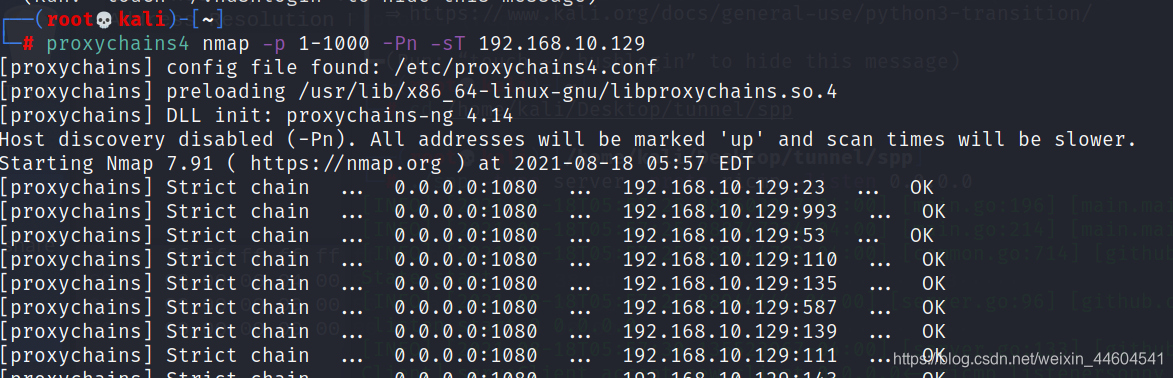
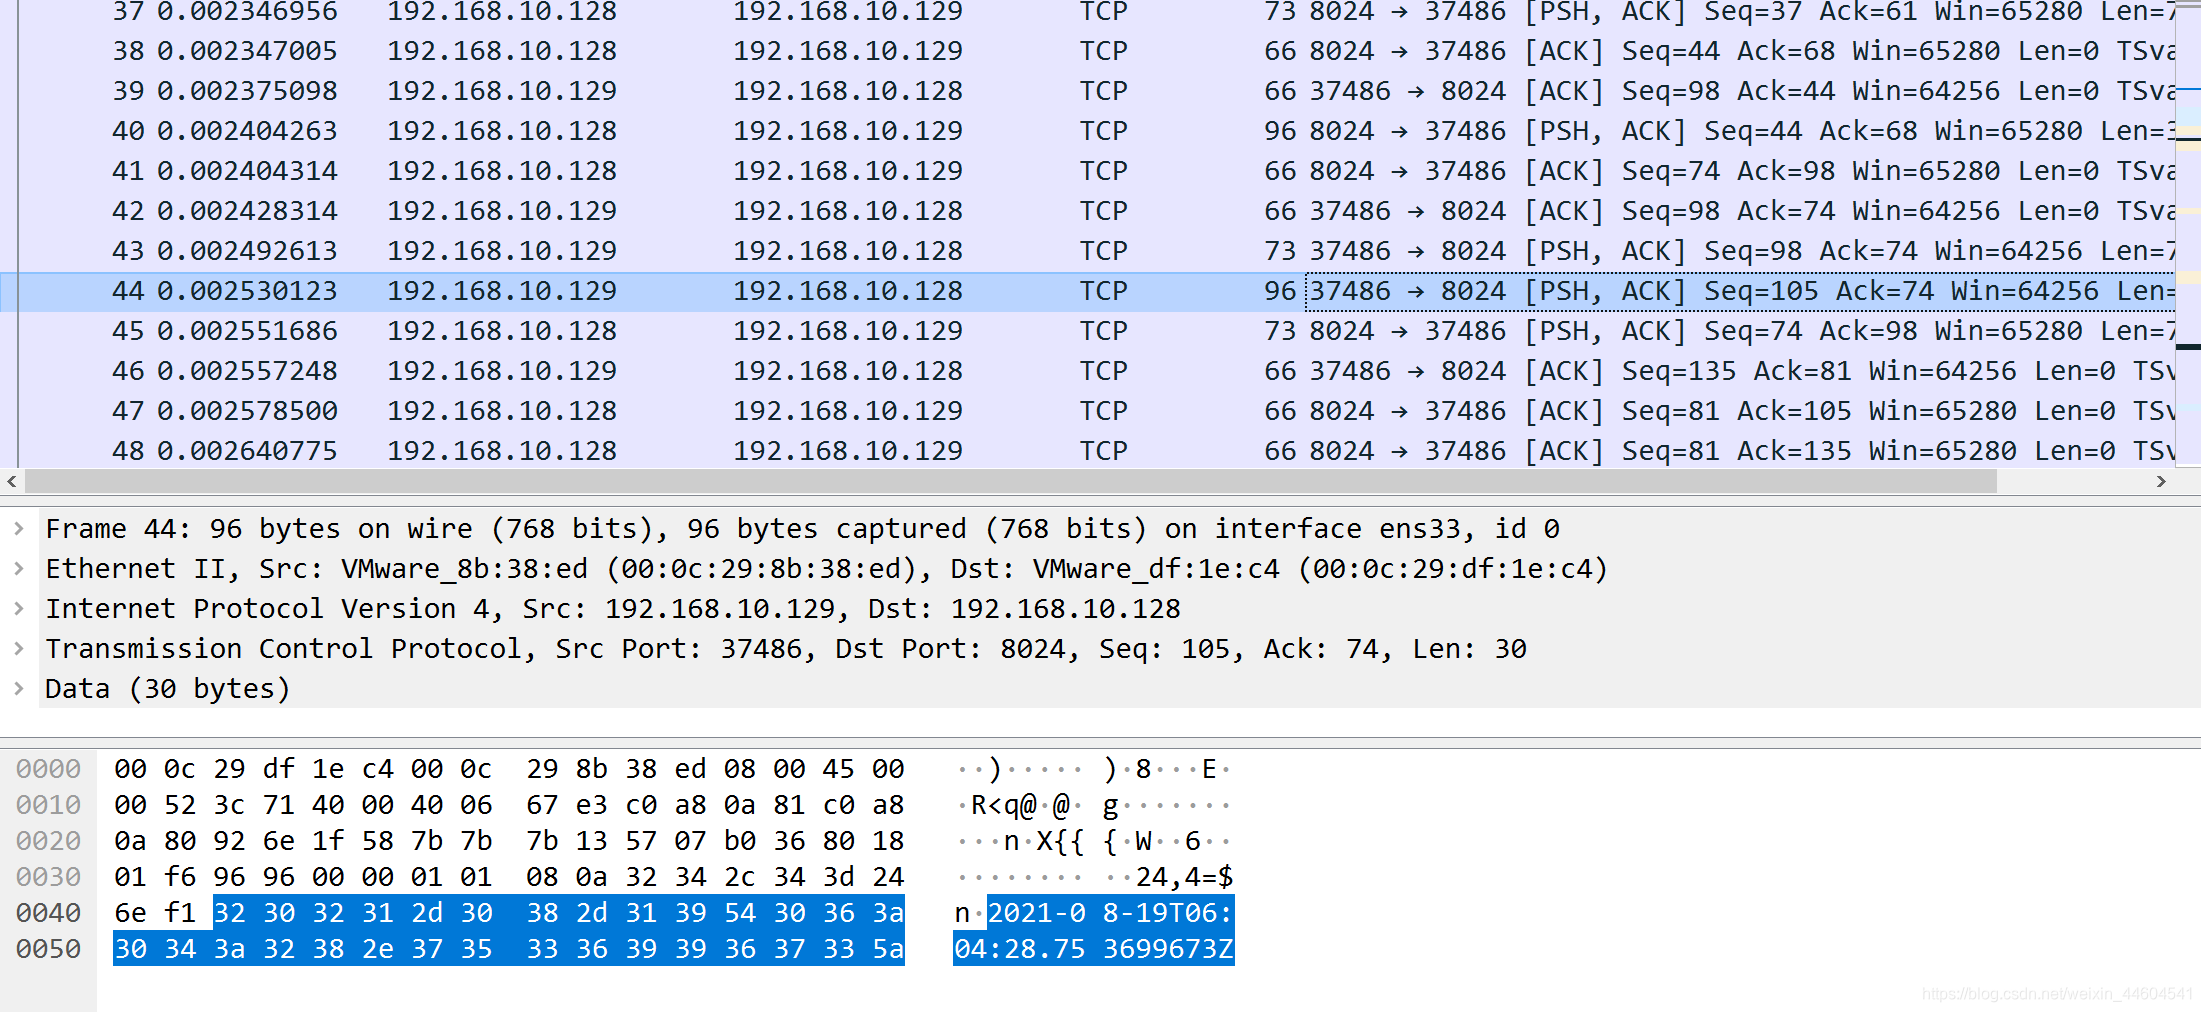
3、抓包看看
建立连接
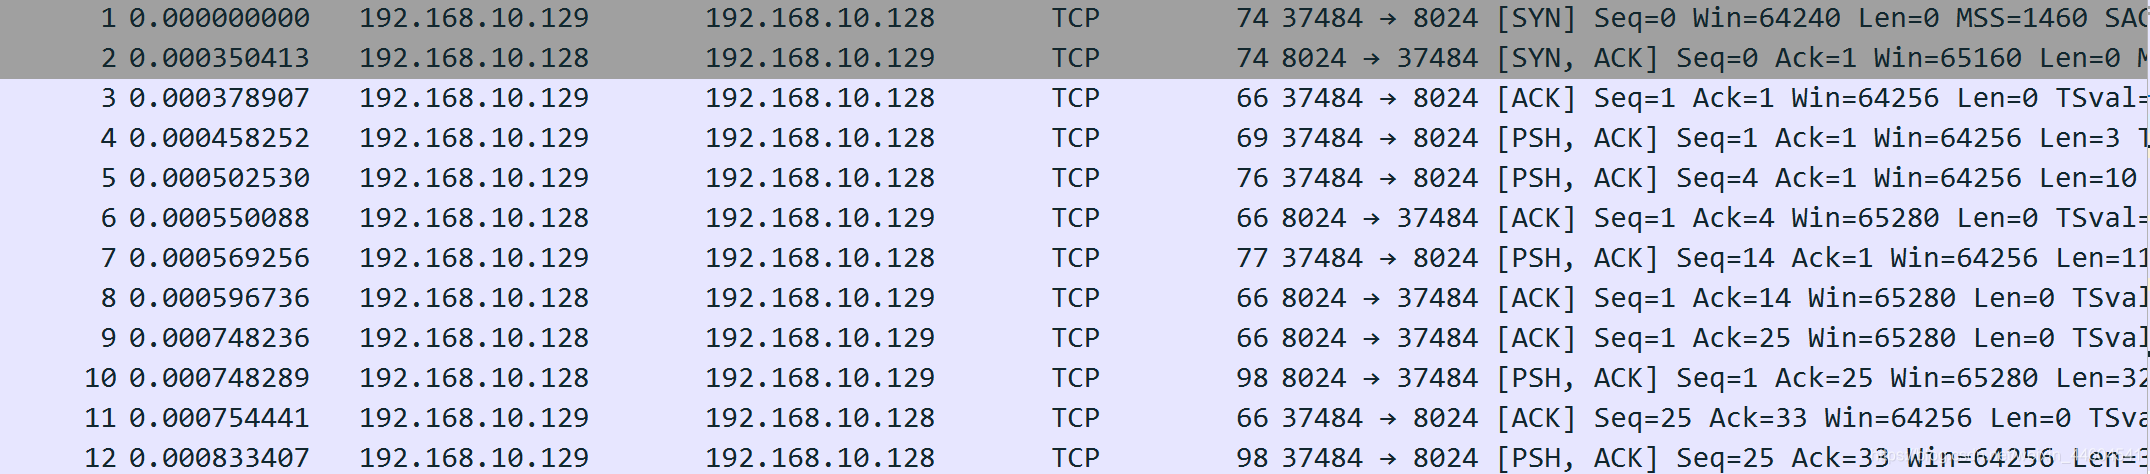
有返回时间、版本等信息
心跳包

三、探索
1、源码与分析
非常庞大完善,可深入学习
2、检测与绕过
(1)配置文件
猜测是学frp的,有个配置文件,大把柄
绕过:写进程序里
(2)端行为
端口,软件行为,进程,特征字符串特征码之类的
(3)流量特征
心跳包等
结语
很强悍的工具